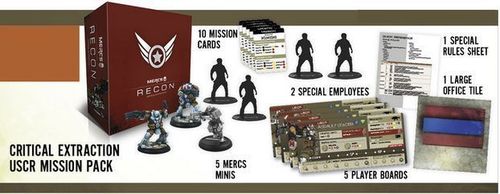
MERCS: Recon – Critical Extraction
MERCS: Recon – Critical Extraction Rulebook
Table of Contents
Table of Contents
- USCR
- Critical Extraction Missions
- Just Give Me the Numbers
- Vengeance for Hamako
- It's the Only Way to Be Sure
- Evolution of Combat
- Behemoth V3.472
- Upload the Wyrm
- Deep Cover
- This Just Got Real
- Overstepping Authority
- Unsung Hero
- A Farewell to Fairbanks
- Project 734-B2
- We're in the Red
- Special Delivery
- Give Them the Product (Part 1)
- Give Them the Knowledge (Part 2)
- Double-Crossed (Part 3)
- Rack Time
- We Were Inverted (Part 1)
- Only One Way Out (Part 2)
- Knight of Cups
- Dot Dot Dot
- Sweet Justice!
- The Worth of One
- Recon This!
- The Impossible (Part 1)
- The Impossible (Part 2)
- Give Me All the News (Part 1)
- What Can I Do to Help (Part 2)
- Glass Cage of Emotion (Part 1)
- Can I Go Home? (Part 2)
- Lights Out (Part 1)
- Unauthorized Access (Part 2)
- Broken Sparrow (Part 3)
- Accountability
- The Miranda Case
- Operation: Paradigm Shift
- Pop the Top
- Yes and Yes
- Bad News
- Hard and Fast
- Lock It Down (Part 1)
- Lock and Reload (Part 2)
- Unsustainable Energy
- Power Play (Part 1)
- Let's Blow This Thing (Part 2)
- Hit-and-Run
- A Monkey in the Wrench
- These Guys Are Crazy (Part 1)
- Step Lightly (Part 2)
- FUBAR (Part 3)
- Too Many Secrets
- Slash & Burn (Part 1)
- Liquidation (Part 2)
- Experimental Nano-Gel
- Secure Dr. Shuisky
- Down the Rabbit Hole
- Flush This! You Piece of...
- I Serve Myself
- A Timely Upgrade
USCR
The USCR reference sheet is reproduced below in full, with printed text as it appears.
Corporate Ability
Intimidate: Employees in LoS Cower. USCR ignores standard cower rules. Regardless of how many employees are in line-of-sight with USCR, employees always cower.
Commissar
Kit
- Semi-Auto Assault Rifle: This is a standard ranged weapon. No special rules apply.
- Ice Grenade: This is a damaging grenade. The Commissar only has one ice grenade. This grenade uses the Throw action. The throw follows all standard rules: if there is no success rolled, then the frag grenade is overthrown. It also follows standard area-of-effect rules, damaging all miniatures in an area.
- In addition to the any damage, the ice grenade pinned status effect to the area.
Printed-text note: the last sentence of the Ice Grenade entry is printed as shown ("In addition to the any damage, the ice grenade pinned status effect to the area."); the words missing from the printed line are not supplied here.
Personal Ability
Leadership: +1 CP to EU in the same area during the Refresh phase. During the resupply step of the Refresh phase, if any EU is in the same area as the Leader (including the Leader), they receive an extra command point. This is in addition to any command points regained naturally in the resupply step.
Breach and Clear
The Commissar's optional B&C ability allows him to convert 1 red die to 1 Blood. This damage is automatic and cannot be prevented. If through location enhancement or special bonuses, the Commissar has more than the standard number of red dice, then he may convert the dice to Blood multiple times.
Pathfinder
Kit
- Single-Shot Rifle: This is a standard ranged weapon. No special rules apply.
- Scanner: The scanner is a tool used to reveal hidden objectives. The objective must be within 1 orthogonal area of the MERC using the scanner. The scanner does not work diagonally, but does work through walls.
Personal Ability
Heroic: +1 red die for attacks when the only CCC in the area. (Printed as "CCC".) If the only MERC in an area, the attacker with the Heroic PA gains an additional red die. This die has not been added to the primary weapon's dice pool, because the bonus is situational.
Breach and Clear
The Pathfinder's optional B&C ability allows him to convert 2 yellow dice to 1 Blood. This damage is automatic and cannot be prevented. If through location enhancement or special bonuses, the Pathfinder has more than the standard number of yellow dice, then he may convert the dice to Blood multiple times.
Gunner
Kit
- Shotgun: This a standard ranged weapon. However, the shotgun does have a special Unload attack. It can cause a massive amount of collateral damage, but each Unload attack costs 3 CP and uses 3 attack slots.
- Quick Load: This is a supplemental part of the primary kit. It does nothing by itself. It changes the Reload command point cost and alters the attack rules. With quick load, the Gunner reloads for 1 CP instead of the normal 3 CP, can attack after reloading, and has an additional attack slot.
- Quick load is classified as ammo and is a limited resource. If the Gunner is out of quick loads and at 0 attacks, he can no longer attack.
Personal Ability
Motivated: May move 2 areas when taking the Move action. A Motivated MERC may move two areas instead of just one when performing the move action. This does not apply to Hustle or the move in Attack & Move.
Breach and Clear
The Gunner's optional B&C ability allows him to take the cover action and still attack with three collateral damage dice. All rules for cover apply.
Engineer
Kit
- Carbine Compact Assault Rifle: This is a standard ranged weapon. No special rules apply.
- Door Hammer: The door hammer allows B&C actions to happen easier. It reduces the total cost of the B&C by 2. To use the door hammer, the Engineer MUST be a part of the B&C action and spend 1 CP to activate the Use Kit action. The CP spent on Use Kit does NOT count towards the CP needed to B&C.
Personal Ability
Eye for Cover: +1 black die to defense rolls if area provides at least 1 armor die. Eye for Cover allows the MERC to receive a bonus armor die if the area where the MERC is being attack already provides an armor bonus. This includes armor bonuses provided by collateral damage discs.
Breach and Clear
The Demo's optional B&C ability allows him to convert a yellow die to a red die if he also converts a yellow die into a black die. This conversion can happen as many times as the Demo chooses until he is out of yellow dice.
Printed-text note: the Engineer's Breach and Clear entry refers to "the Demo". The name is transcribed as printed. The Engineer's kit, ability and B&C text are on the same panel of the sheet, and the sheet names this MERC "Engineer" in its heading.
Booster
Kit
- Single-Shot Rifle: This is a standard ranged weapon. No special rules apply.
- Adrenaline Performance Enhancing Drug: The PED restores 2 CP instantly. The target USCR changes his or her command points immediately. To activate the adrenaline, the Booster MUST be in the same area with the USCR he intends to use the PED on and spend 1 CP to activate the Use Kit action. The Booster may use the PED on himself.
Personal Ability
Boosted: Restores 5 CP minus penalties in the Refresh phase. MERCS who are boosted receive five command points instead of four in the resupply step of the Refresh phase.
Breach and Clear
The Booster's optional B&C ability allows him to convert 2 yellow dice to 1 Blood. This damage is automatic and cannot be prevented. If through location enhancement or special bonuses, the Booster has more than the standard number of yellow dice, then he may convert the dice to Blood multiple times.
Critical Extraction Missions
Each mission card lists its insertion point and special rules, then its objectives, Breach and Clear OpFor placements and resolutions. Breach and Clear entries are given as printed: the position descriptions (for example "All positions", "Lowest position or 2", "Highest red position") and the numbers and ≥/≤ symbols shown on each card. Missions in a row that carry the same name with a part number form a chain; a mission's resolution sets up the next part.
Just Give Me the Numbers
- Objective 1: Locate and kill the Analyst.
- Special rules:
- Insertion point: Entrance.
- Cover the Analyst and three employees with objective markers question mark side up. Randomly place the objectives into four named areas.
- Breach & Clear 1: Random. Positions: All positions.
- The Analyst is killed if the objective is destroyed in the B&C. The objective is destroyed at 7 on the collateral track.
- Resolution: Place 2 SecFor II in the Stairs and 3 SecFor III at the Entrance. Place the Extraction Point at the Entrance.
- Objective 2: If all surviving MERCS reach the Extraction Point, the players win.
Vengeance for Hamako
- Objective 1: Locate and kill the Informant.
- Special rules:
- Insertion point: Elevator.
- The Informant is located in the Data Center.
- Breach & Clear 1: Data Center. Positions: All positions.
- Resolution: Place the Extraction Point at the Elevator. Place 4 SecFor IV in the hallway near the Elevator.
- Objective 2: If all surviving MERCS reach the Extraction Point, the players win.
It's the Only Way to Be Sure
- Objective 1: Locate and kill the Janitor.
- Special rules:
- Insertion point: Entrance.
- The Janitor is located in the Bathroom location.
- For this mission only, when an agent is revealed raise the security level 1 space.
- If a MERC is killed, the players lose.
- Breach & Clear 1: Bathroom. Positions: Lowest position or 2.
- Resolution: Place the Extraction Point at the Stairs furthest from the B&C.
- Objective 2: All MERCS must reach the Extraction Point.
Evolution of Combat
- Objective 1: Destroy the Food Court.
- Special rules:
- Insertion point: Elevator.
- MERCS must place 1 CDDisc in three areas in the Food Court.
- Three MERCS receive 1 explosive each. If detonated, each explosive places 1 CDDisc. MERCS must spend 4 CP to place and detonate an explosive.
- Explosives detonate in the Refresh Phase and cause 4 Blood to anyone in the area.
- Breach & Clear 1: Food Court. Positions: All positions.
- The damage level applied to the MERCS at the end of the B&C is increased by 2.
- Resolution: The security level counter is moved to the 0 space on the reinforcement track. Place the Extraction Point at the Stairs furthest from the Food Court.
- Objective 2: If all surviving MERCS reach the Extraction Point, the players win.
Behemoth V3.472
- Objective 1: Destroy the Behemoth.
- Special rules:
- Insertion point: Entrance.
- Place an objective marker question mark side up (or Behemoth miniature) in the center area of the Garage.
- Breach & Clear 1: Garage. Positions: Highest red position.
- OpFor in red positions roll 4 HDd8.
- Resolution: The security level counter is moved to the 0 space on the reinforcement track. Place the Extraction Point at the Stairs nearest to the B&C.
- Objective 2: If all surviving MERCS reach the Extraction Point, the players win.
Upload the Wyrm
- Objective 1: Locate the Power Core.
- Special rules:
- Insertion point: Entrance.
- Mix up the Power Core objective with three other objective markers. Randomly place the objectives, question mark side up, into four named areas.
- Breach & Clear 1: Special Area. Positions: Lowest position, 8, 9, ≥13.
- Resolution: Move the security level counter to the 0 space on the reinforcement track.
- Objective 2: Interact and defend the Power Core. When the security counter reaches 10 on the reinforcement track and any MERCS are alive, the players win.
Deep Cover
- Objective 1: Interact with the Informant.
- Special rules:
- Insertion point: Elevator.
- Place the Robot Arm in R&D.
- When the building reaches security level 3, place the Informant with the Robot Arm.
- Breach & Clear 1: R&D. Positions: All positions.
- If the MERCS receive 4 Blood this B&C, the players lose.
- Resolution: Place 3 SecFor III in each hallway near the Elevator. Place the Extraction Point in the corner office near the casualty pool.
- Objective 2: If all surviving MERCS reach the Extraction Point, the players win.
This Just Got Real
- Objective 1: Destroy both Bathrooms.
- Special rules:
- Insertion point: Elevator.
- To destroy the Bathrooms, a CDDisc must be placed in each room through the collateral damage track in the B&C.
- The MERCS must destroy the objective in BOTH bathrooms before the security track counter is moved to the reinforcement track.
- Place an employee in each bathroom. This employee does not move.
- Breach & Clear 1: Bathroom. Positions: All red positions.
- A CDDisc must be placed through damage on the collateral track.
Overstepping Authority
- Objective 1: Locate the Informant.
- Special rules:
- Insertion point: Elevator.
- Cover the Informant and three employees with objective markers question mark side up. Randomly place the objectives into four named areas.
- Breach & Clear 1: Random. Positions: ≤10.
- Resolution: Place the location of the Engineer in the named area furthest from this B&C.
- Objective 2: Kill the Engineer.
- Breach & Clear 2: Special. Positions: All positions.
- The Engineer is killed if the objective is destroyed in the B&C. The objective is destroyed at 8 on the collateral track.
- Resolution: Place the Extraction Point at the Stairs nearest to this B&C.
- Objective 3: If all surviving MERCS reach the Extraction Point, the players win.
Unsung Hero
- Objective 1: Locate and kill the Analyst.
- Special rules:
- Insertion point: Elevator.
- Cover the Analyst and three employees with objective markers question mark side up. Randomly place the objectives into four named areas.
- When an agent movement card is drawn, the four objectives move around the building like red agent discs. When the MERCS gain LoS of an objective it is revealed.
- When the Analyst is revealed, she moves immediately. She attempts to get to the Stairs to escape. If she cannot escape, she gets out of LoS. If she escapes, the players lose.
- Breach & Clear 1: Special. Positions: All positions.
- The Analyst is killed if the objective is destroyed in the B&C. The objective is destroyed at 8 on the collateral track.
- Resolution: Place the Extraction Point at the Elevator.
- Objective 2: If all surviving MERCS reach the Extraction Point, the players win.
A Farewell to Fairbanks
- Objective 1: Interrogate a Technician.
- Special rules:
- Insertion point: Elevator.
- Place the Technician in the corner office near the reinforcement track.
- Breach & Clear 1: Office. Positions: ≥7.
- Resolution: Place an Administrator in the corner office near the casualty pool.
- Objective 2: Kill the Administrator.
- Breach & Clear 2: Office. Positions: All black positions; all red positions.
- Resolution: Place the Extraction Point at the elevators.
- Objective 3: If all surviving MERCS reach the Extraction Point, the players win.
Project 734-B2
- Objective 1: Locate and kill the Pilot.
- Special rules:
- Insertion point: Elevator.
- The Pilot is located in the R&D location.
- Breach & Clear 1: R&D. Positions: All positions.
- The damage level applied to the MERCS at the end of the B&C is increased by 2.
- Resolution: Raise the security level counter to the 0 space on the reinforcement track. Place the Extraction Point at the Stairs nearest to the B&C.
- Objective 2: If all surviving MERCS reach the Extraction Point, the players win.
We're in the Red
- Objective 1: Destroy Customs.
- Special rules:
- Insertion point: Entrance.
- MERCS must place 1 CDDisc in any 3 areas in Customs.
- Three MERCS receive 1 explosive each. If detonated, each explosive places 1 CDDisc. MERCS must spend 4 CP to place and detonate an explosive.
- Explosives detonate in the Refresh Phase and cause 4 Blood to anyone in the area.
- Breach & Clear 1: Customs. Positions: All black positions; all yellow positions; highest red position.
- Resolution: The security level counter is moved to the 0 space on the reinforcement track. Place the Extraction Point at the Conference Room.
- Objective 2: If all surviving MERCS reach the Extraction Point, the players win.
Special Delivery
- Objective 1: Locate and secure Receiving.
- Special rules:
- Insertion point: Elevator.
- If a MERC is killed, the players lose.
- Breach & Clear 1: Receiving. Positions: All odd positions.
- If the MERCS receive 4 Blood this B&C, the players lose.
- Resolution: Move the security level counter to the 0 space on the reinforcement track.
- Objective 2: The MERCS must defend Receiving. When the security counter reaches 10 on the reinforcement track, if there is at least 1 MERC alive, the players win.
Give Them the Product (Part 1)
- Objective 1: Locate the Technician.
- Special rules:
- Insertion point: Entrance.
- Cover the Technician and three employees with objective markers question mark side up. Randomly place the objectives into four named areas.
- Breach & Clear 1: Random. Positions: ≤10.
- Resolution: Place the Robot Arm in the Conference Room.
- Objective 2: Destroy the Robot Arm.
- Breach & Clear 2: Conference Room. Positions: All positions.
- The objective must be destroyed in the B&C.
- Resolution: Keep the same building and proceed to mission: Give Them The Knowledge (part 2).
Give Them the Knowledge (Part 2)
- Objective 1: Protect and escape with the Technician.
- Special rules:
- Insertion point: Conference Room.
- Place the Extraction Point at the Stairs closest to the MERCS.
- The Technician has a Priority of 5 and moves 2 areas toward the Extraction Point in the Refresh Phase.
- If the Technician is killed, the players lose.
- Resolution: Setup a new building and proceed to mission: Double-crossed (part 3).
Double-Crossed (Part 3)
- Objective 1: Escort the Technician to R&D.
- Special rules:
- Insertion point: Stairs.
- Place the objective in R&D.
- The Technician moves 2 areas toward the Extraction Point in the Refresh Phase and has a Priority of 5.
- If the Technician is killed, the players lose.
- The Technician must be in the B&C. He allows the MERCS to B&C for 0 CP.
- In Objective 2, the MERCS can force the Technician to interact with the Safe with a successful Interrogation roll.
- Breach & Clear 1: R&D. Positions: All odd positions.
- Resolution: Move the security counter to 0 on the reinforcement track. Place the Safe in R&D.
- Objective 2: Force the Technician to interact with the Safe.
Rack Time
- Objective 1: Locate the Technician.
- Special rules:
- Insertion point: Entrance.
- Cover the Technician and three employees with objective markers question mark side up. Randomly place the objectives into four named areas.
- Breach & Clear 1: Random. Positions: ≤10.
- Resolution: Place the Weapon Rack in Customs.
- Objective 2: Interact with the Weapon Rack.
- In objective 2, any MERC who interacts with the Weapon Rack gains +2 HDd8 to his primary weapon attacks.
- Breach & Clear 2: Customs. Positions: All positions.
- Resolution: Place the Extraction Point at the Entrance.
- Objective 3: If all surviving MERCS reach the Extraction Point, the players win.
We Were Inverted (Part 1)
- Objective 1: Locate the Pilot.
- Special rules:
- Insertion point: Elevator.
- Cover the Pilot and three employees with objective markers question mark side up. Randomly place the objectives into four named areas.
- If the Pilot dies, the players lose.
- Breach & Clear 1: Random. Positions: All positions.
- The Pilot is killed if the objective is destroyed in the B&C. The objective is destroyed at 8 on the collateral track.
- Resolution: Move the security level counter to 0 on the reinforcement track. Place the Extraction Point in the Stairs nearest to the B&C.
- Objective 2: If all surviving MERCS reach the Extraction Point, the players win.
- Resolution: Setup a new building and proceed to mission: Only One Way Out (part 2).
Only One Way Out (Part 2)
- Objective 1: Get to the Extraction Point.
- Special rules:
- Insertion point: Stairs.
- Place the Extraction Point in the center area of Customs.
- The security counter remains on the reinforcement track where it was when the MERCS finished We Were Inverted.
- The Pilot moves 2 areas in the Refresh Phase. He has a priority of 6.
- If the Pilot dies, the players lose.
Knight of Cups
- Objective 1: Locate the Administrator.
- Special rules:
- Insertion point: Elevator.
- Cover the Administrator and three employees with objective markers question mark side up. Randomly place the objectives into four named areas.
- For Objective 2, the B&Cs are the same.
- Breach & Clear 1: Random. Positions: ≤10.
- Resolution: Place the Scientist in the Lab, the Engineer in R&D, and the Technician in the bathroom nearest to this B&C.
- Objective 2: Kill the Scientist, Engineer and the Technician.
- Breach & Clear 2: Special. Positions: All even positions.
- The targets are killed if the objective is destroyed in the B&C. The objective is destroyed at 7 on the collateral track.
- Objective 3: If the employees in Objective 2 are killed, the players win.
Dot Dot Dot
- Objective 1: Locate and secure MegaCon Games Warehouse.
- Special rules:
- Insertion point: Entrance.
- Breach & Clear 1: MCG Office. Positions: All positions.
- Resolution: Move the security level counter to the 0 space on the reinforcement track.
- Objective 2: The MERCS must defend MegaCon Games Warehouse. When the Security Counter reaches 10 on the reinforcement track, if there is at least 1 MERC alive, the players win.
Sweet Justice!
- Objective 1: Kill Brian, Keith, and Kenny.
- Special rules:
- Insertion point: Entrance.
- Place an Objective token in MegaCon Games Warehouse.
- Normal B&C win rules do not apply.
- Breach & Clear 1: MCG Office. Positions: All positions.
- Resolution: If the players did enough damage in the B&C to eliminate Brian, Keith, and Kenny's positions on the B&C tile, then the players win.
The Worth of One
- Objective 1: Secure Nikki (the Administrator).
- Special rules:
- Insertion Point: Entrance.
- Mix up the Administrator objective with three other Employee tokens. Cover these tokens with objective tokens, question mark side up, and randomly place into four named areas.
- Nikki must be captured.
- If Nikki leaves the building without the MERCS, the players lose.
- Breach & Clear 1: Random. Positions: All black positions; all red positions. The objective is destroyed on 8.
- Resolution: Place the Extraction Point in the Stairs furthest from the MegaCon Games Warehouse.
- Objective 2: If all surviving MERCS and Nikki reach the Extraction Point, the players win.
Recon This!
- Objective 1: Destroy the X-30NE.
- Special rules:
- Insertion point: Entrance.
- Place the X-30NE miniature (or an objective marker question mark side up) in the center of MegaCon Game's Warehouse.
- Breach & Clear 1: MCG Office. Positions: All positions.
- The Objective position rolls 2 HDd8.
- Resolution: The security level counter is moved to the 0 space on the reinforcement track. Place the Extraction Point at the Entrance.
- Objective 2: If all surviving MERCS reach the Extraction Point, the players win.
The Impossible (Part 1)
- Objective 1: Secure the Objective in Receiving.
- Special rules:
- Insertion point: Entrance.
- Place an objective token in Receiving.
- If there are SecFor outside MegaCon Games Warehouse when MERCS are occupying it, they enter.
- Breach & Clear 1: Receiving. Positions: All black positions; all yellow positions.
- Resolution: Keep the same building and proceed to mission: The Impossible (part 2).
The Impossible (Part 2)
- Objective 1: Secure the MegaCon Games Warehouse.
- Special rules:
- Insertion point: Receiving.
- Place an objective token in MegaCon Games Warehouse.
- Place 1 SecFor IV outside each Stairs, outside each Bathroom, outside MegaCon Games Warehouse, and inside MegaCon Games Warehouse.
- Breach & Clear 2: MCG Office. Positions: All positions.
- Resolution: Place 1 SecFor II, 1 SecFor III, and 1 SecFor IV outside each entrance to MegaCon Games Warehouse.
- Objective 2: The MERCS must defend MegaCon Game Warehouse 1 round. If there is at least 1 MERC alive, the players win.
Give Me All the News (Part 1)
- Objective 1: Interrogate Nikki (the Administrator).
- Special rules:
- Insertion point: Entrance.
- Place the Administrator in MegaCon Games Warehouse.
- If the security track counter is moved over to the reinforcement track, the player lose.
- If the Administrator is killed, the players lose.
- If the interrogation attempt fails, the players lose.
- Breach & Clear 1: Office. Positions: All positions.
- The Administrator is killed if the objective is destroyed in the B&C.
- Resolution: Place the Administrator in MegaCon Games Warehouse.
- Objective 2: Interrogate the Administrator.
- Resolution (2): Keep the same building and proceed to mission: What Can I Do To Help (part 2).
What Can I Do to Help (Part 2)
- Objective 1: Destroy the Safe.
- Special rules:
- Insertion point: MegaCon Games Warehouse.
- Move the security track counter to 0 on the reinforcement track.
- Place the Safe in the corner office furthest from the warehouse.
- Breach & Clear 1: Office. Positions: All odd positions.
- The objective must be destroyed in the B&C.
- The objective is destroyed at 6 on the collateral track.
- Resolution: Place the Extraction Point in the Entrance.
- Objective 2: If all surviving MERCS reach the Extraction Point, the players win.
Glass Cage of Emotion (Part 1)
- Objective 1: Escape MegaCon Games Warehouse and ascend to the second level.
- Special rules:
- Insertion Point: MegaCon Warehouse.
- Place the Extraction Point at the Stairs furthest from the warehouse.
- The security level carries over to the next mission.
- Resolution (1): Setup a new building and proceed to mission: Can I Go Home? (part 2).
Can I Go Home? (Part 2)
- Objective 1: Get to the Extraction Point.
- Special rules:
- Insertion Point: Stairs.
- Place the Extraction Point in the Conference Room. The Conference Room must be placed at least 6 areas away from the insertion point.
- For each MERC that had died or dies, the remaining MERCS gain 1 HDd8.
- If a MERC reaches the Extraction Point, the players win.
Lights Out (Part 1)
- Objective 1: Locate and interact with the Server.
- Special rules:
- Insertion point: Elevator.
- Place the Server in the Data Center.
- If the security level reaches the reinforcement track, the players lose.
- Breach & Clear 1: Data Center. Positions: Lowest black position; lowest yellow position. Add 1 red position per current security level.
- Resolution: Place the Extraction Point at the Elevator. Place 1 SecFor IV guarding the Elevator in the two hallway areas near the Elevator.
- Objective 2: If all surviving MERCS reach the Extraction Point, the players win.
- Resolution (2): Setup a new building and proceed to mission: Unauthorized Access (part 2).
Unauthorized Access (Part 2)
- Objective 1: Locate and secure Interrogation.
- Special rules:
- Insertion point: Elevator.
- Breach & Clear 1: Interrogation. Positions: All even positions; all red positions.
- Resolution: All MERCS receive 1 LDd8 for the rest of the mission. Place the Extraction Point at the Stairs furthest from the B&C.
- Objective 2: If all surviving MERCS reach the Extraction Point, the players win.
- Resolution (2): Setup a new building and proceed to mission: Broken Sparrow (part 3).
Broken Sparrow (Part 3)
- Objective 1: Locate and kill the Technician.
- Special rules:
- Insertion point: Stairs.
- The Technician is located in the Training Room.
- The Technician is guarded by 2 SecFor IV bodyguards.
- Breach & Clear 1: Training Room. Positions: All black positions; all yellow positions; highest red position.
- The Technician is killed if the objective is destroyed in the B&C. The objective is destroyed at 8 on the collateral track.
- Resolution: If successful, place the Extraction Point in the Stairs furthest from the B&C. Place 2 SecFor IV on each Stairs.
- Objective 2: If all surviving MERCS reach the Extraction Point, the players win.
Accountability
- Objective 1: Secure the Training Room.
- Special rules:
- Insertion point: Conference Room.
- If the objective is destroyed in the B&C, the players lose.
- Breach & Clear 1: Training Room. Positions: All yellow positions; all red positions.
- Resolution: Place an objective token in R&D.
- Objective 2: Secure R&D.
- Breach & Clear 2: R&D. Positions: All black positions; highest red position.
- Resolution: Place the Extraction Point in the Conference Room.
- Objective 2: If all surviving MERCS reach the Extraction Point, the players win.
Printed-text note: the mission card prints two objectives labelled "Objective 2" (the second is the final win condition). Labels are transcribed as printed.
The Miranda Case
- Objective 1: Destroy the Fusion Reactor.
- Special rules:
- Insertion point: Entrance.
- MERCS must place 1 CDDisc in any 3 areas in the Fusion Reactor.
- Three MERCS receive 1 explosive each. If detonated, each explosive places 1 CDDisc. MERCS must spend 4 CP to place and detonate an explosive.
- Explosives detonate in the Refresh Phase and cause 4 Blood to anyone in the area.
- Resolution (1): The security level counter is moved to the 0 space on the reinforcement track. Place the Extraction Point in the corner office near the priority track.
- Objective 2: If all surviving MERCS reach the Extraction Point, the players win.
Operation: Paradigm Shift
- Objective 1: Get the employees to Safety.
- Special rules:
- Insertion point: Training Room.
- Agents are converted to employees in LoS of SecFor and MERCS.
- If 5 or more employees are killed, the players lose.
- Employees do not cower in LoS of MERCS.
- Objective 2: If 7 or more employees escape the building, the players win.
Pop the Top
- Objective 1: Destroy the building.
- Special rules:
- Insertion point: Entrance.
- Any MERC may plant an explosive by spending 2 CP in a corner room. There is no limit to the amount of explosives the MERCS carry.
- After planting an explosive, the planting MERC rolls 2 CDd8. If a burst is rolled, the explosive is armed.
- Armed explosives detonate in the Refresh Phase, and damage anyone in the same area as the explosive.
- Objective 2: If there is a CDDisc in each corner office, the players win.
Yes and Yes
- Objective 1: Locate and kill the Administrator.
- Special rules:
- Insertion point: Entrance.
- Cover the Administrator and three employees with objective markers question mark side up. Randomly place the objectives into four named areas.
- If a MERC is killed, the players lose.
- Breach & Clear 1: Random. Positions: All positions.
- The Administrator is killed if the objective is destroyed in the B&C. The objective is destroyed at 8 on the collateral track.
- Resolution: Increase the security level to security level 3. Place the Extraction Point in the Entrance.
- Objective 2: All MERCS must reach the Extraction Point.
Bad News
- Objective 1: Locate the Open Terminal.
- Special rules:
- Insertion point: Elevator.
- Mix up the Open Terminal objective with three other objective markers. Randomly place the objectives, question mark side up, into four named areas.
- If the Hostage dies, the players lose.
- Breach & Clear 1: Random. Positions: ≤10.
- Resolution: Place the Hostage in the corner office near the casualty pool.
- Objective 2: Rescue the Hostage.
- Breach & Clear 2: Office. Positions: All positions.
- The Hostage is killed if the objective is destroyed in the B&C.
- Resolution: Place 2 SecFor IV at each Stairs. Place the Extraction Point at the Stairs nearest to this B&C.
- Objective 3: If all surviving MERCS reach the Extraction Point, the players win.
Hard and Fast
- Objective 1: Destroy the building.
- Special rules:
- Insertion point: Entrance.
- MERCS must place 6 CDDiscs before the building reaches security level 3.
Lock It Down (Part 1)
- Objective 1: Secure Master Control.
- Special rules:
- Insertion point: Elevator.
- Place an objective marker question mark side up in Master Control.
- Breach & Clear 1: Master Control. Positions: All yellow positions. The OpFor reroll failures once.
- Resolution: The security level counter is moved to the 0 space on the reinforcement track.
- Objective 2: Kill all SecFor in the building before the reinforcement track reaches 10.
- Resolution (2): Keep the same building and proceed to mission: Lock and Reload (part 2).
Lock and Reload (Part 2)
- Objective 1: Rescue the Engineer.
- Special rules:
- Insertion point: Master Control.
- The Engineer is with 2 SecFor IV. He is being held in the Supply Room.
- If the objective in the B&C is destroyed, the players lose.
- Breach & Clear 1: Supply Room. Positions: All black positions; 3 highest positions. The Engineer is killed if the objective is destroyed in the B&C. OpFor CDd8 bursts are added to the collateral track.
- Objective 2: The players win after a successful B&C in the Supply Room which does not destroy the objective.
Unsustainable Energy
- Objective 1: Locate and destroy the Power Core.
- Special rules:
- Insertion point: Entrance.
- Mix up the Power Core objective with three other objective markers. Randomly place the objectives, question mark side up, into four named areas.
- Breach & Clear 1: Random. Positions: All positions. The objective must be destroyed in the B&C.
- Resolution: Increase the security level by 2. Place the Extraction Point in the Entrance.
- Objective 2: If all surviving MERCS reach the Extraction Point, the players win.
Power Play (Part 1)
- Objective 1: Interrogate the Machinist.
- Special rules:
- Insertion point: Entrance.
- Place the Machinist in the Data Center.
- If the security track counter is moved over to the reinforcement track, the players lose.
- If the Machinist is killed, the players lose.
- If the interrogation attempt fails, the MERCS lose.
- Breach & Clear 1: Data Center. Positions: ≤10. The Machinist is killed if the objective is destroyed in the B&C.
- Resolution: Place the Machinist in the Data Center.
- Objective 2: Interrogate the Machinist.
- Resolution (2): Keep the same building and proceed to mission: Let's Blow This Thing (part 2).
Let's Blow This Thing (Part 2)
- Objective 1: Destroy the Power Core.
- Special rules:
- Insertion point: Data Center.
- Move the security track counter to 0 on the reinforcement track.
- Place the Power Core in the Master Control.
- Breach & Clear 1: Master Control. Positions: All positions. The objective must be destroyed in the B&C. The objective is destroyed at 6 on the collateral track.
- Resolution: Place the Extraction Point in the Entrance.
- Objective 2: If all surviving MERCS reach the Extraction Point, the players win.
Hit-and-Run
- Objective 1: Locate the Machinist.
- Special rules:
- Insertion point: Elevator.
- Cover the Machinist and three employees with objective markers question mark side up. Randomly place the objectives into four named areas.
- Breach & Clear 1: Random. Positions: ≤10.
- Resolution: Place the Weapon Rack in the Armory.
- Objective 2: Destroy the Weapon Rack.
- Breach & Clear 2: Armory. Positions: All positions. The objective must be destroyed in the B&C.
- Resolution: Place the Extraction Point at the Stairs nearest to this B&C.
- Objective 3: If all surviving MERCS reach the Extraction Point, the players win.
A Monkey in the Wrench
- Objective 1: Locate and kill the Machinist.
- Special rules:
- Insertion point: Elevator.
- Cover the Machinist and three employees with objective markers question mark side up. Randomly place the objectives into four named areas.
- If a MERC is killed, the players lose.
- Breach & Clear 1: Random. Positions: All positions. The Machinist is killed if the objective is destroyed in the B&C. The objective is destroyed at 9 on the collateral track.
- Resolution: Increase the security level to 3. Place the Extraction Point at the Elevator.
- Objective 2: All MERCS must reach the Extraction Point.
These Guys Are Crazy (Part 1)
- Objective 1: Escape Master Control and descend to the second level.
- Special rules:
- Insertion point: Master Control.
- Place the Extraction Point at the Stairs furthest from the Master Control.
- The security level carries over to the next mission.
- Resolution (1): Setup a new building and proceed to mission: Step Lightly (part 2).
Step Lightly (Part 2)
- Objective 1: Descend to the first floor.
- Special rules:
- Insertion point: Stairs.
- Place the Extraction Point in the other Stairs. The Extraction Point must be at least 6 spaces away from the Insertion Point.
- The security level carries over to the next mission.
- Resolution (1): Setup a new building and proceed to mission: FUBAR (part 3).
FUBAR (Part 3)
- Objective 1: Get to the Extraction Point.
- Special rules:
- Insertion point: Stairs.
- Place the Extraction Point at the Entrance. The Extraction Point must be placed at least 6 spaces away from the Insertion Point.
- This mission begins with the Security token on the 0 position of the reinforcement Track.
- For each MERC that has died or dies the remaining MERCS gain 1 HDd8.
- Objective 2: If a MERC reaches the Extraction Point, the players win.
Too Many Secrets
- Objective 1: Locate and kill the Analyst.
- Special rules:
- Insertion point: Elevator.
- Place the Analyst in the Conference Room.
- Breach & Clear 1: Conference Room. Positions: All odd positions; ≤12. The Analyst is killed if the objective is destroyed in the B&C. The objective is destroyed at 7 on the collateral track.
- Resolution: Place the Extraction Point at the Stairs nearest to this B&C.
- Objective 2: If all surviving MERCS reach the Extraction Point, the players win.
Slash & Burn (Part 1)
- Objective 1: Kill the Scientist in the Lab.
- Special rules:
- Insertion point: Entrance.
- Place a Scientist in the Lab.
- Breach & Clear 1: Lab. Positions: All black positions; all yellow positions. The Scientist is killed if the objective is destroyed in the B&C. The objective is destroyed at 8 on the collateral track.
- Resolution: Place a Scientist in Project Lazarus.
- Objective 2: Kill the Scientist in Project Lazarus.
- Breach & Clear 2: Project Lazarus. Positions: All positions. The Scientist is killed if the objective is destroyed in the B&C.
- Resolution: Keep the same building and proceed to mission: Liquidation (part 2).
Liquidation (Part 2)
- Objective 1: Defend Project Lazarus.
- Special rules:
- Insertion point: Project Lazarus.
- If a SecFor is in Project Lazarus in the Refresh Phase, the players lose.
- All agents appear as SecFor equal to the security rating.
- If the SecFor do not have a MERC target, they attempt to enter Project Lazarus.
- Objective 2: When the security track counter is moved over to the reinforcement track, if there are no SecFor in Project Lazarus and at least 1 MERC is alive, the players win.
Experimental Nano-Gel
- Objective 1: Locate and secure the Lab.
- Special rules:
- Insertion point: Entrance.
- Breach & Clear 1: Lab. Positions: All positions.
- The damage level applied to the MERCS at the end of the B&C is increased by 1.
- Resolution: Move the security level counter to the 0 space on the reinforcement track.
- Objective 2: The MERCS must defend the Lab. When the security counter reaches 10 on the reinforcement track, if there is at least 1 MERC alive, the players win.
Secure Dr. Shuisky
- Objective 1: Secure the Scientist.
- Special rules:
- Insertion point: Entrance.
- Place the Scientist in the Lab.
- If the Scientist is killed, the players lose.
- Breach & Clear 1: Lab. Positions: Odd positions up to 14. The Scientist is killed if the objective is destroyed in the B&C. The objective is destroyed at 7 on the collateral track.
- Resolution: Place the Extraction Point at the Entrance.
- Objective 2: If all surviving MERCS and the Scientist reach the Extraction Point, the players win.
Down the Rabbit Hole
- Objective 1: Kill the Analyst.
- Special rules:
- Insertion point: Elevator.
- When the building is at security level 2 or higher, place the Analyst in the Data Center.
- Breach & Clear 1: Data Center. Positions: All even positions. If the MERCS receive 4 Blood this B&C, the players lose.
- Resolution: Place the Extraction Point in the corner office near the priority track.
- Objective 2: If all surviving MERCS reach the Extraction Point, the players win.
Flush This! You Piece of...
- Objective 1: Locate the Informant.
- Special rules:
- Insertion point: Elevator.
- Cover the Informant and three employees with objective markers question mark side up. Randomly place the objectives into four named areas.
- Breach & Clear 1: Random. Positions: ≤10.
- Resolution: Place the Scientist in the bathroom furthest from this B&C.
- Objective 2: Kill the Scientist.
- Breach & Clear 2: Bathroom. Positions: All positions. The Scientist is killed if the objective is destroyed in the B&C.
- Resolution: Place the Extraction Point in the Stairs nearest this B&C.
- Objective 3: If all surviving MERCS reach the Extraction Point, the players win.
I Serve Myself
- Objective 1: Locate the Analyst.
- Special rules:
- Insertion point: Elevator.
- Cover the Analyst and three employees with objective markers question mark side up. Randomly place the objectives into four named areas.
- Breach & Clear 1: Random. Positions: ≤10.
- Resolution: Place the location of the Server in the corner office near the priority track.
- Objective 2: Destroy the Server.
- Breach & Clear 2: Special. Positions: All positions. The objective must be destroyed in the B&C.
- Resolution: Place the Extraction Point at the Elevator.
- Objective 3: If all surviving MERCS reach the Extraction Point, the players win.
A Timely Upgrade
- Objective 1: Locate and secure the Armory.
- Special rules:
- Insertion point: Elevator.
- Breach & Clear 1: Armory. Positions: All yellow positions; all red positions.
- The OpFor reroll failures once. The damage level applied to the MERCS at the end of the B&C is increased by 1. The damage level applied to the MERCS at the end of the B&C is increased by 1.
- Resolution: Move the security level counter to the 0 space on the reinforcement track.
- Objective 2: The MERCS must defend the Armory. When the security counter reaches 10 on the reinforcement track, if there is at least 1 MERC alive, the players win.
Printed-text note: the A Timely Upgrade B&C note prints the damage-level line twice, as shown.