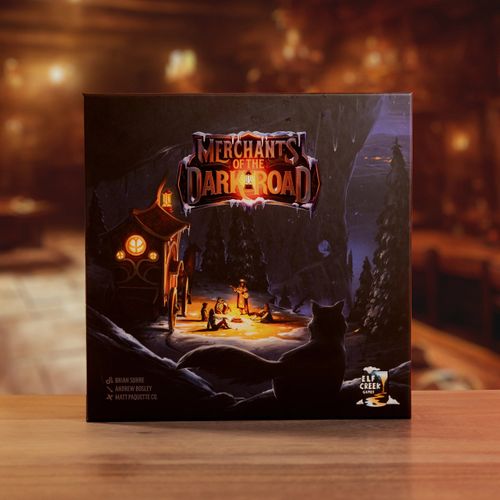
Merchants of the Dark Road
Merchants of the Dark Road Rulebook
Table of Contents
Table of Contents
Game Components
- 1 six-piece kingdom board
- 4 player screens and 4 player aids
- 4 wagon boards and 6 wagon upgrade tiles
- 4 wagon pawns and prestige markers
- 1 market wheel
- 48 hero cards
- 22 companion cards
- 7 steed cards
- 19 deed cards
- 26 event cards
- 30 commission tiles
- 5 double-sided building tiles
- Dark Market and Ruins of Yin markers
- 24 blazing quartz tokens
- 16 lantern tokens
- 12 horseshoe tokens
- 84 goods tiles
- 1 ruins die
- 8 illuminated dice
- 5 market dice
- 28 night dice
- 1 oracle die
- 5 travel dice
- 60 coins
Solo Play Components
- 1 Private Concern wagon pawn and prestige marker
- 10 Private Concern action cards
- 6 guild notice cards
- 3 sarcophagus cards
- 1 Private Concern goods marker
- 6 delivery tiles
- 1 solo rulebook
Setting up the Game
-
Assemble the Kingdom Board:
- Place the board, made up of 6 interlocking pieces, in the center of the table.
- Attach the magnetic market wheel.
-
Build the Resource Pools:
- Place the dice, coins, lanterns, blazing quartz, horseshoes, and goods within reach of all players as the supply.
- The goods have two sides: basic and upgraded. Stack the goods by type with their basic sides face up.
-
Erect the Buildings:
- Choose 4 buildings to use for this game and assign them randomly to the building spaces on the kingdom board.
- For your first game, we suggest using the Blazing Quartz Mine, the Oracle of Lumi, Otho's Lanternworks, and Yedl's Workshop. For later games, choose your own favorite combination of buildings or select at random.
-
Open the Great Bazaar:
- Roll 1 market die to randomly determine a type of goods. Rotate the market wheel so that the matching section is valued at $5.
- Place 1 market die on each of the first 5 sections, valued at $5 / $4 / $3 / $2 / $1 (leaving the $1 section closest to the $5 section empty).
- Set the faces of all 5 market dice to show the types of goods that match their sections.
Player Setup
The players must carry out these steps individually.
-
Determine a start player by any method. Then, in clockwise seating order, each player chooses a player color and takes the matching wagon board, wagon pawn, prestige marker, and player screen. Place your wagon pawn on the Ringway space that is between the Ringway Inn and the Great Bazaar on the kingdom board.
-
Place your prestige marker at the start of the prestige track on the kingdom board.
-
Take 5 coins from the supply and place them behind your player screen.
-
Take 7 night dice and 1 illuminated die from the supply. Place these dice on your wagon board as follows:
- Place 3 night dice in your 3 locked slots, with their values set to "1" (slot #1), "2" (slot #2), and "3" (slot #3).
- Roll the other 4 night dice and place them in your main reserve.
- Roll the illuminated die and place it in your special reserve.
-
Draw 1 deed card from the deck. Look at it, without showing your opponents, then keep it face down in front of you.
- On repeated plays, advanced players may wish to draw 2 deed cards and choose 1 to keep, returning the other to the bottom of the deed deck.
-
Take 1 horseshoe from the supply and place it in your inventory.
-
Take your starting good from the supply, based on your position in clockwise seating order and the current values of the different types of goods (as indicated by the market wheel). Place that good in your storage, basic side up.
- Player 1: Take a good with a current value of $5.
- Player 2: Take a good with a current value of $4 -AND- take 1 coin.
Unused player pieces, starting hero cards, and steed cards can be returned to the game box once setup is complete.
Playing the Game
The game is played in 13 rounds, thematically corresponding roughly to the 13 weeks of winter. In each round, the start player takes the first turn, then each other player takes a turn, in clockwise order. This sequence of rounds continues uninterrupted until the end of the game is triggered.
When it is your turn, you must perform these 4 steps in order:
- Plan — Use a night die from your main reserve to bump a locked night die into your action pool. Gain the bonus from that locked slot.
- Move — Move your wagon pawn clockwise around the Ringway a number of spaces equal to the value of any 1 die in your action pool.
- Activate — Activate 1 or both of the districts that are now adjacent to your wagon pawn, using the dice from your action pool.
- Rest — Perform any necessary upkeep on the kingdom board. Reroll your night dice if your main reserve is now empty.
Step 1: Plan
Resetting — Easy as 1, 2, 3!
At the start of this step, if your 3 locked night dice all have the same value, you may choose to reset their values to "1" (slot #1), "2" (slot #2), and "3" (slot #3), just like you had during setup.
Selecting your Actions:
- Choose a night die from your main reserve.
- Use that night die to bump a night die from one of your 3 locked slots. The die that is bumped from the locked slot goes into your action pool and the die from your main reserve takes its place in that locked slot.
- Important: Make sure not to change the values of these dice when moving them.
- After bumping a night die from a locked slot, take the special action associated with that locked slot. Each of the 3 locked slots has its own special action.
Special Actions of the Locked Slots:
- Slot #1: Craft a basic good. To do this, refer to the crafting chart to determine which basic good matches the value of the newly locked night die. Gain that basic good from the supply and store it on your wagon.
- Important: Make sure to use the value of the new die, not the previous die that was bumped into your action pool!
- Slot #2: Gain 1 lantern from the supply and store it on your wagon -OR- move an illuminated die from your special reserve to your action pool.
- Important: This is the only way to move an illuminated die into your action pool!
- Slot #3: Gain 2 coins from the supply -OR- rotate the market wheel 1 space clockwise.
For the final 3 rounds of the game, your main reserve will be empty, so there will be no dice with which to bump other dice. Instead, simply choose one of your locked night dice and move it into your action pool. Take the special action as normal.
Important: When you take the special action of locked slot #1 during the final 3 rounds, instead of referring to the crafting chart, gain 1 basic good of your choice.
Step 2: Move
Choose a die from your action pool to count as your movement. Move your wagon pawn clockwise around the Ringway a number of spaces equal to the die value. If the value of the die is zero, your wagon pawn does not move at all.
If you have 2 dice in your action pool, do not add their values together. You must choose 1 of the 2 dice to count as your movement.
Horseshoes: After you move your wagon pawn based on the die value, you may spend a horseshoe to move your wagon pawn 1 space in either direction: clockwise or counterclockwise. You may only spend 1 horseshoe per turn.
Step 3: Activate
Your wagon pawn will always be adjacent to 2 districts after it moves around the Ringway. Activate 1 or both of the adjacent districts, using the dice from your action pool.
Each district has an action space where you can place a die. Place a die on the action space to indicate that you are activating that district. The die values themselves do not matter for activation purposes.
- If you only have a night die in your action pool, you will activate one of the adjacent districts. Place the night die on the action space in that district.
- If you have both a night die and an illuminated die in your action pool, you will activate both of the adjacent districts and the connected building that is between them. Place the dice on the action spaces in those districts.
Note: Unlike night dice, illuminated dice are returned to the supply once they are used. These powerful dice are not easy to come by, but they can be regained through the travel action.
When you have 2 dice, you may activate the 2 districts and 1 building in any order, but you must fully resolve each action before moving to the next action.
Districts: There are 5 unique districts, which are all always in play for every game.
Buildings: There are 10 unique buildings, but only 4 are in play for any given game. There are 5 wagon spaces on the Ringway, but only 4 connected building spaces. There is no building space between the Ringway Inn and the Great Bazaar.
Step 4: Rest
Retrieve the night die you used this turn, removing it from the kingdom board and placing it in the spent pile near your wagon board. If you also used an illuminated die this turn, retrieve that die too, but return it to the supply instead.
Perform any necessary upkeep on the kingdom board:
- Market Dice: If any market dice were set aside this turn, reroll them and place them in the matching sections of the market wheel. However, no more than 2 dice may be in any 1 section. If you get a result that matches a section with 2 dice already, keep rerolling until you get a valid result.
- Companion Cards: If any companion cards were taken this turn, slide all of the other companion cards toward the end of the row, then reveal new cards from the deck to refill the row to 3 cards. If the card farthest from the deck does not have a travel die on it, add 1 from the supply.
- Hero Cards: If any hero cards were taken this turn, reveal new cards from the deck to fill the empty slots.
- Deed Cards: If any deed cards were taken this turn, reveal new cards from the deck to fill the empty slots.
At the end of rounds 4, 7, 9, and 10, your main reserve will be empty. In these rounds, take 1 night die from your spent pile and remove it from the game. Then reroll the remaining night dice in your spent pile and place them back in your main reserve.
Important: At the end of the tenth round, after removing 1 night die from your spent pile, you will have none left to reroll and place back in your main reserve.
District Actions
The Great Bazaar
"Buy. Sell. Profit. Praise the Quartz." — Motto of the Great Bazaar
In this district, you can spend coins to buy goods. The market dice on the various sections of the market wheel represent the types and quantities of goods currently available. The costs of the available goods are indicated by their current values.
When you activate this district, first you may perform the following two actions in either order:
- Rotate the market wheel 1 space clockwise.
- Change 1 market die on the market wheel to any face, then move it to the section of the wheel that matches the new face.
- Important: You must still obey the limit of no more than 2 dice per wheel section.
Then choose which of the available goods you wish to buy:
- Add up their total cost, as indicated by their current values. The cost for each section is only counted once. If you buy 2 goods from a single section, the second is free.
- Spend coins equal to the total cost. For each of the goods that you buy, remove the matching die from the market wheel and set it aside, then take the matching basic good from the supply and store it on your wagon.
Example: Susie visits the Great Bazaar. Because she is happy with the current prices, she decides not to rotate the market wheel. There is only 1 armor available, so she changes one of the potions to an armor. Susie then buys 2 armor ($3) and 1 weapon ($1) for 4 coins total. She takes those goods from the supply and stores them on her wagon.
The Queen's Commissions
"We know that people work hardest carrying out our orders when they're also getting rich at the same time." — Queen Gicela's Minister of Roads
In this district, you can gain a new commission for delivering goods from the capital city to one of the outlying towns. Each commission shows which 3 goods are requested and which outlying town they must be delivered to.
When you activate this district, gain the top commission from the stack of your choice and place it in one of the commission slots on your wagon.
Important: You are not allowed to look through the commission stacks. Only the top commission in each stack should ever be visible.
The Dark Market
"By custom, goods and the licenses which regulate them are bought only at official sites. However, it is also customary to ignore custom when some better deal may be made in the shadows." — Izaak Gale's Compleat Merchant
In this district, you can choose from an assortment of items offered by the vendors in the less savory part of the capital city: goods, commissions, and deeds.
When you activate this district, move the district marker around the dark market ring clockwise:
- You choose how many spaces to move it, spending 1 coin for each space.
- You must move it at least 1 space, but you may move it up to 4 spaces.
- You cannot move the marker more spaces than you have coins.
After moving the district marker, gain the benefit shown in whichever space of the dark market ring that the marker has stopped in.
- The north, east, and west spaces provide pairs of goods. If the marker stops here, gain the 2 basic goods shown from the supply and store them on your wagon.
- The south space provides a single commission or deed. If the marker stops here, gain 1 available commission -OR- 1 available deed and its bonus. Note that this is one way to gain horseshoes.
Important: Because you must move the district marker at least 1 space, you must have at least 1 coin to activate this district. If you have no coins, skip this activation entirely.
Example: Andrea visits the Dark Market. The district marker is currently in the west space of the dark market ring. She wants to move the marker to the east space, so she spends 2 coins in order to do so. Andrea then gains the pair of goods shown there, a book and a staff, from the supply and stores them on her wagon.
The Ringway Inn
"...head 'round to the Ringway Inn. The crowd in the fireplace hall never sleeps!" — "Frostpine" the Tout
In this district, you can sell goods to a hero and convince them to join your caravan. You will earn coins for the goods you sell, and the hero who joins you will stay with you until you travel to the outlying town that is their desired destination.
When you activate this district, choose 1 available hero. Each hero shows which outlying town is their desired destination and which goods they request. You may meet any number of their requests by selling them 1 good per request. You must sell at least 1 good.
Return the sold goods from your storage to the supply. Gain coins from the supply for the sold goods, based on their current values.
In addition, gain 1 blazing quartz and 1 extra coin from the supply for each upgraded good sold. Quartz are given to animal companions.
After selling the goods, take that hero and place them in one of the hero slots on your wagon (all relevant storage rules apply). Immediately gain the bonus provided by that hero:
- If the hero has a lantern icon, gain 1 lantern from the supply.
- If the hero has a horseshoe icon, gain 1 horseshoe from the supply.
- If the hero has a storage icon, they can store any 1 good. This is treated as an extension of your wagon storage and all storage rules apply.
Important: If all of your hero slots are full and you decide to discard the new hero instead of a different hero, you do not gain the new hero's bonus.
Example: Brian visits the Ringway Inn and chooses to recruit Atlantes, a wizard from Cursecairn. Atlantes requests 3 goods: a staff, a book, and a potion. Brian has all of these goods, but he shrewdly decides to sell only the staff and the potion, based on current market values. He gains $4 for the staff and $5 for the potion, plus an extra $1 and 1 blazing quartz because the staff is an upgraded good. Brian also gains 1 lantern as a bonus.
Yurg's Excursions
"Nonetheless, the most intrepid (and lucky) travelers earned spectacular profits and fame." — Otto Witcomb's The Merchant Pioneers
In this district, you can travel either to the nearby Ruins of Yin to find upgraded goods or to one of the outlying towns to deliver goods and heroes. If you travel to one of the outlying towns, the other merchants may choose to travel with you in a caravan.
When you activate this district, decide whether you are going to travel to the Ruins of Yin or to one of the outlying towns. You cannot do both! Once you have made your decision, announce it to the rest of the table and follow the instructions in the section for your chosen travel option.
Ruins of Yin
When you choose this travel option, move the district marker around the ruins tablet clockwise. You choose how many spaces to move it. You must move it at least 1 space, but you may move it up to 1 additional space for each hero on your wagon.
After moving the district marker, gain the benefit shown in whichever space of the ruins tablet that the marker has stopped in.
- The top-left, top-right, and bottom-right spaces each provide an option between 2 different upgraded goods. If the marker stops here, gain 1 of the 2 upgraded goods shown from the supply and store it on your wagon.
- The bottom-left space provides an upgraded good of your choice. If the marker stops here, gain 1 upgraded good from the supply and store it on your wagon.
Finally, you may return 1 lantern to the supply. If you do, roll the ruins die and gain the benefit shown by the rolled result. The possible benefits are:
- Take the Ruins action again, moving the marker at least 1 space clockwise and taking the benefits shown in the section.
- Reroll the ruins die and if you roll this benefit again, take 1 illuminated die from the general supply, roll it, and place it in your special reserve. If you roll another benefit, take that benefit instead.
- Take a basic good from the supply worth 1 coin based on market prices.
- Take a blazing quartz from the supply.
- Take 2 coins from the supply.
- Take 1 face-up hero or the hero from the top of the deck and place it on your wagon board. Note: You do not sell to this hero.
Upgraded Goods: Traveling to the Ruins of Yin is the main way of finding upgraded goods. When sold to heroes, upgraded goods sell for more money and gain you blazing quartz. When delivered for commissions, upgraded goods gain you additional prestige. Upgraded goods are also commonly found as benefits on Shortcut Events and on some buildings.
Outlying Towns
When you choose this travel option, you become the leader of a caravan which the other players may join. As the leader, carry out the following steps:
Step 1: Prepare the Caravan
- Choose one available companion and place it next to your wagon board. You may choose the top card of the companion deck instead.
- Declare which route the caravan will take: "I will take the dark road" -OR- "Trust me, I know a shortcut." In order to choose a shortcut, you must spend 3 lanterns. Declare 1 of the 6 outlying towns as your destination.
- Dark Road: The dark road may not cost you any lanterns, but it's also not as profitable.
- Shortcut: Shortcuts are less perilous, but will cost you 3 lanterns!
- Once the route and destination are known, each other player must declare with a "yes" or "no" whether they would like to travel in the caravan. This happens in clockwise seating order.
- Take 1 travel die from the supply for every traveler (player in the caravan), including you.
- Important: If you chose the companion with the extra travel die, add that die too.
Step 2: Resolve an Event
- Reveal the top card of the event deck that matches the chosen route and read it aloud.
- Roll all of the travel dice in the current pool, group the dice by their face values, and place them next to the event card.
- Each traveler must take 1 travel die. The order in which those travelers get to take their travel dice is determined by the chosen route:
- Dark Road: The leader chooses first, followed by each other traveler in clockwise seating order.
- Shortcut: The traveler on the leader's left chooses first, followed by each other traveler in clockwise seating order.
- Before a traveler chooses a travel die, they may spend 1 lantern to reroll all remaining travel dice once. They may repeat this multiple times.
- When a traveler chooses a travel die, compare the die's face value with the event card to determine which benefit (dark icons) or cost (red icons) they receive.
- Each traveler must take 1 travel die. The order in which those travelers get to take their travel dice is determined by the chosen route:
After each traveler has taken a travel die and received their benefit or paid their cost, return all travel dice to the supply.
Step 3: Visit Towns
The travelers may now visit the outlying towns.
- The leader may only visit the town they declared as their destination.
- Each other traveler in the caravan may visit that same town or the other town in the same region (or pass).
All travelers may simultaneously deliver any number of commissions and heroes to the towns they have chosen to visit.
Delivering Commissions: Each commission shows which outlying town is requesting the goods, and which 3 goods they request.
- You may meet any number of their requests by delivering 1 good per request.
- You must deliver at least 1 good. Gain 1/3/6 prestige for delivering 1/2/3 of the requested goods on a commission.
- Important: You gain 1 additional prestige for each upgraded good that you deliver.
- Return all delivered goods to the supply and place the completed commission face down in your merchant's log (a face-down pile of delivered goods and heroes).
Delivering Heroes: Each hero shows which outlying town is their travel destination. Each outlying town is in 1 of 3 regions, and each region offers a different benefit for delivering heroes.
- Gain the benefit shown for that region on the kingdom board.
- Place the delivered hero face down in your merchant's log.
Step 4: Receive Good Fortune
You now receive 1 or 2 good fortunes, as the caravan leader, based on the chosen route: 1 for traveling the dark road or 2 for traveling a shortcut. If you receive 2 good fortunes, you may choose the same good fortune twice.
- A. Gain 1 illuminated die from the supply. Roll the die and place it in your special reserve. Note: This is the primary way to gain new illuminated dice.
- B. Gain 1 available deed and its bonus.
- C. Gain 3 coins. (The first player to choose this good fortune gains 5 coins instead.)
- D. Gain 1 available wagon upgrade. If your wagon already has a wagon upgrade, you cannot choose this good fortune.
Game End
The game ends after 13 rounds have been played. During the 13th round, each player will use the only night die that they have left.
When the end of the game occurs, all players get to travel one last time. Each player may visit the outlying town of their choice in order to deliver commissions and heroes. However, nothing else happens during this final travel.
Once the final travel is complete, proceed to final scoring.
Final Scoring
Each player calculates their final score separately. Follow these steps:
-
Coins & Prestige: Reveal and count up your coins and prestige. Reveal any completed deeds that give you coins or prestige and add them to your totals. Then compare your coins and prestige. The lower of the two values is your base score.
-
Victory Points: Count up your victory points. Reveal any completed deeds that give you victory points and add them to your total. Add 1 victory point for each illuminated die that you have but did not use.
-
Final Score: Add together your base score and your victory points. The combined total is your final score.
The player with the highest final score is the winner!
Breaking Ties: In the case of a tie, apply the following tiebreakers in order: highest discarded base score > most gifts on loyal companions > most commissions delivered > most heroes delivered. If the tie still persists, the tied players share the victory.
Full Travel Example
Griffin visits Yurg's Excursions and decides to travel to one of the outlying towns.
Choosing a Companion: He chooses a Phoenix companion from slot #3, then declares that the caravan will be traveling to Northbreak via a shortcut, which costs him 3 lanterns.
In turn order, the other players then declare whether they will join the caravan. Susie says yes, Brian says yes, and Andrea says no. So Griffin takes 4 travel dice from the supply: 1 for each player in the caravan plus the one that was on his new Phoenix companion.
Griffin reveals and reads the top event card of the shortcut deck. Griffin rolls the dice and gets 1, 3, 4, 6.
Travel Benefits: Because the caravan took a shortcut, the player order is: Susie > Brian > Griffin.
- Susie chooses the 6 (gain 1 quartz).
- Brian spends 1 lantern to reroll the remaining dice and gets 1, 4, 5. He takes the 5 (gain 1 upgraded instrument).
- Griffin takes the 4 (lose 1 good), but adds +1 with his steed's ability to make it a 5 (gain 1 upgraded instrument).
Delivering Goods & Heroes: Susie doesn't have anything to deliver to an outlying town in this region, but the others do. Griffin delivers 2 heroes to Northbreak for 4 coins. He also has 1 commission for Northbreak that requests a weapon, a staff, and an armor. He delivers all 3 goods for 6 prestige.
Brian has no heroes to deliver and 1 commission for Scorchborn that requests an armor, an instrument, and a potion. He delivers an upgraded instrument and a potion for 4 prestige.
Good Fortune: As the caravan leader, Griffin receives 2 good fortunes, because the caravan took a shortcut. For the first good fortune, he gains 1 illuminated die. He rolls it and adds it to his wagon. For his second good fortune, he gains one of the available deeds and places it behind his player screen. Because he took the top deed card, he also gains 2 prestige.
Additional Rules
Drafting Variant
This variant allows for less luck of the draw during game setup. Instead of dealing steed cards and starting hero cards randomly, draft them in the following manner.
Shuffle the steed cards, then reveal a number of cards equal to the number of players plus one. Place these cards face up in a row on the table. Repeat this with the starting hero cards. Stack each starting hero card on top of a steed card.
The players take turns drafting these stacks, beginning with the start player and continuing in clockwise order. Each player will end up with 1 steed card and 1 starting hero card. The remaining stack is returned to the game box.
Private Concern Variant
Solo play, which is explained in a separate booklet, pits you against an automated opponent known as the Private Concern. Once you know how the Private Concern functions in solo play, you can even include the Private Concern in multiplayer games!
The Private Concern is included in the player count. This means that the Private Concern can be used to simulate a 3-player game (2 human players, 1 automated player) or a 4-player game (3 human players, 1 automated player).
The Private Concern takes its turns in the normal sequence, based on the turn order decided at the start of the game, and functions exactly as it does in solo play.
Component Explanations
Buildings
There are 10 unique buildings, but only 4 are in play for any given game.
- Blazing Quartz Mine: Gain 1 blazing quartz from the supply.
- Queen's Eyes Surveyor: Spend 2 coins or 1 blazing quartz to gain 3 prestige.
- Icebreaker Harbor: Gain 1 basic good from the supply of any type that is not currently available on the market wheel.
- Merchant's Guildhall: Spend 2 coins or 1 lantern, then gain 2 basic goods from the supply: 1 good of any type and 1 good of a type with a current value of $1.
- The Oracle of Lumi: Roll the oracle die and gain the benefit shown.
- The Candle & Quartz: Spend 2 coins or 1 basic good with a current value of $1, then gain 1 available hero or commission.
- Otho's Lanternworks: Gain 1 basic good from the supply with a current value of $1. Gain 1 lantern from the supply. Gain 1 prestige.
- Guildmaster's Mansion: You may trade any number of the following items at a 1-to-1 ratio: 1 lantern, 1 blazing quartz, 2 coins.
- Yedl's Workshop: Upgrade 1 good in your storage from the basic side to the upgraded side. Gain 1 lantern from the supply.
- The Frosted Filigree: Spend 2 coins or 1 good, then gain 1 upgraded good from the supply with a current value of $1.
Note: There is 1 Ringway space, between the Ringway Inn and the Great Bazaar, with no connected building space.
Companions & Blazing Quartz
Companions are intelligent animals with powerful one-time abilities. They grant these abilities in exchange for gifts, most commonly the blazing quartz. The most common way of gaining quartz is by selling upgraded goods to heroes at the Ringway Inn.
You may only trigger companion abilities on your own turn, but may do so at any time. There are two different types of companions: loyal companions and stray companions.
Loyal Companions: These companion abilities trigger with a gift of 1 blazing quartz. When you trigger an ability, move the gifted blazing quartz from your supply to the ability space on the companion card. That ability cannot be triggered again for the rest of the game.
- Cave Dragon: Deliver 1 hero to their outlying town and gain the delivery benefit.
- Ice Mouse: Gain 1 available commission.
- Phoenix: Gain 2 lanterns from the supply.
- Raven: Gain 1 illuminated die from the supply. Roll the die and place it in your special reserve.
- Snow Bee: Gain 1 available hero.
- Threy Cat: Duplicate the value of any travel die and gain the benefit shown.
- (Other loyal companion abilities include: Gain 1 basic good from the supply of any type that is not currently available on the market wheel; Gain 1 basic good from the supply; Move the district marker in the ruins 1 space clockwise and gain the benefit shown; Roll the oracle die and gain the benefit shown; Craft an upgraded good using the die locked in slot #1; Add +1 or +2 to the face value of your travel die.)
Stray Companions: These companion abilities are triggered by a variety of gifts. When you trigger an ability, return the gift to the supply. Then pass the companion card to the player seated on your left.
- Grace: Gain 1 available deed and its bonus. This companion requires a potion instead of a blazing quartz. Return the potion to the supply.
- Flicker: Shortcut at no cost. If you choose to take a shortcut while traveling this turn, you may ignore the lantern cost. Return the blazing quartz to the supply.
- Cosimo: Gain 1 available wagon upgrade OR move the district marker in the dark market 1 space clockwise and gain the benefit shown. This companion requires a hero instead of a blazing quartz. Place this hero card on the bottom of the hero deck.
- Li'l Dumplin': Roll the ruins die and gain the benefit shown. This companion requires a horseshoe instead of a blazing quartz. Return the horseshoe to the supply.
Deeds
"You want fame? I have it for sale, step right this way." — Ygor of the Dark Market
Deeds are personal objectives that are evaluated at the end of the game. You can gain coins, prestige, or victory points by completing them.
When you gain a deed:
- Choose one of the 2 available deeds in the courtyard.
- Gain the bonus listed in the banner next to that deed slot. Note that this is one way to gain horseshoes.
- You may choose the top card of the deeds deck instead, but you gain no bonus if you do.
Keep your deeds face down in your merchant's log. You may view them at any time, but do not reveal them to your opponents until the game ends.
Events
"Without question, the road is the most wondrous discovery of humankind..." — Hethel of the Road Wardens Guild
Events are incidents that befall the traveling caravans. Each event card has flavor text describing the situation. Read this aloud when the card is revealed.
Along the bottom of each event card are various effects linked to specific results on the travel dice. Some effects are benefits (dark icons) and some effects are costs (red icons). Benefits are things that you gain, while costs are things that you lose.
When you pay a cost, you lose the indicated resource. If you cannot carry out the effect fully, do as much as possible. You cannot go below zero coins or zero prestige.
Lanterns
Lanterns are an important resource that merchants can use to change their luck along the dark road. They have three main uses:
- To reroll travel dice.
- To take a shortcut, earning more good fortune on the dark road.
- To roll the ruins die when you travel to the Ruins of Yin.
Lanterns are primarily gained during step 1 of your turn (Plan), when you move an action die through the middle slot of your wagon board. But they can also be gained by selling to some heroes at the Ringway Inn or at some buildings.
Steeds
"Steeds are loyal mounts with permanent abilities." — Report of Matilda, Merchant Guild Apprentice
Steeds are loyal mounts with permanent abilities. Each player has 1 steed, with an ability that is in effect for the entire game.
- Brembizánt: When you buy goods at the Great Bazaar, receive a $2 discount off the total cost. The cost cannot go lower than zero.
- Longshadow: When you use an illuminated die, you may choose any 1 of the 4 buildings to activate, not just the connected building.
- Lovebug: When you visit Yurg's Excursions, gain 1 lantern from the supply.
- Sugarfoot: When you move your wagon, you may move exactly 3 spaces, regardless of your dice values. You have a 2x2 extension to your wagon storage (thematically, a saddle bag).
- Velvet: Your wagon can have unlimited upgrades (instead of 1). When you gain a wagon upgrade, gain 2 prestige.
- Whisper: When you choose a travel die, you may add +1 to the face value.
- Woolsworth: When you deliver a commission, you also gain 1 blazing quartz for each upgraded good that you deliver for that commission.
Wagon Overview
Your wagon board helps you organize and keep track of your night dice, illuminated dice, goods, blazing quartz, horseshoes, lanterns, commissions, and heroes.
- Commissions: Commissions are kept along the left side of your wagon. You have 3 commission slots. If you gain a commission when all slots are full, you must discard it unless you discard a different commission to make room. Place the discarded commission at the bottom of the matching commission stack.
- Lanterns: Lanterns are hung from the top of your wagon. You have 4 lantern slots. If you gain another lantern when all of your slots are full, you must discard it.
- Heroes: Heroes are kept along the top of your wagon. You have 3 hero slots. If you gain a hero when all slots are full, you must discard them unless you discard a different hero to make room. Place the discarded hero at the bottom of the hero deck.
- Storage (Goods): Goods are primarily kept in your storage (some heroes also help storing goods). You may store your goods in any orientation as long as they fit completely within the grid. You may also rearrange the goods in your storage at any time to make room. If you gain a good that cannot fit, you cannot keep it unless you discard other goods to make room.
- Inventory (Resources): Blazing quartz and horseshoes are kept in your inventory. You have 3 inventory slots. If you gain another resource when all slots are full, you must discard it unless you discard a different resource to make room.
- Night Dice: Night dice are kept in your main reserve until you move them to the locked slots. Night dice in your locked slots stay there until they are bumped into your action pool.
- Illuminated Dice: Illuminated dice are kept in your special reserve until you choose to move one to your action pool. You may have up to a maximum of 2 illuminated dice at one time.
Wagon Upgrades
Wagon upgrades are permanent additions to your wagon. You can gain a wagon upgrade as a good fortune when you lead a caravan to the outlying towns. You may only have 1 wagon upgrade per game.
- Goes in locked slot #1 and replaces that special action. When you use that special action, craft an upgraded good instead of a basic good.
- Goes in locked slot #2 and replaces that special action. When you use that special action, gain 1 lantern from the supply -AND- you may move an illuminated die from your special reserve to your action pool.
- Goes in locked slot #3 and replaces that special action. When you use that special action, gain 3 coins from the supply or 1 prestige.
- Goes in your wagon storage and must stay there for the remainder of the game. You may reposition it at any time, but you may not discard it to make room in your storage area.
- Goes in a lantern slot. When you travel to the Ruins of Yin, you do not have to spend a lantern to roll the ruins die. May not be discarded from the lantern storage area.
- Goes in an inventory slot. Immediately gain a second steed of your choice from the unused steed cards. You may not discard it to make room in inventory.
Travel Benefits
Each outlying town is in 1 of 3 regions. When you deliver a hero to their destination town, gain the benefit for that region:
- Northbreak and Scorchborn: Receive 2 coins per delivered knight or skirmisher, respectively.
- Windglass and Farglen: Receive 2 prestige per delivered alchemist or bard, respectively.
- Cursecairn and Nightpoem: Receive 1 prestige and 1 coin per delivered wizard or loremaster, respectively.