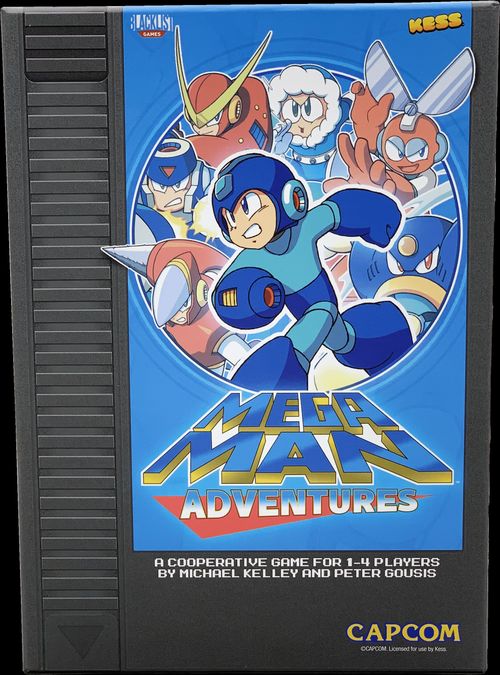
Mega Man Adventures
Mega Man Adventures Rulebook
Table of Contents
Table of Contents
Overview
In Mega Man Adventures, one to four players take on the roles of Mega Man and his allies to battle against the nefarious Dr. Wily and his powerful Robot Masters. There are two main ways to play the game, as a single game or an ongoing campaign to eventually take on Dr. Wily himself!
The following rules are written assuming players are playing a single game; for additional rules on campaign play, see "Campaign Mode".
Components
- 4 Hero Boards
- 4 Hero Standees
- 20 Tarot-sized Stage Cards
- 154 Standard Cards
- 64 Action cards (4 character decks of 16 cards each)
- 18 Dr. Light Cards (for 1 and 2 player games)
- 34 Boss Cards (22 Robot Master Cards and 12 Dr. Wily Boss Cards)
- 25 Boss Pattern Cards
- 9 Sabotage Cards
- 4 Reference Cards
- 26 Mini-sized Weapon Cards
- 79 Tokens
- 4 Energy Tank Tokens
- 4 Life Energy Tokens
- 12 Bonus Tokens
- 38 Weapon Energy Tokens
- 1 First Player Token
- 20 Surprise Box Tokens
- 9 Action Dice (3 Dice in 3 Different Colors)
For your first game: Open the Mega Man 1 pack, leaving Mega Man 2 & 3 packs in the box.
Setting Up the Game
To set up the game, players perform the following steps in order:
-
Hero Setup: Each player chooses a hero to play as by selecting 1 of the hero boards and placing it faceup in their play area; alternatively, players may choose to deal out hero boards randomly. After selecting their heroes, each player performs the following steps: a. Gather the hero standee and deck of action cards corresponding to their chosen hero. b. Shuffle their action deck and place it to the left of their hero board. c. Place 1 life energy token on the "5" space of their hero board. d. Place 1 bonus token of each type (shoot, jump and run) on the corresponding spaces on their hero board, inactive (grey) side up.
-
Gain Weapons & Energy Tanks: Shuffle the weapon cards together and randomly deal 1 to each player, returning any remaining cards to the box (some weapons are labeled "Starting", but ignore that label for standard play; this is only important in campaign play). Each player places their weapon under the leftmost "weapon" space of their hero board, then places 3 weapon energy tokens above that card. Create a pool of energy tank tokens in the center of the play area that contains 2 energy tank tokens (or 1 energy tank in solo play).
-
Prepare Robot Masters: Return the Dr. Wily boss cards to the box and shuffle the Robot Master cards together. Deal four robot master cards to the middle of the table, "stage" side up. Each player chooses one to face, placing it in front of their play area. Return remaining robot master cards to the deck.
Players may glance at the "boss" sides of the robot masters (to see if their weapons match the boss weaknesses). Or, in classic Mega Man style, they can learn over time which bosses are weak to which weapons!
-
Stage and Boss Pattern Decks: Separately shuffle the stage cards and the boss pattern cards. Put each deck in the center of the table. Each player draws two to four stage cards, placing them in a face-up pile in front of their play area (so only the topmost card can be seen), per the table below:
Solo (1 player) 2 players
Object of the Game
Mega Man Adventures is a cooperative game in which all players win or lose together. In order to win, each player must reach the end of their stage by completing their stage cards, and must then defeat their boss by completing all of their boss pattern cards. If any player runs out of life energy (when there are no energy tanks remaining to heal them), the game ends in defeat.
Challenges
Mega Man and his allies will blast enemies, jump over obstacles, and run past attacks as they fight to reach and defeat the robot masters. All of these dangerous elements are represented on stage and boss pattern cards by CHALLENGES.
Challenges have two main components:
- Action Requirements - The actions the hero must take to overcome the challenge, by spending action dice (or bonus tokens) with icons matching the requirements. Some action requirements are wait icons, which are overcome by spending a matching pair of actions (two shoots, two jumps, or two runs).
- Challenge Damage - The damage the hero will suffer if they CANNOT overcome the challenge, or if they choose not to do so.
A stage card has 3 challenges; a boss pattern card has 1 challenge.
The players will choose and play action cards to gain dice, rolling and spending them to overcome challenges. Action cards and weapons can be used to modify dice results to match a challenge's requirements.
Stage cards feature three separate challenges (which are engaged in sequence from left to right by the hero). Boss pattern cards each feature a single challenge.
The Game Round
The game is played over the course of several rounds until the players either win or lose. Each game round consists of the following phases resolved in order:
- Draw Phase: Each player draws 4 action cards
- Planning Phase: The players simultaneously discuss strategy and play action cards
- Action Phase: Starting with the first player and going clockwise around the table, each player rolls their action dice and spends those dice in an effort to overcome challenges
- Clean-up Phase: Players discard all of their action cards, and their next stage cards are revealed (or their boss is set up once no stage cards remain)
Each phase is described in more detail in the following sections.
Draw Phase
Each player draws until they have 4 action cards. If a player ever needs to draw a card when none remain in their action deck, they shuffle their discard pile to create a new facedown action deck and continue drawing.
Robot Master Cards - Stage Side
Each player has a Robot Master boss card on its "stage" side in their play area. These cards have an ongoing ability that is in effect until the player reaches their boss and flips the card to its "boss" side.
The "stage" side of the boss card indicates a phase or step of the round when its ability is in effect. For example, Bomb Man's stage ability (Exploding Missiles: "Dice Pool: If you rolled 2 or more [of the indicated die result], suffer 1 damage") takes effect after the player rolls their dice pool for each stage card.
Planning Phase
Players use the planning phase to simultaneously prepare for overcoming their stage card or boss. During this phase, players play action cards to support their allies and activate their heroes' unique abilities. Each action card has two halves:
- Support - The top half of each action card is used if it is played into a support slot, providing a benefit to the hero who played the card and the hero to their left or right (based on which support slot is used). This benefit is also used when an action card is played as a boost. Most action cards provide a single action die as their support effect.
- Skill - The bottom half of each action card is used if it is played into a hero's skill slot, giving them a unique ability the hero can use during the action phase. The card is discarded after it is used. Some skills will feature an icon above the skill, indicating a cost that must be paid to activate the skill, such as discarding an action die from their pool.
Each player plays three action cards, one to each support slot on the top of their player board and one to the skill slot on the bottom of their player board. These cards should be slotted under the board so only the appropriate half is showing.
Players keep the fourth card in their hand as a "boost card". A boost card may be played during any player's action phase, giving that player the support benefit from the top half of that card.
Players are encouraged to openly communicate during the planning phase and to look carefully at the challenges on their stage card. The dice each have different distributions, with the action matching the die's color more common for each (red, yellow and blue dice are pictured in the manual).
For full details on the icons for both support and skill effects, see the Icon Guide at the end of this rulebook.
Action Phase
Starting with the first player and continuing clockwise, each player individually resolves their own action phase, rolling action dice and spending them to overcome challenges (on stage cards and/or boss pattern cards). For each challenge, they will either overcome it fully (avoiding all damage), or suffer its full damage value as they run through it and progress further into the stage.
The player currently resolving their action phase is referred to as the "active player". To resolve their action phase, the active player builds their action dice pool, rolls it, and spends their dice to overcome challenges. The active player completes these steps in order:
- Dice Pool
- Challenges a. Engage b. Abilities c. Overcome
Dice Pool
The active player gains dice and benefits from their four active support cards. This includes the two action cards played to the support slots on their own hero board, as well as the two immediately "neighboring" support cards from the players on their left and right. The active player rolls all gained dice into a dice pool, sorting them by type (red on the left, yellow in the middle, blue on the right).
Dice Pool effects on stages/bosses affect ONLY these initial dice, not dice gained later from abilities.
Example: the player is gaining 1 blue and 1 red die from their own cards, a red die from the player to their left, and a yellow die from the player to their right, giving them a pool of 2 red, 1 blue, and 1 yellow.
Challenges
This step is composed of three smaller repeating steps (Engage, Abilities, and Overcome) that are completed for each challenge a hero faces.
Engage: The active player places their standee on the leftmost challenge space of their stage card. In the next engage step, they will advance their standee to the next challenge space to the right, and so on. Note that players always advance to the next challenge space, whether or not they overcome it (spaces are never repeated).
In a boss battle (against a Robot Master or Dr. Wily boss), the active player instead engages the boss pattern card on top of their boss's pile and resolves "ENGAGE" abilities on their boss card and/or pattern card, if any.
Abilities: The active player may now modify their dice and tokens through any of the following options, as many times as they like, in any order. Extra dice gained from any of these abilities are NOT affected by "Dice Pool" effects on stages/bosses:
- Discard their skill card to get the bonus listed, paying any costs as required
- Discard a boost card (any player(s) may do this) to give the active player the support effect(s) on top of the card (usually rolling a new die into their pool)
- Discard 1 weapon energy from a weapon card to activate its effect, paying any other cost indicated as well; a given weapon can be used multiple times in the same Abilities step as long as it has enough weapon energy
- Discard 1 weapon energy from a weapon card to reroll any number of dice in their pool
Weapon card:
- Weakness - When fighting a boss, if a weapon's icon matches the boss's weakness icon, the player may use the weapon to gain a die of their choice (rolled) for 1 weapon energy, paying no other cost (see the boss section for more details)
- Added Cost - Additional cost to use the weapon. In the example, the player must pay 1 weapon energy AND discard any one die from their pool
- Effect - The effect of using a weapon, achieved by discarding 1 weapon energy (and paying any other costs)
Overcome: Each challenge has one or more icon requirements that the active player must meet in order to overcome it. Every icon in a challenge must be overcome, or none. A player cannot overcome some icons on a challenge space to reduce the damage. It's all or nothing. In basic terms, a shoot result overcomes a shoot in a challenge, whether it comes from a red, yellow or blue die. Note that a double die result (a die face showing two icons) must be spent on a single challenge, in this case for either of its icons. A player cannot "save" one icon from the double for a later challenge. Spent dice are returned to the communal supply in the middle of the table, while spent bonus tokens are flipped to their inactive sides.
After overcoming their current challenge, or suffering damage, the player returns to the Engage step, moving on to the next challenge space (or pattern card for bosses). They do not form and reroll a new dice pool. They must continue battling with the dice they have remaining.
Damage and Energy Tanks
If the active player cannot or chooses not to overcome EVERY icon in a challenge space or on a boss pattern card, they suffer the damage associated with that challenge, moving their life energy token one space to the left for each damage taken.
They still advance to the next challenge. Challenge spaces and pattern cards are never repeated. Instead, the damage represents them running through the attack or obstacle.
If a damage effect would cause a player's life energy token to reach the Dr. Wily space, they must spend an energy tank token from the communal supply (putting it back in the game box) to regain all their life energy. An energy tank must be used before the full damage effects of a challenge are resolved. For example, a hero with 2 life energy who suffers 2 damage cannot suffer 1 damage, then use an energy tank. They must use it before suffering the full 2 damage, meaning they will heal back to 5 life energy, then get damaged down to 3.
If a player's life energy reaches the Dr. Wily space, and no energy tanks remain in the supply, the players lose the game.
Surprise Box: If the active player overcomes a challenge space or pattern card with the surprise box icon, they immediately draw a token from the surprise box token supply, flipping it face-up into a discard pile near the supply. Generally, players do NOT receive a surprise box if they are damaged by a challenge. They must overcome it.
They gain the indicated bonus immediately (if able), flipping the indicated bonus token to its active side, gaining one life energy, or adding one weapon energy token to a weapon card with fewer than its max capacity (3 for all weapons unless indicated).
Finishing Action Phase
After a player has overcome and/or been damaged by all the challenges on their stage card (or all the pattern cards for their boss), their action phase is completed. The active player returns all remaining dice in their pool to the supply (active bonus tokens remain active), and the next player in clockwise order begins their action phase. This continues until all players have resolved their action phase, then play proceeds to the clean-up phase.
Dice Pool Limitations: Players are limited by the physical dice included in the game. Thus, at any given moment a player may only have up to three dice of the same color in their pool. If an effect would give them a fourth die of a color, that part of the effect is wasted.
However, as dice are spent to overcome challenges they are returned to the central dice supply. These dice may be gained again through an ability later in a player's action phase. For example, a player could spend one of three yellow dice they are holding, then a boost card could give them a new yellow die (which would be rolled into the dice pool as normal).
Example of Play
- A player has a stage card on top of their pile (pictured in the manual), and their current boss stage is Fire Man's stage.
- During the dice pool step of the action phase, the player flips their red shoot bonus token to its active side, and rolls 1 yellow die and 2 blue dice.
- The player rolls the following dice results: 3 jumps and 1 shoot.
- They engage the first challenge space, but they decide that they don't want to spend their only shoot result on it, so they suffer one damage for failing to overcome the card.
- Next they engage the second challenge. They need a pair for the wait icon and two jumps. They could spend the jumps for the wait, but that would leave them without enough for the rest of the challenge. Instead, they spend 1 weapon energy from their weapon, the Magnet Beam. It also has a 1-die cost, so they discard a die. That overcomes the wait icon, and they discard the other die to overcome the rest of the challenge.
- They engage the third challenge, which requires 2 shoot actions. They spend their yellow shoot die and flip their shoot bonus token to its inactive side. The final challenge is overcome, and they draw a surprise box token, gaining 1 weapon energy, which they add back to the Magnet Beam.
- Normally, that would be it, but Fire Man's stage ability adds a fourth challenge. The player has no dice or tokens left to spend. They have their "Learning" skill card unused, and they discard it to flip a bonus token to its active side, but that won't help them against the present challenge.
- They ask if any of the other players has a red boost card (which is more likely to roll a shoot action). The Proto Man player has one, and discards it to give the active player a red die. They roll a result they cannot use. They need a shoot, not that result!
- Even though it's a bit of a gamble, they spend a weapon energy from the Magnet Beam to reroll the red die, rolling a shoot action. They spend it to overcome Fire Man's stage ability, and their action phase is over.
Clean-up Phase
After all players have completed the action phase, each player discards their cards including unused skill and boost cards (to a discard pile to the right of their player board), and their current stage card (to a communal discard pile near the stage card supply). This will reveal the new top card of their stage card pile. Players may not look through the rest of their stage cards. Active bonus tokens remain active until they are spent.
If the players discard their final stage cards, they proceed to their boss battles. See the section below for details.
Boss Battles
When the players have faced all of their stage cards, in the next Clean-Up Phase they will set-up their bosses. To set-up for the boss battle, each player flips their robot master to its "boss" side. They then each draw a number of cards from the boss pattern deck equal to their boss's pattern card value.
They place these piles near their individual play area, flipping the entire pile face-up (they will be able to see the first/topmost pattern card as they are planning).
Boss card:
- Boss Pattern Card Value - The number of pattern cards drawn to form the boss's pattern pile
- Weakness - Weapon cards with the matching type gain a bonus usage option, spending 1 weapon energy to gain a die of the player's choice (rolled).
- Boss Ability - During the indicated phase of the round or step of the action phase, resolve or apply the indicated effect. Some abilities do not list a phase and are ongoing
- Signature Move - When a boss pattern card shows the signature move icon for a challenge, substitute in the indicated icon(s). In this case, Fire Man would require a shoot for every signature move icon.
Action Phase Changes
In boss battles, some steps of the action phase are resolved differently:
Engage: Instead of the active player moving their standee left to right to resolve different challenge spaces, they look at their boss pattern pile and the card on top of it. This is their active pattern card. Players are only allowed to look at their topmost pattern card. Many bosses will feature an "Engage" ability that must be resolved each time a new pattern card is engaged from the pattern card pile. Some pattern cards also have an "Engage" effect. This is resolved AFTER any boss "Engage" abilities.
Overcome: Each boss pattern card represents a challenge to overcome, following the same steps as a single challenge space on a stage card. The players may overcome all icons on the card, or suffer its damage (by choice or because they cannot fulfill its icons). If they are able to overcome it, they will gain a surprise box reward if the boss pattern card features one.
Just like with challenge spaces on stage cards, players do NOT have to overcome all of their boss pattern cards. They just have to survive all of them. The heroes are assumed to be attacking the bosses the whole time, so if they can just survive, they will eventually prevail.
After the overcome step for a given pattern card, the player discards it to a communal discard pile beside the pattern deck (this will reveal the next pattern card on top of the pile). If an effect would cause a player to draw a card from the general pattern supply when it is empty, they shuffle the discard pile facedown into a new deck and then draw.
Weaknesses
Each boss has a specific weakness, presented as an icon below their pattern card value. Players may use specific weapons to exploit these weaknesses.
If the active player has a weapon card with an icon on it matching their boss's weakness, that player may exploit the weakness by spending one weapon energy from the weapon card to gain a die of their choice (rolled). This is an additional option for the weapon, due to the robot master's weakness to its effect. The weapon may instead be used for its normal effect or to reroll dice, as normal.
Boss Battle Example
- A player is facing Fire Man. They begin by drawing four boss pattern cards into a pile and flipping the pile face-up, showing the indicated card on top, which requires two shoot actions to avoid two damage.
- The player's dice pool is rolled and comes up with the results pictured. They have the indicated weapon card and skill effect ready to use.
- The player engages the first boss pattern card. They resolve Fire Man's ability, rerolling a die, and ending up with a shoot result. The player chooses to use no abilities, and overcomes the pattern card by spending the shoot results, discarding the pattern.
- The player engages the new pattern card. They first resolve Fire Man's engage ability, rerolling a die, and ending up with a run. They then resolve the engage effect on the pattern card, discarding a die from the Gemini Laser since they have no bonus tokens.
- They have no shoot to overcome the pattern's challenge (it needs a shoot since that is Fire Man's signature move icon). They choose to use their skill, discarding it and spending one of their two weapon energy. They gain the specific dice indicated, a single red shoot and a single blue jump (the dice are not rolled). They spend the blue jump to overcome the pattern card.
- They engage the next pattern card. They currently have no bonus tokens active, so they suffer damage from Fire Man's ability, bringing their life energy down to the "1" space. They spend one weapon energy to use their Gemini Laser, activating its normal ability to gain a red shoot (matching the one in their pool). Before they overcome the challenge, they want to prepare for their next challenge by prepping a die to avoid Fire Man's ability. They activate Gemini Laser again, spending their third and last weapon energy. Since its icon matches Fire Man's Weakness, they choose to ignore its normal ability and instead roll a die of their choice. They choose a blue die, and roll a result.
- They spend dice to overcome the icons on the pattern. They draw a surprise box token, activating their jump bonus token.
- They engage their final pattern, rerolling the die for Fire Man's ability. The die rolls a result again. Luckily, with their remaining dice, they are able to easily overcome the challenge. Their remaining die is discarded, and they still have their boost card ready to help another player in their battle!
Sabotage Cards and Difficulty
To modify the difficulty of the game, use the changes listed in the table below. If the chosen level includes one or more sabotage cards, shuffle the sabotage deck and draw the indicated number of cards, resolving each card's effect.
| Difficulty | Change |
|---|---|
| Easy | +1 energy tank |
| Normal | No rules changes |
| Hard | 1 sabotage card |
| Master | 2 sabotage cards |
Solo and 2-Player Games
When setting up a one or two player game, shuffle the Dr. Light cards together to create the Dr. Light deck and place it facedown near the play area, if playing with two players, place the Dr. Light deck between the players (as if it were a third player, to one player's left and another player's right).
Planning Phase
At the start of the planning phase in a solo or two player game, flip the top three cards (2-player) or four cards (solo) of the Dr. Light deck faceup. The player(s) choose two of these cards (in two player games each selects one card), and the other card(s) are discarded. If players need to flip Dr. Light cards but none remain in the deck, shuffle the Dr. Light discard pile to create a new facedown deck, then continue flipping cards as needed.
The chosen cards are placed near the players' support slots, leaving room for their support card. In solo, one card will be near the left support slot and the other near the right. In two player games, each player's card will be near the support slot matching the "third player" side where the Dr. Light deck is located (consistently to one player's left and the other player's right).
Action Phase (Dice Pool)
During step one of the action phase (Dice Pool), the active player will gain the die indicated at the top of their Dr. Light card.
This represents Dr. Light sending extra power to the hero's systems, since they have fewer allies to help them defeat Wily's minions.
However, this extra power comes with a cost. If the hero doesn't carefully manage their energy output, the extra power can overload their systems. To represent this, if the action card the active player put in the matching support slot does not match the requirement indicated in the bottom left of the Dr. Light card, they suffer one damage. For example, with the card pictured, the active player would roll a blue die into their dice pool, and would suffer one damage if they didn't assign an action card with a red die to the matching support slot. A solo player resolves these effects for both Dr. Light cards.
Each hero's unique support effects satisfy Dr. Light's requirements in different ways:
- (Rush's choose-a-die support) Always satisfies Dr. Light's requirement.
- (Bonus token support) Counts as the die color matching the action/token icon (shoot = red, jump = blue, run = yellow).
- (Dual-die support) Satisfies Dr. Light's requirement if EITHER die matches. For example, this support card would satisfy a red or yellow requirement.
Clean-up Phase
During the clean-up phase, discard all active Dr. Light cards.
Campaign Mode
For a full Mega Man experience, players may wish to collect the weapons from their defeated Robot Masters and continue playing (either immediately or in a future session), eventually facing Dr. Wily himself. In campaign mode, players can do just that!
Below is a table illustrating the structure of a full campaign, which is made up of three separate game sessions.
| Session | Weapon Cards | Starting Life Energy | Energy Tanks |
|---|---|---|---|
| 1 | 1 per Player | 5 | 1/2/2/2 (1/2/3/4 heroes) |
| 2 | 2 per Player | 5/4/5/4 (1/2/3/4 heroes) | 0/1/0/0 (1/2/3/4 heroes) |
| 3 | 3 per Player | 5 | 0 |
Playing a Campaign
Each game of a campaign follows the normal rules of gameplay, with the exceptions detailed in the table above and below.
Set-up of First and Second Sessions
In the first session, shuffle only the four weapon cards marked "starting" and give one randomly to each player. Return the rest to the weapon deck.
In the second session, if a robot master is drawn that was already fought in the first session, redraw.
End of First and Second Sessions
After all players defeat their Robot Master in the first or second session of a campaign, each player finds the weapon card that matches their defeated Robot Master and adds it to their inventory. They will start the remaining game(s) of the campaign with this weapon card (in addition to previous weapon cards). In future games, players will start with full weapon energy on EACH of their weapon cards.
If the players lose a game in a campaign, they may re-try (setting up again with the weapons they had when they started that session).
Dr. Wily - The Final Battle
The third and final game in a campaign features a different game structure than standard play, as outlined here.
Dr. Wily Set-up
Follow normal set up, with the following exceptions:
- Return stage cards to the box (they are not used for this session)
- Shuffle the robot master boss cards and deal out four. Each player selects one, flipping it to its "boss" side. Shuffle the rest back into the deck. Each player creates a pattern card pile as normal.
- The players begin with zero energy tanks, regardless of player count.
Clean-up Phase Changes
At the end of clean-up, follow these steps:
- Each player discards their defeated boss (without gaining their matching weapon card). If the players defeated their third bosses for this session (the Dr. Wily bosses), they immediately win.
- Deal out 4 boss cards, with each player selecting one and placing it "boss side up". If this is the second boss battle, draw from the robot master bosses. If this is the third boss battle, shuffle and draw from the Dr. Wily boss cards.
- Reshuffle the pattern deck (including the discard pile), and set up each boss's pattern pile as normal.
Quick References
Difficulty levels: Easy: +1 energy tank. Normal: No rules changes. Hard: 1 sabotage card. Master: 2 sabotage cards.
Structure of a full campaign: see the Campaign Mode table above.
Stage cards by player count: Solo and 2 players: 4 stage cards. 3 players: 3 stage cards. 4 players: 2 stage cards.
Mega Man Heroes
Mega Man
Specialty: bonus tokens, balance
Unique Support: (bonus token icon) - Activates the indicated bonus token for the active hero
Roll
Specialty: weapon energy, surprise box tokens
Unique Support: (shoot / jump / run result icons) and (weapon energy icon) - Gives the active hero the specific die result as well as 1 weapon energy
Proto Man
Specialty: risk/reward, damage prevention
Unique Support: (two-die icons: red+yellow / red+blue / blue+yellow) and (damage icon) - Gives the active hero 2 dice instead of 1, at the cost of them suffering 1 damage
Rush
Specialty: supporting other heroes, wild dice
Unique Support: (choose-a-die icon) - Gives the active hero a die of their choice (each hero can choose a different colored die when this is in a support slot)
Icon Guide
- Die (red/yellow/blue): The active player rolls 1 action die of the indicated color into their dice pool.
- Choose-a-color die: The active player chooses a color and rolls a die of that color into their dice pool. If this is a cost, the player must discard any one die from their dice pool to activate the effect.
- Die set to a face: The active player adds 1 action die of the indicated color to their dice pool and turns it to the indicated face (they do NOT roll it with their other dice).
- Bonus token: The active player flips the indicated bonus token on their hero board to its active side; if the token is already active, this icon has no effect. A flipped token remains active until spent in a challenge.
- Any bonus token (ANY): This active player flips a bonus token of their choice to its active side. If this is a cost, the active player must flip any one active bonus token to its inactive side to use the effect.
- Damage: The active player suffers one damage, moving their life energy token one space to the left. If they would reach the Dr. Wily space, they must use an energy tank before the damage is applied to regain all of their life energy. If they cannot, the players LOSE.
- Life energy: The active player gains one life energy, moving their life energy token one space to the right (if able).
- Weapon energy: The active player gains one weapon energy, adding it to a weapon card that is below its maximum capacity (3 for all weapons unless indicated). If this is a cost, the player must instead discard one weapon energy from ANY of their weapon cards to activate the effect.
- Action (shoot / jump / run): The player must spend the indicated action, either by returning an action die with that icon from their pool to the supply, or by flipping a matching active bonus token to its inactive side. If an action die with a doubled icon is spent for a single icon cost, the die is still discarded (the "extra" icon is not kept by the player).