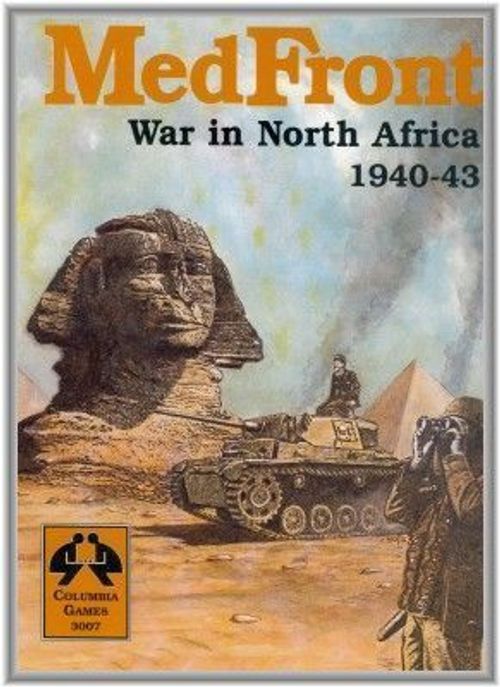
MedFront: War in North Africa 1940-43
MedFront: War in North Africa 1940-43 Rulebook
Table of Contents
Table of Contents
- Introduction
- 1.0 The Maps
- 2.0 The Units
- 3.0 Starting Play
- 4.0 Sequence of Play
- 5.0 Headquarters
- 6.0 Movement
- 7.0 Combat
- 8.0 Hex Control
- 9.0 Railroads
- 10.0 Supply
- 11.0 Production
- 12.0 Weather
- 13.0 Airpower
- 14.0 Paratroops
- 15.0 Seapower
- 16.0 War and Peace
- 17.0 Strategic Objectives
- 18.0 Map Edge Areas
- 19.0 Victory
- 20.0 The Powers
- 21.0 The Fronts
- 21.3 The Med Front
- 22.0 Scenarios
- Scenario: 1942 Axis High Tide
- Scenario: 1936 Spanish Civil War
Introduction
Nations and factions
The AXIS consists of Germany and all powers allied with it. The ALLIES consist of all powers opposing the Axis except the Soviets. The SOVIETS also oppose the Axis, but remain distinct from the ALLIES.
One player (or team) plays the AXIS side, and the other player (or team) plays the ALLIED - SOVIET side.
Great Powers: Germany, Britain / USA, Soviet Union. Major Powers: France, Italy. Minor Powers: Poland, Hungary, Yugoslavia, Belgium, Denmark, Spain, Finland, Norway, Turkey, Iraq, Eire, Rumania, Bulgaria, Greece, Holland, Vichy, Portugal, Sweden, Switzerland, Syria, Persia.
Special rules for various nations are found in rules section 20.0.
Neutrality
Play begins with most powers being neutral. Neutrals do not belong to any faction. Except for the Soviets (whose units are always in play on the map), neutral units are not deployed on the map.
Units cannot enter neutral territory: to do so, a Declaration of War (16.4) must first be issued, converting the neutral into a belligerent.
Belligerence
During play a neutral can become belligerent and join a faction. This can occur in three ways:
-
A Declaration of War is made upon it, and it immediately joins the opposing faction.
-
It makes a successful Alliance Reaction in response to another neutral becoming belligerent.
-
A Diplomatic Event makes it become belligerent in response to the pressure of events or great power diplomacy.
If a neutral becomes belligerent, the faction it joins gains control of its production, territory, and forces (which are then deployed on the map).
Minor power forces are shown on the Pro-Axis / Pro-Allied Neutral OB cards according to the faction they usually join, although neutrals can join either side. Units are shown as of September 1939, but when entering play, they are built up to allow for Peacetime Production (16.32) occurring since that date.
The maps
The maps are divided into hexes (hexagons) to determine location and movement. Terrain features include rivers, forests, mountains, cities, and railways. Terrain affects both hexes and hexsides.
The units
Wooden blocks (called units) represent Axis, Allied, and Soviet forces. Axis blocks are black, and represent German corps or Italian / minor power armies. Allied blocks are blue, and represent British/US corps or French / minor power armies. Soviet blocks are red, representing armies.
Attach an adhesive label showing unit-type, nationality and strength to each block. Units in play normally stand upright, with their labels facing the owning player, to prevent players from seeing the type or strength of opposing units ("fog of war").
The type of unit (armor, etc.) is shown by the symbol in the middle of each label. Unit types have defined movement and combat factors, so these are not shown on the label. Special units called Headquarters (HQs) control other friendly units.
Large numbers around the unit symbol on the label indicate the unit's strength or combat value ("cv"). The current cv of a unit is the number shown upright along its top edge when standing upright.
The fronts
EuroFront is divided into fronts (East Front, West Front, North Front, and Med Front) for Production and Weather purposes. Special rules apply to the Med Front (see 21.3) and North Front (see 21.4).
For the Axis and Allies, the West Front is the "home" front, where production originates. Production can be allocated from the home front to other fronts, but this requires long-term commitment and can be limited by transport. Production can also be transferred between fronts on an emergency basis (at the cost of inefficiency and delay). Units are usually freely transferable between fronts, but Headquarters are more constrained to reflect logistical realities.
NOTE: these fronts are denoted in these rules by two italic words ("East Front"), while the game of the same name is denoted by one bold word ("EastFront"). Both terms may be abbreviated as two letters (EF/EF respectively).
In general, combat units can move freely between fronts, but lose cv when entering extreme fronts (NF/MF). HQs are penalized for activating outside their "home" fronts. Production is allocated between the fronts every six months. Sending production to a front in excess of these allocations is possible, but costly.
Specific definitions of the Fronts and all Special Rules pertaining to them are summarized in 21.0.
Overview of play
Victory. EuroFront is divided into scenarios, one beginning in each summer of the war. All scenario games end in June 1945, when Victory (19.0) is determined.
Sequence of play. A game Month consists of Production and Diplomacy phases followed by two Fortnights of play.
Production awards Production Points (PPs) based on control of cities and resources, which are then spent to rebuild eliminated units or add CV to depleted units in play. Both sides do Production simultaneously.
Diplomacy gives each side a chance for a favorable event to occur.
A Fortnight consists of one Player-Turn for each player. The order of Player-Turns can vary depending on Weather, etc. The current player is the Active Player and the opponent is the Passive Player.
Weather (Dry, Snow or Mud) applies for a fortnight to an entire front, and can be either fixed or variable (dieroll), depending on the game-Month. Mud and Snow hamper operations.
Player-Turns consist of distinct phases taken in order by the Active Player (Command, Movement, Combat, Supply, and Politics).
Command. During the Command phase, players activate friendly HQs in order to command movement and provide combat support for friendly units within Command Range (equal to HQ CV). Declarations of War are made at the beginning of this phase.
Movement. Only units commanded by an activated HQ can move. Units can move a maximum distance according to their unit type. This distance can be modified by terrain and weather. Units must stop upon entering a hex that contains enemy units. Only Supreme HQs (SHQs) can command units to move strategically by sea or rail.
Combat. Combat occurs when opposing units occupy the same hex. Units in combat are revealed to the opponent.
Combat is resolved by exchange of fire between opposing units. Following a possible attacker airstrike (one per battle maximum), passive units fire first, then active units. Battles continue from turn to turn (often for months) until one side is destroyed or voluntarily retreats.
Passive ("defending") units benefit from reduced combat losses (e.g., double defense) in adverse terrain (mountains, forests, etc.), or when combat is not supported by a nearby activated enemy HQ.
Active ("attacking") units always apply full losses (never reduced).
Supply. Units unable to trace a Supply Line to a Supply Source lose one CV per turn, a severe penalty.
Supply Sources are usually rail lines connecting to that faction's Supply Origin (normally its Great Power capital). Sea Lanes between controlled ports connect friendly rail lines.
Politics. Political Events such as Defeat, Surrender, and Demoralization can occur during the Politics phase at the end of the Active Player's turn.
1.0 The Maps
1.1 The Maps
1.11 Playable Area. The EastFront and WestFront maps constitute the play area. Along some map edges are Zones containing Districts and Regions (see 18.0 for governing rules). Partial hexes on the mapedge are playable.
1.12 The Fronts. In EuroFront, four separate fronts (East Front, West Front, Med Front, North Front) are distinguished (see 21.0 for Front-specific rules). Front boundaries appear on the map.
Active Fronts. Production on each active front is tracked separately (exception: the North Front has no separate Production, see 21.4).
Initially only the West Front is active. The East Front and Med Front are inactive until the USSR and Italy (respectively) become belligerent.
Home Fronts: Inactive Front Production is incorporated into the Home Front, which is WF for the AXIS and ALLIES, and EF for the SOVIETS.
1.2 Hexes
The mapboard is divided into hexes [hexagons] to govern the location and movement of units. Hexes are identified by cities/towns or a direction (see: map compass rose) and distance from a city or town.
Example: "Paris NE1" is one hex northeast of Paris.
1.3 Terrain
Terrain is determined by the predominant terrain of a hex/hexside.
Note: in land/sea hexes, consider only land terrain.
Hex terrain affects movement, combat, and stacking (the maximum number of units per hex). Hexside terrain limits movement into and out of battles, termed the Engagement Limit.
1.31 Clear. Clear terrain allows full unit movement. The engagement limit is 2 units per hexside and stacking is 4 units/hex.
1.32 Forest/Hills. Forest and Hill terrain allow full movement. Passive units have double defense. The engagement limit is 1 unit per hexside. Stacking is 4 units per hex.
1.33 Marsh. Marshes halt movement (except cavalry). Passive units receive double defense, and attacking units have SF firepower. The engagement limit is 1 unit per hexside. Stacking is 3 units per hex. Sea Invasions are prohibited.
1.331 Salt Marsh [MF]. This terrain type no longer appears on the maps and is now treated as Marsh.
1.332 Tundra [NF Arctic]. Tundra has the same effects as Mountain terrain (see below).
1.34 Mountain. Mountains halt movement (not cavalry), and provide double defense to passive units. The engagement limit is 1 unit per hexside, and stacking is 2 units per hex. Sea Invasions and Paradrops are prohibited. Alpine (high mountain) hexsides (white) are impassable.
1.35 Desert [MF]. Med Front light tan terrain is Desert. Desert is equivalent to Clear terrain, except Mech and armor units have enhanced offensive firepower. Stacking is 3 units per hex (the maximum stacking allowed in the MF).
1.351 Sand Seas [MF]. Sand Seas are impassable.
1.352 Depressions [MF]. Depressions are impassable.
1.36 Rivers and Lakes. Rivers follow hexsides. They do not impede movement, but the engagement limit is 1 unit per hexside. Initiating battles across rivers, called River Assaults, are subject to possible forced retreat, called Repulse (see 7.61).
Rivers freeze in Snow weather (no Repulse possible) and swell in Mud weather (Repulse more likely).
Lakes are impassable.
1.37 Seas. Sea Areas, bounded by solid blue lines, are controlled by Naval Bases [or Control Ports, see 15.1]. Seas can be traversed only by Sea Movement (15.3) or Invasion Movement (15.5).
Sea areas are grouped into Sea Basins for specific weather purposes (see 12.5 Storms). Basin boundaries are shown as thicker blue lines.
Terrain Key (summary table as printed):
| Type | Stack | Engage |
|---|---|---|
| Clear | 4 | 2 |
| Forest/Hill | 4 | 1 |
| Marsh | 3 | 1 |
| Mountain | 2 | 1 |
| Desert | 3 [1] | 1 |
| Rivers | n.a. | 1 |
| Lakes | Imp2 | Imp2 |
1 Stacking 3 maximum in all MF terrain. 2 Impassable. Italics = Double Defense.
Map Errata / Clarifications (as printed in the rulebook):
- In the BRITISH EMPIRE display the "E AFRICA" region should be retitled "ETHIOPIA."
- Add a short rail route between Dombas and Oslo (Norway).
- Copenhagen-Malmo is a Rail Straits (red).
- Stettin is a 1 PP city (not 2 PPs).
- The Rotterdam-Brussels hexside is Sea, not River.
- Mallorca belongs to Spain (not Britain).
- The hex west of Naples is a Forest hex (its east hexside is also Forest).
- The Po River mouth is River, not Sea.
- The southern boundary of Lithuania follows the Curzon Line.
- The southernmost Soviet Military District boundary (red triangle) should be at the northernmost point of the Jassy hex.
- There is no direct sea connection between the Atlantic and Indian Oceans. Units moving between them must go though South Africa (and stop there).
- In the SCANDINAVIA display (south edge), the rail connection shown between Archangel and Petrozavodsk does not exist. Also, the Stavanger-Haugesund hexside should be shown as a Sea hexside.
- Grozny is forest terrain.
- Kanakkale [Turkey] is misspelled "Canakkale."
- Ismit E1 (Istanbul E2) is a hill hex with one mountain hexside.
Interpreting the Map
The map is drawn in a 'realistic' style, meant to be interpreted in an intuitive manner. When map features slightly depart from the hex grid, they should be interpreted as conforming to it. For example, small projections of land into sea hexes or small incursions of a rail line into the corner of an adjacent hex should be ignored.
1.371 Straits. Straits (crossing arrows) are treated as rivers, except units crossing Straits must start movement on one side, and stop on the other. Red crossing arrows are rail ferry straits (see 9.11).
A faction controlling either adjacent land hex (see 8.32) commands a Straits. This prohibits enemy Naval operations (Sea Movement/Supply/Invasion) through that Straits, but not National Supply.
A faction controlling both adjacent land hexes controls a Straits. This blocks enemy National Supply (10.21) as well.
Neutral-controlled Straits are passable to all naval operations and National Supply (exception: the fortified Turkish Straits, see sidebar).
Sidebar: Neutral Straits (correction). Naval operations (Sea Invasions, Sea Movement, Sea Supply, etc.) CAN pass through neutral-controlled Straits like those adjacent to Cadiz and Copenhagen.
Sidebar: Exception: Turkey. The Turkish Straits (Hellespont and Bosporus) are fortified. Even while neutral, Turkey commands these straits: all naval operations through these Straits are prohibited (but Lines of Communication/National Supply are still traceable).
1.372 Shoals. Shoals prevent Sea Invasions into a hex. However, Sea Movement and Sea Supply are still possible.
1.373 Canals. Kiel Canal. Hamburg borders on the North Sea, Western Baltic and Skagerrak. Units there can sea move into any adjacent sea regardless of the direction of arrival.
Suez Canal. The Suez Canal is treated as a river / straits. Naval operations through it are restricted as with straits.
1.43 Towns. Towns (small dots) have no game function except to name a hex.
1.44 Ports. Coastal cities or towns with an anchor symbol in the hex/area are ports. Ports bordering on two seas have 2 crossbars on the symbol.
Major ports (large anchor symbol) have greater capacity (15.32) than minor ports (smaller anchor symbol).
A Naval Base (black port symbols) controls the adjacent sea area. When bordering two sea areas, the port symbol is located mostly in the controlled sea area.
Fortified Ports (hexagonal port symbols – NF only) are immune to Surprise (20.16): units defending a Fortified Port can repulse sea invasions when surprised. Fortified Ports are not the same as Fortresses (see below).
Sidebar: Shoals. Ports have dredged channels through shoal waters, even if the rest of the nearby coast is inaccessible to shipping.
Sidebar: Red Spanish Cities/Towns. Red cities/towns in Spain are Republican in the Spanish Civil War scenario. In EuroFront, this affects Spanish Volunteers (see 17.7).
1.45 Fortresses. Fortress hexes (large hexagons in Leningrad, Sevastopol, Malta, etc.), give defenders significant combat (7.5) and supply (10.7) advantages. Hexside terrain determines the engagement limit.
Important: Stacking in Malta and Gibraltar is limited to two (2) units. The Allies may stack 4 units in either after the 2nd Front Diplomatic Event (16.6).
1.451 Minor Fortresses. Tobruk is a minor fortress (7.51) which has reduced advantages.
1.452 Bases. Small squares with a center dot in the Med Front (Habbinaya, Basra, etc.) are Bases. They provide automatic Supply, but no Combat advantages (see 10.71).
1.4 Cities
Cities are of two types: major and minor. Cities have no effect on movement in addition to the terrain of the hex.
Home Cities. Cities within national territory are home cities, which are Arrival Locations (11.81) for great power units.
1.41 Major Cities. Major cities are black dots with white numbers (Production value). Passive units in major cities have double defense and DF in combat.
Exception: Rome is an open city, providing no defensive benefits.
1.412 Victory Cities. Victory Cities (black squares) are major cities used to determine Victory in the 1944 scenario (see 19.52). They are also Arrival Locations for Axis units.
1.42 Minor Cities. Minor Cities (circled dots) are arrival locations (11.81) for major power national units, but provide no Production or defensive benefits.
1.5 Resources
A Resource Center is identified with a pick (mineral) or derrick (oil) symbol. Its production value is listed below the symbol. When it's in the same hex as a major city, the resource value is added to the city value.
For the Axis, controlled resource centers count double.
Example: The Lille hex contains a 1 PP city and a 1 PP resource, yielding 3 PPs for the Axis, but only 2 PPs for the Allies.
Sidebar: Axis Resource Centers. The value of Resource Centers is doubled for the Axis player because they were so crucial to the blockaded, resource-starved German economy.
Some Resource Centers, such as Ploesti, have special significance (see 17.1).
1.6 Railroads
Dashed red lines are railroads. These act as Supply Sources for units and a means of rapid strategic Rail Movement (see 9.0).
Railroads often connect Areas in mapedge Zones. Short Rail Routes (thin) are 2 hexes long; Long Rail Routes (thick) are 5 hexes long. See 18.1 Routes.
1.61 Roads. In the Med Front, Roads are thin brown lines and also exist wherever railroads are shown.
Roads also can connect Areas in the mapedge Zones. Short Roads (thin dotted) are 2 hexes long, and Long Roads (thick dotted) are 5 hexes. See 18.1 Routes.
Roads act as road supply sources and as a means of rapid strategic Road Movement (see 21.353).
Sidebar: MF Roads. Unlike Europe, where roads can be assumed to exist everywhere, North Africa is undeveloped, and roads exist only where shown and along rail lines. Therefore, off-road movement and supply are inhibited in the MF. Except along roads, unit speed is reduced by one, and Supply Lines between a unit and its Supply Source can only be 1 hex long.
1.7 National Territory
The area within a national boundary is termed home territory. In some cases other defined areas (e.g., islands) are also included in home territory.
Control of an area does not make it home territory but Annexed areas (16.6) do become home territory.
Germany includes Austria and East Prussia (home territory). It controls Czechoslovakia (not home territory.)
Italy includes Sicily and Sardinia. It controls Albania, Libya, Rhodes and Ethiopia.
France includes Corsica. It controls French North Africa (Morocco, Algeria, Tunisia and West Africa). NOTE: Syria is considered a separate Minor Power.
Greece includes Crete.
Spain includes Mallorca. It controls Spanish Morocco.
1.8 Zones & Areas
Along some map edges are zones that contain abstracted play areas instead of hexes.
Districts (circles) are small areas about 2 hexes in diameter. Regions (squares) are larger areas about 5 hexes in diameter.
Areas have terrain which affects combat and stacking just as for hexes. Areas are connected by rail or road Routes. Some Areas contain ports, which allow Sea Movement.
See 18.0 for complete rules.
1.9 Off-Map Displays
The British/French Empire display (in the North Atlantic) and Scandinavia display (in Algeria) duplicate map locations that are difficult to reach for that player.
Place friendly units there for convenience when those theaters are quiet. When activity resumes, transfer units back onto the map.
Sidebar: MasterFront. For those playing MasterFront on this map (using abstracted North Front and MidEast campaigns), these areas are out of play:
- Britain north of the London hexrow
- Finland, Norway, Sweden, Turkey, and the Middle East (see 21.3).
Use Exit Zones and Transit boxes as defined in the MasterFront and abstracted rules.
2.0 The Units
2.1 Unit Labels
One adhesive unit label is attached to the face of each block. Blocks are placed with the label facing the owning player.
2.11 Unit Nationality. AXIS units are black blocks. German units have gray or black (SS) labels. Other Axis labels are listed in the sidebar.
ALLIED units are blue blocks with bronze (British), tan (Commonwealth) or olive (US) labels. Other Allied labels are listed in the sidebar.
SOVIETS units are red blocks with tan labels.
Pro-Axis Unit Labels (as printed; Nation / Label / Center):
| Nation | Label | Center |
|---|---|---|
| Italy | buff | light green |
| Finland | light gray | grey-blue |
| Vichy | violet | red |
| Rumania | grey-blue | light blue |
| Hungary | pink | light red |
| Bulgaria | buff | gold |
| Portugal | wine pink | tan |
| Spain (Nat) | yellow | tan |
| Sweden |
Pro-Allied Unit Labels (as printed; Nation / Label / Center):
| Nation | Label | Center |
|---|---|---|
| France | dk. blue | red |
| Poland | brown | red |
| Norway | red | dk. blue |
| Denmark | red | white |
| Belgium | orange | red |
| Holland | orange | blue |
| Greece | light blue | blue |
| Yugoslavia* | blue | red |
| Switzerland |
* 5 Pro-Allied Yugoslav units / 3 Pro-Axis, see 20.77.
2.2 Unit Types
A unit's type is shown by the symbol in the center of its label. There are seven basic types of unit: Armor, Mechanized Infantry ("Mech"), Infantry, Cavalry, Static, Forts, and Headquarters (HQ).
A unit's type determines its Speed and Firepower, as shown in the Unit Type table below.
Unit Type table (as printed; footnotes follow the table):
| Unit Type | Speed Dry | Speed Mud | Speed Snow | Fire Power |
|---|---|---|---|---|
| Armor | 3 | 1 | 2 | DF |
| Mech | 3 | 1 | 2 | SF/DF |
| Infantry | 2 [3 Allied] | 1 | 1 | SF |
| Mountain | 2 | 1 | 1 | SF [DF in Mountains] |
| Cavalry | 3 | 2 | 2 | SF |
Footnotes as printed: (1) Offensive/Defensive Fire. (2) British/US Infantry and Amphibious units move 3 in Dry weather. (3) Ski troops move 2 in Snow. (4) DF in mountains. (5) By SHQ command only. (6) Rail/Sea movement only. (7) DF on own Beachhead.
2.21 Armor. Armor represents units with large concentrations of tanks. They move 3 hexes in Dry weather and fire DF on offense and defense. In Desert terrain, they fire TF on offense and DF on defense.
DAK armor is elite in the MF firing TF there (QF/TF in desert).
2.22 Mechanized. Mech units represent highly motorized infantry with extra tank support. They move 3 hexes in Dry weather and fire SF on offense and DF on defense. In Desert terrain, they fire DF on offense and defense.
2.23 Infantry. Infantry units move 2 hexes in dry weather and fire SF on offense and defense. Allied Infantry units are motorized and move 3 hexes.
2.24 Mountain. Mountain units fire DF in Mountains and in the North Front. They move like Infantry but have higher costs.
2.25 Cavalry. Cavalry units move 3 hexes in dry weather and fire SF on offense and defense. Cavalry are the only units which can move through Mountain and Marsh hexes and move 2 hexes in Mud.
2.26 Shock (Soviet). Shock units move one hex in all weather and fire DF on offense and defense. Only the Soviet player has Shock. "Shock" units are special assault troops with massive artillery support.
2.27 Static. Static units are moveable by Supreme Command only (strategically or by normal land movement). They represent low-grade troops with minimal equipment.
Static units have a 0 CV cadre step. 0cv static units are automatically eliminated if engaged alone at the end of a Combat phase.
2.28 Fort. Fort units represent heavily fortified troops such as the Atlantic Wall. They move by rail or sea movement only (supreme command required), but never when engaged. Forts are reduced to cadre strength if moved. Fort units fire SF on offense and TF on defense. They have triple defense which also protects smaller friendly units in combat: when a fort unit is the largest unit in a battle it absorbs 3 hits before losing a step. But equal-strength units absorb hits until they are smaller, upon which then next 3 hits apply to the Fort.
If unsupplied, Fort units lose TF and triple defense, but can only be reduced to 1cv cadres (not eliminated) by supply attrition. Only one fort unit can occupy a hex.
2.3 Special Units
2.31 Amphibious. Amphibious units have enhanced sea invasion capabilities and attached beachheads (see 15.6). They move and fight like Infantry but have a higher cadre cost.
2.32 Paratroop Corps. Paratroop units have special air movement capabilities (see 14.1). They fire SF offensively and DF defensively.
2.33 SS Units. German SS units (black labels) have enhanced firepower: the SS Armor unit fires TF; the SS Mech unit fires DF offensively / TF defensively. SS mountain units fire TF in mountains. They have normal building costs for their type, but only one SS step may be rebuilt per Production per Front.
German SS Corps. Because of Hitler's favoritism, SS units always received the first, most, and best equipment. This is simulated by increasing the firepower of SS units, but keeping their building step cost the same as regular units.
2.34 Siege Gun Corps. Starting with the S'42 scenario, the German 54th Corps has the 1st and 70th Heavy Mortar Regiments attached. Thenceforth, it fires TF offensively versus Fortresses. Rebuilding costs are normal, but it loses its special ability if eliminated and rebuilt.
2.35 Tito. The Allied Tito unit can appear suddenly in Yugoslavian mountain hexes, and has special powers within that country (see 16.73).
2.36 Volunteers. Italian and French volunteers can arrive to fight on the Allied side under certain specified conditions.
2.4 Headquarters
Headquarters (HQ) units are special units that command other units (see 5.0). Their speed is two. They have no firepower but command offensive Airstrikes. They have a 0CV step (which is not eliminated if engaged).
Supreme HQs (SHQs) are high command HQs with special abilities to command units on their Front without regard for distance (see 5.7). Theater HQs (THQs) are low-cost SHQs with limited abilities (see 5.8). Only these units can command Rail/Sea Strategic Movement.
2.5 Combat Value
Around the unit symbol of each label are numbers (usually 4:3:2:1) that represent the current strength or Combat Value (CV) of the unit (not to be confused with its firepower).
2.6 Step Reduction
Most units can have 1-4 possible levels, or "steps" of CV. Units can lose CV in combat and regain CV by production. When units sustain hits, they are rotated counter-clockwise so that their new (lesser) CV is on the "top" edge. Units reduced below their lowest CV step are removed from play, but can be rebuilt as Cadres (11.42).
2.7 Unit ID Codes
In the lower left of each unit label at full strength is the historical Unit ID (in dark type). German, British, and USA units are corps ("54" = "54th Corps"). All other units are armies ("7" = 7th Army).
In the upper right of each label at full strength is its Appearance code (in light type), specifying its starting location or month of arrival (see OB Cards).
2.8 MF & NF Units
Only certain units can operate in the Med Front or North Front without penalty. Special MF units have an orange circle on the label. Special NF units have a blue circle on the label. Inside the circle is a letter R, V, or E.
Residents (R) operate in that front without penalty, but are restricted to it (must remain there).
Veterans (V) operate on that front without penalty and may enter and leave.
Expeditions (E) are free to enter and leave that front, but avoid penalty only under certain conditions.
3.0 Starting Play
3.1 Game Options
Players can play the complete Campaign Game or a Scenario Game.
3.11 The Campaign Games. The full EuroFront 1939-1945 Campaign Game starts with the 1939 Scenario and ends after May 1945. A full-length game takes 50-60 hours. Team play can speed things considerably.
3.12 Scenario Games. Scenarios are shorter games that begin at the start of any Summer campaign and end after May 1945. They take 6-12 hours per game-year.
All Scenarios begin at critical points of the war strategically (see sidebar). 1940, 1941, and 1942 cover the Axis expansion. 1943 and 1944 cover the Allied/Soviet counterattack.
We recommend that players start with a late-war scenario (1942+), working back to 1940 and finally the whole 1939 Campaign Game.
3.2 Game Setup
Players first decide which Scenario to play and select sides.
3.21 OB Cards. GERMAN, SOVIET, ALLIED, PRO-AXIS NEUTRAL and PRO-ALLIED NEUTRAL OB Cards are provided to organize national forces, simplifying setup and play.
Starting Forces for each nation are shown with CVs as of September, 1939. When nations enter play at a later date, their forces are augmented to account for Peacetime Production (16.32) that has occurred since then.
Reinforcements are shown on the OB cards in chronological order. These arrive in the Production phase of the specified month at an arrival location (11.81).
Unless noted, Allied units arrive in the WF, Soviets in the EF, and Axis units in either front.
To begin a game, place all friendly forces on the OB cards exactly as shown. Maintaining exact historical IDs is optional, but unit-type, cv, nationality, and parent game (EF/WF, etc.) must be preserved.
Important: Axis WF units have italicized unit IDs on the labels.
Minor powers have two sets of blocks, one blue (Allied) and one black (Axis). Stack both units on the applicable OB card.
Note: Yugoslavia has 5 Allied units but only 3 Axis units (see 20.77).
Once all units are placed on the OB Cards, see 22.0 for Scenario setup data, instructions, and special rules.
3.3 Game Continuity
Game-years are divided into 2 Seasons: Summer (June-November) and Winter (December-May). At each change of Season (i.e., before June and December Production phases) a Season Break occurs and when certain game parameters may change. These changes are found in the BASIC PRODUCTION / AIRPOWER table of the GAME DATA page and on the GAME RECORD sheets.
- Summer Airpower / Production changes are shown [in brackets] in the Starting Forces table.
- Winter Airpower / Production changes are found in the Winter Transition Special Rules.
- Front Allocations (11.5) can be changed at Season Breaks.
- Special Rules that come into effect at a Summer or Winter Season Break are listed in that Scenario's Special Rules section.
3.31 Procedure. At each Season Break, check the following:
- Basic Production changes. For Summers, these are shown by bracketed numbers [+10] in the Starting Forces table. Winter changes are specified in the Winter Transition Special Rule.
- Changes in Air Firepower on some or all fronts. These are also shown in the places listed above.
- Voluntary changes in MF or EF Allocations (11.5). NOTE: EF Allocations can be increased at Summer breaks only.
- Scenario Special Rules that will apply to the upcoming season.
Then, begin the next Month of play with Production and Diplomacy.
GAME RECORD sheets help keep track of the passing turns, maintain the proper sequence of play, list the arrival of reinforcements and track weather and seasonal changes.
4.0 Sequence of Play
4.1 The Game Month
A Game Year is divided into Summer and Winter Seasons, each composed of six Months of play. Summer includes June-November, and Winter is December-May. To begin each Season, check for changes in game parameters (see 3.3).
A Month consists of Production and Diplomacy phases, followed by two Fortnights of play.
A Fortnight consists of Weather Determination and one Player Turn each for Axis, Allies and Soviets (the order of play varies).
Note: Production and Diplomacy are omitted from the first month of all Scenarios. They have already been factored into the start data.
4.11 Production Phase. Players receive Production Points (PPs), based on resources and cities controlled, and spend them to build up friendly forces (see 11.0). Players complete Production simultaneously.
4.12 Diplomacy Phase. Each side (Allies first) can attempt one (1) Diplomatic Event (DE) when its given Preconditions are met (see 16.6). DEs can bring neutrals into a faction or cause other developments.
4.2 Fortnights
4.21 Weather. On the Game Record sheets, each month is noted for possible weather. Some months have fixed weather but in others weather is determined before each Fortnight by a dieroll.
Weather can be Dry, Mud or Snow (see 12.0).
WF & EF weather are determined independently. MF weather is based on WF weather (but always Dry). The NF is divided into WF/EF portions, with the relevant weather applying in each part.
4.22 Initiative. On the East Front, the Initiative (first Player-Turn of the Fortnight) depends on the weather: the SOVIETS have it in Snow fortnights, the AXIS otherwise.
On the West and Med Fronts, the AXIS player has the initiative until the Second Front Diplomatic Event, after which the ALLIES have the initiative.
Therefore four different sequences of Player Turns are possible in a fortnight:
- Before the 2nd Front DE: EF Dry/Mud: Axis, Allies, Soviets.
- Before the 2nd Front DE: EF Snow: Soviets, Axis, Allies.
- After the 2nd Front DE: EF Dry/Mud: Allies, Axis, Soviets.
- After the 2nd Front DE: EF Snow: Allies, Soviets, Axis.
4.3 Player-Turns
During a Player Turn, the Active Player completes several phases in fixed sequence. The Passive Player participates in a limited manner (Alliance Reactions, Sea Movement Interdiction, Defensive Fire).
4.31 Command Phase.
4.311 Declarations of War. Declarations of War are made at the start of the Command phase. A Declaration of War (DoW) must be issued before entering the territory of a neutral. A DoW causes the affected neutral to join the opposing faction, which then deploys the attacked neutral's forces on the map.
4.312 Alliance Reactions. Following a DoW, a series of Alliance Checks (16.5) are made to see if any other neutrals react and also become belligerent. Any reactions that occur cause further Alliance Checks in a chain reaction.
4.313 HQ Activation. During the Command Phase, the active player must activate (turn flat, face-up) any HQs that are to exert command (enable unit movement and/or support combat) in that Player-Turn (see 5.0 Command).
4.32 Movement Phase. All movement occurs during the Movement phase. Only those units within the Command Range of an activated HQ ("under command") can move.
An active HQ has a Command Range in hexes equal to its current CV. A Supreme HQ can command the movement of units anywhere on its front, including Strategic Movement by rail or sea (see 6.6).
After other units are moved, an active HQ can either Mobilize (see 5.51), or remain active to provide combat support.
4.33 Combat Phase. The Active Player can choose to initiate a round of Combat in any or all existing Battles (see 6.0).
Note: Combat must take place in new battles (in the preceding Movement phase, units were moved into a hex containing opposing units only). Combat is also mandatory in some other cases.
Battles fought outside Command Range of active HQs are Unsupported Combat: defensive losses are reduced, but offensive losses apply in full.
4.331 Combat Sequence.
- Active Player assigns Airstrikes.
- Active Player indicates Active Battles by revealing all units in these battle hexes.
- Active Player chooses the order in which Active Battles are fought.
- A Round of Combat in Active Battles is fought in the following sequence:
- Offensive Airstrike (if any). Apply losses to defender.
- Defensive Fire. Apply losses to attacker.
- Offensive Fire. Apply losses to defender.
- Deactivate active HQs except those designated Blitz HQs. Blitz HQs lose a CV but remain active in that hex for the Blitz phases.
4.34 Blitz Movement. Units under command of a Blitz HQ (i.e., within its now-reduced Command Range) can move again up to their normal movement range. However, units that have moved strategically the current Turn cannot use Blitz Movement.
After units have been moved by Blitz Movement, Blitz HQs can either mobilize or remain active to support Blitz Combat.
4.35 Blitz Combat. After Blitz Movement, another Round of Combat may occur in battles chosen by the Active Player. After Blitz Combat, Blitz HQs deactivate in their current hex.
Unsupported Blitz Combat (outside the command range of an active Blitz HQ) is only allowed in Fronts with Blitz HQs active that turn.
4.36 Supply Phase. In the Supply phase, all enemy units are checked for supply status, and all unsupplied units are reduced by one step. Supply status of friendly units is neither checked nor affected.
In addition, certain other supply related determinations are made.
4.37 Politics Phase. The Active Player can check for the possible occurrence of any or all of the following political eventualities, as conditions allow:
- Nations may become demoralized, and Allied Solidarity may weaken.
- Nations can offer Armistice, which is then accepted or rejected.
- Conquered nations may Revolt.
- Demoralized nations may Surrender.
- Nations that have lost their capitals may be Defeated.
- Conquest of Defeated nations may occur.
- Naval Supremacy is evaluated.
Sequence summary (as printed on the Sequence of Play chart):
- Game Month: Season Break [June/Dec]; Production Phase (determine Production Level, monthly Production, add Saved PPs, add/subtract Allocations, add/subtract Transfers, save or spend PPs, add Replacement Steps, place Reinforcements, build and place Cadres); Diplomacy Phase (Allied Diplomatic Event, Axis Diplomatic Event).
- Fortnight I: Weather Determination; First, Second and Third Player-Turns. Fortnight II: repeat Fortnight I procedure.
- The Player-Turn: Command Phase (Declarations of War, Alliance Reactions, Activate HQs / designate Blitzes); Movement Phase (move units under command, deactivate and move Mobile HQs, Sea Movement Interdiction); Combat Phase (Target Airstrikes, select Active Battles, resolve each Active Battle: Offensive Airstrike, Defensive Fire, Offensive Fire; deactivate Combat HQs); Blitz Movement Phase and Blitz Combat Phase (only if Blitz HQ(s) active: repeat Movement and Combat phases); Supply Phase (BH placement, Invasion Dispersal Recovery, Paradrop Linkup Check, Sea Supply Interdiction, Enemy Supply Check); Politics Phase (Demoralization, French Armistice, Revolt, Surrender / Defection, Defeat / Conquest).
5.0 Headquarters
5.1 Headquarters
Headquarters (HQs) are special units that command friendly forces in movement and support them in combat.
HQs move, defend hexes, and absorb combat losses just like any other unit, except that they can never voluntarily engage enemy units, nor do they fire in land combat. Instead, they have Airstrike capability (see 5.4).
The "strength" of HQ units is called Command Value (CV) with values of Ø, I, II and III. The Command Value determines an HQ's range of control. HQs lose 1 CV each time they exercise command, and can also take losses in combat, but can be rebuilt by Production.
Field HQs represent Axis or Allied Army Groups, and Soviet "Fronts". Command Range (in hexes) equals their CV: they can command all friendly units within this range.
Supreme HQs (SHQs, see 5.7) represent national high commands. Their Command Range covers the entire Front. They can command rail/sea Strategic Movement as well as normal land movement, but they can control only a few units at a time.
Theatre HQs (THQs, see 5.8) are smaller SHQs with limited command ability within a specific front or nation.
5.2 HQ Activation
During the Command Phase, the Active Player activates any HQs by revealing them (tipping them forward, face-up). HQs engaged in battle hexes can activate normally.
5.21 Deploying HQs. When activating, HQs can deploy (move one hex).
Note: in Mud weather, HQs cannot deploy: they can only activate in their current locations.
HQs can deploy into friendly territory only, never into battles or enemy/disputed hexes. HQs can deploy out of battle hexes, but take immediate Pursuit Fire if this constitutes a Retreat (6.4).
HQs can temporarily overstack when deploying, as long as stacking limits are observed at the end of the next Movement Phase (they cannot deploy another hex).
Deploying is not 'movement,' so e.g., HQs can deploy across a straits and still mobilize later that turn.
5.3 HQ Command
5.31 Command Range. Activated HQs have a Command Range equal to their Command Value (in hexes). Zero Command Range is limited to units in the same hex only.
Command Range cannot be traced through impassable terrain (e.g., lake, sea, alpine) or enemy or neutral-controlled hexes, but can be traced through disputed hexes and friendly battles. It extends over front boundaries without adverse effect.
Command Range is determined at the beginning of a Movement or Combat Phase, and lasts unchanged throughout that phase.
5.32 HQ Disruption. HQs may become Disrupted due to weather or other conditions. Disrupted HQs function at one CV less than nominal value. The effect is cumulative if multiple causes apply.
Example: A disrupted HQ III has an effective Command Range of 2 hexes, and only 2 CV of Airpower. A disrupted HQ Ø has no command ability at all.
Important: SHQs in their capitals are not disrupted by weather.
5.33 Axis Logistics. Axis HQs operating outside their normal fronts (see sidebar) are penalized as follows:
- They are disrupted for Command purposes.
- They cannot Blitz.
Exceptions: EF HQs command normally in the WF; AG 'G' (a MF Expedition) can command normally in the MF if it has Tunis or Istanbul Basing (see 21.385).
Sidebar: Axis Logistics. While gamers can load HQs into a Front without limit, historically the practical limit of logistics was probably reached in both the East and the Med. In the game, therefore, historical levels can only be exceeded at the cost of diminishing returns.
Sidebar: Inactive HQs. Inactive HQs remain upright in hidden mode, and move (like any other unit) under command of another activated HQ.
Sidebar: Ø CV HQs. An activated HQ Ø can only command units in its own hex and will self-destruct upon deactivation. Given the high cost of rebuilding HQs, only desperate situations warrant this tactic. HQs reduced below Ø CV by disruption have no command ability at all (including commanding invasions/paradrops).
Sidebar: Axis HQ listing (as printed).
- Axis East Front HQs: OKH (SHQ); Army Group North; Army Group Center; Army Group South; Army Group A.
- Axis West Front HQs: OKW (SHQ); OB West; Army Group B; Army Group C; Army Group E; Army Group G* (* AG 'G' is a MF Expedition, see 21.313).
- Axis Med Front HQs: Army Group Afrika; Commando Supremo THQ.
- Axis North Front HQs: Dietl THQ.
5.34 Allied Coordination.
Movement. Allied units can be commanded to move by national HQs only. British and US HQs are a single nationality for this rule.
Combat. Allied (but not Soviet) HQs can provide combat support and airstrikes for any Allied units within Command Range.
Allied SHQs can move any Allied minor power unit, regardless of location (no combat support).
Axis HQs command any Axis units in movement and support any Axis units in combat.
5.4 HQ Airpower
HQs have Airstrike capability. Their Air Range is based on their CV and their Air Firepower depends on the current overall airpower balance.
During Combat, active HQs can conduct one Airstrike into any active battle within Air Range. Only one Airstrike is allowed per battle.
See 13.0 AIRPOWER for details.
5.5 HQ Deactivation
After commanding movement and/or combat, HQs are deactivated by reducing them 1 step and turning them upright (hidden). Deactivated HQs cannot move in the Blitz phase.
HQs that deactivate at the end of Movement can move themselves (mobilize) and are termed Mobile.
HQs that remain active (face-up) during Combat for Combat Support cannot mobilize during Movement.
5.51 Mobilizing HQs. After deactivating, HQs can mobilize by making a normal land move in addition to any hex moved to deploy. HQs that mobilize are deactivated during Combat and thus cannot command Airstrikes or provide Combat Support.
HQs that Retreat (are the last unit to leave a battle) by mobilizing must take immediate Pursuit Fire (see 6.52).
5.52 Combat Support HQs. Active HQs can forego mobilizing and remain activated during the Combat phase in order to command Airstrikes and provide Combat Support to units within range. Following Combat, Combat Support HQs deactivate in their current hex.
5.6 Blitz HQs
HQs can be activated as Blitz HQs by placing a BLITZ marker on them. Blitz HQs must expend a second step and command a second pair of Movement/Combat phases in that Player-Turn.
During the initial Movement and Combat phases, a Blitz HQ functions as any other active HQ, except that it cannot mobilize at the end of the first Movement phase (they cannot deploy another hex).
A Blitz HQ exerts command during the Blitz Movement phase. Units within its reduced Command Range are eligible to move again (except HQs just deactivated or units that moved strategically that turn).
Following Blitz Movement, Blitz HQs can mobilize (and deactivate), or remain activated to provide Airstrikes and Combat Support during Blitz Combat.
NOTE: Unsupported Blitz Combat is allowed only in Fronts with activated Blitz HQs.
Blitz HQs are deactivated by reducing them a second step and then returning them upright.
Sidebar: Mobile HQs. Mobile HQs are most useful in retreats, exploitation, and general advances, where firepower is secondary to maintaining the advance.
Sidebar: Combat Support HQs. Combat HQs are preferred in pitched battles where attritioning the enemy or obtaining a breakthrough is the object. Combat Support need not be provided by the same HQ that commanded a unit to move. Any active HQ can provide combat support to units within Command Range.
5.7 Supreme HQs
Supreme HQs (SHQs) are "high command" HQs with unique capabilities.
- SHQs can command any unit on that Front, regardless of distance.
- SHQs can command (rail or sea) Strategic Movement (6.62) as well as normal land movement.
- SHQs can command Invasions (15.5) or Paradrops (14.2).
- SHQs can command "strategic" airstrikes at double CV range.
- However, SHQs cannot Blitz or provide Combat Support.
Sidebar: Supreme HQs. SHQs are useful for commanding "oddball" movement of units in remote fronts or rear areas, and are essential for strategic movement of units by road, rail or sea. Supreme HQs can command units to move and attack by land movement. However, they cannot provide combat support to ground units (although they can provide long-range airpower).
5.71 Supreme Moves. The Command Range of SHQs extends over entire Fronts. They command a limited number of Supreme Moves within that front, regardless of range. Activated SHQs command 2 Supreme Moves per CV. For example, II CV SHQs can command four Supreme Moves.
Supreme Moves can move any unit on the front (including unsupplied or surrounded units), regardless of distance. The commanded unit can move normally by land (for example, to attack or enter enemy territory), or more rapidly within friendly territory by Strategic (rail, sea or road) Movement (see 6.62).
NOTE: Dice placed on the units which moved under SHQ command are useful to keep track of Supreme Moves expended, as they are usually mixed with other moves.
Sidebar: Supreme Command. Supreme HQs can move unsupplied units, even when they have been surrounded in a "pocket". Normal HQs (unless they are inside the same pocket) are usually unable to provide command to surrounded forces.
Sidebar: HQs and Weather. HQs, SHQs and THQs are disrupted by the weather in the hex they occupy, not the weather in the hexes where they command. However, a SHQ in its own capital is not disrupted by weather.
Sidebar: SHQ Over-Activation. Activating an SHQ twice per month (in both Player-Turns) is possible, but limits future options and should be avoided. As with other units, Supreme HQs can be built up only one step per Production phase, so the SHQ will be weakened until it can be "rested" for a month.
5.72 SHQ Command Range. SHQ Command Range is not measured in hexes, but extends over the entire front they occupy. They can also sometimes Cross-Command into other fronts (see below).
Axis SHQs. OKH can command units in either the East or West Front (but not in the Med Front), whichever it occupies. OKW can similarly command Axis units in the West or Med Front (but not in the East Front).
Allied SHQs can command the movement of national units within the front they occupy, and Allied minor units anywhere.
Soviet SHQ STAVKA can command the movement of any Soviet units on any front.
SHQs can move further than this single strategic move (e.g., from England to Gibraltar) by reserving Supreme Moves for this purpose.
5.721 WF-MF/NF Cross-Command. Axis OKW and Allied SHQs in the WF can simultaneously command units in the MF or NF (or vice-versa). They command normally in the front they occupy and at half efficiency in the other front (i.e., two Supreme Moves are expended per strategic or normal land move commanded).
Example: Allied SHAEF in the WF can command one MF sea move (e.g., Tobruk to Alexandria) for two Supreme Moves expended.
5.722 WF-EF Cross-Command. Axis OKH can simultaneously command units in the EF and WF, commanding normally in the front it occupies, and at half efficiency in the other front (at double cost as above).
5.723 Flex points. From certain locations, Axis and Allied SHQs can Cross-Command in either of two fronts at full efficiency, while still retaining half efficiency in the other front.
- Berlin (OKH): WF or EF
- Malta/Gibraltar: WF or MF
- Copenhagen/Glasgow: WF or NF
5.73 SHQ Mobilization. Active SHQs can also deactivate and mobilize after Movement. If they do, they are not active during Combat, and cannot command Airstrikes.
SHQs can mobilize normally by land move, or strategically, by Rail (9.21), Sea (15.31), or Road Move (21.352). This does not count as a Supreme Move spent.
5.74 SHQ Combat Support. Supreme HQs can never provide combat support. Units they command for movement fight unsupported unless they can receive combat support from an active Field HQ.
5.75 SHQ Air Range. Active SHQs can command Airstrikes as other HQs, but with double Air Range (see also 13.31). Airstrikes can be made into any battle hex in range, even in other fronts (but not into the Med Front unless accompanying a sea invasion).
Example (SHQ Cross Command): The Allied AF, 2cv strength, is located in Gibraltar and can command four Supreme moves. It elects to command two units in the Med Front and expends its remaining two moves to command one unit (half-efficiency) in the West Front. Alternatively, the AF SHQ could command two moves in the West Front and only one move in the Med Front. Similar benefits would apply to the Axis OKW if it is located in Malta.
Sidebar: HQ Airpower. The Airpower of HQs gives them powerful offensive capability when employed in a Combat Support role.
5.8 Theater HQs
Theatre HQs (THQs) exist for certain Fronts and minor powers. THQs are less powerful, but cheaper SHQs.
- THQs can only activate (and command units within specified fronts or nations (e.g. the Med Front for CS and ME, the NF for Dietl, or Finland for Mannerheim).
- THQs only command one (1) Supreme Move per CV.
- THQs have Air Range equal to their CV (not double).
- THQs cannot Blitz, support combat, or command Paradrops or Sea Invasions.
Exceptions: the following THQs can support combat in certain areas (tracing Command Range in hexes as for FHQs):
-
Dietl within the North Front,
-
ME within the Southern Zone (MF), and
-
Mannerheim within Finland.
-
THQs can mobilize by rail, sea or road Strategic Movement and can reserve Supreme Moves to extend this (as 5.73).
-
THQs cost 5 PPs/step to rebuild.
Sidebar: HQ Activation Example. The HQ II unit deploys 1 hex (to Paris) and activates. It has Command Range 2 hexes. All units within 2 hexes are under command and may move, except unit X since the enemy hex blocks command range to it. All friendly units under command may move. If the HQ doesn't mobilize, it will give combat support to all units within range.
5.9 Invasion/Paradrop HQs
HQs can activate to command Sea Invasions (15.51) or Paradrops (14.21). Invasion HQs and Paradrop HQs expend all movement command ability to send a single unit on a sea invasion or a paradrop, and must begin the COMMAND phase stacked with that unit.
SHQs (but not THQs) can serve as Invasion/Paradrop HQs.
6.0 Movement
6.1 Unit Movement
All unit movement must be commanded by activated HQs. All units under command of an active HQ or SHQ can move. Units not under command cannot move. Units can move once per Movement. See 5.0.
Units move individually, one hex at a time, for 1-3 hexes, depending on their speed (see UNIT CHART on page 96) and limited by terrain and weather conditions.
All units except cavalry must stop upon entering a marsh or mountain hex.
MF Off-Road Movement. Units moving off-road in the MF have their speed reduced by one (1).
6.2 Stacking Limits
The Stacking Limit is the maximum number of friendly units that can occupy a hex after movement. In Battles, both players can occupy the hex up to the Stacking Limit.
Any number of units can pass through a hex during movement.
6.21 Terrain Stacking. The Stacking Limit of a hex depends on its terrain, as follows:
- Clear*: 4 units
- Forest/Hill*: 4 units
- Marsh: 3 units
- Desert: 3 units
- Mountain/Tundra: 2 units
* In the MF, the stacking limit for Clear & Hill terrain types is 3 units.
Cities, fortresses, etc., are not "terrain" and do not affect stacking.
6.22 Overstacking. Players cannot voluntarily overstack hexes. If a hex becomes involuntarily overstacked (e.g., due to Repulse), excess units are unsupplied and lose 1 cv in the enemy Supply phase, largest units first (owner's choice between equals).
Exception: HQs can temporarily overstack when deploying, but stacking limits must be observed at the end of a Movement phase.
6.3 Engagement
6.31 Engaging. A unit that enters a Battle Hex (one containing enemy units) is engaging, and must stop movement.
6.32 Disengaging. A unit that voluntarily leaves a battle hex is Disengaging. Disengaging units can exit battle hexes only into adjacent friendly hexes (not enemy or disputed hexes, see 8.0), after which they can continue to move normally.
Important: units that disengage cannot re-engage in that same move.
If all hexes adjacent to a battle hex are either enemy, disputed or other battle hexes, the engaged units in it are pinned: they cannot disengage.
6.33 Hexside Limits. The Hexside Limit is the maximum number of units that can engage or disengage across a hexside in that Movement phase. There is no limit on movement across hexsides unless it is into or out of a battle.
The Hexside Limit depends on hexside terrain and weather. A maximum of two units can engage or disengage across a Clear terrain hexside per Movement phase. Only one (1) unit can engage or disengage across a non-Clear terrain hexside (or any hexside in Mud weather).
Both engaging and disengaging contribute toward the hexside limit. That is, if a unit disengages across a forest hexside, another unit cannot engage across that hexside during the same Movement phase.
Movement chart notes (as printed): 1 Allied Infantry/Amph move 3 hexes. 2 Supreme move only. 3 Rail/Sea (Supreme) Movement only.
6.4 Attacks. Units initiating a new battle (entering a hex occupied only by enemy units) are Attacking, and mandatory combat follows. Units entering an ongoing battle (friendly units are already engaged there) do not constitute an attack and this does not force combat.
Important: At least one unit must remain in a battle throughout a Movement phase to maintain an ongoing battle.
Disengaging all units from a battle while engaging with new units constitutes both a Retreat and an Attack (mandatory combat). This may change who is Original Defender (7.12).
Attacking units are not revealed as they engage. Leave all units upright until the beginning of the Combat phase to identify this as an Attack rather than an Ongoing Battle.
Sidebar: Terrain & Movement. Most terrain has no effect on unit movement (speed). The exceptions are Mountain and Marsh hexes, where units (except cavalry) must stop even if the hex is not defended.
Sidebar: Disengaging. Units in combat are engaged and can only disengage (leave the battle hex) into friendly hexes. Note that when friendly units control hexes to the enemy rear, it becomes possible to move engaged units "forward" from battles into such controlled hexes.
Sidebar: MF Movement. In the MF, roads exist only where shown (and along RR lines). Off-road movement speed in the MF is reduced by one hex for all units. Note that this means that static units in the MF cannot leave the roads!
6.5 Retreats
Retreats occur when one side in a battle disengages all remaining units from that battle.
6.51 Rearguards. A player disengaging all friendly units from a battle must designate one unit as Rearguard. The Rearguard is then subject to Pursuit Fire from all enemy units in the battle before it makes its disengagement move.
The Rearguard remains in the battle hex during movement, placed on top of enemy units to identify it as such. After all other friendly movement is completed, Pursuit Fire is made on the rearguard(s) by enemy units in that hex (order chosen by retreating Player). The rearguard (assuming it survives Pursuit Fire) then disengages and completes its move normally.
NOTE: at least one unit must remain in a battle throughout the Movement Phase to avoid a Retreat (see sidebar).
6.52 Pursuit Fire. In Pursuit Fire, each pursuing unit rolls one die per CV as for normal combat fire (the retreating player must state the speed of his rearguard). However, the Firepower of a pursuing unit depends not on its type but on its relative speed (under current terrain/weather conditions) compared to that of the rearguard.
Faster pursuers fire Double Fire (DF), scoring a hit for each '5' or '6' rolled. Equally fast pursuers fire Single Fire (SF), hitting on '6'. Slower pursuers do not fire at all! Each hit reduces the rearguard by 1 cv (see 7.3).
The active player chooses the order of Retreat resolution when several are occurring simultaneously. Any defensive advantages due to weather/terrain (e.g., Double Defense, see 7.34) do apply to the rearguard during Pursuit Fire.
Elimination of a rearguard has no effect beyond the loss of the unit.
Sidebar: Retreats. Disengaging all units from a battle and engaging with new units constitutes a Retreat and a new attack (newly initiated Battle with forced Combat). This may also change who is the Original Defender in the Battle.
Sidebar: Rearguards and Pursuit. Armor, Mech, and Cavalry units make ideal rearguards, as their superior speed makes them relatively immune to Pursuit Fire. They also make ideal pursuers, for the same reason. In Mud or bad terrain, cavalry excels in pursuit. Sacrificial 1 cv rearguards can at times be the best option.
Pursuit Firepower (as printed): Faster pursuer: Double (DF). Equal: Single (SF). Slower: None.
Sidebar: SHQ Command Range. SHQ Command Range extends throughout the Front they occupy, and usually over other Fronts as well (see 5.72). SHQ command is the only way to move units distant from any friendly HQ. The commanded unit need not be in supply, nor in communication with the SHQ in any way, just within the Front[s] Commanded.
6.6 Supreme Moves
Supreme HQs do not function like field HQs. Instead of commanding all units within a given radius, SHQs command two (2) Supreme Moves per CV (e.g., a SHQ III can command six Supreme Moves) anywhere within the SHQ's Command Range (5.72).
6.61 Supreme Land Moves. A SHQ can use a Supreme Move to command any friendly unit within Command Range to make a normal land move (engage, disengage, retreat, enter enemy territory, etc).
Units moved by Supreme Land Move can move again during Blitz Movement under Blitz HQ command.
6.62 Strategic Movement. Strategic Movement is high-speed movement by rail, sea, or road which can only occur under SHQ/THQ command. Units that move strategically cannot move again (Blitz movement) in the same Turn. Units cannot enter enemy territory or engage by Strategic Movement; units can disengage strategically (but cannot Retreat).
Supreme Moves can be used to make strategic Rail Moves (9.2) or Sea Moves (15.3). Multiple Rail Moves or Sea Moves can be linked together to move long distances, but Sea and Rail movement cannot be combined in the same turn.
Supreme Moves can also be used in the Med Front for Strategic Road Moves (21.352), which double unit speed along roads within friendly territory.
Sidebar: Supreme & Strategic Moves. The distinction between Supreme Moves and Strategic Moves is important. Strategic Moves are Rail, Sea or Road moves, which travel long distances quickly within friendly territory, but cannot be used to engage enemy forces or retreat. Strategic Moves require SHQ command. Supreme Moves are all moves commanded by SHQs, including Strategic Moves and normal land moves (allowing engagement, retreat, and entry into enemy territory) by otherwise uncommanded units.
6.7 Changing Fronts
6.71 Land Movement. Units can move freely from one front to another without effect, except:
- Residents (2.8) are restricted to a Front.
- Some units can't enter the MF and NF.
A unit's movement speed depends on the weather conditions on the front where it begins its move. However, units must still observe the terrain and weather rules of each hex entered.
Example: units (except cavalry) entering a Mud hex must stop.
6.72 Strategic Movement. SHQ/THQs can command Rail or Sea Movement that begins on their front, but terminates on another front.
Example: a unit in the WF moving into the EF by rail can complete all rail movement to its EF destination commanded by its WF SHQ at normal Supreme Move costs.
6.73 Acclimatization. All units entering the Med Front or North Front from another front (not arriving reinforcements) immediately lose 1-2 cv (see 21.351 and 21.441).
Changing Fronts – Prohibited Units. SS, cavalry and siege gun units are prohibited from the MF and NF.
7.0 Combat
7.1 Battles
7.11 Battle Hexes. A Battle Hex is a hex containing both friendly and enemy units. Battles begin when the Active Player moves units into a hex containing only enemy units. This is called Attacking.
7.12 Original Attacker / Original Defender. The player who initiates a battle is the Original Attacker for as long as that battle lasts. The other player is the Original Defender. This distinction is crucial because the Original Defender maintains control of the Battle hex for supply and other purposes.
To maintain this distinction, units of the Original Defender are turned upright after combat, while those of the Original Attacker remain face-up.
7.13 Airstrikes. HQs have attached airpower (see 13.1). When a Combat phase begins, each active HQ can deliver one Airstrike to a battle hex (7.11) within that HQ's Air Range (13.11). Only one Airstrike per Combat phase can be assigned to a Battle.
Airstrikes are assigned by placing an AIRSTRIKE marker of value equal to the command HQ CV in the Battle hex. This must be done while the units of the Original Defenders are still upright and hidden.
7.14 Active Battles. Active Battles are those in which combat will occur in the current Combat phase. The active player indicates active battles by revealing all hidden units in that battle (tip hidden units forward, preserving current CV).
Generally, combat is optional. The active player can activate none, some, or all battles. However, battles fought beyond command range of an active HQ will be Unsupported Combat (see 7.4).
7.15 Mandatory Combat. Combat is mandatory in three cases:
- New Battle. Friendly units were moved into a hex containing only enemy units.
NOTE: Moving new units into an existing battle does not force combat (new units are revealed if that side is the Original Attacker).
- Airstrike Battles: an Airstrike was allocated to that battle.
- Fortress Battles: the Original Attacker engaged in a Fortress battle. Combat is optional for the Original Defender.
Exception: Fortress combat is not mandatory in a Blitz Phase.
7.2 Combat Resolution
7.21 Combat Rounds. Combat is resolved by executing a Combat Round in each Active Battle, in any order desired by the Active Player (north to south works well).
7.22 Combat Sequence. A Combat Round is resolved for each Active Battle as follows:
- Active player makes an Airstrike (if any), and losses are applied.
- Passive player fires Defensive Fire, and losses are applied.
- Active player fires Offensive Fire, and losses are applied.
- Original Defender returns his units upright, marking the end of the Combat Round for that battle.
IMPORTANT: 0 cv static units (but not Ø CV HQs) engaged alone in a Combat Round are automatically eliminated.
7.23 Counter-Attacks. Because battles often continue from one turn to another, the Active Player in any specific battle can be either the Original Attacker or the Original Defender. Thus, when the active player activates an existing battle in which he is the Original Defender, he becomes the attacker for that combat round only, giving the Original Attacker the benefit of defensive terrain and defensive first fire in that Combat Round.
Note: The Original Attacker never receives Fortress defensive benefits (TF/Triple Defense).
Sidebar: Original Attacker and Original Defender. A clear distinction must be drawn between the Original Attacker and Original Defender of a hex and the "attacker" and "defender" in a combat round. The Original Defender in a battle can choose to activate combat in that hex during his own Player Turn, but this would give the Original Attacker the benefits of defensive first fire and defensive terrain for that round (n/a in Fortresses).
Sidebar: Extended Battles. Battles are usually not resolved in one Combat Round. They often extend over several fortnights, even several months. Players manage a series of ongoing battles along the frontlines over time, feeding reserves into some battles, retreating in others, and counter-attacking where the enemy is weak.
7.3 Combat Fire
7.31 Executing Fire. To execute Defensive or Offensive Fire, the owning player rolls one die per CV (i.e., roll 3 dice for a 3cv unit). The owning player chooses the order of unit fire. Depending on the unit's Firepower (see UNIT CHART), certain results score hits and reduce the CV of enemy units.
7.32 Firepower.
- SF (Single Fire) hits on 6's
- DF (Double Fire) hits on 5's and 6's
- TF (Triple Fire) hits on 4's, 5's and 6's
- QF (Quad Fire) hits on 3's, 4's, 5's and 6's
Example: A 3 cv Armor unit rolls three dice at DF. Each 5 or 6 rolled scores 1 hit.
Terrain can modify Firepower. In marshes, Offensive Fire is always SF. In major cities Defensive Fire is at least DF. Mountain units fire DF in mountains.
Fortress defenders fire TF Defensive Fire. In desert, armor fires TF on offense and mech fires DF on offense.
Airstrike firepower depends on the side and scenario (see: 13.23).
7.33 Applying Hits. Each hit normally reduces an enemy unit by 1 cv. Active units always apply full losses in combat, but Passive units may only have to apply partial losses (see 7.34 and 7.35).
Each loss is applied to the currently strongest (highest cv) enemy unit in the battle (owner chooses between equal-cv units). In general, all hits taken must be applied if possible.
When a unit on its last step takes a hit, it is eliminated and removed from play (but it can be rebuilt later).
Note: 0cv static units are automatically eliminated if engaged alone at the end of a Combat phase.
7.34 Double Defense. In adverse terrain (mountains, major cities, etc.) or unsupported combat (7.4), passive units have Double Defense: hits scored are reduced to half-hits, and two half-hits are required to cause a 1cv loss.
Half-hits within a Combat Round accumulate, carrying over from Airstrikes and from one unit's fire to another. Units which have taken a half-hit must take the next half-hit: two half-hits must always cause a loss. However, half-hits left over at the end of a Combat Round are lost.
7.35 Triple Defense. In some defensive conditions (fortresses, fort units, unsupported combat in adverse terrain), defenders enjoy Triple Defense, losing only 1 cv for every three one-third-hits.
As with half-hits, partial hits accumulate within a combat round but are ignored when left over at the end of one; and a unit that has taken a one-third-hit must take the next two one-third hits.
Recording Partial Hits. A 45 degree rotation of a unit can serve to temporarily indicate a "half-hit" scored against that unit that combat round. Likewise a one-third-hit can be indicated by 30 degree rotation.
Fort Units. Triple Defense also applies when a fort unit is the largest defender (see 2.28).
Double Defense (summary). Only passive units can receive the benefit of Double or Triple defense.
Combat example (as printed): Two Allied units (Armor 4cv and Mech 4cv) move into a clear terrain defended by three German units (Armor 3cv, Infantry 3cv, and Infantry 2cv). Because this is a new battle, combat is mandatory. Airstrike: the Allied player first executes a 2cv Airstrike at TF. Two dice are rolled, a 3 and a 5, resulting in one hit scored. The Axis player must take that hit from a 3cv unit, and chooses the 3cv Infantry, which is reduced to 2cv. Defensive Fire: the Axis player now fires all three defending units. The Armor 3cv (DF) scores one hit (2, 3, 6), and the two Infantry 2cv units score one hit (2, 4) and (3, 6). The first hit is taken from the Mech 4cv, the second from the Armor 4cv. Offensive Fire: the Allies, who have combat support from an active HQ in range, now fire. The Armor 3cv scores two hits at DF (3, 5, 5) and the Mech 3cv misses at SF (3, 4, 5). The first hit must be taken from the German Armor 3cv (the strongest unit) and the second can be taken from either Infantry 2cv. This ends the combat phase. The three Axis units are now turned upright to indicate that they are the Original Defenders.
Example (as printed): The Allied player initiates a battle for Antwerp. Combat is mandatory that round. The Axis units have Defensive DF and Double Defense. In the next Player-Turn, the Axis player adds two more units to the hex and counter-attacks. In this round, the Allied units have Defensive DF and Double Defense.
7.4 Unsupported Combat
During Combat the active player can choose to have Unsupported Combat in battles that are not within the Command Range of any active HQ, or when no HQs have been activated that turn.
Note: Unsupported Blitz Combat can occur only in fronts where a Blitz HQ was activated that turn.
Unsupported Combat raises the 'defense' level for passive units: normal defense rises to Double Defense, Double Defense rises to Triple Defense, etc.
However, Unsupported Combat against a Fortress hex is ineffective: no offensive hits can be scored (defender still returns TF Defensive Fire. This can occur with mandatory fortress combat.
7.5 Fortresses
Original Defenders in fortress hexes receive special benefits in defensive combat. The Original Attacker never receives fortress defensive benefits.
- Combat is mandatory for the Original Attacker during active turns (but not Blitz Combat, see 7.12).
- Original Defenders have Triple Defense (7.35) in passive combat. They also repulse Air Assaults at TR (dierolls of 1-3, see 14.41).
- The largest defending unit (owner's choice between equal cv units) has Triple Fire (TF) when passive.
7.51 Minor Fortresses. Tobruk is a minor fortress.
- Combat is not mandatory for the Original Attacker after the initial attack. Unsupported combat can have effect versus Minor Fortresses.
- Original Defenders have double defense in passive combat, and the largest defending unit (owner's choice between equal cv units) has at least defensive Double Fire (DF).
7.6 Assaults
When all units initiating a battle are attacking across river hexsides, they are conducting a River Assault [place marker]. In the initial combat round, Defensive Fire may Repulse one or more assaulting units, forcing them to retreat immediately.
Similarly, a Sea Assault occurs when all attackers are invading by Sea Invasion (15.56); and Air Assaults occur when all attackers are dropping by air (14.3). A combination of two or more of these assaults is termed a Combined Assault (see 7.65).
Important: If even one attacking unit is not assaulting as defined above, the overall attack does not constitute an Assault, and there is no possibility of Repulse.
Assault Repulses (Defensive Fire) table, as printed:
| Assault type | Repulse on dieroll |
|---|---|
| River | 1-2 (1-3 Mud) [1] |
| Air | 1-2 [2] |
| Sea by Amph. units | FNS 1-3 / NP 1-2 / ENS 1 |
| Sea by Other units | FNS 1-4 / NP 1-3 / ENS 1-2 |
[1] 1 for MF rivers/canals except Nile. [2] 1-3 by Fortress Defenders. NOTE: In the table above, FNS/ENS applies to the player rolling to interdict/repulse enemy movement or supply.
7.61 Repulse. Assaults are resolved during Combat. During the first Defensive Fire of a battle, defending units fire and score hits normally, but certain low dierolls will Repulse an attacking unit, forcing it to return immediately to the hex from which it attacked (see REPULSE TABLE, SIDEBAR).
NOTE: Ambivalent nations (16.711) Repulse assaults only on dierolls of '1'.
Example: In a dry-weather River Assault, each '1' or '2' rolled repulses one attacking unit.
After all defensive fire has been made, each Repulse is applied in turn to the assaulting unit with the least cv strength remaining in the battle (owner's choice of equals). Repulses are not retreats: no Pursuit Fire is made.
Then, all hits are applied to the strongest (cv) attacking units. Hits are applied to unrepulsed attackers if possible, then to repulsed units if necessary. Finally, any unrepulsed attackers return Offensive Fire.
Repulse only applies to the initial Defensive Fire following an Assault: attacking units that are not repulsed form a bridgehead, and from then on the battle is treated as any other.
7.62 River Assaults. River Assaults are normally repulsed on dieroll of 1-2. That is, for every '1' or '2' rolled during Defensive Fire, the weakest assaulting unit must return to the hex from which it attacked.
During Mud weather, River Assaults are Repulsed more easily (rivers swollen). In Snow weather, River Assaults are impossible to Repulse (rivers frozen).
Med Front River Assaults are less easily Repulsed (except across the Nile).
River Assault (Example): A player attacks across two river hexsides with a 3cv armor unit and a 4cv infantry. Defending is a 4cv infantry unit. After an Airstrike scores one hit, the Defending player fires his (now) 3cv unit and rolls (1, 4, 6), scoring one hit and one Repulse. First, the weaker 3cv armor is repulsed, then the hit is applied to the 4cv attacking infantry. The attacking infantry (now 3cv) then fires Offensive Fire, scoring one hit with rolls of (3, 3, 6). A bridgehead is now established in that hex enabling other attacking units to join the battle in future turns without possibility of Repulse.
Ground Support: Airstrikes are very helpful in Assaults, reducing Defensive Fire (and the chance of Repulse) before it occurs.
7.63 Sea Assaults. The chances of repulsing a Sea Assault depend on the type of unit attacking (amphibious units have the best chance to land successfully) and the Naval Supremacy balance. If a unit is repulsed making a Sea Assault, it must return to its invasion port (see 15.53).
7.64 Air Assaults. Air Assaults are difficult to repel, but if repulsed, the paratroop unit takes an automatic hit, and must return its original hex (see 14.41).
7.65 Combined Assaults. When two or more different kinds of assaults are made simultaneously into one hex, it is called a Combined Assault, and the lowest Repulse number applies to all assaulting units.
Combined Assault (Example): A 3cv Paratroop unit makes an Air Assault in support of a River Assault by two infantry units of 4cv and 3cv, making it a Combined Assault. Normally, River Assaults are repulsed on '1' or '2', but adding the Air Assault reduces repulses to '1' only. Assuming a defending infantry at 4cv, and Defensive Fire dierolls of (6, 1, 5, 2), one hit and one repulse are scored. Without the air assault, two repulses would have occurred. The repulse would be taken by the 3cv Para or the 3cv Infantry (the lowest CV unit of the attacker's choice) and the hit must be taken on the 4cv infantry, the strongest remaining unit. The attackers succeed in establishing a Bridgehead with two units. Without the Paratroop support, both infantry units would have been repulsed.
7.7 Unit Capitulation
Demoralized (16.71) Axis minor powers become ambivalent (16.711) about continuing the fight. They Repulse enemy Assaults only on dierolls of "1" and their units capitulate (and are eliminated) in reaction to certain Allied combat dierolls (see below).
- Norway: If DE NP is in effect (see Allied DEs), Norwegian units capitulate on Allied combat dierolls of 1-2.
- Vichy: Demoralized Vichy units capitulate on combat dierolls of 1 by British units, or 1-2 by US units.
- Portugal: Portuguese units capitulate on combat dierolls of 1 by US units, and 1-2 by British units.
8.0 Hex Control
8.1 Hex Control
Hex Control is defined by the location of units and their ZOCs on the map at the beginning of each phase and hex control status lasts unchanged throughout that phase (this includes Production and Diplomacy phases, etc.). Movement through a hex does not, in itself, affect hex control.
In each new phase, hex control can change due to movement, combat, supply attrition, etc.
8.2 Zones of Control
Unengaged, supplied units have a Zone of Control (ZOC) that extends into unoccupied adjacent hexes, but never across impassable hexsides, rivers, or straits. Engaged or unsupplied units have no ZOC.
8.3 Hex Status
Hexes can be Friendly, Enemy, or Disputed. Use inverted markers to indicate hex control as needed.
8.31 Friendly Hexes. Hexes occupied only by friendly units, or within the undisputed ZOC of friendly units, are friendly controlled. Battle hexes are friendly to the Original Defender.
IMPORTANT: Units never control foreign neutral territory.
8.32 Enemy Hexes. Hexes that are friendly to an opponent are enemy hexes.
8.33 Disputed Hexes. An unoccupied hex into which both sides exert a ZOC is Disputed.
8.34 Neutral Hexes. Hexes within Neutral nations (16.1) are neutral. ZoCs do not project into them, and command and/or rail and supply lines cannot be traced through them.
8.35 Prior Control. Hex control remains unchanged unless altered as above.
8.36 Hex Control By Isolation. At the end of the friendly SUPPLY phase, enemy-controlled hexes that are unoccupied and completely surrounded by friendly-controlled hexes pass over to friendly control.
Important: this does NOT apply to areas (Districts/Regions). Areas must be actually occupied to change control.
8.4 Control Effects
Hex control does not affect land movement: units can move freely into and out of vacant hexes that are disputed or enemy controlled.
However, hex control has other important effects as follows:
- Command: HQs can deploy only into friendly hexes. Command Range can only be traced through friendly or disputed hexes, not through enemy or neutral hexes.
- Movement: Strategic Movement (6.62) can be made into or through friendly hexes only. Units can Disengage or Retreat only into friendly hexes.
- Supply: Supply Lines can be traced only through friendly or disputed hexes, not enemy hexes. The Rail/Sea Supply Network can be traced only through friendly hexes, never through enemy or disputed hexes. Rail Lines can be traced into, but not through, friendly Battle hexes.
Sidebar: Hex Control (diagram, as printed). Allied units A and B control their own hexes, as does German unit Z. Hexes A1, A2, and A3 lie within the ZOC of unit A and are Friendly to the Allied player. Hex D1 and D2 are Disputed, lying within the ZOCs of units A and Z. Hex A4 is not a disputed hex because the ZOC of German unit Z does not extend across the river.
Sidebar: Command Range. Command Range can always be traced through any hex containing an upright Friendly unit or a Friendly ZOC.
Sidebar: Battle example (as printed). Units B and Z are the Original Defenders (upright) and control their battle hexes. The units in both battles have no ZOC. Units A and C control their own and all adjacent unoccupied hexes (except those across rivers). Unit B can disengage into any adjacent hex except the other battle. The German armor unit can't disengage at all. If the Allied Armor was absent, hexes A1 and A2 would be disputed, (by the ZOC of Unit Z) but the German armor unit still could not disengage into either hex.
9.0 Railroads
9.1 Rail Lines
Rail lines are shown as dotted red lines. Rail lines connecting off-map Areas can be heavy or thin dotted lines, denoting their length (see 18.1).
9.11 Railways over Seas. Rail Bridges/Causeways. The rail lines south from Melitopol (USSR) and west from Odense (Denmark) are continuous where they cross Straits. Normal land movement is not allowed across these causeways (unless there is also a straits crossing).
Rail Ferries (red straits arrow). Rail ferries connect the Rail Lines between Reggio-Messina, across Lake Van, and Copenhagen-Odense.
A Rail Move must stop at a Rail Ferry. Another Rail Move is used in crossing, and still another Rail Move is used to continue on after crossing the straits in that same movement phase.
Rail movement must end at straits with no ferry or causeway, and cannot continue on to the other side this turn.
9.12 Rail Line Control. A Rail Line is friendly if it connects to the friendly Supply Origin (London, Berlin or SIBERIA, see 10.2) within friendly territory.
Friendly Rail Lines cannot enter Enemy or Disputed hexes. They can enter or leave (but not pass through) friendly Battle hexes.
Friendly Rail Lines also extend across sea zones along Sea Lanes (15.4) between friendly ports.
In cases of doubt, the furthest extension of a friendly Rail Line, can be marked with a Railhead Marker at the beginning of a phase.
9.13 Map-Edge Rail Routes. Along some map edges are Zones containing off-map Areas (see 18.0). Rail Routes often join such Areas.
Short Rail Routes (thin red dotted lines) are considered 2 hexes long; Long Rail Routes (thick red dotted lines) are considered 5 hexes long.
9.2 Rail Movement
Rail Movement is a form of Strategic Movement (6.62), always commanded by a SHQ or THQ. It cannot be combined with strategic Sea or Road Movement in the same turn, nor can it be combined with land movement (even in a blitz phase).
9.21 Rail Moves. A Rail Move consists of moving one unit along friendly Rail Lines up to ten (10) hexes. A Rail Move must begin, traverse, and end in friendly rail hexes only. Units cannot engage (enter battle hexes) by rail.
Each Rail Move expends one Supreme Move (see 6.6). Units can make multiple Rail Moves to move further than 10 hexes, each Rail Move expending one Supreme Move.
See 6.72 for Rail Moves that cross front boundaries.
Units that move strategically (by rail or sea) cannot also move normally in the same Turn, including in the Blitz phase.
Note: Allied Air Supremacy (beginning June 1944), limits Axis WF Rail Movement to five (5) hexes per Rail Move.
9.22 Rail Disengagement. Although units cannot engage by rail, they can disengage from friendly Battle hexes by Rail Movement. However, Rearguard units can never Retreat (6.5) by rail movement.
NOTE: Rail disengagements do count against Hexside Limits.
9.3 Rail Supply
A hex is in Rail Supply if a friendly rail line crosses into the hex.
IMPORTANT: Rail Lines cross into friendly Battle hexes, but not into enemy battle hexes.
Cities and Resource Centers require Rail/Sea Supply to produce. [For unit Rail Supply see 10.31.]
10.0 Supply
10.1 Supply Status
Units able to trace a Supply Line to a Supply Source are Supplied. Units that cannot are Unsupplied.
Sidebar: Supply Status Sequencing. Being "Supplied" is not the same as "having a Supply Line". The timing of supply status determination means that units maintain their supply status between supply checks (which occur at the end of each enemy Player Turn). This sequence has very significant effects on game play. For example, supplied active units can move to unsupplied locations to cut enemy supply lines without suffering any immediate penalty. However, because supply checks occur at the end of the opponent's Player Turn, enemy units that become unsupplied by this maneuver suffer immediate attrition!
Advanced units will be subject to a Supply Check at the end of the opponent's turn, but if the preceding maneuver eliminates enemy units by supply attrition and opens new supply lines as a result, they will avoid becoming unsupplied!
Also note that because active units moving out of supply maintain their supplied status for a turn, they still exert ZOCs during that entire turn, further extending their range for disrupting supply and rail lines.
Be wary of situations where a few enemy units can cut off a large number of friendly units, inflicting serious losses before you can respond. This means that it is essential to maintain a continuous front!
10.2 Supply Origin
All supply originates from the Supply Origin. Without a valid Supply Origin, friendly units are unsupplied.
AXIS: Berlin, provided it has Rail Supply (9.3) to another friendly Victory City (square city symbol).
ALLIES: London, provided it has Rail/Sea Supply (15.4) to the ATLANTIC OCEAN.
SOVIETS: The SIBERIA Region.
Note: Supply Origins function normally if engaged.
10.21 National Supply. Major and Minor Power units must trace supply to their national capital, which in turn must trace National Supply with a Line of Communications (10.22) to its Supply Origin (London or Berlin).
National Supply can be traced out of an engaged capital (see 10.2).
Siege. National Supply traced by sea using a besieged port can support only 1 cv maximum.
Straits. National Supply can pass through a Straits that is commanded by the enemy (1 side enemy controlled), but not one that is enemy-controlled (both sides enemy controlled). See 11.371.
Cooperating Neutrals. National Supply cannot pass through the land territory of "neutrals" Cooperating (16.2) with the enemy (but can pass through neutral seas they control). It can go through neutral Protectorates and Complying nations (see DE DS).
NOTE: National Supply does not apply to Great Power units, which trace supply directly to their Supply Origin.
10.22 Lines of Communications. A Line of Communications (LOC) is a rail/sea (not road) route passing through friendly or neutral controlled territory, seas and straits only.
A LOC cannot pass through enemy-controlled territory, seas or straits, or through engaged hexes. It can pass through engaged Regions but not engaged Districts (see 18.1).
Sidebar: Visualizing Supply Lines. Two-hex Supply Lines to a Rail/Sea Supply Source can always be traced through hexes containing upright friendly units and through Disputed hexes (see 8.33).
Sidebar: National Supply. National Supply reflects the need for a belligerent to remain in communication with its great power ally. Isolation usually results in quick collapse of morale as well as supply. In game terms, nations cannot resort to a defensive strategy of "hunkering down" in the capital (at double defense). National Supply requires powers to defend their capital's communications with their Supply Origin. Once its capital is isolated, a nation's armies are doomed.
Because National Supply can be traced through neutral countries and seas, Allied minor powers such as Poland and Rumania can trace National Supply through neutral Russia and the northern seas to London.
The rules for tracing National Supply through engaged ports and through straits apply particularly to Greece and Belgium.
Sidebar: Supply Example (as printed). The Allies have just moved units X and Y after a breakthrough at Lyon, cutting Axis Supply through those hexes. The Axis RailHeads are shown and the two Axis units (E, F) within 2 hexes are supplied. The Supply Line to these two units can pass through Bordeaux or Bordeaux E1 even though that hex is Disputed. However, the RailHead is back at La Rochelle because Rail lines cannot be traced through Disputed hexes. Axis units A, B, C, and D are all cut off and will be reduced one step in the upcoming Allied Supply Phase.
The Allies must be aware that their own position is somewhat vulnerable. If the Axis successfully engage the unit at Avignon (repulse is possible), Allied units X and Y would be reduced since the Allied RailHead would be at Avignon (Rail lines can enter friendly battles but may never pass through any battle). Attacking the Allied unit at Lyon SE1 from Grenoble would cut off unit X only but there is no risk of repulse. The Axis might also attack Lyon or Clermont-Ferrand with the isolated units with the goal of retreating to friendly hexes on the other side on a subsequent turn.
10.3 Supply Sources
10.31 Rail Supply. Friendly rail hexes that are connected by rail to the friendly Supply Origin (even if engaged) are said to be in Rail Supply. Units and Cities in such hexes are also in Rail Supply (even if engaged).
Hexes in Rail Supply act as friendly Supply Sources. The most advanced such hexes are called Railheads. These can be clarified with RAILHEAD markers.
Rail Supply cannot be traced into or through neutral territory (exceptions: see 16.2 Cooperation and 21.492 Swedish Compliance).
10.32 Sea Supply. Sea Lanes through friendly seas connect friendly ports. Friendly Sea Lanes and Rail Lines together form the Rail/Sea Supply Network, which acts as a friendly Supply Source.
NOTE: Sea Lanes cannot pass though Straits if either side is enemy controlled.
Units and Cities dependent on Sea Lanes as well as rail lines are in Sea Supply (see 15.4).
NOTE: Engaged ports cannot be used for Sea Supply (see 10.8).
10.33 Road Supply. Roads in the MF and mapedge areas that are connected to Rail/Sea Supply can also act as supply sources. Dependent units are in Road Supply.
10.34 BeachHead Supply. BeachHeads (see 15.63) can also provide a Supply Source, even when deployed in enemy battle hexes.
10.4 Supply Lines
Supply Lines are routes no more than two hexes long connecting a unit to its Supply Source.
NOTE: MF Desert Zone supply lines can be no longer than one hex.
Supply Lines can be traced through Friendly or Disputed hexes, including friendly Battle hexes. They can never be traced through enemy hexes, neutral territory (16.1) or impassable terrain.
10.5 Supply Checks
Friendly unit supply status is determined during the Supply Check (enemy Supply phase). Units able to trace a Supply Line are Supplied. Units unable to do so are Unsupplied (place marker). They have no ZOC and are subject to Supply Attrition (see 10.6).
Once determined, the supply status of a unit continues unchanged until the next Supply Check. In effect, Supplied units carry enough supplies to last until the next check.
10.6 Supply Attrition
During the friendly Supply Check (SUPPLY phase), unsupplied enemy units normally lose one step.
These are the only exceptions:
- Fortress Supply (10.7).
- Base Supply (10.71).
- Siege Supply (10.8).
- Fort cadres (2.28).
- Tito within Yugoslavia (16.732).
Sidebar: Bypassing Tactics and Supply Lines. Another implication of the Supply rules undermines the defensive tactic of denying rail lines with sacrificial blocking units in double defense locations (limiting enemy supply options until these blocking locations are reduced). But blocking units are easily bypassed as follows: the blocking unit is engaged, canceling its ZOC. Other active units bypass the enemy blocking unit, occupying advanced locations within the 2-hex supply range of friendly rail lines, and exerting their ZOCs one hex further. These ZOCs will then control all hexes behind the blocking unit (which, being engaged, has no ZOC), cutting its supply, while the bypassing units maintain valid supply lines! The blocking unit suffers supply attrition while advanced friendly units remain supplied and free to advance further next turn.
Sidebar: Supply: Split Allied/Soviet Turns. Under certain conditions the Allies and Soviets do not move in succession. For example: during Snow weather prior to the 2nd Front, the order of turns is Soviet, Axis, Allies. Later in the war, after the 2nd Front, the order of turns, during EF Dry/Mud weather is Allies, Axis, Soviets. This can lead to problems interpreting supply attrition when both Allies and Soviets are contributing to the blocking of Axis supply (e.g., in the Balkans).
Supply attrition of an Axis unit cannot occur during both the Allied and Soviet Supply Phases in the same fortnight. If an Axis unit suffers supply attrition due to Soviet action, it cannot suffer additional supply attrition due to Allied action in the same fortnight.
In cases when one member of the Allied/Soviet coalition puts Axis units out of supply during its turn, Supply Attrition for newly affected Axis units occurs that Supply Phase, but units already unsupplied during the other faction member's supply phase do not suffer attrition again until the next friendly turn.
Example: in Summer 1944 (turn order: Allies, Axis, Soviets) the Soviets isolate German forces in Rumania during their turn. These suffer supply attrition, and are marked as unsupplied during the Soviet Supply phase. Next fortnight, the Allies, expanding from the Yugoslavian coast, cut additional rail lines, isolating additional Axis forces in Rumania. During the Allied Supply phase, those Axis units newly unsupplied during the Allied turn suffer attrition, but those already attritioned during the Soviet Supply phase do not lose a second step before the next Axis turn.
11.0 Production
11.1 Overview
At the beginning of each month, both sides simultaneously complete a Production phase, which allows for unit and HQ rebuilding.
Note: Production is omitted from the first month of a scenario because Starting Forces already include that month's Production.
Production is calculated separately for each active front. Every month, each front receives Production Points (PPs) based on cities and resources controlled. These PPs are spent to build units on that front, or saved. PPs can also be Transferred (inefficiently) between fronts.
Use the GAME RECORD SHEET to record current Production Levels. Axis and Allied PPs are tracked separately for each active front. Soviet EF Production applies to all fronts.
Sidebar: Simo-Production. Simultaneous production speeds play and promotes doubt as players can pay only limited attention to opponent building.
11.2 Production Sequence
- Determine Available PPs for each front.
- Home Front: Basic Production plus front city/resource PPs, minus Allocations to other fronts.
- Other Fronts: PP Allocation plus local city/resource PPs (not MF).
- Add incoming PP Transfers.
- Deduct Desert/Arctic Maintenance.
- Deduct Shipping Losses.
- Add previously Saved PPs.
- Subtract 10 PPs if PP Transfer is made to another front.
- Spend or Save Available PPs.
- Spend PPs to build/rebuild units. (any PPs left over are lost)
- Save all PPs if none are spent.
11.3 PP Sources
The Front Production Level is Basic (or Allocated) Production plus City/Resource PPs located on that front (NF/MF PPs are added to the home front). City and resource PP sources are listed in the sidebar.
Initial Production Levels on each front are noted in the scenario Starting Forces table.
11.31 Basic Production. Each side automatically receives Basic Production PPs each month. Basic Production can be positive (for off-board production) or negative (reflecting non-military production and inefficiencies).
Basic Production PPs arrive in the Home Front (Soviets EF, Axis WF, Allies WF). Other fronts get no Basic Production but can receive Allocations (11.5) from the Home Front. Allocations can be increased at season breaks (June and December).
Basic Production can change from one season to the next, as shown on the BASIC PRODUCTION TABLE (below) and in the scenario Starting Forces and Winter Transition tables.
11.32 City Production. Major Cities have a production value (white number), which is the number of PPs they produce each month. Cities must be in Secure (11.71) Rail/Sea Supply to produce (see: 9.3 and 15.4).
Note: MF and NF City and Resource PPs add to the Home Front Production.
11.33 Resource Production. Resource Centers (oil or pick symbols) also produce PPs each month, and similarly must be in Rail/Sea Supply to produce PPs.
For the resource-starved Axis economy, Resource Centers produce double their printed amount. For example, Gyor, a 1 PP oil center, produces 2 PPs/month for the Axis.
11.34 Isolated Powers. For powers with National Supply but no Rail/Sea Supply, see 20.64.
Note: When belligerent by DE FL, Finland is also an isolated power.
EUF PP Sources (as printed; City and Resource PP values by nation):
| Nation | City PPs | Resource PPs |
|---|---|---|
| BRITAIN | 22 | |
| FRANCE | 10 [1] | 2 |
| Baltic States | 1 | |
| Belgium | 2 | |
| Bulgaria | 1 | |
| Czechoslovakia | 3 | |
| Danzig | 2 | |
| Denmark | 2 | |
| Finland | 1 |
[1] Includes Tunis. [2] Includes Vienna (Note: Stettin is only 1 PP). [3] Excludes Riga.
Note on the PP Sources table: the footnote numerals were superscripts in the printed table and are shown here in brackets. Cell values were read from the word positions of the printed page.
Basic Production Table (as printed):
| Side | S39 | W39 | S40 | W40 | S41 | W41 | S42 | W42 | S43 | W43 | S44 | W44 |
|---|---|---|---|---|---|---|---|---|---|---|---|---|
| AXIS | -30 | -30 | -30 | -30 | -30 | -25 | -20 | -15 | -10 | -5 | 0 | 0 |
| ALLIED | -20 | -15 | -10 | -5 | 0 |
Bold Italics = Basic Production increases (as printed).
11.4 Available PPs
Available PPs are those available for a front after subtracting any adjustments to Total Production. Record Available PPs on the GAME RECORD SHEET.
Before the start of Production, Available PPs start either at zero or all PPs Saved from last month.
After Production, this should either equal zero or PPs Saved (if no PPs were spent that month).
NOTE: Available PPs must either all be spent or all saved. If any Front PPs are spent, any unused PPs are forfeit. PP Transfers are not considered expenditures and do not prevent saving remaining PPs.
11.5 PP Allocations
Allocations are long-term assignments of PPs from the Axis or Allied Home Front (WF) to another front.
The AXIS and ALLIES can Allocate WF Production to the Med Front. The Axis (only) can allocate PPs to the East Front. The SOVIET player never makes PP Allocations.
Normally, Allocations can be increased only at Season Breaks (Jun/Dec), but can be decreased during any Production Phase.
For details see, 21.23 and 21.37.
Sidebar: PP Transfer Efficiency (as printed). Source WF to MF 50% [1, 3], to EF 50% [2]; Source MF to WF 50% [1, 3], to MF n/a, to EF 50% [3]; Source EF to WF 50%, to MF 50% [3], to EF n/a. Footnotes: 1 Allies have Shipping Losses. 2 Allies have Shipping Losses if Narvik is Axis. 3 Axis has Shipping Losses unless Mare Nostro (see 17.5).
Sidebar: Production Evaluations. City PP values are derived from economic production figures of the time, evaluated in war production terms: metals, chemicals, and especially machinery are emphasized, but more mundane items such as textiles, lumber, and food are also considered.
Sidebar: Initial Axis EF PPs. The Axis usually owns 14 EF PPs when the EF opens: Danzig (2), Konigsberg (1), Warsaw (2), Ploesti (8) and Bucharest (1).
11.6 PP Transfers
During Production, the Axis can transfer 10 PPs from one front to another, but it is slow and inefficient. The Soviets cannot transfer PPs.
11.61 Transferring PPs. During Production, Axis and Allies can make one 10 PP Transfer from each front to another front. Half are lost in transit, and 5 PPs arrive one month later.
To transfer PPs, reduce the PPs Available on the sending front by 10 PPs, and note +5PP Transfer on the receiving front for the following Month on the Game Record Sheet.
11.62 Receiving PP Transfers. When a PP Transfer arrives in a front, add 5 PPs to PPs Available.
NOTE: The Soviets can only receive WF PP Transfers via Arctic Convoy if Murmansk has Rail/Sea Supply to both London and Siberia. MF PP Transfers to the Soviets can be made via Persia if Teheran has Rail/Sea Supply to both London and Siberia.
- PP Transfers into the MF are subject to Shipping Losses (even if that side has Naval Supremacy).
- Allied WF-Soviet PP Transfers (by Arctic Convoy) are subject to Shipping Losses if the AXIS controls Narvik.
Shipping Losses. If PP Transfers are subject to Shipping Losses, roll one die for every 5 PPs to determine the number of PPs arriving (cannot exceed the PPs sent).
Sidebar: PP Transfers. PP Transfers are short-run adjustments to the economic "master plan" set out by Front Allocations. As such, there are inherent inefficiencies.
Sidebar: PP Transfers to the Med. Aside from Shipping Losses, logistical traffic to Africa was constrained by a lack of developed infrastructure. Port facilities were minimal by European standards, and road/rail transport was even worse.
Sidebar: PP Transfers to the East. Axis logistical traffic to the East severely stressed the Russian rail system even at historical volumes: any increases in traffic would have been problematic. The Allies can increase PPs shipments to Russia via Murmansk Convoy (some are already factored in), a route subject to Axis air/sea interdiction from Norway. PPs can also be shipped from the Med Front to Russia via Persia. Shipping Losses are not involved since these have already occurred en route to the MF. The Allies cannot transfer PPs to Russia until she joins the Allied side.
11.7 Unit Building
During Production, players spend PPs to rebuild damaged or eliminated units. For unit costs, see the sidebar table below.
Allied unit costs apply to the West Front. In the Med Front and North Front, Allied units generally build with Extreme Costs (NF Scandinavians are exempt, see 21.462). See UNIT DATA TABLE on page 96. Until the MF is activated, Extreme Costs in the MF are doubled.
Axis unit costs apply to the West Front and East Front. Axis units in the Med Front and North Front use Extreme Costs (NF Scandinavians again exempt). Axis minors use Axis costs.
Note: Only one SS step can be built per month in each front.
Soviet units on all fronts are built with Soviet PPs. They initially use Allied unit costs (Extreme Costs in the NF), but switch to Soviet Costs once Great Patriotic War (20.56) is declared (use half Extreme Costs in the NF).
Major/Minor Power units are built with faction PPs when their capital has Rail/Sea Supply to their faction's Supply Origin (see 10.2).
Isolated Powers (see 11.34) with National Supply only (no Rail/Sea Supply) must build with National PPs, which are spent, saved and tracked separately.
Unit Costs table (as printed; Stp = step cost, Cad = cadre cost; • = not buildable by that side):
| Unit | Axis Stp | Axis Cad | Allied Stp | Allied Cad | Soviet Stp | Soviet Cad |
|---|---|---|---|---|---|---|
| HQ [1] | 10 | 20 | 10 | 20 | 10 | 20 |
| THQ | 5 | 10 | 5 | 10 | • | • |
| Armor | 8 | 12 | 8 | 16 | 4 | 8 |
| Mech | 6 | 9 |
[1] All HQs +5 (+10/cadre) in Sea Supply. All HQs +5 (+10/cadre) in Road/BH Supply (cumulative with Sea Supply). Axis HQs +5 (+10/cadre) beginning W'43. Axis/Sov HQs +5 (+10/cadre) w/out Oil Supply. [2] Costs halved for grounded Paras. [3] Ø cv cadre is cheaper than 1 step.
11.71 Replacements. During Production, players can build up units in play, provided they are unengaged and have Secure Supply (make a supply check as needed).
Note: Interdictable Sea Supply, Fortress Supply or Siege Supply is not Secure Supply.
Only one step can be added to each unit in a Production phase. PPs are spent for each step added (see Step column of the Unit Costs table).
Units in BH Supply (15.63), units engaged in Areas (18.0), and units in the MF before it has been activated (21.32) have doubled replacement costs.
Sidebar: HQ Costs. HQ and SHQ rebuilding costs increase under certain conditions (THQs always cost 5 PPs).
- 11.731 Sea Supply. HQs in Sea Supply (see 15.4) cost +5 PPs/step (+10 PPs/cadre) to build, unless they are in or adjacent to a friendly major port (or in a MF minor port) in secure Sea Supply.
- 11.732 Road Supply. HQs in Road Supply cost +10 PPs/step (+20 PPs/cadre). See 10.33.
- 11.733 BeachHead Supply. HQs in BH Supply (15.63) cost +10 PPs/step (+20 PPs/cadre).
- 11.734 Strategic Bombing. Starting W'43, Axis HQs in the WF cost +5 PPs/step (+10 PPs/cadre). See 13.31.
- 11.735 Axis Oil Supply. If no Line of Communications (10.22) exists between Berlin and a major oil source (Ploesti, Abadan or Baku), Axis HQ costs rise by 5 PPs/step (cadres 10 PPs). See 17.1.
- 11.736 Soviet Oil Supply. If the Soviets lose Baku or its Line of Communications to Siberia, their HQ costs rise by 5 PPs/step (cadres 10 PPs).
11.74 BeachHead Prep. For 20 PPs, BeachHeads can be advanced from Prep to Ready status, or eliminated BHs can be rebuilt to BH Prep status.
Replacements (sidebar). Units can rebuild only one step each month because it takes time (training) as well as equipment to build combat units.
Cadre Costs (sidebar). Higher cadre costs reflect the price of having a unit completely destroyed in combat. It is much easier to rebuild a unit when its infrastructure (leaders, organization, support services, etc.) remains intact. German cadres are cheaper to rebuild, reflecting their superior training and leadership.
Allied HQs & Overseas Supply (sidebar). Because the British/US draw supply from London, British/US HQs on the continent, in the MF or in the NF will cost 15 PPs/step (Overseas Supply) unless in or adjacent to a major port. On the other hand, French HQs tracing supply overland to Paris are not subject to this (unless they convert to Free French and begin tracing supply to London). HQs dependent on BH Supply are even more costly to build up (20 PPs/step).
Axis Oil Supply (sidebar). Ploesti, Abadan and Baku do not need to be Axis controlled. The Axis must only have access (LoC) to the oil, which can still be the case when Rumania, etc., is neutral.
11.72 Rebuilding Cadres
During Production, eliminated units can be rebuilt into cadres, and placed in Arrival Locations (11.81).
Cadre costs are listed in the Cadre column on the Unit Cost Table. Rebuilt cadres cannot be built up further in the same Production phase.
11.8 Reinforcements
Reinforcements are new units arriving at no PP cost. They cannot be built up in the month of arrival.
11.81 Arrival Locations. Reinforcements and newly rebuilt cadres must arrive in Arrival Locations, as defined below.
Note: Reinforcements arriving in the first month of a game must be set up in valid Arrival Locations.
Arrival Locations must be in Rail/Sea Supply and not embattled. Two [2] units per Production can arrive in a major city, one [1] unit in other locations.
AXIS: German units arrive in German (major/minor) home cities or Victory Cities (1.412). Italian units arrive in Italian major cities. Axis Minor units arrive in their national capitals. MF reinforcements arrive in Tripoli, and NF reinforcements in Oslo.
ALLIES: British/US/FF units can arrive in friendly major ports (in Sea Supply). British units also arrive in home cities and French units in French major cities. Allied Minor units arrive in their national capitals.
SOVIET: Soviet units arrive in Soviet home cities (major/minor) or in home Districts/Regions.
11.82 Advanced Arrival. During Production, the arrival of one reinforcement unit can be advanced one month by expending PPs equal to that unit's cadre cost (note this secretly on the GAME RECORD SHEET). A BH's arrival can be advanced a month at a cost of 20 PPs.
Alternatively, one reinforcement unit of greater than 1 cv can be advanced 1 month by reducing its arrival strength by 1 cv.
Note: MF PPs and MF cadre costs must be used to advance MF Reinforcements.
11.83 Delayed Arrival. Reinforcement arrival can also be delayed (no effect on arrival strength).
11.84 Unit Disbanding. During Production, players can voluntarily eliminate friendly units (typically for stacking purposes), but cannot rebuild them that Production.
Important: Minor Power units cannot be disbanded.
11.9 MF/NF Production
In addition to using Extreme Costs, units located in the Med Front and North Front are subject to special rules that modify Production. Details are found in 21.3 (MF) and 21.4 (NF).
Sidebar: Home Cities. All Cities within national Territory.
Sidebar: Alien Units. All units but MF Residents, MF Veterans and MF Expeditions are MF Aliens. The same is true of the North Front.
Sidebar: The Desert Zone. The MF Desert Zone includes North Africa and the Mid East [all MF hexes], but not the Southern Zone (areas). This means that units in India or South Africa (for example) are not subject to Desert Maintenance (but are still subject to Acclimatization).
Sidebar: The Arctic Zone. The Arctic Zone includes all NF areas, but not the Temperate Zone (hexes).
Sidebar: Desert & Arctic Maintenance. In the uninhabited wastelands of North Africa and the Arctic, everything necessary for life must be imported and laboriously transported to the front, including food, shelter and most importantly, water. As a result, only a limited number of divisions could be supported there -- more units only added to supply problems. The maintenance penalty represents that historical force levels in these locations stretched logistics to the limit.
MF/NF Residents and Veterans are never subject to Desert/Arctic Maintenance. MF/NF Aliens are always subject to Desert/Arctic Maintenance. MF Expeditions are exempt from Desert Maintenance only when Morocco or Tunis/Istanbul Based (see 21.38).
Important: MF Alien units in the MF Southern Zone (South Africa/India, etc). are NOT subject to Desert Maintenance.
12.0 Weather
12.1 Weather Determination
Dry, Mud, and Snow weather states are possible. Snow and Mud hamper operations in different ways.
Some Months have fixed weather, but in others it is variable, see sidebar and the GAME RECORD SHEETS.
Each Fortnight begins with separate WF and EF Weather determinations. In each case both players roll one die and the sum of the dice determines WF or EF weather for that Fortnight (if Dry weather is certain, omit this step).
Odd dierolls mean Mud weather; even dierolls mean Dry or Snow weather (see WEATHER TABLE).
These weather rolls also determine the weather in the North Front and Med Front (see below), and the occurrence of Storms (see 12.5). Storms disrupt certain naval operations within a Sea Basin (15.1).
Weather Table (as printed; Month / WF / EF; bold = weather dieroll each Fortnight, italic = dieroll for Storms only; odd/even results shown for variable months):
| Month | WF | EF |
|---|---|---|
| JUN | DRY | DRY |
| JUL | DRY | DRY |
| AUG | DRY | DRY |
| SEP | DRY | DRY |
| OCT | DRY | MUD/DRY |
| NOV | MUD/DRY | MUD/SNOW |
| DEC | MUD | SNOW |
| JAN | MUD | SNOW |
| FEB | MUD/DRY |
Weather Fate. With each player rolling one die, neither can affect the weather with a "good" roll: it is pure fate.
Weather Equalization [optional]. If players agree, the second fortnight of a random weather month can always have the opposite weather to the first fortnight.
Example: Players roll Snow weather for the first fortnight of November 1941. If using Weather Equalization, the second fortnight will necessarily be Mud.
12.11 WF Weather. West Front weather is always Dry and Storm-free from March-October. From November-February, Mud and Storms can occur. During these months make weather determination dierolls to begin each fortnight.
12.12 EF Weather. Separate dierolls are made for East Front weather each fortnight from October through May (June through September are always Dry). Storms can occur in the E. Baltic, Arctic and Black Sea basins.
12.13 MF Weather. Med Front weather is always Dry. WF weather rolls can produce Storms in the Mediterranean or Atlantic Basins, affecting naval operations into the Med Front.
12.14 NF Weather [change]. WF weather applies in the WF portion of the NF (Norway/Sweden). EF weather applies in the EF portion (Finland/USSR).
EF/WF weather rolls can produce Storms in the Atlantic, Arctic, W. Baltic, or E. Baltic sea basins (see 12.5).
12.2 Dry Weather
Dry weather has no negative effect on game operations.
12.3 Mud Weather
Mud weather has severe negative effects on game operations.
12.31 Command. HQs activating in Mud weather locations are disrupted (commanding at 1 CV below nominal, see 5.8). Moreover, HQs in Mud weather locations cannot deploy one hex upon activation.
NOTE: SHQs in their capitals are not disrupted by weather.
12.32 Movement. Mud weather reduces all unit speeds to 1 hex per Movement phase (exception: Cavalry moves 2 hexes). The hexside limit is 1 in all terrain.
12.33 Combat. In Mud, all hexes have double defense, River Assaults are easier to repulse (7.62) and offensive Firepower is reduced to SF in all terrain.
In Mud weather, Marsh terrain effects apply to Clear, Forest, Hill, and Mountain hexes, except that stacking is unchanged.
12.4 Snow Weather
During Snow weather, Forest terrain effects apply to Marsh hexes, except stacking remains unchanged at 3. Rivers freeze in Snow weather.
12.41 Initiative. In EF Snow weather fortnights, the Soviets play first (see GAME RECORD SHEET), modifying the order of Player Turns (see 12.7).
12.42 Command. HQs in Snow weather locations are disrupted (but can deploy). Soviet and Scandinavian HQs are exempt.
Important: SHQs in their capitals are not disrupted by weather.
12.43 Movement. Snow weather reduces all unit speeds by one (to a minimum of 1).
Example: In Snow weather, armor, mech and cavalry units move 2 hexes, not 3.
The hexside limit across frozen rivers remains 1 (ZOCs still do not extend across frozen rivers).
Snow Invasions. Only the Soviets can Sea Invade (15.5) into Snow hexes (the Allies and Axis cannot), but they cannot Sea Assault (initiate a battle from the sea, see 15.53) during Snow.
12.44 Combat. River Assaults across frozen rivers cannot be Repulsed (see 7.62).
12.45 Axis Winter Paralysis. During the first EF winter, Axis Winter Paralysis is in effect:
- During Winter Productions (December-May), Axis EF HQs cost 15 PPs/step (cadres 30 PPs).
- During Snow weather, all Axis units have their speeds reduced to one (1) and offensive Firepower reduced to SF (defensive Firepower is unaffected).
IMPORTANT: If the EF opens in March, April or May, Winter Paralysis does not occur until the following winter.
Sidebar: Axis Winter Paralysis. Note that if the Soviets Mobilize in June/40, for example, Axis Winter Paralysis will occur during W40, not in W41 as is normally the case. This can have serious consequences for the Soviets if the Axis then conducts a normal Barbarossa campaign in S41.
Sidebar: Weather & Initiative Examples. S'41: EF Dry: Axis, Allies, Soviets. W'41: EF Snow: Soviets, Axis, Allies. S'42: EF Mud: Axis, Allies, Soviets. -- Second Front occurs -- S'43 EF Dry: Allies, Axis, Soviets. W'43 EF Snow: Allies, Soviets, Axis.
12.5 Sea Storms
WF and EF weather die-rolls also determine the occurrence of Storms, which can only occur in Mud or Snow weather (on odd die-rolls, see STORM TABLE, sidebar).
Storms affect all seas within the specified Sea Basin (see 15.1) during that Fortnight [place STORM marker in the box provided]. Sea Basin boundaries are shown double-thick.
NOTE: Weather rolls are still made in fortnights with certain Snow or Mud weather, to check for Storm occurrence.
12.51 Storm Effects.
- No Sea Invasion movement (15.5) is possible through affected seas.
- BeachHeads in affected seas are disrupted (invert marker), losing their supply and port abilities for that fortnight (15.64).
NOTE: Invasion HQ Command Range [for combat support] is still traceable across a stormy sea.
NOTE: Storms have no effect on Sea Supply and Sea Movement (ports are storm-proof).
Storm Table (as printed; 2d6 result):
| 2d6 | WF | EF |
|---|---|---|
| Even | None | None |
| 3 or 11 | Mediterranean Basin | Black Sea Basin |
| 7 | W Baltic Basin | E. Baltic Basin |
| 5 or 9 | Atlantic Basin | Arctic Basin |
Storms only occur in one basin at a time. BHs are completely incapacitated during storms, and invasions are impossible.
Stacking Considerations. Terrain changes due to weather do not reduce stacking limits.
12.6 Assaults
12.61 River Assaults. MUD: River assaults are repulsed on dierolls 1-3 (Triple Repulse or TR) in Mud weather (as opposed to DR 1-2 in Dry weather). SNOW: In Snow weather, rivers freeze, and river assaults cannot be repulsed. However, ZOCs still do not extend across frozen rivers and the hexside limit remains 1 unit/hexside.
12.62 Sea Assaults. SNOW: Sea Assaults cannot be made in Snow weather [the Soviets only can Sea Invade in Snow, but not Sea Assault].
12.7 Initiative
East Front weather can alter the order of play. The SOVIETS go before the AXIS in EF Snow (Soviets/Axis/Allies). Otherwise the AXIS goes before the SOVIETS.
Thus, the sequence of Player Turns can change, as noted in the sidebar and prompted in the GAME RECORD SHEET.
13.0 Airpower
13.1 HQ Airpower
HQs have attached airpower resources. During Combat, activated HQs can conduct one (1) Airstrike in a battle within Air Range. Airstrikes cannot attack enemy airpower, and ground units cannot fire at Airstrikes.
13.11 Air Range. Air Range is equal to HQ CV. It is traceable through enemy hexes and impassable terrain, but not through neutral countries. Airstrikes can cross front boundaries without penalty.
Exception: only MF HQs can airstrike into the MF from another front (21.393).
SHQs have doubled Air Range (e.g., SHQ IIIs have Air Range of 6).
13.12 Airpower Disruption. The effective CV of disrupted HQs (5.32) is reduced by one, and this affects both Air Range and Airstrike CV. Air Firepower is unchanged.
13.2 Airstrikes
13.21 Targeting. Airstrikes can only be made into active battles being contested during that Combat phase. Only one Airstrike per battle is allowed.
Airstrikes are assigned before units in the battle are revealed or combat begins. Place an AIRSTRIKE marker of the commanding HQ's strength in the target hex (e.g., an AIRSTRIKE 2 for a II cv HQ).
13.22 Airstrike CV. Airstrike CV (number of dice rolled) equals that of the commanding HQ. An HQ's airpower cannot be divided into multiple Airstrikes.
13.23 Air Firepower. Airstrike firepower (SF, DF, or TF) varies with time, increasing for the Allies and Soviets, and decreasing for the Axis.
Axis, Allied, and Soviet Air Firepower on each Front are shown in the EUROFRONT AIR FIREPOWER table below (also see GAME TABLES), and changes are noted on the GAME RECORD SHEETS.
ALLIED airstrikes always use Allied Air Firepower. SOVIET airstrikes use Soviet Air Firepower.
AXIS airstrikes use EF Firepower against Soviet units, and WF or MF Firepower against Allied units (this includes Minor HQs and THQs).
EUROFRONT AIR FIREPOWER (as printed):
| Side | S39 | W39 | S40 | W40 | S41 | W41 | S42 | W42 | S43 | W43 | S44 | W44 |
|---|---|---|---|---|---|---|---|---|---|---|---|---|
| Axis EF | TF | TF | TF | TF | TF | DF | DF | DF | DF | SF | SF | Ø |
| Axis WF | TF | TF | TF | DF | DF |
Italics = Change (as printed). [1] Extended Air Range. [2] Air Supremacy.
Sidebar: Airstrike Firepower (layout note). Column values were read from the printed table; the italic change markers are not reproduced.
13.24 Resolving Airstrikes. Airstrikes are resolved before Defensive Fire. One die is rolled per Airstrike CV.
Hits are scored based on the current Airstrike Firepower (SF, DF, or TF), and are immediately applied to enemy units in the hex. All terrain and weather defensive benefits apply (e.g., Double Defense in forests). Partial hits from Airstrikes do carry forward to normal land combat.
Note: When Airstrikes are made into Unsupported Combat battles, hits are only half-effective, just as for ground attacks.
13.3 Air Superiority
13.31 Extended Air Range. Beginning W'43 [Dec 1943], Allied Air Range is doubled to twice the CV of the commanding HQ. The CV (number of dice rolled) and Firepower (hit numbers) of the Airstrike are unchanged. Air Range of SHQs rises to triple the SHQ's CV.
Strategic Bombing. Beginning W'43, Axis HQ costs in the WF increase by 5 PPs/step (10 PPs/cadre).
13.32 Air Supremacy. In S'44, Allied Air Supremacy comes into effect in the West Front.
- Axis movement is suppressed: unit speeds in the WF are reduced by one (to a minimum of 1), and Rail Moves are halved to 5 hexes each.
- If the Allies also have Naval Supremacy, all Atlantic Basin seas become Allied controlled, regardless of Naval Base ownership (e.g. Biscay becomes Allied controlled despite Axis control of Brest).
Important: Loss of the seas around Norway cancels the Axis Ore SeaRoute (Axis loses 5 PPs).
14.0 Paratroops
14.1 Paratroops
Paratroops are elite infantry with Paradrop capability. They lose this ability when grounded (see 14.7).
14.2 Paradrops
14.21 Paradrop HQs. An activated Paradrop HQ expends all of its command ability for that Player-Turn (including airpower) to command a Paradrop (mark with PARADROP HQ marker). A Paradrop HQ cannot deploy: it must begin the turn already located in the same hex as the Para unit(s) to be airdropped (but may Mobilize after).
BLITZ Paradrop HQs can command two Paradrops, one in each phase.
Med Front Paradrops. Paradrops into the Med Front are prohibited unless combined with a sea invasion into the same [port] hex (see 15.9).
14.22 Paradrop Range. During Movement, Para units stacked with Paradrop HQs can airdrop (move) into any hex (except mountains) within the Air Range of the Paradrop HQ.
Note: When a SHQ acts as a Paradrop HQ, doubled (or tripled) Air Range applies.
14.3 Para Dispersal
Airdropped Para units are Dispersed during the Player-Turn of the Paradrop (place them face down).
Dispersed Paras have no effect on hex control, including the hex they occupy. Dispersed paras cannot move (e.g., in the Blitz Phase), but combat is unaffected by dispersal.
14.4 Para Combat
Paras on the ground move and fight like unmotorized infantry, except they fire DF Defensive Fire.
Paras do not receive combat support from their Paradrop HQ, so unless they receive it from another HQ within Combat Support Range, they fight unsupported.
14.41 Air Assaults. Paradrops into enemy-occupied hexes that initiate a new battle, are termed Air Assaults. Paradrops into existing battles are not Air Assaults, nor are Paradrops combined with normal ground attacks (except as noted in 14.42).
Air Assaults are treated like River Assaults (7.62) except that the Para unit is only repulsed on a die-roll of '1' (Single Repulse or SR).
IMPORTANT: Air Assaults against a Fortress (e.g., Malta) are repulsed on dierolls of 1-3 (no effect versus Fort units, except see 20.72).
If repulsed, a Para unit must take an automatic 1 CV loss (in addition to losses from defensive fire) and return to its starting hex.
14.42 Combined Air Assaults. When a Paradrop is combined with a River and/or Sea Assault, it will reduce the repulse dieroll for all assaulting units to "1" (SR), except versus Fortress hexes (see 7.65).
14.5 Para Linkup
During the friendly SUPPLY phase, just after the Invasion Dispersal Recovery sub-phase, dispersed para units (just airdropped that turn) must check for Paradrop Linkup.
Dispersed Paras in friendly hexes, adjacent to unengaged friendly hexes, or stacked with undispersed friendly units achieve Linkup and recover from dispersal (turn upright). They then regain their ZOCs and hex control ability.
Dispersed Paras that do not achieve Linkup are eliminated.
NOTE: Linkup is not affected by the presence/absence of a supply line.
Sidebar: Para Repulse. Only 20-30% of a Para corps is actually dropped in parachutes. Their job is to secure airfields to allow the balance of the corps to land in gliders and air transports. A Para repulse indicates the initial wave fails to secure the necessary airfields for the operation to succeed. The 1 cv hit upon Repulse reflects the loss of these "pathfinder" Paras.
Sidebar: Combined Assaults. Paradrops can be useful for supporting River and Sea Assaults because they can reduce repulse fire for all assaulting units, while adding an extra unit to the assault, significantly reducing the chances of a complete repulse.
Sidebar: Para Dispersal. Paras do not alter hex control on the turn they airdrop (otherwise they would enable Blitzing units to disengage 'ahead' into the paradrop hex). Nor can Paradrops cut enemy rail lines or supply lines, unless they achieve Linkup.
Sidebar: Para Linkup. Para units are notoriously light on logistics, heavy weapons and ammunition. Dropping into advanced, unsupplied positions is a risky venture. Without contact with ground units, paradropped units cannot survive for long.
Airdropped Paras must achieve Linkup with non-airdropped units. Linkup is achieved when stacked with such units (even if engaged), or when adjacent to them (even across a river). Linkup is not achieved when adjacent to enemy battle hexes (i.e., behind the lines).
Important: Paras can achieve Linkup with sea-landed units, as the latter recover from their dispersal before Paras are checked for Linkup (see SEQUENCE OF PLAY, p 14 sidebar and GAME DATA, p. 96).
Editorial note: the printed text of this sidebar contains several typographical errors ("musk", "Limkup", "encgeged", "acheived"); they are corrected here to "must", "Linkup", "engaged" and "achieved" without change of meaning.
14.7 Paratroop Grounding. Grounded paratroops can no longer paradrop, but their rebuilding cost drops by half. Grounded Paras retain DF defensive fire. Grounding is not reversible.
The Axis, Allies or Soviet player can voluntarily ground all paras in any Production phase.
German paras are automatically grounded if Allied Air Supremacy (13.32) is in effect.
Sidebar: Paratroop Grounding (Optional). All national Paras are immediately grounded once any national para unit has been eliminated in any manner.
15.0 Seapower
15.1 Sea Areas
In EuroFront, seas are divided into Sea Areas. Each Sea Area has a controlling Naval Base (controlling port) shown as a black port symbol. Control of the Naval Base exerts control over the Sea Area.
Each Sea Area also has a Sea Interdiction Value shown as a number inside a triangle [in brackets below]. This represents the degree of suppression the Naval Base exerts on enemy naval activity in its Sea Area.
Ports for each Sea Area are listed below (Sea Areas are grouped into Sea Basins for weather purposes):
- Naval Bases are in italics.
- Major Ports are in bold.
- AREAS are in SMALL CAPS.
Atlantic Basin
- Atlantic Ocean [3]: always Allied controlled. Ports are Vigo, Porto, Lisbon, Cadiz, Gibraltar, Tangiers, Casablanca, WEST AFRICA, and SOUTH AFRICA.
- North Atlantic [3]: controlled by Glasgow. Other ports are Shetlands and Scapa Flow.
- North Sea [2]: controlled by London. Other ports are Shetlands, Scapa Flow, Aberdeen, Edinburgh, Newcastle, Hull, Yarmouth, Ipswich, Dover, Calais, Ostende, Antwerp, Rotterdam, Hamburg, Amsterdam and Bremen.
- English Channel [2]: controlled by Portsmouth. Other ports: Dover, Weymouth, Plymouth, Calais, Le Havre, Cherbourg, and Brest.
- Irish Sea [3]: controlled by Liverpool. Other ports are Cardiff, Bristol and Glasgow.
- Bay of Biscay [1]: controlled by Brest. Other ports are Lorient, Bordeaux, Bayonne and Bilbao.
- Norwegian Leads [1]: controlled by Bergen. Other ports are Stavanger, Haugesund, ALESUND, ANDALSNES, and TRONDHEIM.
- Norwegian Sea [1]: controlled by TRONDHEIM. Other ports are NAMSOS and NARVIK.
- Nordkapp Sea [1]: controlled by NARVIK. Other ports are TROMSO and PETSAMO.
Arctic Basin
- Arctic Ocean [2]: controlled by ALLIES. No ports.
- ARCHANGEL. No other port.
- Barents Sea [2]: controlled by MURMANSK. Other port: PETSAMO.
- White Sea [3/freezes]: controlled by ARCHANGEL. No other port.
W. Baltic Basin
- Skagerrak [3]: controlled by Copenhagen. Other ports are Hamburg, Malmo, Goteborg, Oslo, Aarhus and Kristiansand.
- Western Baltic Sea [2]: controlled by Stettin. Other ports are Malmo, Copenhagen, Hamburg & Rostock.
E. Baltic Basin
- Baltic Sea [2]: controlled by Danzig. Other ports are Konigsberg, Memel, Ventspils, Karlskrona and Stockholm.
- Gulf of Riga [3]: controlled by Riga. The other port is Ventspils.
- Gulf of Finland [3]: controlled by Tallinn. Other ports are Turku, Helsinki, and Leningrad.
- Gulf of Bothnia [2, freezes]: controlled by Stockholm. Other ports: Turku, GALLIVARE & OULU.
Mediterranean Basin
- Alboran Sea [2]: controlled by Gibraltar. Other ports are Malaga, Almeria, Cartagena, Valencia, Barcelona, Mallorca, Tangiers, Melilla, Oran, and Algiers.
- Western Med. [1]: controlled by Algiers. Other ports are Mallorca, Bizerte, Cagliari, and Sassari.
- Gulf of Lyon [1]: controlled by Marseilles. Other ports: Mallorca, Toulon, Sassari, and Barcelona.
- Ligurian Sea [2]: controlled by Genoa. Other ports are Toulon, La Spezia, Livorno, Olbia, and Bastia.
- Tyrrhennian Sea [1]: controlled by Tunis. Other ports are Rome, Naples, Reggio, Messina, Olbia, Cagliari, Palermo, and Bizerte.
- Central Med [1]: controlled by Tripoli. Other ports: Tunis, Sfax, Benghazi, Malta, Palermo, & Catania.
- Ionian Sea [1]: controlled by Benghazi. Other ports are Catania, Messina, Reggio, Brindisi, Tobruk, Kalamata, Patras and Canea.
- Adriatic Sea [2]: controlled by Trieste. Others: Brindisi, Bari, Termoli, Ancona, Venice, Fiume, Split, Dubrovnik and Durres.
- Aegean Sea [2]: controlled by Athens. Other ports are Canea, Kalamata, Salonika, and Rhodes.
- Eastern Med [2]: controlled by Alexandria. Other ports are Tobruk, Port Said, Suez, Jaffa, Nicosia, Rhodes and Canea.
- Red Sea [3]: controlled by ADEN. Other ports: Suez, Aqaba, and SOMALILAND.
- Persian Gulf [3]: controlled by Basra. Other ports: Abadan and KARACHI.
- Indian Ocean [3]: controlled by KARACHI. Other ports: KENYA, SOMALILAND, SOUTH AFRICA.
Black Sea Basin
- Sea of Marmara [3]: controlled by Istanbul.
- Western Black Sea [2]: controlled by Sevastopol. Other ports are Burgos, Varna, Constanta, Odessa, Nikolaev, Samsun, and Istanbul.
- Eastern Black Sea [2]: controlled by Batumi. Other ports are Kerch, Novorossiysk, Trabzond, Samsun, and Sevastopol.
- Sea of Azov [3]: controlled by Rostov. Other ports are Kerch, and Mariupol (not Novorossiysk).
- North Caspian Sea: controlled by Astrakhan. Other ports are Guryev, Baku, and Makhach Kala.
- South Caspian Sea: controlled by Baku. Other ports are Rasht and KRASNOVODSK.
Abstract Naval Operations. Naval operations are represented abstractly in this land-oriented game system. This rules section defines the movement of units by sea and tracing of supply lines by sea.
Sea Interdiction Values. These reflect the danger of operating in that sea area, considering geography and proximity of enemy naval and air bases.
Dual-Sea Ports. Note that some ports border on two sea areas. These ports have two crossbars on the anchor symbols. Hexes with two disconnected seacoasts bordering on different seas (e.g., Bari, Cadiz, Weymouth) only have ports on the sea with the port symbol.
South Africa. IMPORTANT: Sea Movement between the Atlantic and Indian Oceans must pass though South Africa (and stop there). Continuous sea movement is not allowed around the Cape of Good Hope.
15.11 Seapower Restrictions. Only the Soviets can use any form of seapower (e.g., Sea Supply) in the Caspian Sea.
Unless Turkey is Allied, the SOVIETS cannot use Seapower in the Mediterranean Basin, nor can the ALLIES in the Black Seas.
15.12 Straits. Naval operations cannot traverse enemy-commanded Straits (see 1.371).
Soviet SeaPower (sidebar). Without use of the Turkish Straits (long coveted by Russia), the Soviets cannot make use of any form of SeaPower (including Sea Supply) in the Mediterranean Basin (e.g., to trace supply via the Indian Ocean).
Straits Control (sidebar). Naval operations [Sea Movement, Sea Invasion, or Sea Supply] cannot traverse enemy-commanded Straits (i.e., not if either side is enemy controlled). National Supply is traceable through a Straits unless both sides are enemy controlled [so opposing factions can both trace National Supply through a Straits]. NOTE: Sea Supply can be traced into a port on an enemy-controlled Straits, but not through the Straits (e.g., via the port).
Example (sidebar). If Tangiers is Axis controlled, the Allies can still trace Sea Supply into Gibraltar from inside the Med, but cannot trace Sea Supply through the Cadiz straits.
15.2 Sea Control
Each Sea Area has a controlling Naval Base (controlling port), shown with a black anchor symbol. The owner of the Naval Base controls that Sea Area.
Naval operations within friendly and neutral controlled sea areas are completely free of enemy interference.
Naval activities within enemy controlled sea areas are subject to possible enemy interference, called Sea Interdiction (15.7).
15.21 Sea Basin Control.
- Mediterranean Basin. If Italy is defeated, all Mediterranean Basin seas are Allied controlled, regardless of Naval Base ownership.
- Atlantic Basin. If Allied Naval & Air Supremacy are both in effect, all Atlantic Basin sea areas are Allied controlled, regardless of Naval Base ownership.
15.3 Sea Movement
Sea Movement is strategic movement between friendly ports. Sea Movement passes freely through friendly or neutral seas (but not through enemy commanded Straits, see 1.371).
Sea Movement through enemy controlled seas is subject to Sea Interdiction, which can result in losses and/or Repulse (see: 15.7).
As with strategic Rail Movement, Sea Movement must be commanded by a SHQ or THQ. Multiple sea moves can be linked for a long-distance move by sea.
Units cannot engage by Sea Movement, but can disengage if a rearguard is left behind (no Retreats).
15.31 Sea Moves. Sea Movement is composed of one or more Sea Moves. A unit in port can move to any other friendly port on the same sea area for one Sea Move. Two Sea Moves are required to move between friendly ports across two sea areas, etc. Each Sea Move normally costs one SHQ Supreme Move.
A unit can make multiple Sea Moves in one MOVEMENT phase, but Sea Movement cannot mix with Rail (or normal land) Movement.
15.32 Port Capacity. Port capacity is the number of Sea Moves a port can handle per turn.
Port capacity of a minor port is 1, meaning that only one unit can either enter or leave that port by Sea Movement in a Player-Turn.
Port capacity of a major port is 2: two units can attempt to enter or leave (or one unit each way) per turn.
NOTE: Sea Invasions [15.5] are not limited by port capacity.
15.4 Sea Supply. Sea Lanes are sea routes between friendly ports. Sea Lanes connect friendly Rail Lines (see sidebar example) to form Rail/Sea Supply.
Units dependent on Sea Lanes as well as Rail Lines for supply are in Sea Supply. Sea Supply equals Rail Supply for production purposes.
Sea Lanes, like Rail Lines, can be traced into friendly battle hexes (ports), but not through such hexes. Sea Lanes ending at an engaged port have limited supply ability (see: Siege Supply below).
Sea Lanes through enemy controlled seas are subject to Sea Interdiction (15.7), which may interrupt the Sea Lane, resulting in Supply Attrition.
A Sea Lane cannot pass through a Straits if either side is enemy controlled. It can end in a port on the Straits but can go no further by sea even if the port borders another sea.
15.41 Siege Supply. Sea Supply to an engaged port called Siege Supply, can support one unit, at cadre strength (correction). Excess units/cvs suffer Supply Attrition.
Under Naval Supremacy (15.8), one unit at any cv is supported.
Under Naval and Air Supremacy [13.32], any number of units can be supported. The engaged port serves a Rail/Sea Supply Source, to which units can trace a Supply Line (10.4).
NOTE: Fortresses do not provide Siege Supply in addition to Fortress Supply.
REMEMBER: Rail lines never emanate from an engaged port.
Sidebar: Sea Movement. Example: The Allies control Tunis, Malta, Taranto, and Benghazi. AF SHQ commands an Allied unit in Tunis to sea-move to Taranto. This counts as two Sea Moves since two sea areas are crossed (but only costs 1 Supreme Move under Naval Supremacy). As both Seas are Allied controlled, no Sea Interdiction is possible.
Sidebar: Sea Movement vs. Sea Invasion. Sea Movement of units by sea between friendly ports is cheap and efficient. But Sea Movement cannot be used to enter [or engage] coastal hexes that are not friendly ports. These moves require Sea Invasion (15.5), a much more expensive and difficult process.
Sidebar: Port Capacity & Repulse. "Attempts" to use a port count against capacity even when the attempted Sea Move is Repulsed by enemy Sea Interdiction and forced to return to the port of embarkation.
Sidebar: Sea Invasions & Port Capacity. Port capacity governs Sea Movement, but not Sea Invasions. Blitz multiple invasions can be launched from minor ports. Invasions into a port hex do not interfere with full use of the port for Sea Movement (if, for example, a player wants to reinforce a captured port as quickly as possible).
Sidebar: Shoals & Sea Movement. Sea Movement and Sea Supply are possible through shoal hexes because ports have cleared and marked channels.
Sidebar: Sea Lane Example. An Allied Rail Line connects London to Dover. A Sea Lane through the English Channel connects Dover to Cherbourg. The Allies can trace Rail/Sea Supply via the rail line out of Cherbourg (once cleared).
15.5 Sea Invasions
Sea Invasion is movement by sea from a friendly port to any coastal hex (except mountain, marsh or shoal hexes). Unless moving between unengaged friendly ports, units can cross seas only by Sea Invasion.
Note: Sea Invasions into the Med Front and North Front have special restrictions noted in 21.39 and 21.47.
Sea Invasions are not Strategic Movement. They are special moves requiring activation of a dedicated Invasion HQ to invade with one unit.
15.51 Invasion Command. During the Command phase, Invasion HQs can be activated to command Sea Invasions (use INVASION HQ markers).
Each Invasion HQ commands the movement of one invading unit and no other movement. They must begin the Command phase in a friendly port, (i.e., cannot deploy into it), stacked with any unit(s) they will command to invade.
NOTE: Invasion HQs may be activated for Combat Support purposes only, without commanding unit(s) to invade (or being stacked with invadeable units).
Invasion HQs can launch Airstrikes and can provide Combat Support to battles within Invasion Command Range (see below), if they do not Mobilize.
SHQs can act as Invasion HQs, but without Blitz capability or Combat Support, as always. [THQs cannot.]
15.511 Invasion Combat Support. For Combat Support purposes, Invasion HQs have Command Range equal to their CV, as usual, and can support combats within this range.
However, Invasion HQ Command Range is traceable only through sea or coastal hexes (and never through all-land hexes or hexsides) into invadeable coastal hexes only. It is not traceable through unfriendly straits (1.371) or into shoal, mountain, or any other kind of non-invadeable hex (e.g., MF non-port hexes).
Important: Sea Invasions can be sent beyond Invasion HQ Command Range, but any resulting combat is unsupported.
Invasion HQ Command Range can extend through enemy-controlled seas and through the sea portion of enemy controlled coastal hexes.
Invasion HQ Combat Support Range doubles under Naval Supremacy.
15.512 Blitz Invasion HQs. HQs can also be activated as Blitz Invasion HQs (mark with BLITZ and INVASION HQ markers) to command Two-Wave or Long-Range Invasions (see 15.54 Blitz Invasions).
15.52 Invasion Movement. Amphibious, infantry, mech, armor, mountain, para, and HQ units can Sea Invade. Cavalry, shock, static, fortress, and siege gun units cannot sea invade.
The invading unit is moved from the invasion port (where the Invasion HQ is activated) to the target coastal hex.
Normally, invading units must invade coastal hexes within the same sea area, though Long-Range Invasions (15.542) can cross 2 seas.
NOTE: Naval Supremacy doubles the range [in Sea Areas] of friendly Sea Invasions.
Sea Invasions cannot be made into Mountain, Marsh, or Shoal hexes. Mud weather does not affect Sea Invasions. The Soviets (only) can Sea Invade (but not Sea Assault) into Snow weather hexes.
In the MF and NF, invasions can be made into port hexes only (see 15.9).
Invasion moves cannot pass through enemy Straits (15.12). Invasions passing through enemy-controlled seas are subject to Sea Interdiction, which can result in losses and/or Repulse (see 15.7).
15.521 Opposed Invasions. Only one unit per MOVEMENT phase can sea invade into a defended hex (a second unit can invade during BLITZ MOVEMENT, see Two Wave Invasions - 15.541).
This limitation does not apply to undefended hexes, which can be simultaneously invaded by multiple units (up to maximum stacking).
15.53 Sea Assaults. Sea Assaults are Sea Invasions that initiate battles, and are subject to possible Repulse. Invasions into existing battles are not Assaults.
Amphibious, infantry, mountain, mech, and para units can Sea Assault.
Armor and HQ units can Sea Invade but cannot Sea Assault (e.g., they can invade into undefended hexes but cannot initiate a battle by sea invasion). Armor can invade into existing battles but not HQs (they can never voluntarily engage into enemy occupied hexes--see 5.1).
Sidebar: Sea Invasion Example. The Allies control the English Channel. They have an HQ II and an amphibious corps in Portsmouth. The HQ is activated as an Invasion HQ and the amphibious unit is moved by sea to invade Brest, which is Axis controlled but currently undefended. By capturing the port, the Allies have established a friendly Sea Lane, so Brest (and any rail lines emanating from it) becomes an Allied supply source. Control of Brest also gives the Allies control of the Bay of Biscay.
Sidebar: Invasion Command. Invasions are a costly form of movement in terms of HQ expenditure. However, Invasion HQ combat support under Naval Supremacy can be very good (simulating naval gunfire support), often better than land combat support (due to doubled combat support range, traced by sea). The beaches can be a good place to fight for both the invader (good combat support and DF amphibious firepower in BHs). They are also usually a good place to fight for the defender: keeping the beachhead engaged prevents cheap reinforcement and the landing of enemy HQs (which cannot enter engagements).
Sidebar: Sea Assault Example. In S'43, the Allies control Tunis, and have Naval Supremacy. A 3cv Italian army (infantry) defends Licata. The Allies activate an HQ III in Tunis and commands the US 6th amphibious corps (4cv) there to Sea Invade to Licata. A 3 TF airstrike from the Invasion HQ scores two half-hits (hill terrain) on the defending Italian army, reducing it to 2cv. The Italian unit rolls (2/6) for Defensive Fire and scores one hit but fails to repulse the invader (SR vs. amphibious units). The Allied unit loses a step, and then returns fire at 3 SF (no BH yet), scoring one ineffective hit (4/6/2). During the Supply Phase, the Allies place the US 6th BH there to ensure supply for the invader, and provide naval gunfire support (15.66) in future combat.
Sidebar: Getting HQs Ashore. To break out after an invasion against enemy resistance is virtually impossible without landing a HQ unit. HQs can only cross seas in two ways: either by Invasion into an unengaged hex or sea movement into an unengaged friendly port. HQs can never move into a battle hex.
15.531 Repulse. In assaults, the initial defensive fire can Repulse assaulting units as well as scoring hits normally. See the Repulse Table (7.6) regarding the repulse of sea assaults.
Repulse is applied to the weakest cv assaulting units first. Repulsed units return immediately to their port of embarkation, without returning fire. See 7.61 Repulse for details.
Note: Combined Assaults (see 7.65) using Paradrops often reduce the chances of Repulse.
15.54 Blitz Invasions. Blitz Invasion HQs can command two types of Blitz Invasions.
Blitz Invasion HQs must command invasions in both phases. They cannot mix Invasion Command in one phase with normal or paradrop command.
15.541 Two-Wave Invasions. Blitz Invasion HQs can command the invasion movement of one unit during MOVEMENT and a second unit during BLITZ MOVEMENT (this can be a previously repulsed invader).
The second-wave invader must land in a hex invaded in the previous MOVEMENT unless a second-wave invasion hex has been pre-assigned by placing a BLITZ marker there during MOVEMENT, in which case this hex must be invaded.
Sidebar: Two-Wave Sea Invasions. Blitz two-wave invasions are common in EuroFront. Firstly, with the ever-present possibility of Repulse, a second wave gives a second chance. Secondly, it is usually wise to get maximum strength ashore quickly, to withstand or deter enemy counterattacks on the Beachhead.
15.542 Long-Range Invasions. Blitz Invasion HQs can also command amphibious units (only) to invade across two [2] sea areas to more distant coastal hexes, landing during the BLITZ MOVEMENT phase.
NOTE: friendly Naval Supremacy doubles the maximum range of Long-Range Sea Invasions to 4 Sea Areas.
Sidebar: Long-Range Sea Invasions. Long-Range invasions are expensive but often worth the surprise value. Lacking amphibious units, the Axis cannot do these.
15.55 Sea Evacuations. Sea Evacuations are Invasions in reverse. The evacuating unit is "reverse-invaded" from a coastal hex to a friendly port, commanded by an Invasion HQ in the target port.
If Retreating, the evacuated unit takes Pursuit Fire based on a speed of '1' ('2' for amphibious units).
Sea Evacuations are also subject to Opposed Invasion limits (15.521). Only one (1) unit can be evacuated from a battle hex per MOVEMENT phase. This limit does not apply to unengaged hexes.
Sidebar: Sea Evacuations. When a unit must move from a coastal hex back to a friendly port by sea and Sea Movement is impossible (e.g., a Retreat or no port/BH in the embarkation hex), a Sea Evacuation is the only means of extracting the unit.
Sidebar: Sea Evacuation Example. In Summer 1944, the Allies have a 3CV amphibious unit and BH stalemated in Calais after invading, and an HQ III in Portsmouth. The Allies activate the HQ as an Invasion HQ, and "reverse invade" the amphibious unit back to Portsmouth. Since this is a retreat, engaged Axis units get Pursuit Fire. A 3 cv German armor unit rolls 3SF (speed 2 in S'44), scoring 1 hit. An Axis 2cv infantry (speed 1 in S'44) also present cannot fire. The amphibious unit returns at 2cv and the BH is eliminated.
Sidebar: Sea Invasion Threats. Usually, not all Allied BHs are currently invasion-ready. With BHs kept facedown, the Axis cannot tell where the invasion threat is most serious, even if the locations of the Allied amphibious corps are known.
15.56 Invasion Dispersal
Like airdropped Para units, units invading by sea are Dispersed during the Player-Turn of the Invasion.
Dispersed units have no effect on hex control, including the hex they occupy. Dispersed units cannot move (e.g., in the Blitz Phase), but combat is unaffected.
Dispersed Sea Invaders automatically recover during the SUPPLY phase of the invasion turn, regaining their hex control ability (and ZOCs).
Para Linkup. Unlike Paras, dispersed sea invaders need not achieve Linkup to avoid elimination. However, because sea invaders recover from dispersal before Paras are checked, airdropped Paras can achieve Linkup with recovered invaders.
Sidebar: Assault Repulses (Defensive Fire). The table is as printed in section 7.6 (River 1-2 (1-3 Mud); Air 1-2; Sea by Amphibious units FNS 1-3 / NP 1-2 / ENS 1; Sea by Other units FNS 1-4 / NP 1-3 / ENS 1-2).
Editorial note: the printed text of this section contains the typographical error "acheive" (corrected here to "achieve").
15.6 BeachHeads
Each amphibious unit has an associated BeachHead (BH) marker. In the SUPPLY phase, BHs can be placed in invaded hexes, serving as supply sources while the hex remains embattled, and as temporary ports after it is won. If enemy units control a BH hex with no friendly units present, the BH is eliminated.
BHs are listed in Scenario Starting Forces, and can also arrive as reinforcements. The Axis has no amphibious units, and hence no BHs.
15.61 BH Preparation. Ready BHs are available for immediate use. They are kept face down in the BH Ready box (on map).
Preparing BHs are not ready for use, and are kept facedown in the BH Prep box. During Production, they can be raised to BH Ready status for 20 PPs, and eliminated BHs can be rebuilt to BH Prep status for 20 PPs.
15.62 BH Emplacement. During any Allied SUPPLY phase following a Sea Invasion by an amphibious unit, its associated BH can be emplaced in the invasion hex provided the BH is Ready and the amphibious unit is in the hex. Only one BH can be emplaced per hex.
Once emplaced, BHs cannot be moved (except as below).
Unengaged BHs that are no longer useful where emplaced can be removed to the BH Prep box (no cost) in any friendly SUPPLY phase.
Sidebar: Beachhead Supply. Invasions without BeachHeads will suffer continual supply attrition until a port is captured. Players should not count on BH Supply in winter, because of Storms.
15.63 BeachHead Supply. BeachHeads act as a supply source for friendly units in their own hex, even if the hex is embattled and enemy controlled.
In friendly controlled hexes (even if embattled), BHs act as Supply Sources (to which friendly units can trace 2 hex supply lines).
To act as a Supply Source, a BH must be able to trace a Sea Lane to a friendly port. This Sea Lane cannot pass through enemy controlled straits, and is subject to Sea Interdiction (15.7) if it passes through enemy-controlled seas.
15.64 BH Disruption. BHs dependent on Sea Supply passing through enemy controlled seas are subject to enemy Sea Interdiction (15.7) which can disrupt BHs. Storms also disrupt BHs. Disrupted BHs lose all function for that fortnight (invert).
15.65 Mulberries. Unengaged BHs function as temporary minor ports (capacity 1) for Sea Movement (this is in addition to on-map port capacity). BHs do not form Sea Lanes connecting friendly rail lines. Invasions cannot be launched from BHs.
15.66 Shore Bombardment. Allied amphibious units occupying their own BH hex fire DF, both offensively and defensively.
15.67 The Soviet BH. The Soviet amphibious Coastal Army has an associated BH, which can supply units in its own or adjacent hexes only, but does not provide DF for the CA unit. It cannot be deployed in the Mediterranean Sea Basin.
Note: The Axis has no amphibious units, hence no BHs.
Sidebar: Beachhead Support. BHs represent the logistic and naval support for invasions. DF for amphibious units in BHs represents ongoing naval gunfire support. Naval bombardment proved crucial in breaking up several panzer counterattacks well after D-Day.
15.7 Sea Interdiction
Sea/Invasion Movement and Sea/BH Supply are totally secure from enemy interference when confined to friendly controlled seas. However, when passing through enemy seas, units and supply can be damaged or repulsed by Sea Interdiction.
15.71 Sea Interdiction Values. Each sea area has a Sea Interdiction Value (in triangle), which rates its defensibility with naval forces based in the controlling Naval Base.
15.72 Sea Movement Interdiction. When an opponent is attempting to traverse a friendly-controlled sea by Sea Movement, the passive player can attempt Sea Interdiction after all enemy movement is complete.
In each case, the passive player rolls a number of dice equaling the Sea Interdiction Value of each friendly sea area crossed. Certain results cause Repulse or hits to the moving unit (see: Sea Interdiction table, sidebar).
If any Repulse result occurs, the unit returns to its port of departure.
15.73 Supply Interdiction. During the Enemy Supply Check (SUPPLY phase), the active player can attempt to interdict enemy Sea Lanes passing through a friendly controlled sea. Success negates the enemy Sea Lane that turn (possibly leaving enemy units unsupplied).
Check each enemy port/BH separately for interdiction. For each port being checked, the passive player specifies a Sea Lane to friendly Rail Supply. The active player rolls a number of dice equal to the Sea Interdiction Value of friendly seas this Sea Lane traverses.
If one (or more) Repulse result is obtained, that Sea Lane is interdicted (unusable) during that SUPPLY phase (BHs are disrupted: invert). Resulting unsupplied enemy units then must suffer supply attrition.
Example: During the Axis Supply phase, the Allies need a Sea Lane through the Axis-controlled Bay of Biscay to Bordeaux or Lorient. Naval Parity applies, so an Axis roll of 1-3 would interdict. The Sea Interdiction value of the Bay of Biscay is "1," so the Axis player rolls one die for each port: 5 for Bordeaux and 3 for Lorient. Lorient is interdicted but Bordeaux receives Allied Sea Supply this Supply Check.
Sidebar: Sea Supply Interdiction. Sea and BH Supply across enemy seas is unreliable until Sea control is obtained. Sea Supply (port-based) is easier to interdict than BH Supply is.
Sidebar: Sea Movement Interdiction. Sea Movement (ordinary sea transport) is more likely to be repulsed or damaged than Invasion Movement (valuable and heavily escorted convoys).
Example (sidebar): In S'43, the Axis controls the Bay of Biscay from Brest. The Allies control Bordeaux and attempt to Sea Move a unit there from Dover. The Axis player rolls one die for Sea Interdiction, obtaining (2), a successful interdiction despite enemy Naval Supremacy. The Allied unit returns to Dover.
Sea Interdiction tables (as printed):
Movement Interdiction (Passive Player Roll) — R = Repulse numbers, H = Hit numbers:
| Type | FNS | NP | ENS |
|---|---|---|---|
| Invasions — R | 1-3 | 1-2 | 1 |
| Invasions — H | 4-6 | 5-6 | 6 |
| Sea Moves — R | 1-4 | 1-3 | 1-2 |
| Sea Moves — H | 3-6 | 4-6 | 5-6 |
Supply Interdiction (Active Player Roll):
| Type | FNS | NP | ENS |
|---|---|---|---|
| BH Supply — R | 1-3 | 1-2 | 1 |
| Sea Supply — R | 1-4 | 1-3 | 1-2 |
FNS: Friendly Naval Supremacy. ENS: Enemy Naval Supremacy. NP: Naval Parity. R: Repulse Numbers. H: Hit Numbers. NOTE: In the table above FNS/ENS applies to the player rolling to interdict or repulse enemy movement or supply.
15.8 Naval Supremacy
Naval Supremacy and Naval Parity describe the overall naval balance between two opposing sides.
A fairly equal naval balance is termed Naval Parity. Parity always applies between the Axis and Soviets.
Naval Supremacy describes the overall naval superiority of one side. It implies improved naval capabilities for that side and weakened ones for the enemy (see 15.82). Naval Supremacy does not affect sea control.
Between the Axis and Allies, the naval balance is determined by use of Seaways (see 15.81). The side with use of more Seaways has Naval Supremacy. If both sides can use the same number of Seaways, Naval Parity prevails.
Naval Supremacy is re-evaluated at the end of every POLITICS phase.
15.81 Seaway Control. Seaways are sea passageways traceable through friendly and neutral controlled seas (Cooperating neutrals do not block Seaways) and Straits. Seaways are not traceable through enemy-controlled seas or Straits (15.12).
-
Southern Seaway: A sea Line of Communications between the Atlantic Ocean and India via South Africa. The Allies usually have a Southern Seaway. The Axis never does (it can never control South Africa), but can deny one to the Allies by controlling Karachi.
-
Middle Seaway: A sea Line of Communications between the Atlantic and Indian Oceans via the Mediterranean. The Allies have a Middle Seaway as the game opens (Italian seas are neutral, hence usable). The Axis does not (cannot pass either Gibraltar or the Suez canal). Italian belligerence closes this seaway to the Allies (Central Med and Ionian become Axis). The Allies regain use of this seaway by taking Benghazi and Tripoli.
-
Northern Seaway: A sea Line of Communications between the E. Baltic Sea and the Barents Sea. At game start, the Axis has a Northern Seaway. The Allies do not due to Axis control of the W Baltic. Allied control of any Norwegian naval base would negate Axis use of this Seaway.
Naval Supremacy Determination. If none of the Seas/Straits of a Seaway are enemy controlled, that Seaway is passable. The side (Allies/Axis) with the most passable Seaways has Naval Supremacy. If equal, Naval Parity is in effect.
Seaway list (as printed):
- Northern Seaway: Eastern Baltic Sea (Danzig); Western Baltic Sea (Stettin); Denmark Straits (Odense/Copen./Malmo); Skagerrak (Copenhagen); Norwegian Leads (Bergen); Norwegian Sea (Trondheim); Barents Sea (Narvik).
- Middle Seaway: Cadiz Straits (Cadiz/Tangiers); Gibraltar Straits (Gibraltar/Tangiers); Alboran Sea (Gibraltar); Western Med. Sea (Algiers) OR Gulf of Lyon (Marseilles) AND Ligurian Sea (Genoa); Tyrrhenian Sea (Tunis); Central Med. Sea (Tripoli); Ionian Sea (Benghazi); Eastern Med. Sea (Alexandria); Suez Canal (Suez/Port Said/Port Said E1).
- Southern Seaway (never Axis): Atlantic Ocean (always Allied); South Africa (always Allied); Indian Ocean (Karachi).
15.82 Naval Supremacy Effects.
15.821 Sea Movement. Naval Supremacy doubles the range of Sea Moves: a unit can cross two (2) Sea Areas per Sea Move.
NOTE: Double-range Sea Moves cannot be split to move two units one sea each.
15.822 Sea Invasions. Naval Supremacy doubles the maximum range of an Invasion Move from one to two sea areas (Long Range Blitz invasions can traverse up to four Sea Areas). [This does NOT allow two units to each move one sea each for a single Invasion Move.]
Naval Supremacy also doubles the combat support Command Range of Invasion HQs to twice the CV of the commanding HQ (e.g., 6 sea hexes for a HQ III). [Remember, SHQs cannot support combat.]
15.823 Sea Assaults. Naval Supremacy reduces the chance of friendly sea assaults being repulsed, and increases the chance of repulsing enemy sea assaults (see SEA ASSAULT table on map).
15.824 Sea Interdiction. Naval Supremacy increases the chances of successful Sea Interdiction of enemy naval actions and reduces the chances of successful enemy Sea Interdiction of friendly naval actions (see SEA INTERDICTION table on map).
15.825 Siege Supply. With friendly Naval Supremacy, an engaged port can supply one unit at any cv, not just 1 cv (see also 15.83).
15.826 Shipping Losses. Shipping Losses still apply to a side that has Naval Supremacy, unless other conditions (eg, Mare Nostro) change this.
15.83 Naval & Air Supremacy. Siege Supply: With both Air and Naval Supremacy, an engaged port can supply any number of units.
IMPORTANT: If both Allied Air and Naval Supremacy are in effect, all Axis sea capability in the Atlantic and Mediterranean Sea Basins is lost.
Naval Supremacy Examples (as printed):
| 1939 (Historical) | Axis | Allies |
|---|---|---|
| Northern Seaway | Yes | No |
| Middle Seaway | No | Yes |
| Southern Seaway | No | Yes |
| Total Seaways | 1 | 2 |
= Allied Naval Supremacy.
| 1941 (Historical) | Axis | Allies |
|---|---|---|
| Northern Seaway | Yes | No |
| Middle Seaway | No | No* |
| Southern Seaway | No | Yes |
| Total Seaways | 1 | 1 |
= Naval Parity. *Italian belligerence has closed the Middle Seaway to the Allies [Central Med/Ionian become Axis, not neutral].
15.9 MF/NF Seapower
Sea Invasions into the Med Front or North Front must originate in ports and land in ports. For front specific invasion rules, see 21.39 (MF) and 21.47 (NF).
16.0 War and Peace
Belligerent nations are actively at war. Neutral nations are at peace. Cooperating nations are technically neutral, but have granted concessions to one side or the other.
16.1 Neutrality
Most nations begin the game as neutrals. Neutral forces are not deployed on the map until they become belligerent (exception: Soviets are always in play).
Neutral Territory. Belligerent forces cannot enter neutral land territory without a prior Declaration of War. Belligerent ZOCs do not extend into neutral territory, nor can Belligerents trace command or rail/supply lines through it.
Note: National Supply (see 20.63) can be traced through neutral land territory (exception: see Cooperation 16.2).
Neutral Seas. Neutrals exert no seapower. Belligerents can move/trace supply through neutral-controlled sea areas/straits (except Turkey, see 1.371).
16.2 Cooperation
Some nations (e.g., Vichy) Cooperate with the Axis as the result of an Axis Diplomatic Event (DE). Other nations Cooperate with the Allies (see 20.921).
Cooperating nations remain neutral but transfer their future Production to a faction and allow it use of their railroads.
16.21 Cooperation Effects.
- Production: That nation's full (wartime) Production capacity is transferred to a faction, ending its Peacetime Production (16.32).
- Territory: Units can move / trace supply through national territory by rail only, but cannot remain within national territory without a prior Declaration of War (see 16.41).
- National Supply: Though ostensibly neutral, a Cooperating nation does not allow the opposing faction to trace National Supply through its borders.
- Seas: The opposing faction can use seas controlled by Cooperating nations (without Interdiction).
- Politics/Diplomacy: Cooperating nations can never join the opposing faction by Alliance Reaction or Diplomacy (ignore such results).
16.22 Cooperating Forces. Cooperating forces do not enter play. However, a Cooperating nation yields all future Production to a faction, and its Peacetime Production (16.32) terminates.
Apply accumulated Peacetime Production to national forces on the Neutral OB card and turn them upright to show this has been done.
Thereafter, the controlling faction can build Cooperating forces (those upright on the OB card) using faction PPs and costs (MF rules apply to units in the MF), but all builds apply even if that nation joins the opposing faction instead.
Cooperation (sidebar). During WW2, some minor powers granted Germany transit rights through national territory and favorable trade agreements supplying critical resources. However, these nations neither contributed troops nor allowed German forces to stay within their territory. In EuroFront this is called Cooperation.
Swedish Compliance (sidebar). Upon Axis DE DS, Swedish Compliance comes into effect. This is a special form of limited "cooperation" (see 21.492).
Soviet Neutrality (sidebar). While most Neutrals set up freely upon belligerence, the Red Army is far too powerful to have this privilege. Neutral Soviet forces are deployed, built, and maneuvered by the Allied player in plain view of the Axis player, and all movements must be paid for with Soviet HQ expenditures (which are not cheap in 1939/40).
Unit Restriction (sidebar). Early in the war the Wehrmacht high command argued against having Satellite forces involved in their campaigns as this would introduce language and military problems into operational planning, and require Germany to supply and protect poorly equipped Satellite forces. Most of the General Staff also advocated keeping Italy neutral, having concluded (correctly, as it turned out) that her entry on the Axis side would be a hindrance rather than a help to the war effort. Later, as casualties mounted in the east, Hitler sought a more active role for Satellite forces, and some allies sent sizeable contingents, but others declined. As the tide of war turned, Hitler's allies became less willing to contribute soldiers to his war, and only allowed limited forces to be stationed outside the homeland.
Example (sidebar). Rumania joins the Axis by Diplomatic Event RX, so its forces are restricted to Rumania/1939 (and adjacent hexes). Its 3rd Army is then released by Diplomatic Event 3R. It fights in Russia but is eliminated. If rebuilt, this unit is permanently restricted to Rumania/39 and adjacent hexes.
16.3 Belligerence
Belligerent nations have joined either the AXIS or the ALLIES (their forces, territory and production being controlled by that faction). Neutrals never join the SOVIETS.
Neutrals can become belligerent in three different ways, which affects their range of movement:
- By Declaration of War (16.4): Such nations are termed Co-belligerents. These units may go anywhere.
- By Alliance Reaction (16.5): These nations are called Interventionists. Their forces are restricted (16.311) to home territory and adjacent nations.
- By Diplomatic Event (16.6): These nations are termed Satellites. Their forces are restricted to home territory and adjacent hexes/Areas.
16.31 Belligerent Forces. Upon belligerence, the owning faction deploys national forces freely within national territory (minors can only set up one unit per hex).
National forces are shown on the OB cards as of September 1939. Before deployment, they must be built up to reflect Peacetime Production (see 16.32) that has occurred since September 1939.
16.311 Unit Restriction. Restricted units must remain within a defined area, or they are unsupplied (suffering Supply Attrition- see 10.6).
Sometimes restricted units are released from restriction by Diplomatic Event, but released units that are eliminated are permanently restricted thereafter even if rebuilt.
16.32 Peacetime Production. Before belligerence, neutrals are building up military capability at a reduced rate. Peacetime Production is equal to one fourth of a neutral's nominal (wartime) production. To calculate the accumulated Peacetime Production of a new belligerent:
- Count months elapsed since September/39. These figures are shown in gray in the 2nd from right column of the GAME RECORD SHEET.
- Multiply months elapsed by national (wartime) Production, and divide this figure by four (drop fractions). This equals PPs of Peacetime Production available.
- Spend these PPs to build up national forces as desired before deploying them on the map. Unused PPs are lost.
Example: Jan/41 = 16 months elapsed since September/39. Bulgaria (production 1 PP) joins the Axis in May/41. Multiplying 20 months elapsed times 1 PP and dividing by four yields 5 PPs of Peacetime Production.
Note: Peacetime Production cannot be applied in unsupplied locations (e.g., Ethiopia).
Remember: Cooperating units (upright on the OB Cards) receive no further Peacetime Production.
Note (sidebar): In defining home territory for this rule, use current or 1939 borders, whichever is larger.
16.4 Declarations of War
Belligerent units can never enter neutral territory until a Declaration of War (DoW) has been issued (except: see 16.21 and 16.42). Declarations of War are made at the beginning of the COMMAND phase, and cause the target neutral[s] to immediately join the opposing faction. Alliance Reaction checks (16.5) are then immediately made to see if other neutrals also become belligerent in reaction.
To Declare War, a faction must be able to enter the targeted neutral and then must actually attempt to do so.
Chamberlain Rule (sidebar). The ALLIES cannot Declare War before W'39, or while Phony War (20.43) is in effect.
16.41 Betrayal. AXIS Declarations of War upon Pro-Axis or Cooperating neutrals, or other Axis nations (eg, by exceeding Occupation Limits) are considered Betrayal (exception: Axis entry into the [pro-Axis] ME Mandates does not require a DoWar).
With the following exceptions, ALLIED Declarations of War upon any neutral constitute Betrayal:
- Allied DoWs on Norway and the ME Mandates are exempted under certain conditions (see DEs NX & ME).
- After DE 2F, Allied DoWs on minors Cooperating with the Axis are exempt.
Betrayal annuls all future Alliance Reactions in favor of that faction, and adds +1 to all future Diplomatic Event die-rolls by that faction (reducing the odds).
AXIS Betrayal also cancels Surprise Attack effects (20.16) in future.
16.42 Molotov Pact Border Disputes. During Soviet neutrality (i.e., Molotov Pact in effect), both Axis and Soviets must occupy all mutual border hexes within/adjacent to E. Poland, the Baltic States, and Bessarabia to avoid Border Disputes.
If either side fails to occupy mutual border hexes in these areas, the other side can occupy and annex (16.6 sidebar) them without a Declaration of War.
Moreover, any new border hexes resulting from such annexations then become similarly exposed to new border disputes if left undefended. In effect, either side can advance 1 hex/turn across undefended borders within the specified areas.
Grace Period. If the Axis-Soviet border changes by any means other than Border Dispute (e.g. Politics, Conquest, or Diplomacy), both sides are allowed one Month to garrison their new borders before the other can annex them by Border Dispute.
16.5 Alliance Reactions
Whenever a Declaration of War is made, other neutrals may react and also become belligerent. If so, their belligerence may trigger further reactions in a "domino" effect.
16.51 Alliance Checks. After Declarations of War are made, check for Alliance Reactions using the ALLIANCE REACTIONS table (see DIPLOMACY pages 88-91).
Alliance Reaction Example (as printed; assumes France defeated, no Betrayals).
- The Axis Declares War on Yugoslavia (Axis COMMAND phase). Yugoslavia joins Allies. Place its units face down in Yugoslavia to indicate New Belligerent with Alliance Checks pending (tip units back to preserve Sept/39 cv).
- Yugoslavia Alliance Checks: Determine possible Reactions. Read across the Yugoslavia row on the Alliance Table (France is defeated, so use the 2nd number of each pair m/n). The following neutrals may react joining Yugoslavia's side, unless otherwise noted (* = Always Joins Axis. † = Always Joins Allies).
| Nation (Reacts) | DR | Result |
|---|---|---|
| Italy (1*) | DR1 | Joins Axis (only). |
| Hungary (1-2*) | DR3 | Remains neutral. |
| Rumania (1-2) | DR2 | Joins Allies (Yugo). |
| Bulgaria (1-2*) | DR5 | Remains neutral. |
| Greece (1-3†) | DR3 | Joins Allies (only). |
As they react, place Italian, Rumanian, and Greek units face down in national territory (means New Belligerent: Alliance Checks pending). When finished, turn Yugoslavian units upright to show its Alliance Checks are complete.
- Italy Alliance Checks [Uppermost New Belligerent in AR table.] Hungary (1*) DR1 Joins Axis (only). [Spain is not Republican.] Place Hungarian units face down in Hungary (New Belligerent). Turn Italian units upright (checks completed).
- Hungary Alliance Checks [Uppermost New Belligerent in table.] [Italy, Yugoslavia and Rumania belligerent.] Turn Hungarians upright (checks done).
- Rumania Alliance Checks [Hungary, Yugoslav, Greece belligerent] Bulgaria (1-4*) DR6 Remains neutral. Turn Rumanians upright (checks done).
- Greece Alliance Checks [Italy, Yugoslavia, Rumania belligerent] Bulgaria (1-2*) DR3 Remains neutral. Turn Greeks upright (checks done).
- [No New Belligerents remain to check.]
- Deploy New Belligerent Forces. Axis applies Peacetime Production to Italian and Hungarian units (unless previously Cooperating) then deploys them as desired within national territory. Allies apply Peacetime Production to Yugoslavian, Rumanian, and Greek units then deploys them in national territory.
Note (as printed in the example): the Alliance Reaction example text is transcribed as printed, including the bracketed notes.
Alliance Reactions table procedure (as printed). Find the uppermost New Belligerent in the left column of the table. Trace across its row to find its Alliance Linkages with other Linked Neutrals (top row). Use the first figure in each cell before French defeat and the second figure after.
The passive player rolls one die per Linked Neutral (ignore belligerent nations and those with no linkage).
If the die-roll is equal to or less than the linkage number, that Linked Neutral also becomes belligerent, joining the same side as the New Belligerent it reacted to, unless otherwise specified.
16.52 Secondary Reactions. When a Linked Neutral reacts to become a New Belligerent itself, its belligerence triggers a further round of Alliance Reaction checks.
If multiple checks are pending, check the uppermost New Belligerent in the table first. Complete all checks for one New Belligerent before proceeding to the next.
NOTE: Neutrals are checked for possible reaction to each New Belligerent in a single "chain reaction" of Alliance Checks.
After all New Belligerents have been checked for Alliance Reactions, players deploy newly belligerent forces. The active side deploys its newly belligerent forces first, then the passive side.
Sidebar: Alliance Reactions vs. Diplomacy. Alliance Reactions reflect "heat of the moment" decisions to join in the defense of (or attack on) an attacked neutral, and is a one-time, yes/no determination. The chances of Alliance Reaction are based on the number, currency and strength of alliances concluded between the parties, or hostility and/or territorial disputes between neighboring countries. Diplomatic Events randomize the entry of Neutrals into the war. As opposed to Alliance Reactions (which are one-time hit-or-miss affairs), Diplomatic Events represent long-term application of diplomatic, military, or economic pressure, and have a sense of inevitability about them (players can attempt most DEs repeatedly, as long as the Preconditions are met).
NOTE: Some DEs are not truly "diplomatic" in nature, but the terminology is retained for continuity with previous editions.
Sidebar: Diplomacy/Politics Terminology. "Rumania AXIS" means that Rumania must belong to the Axis faction. (Defeated nations do not belong to any faction.) "Rumania AXIS controlled" means all Rumanian hexes must be Axis controlled. "EF all-Snow month" means that EF Snow weather must be certain (fixed) for the entire upcoming month. "Annexation" means incorporation of an area into home territory (i.e., new units and reinforcements can arrive there). This occurs in the cases of Bessarabia and E. Poland / Baltic States (annexed to the USSR), W. Poland / Danzig (annexed to Germany), and Transylvania (annexed to Hungary).
Sidebar: Politics vs. Diplomacy. Political events can occur at the end of every turn (2 times per month), and any number of these can occur in a fortnight. In contrast, only one Diplomatic Event can occur per month for each side.
Sidebar: 3 Player Diplomacy. When the Allies and Soviets are being played as separate factions, only one Diplomatic Event is allowed per month. Players must agree which event is attempted or none can attempted.
16.6 Diplomatic Events
The DIPLOMACY phase follows Production each month. The Allies-Soviets (jointly) can attempt one Diplomatic Event (DE), for which the Preconditions are currently met (see the DIPLOMACY pages 88-91). Next the Axis has the same opportunity.
Procedure. Announce which DE is being attempted, then roll one die (unless it occurs Always). If the result is within the specified range, the DE occurs (along with any Other Effects listed) and cannot be declined (e.g., Soviet Mobilization).
16.7 Politics
During the Politics phase, the active player can check for any or all of the following political events:
- Demoralization/ Solidarity
- Armistice (ALLIES only)
- Revolt/ Surrender (ALLIES only)
- Defeat/ Conquest
- Naval Supremacy (see 15.8)
16.71 Demoralization. Demoralized nations can Surrender (16.8) or suffer other effects.
Demoralization is caused by:
- France (20.43): Poland is defeated and a French/Belgian major city or a Maginot Line fort is lost.
- Norway: Allied DE NP (Norway-Finland Expedition Proposed).
- Italy (20.25): Allied control of Sicily, Sardinia, an Italian major city, Libya, or Albania.
- Axis Satellites (16.3): Allied DE 2F.
- Vichy: Allies control Libya.
16.711 Ambivalence. Norway, Vichy and Portugal become ambivalent if demoralized. Their units Repulse (7.61) enemy Assaults weakly (only on dierolls of '1') and may Capitulate in combat (see 7.7).
16.72 Armistice. Once per game, during Allied POLITICS, the Allies can offer French Armistice. The Axis must immediately either accept or reject Armistice (20.46).
NOTE: if France is demoralized, Allied Solidarity is checked every Axis Politics (see 20.45). Once it fails twice, the Allies must offer Armistice next Allied Politics.
Once per game, during Axis POLITICS, the Axis can offer Finnish Armistice. The Soviets must then immediately either accept or reject Armistice. See 21.48.
16.721 Withdrawal. Following Armistice, units left inside neutralized territory may immediately make one Rail or land move to a friendly location (hex/Area) bordering on that territory (no command needed). Units unable to do so are eliminated.
16.73 Revolt [Allies only]. Revolt can occur in exploited nations if the Allies/Soviets control any national territory. A Resistance Army appears in home territory (and is restricted to it).
Exploitation: Nations that have been defeated by the AXIS for one complete Winter season (Dec-May) are exploited.
16.731 France, Greece & Norway. Once exploited, France, Greece and Norway can Revolt once per game if national hexes are controlled by the Allies / Soviets.
Note: If the Axis betrays Vichy, France can Revolt at any time (no exploitation/ Allied hexes needed).
During friendly POLITICS, the Allies/Soviets can check for Revolt by rolling one die. If the result is less than the number of Allied/Soviet controlled national hexes (or areas), Revolt occurs.
Resistance Army. Upon Revolt, the Allies/Soviets place a Resistance army (Maqui/Edes/Norwegian static) at 1 cv in any national hex not containing a German unit or ZOC. It arrives unsupplied (no ZOC) as a normal Allied / Soviet unit, subject to all normal rules.
16.732 Yugoslavia. If Yugoslavia has been exploited, it can Revolt in any Allied POLITICS (no controlled hexes or dieroll needed). The Tito unit arrives unsupplied at 1 cv (2 cv after 2nd Front) in any mountain hex within Yugoslavia (not Axis occupied).
Tito functions as an Allied mountain unit, subject to all normal rules, except for the following special abilities within Yugoslavia only:
- Tito is immune to supply attrition (but if unsupplied, it still has no ZOC and cannot build, as usual).
- Tito can disengage/retreat into unoccupied mountain hexes regardless of Axis ZOCs, and is immune to Pursuit Fire.
- Tito can be disbanded during any Production and raised again in any Season that starts 3+ months later.
16.8 Surrender
If demoralized (16.71) certain Axis Satellites (16.3) may Surrender if Allied or Soviet forces control any national territory. Land Satellites and Maritime Satellites are treated slightly differently.
Note: After Allied DE NP, Norway can also Surrender to the ALLIES (see 16.83).
Procedure. During friendly POLITICS, the Allies/Soviets roll 1 die for each demoralized Satellite in which they control territory: if the result is less than that Satellite's War Weariness, it Surrenders.
16.81 Maritime Satellites. For Italy, Spain, or Vichy*, War Weariness is the number of enemy-controlled ports (major ports count double) plus currently eliminated or unsupplied units. For this rule, units without Secure Supply (11.71) are considered unsupplied.
*Note: For Vichy only, MF ports/units are counted, otherwise not.
16.82 Land Satellites. For Rumania, Hungary, Bulgaria or Yugoslavia, War Weariness equals the number of Allied/Soviet controlled hexes*, plus currently eliminated/unsupplied units. For this rule, units without Secure Supply (11.71) are considered unsupplied.
*Note: use 1939 or current borders, whichever is smaller.
16.83 Norway. If Allied DE NP is in effect, Norway is demoralized and can Surrender to the Allies as for Maritime Satellites (16.81). See Allied DEs and Defection (below).
16.84 Surrender Effects.
- That nation is defeated (16.9).
- Territory control is unchanged until Conquest (16.92) occurs.
- Defection. One national unit not in a hex containing German/foreign Axis units/ZOCs is replaced by a 1 cv national Volunteer unit (see sidebar). This unit is restricted to national territory and adjacent hexes.
- All other national units are eliminated.
Note: If no unit Defects, a Volunteer unit can be built in the national capital in any future Production. If no such unit is provided, use any national unit.
Sidebar: Satellite Surrender. When an Axis minor has been [reluctantly] forced into the war by Diplomatic Event, it will readily Surrender once enemy forces begin conquering its home territory. On the other hand, if an Axis minor has been a victim of Declaration of War, or has reacted to the belligerence of a neighbor, it will not Surrender and can only be defeated by the capture of its capital.
Sidebar: Surrender and Eliminated Units. Only currently eliminated units count against a Surrender dieroll. A player can therefore resist Surrender by rebuilding eliminated national units back into cadres.
Sidebar: ALLIED Volunteer Units (as printed). France (Revolt): Maquis. Greece (Revolt): Edes. Yugoslavia (Revolt): Tito. Norway (Revolt/Defection): 1 (static). Italy (Defection): Friuli. Vichy (Defection): 2 Mtn Cps* (* arrives next Production in Algiers/Tunis).
Sidebar: SOVIET Volunteer Units (as printed). Rumania (Defection): 1R. Bulgaria (Defection): 1B. Hungary (Defection): 1H.
16.9 Defeat
A Great or Major Power is defeated when its capital is enemy-controlled AND all national units are eliminated.
A Minor Power is defeated when its capital is enemy-controlled OR all national units are eliminated.
Exceptions: Switzerland and Norway, although minor powers, are defeated as major powers (see 20.76, 20.81).
Surrender (16.84) also causes defeat.
16.91 Defeated Nations. Defeated forces are permanently eliminated. Defeated nations no longer exist in game terms (see sidebar).
Sidebar: Defeated Nations. Defeated nations no longer exist in the game (they no longer belong to any faction regarding DEs, etc).
16.92 Conquest. After its defeat, control of a nation's Capital at the end of any subsequent POLITICS phase confers total control of all national territory, provided no units of the opposite faction remain therein.
Note: Conquest also applies to British/Italian/French Colonies in the Med Front.
Sidebar: Conquest. As long as enemy forces remain within its home territory, no automatic change of territory control occurs. Conquest occurs only when no enemy forces remain in a Politics Phase. Conquest then confers control of all national territory.
Sidebar: Control of Territory. Control of nations, islands, or colonies is defined as control of ALL its hexes. It is not necessary that every hex be occupied.
Sidebar: Med Front Colonies. Italy: Libya. France: Morocco, Algeria, Tunisia. Britain: Egypt, Palestine.
17.0 Strategic Objectives
Strategic Objective Evaluation (sidebar, as printed). Example: If MF Victory has been awarded and then lost, the MF Allocation level reverts to the level prior to MF Victory, not to 15 PPs.
17.1 Axis Oil Supply
The Axis Oil Supply is defined as a Line of Communications (see 10.21) traceable between Berlin and a major oil source (either Ploesti, Baku, or Abadan).
Effect: If the Axis has no Oil Supply, all Axis HQ steps rise in cost by 5 PPs (cadres +10 PPs).
17.2 Axis Ore Supply
The Axis Ore Supply is a Line of Communications (10.22) between Berlin and Gallivare (Sweden).
Effect: If the Axis has no Ore Supply, Basic Production drops by 10 PPs.
The Axis Ore SeaRoute is a Line of Communication traceable between Berlin and Gallivare via Narvik and the Northern Seaway (the main delivery route for Swedish iron ore).
Effect: If the Ore SeaRoute is broken, the Axis loses 5 PPs of Basic Production.
17.3 Satellite Release
Axis control of Sevastopol and Odessa allows the release of certain Axis Satellite (16.3) armies from restriction (but not eliminated and rebuilt units).
Effect: see Axis DEs 3R and XR.
Note: Soviet recapture of these cities once again restricts affected units. Restricted units outside allowed territory are unsupplied.
17.4 Balkan Pacification
The Balkans are defined as: Greece, Albania, Hungary, Rumania, Bulgaria, and Yugoslavia.
Balkan Pacification means that all six nations have:
- Joined the Axis, or
- Been Defeated by the Axis, or
- Are Cooperating with the Axis.
Effect: Favorable Axis diplomatic events may result: 3R, XR, ME, and TX.
17.5 Mare Nostro
Axis control of Gibraltar, Malta, or Suez ensures secure Axis sea lanes to North Africa.
Effect: Axis MF Production is not subject to Shipping Losses.
Note: This rule does not apply under Allied Naval Supremacy.
17.6 Med Front Control
The conditions below are evaluated each friendly Politics, and are reversible.
17.61 North Africa Victory. Control of all six (6) major ports in North Africa (Algiers, Tunis, Tripoli, Benghazi, Alexandria, Suez) provides sufficient MF control to overcome Acclimatization problems.
Effect: A player controlling all 6 major North African ports can ignore MF Acclimatization.
17.62 Desert Victory. Control of all seven (7) major ports in the MF Desert Zone (the above 6 plus Basra) provides sufficient control of the MF to overcome Maintenance problems.
Effect: A player controlling all 7 MF Desert Zone major ports can ignore Desert Maintenance.
17.63 Med Front Victory. Control of all MF major ports except SOUTH AFRICA (Desert Victory plus Karachi) signifies complete control of the Med Front, merging it into the West Front for that faction.
- Use WF PPs/Costs,
- Ignore all special MF rules (MF-WF Invasions/Paradrops, Axis Logistics, etc.).
- SHQs gain full MF/WF Cross-Command at 100% efficiency.
17.7 Spanish Volunteers
Allied control of pro-Republican (red) cities in Axis Nationalist Spain rallies Republican volunteers.
Result: The Allies can build Republican unit cadres in controlled red cities (at normal WF unit costs). One such unit can be built in each captured minor city and two in each Major City. These units are restricted to Greater Spain and adjacent hexes. They are Allied units, tracing supply directly to London, and not immune to supply attrition in red towns (as in the SCW).
The reverse applies equally if the Axis controls black (pro-Nationalist) towns in [Allied] Republican Spain.
17.8 Soviet Oil Supply
If the Soviets lose Baku or Rail/Sea Supply to it, their HQ costs rise by 5 PPs/step (cadres 10 PPs).
There is also a penalty for the loss of the Soviet Oil SeaRoute. See 20.591.
Sidebar: Ploesti Oil. The "Achilles heel" of the Third Reich was petroleum. The Allies out-produced the Axis by almost 20:1 in oil. Ploesti's oil provided about 40% of Germany's supply (an equal amount was made chemically from coal). After the Soviets overran Ploesti in September 1944, the Axis fuel situation deteriorated rapidly, affecting especially the Luftwaffe.
Sidebar: Swedish Iron. Swedish mines at Gallivare and Kiruna supplied about 30% of Germany's iron ore, the bulk of which shipped from Narvik, Norway. In early 1940, the British actively considered invading Norway, under the pretext of sending aid to Finland in its Winter War with the USSR. But Britain actually wanted to interdict iron shipments from Gallivare, the rich Swedish orefield just inland from Narvik. Allied planners judged that depriving Germany of Swedish iron ore would be crippling to its war production, though recent studies have cast some doubt on this. Nevertheless, Hitler called Norway the "zone of destiny" and defended it heavily throughout the war.
Sidebar: Oil and Ore Supplies. Note that the oil / ore supply locations themselves need not be Axis controlled. Neutrality is sufficient.
Sidebar: Sevastopol and Odessa. Sevastopol, the main base for the Soviet Black Sea Fleet was reputedly the strongest fortress in the world. The threat of air or seaborne attack on the crucial Ploesti oilfields from there or Odessa tied down large Axis forces.
Sidebar: Mare Nostro. Mussolini's "New Roman Empire" propaganda sought domination of the Mediterranean Sea as a renewed Mare Nostrum. Only the presence of the British Mediterranean Fleet prevented Italy's large navy from achieving this goal. Assuming France has fallen, Axis control of Gibraltar, Malta, or Suez would expel Allied naval forces from the western, central, or eastern Mediterranean, respectively, giving the Axis secure sea lanes to North Africa.
18.0 Map Edge Areas
18.1 Map Edge Areas. Along some map edges are the Arctic, Eastern and Southern Zones, which contain abstracted off-map Areas, either:
- Districts [circles]: small areas about 2 hexes in diameter; OR
- Regions [squares]: large areas about 4-6 hexes in diameter.
Regions and Districts differ mainly regarding Supply: supply lines into/through Districts are affected by the presence of enemy units (i.e., engagement), while those in larger Regions are not (see 18.5).
Areas have terrain, which affects stacking, combat and supply as for hexes. It does not affect movement.
Routes. Rail (red) and Road Routes (brown) are dotted lines connecting off-map Areas to each other or to on-map hexes.
Short Routes (thin dotted lines) are considered 2 hexes long for the purposes of tracing Command Range and Air Range.
Long Routes (thicker dotted lines) are counted as 5 hexes long.
18.11 Area Control. As with hexes, Areas change control only upon undisputed enemy occupation. The Original Defender retains control of engaged areas. Nations initially control all areas within home territory.
18.12 Area Stacking. Stacking varies with Area terrain the same as hexes.
18.2 Area Command
18.21 HQ Movement. Activation. HQs cannot deploy along a Route (too far, see 18.31).
Deactivation. HQs can mobilize along Short Routes by 1 March (see 18.33). SHQ/THQs can also mobilize along Rail Routes by Rail (18.33).
HQs can enter engaged areas (unlike for hexes), either under the command of another HQ or when mobilizing (but cannot attack alone).
18.22 HQ Command Range. Command Range along Routes is measured by equivalent hex distances.
Example: An HQ III can exert command 2 hexes along a Short Route, plus 1 hex further on-map.
18.23 HQ Air Range. Air Range is calculated in the same way as 18.22.
18.3 Area Movement
18.31 Routes. Rail Routes and Road Routes connect Areas. Rail (red) and Road Routes (brown) are as in 18.1.
18.32 Rail Routes. Rail Movement is the fastest and cheapest method of movement between friendly areas along a Rail Route. Short Rail Routes are two (2) rail hexes long. Long Rail Routes are five (5) rail hexes long.
Rail Moves involving both hexes and routes can be freely combined using Route distances as above. Linking such rail moves is allowed.
18.33 Road Routes. A unit moving along a Road Route (or engaging by Rail Route) moves by Marches only. Units can make one March or DoubleMarch per turn.
18.331 Marches. Any unit can March along a Short Route, regardless of its speed, weather, or terrain. Marches can be commanded by normal HQ command or by SHQ/THQ command (cost 1 Supreme Move).
Any unit can DoubleMarch along a Long Route, regardless of its speed, weather, or terrain. DoubleMarches can be commanded by SHQ/THQs only (2 Supreme Moves per DoubleMarch).
18.34 Sea Movement/Invasion. Units can Sea Move between friendly areas with ports (but see 18.35 regarding engagement) by normal Sea Movement.
Sea Invasions can be made into areas with Ports and only into such areas (NOTE: mountain/marsh terrain does not prohibit invasions into areas with Ports).
18.35 Engaged Areas. Ports and Rail Lines in Districts (small areas) are affected by engagement in the same way as in hexes: no Sea or Rail Movement is allowed into them (and Ports are besieged).
However, for the Original Defender, use of Ports and Rail Lines in engaged Regions (large areas) is not affected. The Original Defender (only) can move units in and out of engaged Regions by Rail or Sea Movement, and can even rail right through engaged friendly Regions.
Units can only enter enemy controlled areas by Marches (18.311), never by strategic Sea or Rail Movement.
Sidebar: Districts. Districts are small offmap areas shown as circles. They function much like hexes except rail movement is allowed into friendly battles. Sea movement is not because the Ports are considered to be besieged.
Sidebar: Regions. Regions are much larger offmap areas, shown as squares. They are large enough that engagement by enemy forces is not considered to affect the rail net or ports. Rail Movement is still allowed into or through the Region. Sea Movement is allowed into friendly battles.
Sidebar: Engaging Enemy Areas. Units entering an enemy controlled area cannot use Rail Movement. Therefore units engaging enemy areas must move by March, even along Rail Routes.
A March along a Short Route costs 1 Supreme Move. A DoubleMarch along a Long Route costs 2 Supreme Moves.
Movement along Road Routes always requires Marches.
Sidebar: Tracing Air/Command Range by Sea. When tracing Air/Command Range over a combination of Routes and Sea hexes, consider any area bordering a sea hex to be one hex further away.
Example: Bremanger is 4 hexes from the Shetlands (3 North Sea hexes plus 1 hex further). Thus Alesund is 6, Andalsnes 8, Dombas 10 and Trondheim 12 hexes from the Shetlands (via 2-hex Short Routes).
Air/Command Range is NOT traceable over sea areas that are not covered with hexes (e.g., the Norwegian Sea).
18.36 Disengagement. Units can disengage by March or by Strategic Movement, but must Retreat by March (Pursuit applies).
Units must disengage into friendly hexes/areas, including re-engagement into friendly battle areas.
18.37 Engagement Limit. The engagement limit is two (2) units per Route, regardless of route type, terrain or weather.
18.4 Area Combat
Combat within areas is always optional except that [river/ sea/ air] Assaults must be fought that turn.
The forces of the Original Attacker always remain revealed, whether or not combat is to occur (unactivated HQs of the Original Attacker remain upright, but can be inspected by the opponent). Defending units are revealed only during combat.
Area terrain and weather apply normally regarding combat.
18.5 Area Supply
A major difference between Districts and Regions is the treatment of ports and rail lines through them when they are engaged.
18.51 Region Supply. The Original Defender of a Region (large area) retains full use of its rail lines, roads, and ports even when it is engaged. If a port is present, Sea Supply (not Siege Supply) applies. Rail Movement, Rail Supply, and Road Supply can pass into or through friendly Regions that are engaged.
The Original Attacker can trace Rail or Road Supply into (but not through) engaged Regions.
18.52 District Supply. Districts (small areas) follow the same supply rules as hexes. When a District is engaged, Rail Supply terminates there (cannot be traced through), Rail Movement must stop there, and ports are besieged (Siege Supply applies).
Both sides can trace Rail or Road Supply into (but not through) engaged Districts.
18.6 Area Production
18.61 Area PPs. Area PPs follow the same rules as for hexes. Rail/Sea Supply is necessary to produce PPs.
18.62 Area Unit Costs. Units occupying areas are rebuilt using normal rebuilding costs.
Engaged Unit Rebuilding: Because opposing units in the same area are not necessarily close, they can be built up during Production, but using double normal costs. Cadres can also be rebuilt in engaged arrival areas at double cost. This applies to units of both Original Defender and Original Attacker (must be supplied).
18.63 Arrival Locations. New units (rebuilt cadres and arriving reinforcements) can arrive in qualified friendly areas.
- SOVIET/AXIS units: home areas.
- ALLIED units: friendly-controlled areas containing a major port.
19.0 Victory
19.1 Victory. Players can score a 'sudden-death' Victory at any time. Otherwise, Victory is determined at the end of May/45.
Note: The 1944 Scenario (only) uses Victory Conditions in 19.5. [Section 19.5 is omitted from this transcription as it applies only to the 1944 EuroFront scenario; see the edition note.]
19.2 Axis Victory. Note: for Victory calculation purposes, use full 'wartime' Production (i.e., not divided by 3) even for powers that are not belligerent (e.g. Soviet Union).
19.21 Axis Decisive. If, during any Production, the Axis PP total is at least twice the total of Allied/Soviet Production, the Axis immediately wins a Decisive Victory (game ends).
19.22 Axis Major. At the end of May 1945, Axis Production exceeds combined Allied/Soviet Production.
19.23 Axis Minor. At the end of May 1945, Axis Production totals at least three-quarters of combined Allied/Soviet Production.
19.24 Axis Marginal. At the end of May 1945, Axis Production totals at least two-thirds of combined Allied/Soviet Production.
19.3 Allied Victory.
19.31 Allied Decisive. Allies/Soviets control Berlin by the end of W'43 (May/44).
19.32 Allied Major. Allies/Soviets control Berlin by the end of S'44 (November/44).
19.33 Allied Minor. Allies/Soviets control Berlin by the end of W'44 (May/45).
19.34 Allied Marginal. Allied/Soviet Production totals at least triple total Axis Production at the end of May 1945.
19.4 Draw. If none of the above results are achieved, the game is a Draw.
Victory Conditions (sidebar, as printed). The Axis Victory conditions are based on attaining a defensible and economically viable empire (one that is capable of matching Allied industrial power in the long run), not upon Nazi survival into 1945 or some variation on a slow death. The Allied Victory Conditions are based upon the total destruction of the Nazi empire within the historical time frame. Allied planners worried that further continuation of the war might result in Allied and Soviet manpower shortages, and deterioration in the strategic balance due to the introduction of advanced German weaponry such as the Me262 jet fighter and the type XXI U-boat.
Axis Decisive Victory (200%+): This Victory Level typically requires the defeat of Britain or the USSR.
Axis Major Victory (100%+): Axis Major Victory requires the Axis to control non-neutral continental Europe, the Ukraine, and the Mid East (or an economic equivalent: ±145 PPs) into Summer 1945.
Axis Minor Victory (75%+): Axis Minor Victory requires the Axis to control non-neutral continental Europe plus some of the Ukraine (or an economic equivalent: ±125 PPs) into Summer 1945.
Axis Marginal Victory (66.7%+): Axis Marginal Victory requires the Axis to hold all continental Europe (or the economic equivalent: ±115 PPs) into Summer 1945.
Draw (33.3%+): The Axis must retain its core territory (Rhine-Alps-Vienna-Vistula) or economic equivalent (±75 PPs) into Summer 1945.
20.0 The Powers
20.1 Germany
Germany is the Axis great power. Germany includes East Prussia and Austria, and controls Czechoslovakia.
Danzig and West Poland are annexed to Germany upon DE PW (Phony War).
20.11 German Forces. German units have gray labels (SS labels are black). Med Front units have orange circles on the label; North Front units have blue circles.
Med Front Veterans have "V" inside an orange circle. These units can operate in the Med Front without penalty (but are not restricted to it).
Important: no German units are allowed in Egypt before the Afrika HQ arrives.
The DAK unit is elite armor only within the MF. Outside the MF, it is a normal armor unit.
Med Front Expeditions have "E" inside an orange circle. These units can operate in the Med Front without penalty under certain conditions (see Tunis/Istanbul Basing 21.385).
North Front Veterans have "V" inside a blue circle. These units have reduced acclimatization on entry into the North Front and can operate in the Arctic Zone without penalty.
The Dietl THQ can provide combat support within the NF.
20.12 Command and Supply. German units can be commanded by German or Italian HQs.
Berlin is the German capital. It is also the Axis Supply Origin (10.2) provided it can trace rail/sea supply to another friendly Victory City (black numbered square).
20.13 Unit Restrictions.
20.131 Cooperating Neutrals. Axis forces can pass through the territory of a Cooperating neutral by Rail Movement (only), but cannot remain without a prior Declaration of War (see 16.4 & 20.17).
20.132 Occupation Limits. Axis Minors. No more than four (4) German (or other foreign Axis) units can be inside the territory of an Axis minor unless Allied/Soviet units have entered its territory (as currently defined).
Exceeding Occupation Limits requires a Declaration of War upon the Axis minor (see Betrayal, 20.17).
Italy. The Occupation Limit (4 units) also applies to Italy Proper unless Italy is demoralized (16.71).
20.14 The Molotov Pact. Entry of foreign Axis units into the Baltic States, Turkey, Persia or Finland (unless FL/FX in effect), constitutes a Declaration of War upon the USSR.
Axis units can enter Eastern Poland (east of the Curzon Line, see sidebar), but must exit all units during the month of Polish Partition [Allied DE PP]. Failure to do so constitutes a Declaration of War on the USSR.
20.15 Axis-Soviet Borders. During Soviet neutrality, the Axis should occupy all hexes that border the annexed Soviet territories of East Poland, the Baltic States and Bessarabia. Failure to do so risks their loss (see 16.42 Axis-Soviet Border Disputes).
20.16 Axis Surprise. When the Axis Declares War upon a neutral, it is Surprised for that fortnight.
- Surprised HQs are disrupted.
- Assaults (7.6) within the territory of a surprised nation cannot be Repulsed (ignore Repulse results). Note: fortified ports (1.44) cannot be Surprised.
- Sea Interdiction (15.7) is nullified in seas controlled by Surprised nations.
If Axis Betrayal (20.17) occurs, Axis Surprise effects are canceled in future.
20.17 Axis Betrayal. An Axis Declaration of War upon a pro-Axis Neutral (see OB Cards), Cooperating neutral or Axis minor power (e.g., violating Occupation Limits) constitutes Betrayal.
In the future, no further pro-Axis Alliance Reactions can occur and +1 is added to all Diplomatic Event dierolls (see 16.41 for details).
20.18 Winter Paralysis. During the first Winter season that the East Front is active, the Axis suffers serious disadvantages (see 12.45).
20.19 Axis Production. Prior to activation of the East Front (21.22) or Med Front (21.32) all Axis PPs are considered West Front Production. After activation, Axis Production on these other fronts is segregated (see 11.5).
Sidebar: The Curzon Line. The Curzon Line is the 1941 German/Soviet border, comprising the E/W Poland division plus the E Prussia-Baltic States border. Note: Swalki (originally part of Poland) is west of the Curzon Line.
Sidebar: Danzig & West Poland. Once Poland is defeated, Axis DE PW (Phony War) can annex Danzig and West Poland (that part west of the Curzon Line) effectively incorporating them into Germany.
Sidebar: German WF Infantry. German WF infantry corps are generally divided into two units, one being a static component. As a result, their infantry components are now limited to 3 cv.
Sidebar: Med Front / North Front Units (as printed). MF Veterans: Afrika HQ; DAK Armor Corps; LtAfr Mech Corps; 2 Para Static Corps. MF Expeditions [Tunis/Istanbul Basing]: AG 'G' HQ; South Armor Corps; 90 Infantry Corps; 90 Static Corps. NF Veterans: Dietl THQ; 18 Mountain Corps; 36 Mountain Corps; 33 Infantry Corps; 33 Static Corps; 19 Infantry Corps; 19 Static Corps; 70 Static Corps; 71 Fort Corps.
Sidebar: Axis Occupation Limits. Most Axis minor powers resisted the large scale stationing of German forces on their soil, rightly fearful for their independence. Mussolini refused to allow German forces in Libya until after the disaster at Beda Fomm, and resisted major deployments in Italy itself until Tunis had fallen.
Sidebar: The Molotov Pact. The Molotov Pact, signed in August 1939, secretly mandated German and Soviet spheres of influence in Eastern Europe. Finland, Bessarabia, the Baltic States, and Poland east of the Curzon Line (the 1941 German-Soviet border in Poland) were assigned to the Soviets. Germany was assigned the remainder of Central Europe, including Western Poland.
Sidebar: Axis Surprise. The Nazis gained considerable military advantages from their unscrupulous policy of attacking neutrals without an advance Declaration of War. The Allies (and Soviets) never receive Surprise benefits.
20.2 Italy
Italy is an Axis major power. It includes Sicily and Sardinia, and controls Albania, Libya, Rhodes, and ETHIOPIA (which contains a base).
Italy Proper is composed of mainland Italy, Sicily and Sardinia.
Greater Italy is composed of: Italy Proper, Albania, Yugoslavia, Greece, the entire Med Front, and all Mediterranean Basin islands. Italian units are commonly restricted to Greater Italy and adjacent hexes.
20.21 Italian Forces. Italian units have gray labels with green centers. Med Front units have orange circles on their labels. The East Front unit has a red circle.
MF Residents have "R" inside an orange circle. They operate in the Med Front without penalty, but cannot leave it (restricted to the MF).
EF/MF Expedition. The Italian 8I infantry has "E" inside its red circle. This unit can operate in the EF if released by Axis Diplomatic Event XR. It can also operate in the MF without Maintenance penalty if Tunis Based (see 21.385).
20.22 Belligerence. Italy can become belligerent by Declaration of War or Alliance Reaction, but most often does so by Axis Diplomatic Event IX (which is a mandatory DE for the Axis if France is defeated and Italy is not belligerent).
Setup: Upon belligerence, the 1EA static unit starts in Ethiopia, the 3 MF Residents start one per Libyan port, and the Lib mech unit arrives in Tripoli the next Production.
Other Italian units are initially deployed in Italy Proper and Albania, at least one unit in each Italian major city and Albania.
Peacetime Production: Upon belligerence, supplied Italian units can be built up with Peacetime Production (see 16.32). MF Residents may be increased at double Extreme Costs. The Ethiopian static 1EA is not supplied (see 10.71) and cannot be built up with Peacetime Production.
The Med Front is activated by Italian belligerence. In the next Production phase, both sides make their initial MF PP Allocations (see 21.37).
20.23 Unit Restriction. Italian MF Residents are Restricted to the Med Front.
If Italy becomes belligerent by Diplomatic Event IX (as is usual), like all Satellites (16.311) its other forces are restricted: in Italy's case to Greater Italy and adjacent hexes. Some or all restricted units may be released from restriction by Axis Diplomatic Events XR and IU.
20.24 Command & Supply. German HQs can command Italian units, and vice-versa.
National Supply. Italian units trace supply to Rome, which must then trace National Supply to Berlin (see 10.2).
20.25 Italian Surrender. If Italy is an Axis Satellite, it can become demoralized (16.71) by:
- Allied DE 2F, OR
- Allied control of Sicily, Sardinia, Libya, Albania or an Italian major city.
If demoralized, Italy may Surrender once the Allies control any port in Italy Proper (see 16.8).
20.26 Italian Defeat. Upon Italian defeat (see 16.9), all seas in the Mediterranean Basin (see 15.1) become Allied controlled, regardless of naval base ownership.
Sidebar: Greater Italy. The full extent of Mussolini's ambition for Italy included all the territories listed plus Ethiopia. Mussolini liked to call this fictional creation the "New Roman Empire", but he proved himself an unworthy Caesar.
Sidebar: Italian Belligerence & Naval Parity. When Italy joins the Axis, the Ionian and Central Mediterranean seas become Axis controlled, blocking the Mediterranean Seaway for the Allies. If the Axis has secured a Northern Seaway by conquering Denmark and Norway, Allied Naval Supremacy ends and Naval Parity begins.
Sidebar: Med Front Units (as printed). MF Residents: CS THQ; 10 Infantry Army; Libya Colonial Army; 1 EAfrica Colonial Army (Ethiopia); 20 Mech Corps [reinforcement]. MF Expeditions: 8 Infantry Army.
Sidebar: Italian Restriction. Italy's agenda in WW2 involved a renewed empire in the Mediterranean and Balkans. Mussolini wanted no part of a major land war in Europe. For political reasons, Mussolini refused repeatedly to countenance loss of Libyan territory even if military disaster loomed. Requiring Italian Med Front forces to defend North Africa to the death simulates this political imperative.
Sidebar: Italian Surrender. As the tide of war approached, Italy began to doubt the wisdom of continuing the struggle by serving as a battleground for the defense of the Reich. Secret talks undertaken with the Allies led to Italy's surrender even as Allied landing craft approached Salerno Bay. However, Hitler anticipated this development and deployed sizeable German forces into Italy. Most Italian forces were easily disarmed, although several units resisted and paid dearly (officers were shot).
Sidebar: Control of Sicily and Sardinia. Control of either island is defined as control of all its hexes.
20.3 Britain/U.S.
Britain/US is the Allied great power. Britain and the U.S. are considered one nationality for game purposes.
Britain controls Gibraltar, Malta, Cyprus, Egypt, Palestine, Arabia, Sudan, Somaliland, Aden, Kenya, Afghanistan, India, South Africa and bases in Iraq and Persia (21.397).
20.31 British/US Forces. British forces have tan labels. Canadian forces have blue centers and Polish forces red centers. US forces have olive labels, Free French with dark blue centers. All these units are functionally equal. Med Front units have orange circles on the label, North Front units have blue circles.
North Front Expeditions have "E" inside a blue circle.
- The 3 NF Brigade Groups (NExp, HA & TA) are restricted to the NF and Britain, and may enter the NF with reduced Acclimatization (21.441) and operate in the Arctic Zone without Maintenance (see 21.461) after Allied DE FR.
- The Canadian Mech units are not restricted, but only gain the above NF privileges after Allied DE 2F.
Med Front Residents have "R" inside an orange circle. These units can operate in the Med Front without Maintenance but cannot leave it (restricted).
The 3 MF Resident Brigade Groups (HabF, PalF, and IndF) must set up in Mid-East Mandate ports or bases (1 unit per port/base max). The other 2 MF Residents set up in Egyptian ports, 1 unit per port.
Med Front Veterans have "V" inside an orange circle. These units can operate in the MF without penalty (no Maintenance) but are subject to Acclimatization upon initial entry (see 21.351). They are not restricted to the MF but must re-acclimatize if they leave and re-enter (change).
Med Front Expeditions have "E" inside the orange circle. These units can operate in the MF without penalty (no Desert Maintenance) only if Morocco Based (see 21.381).
Garrisons (static units) are restricted to Britain, Gibraltar, and Malta (units in the latter 2 fortresses are subject to special rules before the MF "opens", see 21.315 and 21.32). Two Home Guard garrison units arrive following French defeat.
20.32 US Belligerence. In Dec. 1941, the USA joins the Allies. US forces function as British units: no distinction is made regarding command, supply, production, etc.
20.33 Command & Supply. British/US HQs can command the movement of British/US forces only (exception: Allied SHQs can move Allied minor units, see 5.34).
London is the Allied Supply Origin, provided it can trace rail/sea supply to the Atlantic Ocean.
Chamberlain: The Allies cannot Declare War before W'39, nor during the Phony War (except: Norway, see DE NX).
20.34 Unit Restrictions.
Med Front: Until the Med Front opens (Italian belligerence), only MF Residents can occupy the Med Front, and only the Fortress Garrisons can occupy Malta/Gibraltar.
French Colonies: While France is undefeated, British forces cannot enter French North Africa (FNA), unless Axis units have entered first.
Red Army: Allied units (blue blocks) cannot enter a hex containing Soviet units (red blocks).
NOTE: Allied/Soviet territory is common for command, supply, and movement purposes. Units can enter hexes controlled (but not occupied) by the other, but this never alters its ownership for PP purposes.
20.35 Full Motorization. British/US infantry and amphibious units are fully motorized, moving 3 hexes in Dry weather.
20.36 Allied Betrayal. Allied (not Soviet) Declarations of War upon neutrals normally constitute Betrayal (see 16.41): all future pro-Allied Alliance Reactions are cancelled, and +1 is added to all future Allied (but not Soviet!) Diplomatic Event dierolls (making success less likely).
Exceptions: the following Allied DoWs are not considered Betrayal if the conditions specified below are in effect:
- DoW on Norway: DE NX in effect.
- DoW on a ME Mandate (20.92): DE ME has occurred.
- DoW on a Cooperating Axis Minor: DE 2F in effect.
Sidebar: Commonwealth Forces. While British soldiers were respected by the Germans for their defensive staunchness, Commonwealth troops were well regarded for their attacking prowess. There was great selflessness in the submission of Commonwealth forces to British command, despite serious differences in strategic outlook and style.
Sidebar: The US Army. The strengths of the US Army were logistics, firepower, and organization, with artillery, air, and logistical support on a level unapproached by any other army. Common language aside, the outstanding level of cooperation achieved with Britain was due in no small part to Eisenhower, and also to the personal qualities of the British commanders.
Sidebar: Med Front Units (as printed). MF Residents (British): ME THQ; WDF Mech Corps; PalF Infantry BrGroup; HabF Mech BrGroup; 1 Indian Infantry BrGroup; ANZ Infantry Corps [reinforcement]. MF Veterans (British): 21 AG HQ; 13 Mech Corps; 10 Infantry Corps; 30 Armor Corps. MF Expeditions: AF SHQ [British]; 15 AG HQ [British]; 5 Infantry Corps [British]; 2 Para Corps [British]; SHAEF US SHQ; 2 US Amphib Corps; 6 US Amphib Corps.
Sidebar: North Front Units (as printed). NF Expeditions: *NExp Infantry BrGroup [after FR]; *HA Static BrGroup [after FR]; *TA Static BrGroup [after FR]; 1 Cdn Mech Corps [after 2F]; 2 Cdn Mech Corps [after 2F]. * Restricted to Britain/NF.
Sidebar: Britain Stands Alone. Once France is defeated, the Allies must walk a very fine line to successfully defend both Britain and the Mid East. They have very limited offensive potential until the US enters the war, and even then the buildup is excruciatingly slow.
20.4 France
France is an Allied major power. It includes Corsica and controls French North Africa (Tunis, Algeria, Morocco, W. Africa).
If France is defeated, Vichy (20.48) or Free France (20.49) comes into being. These successor states can use surviving French units, but follow distinct rules.
French North Africa (FNA): Control of a Colonial Capital confers control over its territory (but Conquest applies, 16.92).
| FNA Colony | Capital |
|---|---|
| Morocco | Casablanca |
| Algeria | Algiers |
| Tunisia | Tunisia |
Upon French defeat (20.47) control of FNA capitals passes to the Allies, Axis, or Vichy depending on how defeat occurs.
20.41 French Forces. French WF units have purple/red labels. They are restricted (16.311) to France, Belgium and nations adjacent to them. At least one unit must start in each French major city. Eliminated French units can be rebuilt in any French major city.
French Army Artillery: French infantry units, due to their size (armies) and strong artillery, have DF defensive firepower. Offensive firepower remains SF.
Sedan Appendix: One French unit can occupy the Phillippeville/Sedan hex of neutral Belgium. This unit is subject to Belgian Surprise.
Maginot Line: The three (3) French fort units must be deployed in Metz, Strasbourg, and Mulhouse and cannot be moved. They lose all special fort unit abilities while unsupplied.
MF Residents: French units with orange circles containing "R" on the labels. They are restricted to the Med Front, but exempt from Desert Maintenance. They are initially deployed in or adjacent to FNA ports, at least one unit per colony.
20.42 Command & Supply.
Command Coordination: Only French HQs can move French units, and they can move French units only (exception: GQG SHQ can also move Allied minor units). See 5.34.
Gamelin: in the fortnight that Belgium is Surprised (20.16), Allied HQs in France are disrupted and cannot Blitz.
National Supply: the French trace National Supply (10.2) to Paris and thence to London.
20.43 Phony War. The Axis Peace Offer DE (following Polish defeat) begins the Phony War. During Phony War, the ALLIES can neither Declare War nor build more than 1 French cv/month.
Phony War ends upon AXIS entry into France/Belgium/Holland, ALLIED control of a City/Resource hex within Germany, or Soviet Emergency (DE SE).
20.44 French Morale. France is demoralized (Axis POLITICS) when Poland is defeated and the AXIS controls a French/Belgian major city, OR Maginot Line hex.
Effect: All French HQs are permanently disrupted, its infantry reverts to SF/SF (the Artillery effect is lost), and Allied Solidarity (below) must be checked.
20.45 Allied Solidarity. Once France is demoralized, Allied Solidarity is checked in that and each subsequent Axis POLITICS phase.
Solidarity depends on the size of the British Expeditionary Force (BEF), defined as the number of British units in (or eliminated in) France/Belgium. BEF units in/adjacent to AXIS controlled hexes or Belgium count double.
Procedure: During AXIS Politics, the Axis player announces "solidarity check"; the Allies state BEF size. The Axis rolls one die: if the result is greater than or equal to the BEF, Solidarity fails.
On the first failure, the Petain Regime takes over France. If it fails a second time, France must offer Armistice in the next Allied POLITICS.
20.46 French Armistice. Once per game, the Allies can offer French Armistice during Allied POLITICS, seeking negotiated peace in France (may be forced, see above).
The Axis must immediately either accept or reject Armistice.
Acceptance: France is defeated -- all units are eliminated, and a new neutral nation, Vichy, is created from part of France (see 20.48). The rest, Occupied France, becomes Axis upon Conquest (see 16.92).
Rejection: France is defeated and Free France is created (see 20.49). Anglo-French Union is declared, and all remaining French units convert to Free French.
Sidebar: Allied Solidarity Example. Brussels is captured by the Axis during May I, 1940. During Axis Politics, the French become Demoralized. In Allied Politics, Allied Solidarity must be checked. 4 British units are in France, 3 of which are Frontline. The Allies are solid, (BEF =7) so no Solidarity dieroll is required.
Sidebar: The Maginot Line. The location of the Maginot Line fortifications was well known before the war. Unlike several German-held fortifications in the war, which survived isolation for lengthy periods, the Maginot Line surrendered once surrounded.
Sidebar: French Artillery. French infantry units in EuF are armies, not corps. Unlike other armies in the game (e.g., Italian, Soviet, minor power) these are large, powerful armies with excellent artillery, considered the equal of any in Europe. Defensively minded and slow, they proved vulnerable to Blitzkrieg. Accordingly, they are represented as 4cv units with DF defensive firepower.
Sidebar: Phony War. Grievously damaged in WWI, France went reluctantly to war over Poland, opposing aggressive Allied action in hopes Germany would remain defensive in the West. When Hitler followed his quick Polish victory with an offer to quit hostilities based on accepting Poland's extinction, many French saw nothing to gain (and much to lose) by continuing the struggle. As a result, the French Army improved little if any over that winter.
Sidebar: French Armistice. As French National Supply becomes untenable, failure to offer Armistice risks the loss of FNA as well as France. Once National Supply is lost, all French units (including MF) begin dying of attrition. After the last unit dies, France is Defeated in the next Axis Politics phase, allowing the Allies an opportunity to Sea Invade into FNA ports (now Axis controlled) before the Axis can occupy them (by Sea Movement) in their ensuing turn. A struggle for FNA will likely follow.
Accepting Armistice eliminates the French army at once, but guarantees a Vichy-defended "soft spot" for later Allied invasion in French North Africa. It also complicates the process of Spain Joins the Axis (as Vichy must be Betrayed).
Rejection means that French troops become Free French (effectively British troops), and can be evacuated to North Africa or Britain by sea. This usually means a stronger Allied presence in North Africa, though Spanish involvement, which becomes more possible, may offset this.
20.47 French Defeat. France is defeated once Armistice is either accepted or rejected (with Vichy or Free France, respectively, becoming its successor state). It is also defeated if the Capital and all units are lost (see 16.92).
Upon French defeat:
- (Italy neutral) DE IX (Italy Joins AXIS) is mandatory for the Axis next Diplomacy phase.
- British units can now enter FNA.
- The two (2) British Home Guard units arrive next PRODUCTION.
- Use the second figure in each cell of the Alliance Reaction table.
- Axis DE RB becomes possible.
- Occupied France (see below) can Revolt (16.73) once exploited.
Arab Nationalism: If France is defeated (16.9) without an Armistice offer, all FNA colonies immediately become Axis controlled, except where Allied units/ZOCs are located.
Sidebar: French Defeat. Retention of its overseas empire was one of France's main reasons for the Armistice settlement with Germany.
Sidebar: Mussolini the Jackal. Despite the Pact of Steel with Germany, and his extensive territorial ambitions, Mussolini understood Italy's military and naval inferiority to France and had no intention of fighting the Allies until the military balance was favorable. The rapid collapse of France surprised all of Europe, but Mussolini was quick to attack France once it was clear that his Mediterranean rival was doomed. With France out of the way, no Balkan or Mediterranean power could match Italy, and the empire building could begin. Jealous of German successes, Mussolini could not have been restrained by German "advice" (hence automatic belligerence).
Sidebar: Syria. In reality Syria was a Vichy colony, but its overt aid to Germany provoked Allied invasion and conquest, without any effect on Allied-Vichy relations. So in EuF, Syria is treated as an independent ME Mandate.
20.48 Vichy
If Armistice is accepted, Vichy is created from part of France. Vichy is initially a neutral minor power (capital Lyon), Cooperating with the Axis (see 16.2). As long as Vichy remains neutral, controlled seas (Gulf of Lyon, West Mediterranean, and Tyrrhenian Sea) also remain neutral.
20.481 Vichy Territory. Vichy territory is shown on the map, and also includes Corsica. Vichy retains control of French North Africa (Morocco, Algeria, Tunisia, & W. Africa).
Withdrawal: Upon Armistice, all Axis & Allied units within Vichy territory must immediately Withdraw (16.721) to a controlled hex bordering Vichy territory (no command needed and unit speed is irrelevant). Subsequent entry into Vichy territory requires a Declaration of War.
Occupied France: The remainder of France (aside from Vichy territory). Control is not affected by French defeat.
20.482 Vichy Cooperation. As a Cooperating neutral (16.2), Vichy's production (4 PPs with Tunis) is included into Axis WF Production.
Axis forces can move or trace supply through Vichy territory by rail only (cannot use ports). They cannot remain within Vichy territory without a prior Declaration of War (and this would constitute Betrayal).
20.483 Vichy Forces. As a Cooperating neutral, Vichy forces are stood upright on the Pro-Axis Minor OB card to show that they are buildable but not eligible for Peacetime Production (Vichy PPs are ceded to the Axis).
20.484 Vichy Belligerence. If the ALLIES Declare War on Vichy, it joins the AXIS (use black block Vichy units). The Med Front Residents set up in/adjacent to FNA ports, at least 1 unit/FNA Colony (see 20.4). The other 2 units set up in European Vichy territory.
If the AXIS Declares War on Vichy, Vichy joins the ALLIES as Free French (see 20.49). Its units (blue block Vichy units) set up as above.
NOTE: An Axis DoW on Vichy is Betrayal, and also puts France in Revolt (see 16.731).
Vichy can also join the ALLIES via Allied DE VF if the Allies successfully invade Occupied France (setup as above).
20.485 Vichy National Supply. The Vichy capital, Lyon, must trace National Supply (10.2) normally.
A FNA colonial capital (20.4) can also act as national capital for Vichy MF Residents (only), provided it can trace National Supply (eg, via Spain).
20.486 Demoralization. Vichy becomes demoralized if Libya is Allied controlled or the Allied 2F DE occurs (see 16.71).
Ambivalence (16.711): Demoralized Vichy units only Repulse Allied Assaults on a DR of '1' (see 7.61). They can also Capitulate (7.7) to Allied units in combat: if a US unit rolls 1 or 2 in combat, all Vichy units in that battle are eliminated. British units obtain the same result on dierolls of 1.
20.487 Vichy Surrender. If demoralized, Vichy may Surrender (see 16.81) if the Allies have captured any Vichy ports (including FNA ports).
In the next Production following Vichy Surrender, the Free French 2 Mtn unit (Algiers or Tunis) appears as a Volunteer reinforcement unit.
Sidebar: Vichy Forces. Under Armistice terms, Vichy was limited to a 100,000-man domestic army, but could retain its existing colonial forces.
Sidebar: Vichy Surrender. When the Torch invasion landed in Morocco and Algeria, there was considerable confusion among the local Vichy commanders as to their response. The Allies had made surreptitious approaches to "sympathetic" Vichy generals; some did what they could to aid the invaders, some resisted fiercely, and others sat on the fence pending "orders" from higher up. Following the consolidation of the Torch landings, few Frenchmen wanted to continue fighting for the Nazi regime. All resistance ceased within a few days.
NOTE (sidebar): After Vichy Surrender the FF 2 mountain unit (MF Veteran) arrives in Algiers/Tunis as an Allied reinforcement.
Sidebar: Vichy Capitulation upon Repulse. Allied repulse of a Vichy assault (i.e., on a DR 1) can also result in Capitulation.
20.49 Free France
20.491 Anglo-French Union. If Armistice is rejected, Anglo-French Union (AFU) is declared:
- France is defeated (see 20.47). Control of French territory is unchanged (Conquest applies).
- Free France, a new nation united with Britain, is created.
- Surviving French units convert to Free French (see 20.492).
- British units can now enter FNA.
- Axis Diplomatic Event IU (Italy Unleashed) becomes possible.
20.492 French Converts. Upon AFU, all surviving French units (including HQs) convert to Free French (20.493). They remain in play but cannot be rebuilt if eliminated.
20.493 Free French Forces. Free French (FF) units are effectively British/US units. They trace Rail/Sea Supply directly to London and are no longer restricted to France/Belgium and nations adjacent to them.
Free French units can be of three different types:
- French Converts (blue/red labels) as above, when AFU occurs. They cannot be rebuilt if eliminated.
- Pro-Allied Vichy units (light blue/red labels) when the Axis Betrays Vichy (see 20.483). These units can be rebuilt if eliminated.
- FF reinforcements (light blue labels): (a) Following Vichy Surrender (to the Allies, see 16.81) the FF 2 mountain corps (MF Veteran) arrives in the next Production (Algiers or Tunis) as an Volunteer unit (16.84). (b) The FF 1 Tank and 3 Infantry corps arrive normally as Allied reinforcements in 1944.
These units also can be rebuilt.
Important: All FF units that are not already MF Residents are considered MF Expeditions, exempt from Desert Maintenance when Cape Town/Morocco Based (21.38), but still subject to MF Acclimatization.
20.494 Command and Supply. British/USA HQs can command Free French units and vice versa. FF forces (including French Converts) do not need National Supply: They trace supply directly to London (HQs must pay Overseas Supply costs when applicable – see 11.731).
Important: Converted French HQs can only activate in France, Belgium, FNA, or adjacent nations/colonies.
20.495 Production. Free French units are built with Allied PPs as for British/US units.
Exception: Converted (blue/red) French units cannot be rebuilt if eliminated.
Sidebar: Free France. The Free French under De Gaulle, headquartered in London, were denounced by Vichy France as traitors. Many were survivors of Dunkirk who elected to remain in the Allied armed forces rather than be repatriated home. The Free French attempted to seize Vichy West Africa (Dakar) in September 1940, but were repulsed by the Vichy French. They were later successful (with British assistance) in capturing Madagascar from Vichy forces, and participated in the liberation of Europe.
Sidebar: French HQs Integration. Given the command problems of the French army, language differences, and the personalities involved, incorporation of the French command structure into Allied forces could not have been effected.
20.6 Minor Powers
Minor powers are either neutral (and out of play) or belligerent (16.0). Cooperating powers (16.2) are still neutral.
Belligerent minors have joined a faction and their forces are in play on the map. They are termed Satellites, Co-belligerents, or Interventionists depending on the cause of belligerence (see 16.3).
Defeated minors cease to exist and no longer belong to any faction.
20.61 Minor Forces. Upon belligerence, the owning faction sets up minor power forces within their territory (stacking 1 unit per hex only).
Minor forces are depicted on the PRO-ALLIED or PRO-AXIS MINOR OB cards as of September 1939. Before setup Peacetime Production (16.32) must be applied, to account for buildup during the intervening time.
Restriction. Depending on the nature of belligerence, minor power units may be restricted (see 16.311).
20.62 Minor Command. National HQs (if any) can always command Minor power units.
Any Axis HQ can also command AXIS minor units for movement and combat support purposes.
ALLIED minor power units can also be commanded for Movement purposes by Allied SHQs (only). They can receive Combat Support from any active Allied HQ in Combat Support range.
20.63 National Supply. Minor (and major) powers require National Supply (see 10.21). Their capitals act as the Supply Source for national units only if they can trace National Supply to the faction Supply Origin (London or Berlin). If not, all national units are unsupplied.
20.64 Minor Production. Minor powers with Rail/Sea Supply to the faction Supply Origin contribute national PPs to the faction PP pool and build using that pool. Minor units build using the costs of their faction.
Isolated Minors with National Supply only (e.g., Poland/39, and also Finland under DE FL) spend/save PPs from a National PP pool, completely separate from their faction's PP pool.
Eliminated minor units can be rebuilt as cadres in their capitals.
Minor Power Labels (as printed; Nation Label/Center):
- Pro-Allied Minors (Blue Blocks): Poland Brown/Red; Belgium Light Orange/Red; Holland Orange/Blue; Denmark Red/White; Greece Light Blue/Blue; Yugoslavia Blue/Red; Norway Red/Blue; Spain (Repub.) Yellow/Orange* (* Red blocks); Switzerland White/Red.
- Pro-Axis Minors (Black Blocks): Rumania Light Blue/Blue; Hungary Light Pink/Pink; Bulgaria Light Yellow/Yellow; Portugal Violet/Tan; Vichy Light Purple/Red; Finland Light Grey/Light Blue; Spain (Nat) Yellow/Tan; Sweden Light Blue/Yellow; Turkey Green/Red; Iraq Red/Green; Syria Violet/Green; Persia Green/Red.
National Supply (sidebar). National Supply represents commercial transport routes and connection to the outside world. Without it, national morale fails, and defeat is not far away. In game terms, this provision prevents minor powers from "holing up" in the capital at double defense.
Sedan Appendix / Phillippeville (sidebar). French territory protrudes along the Meuse River into a large portion of this hex. Most of the river crossings are in French territory.
The Baltic States (sidebar). Lithuania, Latvia, and Estonia are considered a single nation (capital Riga) with no armed forces (units).
Spanish Civil War Linkage (sidebar). If a Spanish Civil War prequel game was played, see the 1936 SCW scenario Special Rule #10 for linking rules to EuroFront.
20.7 WF Minors. The following minor powers are Western Front minors (as printed).
20.71 Denmark. Denmark has no Peacetime Production.
20.72 Belgium. Eben Emael. The Belgian fort unit must be located in Liege. It loses all special fort abilities (effectively becoming infantry) when engaged by an airdropped enemy para unit.
Sedan Appendix. One French unit can be deployed in the Philippeville hex while Belgium is neutral. It is subject to Axis Surprise (20.16) if Belgium is surprised.
While Belgium is Surprised (20.16), Allied HQs in France are disrupted and cannot Blitz (see Gamelin 20.42).
20.73 Greece. Greece includes Crete. Greek National Supply cannot be traced via Turkey if the SOVIETS are belligerent (see also 10.21). Once exploited, Greece may Revolt (see 16.73) if entered by the Allies (or Soviets).
20.74 Spain. Spain includes Mallorca and controls Spanish Morocco. If Spain becomes belligerent, deploy Nationalist forces as per the PRO-AXIS NEUTRAL OB card (see sidebar for Spanish Civil War linkage). The THQ commands Spanish units only [anywhere].
MF Veterans ("V" in orange circle) can set up in Spanish Morocco (despite 21.321). The SFL unit can be released by Axis DE XR.
Fortress Spain. Spain can trace National Supply internally from Madrid (capital) to any friendly port in Spain. Once demoralized by DE 2F, Spain may Surrender (16.8) if Allied occupied. See also Spanish Volunteers 17.7.
20.75 Portugal. If demoralized (by DE 2F), Portuguese units become ambivalent (16.711). They repulse Allied assaults only on dierolls of 1 and may capitulate (7.7) to Allied forces.
20.76 Switzerland. Fortress Switzerland. Switzerland can trace National Supply internally from Bern (capital) to a fortress hex. It is defeated as a major power (Bern lost and all units eliminated), so 2 Swiss units can survive by Fortress Supply even after Bern is lost.
20.76 Yugoslavia. Yugoslavia fields 5 Allied units but only 3 Axis units (see sidebar), the only minor with different forces for each side.
Yugoslavia's Divided Loyalty (sidebar). Yugoslavia was a bitterly divided nation. Its Croatian and Slovenian armies declined to resist the German invasion, so only 5 (Serbian) of its 8 armies are available to the Allies. Symmetrically, only 3 of its 8 armies (Croat or Slovenian) are available to the Axis in case of Allied or Soviet invasion.
Note: the printed section numbers for Switzerland and Yugoslavia both read 20.76 in the source; they are reproduced as printed.
20.8 NF Minors. Scandinavian minors (Norway, Finland, Sweden) and the Norway/Finland/Sweden North Front rules are North Front material and are omitted from this transcription (see the edition note).
20.9 The MF Minors.
20.91 Turkey. Turkey is a pro-Axis minor power (not a ME Mandate). European Turkey is in the WF; Asiatic Turkey is in the EF. Turkish belligerence activates the East Front (21.22). Its units are MF Veterans [21.312], its infantry firing SF/DF within Turkey. Its fort unit goes in Kanakkale. Its THQ commands Turkish units only.
Fortress Turkey: Turkey can trace National Supply internally from Ankara to Istanbul.
20.92 The ME Mandates. The 4 MidEast Mandates listed below are Pro-Axis Minors (MF Resident units) that can join the Axis as its forces approach (DE ME). Allied attack before this is Betrayal. If defeated they must be garrisoned to avoid DE MR. No Axis DoWar is required to enter (see 21.396).
- Palestine (capital Jerusalem) is a British colony. It can join the Axis by DE MR (ME Rebellion) if not garrisoned.
- Syria (capital Damascus) is a normal Pro-Axis Minor neutral (20.6). It can join the Axis by DE ME (ME Uprising) as Axis forces approach.
- Iraq (capital Baghdad) is a British Protectorate (see 20.921). It can also join the Axis via DE ME (ME Uprising).
- Persia (capital Teheran) is another Protectorate that can join the Axis via DE ME (ME Uprising). Its units can enter N. PERSIA despite being MF Residents.
20.921 British Protectorates. Iraq and Persia are Cooperating (16.0) with the Allies: they have ceded PPs, Bases and Transit Rights (see below) to the Allies while still remaining 'neutral'. Even when occupied by the Soviets, they are considered to be Allied controlled.
Transit Rights: Allied units can move and trace supply via national railroads, roads, and ports. However, they cannot remain in national territory (outside Bases) without a prior Declaration of War. Occupation Limits apply.
Bases: One Allied unit occupying a Base hex (Habbinaya, Basra, or Abadan) is automatically supplied.
20.93 Saudi Arabia. Saudi Arabia is a British colony that is neither a Mid East Mandate nor a British Protectorate (no Uprisings or Rebellions possible). It has no forces.
Sidebar: Mid East Uprisings (DE ME). As the Axis tide of conquest reached Turkey and Egypt, the new Iraqi leader Rashid Ali surrounded a British airbase near Baghdad and demanded British withdrawal from Iraq. In Syria, Vichy General Dentz allowed the Luftwaffe to occupy airbases in support. A hastily assembled British brigade force drove east from Palestine, relieved the airbase and entered Baghdad. This was followed in the next few months by successful offensives into Syria and (with the Soviets) Persia, which re-secured the vital Mid East oil supplies and supply routes to Russia. ME Uprisings become possible once the Balkans are Pacified (17.4) and more likely as the Axis advances nearer Suez.
Sidebar: Mid East Rebellions (DE MR). ME Mandates that are Allied controlled (either from being colonies or after a defeated Uprising) may Rebel if there is no Allied (or Soviet) garrison unit present. The 2cv British MF mech and infantry groups are well suited to this purpose.
Sidebar: Syria. Although a colony of France and later of Vichy, Syria is considered an independent ME Mandate in EuroFront, completely separate from both France and Vichy. When the Iraqi rebellion began shortly after Crete fell, General Dentz of Syria allowed Luftwaffe planes to land in Syria and bomb British positions from there. After the Allies had regained control of Iraq they promptly invaded and subdued Dentz's Syria. Despite this campaign, Vichy France raised no protest and remained neutral with respect to the Allies.
Sidebar: ME Mandates & Axis Liberation. These nations were nominally independent but really under British/French control and chafed under this pseudo-colonialism. For this reason they can rebel pro-Axis via ME/MU and do NOT resist Axis occupation if it occurs.
Sidebar: Abadan & Axis Oil Supply. Since Abadan is Allied controlled (base hex) it cannot be used as an Axis oil source unless it is captured.
21.0 The Fronts
Rules that differ between the four Fronts are summarized here.
Scope note: 21.1 West Front, 21.2 East Front and 21.4 North Front are EuroFront-only material and are omitted from this transcription (see the edition note). Section 21.3 (Med Front) follows.
21.3 The Med Front
The Med Front includes: North Africa (Morocco/Algeria/Tunisia/Libya/Egypt); the Mid East (Palestine/Syria/Iraq/Persia) except Northern Persia (that part north of the EF/MF line on the map); and the SOUTHERN ZONE (Sudan, Aden, Karachi, etc).
NOTE: European Turkey and all Mediterranean islands are in the WF. Asiatic Turkey and Northern Persia are in the EF.
Desert Zone: The portion of the MF covered with hexes (i.e., North Africa plus the Mid East). The Southern Zone is not part of the Desert Zone, though it contains some desert terrain.
21.31 MF Units
There are three types of Med Front units, defined by orange circles on their labels (listed in the sidebar).
21.311 MF Residents. MF Residents have "R" in an orange circle on their labels. They are permanently restricted to the Med Front but exempt from Desert Maintenance.
21.312 MF Veterans. MF Veterans have "V" in an orange circle on their labels. They are exempt from Desert Maintenance, but not restricted to the Med Front.
21.313 MF Expeditions. MF Expeditions have "E" in an orange circle on their labels. They are exempt from Desert Maintenance only if Morocco or Tunis/Istanbul Based (see 21.38).
21.314 MF Aliens. Units outside above 3 classes are MF Aliens. All MF Alien units occupying the Desert Zone must pay Desert Maintenance (see 21.372).
21.315 Fortress Garrisons. The Malta and Gibraltar static fortress garrisons are not MF units. They are restricted to these fortresses.
21.316 MF Prohibited Units. Siege Gun, Cavalry, SS, and Fort units cannot enter the MF.
Sidebar: MF Residents (as printed). Britain: ME THQ; WDF Mech Corps; ANZ Infantry Corps [MF reinf]; PalF Infantry Group; HabF Mech Group; Ind Infantry Group. Italy: CS THQ; 10I Infantry Army; Lib Static Army; 1EA Static Army; 20 Corps Mech Group [MF reinf]. French: N Af Infantry Army; Tun Static Army; Alg Static Army; Orn Static Army; Mor Static Army. Iraq: Iraqi Army. Syria: 1 Syr Army; 2 Syr Army. Palestine: Pal static irregulars. Persia (also allowed in N Persia/EF): 1 Per Army; 2 Per Army.
Sidebar: MF Veterans (as printed). Britain: 21 Army Group HQ; 10 Infantry Corps; 13 Mech Corps; 30 Armor Corps. Germany: Army Gp Afr HQ† [MF reinf]; DAK Armor Corps* [MF reinf]; LtAfr Mech Corps [MF reinf]; 2 Pa Static Corps [MF reinf]. († moves 3 in the MF. * elite armor.) Free French: 2 Mountain Corps [MF reinf]. Turkey: MK THQ; 1 Infantry Army; 2 Infantry Army; 3 Infantry Army; 4 Infantry Army; 5 Infantry Army; 6 Mtn Army; 7 Static Army; 8 Static Army; 9 Static Army; Tur Cavalry Corps; Kan Fortress Corps.
Sidebar: MF Expeditions (as printed). Britain: AF SHQ; 15 Army Group HQ; 5 Infantry Corps; 2 Para Corps. USA: SHAEF SHQ; 2 Amphibious Corps; 6 Amphibious Corps. Free France: WF French units (blue/red labels). Germany: Army Group G HQ; Sth Armor Corps; 90 Infantry Corps; 90 Static Corps. Italy: 8 Infantry Army. Malta: Note that Air Assaults versus fortress hexes are Repulsed on DR 1-3.
Sidebar: South Africa Basing. Units in South Africa have Cape Town Basing.
21.32 MF Activation
21.321 MF Inactive. Before Med Front Activation:
- Only MF Residents are allowed inside the MF, and only the British fortress garrisons can occupy Gibraltar/Malta.
- These units can be built with WF PPs, but at double MF costs.
- MF Reinforcements cannot be advanced.
21.322 MF Activation. The Med Front is activated by Italian belligerence. After MF Activation:
- Units in the MF must thenceforth be built with MF PPs at MF costs (except see 21.38 MF Basing).
- Next Production, both Axis and Allies make initial MF Allocations (21.37), and the British ANZ and Italian 20 Corps MF reinforcement units arrive.
21.33 MF Weather
MF Weather is always Dry. No separate MF weather die-roll is made, but WF weather can result in Mediterranean Basin Storms.
21.34 MF Command & Supply
The Italian CS and Allied ME THQs can command units within the MF only. Alien HQs are disrupted in the MF.
The ME THQ can support combat in the Southern Zone (range = CV).
MF Supply Lines (10.4) can be no longer than one hex.
21.35 MF Movement
21.351 Acclimatization. All units entering the Med Front from another front immediately lose 2 cv Acclimatization (this excludes reinforcements arriving in the MF).
NOTE: Units repulsed attempting to enter the MF by assault do not "arrive" and do not Acclimatize until they succeed (i.e., after Defensive Fire but before they fire).
All acclimatized units that leave the MF must re-acclimatize on re-entry.
IMPORTANT: N. Africa Victory (17.61) cancels Acclimatization for that side.
21.352 Road Movement. Roads exist in the MF where shown and also along all rail lines.
Strategic Road Movement is made along MF roads: one Supreme Move can move a unit double its normal distance, if it follows a road and remains within friendly territory for its entire move. Units can only make one strategic Road Move per turn (no linking).
Units cannot engage or retreat by [strategic] Road Movement, but can disengage (counts against hexside limit).
21.353 Off Road Movement. Units moving off-road in the MF (for any part of their move) have their speed reduced by 1 (static units cannot leave the road in the MF).
21.354 Desert Zone Stacking [change]. Units in the MF Desert Zone are limited to maximum 3 stacking in all terrain (except 2 stacking in mountains).
21.36 MF Combat
In desert terrain, Armor fires TF/DF (DAK: QF/TF), and Mech fires DF/DF. Other firepower is unchanged.
The British ME THQ can support combat in the Southern Zone (range = CV).
21.37 MF Production
Prior to MF activation, MF building is paid for with WF PPs at double Extreme costs. After activation, MF Production is tracked separately.
IMPORTANT: MF City/Resource PPs are added to WF Production. Both the AXIS and ALLIES can Allocate WF Production to the Med Front. MF Allocations are increased / decreased 5 PPs at a time.
Initial Allocation. Once the MF is activated (21.322), the Allies and Axis must make their initial MF Allocations (0-15 PPs) next Production Phase (reducing their WF Production by that amount).
Players can increase their MF Allocation to 15 PPs during any Production Phase.
Raising Allocations above 15 PPs can only be made at Season Breaks (Jun & Dec), and always in increments of 5PPs. No increases are allowed if the MF has been active less than 3 months.
De-Allocations. MF Allocations can be reduced by 5 PPs during any Production Phase. De-allocated MF PPs revert immediately to the West Front.
PP Transfers. Players can Transfer 10 WF PPs to the MF: half this (less Shipping Losses) arrives 1 month later.
21.371 Shipping Losses. All Allocated and Transferred PPs arriving in the Med Front are subject to Shipping Losses.
To resolve Shipping Losses, roll one die for every 5 PPs arriving in the Med Front that month. For example, for 15 PPs Allocated, plus one 5 PP Transfer (10 PPs sent), 4 dice are rolled. The dieroll total is the number of PPs arriving safely. This cannot exceed the PPs being shipped.
Note: Axis Shipping Losses are cancelled if they control Malta, Suez, or Gibraltar (see 17.5). Naval Supremacy does not cancel Shipping Losses.
21.372 Desert Maintenance. Each MF Alien unit in the MF Desert Zone (21.3) costs 5 PPs per month Desert Maintenance. This is deducted from MF Allocated PPs before Shipping Losses are resolved (deduct 1 die per maintained unit). MF Expeditions without MF Basing (21.38) also pay Desert Maintenance. If PPs arriving in the MF are insufficient to pay Desert Maintenance, excess units are disbanded (owner's choice).
Desert Victory (17.62) cancels Desert Maintenance for that side.
MF Expeditions (21.313) are exempt from Desert Maintenance if they have Morocco (Allies) or Tunis/Istanbul (Axis) Basing. See 21.38.
21.373 MF Building. All units in the MF build/rebuild with MF PPs using EXTREME COSTS, which are about 50% higher than normal. See UNIT DATA (p. 96). Only MF units eliminated in the MF are rebuildable there as cadres.
MF Victory (21.395) allows the victor to use WF PPs and WF Costs.
IMPORTANT: with MF Basing (21.38) units in the MF may also build with WF PPs under limited circumstances.
NOTE: Prior to MF Activation (Italian belligerence), units in the MF can only be built at double costs (see 21.321).
Example: Units in the British Empire Box cost double to build before MF Activation. This area was not a war priority before Italian belligerence.
21.374 MF Arrival Locations. Only MF Residents and MF Veterans can arrive in the MF as reinforcements.
Axis units (cadres or reinforcements) can arrive only in Tripoli. Allied units can arrive in any friendly MF major port.
21.38 MF Basing
21.381 Allied Cape Town Basing. Allied units that can only trace supply from or via SOUTH AFRICA must build with MF PPs. They use MF costs if located in the MF, and ALLIED costs if elsewhere (e.g., Greece 1941).
21.382 Allied Morocco Basing. Allied units in the MF that can trace supply to a rail line connected to Casablanca or Tangiers (or directly to those ports) and on by sea to London, can use a limited amount of WF PPs for building (at MF costs, no Shipping Losses apply).
Important: The total WF PP expenditure on Morocco-based units cannot exceed half the current Allied MF Allocation.
21.383 Allied Dual Basing. Allied units in the MF that can trace supply by both the above methods can build using WF and/or MF PPs in any combination.
21.384 Axis Standard Basing. Axis units in the MF tracing supply by any route build using MF PPs / MF costs.
21.385 Axis Tunis/Istanbul Basing. Axis units in the MF that can trace supply to a rail line connected to Tunis or Istanbul (or directly to those cities) and then on to Berlin by Rail Line/Sea Lane can use a limited amount of WF PPs for building (at MF costs, no Shipping Losses apply).
Important: Total Axis WF PPs spent on Tunis/Istanbul-based units cannot exceed half the current Axis MF Allocation.
21.386 Axis Dual Basing. Axis units in the MF that can trace supply by both the above methods (Standard and Tunis/Istanbul) can build using WF and/or MF PPs in any combination, at MF costs.
21.39 MF Special Rules.
21.391 MF Sea Invasions.
- Sea Invasions between MF locations are not allowed.
- Sea Invasions into/out of the MF must start from a major port, and land in any port.
21.392 MF Paradrops. Paradrops are prohibited in the MF unless combined with a sea invasion into the same hex.
21.393 MF Airstrikes.
- Axis Airpower is DF maximum.
- Only MF HQs can make Airstrikes into the MF from another front.
21.394 Suez Canal.
- Naval operations through the Suez Canal are governed by Straits rules (see 15.12). The Canal is treated as a river for River Assaults, but Repulse is '1' only.
21.395 MF Control. Control of all six (6) major ports in North Africa (Suez, Alexandria, Benghazi, Tripoli, Tunis, Algiers), constituting North Africa Victory (17.61), confers a benefit.
Also controlling Basra constitutes Desert Victory (17.62) and adding Karachi gains MedFront Victory (17.63), which confer added benefits.
21.396 ME Mandates/Axis Entry. Axis units are allowed free entry into ME Mandates. They can enter without a Declaration of War and without committing Betrayal. The ME Mandate does not become belligerent as a result and no national units appear (though they may appear subsequently as a result of DE ME, see below).
21.397 MF Bases. One unit in a friendly base hex is automatically supplied (i.e., has a ZOC). If more than one unit is present, neither is automatically supplied.
Unoccupied base hexes become national territory upon Uprising or Rebellion (revert to being bases if re-occupied).
21.398 ME Uprisings. ME Uprisings (DE ME) can occur once the Balkans are Pacified (17.4) and all hexes of Greece/Bulgaria are Axis controlled. ME Mandates Iraq, Syria and Persia may suddenly join the Axis, creating problems for the Allies.
NOTE: If DE ME occurs, Cooperation with the Allies terminates: all national territory not controlled by Allied units/ZOCs (including bases) becomes Axis-controlled.
21.399 ME Rebellions. ME Rebellions (DE MR) are possible when Allied-controlled ME Mandates do not contain an Allied garrison unit. A pro-Axis unit appears in its capital.
Sidebar: East Africa Campaign. An East African campaign can also present a problem to the overstretched British in the Mid East. Failure to deal with Ethiopia presents three dangers. Firstly the Italian 1EA can leave its base in Ethiopia and move into Somaliland, cutting the Red Sea straits. This blocks Allied sea movement into Egypt and threatens a further move to Aden, further complicating the situation. Secondly, if the Axis captures Alexandria, Allied units retreating up the Nile into Sudan will become reduced to Siege Supply if engaged there. Thirdly, closing the straits leaves Allied units in the MF reliant on a single road supply line via Palestine and Iraq to the Persian Gulf, easily cut by ME Uprising. However, the Italian 1EA is unsupplied outside its Ethiopian base, so it must return there immediately upon capturing Somaliland or die. A British unit sent to Aden can reopen the straits by crossing them to liberate Somaliland. If Aden is also lost, things become more difficult.
Sidebar: ME Uprisings. ME Uprisings occurring at a crucial time also present serious problems to the Allies. It is critical to understand how National Supply and ME Bases work in this regard. National Supply is traceable by rail or sea, but NOT by road. For Axis ME Mandates it must reach Berlin via the Balkans. British units in bases retain their ZOCs, which can help in cutting National Supply. An unoccupied base becomes national territory upon Uprising/Rebellion.
Iraq must trace National Supply either via Mosul - Turkey or via Basra - Persian Gulf - Abadan - Persia - Turkey. The Allies can quickly defeat an Iraqi Uprising by cutting both routes, which requires pre-placed units in both Habbinaya and Basra.
Persia must trace National Supply via Turkey. The Soviets can easily cut this. Syria must also trace via Turkey. Two Allied units are normally required to cut this route while tying down the Syrians.
Sidebar: ME Rebellions. ME Rebellions can occur whenever Allied controlled ME Mandates (Iraq/ Syria/ Persia once conquered, or Palestine at any time) are left ungarrisoned. In the pressure of events this risk must occasionally be taken, but the Allies will find it unprofitable to take unnecessary chances with ME Rebellions. Rebellions can be defeated like Uprisings. Palestine needs National Supply via Syria, but its 0 cv unit is easily overcome.
Sidebar: Cape Town Basing (Greece 1941). Allied units operating in Greece in 1941 were dependent on a supply line through the Suez Canal, Red Sea, Indian Ocean, Cape Town, Atlantic Ocean to London. This is represented in the game by Cape Town Basing for units in the West Front (see 21.14).
Sidebar: Morocco and Tunis Basing (as printed). Northwest Africa has a wetter climate, larger population base, and considerably better infrastructure than Libya/Egypt, including a better rail net. It also has shorter and more defensible shipping lanes for both sides: Tunis to Sicily, and Casablanca to London. Therefore, both sides are allowed to "shunt" a limited amount of WF PPs directly into FNA, provided they have short, secure supply lines, Axis via Tunis/Istanbul, and Allies via Casablanca (or Tangiers).
Sidebar: Tunis Basing Example (as printed). With Vichy Cooperating, Tunis Basing is still not possible because ports of a Cooperating nation cannot be used (only rail lines). If Vichy joins the Axis (or if the Axis conquers Tunisia) Tunis Basing becomes possible. Example: Vichy has joined the Axis, enabling Tunis Basing. Axis armor unit 'G' in Mareth is adjacent to a friendly rail line connecting to Tunis. As this unit is an MF Expedition, it is now free to operate in the MF without incurring Desert Maintenance. During Production the Axis can spend WF PPs not exceeding half its current MF Allocation on units with Tunis Basing. Assuming this is 20 PPs, the Axis can spend 10 WF PPs to build the armor, adding an additional 2 MF PPs to complete its 12 PP step cost in the MF. An Axis unit in Tripoli W1 is never eligible for Tunis Basing because it is two hexes from the Gabes railhead and thus cannot trace a Supply Line to a rail line connected to Tunis.
22.0 Scenarios
22.1 Scenarios
Scenarios specify game starting conditions. The Campaign Game starts in September, 1939. The other Scenarios begin in Summers (June I, unless otherwise mentioned in Scenario Special rules) of the succeeding years.
The full 1939-45 EuroFront Campaign Game plays in ±60 hours, comparatively quickly for this size of game. Team play can speed things up considerably. The late-war Scenarios are naturally shorter.
22.11 Short Games. For those with limited time or space, some shorter and smaller EuroFront mini-games are offered (see the 1940 and 1944 Scenarios).
22.2 Scenario Setup
See section 3.0 STARTING PLAY regarding game options and arranging forces on OB CARDS.
All Scenarios state Starting Forces and controlled territory for each faction, which faction must set up first, and which has the Initiative (first turn).
To save time, players should set up simultaneously, the faction setting up last having the last adjustment.
NOTE: Setup requirements do not imply that units must remain in that location.
All Scenarios also list Reinforcement units that enter the game in succeeding game months (those arriving in the first month must setup in valid Arrival Locations). The GAME RECORD sheets also prompt players for reinforcement arrival.
Available Forces. Assuming all units have been located on the relevant OB Cards, units already "in play" on any given starting date are easily determined, and upcoming reinforcements are arranged in order. Example: 1940 Available Forces include 1939 Starting Forces plus 1939 Reinforcements.
To begin a EuroFront scenario, players select their starting units from Available Forces. Then, referring to the Starting Forces charts for that Scenario, each side then assigns the proper number and strength (CV) of each unit type to the various fronts.
Unit CV can be assigned as desired, so long as the total CV of each unit type matches that given for that Front (but SS unit cv cannot be greater than the average for that unit type). Units left over are currently eliminated (but can be rebuilt).
Deploy these forces on each Front as instructed in the Scenario rules. Record the current Production Levels and Airpower on each Front.
Note all scenario Special Rules, and begin the first fortnight of play (omitting PRODUCTION and DIPLOMACY phases as usual).
Historical Setups. Follow the Historical Setup directions, consulting the Historical OB (if any).
Semi-Historical Setups. Available Forces at any given starting date are easily determined using the relevant OB Cards, and upcoming reinforcements are arranged in order. Players select their starting units from Available Forces, assigning unit cv as desired, so long as number of units and a total CV for each unit-type agree with the Starting Forces table. Deploy starting forces as directed by Semi-Historical Setup instructions. Surplus Available Forces units that are not included in listed Starting Forces have been eliminated in a previous scenario, but are eligible for rebuilding.
Free Setups. These setups allow players more flexibility in unit deployment, at the cost of historical accuracy. Determine Available Forces as above and deploy them as desired.
Free Setup Example. If a scenario lists Armor: 5 units / 13 cv, the player can set any individual armor unit strengths desired, as long as there are 5 armor units totaling 13 cv.
SS Units & Free Setups. SS units cannot start at cv greater than average cv [round down] for that German unit-type on that Front.
Game Start. In all Scenarios, Production and Diplomacy are omitted from the first month of play. They have already been factored into the start data.
22.3 Startlines
Scenario Startlines separate the territories of the combatants (where these are not national frontiers). Most Startlines are printed on the maps. All Startlines are described in the Scenario instructions.
22.31 Frontline Hexes. Hexes bordering a Startline are termed Frontline hexes. To begin a Scenario, players usually must occupy all Frontline hexes with at least 1 unit. Otherwise players deploy forces as desired within friendly territory (in supplied or fortress, or base locations only).
Note: Only MF Frontline road hexes must be occupied on setup.
22.4 Continuity
Season Breaks occur when a new Summer or Winter Season begins (just before December or June Production). Certain game parameters, such as Basic Production and Airpower may change at Season Breaks. See 3.3.
Scope note: the 1939, 1940 (including 1940B: Britain Stands Alone), 1941, 1943 and 1944 scenarios are EuroFront campaign scenarios whose setups are not transcribed here. The 1942 Axis High Tide scenario (the Desert-campaign scenario) and the 1936 Spanish Civil War scenario are transcribed below.
Scenario: 1942 Axis High Tide
Starting Forces table (as printed, page 78; the MED column is the Med Front portion, the other columns are EuroFront fronts and are reproduced for reference only; superscript footnote numerals are run together with the figures as printed):
                    1942: AXIS HIGH TIDE
                               AXIS                                                 SOVIET                                ALLIED
                    EAST1           WEST           MED           NORTH                   EAST           NOR                     WEST           MED
              Unit     CV      Unit   CV      Unit   CV   Unit      CV              Unit     CV    Unit   CV              Unit      CV    Unit     CV
HQs            51      12       42     6       23     4    24        6   HQs         61      11     1      0   HQs         21        5     22       4
Armor          11      38       2      2       1      3                  Armor        4       8                Armor                       1        3
Mech            3      10       1      2       1      4                  Mech         5       9                Mech        3        10     3        6
Infantry       29      88       6     12                     2      4    Infantry    28      88     5     10   Infantry    2         7     5       11
Mountain        1       4                                    2      7    Shock        4      12                Para        1         1
Para                            1       2                                Para                                  Static      63       11
Fort                            4       6                  1         1   Cavalry     4       10                Amphib      2         8
Static                          5       7                  3         6   Amphib      1        2
SAT Inf         2       8       5       9                  64       12   Mountain    2        4
SAT Static                      2       2                  14        1
IT Mech                         1       2      1      2
IT Infantry                     8      14      1      4
IT Static                       2       0      1      1

                                                                         BH R/P    0/1                         BH R/P    0/1
PPs            80      F35     12     (+5)6   30           --            PPs       60      (+6)2   --          PPs       17 (+10)4 35
Air Power      DF              DF             DF           DF            Air Power SF              SF          Air Power DF        DF
 1 Includes OKH                 2 Includes OKW                           1 Includes Stavka                     1 Includes AF     2 Incl ME II cv
 3 Includes Italian CS II cv    4 Finnish forces (NF & EF)               2 Basic Prod. rises by 6 PPs.         3 Garrisons & NF Expeditions.
 5 Finland = Isolated Minor 6 Basic Prod. +5 PPs                                                               4 Basic Prod rises by 10 PPs.
Reinforcement lists (as printed, page 78): Axis reinforcements JUN '42 to APR '43 (80 Inf Corps; 2 Para Corps*; 88 Inf Corps; Mech Group 'E'; 88 Corps; 65 Corps; 89 Fortress Corps; 89 Corps; 66 Corps; 1Para Corps; 84 Ftrs Corps; Army Grp 'C'; 87 Inf Corps; 85 Inf Corps; 87 Corps; 1ss Pzr Corps; 2ss Pzr Corps; Army Grp 'B'; 2 Para Corps; Pzr Group West; Pzr Group 'C'; 78 Cav Corps; 68 Inf Corps; *May arrive in the Med Front (Tripoli)). Allied reinforcements OCT '42 to APR '43 (US 6 Amph Corps and BH (US6); US 1 Army Gp; US 2 Amph Corps and BH (US2); US 3 Para Corps). Soviet reinforcements JUN '42 and JUL '42 (5 Gds Tank Army; 6 Gds Tank Army).
Scenario rules, 1942 Axis High Tide (as printed, page 79):
Setup (Semi-Historical).
- Axis. Germany, Italy, Rumania, Hungary, Bulgaria and Finland: controls Czechoslovakia, Poland, Denmark, Norway, Holland, Belgium, Occupied France, Yugoslavia, Albania, Greece, Libya west of the 1942 Startline, the Baltic States, and Russia west of the 1942 Startline. Rumanian 3A has been released (DE 3R). Finnish Limited War (FL) is in effect (Finland is an isolated minor using its own production).
- Note: Volkhov (EF) is a battle hex: the Axis and Soviets must deploy at least one unit there (Axis is Original Defender).
- Allies. Deploy first, but move second. Yugoslavia is in Revolt (Tito may arrive).
- BRITAIN: Most units may set up in Britain or Gibraltar. NF units (blue circles) set up in Britain and garrisons (tan circles) in Gibraltar or Malta, to which they are restricted. MF units (orange circle) set up in the MF, east of the 1942 Startline on/adjacent to a road. All Frontline road hexes must be occupied. One MF Alien sets up in India. Both MF HQs are 2cv.
- Britain controls Gibraltar, Malta, Libya east from Tobruk/Bir Hacheim, Egypt, Palestine, Syria, Iraq, S. Persia, Aden, Sudan, Ethiopia, Somaliland, Kenya, South Africa, Afghanistan and India. All 3 MidEast Uprisings (ME) have been defeated. Mid East Rebellion (MR) is possible in any ME Mandate that is not garrisoned. Axis DE RS (Rising Sun) is possible if India is not garrisoned. Yugoslavia, France and Greece are exploited (see Revolt 16.73).
- SOVIET UNION: The Soviets control Leningrad and all territory east of the S'42 Startline (see above re: Volkhov) and N. Persia. Finland Limited War (FL) and Great Patriotic War (SG) are in effect. Red Army Reforms (S1 & S2) are complete (HQs cost 10 PPs/step, cadres 20 PPs).
- GERMANY: Deploy in friendly territory, subject to Occupation Limits (20.132). All Frontline hexes must be occupied. The SiegeGun unit is activated. MF units (orange circle) set up in the MF, west of the 1942 Startline. All Frontline road hexes must be occupied. Both MF HQs are 2cv. NF units (blue circle) set up in the NF. German units in Finland are restricted to Petsamo and Oulu (DE FL in effect).
- ITALY: Units are restricted to inside or within one hex of Greater Italy. At least one unit must set up in France, Yugoslavia, Albania and Greece.
- MF Residents (orange circle) must deploy in the Med Front, to which they are restricted.
1942 Special Rules (as printed).
-
German Siege Guns. Beginning this scenario, the German 54th Infantry Corps (three dots within infantry symbol) has heavy Railroad Siege Guns attached. It fires TF versus fortresses (must be in Rail Supply), but cannot move/invade by sea.
-
Axis Satellite Demoralization. Allied DE 2F (Second Front) becomes possible this scenario, giving the Allies the initiative in the West / Med Fronts, and causing Axis Satellites and Vichy (but not Italy) to become demoralized (16.71) and subject to Surrender (16.8). Italy is demoralized by the loss of Libya, Albania, Sicily, Sardinia, or any Italian major city.
-
Morocco (Allies) or Tunis/Istanbul (Axis) Basing. Units in the MF that trace Supply Lines to a rail line connected to Casablanca/Tangiers (Allies) or to Tunis/Istanbul (Axis) have special privileges. See 21.36.
-
Vichy Demoralization and Torch. Once 2nd Front DE is in effect, Vichy is demoralized and ambivalent: its units only repulse Allied assaults on dieroll of '1' and may Capitulate (see 20.486), and Vichy may Surrender (20.487).
-
W '42 Scenario Transition (Dec/42). Winter table as printed: Production row "+5 • • +10 • +8" and Airpower row "SF SF DF DF DF DF", under the column headings WF / MF / EF for AXIS and ALLIED, with the SOVIET column alongside (see the printed page for exact cell placement). If the Med Front is active, Axis and Allied MF Allocations can be raised by 5 PPs. The Axis EF cannot be increased.
-
Winter Initiative. Because East Front initiative varies with the weather, the sequence of Player Turns in winters can vary. See 12.7 for details.
1942 Historical Commentary (as printed). The war in Europe still hangs in the balance. The Axis still has good prospects in the East, while the Allies remain relatively impotent in the West for the time being. The war in Africa remains undecided, although the American aid has begun to tilt the balance against the Axis, and Torch invasion forces are nearing readiness.
Note on the 1942 transcription: the table and special rules above are transcribed from the printed page; figures in the Starting Forces table are reproduced as printed in the layout. The Air Power and Production cells of the Winter Transition table are approximate readings of a multi-column layout and should be checked against page 79 before use.
Scenario: 1936 Spanish Civil War
Starting Forces (as printed, page 85):
| Unit type | Nationalists Unit | Nationalists CV | Republicans Unit | Republicans CV |
|---|---|---|---|---|
| HQs | 21 [1] | 4 | 21 [1] | 2 |
| Armor | • | • | • | • |
| Mech | • | • | • | • |
| Infantry | 6 | 10 | 4 | 6 |
| Static | 4 | 2 | 6 | 3 |
[1] Nationalists: includes JDN THQ. Republicans: includes FP THQ. [2] Nationalists: includes 4 PPs Foreign Aid. Republicans: plus 0-3 PPs Foreign Aid.
Reinforcements (as printed): Nationalists: DEC '36 BS Mech Corps* (Mech 1). Republicans: SEP '36 International Brigade† (Infantry 1); OCT '36 Pavlov Tank Corps* (Armor 1). * Arrives in a friendly port. † Arrives Albacete.
The Situation (as printed, page 85). The Spanish Nationalists have risen in revolt against the Republican government. Some units of the army and militia have sided with the rebellion, others remain loyal to the government, including those controlling the capital (Madrid) and the second largest city, Barcelona.
Portugal is aiding the rebellion and Lisbon acts as the Nationalist capital. Germany and Italy also support the Nationalists. France and the USSR support the Republicans.
The game begins in July 1936, which only has one fortnight. West Front weather applies. No special Med Front rules are used. Spanish Morocco is considered a West Front location in this scenario. Neither side needs National Supply.
IMPORTANT: No form of Seapower can be used in the SCW scenario.
The Map. Use only the WestFront southern map. Units can only enter Spain and Spanish Morocco. Portugal and France are in play only as supply sources. All other areas are out of play.
Within Spain, red cities and towns are loyal to the Republicans and black cities and towns are loyal to the Nationalists. This is important to play.
The Nationalists. Nationalist units are black blocks with yellow/brown labels. The Nationalist capital (and Supply Origin) is Lisbon (although no units can enter Portugal). The Nationalists always have the first turn.
The Republicans. Republican units are red blocks with yellow/orange labels. The Republican capital is Madrid. The Republicans always take the second turn.
SCW Historical Game. Deploy all units in the historical locations noted on the SCW O/B card. Railhead markers are placed in friendly controlled ports and French border hexes, Bayonne and Perpignan.
SCW Semi-Historical Game (Recommended). Deploy infantry and HQ units in the historical locations noted on the SCW O/B card.
Random Militia Deployment. Taking one static unit at a time (without revealing its cv), the owning player rolls 1 dice for its Region of appearance, and another dice for the City/Town within that region, according to the Militia Table. If that location already has a militia unit, roll again.
SCW Free Setup Game. The Nationalist player deploys his 3 Spanish Morocco units in separate cities there. Players then alternate placing one infantry or HQ unit at a time in a loyal city (Republicans go first). No more than four (4) units can start in a major city, two (2) per minor city, and one (1) per town.
When this has been done, complete Random Militia Deployment as above.
SCW Special Rules (as printed, page 86). Because this scenario reflects a civil war, several special rules altering the game system are in effect.
1) Hex Control. In the SCW, prior control of a hex has no meaning. Hex control is determined as follows.
Controlled Hexes:
- Occupied solely by friendly units or garrisons.
- Friendly battles (Original Defender).
- Unoccupied but in an undisputed friendly ZOC.
- Unoccupied and no ZOC present, but contains a loyal city or town.
Disputed Hexes: Unoccupied and contains a ZOC of both sides. Normal rules for Disputed hexes apply (e.g., units cannot disengage into them, rail through them, etc.).
Uncontrolled Hexes: Unoccupied and contains neither a ZOC nor a city/town. In the SCW, uncontrolled hexes are treated as friendly, except that units cannot disengage into them. Command, supply, and rail movement are allowed through uncontrolled hexes.
2) Garrisons. In the SCW, (as in most civil wars) territory control was confused. Use blank black and red blocks, placed flat, as garrisons. During Production, garrisons can be built for 1 PP in any controlled, supplied, unengaged hex.
Garrisons are not units: they cannot move, fight, or restrict movement. They simply control their own hex and exert a ZOC. They are immediately eliminated if an enemy unit enters their hex (need not stop) unless a friendly unit is also present. Unsupplied Garrisons continue to exist and control their hex, but lose their ZOC.
3) Foreign Aid. In addition to the 3 PPs they initially control (Madrid: 2 PPs; Barcelona 1 PP), the Republicans may also receive Foreign Aid from France and Russia.
French Aid: The Republicans receive intermittent and erratic Foreign Aid from France, varying between 0-2 PPs per month (initially 2 PPs). Each Production, the Republican player rolls one die for 1 PP of French Aid received. Place a RailHead marker on a controlled port or French border hex. 2 PPs of French Aid received: place two RailHead markers on controlled ports or French border hexes. 3-4: no change from previous month. 5-6: French Aid is reduced by 1 PP. Remove one RailHead marker (if any remain). French Aid. Place 0-2 Railhead markers in French border rail hexes (Bayonne/Perpignan) or in friendly port(s) for arriving French Aid.
Soviet Aid: The Republicans can also receive 1 PP of Soviet Foreign Aid each Production, provided they control a port (place a RailHead marker next to the selected port). Beginning S'37, however, Soviet aid is subject to Blockade (see #5).
Axis Aid: The Nationalists receive 4 PPs of Foreign Aid per month, 1 PP from Portugal, 1 PP from Italy, and 2 PPs from Germany. Axis Foreign Aid can arrive in Lisbon (where it is not subject to Blockade), or in a Nationalist controlled port (place RailHead marker).
4) Supply. The respective Capitals (Lisbon and Madrid) and/or External Supply (below) can act as the Supply Origin for SCW units. Neither side needs National Supply.
External Supply: Arriving Foreign Aid also provides External Supply to friendly units (Soviet and French Aid for the Republicans, and Axis Aid for the Nationalists). RailHead markers serve as External Supply Sources for SCW units.
Loyalty: Units defending Loyal cities and towns are immune to supply attrition: they can survive indefinitely without a supply line. However, these unsupplied units cannot be built during Production.
5) Blockade. Beginning S'37, sea-borne Foreign Aid/External Supply is subject to Blockade.
To begin Production, the Republican player selects a controlled port and rolls 1 dice to see if 1 PP of Soviet Aid arrives. If the number rolled is less than or equal to the number of Republican-controlled ports in European Spain (Barcelona counts double), the blockade is run successfully and Soviet Aid arrives (place a RailHead marker in that port). If the dieroll fails, the Republicans receive neither the 1 PP nor External Supply that month by sea.
Blockade applies equally to the arrival of Nationalist External Supply to any one port other than Lisbon (which cannot be blockaded). If the Nationalist player desires External Supply to arrive elsewhere than Lisbon, he must declare the target port (controlled) and roll one die. If the dieroll is less than or equal to the number of Nationalist-controlled ports in European Spain (Barcelona counts double), the Foreign Aid/External Supply arrives: place a RailHead marker in the port. If not, both External Supply and 1 PP of Nationalist Foreign Aid are lost that month.
6) Foreign Aid "Ends". In Spring, 1939, the great powers agreed that foreign intervention in the SCW would end (but this was not fully honored by the Axis). Beginning December, 1938 (W'38), each player rolls one die at the start of every Production. If doubles are rolled:
- All 3 foreign units (BS mech, Pav tank, and International Brigade infantry) are removed from play.
- All Soviet and French Foreign Aid PPs to the Republicans are canceled. External Supply continues as before, still subject to Blockade. Axis Foreign Aid (4 PPs) and External Supply to the Nationalists continue.
7) Production. Nationalist and Republican units rebuild using SCW Unit Costs. These are the same as Allied costs except for Statics (3/2) and the International Brigade (2/4).
SCW Unit Costs (as printed; CV step / cadre): HQ 10 / 20 (1: 5 PPs/cv and 10 PPs/cadre in Double Supply); THQ 0 / 0 (2: free 1 cv build each month); Armor 8 / 16; Mech 6 / 12; Infantry 4 / 8; Static 3 / 2 (3: 6 PPs for Nationalists / 8 for Republicans); Int'l Brig 2 / 4; Garrison • / 1.
Note: the SCW Unit Costs values were read from a multi-column layout; the figures above follow the companion module's printed chart (SCW module rules v1.2, section 11.5-11.6), which is transcribed in full as the companion file.
A) Cadres. Eliminated units can be rebuilt as new cadres in any controlled Loyal City in rail supply (not embattled). See UNIT COSTS Table.
B) Garrisons. During Production, Garrisons can be built in unengaged, supplied friendly hexes for 1 PP.
C) HQs. A Field HQ is in Double Supply when it can trace supply both to its Capital and to External Supply. HQs in Double Supply can be built at a reduced cost of 5 PPs/cv (10 PPs/cadre). Other unit costs are unaffected by Double Supply.
Thus, the Nationalist HQ can always build a step for 5 PPs when it can trace supply to Lisbon, but the Republican HQ can only do so when it can trace supply both to Madrid and to an External Supply marker.
D) THQs. SCW Theater HQs can be rebuilt one step only per Production at no PP cost (for free).
8) Railroads. In the SCW, friendly Rail Lines can extend through Friendly and Uncontrolled hexes, but not through Disputed or Enemy controlled hexes.
NOTE: Cities and towns of enemy loyalty block Rail Lines unless the hex is otherwise friendly controlled.
9) SCW Victory.
- A) Defeat: all enemy units eliminated.
- B) Foreign Recognition. Beginning W'36, either side can win via Foreign Recognition as the legitimate Spanish government. Once per Summer/Winter season, each side can try for Foreign Recognition at the beginning of any Production phase. Each side rolls a pair of dice -- if each pair totals less than the current Pacification Level (see below) the leader wins via Foreign Recognition.
Pacification Level: Each side counts the number of controlled Spanish Cities (excluding Morocco) that are in Rail Supply (connected by rail to the friendly Capital or to External Supply). Major Cities (Madrid/Barcelona) count double. Pacification Level equals the difference between the counts.
Example: The Nationalists have 11 Cities to the Republicans' 6, for a Pacification Level of +5. If the Nationalists roll '4' but the Republicans roll '7', Recognition fails.
- C) Stalemate: If neither side wins by the end of W'38 (May/39), the Republicans win a Marginal Victory.
10) EuroFront Carryover. If the SCW is played as a prequel to EuroFront, play to a decision or to Sept/39, then proceed as follows:
- A) Nationalist Victory: This is the historical result and EuroFront proceeds normally (see 20.74).
- B) Republican Victory: EuroFront proceeds normally as above, except: upon Spanish belligerence, set up Republican Spain forces as per the PRO-ALLIED MINOR OB card. Allied DE RE is possible, Axis DE SX is not, and some Alliance Reactions are altered (see AR table). An Axis Declaration of War on Republican Spain raises the odds of Soviet Mobilization (SM) & cancels Axis Surprise if it attacks the USSR.
- C) Stalemate: The SCW continues, becoming treated after Sept/39 as a EuF sideshow: both sides are "neutral" and neither need trace National Supply. Lisbon remains the Nationalist Capital/Supply Source but no Foreign Aid can arrive unless it can trace a LoC (10.22) to Berlin. Madrid remains the Republican Capital/Supply Source, and Foreign Aid can only arrive if it can trace a LoC to Paris.
Important: Reduce Allied/Axis PPs by 2 for each Foreign Aid PP sent.
SCW continues (usual rules) until:
-
Victory (see #9 above): the victor becomes Spain, a new EuF neutral. Remove its units at current cv to the relevant MINOR OB card [begin Peacetime Production]. Remove defeated units from play.
-
Intervention: prior to entering Spain, Axis/Allies must declare Intervention [COMMAND phase], upon which the Nationalists / Republicans become Satellites of the Axis and Allies respectively.
- Lisbon/Madrid remain capitals,
- #7A (only) remains in effect,
- Otherwise, all SCW Special Rules are canceled and normal EuF rules (eg, Occupation Limits, National Supply) apply. Neither side is "Spain", so 17.7 Volunteers & 20.74 Fortress Spain do not apply,
- Upon SCW Victory, all foreign units must Withdraw (16.721).
Sidebar: SCW Scenario Notes (as printed, page 87). The Spanish Civil War, perhaps the saddest war of the 20th Century, reflected the clash of Fascism and Socialism. In the early 1930s Spain was wracked with political upheaval through a series of bitter, closely fought elections between leftist and rightist multi-party coalitions with nearly equal popular support.
The Popular Front, a loose coalition of landless peasants, labor activists, liberals, socialists, anarchists, Communists, and Catalonian and Basque nationalists, formed the government after a narrow election victory in Feb 1936. On the right were the army, wealthy landowners, the Church, Royalists, and the proto-fascist Falange.
An exchange of assassinations shook the country, prompting Generals Franco and Mola to raise an army revolt in July 1936. Some risings were suppressed by loyalists (notably in Barcelona and Madrid) and a bloody tradition of execution of "traitors" began on both sides, the Nationalists executing 500,000 of its opponents versus 20,000 by the Republicans.
The war was fought with a terrible outpouring of passion, valor, and hostility on both sides. Portugal, Germany, and Italy openly aided Franco, while Russia sent help to the Republic, France vacillated and Britain stood aloof. Motivation was not lacking on either side, just armaments. While the Republican government could never fully arm its numerous volunteers, Germany and Italy saw to it that Franco's army was well endowed.
The Nationalists advanced on Madrid, spearheaded by the Spanish Legion (which Franco commanded in the '20s) and the largely Moorish Army of Africa. The capital was saved by a stubborn defense keyed by the 11th-hour arrival of the first International Brigades.
The struggle continued for 3 long years, ending in the slow strangulation of Republican Spain by an international arms blockade, while Franco continued to receive German and Italian arms covertly via Portugal.
Sidebar: SCW Continues through Sept 1939. Once the Allies become belligerent, they block all land and sea Lines of Communication from Lisbon to Berlin: Franco will lose most of his Foreign Aid and will be at a grave disadvantage without it.
If Intervention occurs, all Foreign Aid is canceled and the Nationalists and Republicans become minor Satellites of the Axis and Allies, using normal Production rules (except 7A still applies). Existing Garrisons remain in play to clarify hex control, but no more can be built.
10.7 Fortress Supply
Fortress hexes (including Tobruk) can supply one defending unit (Original Defender) without a Supply Line. Units receiving Fortress Supply must be in the fortress hex.
The largest defender (owner's choice between equals) is supplied. All other units are unsupplied and suffer supply attrition.
NOTE: Units in Fortresses (and Bases) do have a ZOC.
10.71 Base Supply. Bases automatically supply one defending unit as above (if 2 or more units are there, neither is supplied!).
10.8 Siege Supply
Sea Supply (15.4) through engaged ports is called Siege Supply, which can only support one unit at cadre strength (see 15.41).
NOTE: Fortresses do not provide Siege Supply in addition to Fortress Supply.
- Friendly Naval Supremacy: Siege Supply can supply one unit of any CV.
- Friendly Naval AND Air Supremacy: Siege Supply can supply any number of units. Engaged ports serve as Rail/Sea Supply Sources, to which units can trace Supply Lines.
NOTE: If Sea Supply is negated by Sea Interdiction, Siege Supply is also negated.
Sidebar: Supply Origin. AXIS: Berlin, provided it has Rail Supply to another friendly Victory City (square city symbol). ALLIES: London, provided it has Rail/Sea Supply to the Atlantic Ocean. SOVIETS: the Siberia Region.
Sidebar: Rail Ferry Straits. Rail Ferries (Red Straits) exist across the straits from Messina-Reggio (Sicily), and from Copenhagen to both Odense and Malmo (map errata), Denmark. Rail Supply and/or Rail Movement across other straits is not possible.
Sidebar: Rail Lines and National Supply. Because Rail Lines can be traced into and out of (but not through) friendly battle hexes, national capitals can still act as national Supply Sources when engaged. The engaged Capital can still trace National Supply to the Faction Capital (Berlin or London), tracing Rail Supply out of its engaged friendly battle hex. And it can act as the national Supply Origin by tracing rail lines out of its engaged friendly battle hex to national units.
Sidebar: Rail/Sea Supply & Production. A city in isolation cannot effectively produce war materials. Equipping a combat unit requires a large variety of products and/or resources, supplied in quantity, and usually from multiple sources.
Sidebar: Rail Entry hexes. All mapedges are marked with potential Rail Entry hexes. Only those on the outer edge of the map play area are Rail Entry hexes, not those abutting another map.