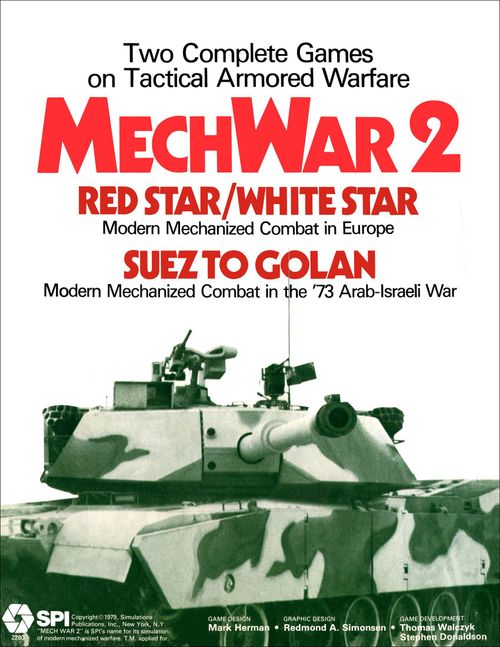
MechWar 2
MechWar 2 Rulebook
Table of Contents
Table of Contents
-
- 1.0 Introduction
- 2.0 How to Play the Game
- 3.0 Game Equipment
- 4.0 Sequence of Play
- 5.0 Command
- 6.0 Movement
- 7.0 Observation
- 8.0 Direct Fire Combat
- 9.0 Automatic Weapons Fire
- 10.0 Main Gun Fire
- 11.0 ATGM Fire
- 12.0 Loss Modification
- 13.0 Close Assault
- 14.0 Indirect Fire
- 15.0 Defilade
- 16.0 Smoke
- 17.0 Transport and Mounted Combat
- 18.0 Morale
- Advanced Rules
- 19.0 Minefields
- 20.0 Aircraft, Helicopters, and Air Defense
- 21.0 Short Halt
- 22.0 Ammunition Depletion
- 23.0 Night
- 24.0 River Crossing
- 25.0 Positions of Advantage
- 26.0 Electronic Warfare
- 26.1 Radio Direction Finding
- 26.2 Jamming Units
- 26.3 Effects of Jamming
- 26.4 The Effects of Jammers on Companies
- 26.5 Other Effects of Jamming
- 26.6 Circumvention of Jamming Effects — Telephones
- 26.7 Circumvention of Jamming Effects — Short Range Radio
- 26.8 Circumvention of Jamming Effects — Visual Signals
- 26.9 Circumvention of Jamming Effects — Messengers
- 27.0 Ambush
- 28.0 Camouflage
- 29.0 Engineers
- 30.0 Fire-and-Move
- Red Star/White Star Exclusive Rules
- Suez to Golan Exclusive Rules
1.0 Introduction
MechWar 2 is a tactical level simulation of modern ground combat. It is composed of two separate games: Red Star/White Star, which presents hypothetical confrontations between NATO and Soviet troops in the near future; and Suez to Golan, featuring actual battles from the October War of 1973 and possible future encounters. The Standard Rules Booklet provides those rules common to both versions, while the Exclusive Rules Booklets provide the scenarios and any additional information required for each individual game.
SPI expects to update Red Star/White Star annually by incorporating the latest military developments in weaponry, doctrine and organization in inexpensive kits. In order to make this updating process as accurate as possible, SPI welcomes unclassified information sent in by Players regarding the various aspects of the military situation in Europe. Weapons performances and TO&Es are particularly important. Players are encouraged to forward suggestions relevant to the rules of play, ideas for the next edition, and reports on the progress of games played. SPI is particularly interested in which scenario was played (especially good ones may be included in future editions) and advice to Players. Please do not write these reports on the same page as a rules question. Send reports to: MECHWAR UPDATE, Simulations Publications, Inc., 257 Park Avenue South, New York, New York 10010.
2.0 How to Play the Game
The game is played in Game-Turns, each of which is divided into a number of Phases. MechWar 2 is basically a two-Player game. During each Game-Turn, a Player may move and attack (fire) with his units. This is done by moving the individual units through the hexgrid and by using their various weapon systems. In order to make the play of the game more realistic, Players are also required to plan ahead for their future actions (in a very general way) by issuing set commands to their units. As units take losses, it is possible that their morale may suffer, forcing them to temporarily withdraw from combat. The advanced rules provide for the effects of such complicating elements as helicopters, night, weather, and so forth. Victory in each game is determined by accumulating more Victory Points than one's opponent and/or by fulfilling certain stated Victory Conditions.
Modern warfare is a complex subject, and the rules to MechWar 2 are thus also complex, especially when compared to much simpler games (such as Monopoly, for example). We have tried to keep the rules as short as possible while ensuring their clarity and thoroughness. Basically, the rules are written within a special and highly organized system:
- Each separate topic is presented as an individual major Section, numbered consecutively from 1.0. Further divisions within the Sections are made by Primary Cases, which contain rules clarifying one aspect of a Section as a whole (e.g., 5.1, The Bound Command); and by Secondary Cases, which are the individual rules themselves (e.g., 5.11).
- Most rules are presented with the accompanying General Rule and Procedure descriptions which describe the general subject and concept of the rules that will follow. (Further information can also be found in the Designer's Notes section at the end of the Standard Rules.)
- The rules Sections are presented in a rough sequence of play, placing each Section in the order that the Player would be likely to encounter the particular topic while learning the game.
- The rules are divided into three main parts. Basically, Sections 1.0 through 18.0 deal with the Standard Rules, Sections 19.0 through 28.0 with the Advanced Rules, and Sections 101.0 and beyond with the Exclusive Rules and the Scenarios.
- Terminology: The rules use a specific jargon — gamespeak. If confusion arises from unfamiliar terms, Players should consult the Definition of Terms (Case 3.5).
- As a last note, Players should not be frightened off or be ill at ease with the "legalistic" wording of the rules. Players should not feel compelled to let the rules "play the game for them." If a dispute arises, a compromise should be sought. After all, MechWar 2 is designed to provide a realistic simulation of modern ground combat in an enjoyable game format, not as an exercise in constitutional law. Players are strongly encouraged to make modifications they feel will improve the game (and are mutually acceptable to each Player).
3.0 Game Equipment
3.1 The Game Map
3.11 The game map shows those geographical areas and features required for play. A hexagonal grid is printed on the game map to regulate the movement and location of the playing pieces on the map. Each hex is given a four digit number. The first two digits of the number identify a specific hex column (running vertically, north to south); the last two digits identify a specific zig-zag hex row (running horizontally, west to east). When referred to in the rules, each hex number is preceded by a letter-code identifying which map section that hex is in.
3.12 Each game consists of two separate map sections. These are:
- Red Star/White Star: Map section A (European open terrain) and map section B (European closed terrain).
- Suez to Golan: Map section C (Sinai) and map section D (Golan Heights).
3.2 Game Charts and Tables
Various visual aids are provided with the game to simplify and illustrate certain game functions. The use of these graphic aids is explained in the appropriate rules Sections.
3.3 The Playing Pieces
There are 800 playing pieces in each game of MechWar 2. About half of these are informational counters. Informational counters include Strength markers, Artillery Impact markers, Suppressed markers, etc. All of these counters indicate the current status of a given unit or hex. The actual units in the game — the vehicle and infantry platoons, air units, headquarters units, etc. — are represented by organizational counters. These counters contain certain information regarding the designation, target profile, armor class, and movement allowance for vehicular units, and the designations and automatic weapons strength for infantry units. Many additional values for each unit are provided on the Players' Unit Data Sheets.
3.31 There are two types of organizational counters: combat units and non-combat units. Combat units are represented, for play purposes, by two counters: the unit's particular organizational counter and a combat strength counter, which is always placed under the organizational counter and represents the actual strength of that unit at a given time. This strength is measured in the number of vehicles for vehicular units and in the number of steps for infantry units. The combat strength counter may be changed as the unit takes combat losses or regroups. Regardless of a unit's current strength, its weapon systems never change, although they may run out of ammunition.
3.32 The strength of a vehicular unit varies from one to five vehicles, infantry units from one to three steps.
3.33 Most organizational counters are printed on only one side, allowing them to be placed "face-down" and hidden on the map until observed by the Enemy Player.
3.34 Sample Units. The printed sample counters label the following parts:
- Vehicle Unit: designation; vehicle type; silhouette; Target Profile; Movement Allowance; Armor class.
- Infantry Unit: designation; type; type symbol; Automatic Weapons Strengths (shown as 8-6-4-2).
- Aircraft Unit (front): designation; type; silhouette. Aircraft Unit (back): Low Altitude and High Altitude flight profile.
- Helicopter Unit (front): designation; type; silhouette. Helicopter Unit (back): Nap of Earth (NOE), Low Altitude and High Altitude flight profile.
(The printed page 4 counter sheet shows the Neutral, Soviet/Arab and NATO/Israeli markers, Strength markers and Common markers as illustrations. Those illustrations are not reproduced as text; the rules that use each marker appear in the Sections that follow.)
3.4 Definition of Terms
- Abatis. A defensive obstacle formed by felled trees.
- Aircraft. Any fixed-wing airplane in the game (i.e., not a helicopter).
- Air Unit. Term used to describe both aircraft and helicopters in the game.
- APC (Armored Personnel Carrier). A vehicular unit capable of transporting Friendly infantry units (also known as an AFV).
- Armor Class. A classification of each vehicular unit according to its vulnerability to fire. All vehicular units are defined as either hard, protected, or light targets.
- Close Assault. The procedure by which opposing units in the same hex resolve Direct Fire Combat.
- Company Status. Any condition that mutually applies to all platoons of a given company.
- Contamination. The after-effects of a successful nuclear or chemical fire mission on a given area of the map.
- Defilade. The status of a unit which has followed a certain procedure to increase its defensive abilities.
- Delivery System. A means of delivering ordnance or munitions to a target, usually referring to systems which are capable of delivering a wide variety of types of munitions. Artillery, mortars, aircraft, and helicopters may all be classed as delivery systems.
- Direct Fire. Any type of attack which is directed at a specific defending Enemy unit and requires a valid Line of Sight.
3.5 Game Scale
Each hexagon on the map represents 200 meters of actual terrain. Each Game-Turn represents five minutes of real time.
4.0 Sequence of Play
Each game or scenario of MechWar 2 is composed of Game-Turns during which Players move their units and engage in combat strictly according to the following Sequence of Play. This sequence is repeated, Game-Turn by Game-Turn, until the end of the Scenario being played.
4.1 Sequence Outline
A. First Player Indirect Fire Phase
- Plot Segment: The first Player (as designated in the Scenario) plots his air strikes and artillery fire missions. These may or may not be delayed a certain number of Game-Turns, depending on the circumstances.
- Marker Removal Segment: All Friendly Smoke, Artillery Impact and Starshell markers are removed from the map. All Suppression markers are removed from units belonging to the second Player.
- Resolution Segment: Any artillery fire missions that the first Player has plotted to arrive in the present Game-Turn have their accuracy resolved; all plotted aircraft movement and combat is carried out. All indirect fire combat called for by these attacks is resolved; all Smoke and Starshell markers are placed as required. The second Player may fire air defense systems at the first Player's aircraft.
- Rally Segment: The first Player may attempt to rally those of his units with rally commands.
B. Second Player Command Phase
The second Player (as designated in the Scenario) plots commands for each of his units on a company by company basis. These commands will be carried out in the appropriate Phases and may be changed only at the beginning of the next Friendly Command Phase.
C. First Player Movement Phase
-
Movement Segment: The first Player may move any or all of his units, according to their company commands. As the Player moves a unit, hex by hex, across the map, it may be attacked by any artillery impact or mine hex it enters. In addition, the second Player may interrupt this movement at any point and attack the moving unit with opportunity fire from one of his units. After this attack has been resolved, the first Player may attack the firing Enemy unit with one of his units, or "pass" (choose not to attack). The second Player may then attack either the moving unit or one of the first Player's units that fired with another of his units, or likewise pass. After both Players have passed, the moving unit may then resume its movement, possibly triggering more opportunity fire as it does so. This pattern continues until all of the units of the first Player have completed their movement.
-
Final Fire Segment: Any units of either Player (with an overwatch command) that did not fire in the preceding Movement Segment may now do so. This fire is resolved in the alternating manner already described. Final fire is resolved in an order determined by rounds of priority. Within each priority, the Phasing Player has the first chance to fire. Players alternate in firing the same priority class or passing until both Players have passed, whereupon the Phasing Player may commence final fire of the next lower priority. At any point in the Final Fire Segment, so long as it is his turn to fire, a Player may fire a unit with higher priority than the currently scheduled one. Thus, the Friendly Player may have a tank with an overwatch command and ability fire its main gun (Priority 2). Seeing no good targets while Priority 2 is scheduled, he chooses not to fire the tank's main gun. Later in the Final Fire Segment, an Enemy APC opens up with short halt automatic weapons fire (Priority 4), thus exposing itself to observation by the tank. Since it is now the Friendly Player's turn, he may fire the Priority 2 tank main gun at the Enemy APC; then it is the Enemy Player's turn. If the Enemy Player passes or has no more units able to fire of the current or higher priority, the Friendly Player may continue firing with various units until he, too, passes; then play proceeds to the next lower priority. When both Players have passed the lowest priority, the Final Fire Segment is ended. The order of priorities is:
- Automatic Weapons Final Fire
- Main Gun Final Fire
- ATGM Final Fire
- Automatic Weapons Short Halt and Fire-and-Move Final Fire
D. Second Player Indirect Fire Phase
The second Player now carries out his air and artillery plotting and attacks, in the same manner as the first Player in Phase A. The first Player may fire air defense systems at second-Player aircraft.
E. First Player Command Phase
The first Player now plots commands for each of his units, in the same manner as the second Player in Phase B.
F. Second Player Movement Phase
The second Player now carries out the movement of his units in the same manner as the first Player in Phase C.
G. Second Player Command Phase
The second Player now repeats Phase B.
H. First Player Movement Phase
The first Player now repeats Phase C.
J. First Player Command Phase
The first Player now repeats Phase E.
K. Second Player Movement Phase
The second Player now repeats Phase F.
L. Record Phase
The Game-Turn marker is advanced one space on the Game-Turn Record Track, signalling the end of one Game-Turn and the start of the next. Various other functions may take place during the Record Phase in certain Scenarios.
5.0 Command
General Rule: In order to function in combat, units must be part of an effective command system. Platoon leaders can see only a small part of the battle in which they are engaged, and their actions must be guided and coordinated by their company headquarters. Each company headquarters relies in turn on some higher level of command (battalion/brigade/division). In this game, this higher level of command is represented by the Player himself.
Procedure: During each Command Phase, a Player must issue specific commands (orders) to all of his units in the game, on a company-by-company basis. There are five commands that may be given: Bound, Overwatch, Bounding Overwatch, Withdraw, and Rally.
Each company is given one command, which remains in effect until the beginning of the next Friendly Command Phase. All commands are written down by each Player on a separate sheet of paper, known as the Command Plot. Command Plots are assigned secretly and are normally revealed only at the end of the Game-Turn. Note: If the Players trust one another — and have good memories — they can simply make a mental note of each of their companies' commands, and thus eliminate the need to write commands down.
Cases:
5.1 The Bound Command
When issued a Bound Command, all platoons on the company must either leave the hex they currently occupy during the next Friendly Movement Phase, or remain in that hex and undergo a change in status (Case 5.13).
5.11 When fulfilling a Bound Command, each unit of the company may be moved as the owning Player desires. The units may expend either part or all of their Movement Allowance, and may be moved in any direction or combination of directions.
5.12 Units that fulfill a Bound Command by movement must end the Movement Phase in a hex other than the one in which they began the Phase.
5.13 Units may also fulfill a Bound Command by remaining in place and undergoing a "change in status." Such status changes include:
- A. Entering column formation, see Case 6.6.
- B. Entering defilade (for vehicular units) or leaving defilade (for infantry units); see Section 15.0.
- C. Undergoing snorkeling or amphibious operations; see Section 24.0.
- D. Embarking or disembarking from Friendly APC units; see Section 17.0.
5.14 Units with a Bound Command that undergo a change in status may also move if they have sufficient Movement Points to do so. However, if they choose to do so they are also subject to Case 5.12.
5.15 Units with Bound Commands may also initiate or withdraw from close assault combat.
5.16 Engineer units performing engineer functions with a Bound Command are not required to move.
5.2 The Overwatch Command
When issued an Overwatch Command, all platoons of the company must remain stationary in the hex(es) they currently occupy.
5.21 Units given Overwatch Commands are the only units that may engage in normal direct fire (see Bounding Overwatch for that command's effects in terms of Overwatch).
5.22 Units given an Overwatch Command may initiate fire on moving Enemy units, or in response to the fire of Enemy units, or in the Final Fire Segment of the Movement Phase.
5.23 Units fulfilling an Overwatch Command may enter defilade in the hexes they currently occupy (see Section 15.0) or change the facing of Vehicle Defilade markers. This has no effect on their ability to use direct fire.
5.24 APC units fulfilling an Overwatch Command may be mounted by Friendly infantry units in the hex they currently occupy. Infantry units fulfilling an Overwatch Command may dismount from APCs in the hex they currently occupy (see Section 17.0).
5.25 Units with Overwatch Commands may engage in close assault initiated by Enemy units or continue a close assault initiated in a previous Game-Turn.
5.3 The Bounding Overwatch Command
This command combines elements of both the Bound and the Overwatch Commands. When issued a Bounding Overwatch Command, one or more platoons of the company must fulfill a Bound Command, while the remainder of the company (i.e., at least one platoon) must fulfill an Overwatch Command.
5.31 The exact units within a company that are to fulfill either "part" of the Bounding Overwatch Command is not determined in advance. Instead, the Player is free to determine which units will Bound and which will Overwatch at any time throughout the Phases starting with the current Command Phase and ending in the next Friendly Movement Phase.
5.32 For obvious reasons, companies that consist of a single unit may not be issued a Bounding Overwatch Command.
5.33 Only certain nationalities may use the Bounding Overwatch Command. This is noted in the Exclusive Rules Booklets.
5.4 The Withdraw Command
Withdraw and Rally are the only commands that may be given to companies that, due to combat losses, are currently in Morale State 3 (see 18.0). When given a Withdraw Command, all units of the company are under the same restrictions as for a Bound Command, except that units may choose to remain in their hex (that is, to do nothing). If moving, they need not move in any particular direction. However, once given a Withdraw Command, a company may be issued no further commands other than Withdrawal and/or Rally until the company has reduced its Morale Level to zero (see Case 5.5). Units with Withdraw Commands may not initiate close assault unless their observation range is zero; if involved in close assault they must withdraw as soon as possible.
5.5 The Rally Command
When the platoons of a company take losses, there is a chance that their morale may begin to suffer (see Section 18.0). Companies may restore their morale through the Rally Command. This command and the Withdraw Command are the only commands which may be issued to companies that are currently in Morale State 3. When given a Rally Command, no units of the company may expend any Movement Points, fire any of their weapons systems, initiate close assault, or undergo a change in status. Once given a Rally Command, a company may not be issued any other type of command except for further Withdraw or Rally orders. This restriction continues until the company has restored its Morale State to zero.
5.6 Regrouping
Two or more platoons that have taken losses in combat may combine into a single platoon by regrouping. This may be done by any units with a Bound Command that have begun a Friendly Movement Phase stacked in the same hex. Regrouping costs the units involved their entire Movement Allowance for that Phase. At the end of the Phase, only one "combined" platoon remains in the hex; the other counters are removed from the map.
5.61 Only platoons of the same company may Regroup.
5.62 Only platoons of the exact same type (e.g., all M60A1, all infantry) may Regroup.
5.63 Platoons may Regroup only up to a strength (in vehicles or steps) less than or equal to their original strength at the start of the Scenario.
5.64 The combined platoon formed by Regrouping has all facets of its platoon status determined by the Enemy Player. He may apply any status that was true of at least one of the component platoons to the new one. For example, if a Suppressed platoon Regrouped with a platoon that was not Suppressed, the Enemy Player could choose to have the newly formed platoon Suppressed.
5.65 Regrouping has no effect on any company status for the newly formed platoon. It "inherits" all company status from its component platoons.
6.0 Movement
General Rule: During the two Friendly Movement Phases of the Game-Turn, a Player must move his units in accordance with the commands given to each company in the preceding Friendly Command Phase. During the Movement Segment of each Movement Phase, a unit may move as many or as few hexes as desired as long as its Movement Allowance is not exceeded. During the course of a Friendly unit's movement, the Enemy Player may fire opportunity fire at the moving unit with any of his units that were issued an Overwatch Command. At this point, the moving unit must stop as the fire is executed. The Phasing Player may fire overwatch fire at the unit which is executing opportunity fire; thus large exchanges of fire could develop over the movement of one unit. Once all fires have been announced, they are resolved in the order of priority dictated in the rules for Overwatch Fire (Case 8.3). Once all fires have been resolved, the moving unit (if it has survived) may finish its movement, possibly triggering more opportunity fire.
Procedure: Each unit (or stack of units) is moved individually, tracing its path of movement through the hexgrid. The order in which Friendly companies move is determined by the Enemy Player. Movement is calculated in terms of Movement Points. Basically, each unit expends a minimum of one Movement Point of its Movement Allowance for each hex it enters. The actual cost for a unit to enter a hex (or cross a hexside) varies according to the type of unit and the terrain involved. The effects of terrain on movement are listed on the Terrain Effects Chart (6.9).
Players' Note: The Enemy Player determines the order in which companies move, since all such movement is really simultaneous. This allows the Enemy Player to choose which Enemy movement he would like to "see" first, and thus be more likely to fire at (because a given weapons system may fire only once per Phase). In practice, however, this procedure need be followed only when Enemy and Friendly units are actually "in contact" and likely to exchange overwatch fire with one another.
Cases:
6.1 Movement Inhibitions and Prohibitions
6.11 A unit may not expend more Movement Points than its total Movement Allowance in any one Movement Segment. A unit may not "save" unexpended Movement Points for use in a later Movement Segment, nor may unused Movement Points be transferred from unit to unit.
6.12 Units may be moved only during a Friendly Movement Segment. Although there may be some movement as a result of close assault (due to a withdrawal), this is not considered movement per se and does not require the use of Movement Points.
6.13 Units are normally moved individually hex-by-hex across the map. However, units which begin a Movement Phase stacked in the same hex and are stacked in the same hex at the end of that Movement Segment must be moved together (see Case 6.4).
Player's Note: This procedure is used so that units that spend an entire Friendly Movement Phase together pay the appropriate penalty (on the Loss Modification Tables) when defending against Enemy opportunity fire.
6.14 There are certain doctrinal restrictions placed on the ways in which the platoons of a company may move. These vary by nationality and are listed in the Exclusive Rules booklets.
6.15 Once moved off the map, units may not move onto the map.
6.2 Vehicle Movement
The movement of vehicles is affected by formations they are required to enter while in some types of terrain. Such units must enter Dispersed Formation (see Case 6.5) when moving into heavy woods or town hexes; they must enter Column Formation (see Case 6.6) to gain the movement benefits for road and trail hexes and to cross bridges. Vehicle units (with Bound Commands) may always move one hex per Friendly Movement Segment by spending their entire Movement Allowance doing so.
6.3 Infantry Movement
Men on foot (dismounted or "leg" infantry) move a great deal more slowly than vehicles. For this reason, infantry units may either be mounted (transported by Friendly APCs) or dismounted (on foot).
6.31 All dismounted infantry units have a Movement Allowance of 1 (however, see Cases 6.32 and 6.33). Mounted infantry units have no Movement Allowance, but are instead treated like the vehicular units that are transporting them (see Section 17.0).
6.32 Leg infantry units may voluntarily double their Movement Allowance (to 2) through a procedure known as double-time. In order for a unit to double-time, the owning Player simply declares that the unit is doing so. After completing its movement for that Segment, the unit is fatigued (see Case 6.7).
6.33 Leg infantry units may voluntarily triple their Movement Allowance (to 3) through a procedure known as charge. In order for a unit to charge, the owning Player simply declares that the unit is doing so. After completing its movement for that Segment, the unit is fatigued (see Case 6.7).
6.34 Leg infantry units must pay one additional Movement Point when moving from a hex at a lower height level to a hex at a higher height level (however, see Case 6.6). There is no additional cost for a unit to move in the reverse direction (i.e., downhill). Note: This means that infantry units must become fatigued when moving uphill and not using a road or trail.
6.35 Infantry units (with Bound Commands) may enter a hex only if they have sufficient Movement Points to do so.
6.36 Infantry units may always move one hex by charging, even if they would not ordinarily have the Movement Points to enter a hex.
6.4 Stacking
There may never be more than three Friendly units of the same type (vehicle or infantry) in a hex at the end of any Segment.
6.41 The stacking limit applies only at the end of each Segment. A Player may have any number of Friendly units move through a hex during a Segment, so long as the stacking limit is met at the end of the Segment.
6.42 Stacking has no effect on a unit's ability to make fire attacks. For the effects of stacking on close assault, see Case 13.1.
6.43 Stacking increases a unit's vulnerability to fire by altering the die roll on the appropriate Loss Modification Tables (see Cases 12.1 and 12.2). However, when resolving combat during a Friendly Movement Segment, of those Friendly units that are moving, only units "moving together" (see 6.45) are considered to be stacked.
6.44 Stacked units are each attacked separately by any indirect fire in the hex (see Case 14.3).
6.45 Units that begin and end a given Movement Segment stacked together must be moved together as a stack (if they are to be moved at all). This is important, as it will have an effect on the results of any opportunity fire on the moving units.
6.46 When transporting infantry, the APC unit counter is placed on top of its passenger infantry unit (see Section 17.0). For purposes of stacking, a vehicle transporting a passenger unit is treated as if it were a single vehicular unit.
6.47 There is no Movement Point cost to stack or unstack units except when such action represents infantry mounting or dismounting from vehicles (see Case 17.1).
6.48 Friendly units that end a Segment in a hex in excess of the stacking limit are immediately eliminated. The owning Player has the choice of which unit(s) in the hex to eliminate.
6.49 Headquarters units never count for stacking purposes.
6.5 Dispersed Formation
Vehicular units that enter any heavy woods or town hex are automatically placed in Dispersed Formation.
6.51 Dispersed units may not observe (see Section 7.0) into any adjacent heavy woods or town hex. However, they may observe into all other hexes normally.
6.52 There is no cost for a unit to enter or leave Dispersed Formation. Vehicular units remain dispersed so long as they occupy a heavy woods or town hex and immediately revert to normal after leaving such a hex. There is no limit to the number of times a unit may change formation during a given Segment.
6.53 Dismounted infantry units never enter Dispersed Formation.
6.54 Vehicular units in Column Formation automatically leave Column Formation and enter Dispersed Formation when they enter any heavy woods or town hex and they are not moving on a road or trail.
6.6 Column Formation
In order to gain the movement benefits of roads and trails, units must enter Column Formation. When a unit in Column moves so that its path coincides with the path of a road or trail, the unit pays only the cost for moving along that road or trail, regardless of the other terrain in the hex, or (for leg infantry) any changes in height level.
6.61 Vehicular units may enter Column Formation by remaining stationary in a hex for one complete Friendly Movement Segment. The unit must have a Bound Command. Units may enter Column Formation in any hex (place an "In Column" marker on the unit).
6.62 Vehicular units may leave Column Formation during any Movement Phase. This may be done, first, during any Friendly Movement Segment, at no cost and with any command. A unit may also leave Column Formation during an Enemy Movement Phase, also at no cost, and with any command. However, a unit that does so cannot use opportunity fire during that Segment.
6.63 Infantry units may enter Column Formation at no cost, but only with a Bound Command. They may leave Column in the same manner as vehicular units (see Case 6.62). Infantry units that are Suppressed due to combat results automatically leave Column Formation.
6.64 Column Formation has no effect on stacking limits.
6.65 Units must automatically leave Column Formation when they are involved in a close assault (see Section 13.0). This is not done, however, until the unit either withdraws from the hex or one Phase of close assault has been completed.
6.66 Units in Column Formation may not enter defilade.
6.67 While in Column Formation, a unit's fire strength is affected as follows: vehicular units are treated as "1-vehicle units" when resolving all fire attacks; infantry units are treated as one-step units.
6.68 Column Formation increases a unit's vulnerability to Enemy attacks by altering the die roll on the appropriate Loss Modification Tables (see Cases 12.1 and 12.2).
6.69 Vehicular units reduced to a strength of one vehicle are automatically considered to be in Column Formation, but only for movement purposes. Such units do not have their die rolls altered for being in Column when defending against direct fire attacks. However, this does not apply to one-step infantry units; they must enter Column Formation normally.
Player's Note: When a number of Friendly units are moving "together" (whether stacked or not) in Column Formation (e.g., in a long line on the same road or trail), it is usually necessary to place
Player's Note (continued): it is usually necessary to place an "In Column" marker only on the unit at the head of the column. (This is a method for reducing the number of "In Column" markers on the map.)
6.7 Infantry Fatigue and Resting
While dismounted infantry normally move at a slow rate of speed, they are capable of short bursts of much faster action (see Double-Time and Charge, Cases 6.32 and 6.33). When units perform charge or double-time, they become fatigued, but may recover from that fatigue by resting.
6.71 When units without a fatigue level perform one Segment of double-time, the units have a Fatigue 1 status noted on their unit status sheet.
6.72 Units at Fatigue Level 1 may not charge. In all other respects they are treated as normal infantry units (however, see Case 6.73).
6.73 When units at Fatigue Level 1 perform one Segment of double-time, the units have Fatigue 2 status noted on their unit status sheet.
6.74 When units without a Fatigue Level perform one Segment of charge, the units have Fatigue 2 status noted on their unit status sheet.
6.75 Units at Fatigue 2 may not move or expend Movement Points for any purpose. In all other respects they are treated as normal infantry units.
6.76 Infantry units may reduce their Fatigue Level by resting. Resting consists of spending one Friendly Movement Segment in a hex, without expending any Movement Points. The resting units may receive any command and may fire normally. For each Segment that a unit rests, its Fatigue Level is reduced by one Level (i.e., from Fatigue 2 to Fatigue 1, or from Fatigue 1 to no fatigue).
6.77 The effects of double-time and charge (in producing fatigue) and resting (in reducing fatigue) occur at the end of the Movement Segment.
6.78 There is no limit to the number of times that a unit may become fatigued and/or recover by resting.
6.79 Units being mounted and/or transported by Friendly APC units may also rest in that Segment, provided the infantry units themselves did not expend any Movement Points. Units may not rest in hexes containing Enemy units.
6.8 Dummies
Dummies are meaningless counters employed as though they were real units, so that the Enemy Player will never know whether or not a particular unspotted Enemy unit is real. The number of Dummies available to each Player is listed in the Scenario instructions. Where there are insufficient blank counters available, counters not used in the current Scenario may be employed as Dummies. Thus, if the only NATO forces in the Scenario were British, American units may serve as Dummies; if no airborne units are in the Soviet Order of Battle for a given Scenario, these may be employed as Dummies, etc.
6.81 Dummies are moved and positioned on the map like normal units. They do not require commands, but may be used as the Player sees fit, in order to best confuse the opposing Player.
6.82 Dummy units are removed whenever they are observed (spotted) by Enemy units. They may also be removed voluntarily by the owning Player (see Case 6.83).
6.83 The owning Player may re-deploy any or all of his Dummy units during any Friendly Movement Segment. This is done by physically removing the Dummy counter(s) from the map and then simply placing them in a hex containing unspotted Friendly ground units.
6.84 Dummy units may not attempt to observe Enemy units. When a Dummy unit is the target of an Enemy spotting attempt, the owning Player may decide whether the unit is to be considered infantry or vehicle when determining the results (see Section 7.0).
6.85 Dummy units may not be used to determine the scatter of Friendly artillery fire missions (see Case 14.2).
6.9 Terrain Effects Chart
(Printed as a separate sheet: "see separate sheet." The Terrain Effects Chart is a table and is transcribed in the Terrain Effects Chart section below once its values are entered.)
7.0 Observation
General Rule: Before a unit can fire at a target in the game — as in actual combat — it must first be established that the firing unit can observe the target. The ability of a unit to observe a target is determined by range, nature of the target (i.e., whether it is infantry or vehicle), attitude of the target (i.e., moving, stationary, or firing), weather conditions and the nature of the terrain between the observing unit and the target. Once the attacking unit is determined to be in observation range of the target, it must be determined that the Line of Sight (LOS) between the attacking unit and the target is not blocked (see Case 7.2).
Cases:
7.1 Observation Range
All units are initially deployed face-down so that only the owning Player knows what they are. They are turned face-up, and may be fired at, only when observed (spotted) by Enemy units. Units may become liable to observation at different distances (observation ranges) from the Enemy, depending upon the weather, illumination, type of unit, motion or lack thereof, or upon actions such as firing. Once observed, a unit may remain observed or it may become unspotted once more. Observation is always by specific Enemy units; it is never general.
7.11 If a face-down unit fires direct fire at an Enemy unit, it is automatically observed by any Enemy unit with an unblocked Line of Sight and which is within maximum observation range, and is turned face-up for at least the remainder of the current Movement Phase. If a face-down unit moves and it is within the regular observation range for that type of unit with an unblocked Line of Sight, it may be observed by that unit and turned face-up. If a face-down unit neither moves nor fires, it remains face-down and unobserved until an Enemy unit comes within regular observation range of it, demonstrates an unblocked Line of Sight, and demands observation. Regular observation range is always based on the type of unit, motion status, terrain, etc., of the unit which the Enemy is attempting to spot; it is never based on the type of unit, motion status, terrain, etc., of the Enemy unit which is attempting to make the observation. Just because unit A is within regular observation range of unit B does not mean that B is within regular observation range of unit A.
7.12 Once observed (face-up), a unit remains observed by the unit which spotted it for as long as it remains in that unit's Line of Sight and within focused observation range (see Case 7.19). When a unit has exposed itself (become observed) because it has made a direct fire attack, it remains observed by all units within maximum observation range having an unblocked Line of Sight for the remainder of the current Phase. Once that Phase is over, the unit remains observed by all Enemy units within focused observation range having unblocked Line of Sight. If an observed unit can move out of the Line of Sight or observation range of all Enemy units, it may be turned face-down (unobserved) until such time as it is again observed by an Enemy unit.
7.13 For purposes of determining observation range, whenever a Friendly unit moves through two or more different types of terrain that is within the LOS of an Enemy unit — including the hexes in which the unit begins and ends its movement — determine the Enemy unit's ability to observe that unit based on the terrain type passed through that best affords a chance for observation.
7.14 Dummy units may never attempt to sight Enemy units.
7.15 Units are not required to attempt to sight a given Enemy unit. The owning Player may voluntarily withhold any such sighting attempts, and thus hope to mislead the Enemy Player that a real unit is in fact a Dummy.
7.16 The length (in hexes) of a unit's Line of Sight may never exceed the maximum range of observation given on the Observation Chart. While this range is normally unlimited, it may be reduced due to certain weather conditions.
7.17 Day Clear Weather Observation Range Table (see separate sheet).
7.18 For purposes of determining the observation range, a unit is moving if it:
- A. is moving from hex to hex;
- B. is withdrawing from close assault;
- C. is entering defilade under an overwatch command;
- D. is mounting or dismounting;
- E. is an engineer unit performing engineer functions;
- F. (during an Enemy Movement Phase) was moving (as defined in this Case) during the previous Friendly Movement Phase and currently has a Bound or Bounding Overwatch command.
7.19 The focused observation range is equal to twice the maximum regular observation range for the type of unit (vehicle or infantry), motion status (moving or stationary), and terrain concerned. Thus, under regular observation procedures, a Friendly stationary vehicle which is unobserved may be spotted by an Enemy unit moving into a hex 15 hexes away, by day and in clear weather, provided that there is an unblocked Line of Sight. Once observed, the Friendly unit remains observed by the Enemy unit which spotted it as long as the Enemy unit maintains an unblocked Line of Sight and is within 30 hexes of the Friendly unit. If the regular observation range is zero, the focused observation range is 1.
7.2 Height Effects on Observation
The terrain features printed on the maps represent physical characteristics typical of battlefields in Central Europe/Middle East, including contour (height) variations. Once a LOS has been established between two units, it is still necessary to determine whether the LOS is valid or invalid (blocked by contour changes).
7.21 The Height Level of a unit is determined by the color of the hex it occupies (see the Terrain Effects Chart, 6.9). Each separate Height Level represents a 20 meter change in elevation.
7.22 One Height Level (20 meters) must be added to the Height Level of any light woods, heavy woods, smoke, or town hex, for purposes of blocking terrain. (This is because the trees/buildings/smoke in the hex is assumed to be about 60 feet tall.)
7.3 Observation Procedure
- Determine if the sighting unit is within observation range of the unit it is trying to observe (see Case 7.1).
- Determine the Line of Sight between the sighting unit and the unit it is trying to observe. This is accomplished by visualizing a perfectly straight line drawn from the center of the hex occupied by the sighting unit to the center of the hex occupied by the unit being observed. If the Players find this difficult, they should hold a ruler over the map, aligning it between the centers of the two hexes.
- Determine if the Line of Sight is blocked (preventing observation) or clear (permitting observation). Once the Line of Sight between the two units is established, the Players must determine if any of the hexes traversed by this LOS contains blocking terrain. There are five types of blocking terrain: elevated hexes, heavy woods hexes, light woods hexes, town hexes, and smoke hexes. Any hex which contains blocking terrain may interrupt the LOS, allowing a unit to see into the specific (blocking) hex, but preventing observation beyond that hex along the LOS. Whether blocking terrain actually interrupts or blocks the LOS depends upon the elevation of both the sighting unit and the unit it is attempting to observe. How to determine if the LOS between two units is blocked is explained in the following Cases (7.31 through 7.35).
7.31 If the two units occupy hexes which are at the same level of elevation, either unit may observe the other unless the Line of Sight traverses (goes through) any hex which is on a higher elevation than either of the two units.
Example (Map A): Units in hexes 3113 and 3119 (both at Height Level 0) may not trace a Line of Sight to one another because hex 3116 is higher (Height Level 1).
Example (Map C): Units in hexes 2912 and 3113 (both at Height Level 0) may not trace a Line of Sight to one another because hex 3012 is higher (Height Level 1).
7.32 If the two units occupy hexes on different levels of elevation, the Line of Sight is automatically blocked if it crosses any hex which is on a higher elevation than both of the observing units. If the LOS is not blocked by higher terrain, use the Height/Line of Sight Display to determine if intervening terrain blocks the Line of Sight. This is performed as follows:
- Locate the elevation of the higher unit on the zero distance line.
- Determine the range in hexes to the lower unit, and then on that line locate the height of that unit.
- Connect the two points with a straight edge (a transparent plastic rule is ideal). Now locate the height and distance of any suspected obstacle. If the obstacle is higher than the Line of Sight at the point of intersection, then the LOS is blocked. If the Line of Sight exactly intersects the obstacle, or passes over it, then the LOS is not blocked. If there is any doubt, or should the Players prefer, they may resort to the Line of Sight Algorithm (see Case 7.34) instead.
7.33 Town, woods, and smoke hexes add one level to the height of a hex when calculating blocking height, but not sighting/firing position.
7.34 Players may also determine the Line of Sight by using the basic algorithm (mathematical expression of the Line of Sight). It is expected that this will be used only to check the occasional "close call" on the Height Level/Line of Sight Display. The result of the algorithmic method is governing. Under the algorithmic procedure, a clear Line of Sight exists only if
H / D is equal to or greater than h / d
whereby
- H = Height (in meters) of higher position minus height of lower position.
- D = Distance (in meters) from higher position to lower position.
- h = Height (in meters) of potential obstacle minus height of lower position.
- d = Distance (in meters) from potential obstacle to lower position.
Note: Each height level represents a vertical distance of 20 meters. Each hex represents a horizontal distance of 200 meters.
Example (Map A): A unit in hex 3716 (Height Level 4) attempts to trace a LOS to a unit in hex 2108 (Height Level 0). The only potential obstacle — the light woods hex in 2912 (Height Level 1) — does not block the LOS. If, however, the lower unit were to move to hex 2711 the LOS between the two units would be blocked.
Example (Map C): A unit in hex 4217 (Height Level 2) attempts to trace a LOS to a unit in hex 4223 (Height Level 0). The only potential obstacle — the Height Level 1 hex at 4219 — does not block the LOS. If, however, the lower unit were to move to hex 4220, the LOS between the two units would be blocked.
7.35 Line of Sight Gauge (see separate sheet).
8.0 Direct Fire Combat
Commentary: For the most part, individual units have a number of different "weapon systems." For example, the BMP (the most advanced Soviet APC) is equipped with a machinegun (automatic weapons), a conventional 73mm gun (a medium main gun), and a Sagger (an ATGM). Unless prohibited by information given on its data sheet, a unit may fire each of its weapons systems (at the same or at different targets) in a given Phase.
Do not become confused by the different types of direct fire. They are (1) Opportunity Fire, in which Friendly units fire at Enemy units as the latter move; (2) Overwatch Fire, in which Friendly units fire at Enemy units immediately after those Enemy units themselves have fired; (3) Final Fire, in which Friendly and Enemy units (that have not already fired in the current Phase) exchange fire; and (4) Withdrawal Fire, which occurs only during close assaults.
Cases:
8.1 Restrictions on Fire
8.11 Only units with an Overwatch Command may use direct fire. Exceptions: See Sections 13.0, 21.0, and 30.0.
8.12 A unit may never fire the same weapons system more than once in the same Phase, unless involved in a close assault (see Section 13.0), or unless the unit is using an air defense system to fire at Enemy aircraft (see Section 20.0).
8.13 All direct fire is resolved in alternating fashion. First a unit of one Player fires a weapons system, then a unit of the other Player fires a weapons system. This procedure continues until all units have carried out the desired direct fire.
8.14 A given unit may be attacked any number of times in the same Phase.
8.15 All units make separate attacks, which are announced and resolved on an individual basis.
8.16 Combat is not considered to be simultaneous. With the exception of certain types of overwatch fire (see Case 8.33), the results of each fire combat are applied before any additional combat takes place.
8.17 If a Player states an attack, he must carry out that attack. He is responsible for calculating the chances of success beforehand. If he states an attack which is then found to make no sense, it is still considered to have been executed. In effect, the firing units have wasted their fire.
8.18 A unit may only fire at an Enemy unit if it can see the Enemy unit. This may be determined in one of three ways.
- A. The unit attempting to fire can by itself spot the Enemy unit, having an unblocked Line of Sight and being within the regular observation range for the type of unit (vehicle or infantry), motion status (moving or stationary), and terrain concerned.
- B. The Enemy unit has revealed itself by firing any of its weapons systems, there is an unblocked Line of Sight, and the Enemy unit is within the maximum observation range (unlimited during daylight and clear weather, otherwise variable).
- C. The Enemy unit has been spotted by a Friendly unit other than the one which is attempting to fire on it, the Friendly unit which is attempting to fire on it has an unblocked Line of Sight, and the Enemy unit is within the focused observation range (see Case 7.19) of the unit which is attempting to fire on it.
8.2 Opportunity Fire
8.21 Opportunity fire (for all weapons systems) is performed during the Enemy Movement Segment. It may only be used against moving Enemy units.
8.22 There is no limit to the number of targets a particular unit may fire at during different times during the Movement Phase, so long as none of the unit's weapons systems fire more than once.
8.23 A unit with an Overwatch Command may withhold its fire and is never forced to attack a given target. It may pass up one possible target in the hope that a better target will later show itself. However, a Phasing Player is never forced to "take back" the movement (or part of the movement) of a unit in order to allow an Enemy unit to attack. Example: If a U.S. M60 unit moves into and then out of the Line of Sight of a Soviet T72 platoon, and the Soviet Player elects to withhold his fire and wait for another target, he may not afterwards change his mind and have the T72 platoon fire "retroactively" at the M60 unit.
8.24 If a Friendly ATGM system fires at a moving Enemy unit, all Enemy overwatch fire on the firing unit by automatic weapons and main gun systems (only) occurs before the result of the original attack is determined. (This is due to the fact that the missile of the ATGM system takes a much greater time to reach its target than a comparable gun system.)
8.25 Opportunity fire is always resolved in the hex that the moving unit has entered. Exception: See Case 8.26.
8.26 Units entering defilade may be attacked by opportunity fire. This fire is resolved before the defending unit enters defilade. The defending unit would be treated as a moving unit on the Loss Modification Tables.
8.3 Overwatch Fire
Overwatch fire is the only type of direct fire during a Movement Segment that may be directed against non-moving Enemy units. Furthermore, it may only be directed at Enemy units that have previously fired during the Segment.
8.31 Any unit with an Overwatch Command may perform overwatch fire.
8.32 All Friendly overwatch fire is resolved immediately after the fire of the Enemy target unit is resolved. Exception: See Case 8.33.
8.33 If the target Enemy unit is using an ATGM system, then all Friendly overwatch fire on that unit by main gun systems and automatic weapons (only) is resolved first.
8.34 There is no limit to the number of different targets a given unit may fire at during different times of the Movement Segment, so long as none of the unit's weapons systems fires more than once.
8.4 Final Fire
Final fire (for all weapons systems) is carried out during the Final Fire Segment of each Movement Phase.
8.41 Only weapons systems which did not fire in the preceding Movement Segment may use final fire.
8.42 Units may fire at any Enemy unit to which they may currently trace a Line of Sight and which is visible to them.
8.43 All final fire is resolved in alternating fashion. Weapons systems have priority of fire in the order given in the Sequence of Play (4.0).
8.5 Withdrawal Fire
Withdrawal fire is a special form of direct fire that only occurs when a Friendly unit leaves an Enemy-occupied hex as a result of close assault (see Section 13.0).
8.6 Suppression
As a result of direct and/or indirect fire, combat units may become suppressed. Once suppressed, units remain so until the following Enemy Indirect Fire Phase. Suppression has the effects listed in the following Cases.
8.61 Suppressed vehicular units:
- A. May not fire any of their externally controlled weapons systems.
- B. May not mount or dismount infantry.
- C. Receive a die adjustment on the appropriate Loss Modification Tables when attacking (see Section 12.0).
8.62 Suppressed infantry units:
- A. Automatically enter defilade in the hex they are in.
- B. May not move. Infantry units may remove their Suppression during any Friendly Movement Segment by taking an immediate one-step loss. If the Suppression occurred as a result of opportunity fire, this option may be taken at once (before the unit enters defilade due to condition A), allowing the unit to continue its movement. If this occurs, the unit must check morale as usual for a loss of one step. Note: If the Suppression is due to a step-loss combat result, the removal of this Suppression results in an additional one-step loss.
- C. Receive a die roll adjustment on the Loss Modification Tables when attacking (see Section 12.0).
8.7 Silhouetting (Optional Rule)
Under certain circumstances, vehicular units may be considered "silhouetted against the sky" and thus be more vulnerable to direct fire combat. In either version of MechWar 2, all vehicular units are considered to be silhouetted if they are in any clear hex at height level 4.
8.71 Only vehicular units may be silhouetted. Dismounted infantry units may never be silhouetted.
8.72 Defilade (or any other unit status) has no effect on whether a vehicular unit is silhouetted or not.
8.73 Units may not be silhouetted during new moon or overcast conditions at night. Otherwise weather, day, or night conditions have no effect on silhouetting. Note: These silhouetting rules are modified when playing Suez to Golan.
9.0 Automatic Weapons Fire
General Rule: Automatic weapons represent the fire of machineguns, rifles, and grenade launchers. The procedures used to resolve automatic weapons fire will vary, depending on the types of attacking and defending units involved. The automatic weapons strength (at various ranges) of infantry units is printed on the counters themselves, although it may be reduced due to losses. The ability of vehicular units to fire automatic weapons is listed on the unit's Data Sheet; each separate MG (machinegun) listed on the Data Sheet represents a separate automatic weapons system. Infantry automatic weapons systems have a maximum range of five hexes. Vehicle automatic weapons systems have a maximum range of 10 hexes.
Cases:
9.1 How to Attack with an Infantry Unit
Fire Routine:
- Determine the firing unit's automatic weapons strength at the range (in hexes) between the firing unit (exclusive) and the defending unit (inclusive). This is printed on the counter. Note: This strength is reduced by one-third for each step that the infantry unit loses (round fractions down); it is never reduced below zero.
- The attacking Player should roll two dice and consult the Automatic Weapons Combat Results Table (9.3). Cross-index the die roll with the firing unit's attack strength to obtain a combat result.
- Regardless of the results of this attack, the defending Player now rolls one die and consults the appropriate Loss Modification Table (depending on whether the defending unit is infantry or vehicle; see Section 12.0).
9.2 How to Attack with a Vehicular Unit
Fire Routine:
- Determine the number of vehicles in the firing unit.
- Cross-index the number of vehicles in the unit with the range in hexes between the firing unit (exclusive) and the defending unit (inclusive) on the Vehicle Automatic Weapons Strength Chart (9.21). The indicated number is the firing unit's attack strength for the attack.
- The attacking Player now rolls two dice and cross-indexes the dice roll with the appropriate column on the Automatic Weapons Combat Results Table to obtain a combat result.
- Regardless of the results of Step 3, the defending Player now rolls one die and consults the appropriate Loss Modification Table (depending on whether the defending unit is vehicle or infantry).
9.21 Vehicle Automatic Weapons Strength Chart (see Charts and Tables section).
9.3 Automatic Weapons Combat Results Table
(See Charts and Tables section.)
9.4 Explanation of Modified Combat Results
Automatic Weapons and Indirect Fire: The following Case explains how each combat result is actually applied to the defending unit. Note that these are modified combat results: the defending Player must first take the original combat result and consult the Loss Modification rules (see Section 12.0).
All Defending Units:
- — = No effect (the attack has failed).
The Defending Unit Is Infantry:
- S = Suppressed. The defending unit is Suppressed (place a Suppressed marker on the unit). If the unit was already Suppressed, it remains in that state and suffers an additional one-step loss.
- 1, 2, 3 = The defending unit loses the number of steps indicated and is Suppressed (if the unit was already Suppressed, it loses the number of steps indicated and remains Suppressed). Place a Suppressed marker on the unit and adjust the unit's strength counter accordingly.
The Defending Unit Is a Light Target Class Vehicle:
- S = Suppressed. The defending unit is Suppressed. If the unit was already Suppressed, there is no additional effect.
- 1, 2, 3, 4, 5 = The defending unit loses the number of vehicles indicated and is Suppressed. Place a Suppressed marker on the unit and adjust the unit's strength counter accordingly. If the unit was already Suppressed, it loses the indicated number of vehicles and remains Suppressed.
The Defending Unit Is a Protected Target Class Vehicle:
- S = Suppressed. The defending unit is Suppressed. If the unit was already Suppressed, there is no additional effect.
- 1 = Same result as Suppressed.
- 2, 3, 4, 5 = The defending unit loses one less than the number of vehicles indicated and is Suppressed. Place a Suppressed marker on the unit and adjust the unit's strength counter accordingly. If the unit was already Suppressed, it loses the indicated number of vehicles and remains Suppressed.
The Defending Unit Is a Hard Target Class Vehicle:
- S, 1, 2, 3, 4, 5 = Suppressed. The defending unit is Suppressed (place a Suppressed marker on the unit). If the unit was already Suppressed, there is no additional effect.
Note: Against FROGs and SCUDs, each vehicle should be treated as if its armor were one class less (e.g., hard vehicles are treated as Protected). Vehicles are never reduced below "light" armor class, however.
9.5 Co-Axial Machineguns (Optional Rule)
Certain vehicles have an additional automatic weapons system, their co-axial machinegun. This is noted on the unit's Data Sheet. This weapon system is treated in all respects like the normal automatic weapons strength of the vehicle unit, with the exception that the system may not fire in the same Phase as the unit's main gun. (If both automatic weapons systems of the same vehicle fire at the same defending unit, two separate attacks are made.)
10.0 Main Gun Fire
General Rule: This represents the fire of various vehicle and infantry main guns. Such guns may be heavy or medium caliber. This is listed on the unit's Data Sheet.
Cases:
10.1 How to Fire on an Enemy Vehicular Unit
Fire Routine:
- Determine the caliber of the main gun of the firing unit (either heavy or medium).
- For a heavy main gun, determine its type of fire control and the target profile of the defending unit. Then consult the Heavy Main Gun Attack Strength Table. Cross-index the range in hexes between the firing unit (exclusive) and the target unit (inclusive) with the target profile of the defending unit. (Make sure to use the sub-column corresponding to the fire control of the attacking unit.) The number indicated is the firing unit's attack strength for the attack. (Go on to step 4.)
- If the gun is a medium main gun, it has no fire control system. Instead, determine its firing class (either 1, 2, or 3) and the target profile of the defending unit. Then consult the Medium Main Gun Attack Strength Table. Cross-index the range in hexes between the firing unit (exclusive) and the target unit (inclusive) with the target profile of the defending unit. (Make sure to use the sub-column corresponding to the class of the firing unit.) The number indicated is the firing unit's attack strength for the attack.
- Determine the number of vehicles (or steps) in the firing unit. Cross-index this line on the Main Gun/ATGM Combat Results Table with the firing unit's attack strength. This will determine which column (labeled A through V) on the Table to use.
- The attacking Player now rolls two dice and cross-indexes the die roll with the appropriate column on the Combat Results Table.
- Regardless of the results of step 5, the defending Player now rolls one die and consults the Vehicle Loss Modification Table (12.11) to determine the actual results of the attack. This final result is applied immediately (see Section 12.0).
10.2 How to Fire on an Enemy Infantry Unit
This fire represents main guns firing High Explosive (HE) shell. Its maximum range is 5 hexes.
10.21 Procedure:
- Determine the caliber of the main gun of the firing unit. Cross-index the caliber of the main gun with the number of vehicles in the firing unit on the Main Gun Anti-Infantry Attack Strength Table (10.22). The indicated number is the attack strength for the attack. The attack is then resolved on the Automatic Weapons Combat Results Table (9.3).
- The attacking Player now rolls two dice. Cross-index the dice roll with the firing unit's attack strength.
- Regardless of the results of step 2, the defending Player now rolls one die and consults the Infantry Loss Modification Table (12.2) to determine the actual results of this attack. This final result is applied immediately.
10.22 Main Gun Anti-Infantry Attack Strength Table (see Charts and Tables section).
10.3 Main Gun/ATGM Anti-Vehicle Combat Results Table
(See Charts and Tables section.)
10.4 Explanation of Modified Combat Results
The following Case explains how each combat result is actually applied to the defending unit. Note that these are modified combat results: the defending Player must first take the original combat result and consult the Loss Modification rules (Section 12.0).
All Defending Units:
- — = No effect (the attack has failed).
- 1, 2, 3, 4, 5 = The defending unit loses the number of vehicles indicated and is Suppressed. Place a Suppressed marker on the unit and adjust the unit's strength counter accordingly.
10.5 Main Gun Range Attenuation Tables
10.51 Heavy Main Gun Attack Strength Table (see Charts and Tables section).
10.52 Medium Main Gun Attack Strength Table (see Charts and Tables section).
11.0 ATGM Fire
General Rule: This represents the fire of various anti-tank guided missiles (ATGM). The performance of such weapons varies greatly from system to system; the specific type of ATGM with which a unit is equipped is listed on the unit's Data Sheet. ATGM weapons systems may only attack vehicular units; they may never attack dismounted infantry units.
Procedure:
Fire Routine:
- Determine the specific type of ATGM (e.g., Sagger, TOW) used by the firing unit. This is listed on the unit's Data Sheet and may be modified by Scenario instructions.
- Determine the range in hexes between the firing unit (exclusive) and the defending unit (inclusive).
- Cross-index the range with the ATGM system of the firing unit on the ATGM Attack Strength Table (11.3). The number indicated is the firing unit's attack strength for the attack.
- Determine the number of vehicles (or steps) in the firing unit. Cross-index this line on the Main Gun/ATGM Combat Results Table with the firing unit's attack strength. This will determine which column (labeled A through V) on the Table to use.
- The attacking Player now rolls two dice and cross-indexes the dice roll with the appropriate column on the Combat Results Table.
- Regardless of the results of step 5, the defending Player now rolls one die and consults the Vehicle Loss Modification Table (12.11) to determine the actual results of the attack. This final result is applied immediately (see Section 12.0).
Cases:
11.1 Restrictions on ATGM Fire
11.11 When calculating the range in hexes between the firing unit and the defending unit, Players must determine if the Line of Fire goes through a river hexside and/or a lake hex. If it does so, then all hexes on the "far" side of the river hexside or lake hex count as double when determining the range. There is no additional effect for crossing more than one such water obstacle.
11.12 The ATGM weapons systems of vehicle units (only) are subject to damage due to indirect fire (see Case 14.34).
11.13 The ability of mounted infantry units to fire their ATGM systems depends on the type of APC transporting the infantry (see Section 17.0).
11.14 ATGM weapons systems may fire only at vehicle units. They may not fire at dismounted infantry units. However, ATGMs may eliminate mounted infantry units by eliminating the vehicles they are riding in.
11.2 Sequencing ATGM Fire
Due to the fact that ATGM missiles have a relatively long time of flight (up to 30 seconds), their fire is not considered to be simultaneous with automatic weapons and main gun fire. Therefore, when resolving Friendly overwatch fire on firing Enemy units using an ATGM system, all Friendly overwatch fire by automatic weapons and main gun systems on that Enemy unit is resolved first before the Enemy fire itself is resolved. Thus the originally firing ATGM unit could have its strength reduced (or totally eliminated) before it got to resolve its fire. Note: The fire of Friendly ATGM systems performing overwatch fire on Enemy ATGM firing units is resolved normally, since the time in flight of the missiles cancels each other out.
11.3 ATGM Attack Strength Table
(See Charts and Tables section.)
11.4 Personnel Anti-Tank Weapons
These represent a variety of short-range weapons used by infantry units against vehicles. (These are listed on the unit's Data Sheet.) These weapons systems may be used only against vehicles; they may not attack dismounted infantry units. Their fire is resolved as described in the following Case.
Procedure:
- Determine the type of anti-tank weapon carried by the firing unit (R, B, or A).
- Cross-index the range in hexes from the firing unit (exclusive) to the target unit (inclusive) with the appropriate weapons system on the Personnel Anti-Tank Range Attenuation Table. The indicated number is the firing unit's attack strength for the attack.
- Determine the number of steps in the firing unit. Cross-index this line on the Main Gun/ATGM Combat Results Table with the firing unit's attack strength. This will determine which column (labeled A through V) on the Table to use.
- The attacking Player now rolls two dice and cross-indexes the dice roll on the appropriate column on the Combat Results Table.
- Regardless of the results of step 4, the defending Player now rolls one die and consults the Vehicle Loss Modification Table (12.11) to determine the actual results of the attack. This final result is applied immediately.
11.41 Personnel Anti-Tank Attack Strength Table (see Charts and Tables section).
12.0 Loss Modification
General Rule: Loss Modification is the means whereby combat results obtained by the attacking Player (see Sections 8.0, 9.0, 10.0, and 11.0) are altered. This alteration is due to a variety of factors, such as terrain, target attitude, crew quality, etc. Loss Modification must be carried out regardless of the result of the original attack (even if the result was No Effect). Note: An original attack must actually have been made. That is, the firing unit must have had an attack strength of at least zero.
Procedure: After the attacking Player has obtained a combat result, the defending Player must total his Loss Modifiers. This is performed by referring to the Loss Modifier Chart (12.3) while the defending Player checks for (a) troop quality of firing unit, (b) target unit type, (c) firing unit type, and (d) defender's terrain. Each of these modifiers is listed as an addition or subtraction from the defending Player's upcoming Loss Modification die roll (they are all cumulative). When a final number to be added or subtracted has been determined, the defending Player should roll a single die and consult the Vehicle Loss Modification Table (if the target is a vehicle) or the Infantry Loss Modification Table (if the target is infantry). This die roll is modified by the Loss Modifiers determined by the Player and is read as described in the following Cases.
Cases:
12.1 Vehicle Loss Modification
Procedure: After totaling the appropriate Loss Modifiers and adding them to or subtracting them from his die roll, the defending Player should cross-index the modified die roll with the target class of the defending unit on the Vehicle Loss Modification Table. The indicated change in the combat result is applied immediately.
12.11 Vehicle Loss Modification Table (see Charts and Tables section).
12.12 Explanation of Vehicle Loss Modification Table:
- — = No effect (the original combat result is applied).
- −1, −2, −3 = Reduce the number of vehicles eliminated in the original combat result by the indicated number. If no vehicles were originally lost (e.g., the combat result was Suppression or zero), then the defending unit is not affected by that combat.
- +1, +2, +3 = Increase the number of vehicles due to be eliminated because of the original combat result by the indicated number.
12.13 If more than one unit of the same armor class and target profile are stacked together, the modified combat result calls for more vehicles to be lost than are contained in the target unit, and a second or third unit of the same armor class and target profile as the original target unit are also visible to the firing unit, the losses which cannot be absorbed by the original target unit must be taken by the second such unit. If there are three units of the same armor class and target profile visible to the firing unit, the firing Player may choose which of the other two units will absorb losses beyond the capacity of the original target unit to absorb. If, in this case, the second unit is also eliminated without all losses having been absorbed, the third such unit must suffer the unabsorbed losses. In no case, however, may a unit of a different armor class or target profile be called upon to absorb a loss due to direct fire on another unit. Optional: Players may modify this rule prior to the game. For example, losses can be taken by other units in the hex if they are equally or less armored than the original target unit and are of equal or worse target profile. (This modification is less realistic than the standard rule.)
12.2 Infantry Loss Modification Procedure
After totaling the appropriate Loss Modifiers and adding or subtracting them from his die roll, the defending Player should cross-index this modified die roll with the column on the Infantry Loss Modification Table. (Only one column is needed, because all infantry units have the same target class.) The indicated change in the original combat result is applied immediately.
12.21 Infantry Loss Modification Table (see Charts and Tables section).
12.22 Explanation of Infantry Loss Modification Table:
- — = No effect (the original combat result is applied).
- −1 = If the original combat result is 1 or greater, reduce the result by 1 and suppress the affected unit. If no steps were originally lost (i.e., the combat result was Suppression or no effect), then the defending unit is completely unaffected by this particular combat.
- +1 = Increase the number of steps due to be eliminated in the original combat result by 1. If the original combat result was Suppression, then the defending unit loses 1 step. If the original combat result was no effect, then the defending unit is Suppressed.
12.3 Loss Modifier Chart
(See Charts and Tables section.)
12.4 Troop Quality (Optional Rule)
An additional modifier to all direct fire attacks may also be made due to overall troop quality. This is a measure of the general level of training and experience of the soldiers that make up a given unit. In each scenario the instructions will list the troop quality rating to be used by each Player.
12.41 When using the troop quality rules, the appropriate die roll adjustment must be made from the Loss Modification Tables for all direct fire attacks (see Case 12.3). Note: Only the troop quality of the firing unit is considered.
12.42 Troop quality affects only direct fire attacks; it has no effect on any form of indirect fire. The troop quality of the defending unit has no effect on the combat.
12.5 Loss Modification for Moving
12.51 There is a modification of −2 on the loss modification die roll if the target unit is moving. This modification applies to units which are:
- a. Attacked by opportunity fire while moving from hex to hex;
- b. Attacked during the Final Fire Segment after having moved in that Phase from hex to hex, not short halting;
- c. Withdrawing from close assault;
- d. Fired upon at the beginning of close assault under Case 13.12;
- e. Attacked by opportunity fire while entering defilade under an Overwatch command;
- f. Attacked during the Final Fire Segment of the Enemy Movement Phase, if the current command and the previous command were both "Bound" or "Bounding Overwatch" and the unit did move from hex to hex during the previous Friendly Movement Phase, and the unit is not short-halt designated.
12.52 There is no loss modification for a target unit which is:
- a. Mounting or dismounting without moving from hex to hex;
- b. Involved in close assault rounds of fire (exceptions: see Case 12.51 c. and d.);
- c. Attacked by Overwatch fire after performing short halt fire;
- d. Attacked during the Final Fire Segment while short-halt designated;
- e. An Infantry or motorcycle unit which is either suppressed or in defilade, even if otherwise covered by Case 12.51;
- f. Not moving.
13.0 Close Assault
General Rule: During a Friendly Movement Segment a Player may move a unit (or units) into a hex containing an Enemy unit (or units). This is known as close assault. The moving units must stop in the hex being assaulted, and they must resolve combat during the Close Assault Segment of that Phase. Close assault, fire-and-move, and short halt are the only procedures by which units with non-overwatch commands may fire their weapon systems, and close assault is the only instance in which weapons systems may fire more than once per Phase.
Procedure: Like a sort of boxing match, close assault is divided into three rounds. Each round is composed of:
- (A) Non-phasing Player Fire Impulse
- (B) Phasing Player Fire Impulse
During each Segment all of the Friendly Player's units involved in the close assault may fire their appropriate weapon systems at any Enemy units in the same hex. This fire is resolved in the usual manner. ATGM weapon systems may not fire during a close assault, as they may not fire at 0 hex range.
At the beginning of the Close Assault Segment, Players must determine whether the units in the hex being assaulted are eligible to fire at the units moving into the hex under Case 13.12; if they meet the criteria specified in that Case, such fire is immediately resolved. Players then proceed to the first round of close assault fire. Each round begins with the Non-phasing Player Fire Impulse. During this Impulse, the non-phasing Player may have some or all of his units fire at one or more of the Enemy units in that same hex. When this fire is completed, and resolved, play moves to the Phasing Player Fire Impulse; the phasing Player may have some or all of his units fire at one or more of the Enemy units in that same hex. This completes one round. The next round begins with the Non-phasing Player Fire Impulse, etc., until three rounds have been completed. There is one other procedure for close assault fire, Withdrawal Fire; this is covered in Case 13.3.
Cases:
13.1 Entering Close Assault
13.11 The assaulting Player may move one or more units into a hex, as he desires. The assaulting units may have begun the Movement Segment in the same or different hexes.
13.12 At the beginning of the Close Assault Phase, but before commencing the first round of close assault, engaged defending units in the assaulted hex (with an overwatch command) may fire each of their weapon systems (under the normal restrictions) once at any assaulting units in the hex. This fire is resolved at 0 hex range.
13.2 Close Assault Combat
All Close Assault combat is resolved in the same manner as normal combat, unless specified otherwise, but at close assault (0 hex) range. Fire alternates between Players; that is, all of the units of one Player may fire, then all of the units of the other Player may fire, etc.
13.21 The non-phasing Player is the first Player to fire during each round of combat. There are three rounds of close assault combat per Close Assault Segment; each round consists of one fire impulse for each Player. Fire under Case 13.12 and Case 13.3 is outside of these three rounds.
13.22 During each impulse, and during fire under Cases 13.12 and 13.3, each vehicular unit may fire one weapon system, and each infantry unit may fire its automatic weapons as well as one other weapons system. Each unit's fire is resolved separately.
13.23 All units in a hex which is undergoing close assault are considered to be engaged. Place an engaged marker on the hex. The "engaged" marker is removed as soon as only one Player has units in the hex.
13.24 Friendly engaged units may only fire their weapon systems at Enemy engaged units that occupy the same hex that the Friendly engaged units occupy.
13.25 Units outside of the hex may not carry out direct fire attacks on engaged units. However, all indirect fire attacks continue to be resolved normally.
13.26 Units may not move through a hex containing engaged units, although they may move into such a hex under certain circumstances (see Case 13.27).
13.27 When units begin a Movement Phase engaged, the Phasing Player may, within the stacking restrictions (which apply only in the context of one Player's units), bring other Friendly units into the hex as reinforcements, under Bound Commands. Engaged Enemy units may not fire at these additional units under Case 13.12.
13.28 Before units begin a Close Assault Round, the owning Players may give new Commands to the engaged units before anything else is done in the Close Assault Round. This is the only time, other than following a change in morale state, when commands may be given outside of the Command Phase. If part of a company is engaged, and part is not engaged, the engaged and non-engaged units may be given separate commands; this is the only instance when this is possible, other than Bounding Overwatch. Since these commands are assumed to originate locally, their issuance is not subject to jamming.
13.29 If a unit has an Overwatch Command, it is obligated to remain in the assaulted hex upon conclusion of the Round. If a unit has a Bound Command, it is obligated to withdraw from the hex upon conclusion of the Round. If both Players, following the round, retain units in the hex, and both are in Overwatch Command, play proceeds to the next Round, unless the just-concluded Round was the third Round, in which case the Movement Phase is ended. If both Players' units have Bound Commands, the Phasing Player withdraws first, but he is not subject to withdrawal fire from Enemy units in Bound Command; if his withdrawal blocks all allowable exit hexes for the non-Phasing Player, the non-Phasing units may remain in the hex despite the Bound Command. If there are Friendly units with Bound Command and Enemy units with Overwatch Command, the Friendly units with Bound Command must exit the hex and are subject to withdrawal fire. Note that suppressed infantry will take a step loss by withdrawing. If a unit withdraws, it remains in Bound Command until the next Friendly Command Phase. Withdraw Commands are treated the same as Bound Commands for engaged units.
13.3 Withdrawal Fire
Engaged units with Overwatch Commands may not withdraw from close assault. Engaged units with Bound Commands must withdraw from the hex at the end of the Round of close assault combat. All Friendly units of the same type (infantry or vehicle) must withdraw from a given hex at the same time. If such units are unable to withdraw, see Case 13.37.
13.31 Withdrawing units may be placed in any adjacent hex not occupied by Enemy units. However, units may not withdraw into lake hexes, across river, ferry or bridge hexsides, in excess of the stacking limits, or into hexes from which Enemy units moved into close assault during that Movement Phase.
13.32 All withdrawing units of the same type (vehicle or infantry) must be placed in the same hex.
13.33 Dismounted infantry units that withdraw have their Fatigue level immediately increased by 1. Note: This means that infantry units already at Level 2 Fatigue may not withdraw.
13.34 All of the previously engaged units of the non-withdrawing Player in Overwatch Command may immediately fire withdrawal fire at the withdrawing units (separately, with each of their weapons systems). This fire is resolved at 1 hex range.
13.35 Units in Morale State 2 or 3 may not engage in close assault (see Case 18.42).
13.36 Withdrawing units do receive the die modification for movement on the Loss Modification Table.
13.37 If an engaged unit with a Bound Command is unable to withdraw due to the restrictions in this Case, its morale level automatically increases by 1 at the end of the Close Assault Segment.
14.0 Indirect Fire
Indirect fire is the method by which artillery, mortars, missiles and rocket launchers attack. These weapons fire only once per Game-Turn and do not require a valid Line of Sight. There are two types of indirect fire weapons: missiles (Honest John, Lance, SCUD or FROG) and conventional artillery (mortars, howitzers, multiple rocket launchers, self-propelled guns). Because they are "area" weapons, all indirect fire attacks a specific hex rather than an individual unit. The use of indirect fire weapons may require a certain amount of advance planning and the accuracy of artillery fire is determined by the ability of other Friendly units to spot (observe) registration fire in the target hex. Indirect fire units may be either deployed on the map or off-map, as specified in the scenario.
Procedure (Fire Plot): Each time a unit uses indirect fire it must have a fire plot. Fire plots are assigned secretly and remain so unless questioned by the opposing Player. To plot a fire mission, the Player must list on a piece of paper:
- The identification of the firing unit (by caliber).
- The intended target hex number (this would be the "apex" hex of a battery pattern (see Case 14.14) or the "central" hex of the battalion impact pattern (see Case 14.14)).
- The type of indirect fire being requested (either starshell, smoke or HE) and its pattern (battalion, battery or section).
- If necessary, the Game-Turn in which the fire is due to impact on the map.
Player's Note: The Players must construct their own Fire Plot Sheet. We suggest that each Player prepare a form similar to the one illustrated in the printed rulebook. (The printed sample Indirect Fire Plot is a form layout with columns for Caliber, Pattern, ID of Firing Unit, distance from firing unit, and on-map range; its abbreviations are: S = section; Bn = battalion; Btty = battery; GT = Game-Turn; LHmor = Light Howitzer on CRT (mortar); e = eastern mapedge; s = southern mapedge; S = Smoke; St = Starshell; NPG = non-persistent gas (EU); NPS = non-persistent spray (EU); HE = high explosive (hex with no ordnance indicated is also HE); kt = kiloton (EU); ASM = air-surface missiles; A# = hex number on map A; B# = hex number on map B; ID = identification number (where there is more than one type); (EU) = MechWar Europe only.)
Procedure (Application of Fire): After a Player writes a fire order for off-map artillery, there is a delay of one Game-Turn before he can apply that fire on the map. (There is no delay for on-map artillery). When the Friendly Resolution Segment of the Indirect Fire Phase of the correct Game-Turn occurs, the firing Player takes the following steps to apply his plotted fire to the map:
- He announces that he has indirect fire plotted to arrive.
- He then announces what his target hexes are for each caliber and pattern.
- Having determined the target hex, he then follows the procedure for determining Scatter (14.2) to determine exactly where the fire will impact.
- Having determined the exact impact hex, he places the appropriate impact marker on the hex. If the type of fire requested was smoke (see Section 16.0), the procedure ends here. If not, the Player proceeds to step 5.
- The Player proceeds to attack all the units in the impact hex (whether Enemy or Friendly) using the correct Artillery Combat Results Table.
Cases:
14.1 Requesting Fire
When a Player writes a fire mission he is requesting fire. The number of fire missions that a Player may request at any one time depends on the number of indirect fire units he has available. An indirect fire unit may only fire one mission at a time. If, for example, the U.S. Player had only one 81mm mortar unit available, he could only request one fire mission at that time. A scenario may provide that a battalion may be broken down at the owning Player's option into three battery fire units or a battery may be broken down into three section fire units. These may be recombined and broken down by the owning Player any number of times.
14.11 Artillery units are assumed to repeat their current fire mission until they are assigned a new fire mission (see Case 14.25). If a Player does not wish an artillery unit to fire, he should simply write "No Fire" on the unit's fire plot.
14.12 Indirect fire may only be requested during the Plot Segment of a Friendly Indirect Fire Phase (see the Sequence of Play).
14.13 At the beginning of certain scenarios, Players can "pre-plot" fire missions so that the fire arrives on Game-Turn 1. This will be listed in the scenario.
14.14 When requesting artillery fire, Players must specify the pattern of fire. Battalion Patterns impact in the target hex and all adjacent hexes equally. Battery Patterns impact in a "triangle" of three adjacent hexes, of which the "apex" is the target hex; the other two impact hexes are on the side away from the mapedge from which the fire is coming (see scenario). Section Patterns impact only in the individual target hex. The types of patterns which may be requested are listed in the scenario instructions.
14.15 Players should note that there is no way to "shift" artillery fire from hex to hex other than by plotting a fire mission for the new target hex.
14.2 Determining Scatter
When fire is due to impact on the map, the firing Player must determine how accurate that fire will be.
14.21 The Player states what his plotted target hex is. If the firing unit is conventional artillery, he then determines which of his (Friendly) units on the map has the shortest Line of Sight to the target hex. This determines what column will be used on the Conventional Artillery Scatter Table (14.27). If no unit has a Line of Sight to the target hex, the Player uses the 61+ column. If the firing unit is a FROG or missile, then the observation of Friendly units is not considered; the Player automatically rolls one die for Scatter on the indicated column of the Missile Scatter Table.
14.22 The firing Player rolls two dice and consults the proper column on the Artillery Scatter Tables. This determines whether the fire is on target, scattered in the plotted target hex, or scattered in some other and more distant hex (see Case 14.26). If the firing unit is conventional artillery, the Player then places the appropriate impact marker in the actual (post-scatter) target hex, corresponding to the pattern, caliber and accuracy of the fire. If the firing unit is a missile or FROG then no marker is placed. Instead, the Phasing Player should immediately resolve any indirect fire attacks on all units in the impact pattern (see Case 14.33).
14.23 The Player repeats the Scatter routine for each of his firing units, until the accuracy of all such fire has been resolved.
14.24 After the Player has placed all his impact markers on the map, he then resolves indirect fire attacks on each of the units in each of the impact hexes.
14.25 When a conventional artillery unit repeats an immediately preceding (observed) fire mission, and the plotted target hex as well as the actual (scattered) target hex are still being observed by a Friendly unit, then the accuracy for that fire mission is resolved on the Fire For Effect column of the Scatter Table. FROG units may never fire for effect. When guided missiles Fire For Effect, there is a die modification of −2 on the Missile Scatter Table.
14.26 There are four possible results from any Scatter die roll. If the fire is on target or scattered in the target hex, the Player simply places the impact marker (with the appropriate side face-up) in the plotted target hex. For all other results the following procedures are used:
- Scattered One Hex: The Player rolls one die and consults the Scatter Diagram to determine the exact direction of fire. The impact marker is placed (with its Scattered side up) in the indicated hex.
- Scatter 2, 3 or More Hexes: The Player rolls one die and consults the Scatter Diagram to determine the direction of Scatter. He then places the impact marker in the indicated hex, but in the hex which is the correct number of hexes away from the plotted target hex (either 2, 3 or more). The Player then makes a second die roll and "wheels" the impact marker in a clockwise direction one hex for each number in the die roll, staying the same distance away from the plotted impact hex. (E.g., 2 equals two hexes.) The impact marker is then placed (with its Scattered side up) in the indicated hex.
14.27 Artillery Scatter Table (see Charts and Tables section).
Example of Scatter (Patterns of Fire): The plotted target hex for a section pattern of conventional artillery was 4412, but the artillery fire has scattered two hexes (on an S-2 result). The owning Player rolls one die and receives a result of 5. This indicates that the direction of scatter is towards hex 4213. The Player then again rolls one die in order to determine the actual impact hex of the fire. A die roll of 3 indicates that the artillery fire must be wheeled three hexes (i.e., through hexes 4212 and 4211, and into 4311). Hex 4311 is the actual impact hex of the artillery fire.
14.28 Missile/Rocket Scatter Table (see Charts and Tables section).
14.3 Indirect Fire Combat
The effect of indirect fire on both vehicular and infantry units in each impact hex is reflected on the Indirect Fire Combat Results Tables (14.31 and 14.32). Depending on the results of Scatter the fire will either be On-Target or Scattered. There is a separate Combat Results Table for each of these two states.
14.31 On-Target CRT (see Charts and Tables section).
14.32 Off-Target CRT (see Charts and Tables section).
14.33 The firing Player should roll two dice for each unit in each impact hex (it makes no difference whether they are Enemy or Friendly). He should then cross-index the die roll with the correct column corresponding to the caliber of the firing unit. If the defending unit is infantry, the owning Player immediately rolls one die and consults the Infantry Loss Modification Table (12.2) for any alterations in combat results; these modified results are then applied. No Modified Combat Results Table is used for vehicles defending against indirect fire. Note: Only those modifiers marked with an * (or specifically noted) are used when modifying the results of indirect fire combat.
14.34 Indirect Fire Combat Results are the same as for the Automatic Weapons Combat Results Table (9.4). However, a result of 2 or 3 against a vehicular unit mounting an ATGM system also results in an ATGM kill (note this fact on the unit's status sheet). The unit's ATGM systems have been destroyed and may no longer fire. (This result is in addition to the normal combat results against the unit.)
14.4 Restrictions on the Use of Indirect Fire
14.41 A Player may request fire on any hex on the map, within the range of the firing unit. Off-map artillery has unlimited range in most scenarios, but in two-map and EW Jamming scenarios their range and hypothetical distance from a map edge is given in the scenario. The ranges of on-map artillery units are noted on their data sheet entries.
14.42 Any Friendly unit (except dummies, of course) may spot for indirect fire during the Scatter routine.
14.5 Indirect Fire Against Moving Units
Impact markers from conventional artillery fire missions remain on the map from the resolution of the Indirect Fire Phase in which they are placed until the Marker Removal Segment of the next Friendly Indirect Fire Phase. If a unit moves into an impact hex, the moving unit is immediately attacked by the indirect fire. This is not true of the indirect fire of missiles. Missile fire missions attack only those units in a hex at the moment the impact is resolved. They have no effect on units that may later enter the hex.
14.6 On Map Artillery Units
Certain units are equipped with mortar or self-propelled howitzer weapons systems and function as on-map artillery.
14.61 All on-map artillery units are treated as 1 vehicle (or step) units. If they take losses they are completely eliminated and removed from the game. (Exception: see Case 14.68.)
14.62 On-map artillery units must have an Overwatch Command while performing (or plotted to perform) a fire mission.
14.63 On-map artillery units have certain minimum and maximum ranges. (Those are listed on the unit's data sheet.) On-map artillery units may not perform a fire mission in any hex that is closer to the firing unit than its minimum range would allow, or further than its maximum range.
14.64 The caliber of each on-map artillery unit is listed on the unit's data sheet.
14.65 Should the need arise, on-map artillery units may serve as their own observers when determining Scatter for a fire mission.
14.66 Certain on-map artillery units may use direct as well as indirect fire; this is noted on the unit data sheet.
14.67 The delay time for on-map artillery is 0 (No Game-Turn).
14.68 The Soviet SP74 unit may only use Indirect Fire when it is at full (3 vehicle) strength. However, the unit may continue to use Direct Fire even when reduced to 2 or 1 vehicle strength.
14.7 On-Call Targets
Before the start of each game, each Player may choose three hexes (anywhere on the map) as on-call targets, unless restricted by scenario instructions. When requesting a fire mission on any hex within five hexes (inclusive) of such a hex, the delay time for indirect fire is reduced by one Game-Turn. Note: This may reduce the delay time to zero (i.e., the impact of the fire is resolved in the same Phase as it is plotted). Nuclear artillery may also take advantage of on-call targets.
14.8 Environmental Effects of Artillery (Optional)
14.81 An artillery result of 2 or more on a town hex will produce Town Devastation in that hex. This must be noted on a separate sheet of paper.
14.82 An artillery result of 2 or more in a heavy woods hex or 3 or more in a light woods hex will produce Abatis. Place an Abatis marker on the hex.
14.83 An artillery result of 3 in a hex will destroy any bridges over its hexsides.
14.84 All environmental artillery effects are cumulative from Game-Turn to Game-Turn. That is, two Indirect Fire results of "1" equal a result of "2" and so on.
15.0 Defilade
General Rule: Units may improve their defensive abilities by entering defilade. For vehicles, this means positioning the body of each vehicle so that it is protected by some obstacle with only the turret exposed and vulnerable. For infantry, defilade means going prone behind whatever cover is available. Since very minor terrain features are suitable for this purpose — trees, small hills and depressions, buildings, etc. — units may enter defilade in any hex.
Procedure: The cost in Movement Points for a vehicle unit to enter defilade varies with the terrain in the hex the unit occupies. A vehicle unit enters defilade simply by expending Movement Points for that purpose. There is no cost for infantry units to enter defilade (but see Case 15.42). Note: Vehicle units may always enter defilade by spending an entire Friendly Movement Segment in a hex (with a Bound or Overwatch Command), even if the unit would not ordinarily have the Movement Points to do so. Units may not fire in a Segment in which they entered defilade, even if they have an Overwatch Command, but they may fire in the Final Fire Segment of that Movement Phase.
Cases:
15.1 Indicating Defilade
15.11 When a vehicular unit enters defilade, a defilade marker must be placed on top of the unit. This marker must be faced towards a specific hexside, but entirely at the owning Player's option. (See example in the printed rulebook.)
15.12 Each vehicular unit in a hex is treated separately. They may position their defilade markers in the same or different directions, as the owning Player desires.
15.13 Infantry units in defilade receive a defensive advantage from all directions. It is thus unnecessary to position the defilade marker in any particular way when dealing with infantry units. However, it is still required that a Player face the defilade markers for unobserved infantry units, so that the Enemy Player will not know whether the unit is vehicle or infantry.
15.14 Vehicular units may not enter defilade in a hex containing Enemy ground units.
15.15 Infantry units in hexes containing Enemy ground units may enter defilade normally.
15.2 Effects of Defilade on Direct Fire
15.21 If a vehicle unit in defilade is the target of a direct fire attack, and the Line of Fire goes through one of the unit's defilade hexsides, then there is a die roll adjustment made on the Vehicle Loss Modification Table (12.1) when resolving the results of the attack. (The extent of this adjustment will vary with the target profile of the defending unit.) (But see also 15.23.)
15.22 If an infantry unit in defilade is the target of a direct fire attack, the Line of Fire must, by definition, go through one of the unit's defilade hexsides. Thus, infantry units in defilade always receive the indicated die roll adjustment on the Infantry Loss Modification Table. (But see also Case 15.23.)
15.23 If the firing unit is two or more Height Levels above a defending vehicle unit, then no adjustment is made on the Loss Modification Tables for the effects of defilade. Defending infantry units, however, would receive the normal die roll adjustment.
15.24 No adjustment for defilade is ever made for a defending vehicle unit when the firing unit is an aircraft at high altitude or is a helicopter in the same hex. Defending infantry units, however, would receive the normal die roll adjustment.
15.3 Effects of Defilade on Indirect Fire and Close Assault
15.31 If an infantry unit in defilade is the target of an indirect fire or close assault attack, it always receives the indicated die roll adjustment on the Modified Combat Results Table.
15.32 Vehicular units in defilade receive no benefit from being in defilade when defending against an indirect fire or close assault attack.
15.4 Effects of Defilade on Movement
15.41 There is no cost for a vehicle to leave defilade.
Example of Defilade: Infantry units would always receive the benefit of defilade, regardless of the direction of the Line of Fire.
15.42 There is a cost of one additional Movement Point for an infantry unit to leave defilade.
15.43 There is never any additional cost for a unit (whether Enemy or Friendly) to enter a hex containing a unit in defilade.
15.44 All defilade markers are immediately removed when the unit in defilade either leaves the hex or is eliminated.
16.0 Smoke
Most conventional artillery units are capable of firing smoke instead of their normal high explosive (HE) shell. FROGs and missiles are not capable of firing smoke. However, not all artillery units are equipped with smoke munitions. The scenario instructions will list which units are smoke-capable for that scenario.
Procedure: When plotting a fire mission, the Player notes SMOKE (or just S) on his Indirect Fire Plot. The mission is thereafter executed as normal, except that the Player places a Friendly smoke marker in the impact hex and no indirect fire combat is resolved. It does not matter whether the fire is on target or Scattered (the effect is the same). Likewise, the caliber of the firing unit makes no difference (a smoke hex is a smoke hex, regardless). Note: Smoke missions must be ordered in the same patterns as normal fire missions. There is no load time for smoke, nor load time for HE following smoke.
Cases:
16.1 Effect of Smoke
When present in a hex, smoke acts to block the Line of Sight like other forms of blocking terrain.
16.11 Units can see into a smoke hex as if it were a light woods hex. However, units in a smoke hex may not see or fire into hexes other than their own (close assault) and adjacent hexes.
16.12 Units in a smoke hex subtract 2 from all die rolls on the Modified Combat Results Table when defending against direct fire of any kind.
16.13 Smoke is considered to extend up indefinitely, into all Height Levels.
16.14 All units must expend one additional Movement Point to enter a smoke hex.
16.15 There is no additional effect for additional smoke impacting into a hex. Multiple smoke markers are always combined and treated as one.
16.16 Helicopters at NOE may not enter a smoke hex. Helicopters at Low may enter such hexes normally, however.
16.2 Smoke Removal
During the Marker Removal Segment of each Friendly Indirect Fire Phase, all Friendly smoke hexes on the map are immediately removed.
16.3 Smoke Effects on Lasers
If a unit in a smoke hex is being fired at by a unit using laser fire control, then the firing unit must use its secondary fire control system when determining the attack strength for the attack. Note: The defending unit would also receive the normal Loss Modification for being in a smoke hex.
16.4 Smoke Restrictions
Smoke may not be used in blizzards or during moderate or heavy wind conditions. Smoke may be used at night.
16.5 Vehicle Smoke (Optional)
Certain vehicular units (see Unit Data Sheet) are capable of producing smoke.
16.51 A smoke marker (section pattern) is placed in the hex occupied by the vehicle which is producing smoke.
16.52 Smoke may be produced under any command.
16.53 Vehicle smoke is produced during the Friendly Movement Phase, and may be produced in any or all hexes occupied by or transited by the smoke-producing unit in that Movement Phase.
16.54 No vehicular unit may produce smoke in more than 4 Movement Phases. Whenever a vehicular unit produces smoke, this must be noted on the Unit Status Sheet.
16.55 Stationary vehicles producing smoke are treated as moving vehicles for purpose of observation only.
16.56 Vehicle smoke is considered to extend up only 1 Height Level. (If necessary, note which smoke is vehicle smoke on a separate piece of paper.)
17.0 Transport and Mounted Combat
General Rule: Infantry units may be carried (transported) in Friendly armored personnel carriers (APCs) or armored fighting vehicles (AFVs). While mounted, infantry units may fire any of their weapons systems, although with reduced effectiveness. Engineer units are treated as infantry under this section.
Cases:
17.1 Transport
Transport is a specialized form of movement which allows a vehicular unit to carry a certain amount of infantry units. It is the only time (other than stacked units) that a Player is allowed to move more than one unit at a time. Transport requires two separate operations: mounting and dismounting. Mounting represents an infantry unit boarding a Friendly vehicle. Dismounting is just the opposite. While being carried by a vehicle, the infantry unit is said to be mounted.
17.11 There is a cost of one Movement Point to the infantry unit and two Movement Points to the vehicular unit to mount or dismount. To mount, the Player places the vehicular unit on top of the infantry unit. To dismount, he places the vehicular unit underneath the infantry unit. Transporting simply involves the Player moving the vehicular unit with its passengers underneath as one, just as though the Player were moving the vehicle alone. In other words, the mounted units just ride along with the transport units.
Note: Players may remove mounted infantry counters from the map if their location with a particular vehicular unit is noted on the Unit Status Sheet.
17.12 Transported and transporting units must mount and dismount in the same hex. However, both units may have begun or ended the Phase in different hexes. (That is, they may continue moving before and/or after the mounting/dismounting operation.)
17.13 Each vehicle of an APC/AFV unit may transport one step worth of an infantry unit. Thus, for example, a three-vehicle platoon of APCs could carry a full strength (3 step) infantry unit.
17.14 When a transporting vehicle is eliminated due to combat, any infantry (i.e., one step) that is carrying is also eliminated. All other combat results have no effect on mounted infantry units. No Loss Modification die roll would be made for the mounted infantry unit in such a case.
17.15 A Player may voluntarily eliminate steps from a Friendly infantry unit so that it may be transported by a given APC/AFV unit. If using the morale rules, the Player need not check morale for the company when doing so, but all subsequent morale checks would include those eliminated units (see Section 15.0).
17.16 If there is "extra space" in an APC/AFV unit (for example, if a 3-vehicle APC unit were transporting a 1-step infantry unit), the infantry unit would not be affected by the loss of vehicles until the extra space was eliminated.
17.17 While mounted, infantry units may be issued any command that they could ordinarily be given. The two units (carrying vehicle and transported infantry) need not have the same command.
17.18 Any infantry unit which dismounts and fires during the same phase is considered to be engaging in short halt fire, regardless of whether it is in a bound command with short halt designation or whether it is in an overwatch command.
17.2 Mounted Combat
Mounted combat represents the direct fire abilities of infantry while they are being transported in Friendly vehicular units. All such units (APCs/AFVs) have their "mounted combat class" included on their data sheet. They may be either hatch or mixed (hatch and port). This class determines the ability of infantry units to fire their weapon systems while mounted in the vehicle (see Case 17.21).
17.21 Mounted Combat Matrix (see Charts and Tables section).
17.22 Certain ATGM systems may not be fired by mounted infantry units. This is listed on the infantry unit's data sheet.
17.23 When halving the automatic weapons strength of mounted infantry units, fractions are rounded down.
17.24 Mounted infantry units may not fire ATGM weapons unless both vehicle and infantry are in Overwatch Command or Bound Command with short halt designation.
18.0 Morale
General Rule: Companies and battalions can sustain only a certain amount of casualties before they are no longer able to function effectively as a fighting force, and must pause to regroup and Rally. The basic "unit" in the game for morale purposes is the company, usually composed of three platoons. Each time a platoon of a given company suffers any casualties (losing either vehicles or steps), the company as a whole must check morale. If company losses become too severe, the morale problems may begin to spread, affecting other companies within the battalion, and eventually battalions within the brigade. Companies have their morale expressed by entering one of three Morale States. Battalion and brigade/regiment headquarters have their morale difficulties expressed by becoming broken. The current morale status of all units is recorded on the unit's status sheet.
Procedure: Immediately after the combat results are applied, the defending Player must roll two dice and consult the Morale Table (18.2). The Player should determine the total number of vehicles (or steps) lost so far in the game by the company in question. Read across on the line corresponding to the number of vehicles (or steps) with which the company began the game (round down to the nearest number on the table). This will determine what column to use on the Morale Table. Shift one column to the right for each "additional" vehicle or step (other than the first one) lost in that particular combat (e.g., if the adjusted combat result was 2, shift one column to the right). Cross-index the die roll with the correct column to locate the indicated result. This result is immediately applied to all units in the company, and is marked on the Player's unit status sheet. Note: Players may agree before starting play to keep morale status and morale die rolls secret.
Cases:
18.1 Morale Checks
18.11 Companies check morale only after the loss of one or more of their vehicles or steps. No morale check is required due to Suppression results.
18.12 Battalion headquarters must check morale at the end of any Phase in which one-half or more of the companies under their command are in Morale State 3.
18.13 Brigade/regiment headquarters must check morale at the beginning of the Rally Segment of any Friendly Indirect Fire Phase in which they attempt to Rally one of the battalion headquarters under their command (see Case 18.8).
18.14 The effects of a morale check do not take effect until the end of the current Phase.
18.15 Units whose current commands have become invalid due to a morale check must immediately be given some valid command by the owning Player; this new command always takes effect immediately.
18.2 Morale Table
(See Charts and Tables section.)
18.21 Explanation of Morale Results:
- — = NO EFFECT. The company's Morale State is unchanged.
- 1 = All units of the company have their Morale State increased by 1.
- 2 = All units of the company have their Morale State increased by 2.
Note: All morale results are cumulative, up to a maximum of Morale State 3.
18.3 Morale State 1
Morale State 1 has no effect other than to prepare units to enter Morale States 2 and 3 after further morale checks. (In other words, the morale of the company is becoming shaky, but has not yet broken.)
18.4 Morale State 2
18.41 Units in Morale State 2 may not be given a Bound Command. If they wish to move, they must do so by a Withdraw Command (see Case 5.4).
18.42 A unit in Morale State 2 or 3 which is in close assault must withdraw into an adjacent hex after the first round of close assault combat (see Case 13.35). If the unit(s) is unable to withdraw, it is immediately and completely eliminated. Withdrawal is mandatory for dismounted infantry units in town hexes only if there is an adjacent town hex not occupied by Enemy units.
18.43 Units in Morale State 2 may still be given an Overwatch Command and may continue to fire normally.
18.44 Companies in Morale State 2 or 3 cannot be given Bounding Overwatch Commands.
18.5 Morale State 3
18.51 Like units in Morale State 2, units in Morale State 3 may not be given a Bound Command. (See Cases 18.41 and 18.42.)
18.52 Units in Morale State 3 may not be given an Overwatch Command, and may not fire any of their weapons systems.
18.6 Rallying Companies
Companies may attempt to reduce (improve) their Morale States through the procedure known as Rallying; this involves battalion HQs. During each Friendly Indirect Fire Phase the Phasing Player may attempt to Rally those companies which have had a Rally Command assigned to them in the two immediately preceding Friendly Command Phases. For each company the Player wishes to Rally, he rolls one die. If the die roll is less than or equal to the value of the battalion HQ to which the company belongs (see Case 18.7), then the company has successfully Rallied and its Morale State is immediately reduced by 1. Any other result and the Morale State of the company is unaffected.
18.61 Companies may not attempt to Rally if their battalion HQ is currently broken (see Case 18.7).
18.62 Companies may not attempt to Rally if any unit of that company has lost any vehicles (or steps) during the preceding complete Game-Turn (11 consecutive Phases).
18.63 A company may only attempt to Rally once in a given Friendly Indirect Fire Phase.
18.64 If all units of the Rallying company are currently adjacent to or stacked with their battalion or brigade/regiment HQ, subtract two from the Rally die roll. Such companies are also exempt from Case 18.62, and may attempt to rally in any Friendly Indirect Fire Phase, regardless of current command.
18.65 There is no limit to the number of times during the game that a unit may enter a certain Morale State, Rally, and enter that Morale State again.
18.66 Independent command units are treated as companies under Case 18.6. Independent command units which are attached to Brigade/Regiment HQ rather than to a Battalion HQ are, like other independent command units, not usually subject to morale deterioration, but if they must be rallied, they are rallied by the Brigade/Regiment HQ to which they are attached. In such a case the Brigade/Regiment HQ acts just like a Battalion HQ in rallying the unit.
18.67 If battalion HQ is Suppressed, add 2 to the Rally die roll.
18.68 Once a company has been successfully rallied to Morale State 0, the number of vehicles/steps in the company at that time is noted on the unit status sheet. All further morale checks for that company are based on the company strength at the time it was last rallied to Morale State 1 or better, but with a column shift of 2 to the right on the Morale Table.
18.69 Any company reduced below ⅓ of its original strength is prohibited from Rallying.
18.7 Battalion Headquarters (HQ)
18.71 Before the start of the game, each Player must roll the die once for each of his battalions. Each die roll determines the value of one of the Player's battalion HQs.
18.72 The value of the battalion headquarters determines the ability of that battalion to successfully Rally all of its companies. (See Case 18.6.)
18.73 At the end of any Phase in which one-half or more of the companies of a battalion are in Morale State 3, the headquarters of that battalion must check its own morale. The owning Player should immediately roll one die. If the die roll is less than or equal to the value of the battalion HQ then that HQ has successfully passed its morale check and does not suffer any ill effects. However, if the die roll is greater than the headquarters' value, then the HQ's morale is considered to be broken. All companies of a broken battalion immediately enter Morale State 3, and they may not attempt to Rally until the battalion HQ itself has successfully Rallied. (See Case 18.8.)
18.74 Once a battalion HQ has successfully passed its morale check due to combat losses, it need not check morale for this reason again for the remainder of the game. However, such a HQ unit may still be broken due to the Morale State of its brigade/regiment headquarters (see Case 18.8).
18.75 Subtract 2 from the die roll of the battalion HQ if that HQ is currently stacked with or adjacent to its brigade/regiment headquarters.
18.76 The battalion HQ is treated as a 1 vehicle platoon. If the battalion HQ unit is eliminated due to combat, it is immediately replaced. The owning Player should repeat the initial procedure for determining the HQ's value, but this time use a battalion HQ's rating 4 columns to the right of the initial rating given in the scenario. If this would cause the Player to shift to a column "off the table," then no die roll is made and the battalion HQ is replaced but the companies of that battalion may no longer Rally. This procedure continues each time the battalion HQ is eliminated, with cumulative shifts of 4 columns on the table each time. When the battalion HQ is replaced, the unit may be placed on any unit of that battalion, at the owning Player's choice.
18.8 Rallying Headquarters
Before the start of the game, each Player must roll the die once for each of his brigade/regiment headquarters, in order to determine their value, unless there is no Friendly brigade/regiment HQ present in the scenario.
Broken battalion HQs may attempt to Rally during the Rally Segment of any Friendly Indirect Fire Phase in which they are stacked in the same hex or adjacent to their brigade/regiment HQ. The owning Player, however, must first have his brigade/regiment HQ check its morale by rolling one die. If the number rolled is less than or equal to the value of the brigade/regiment HQ then that HQ has successfully passed its morale check and the battalion HQ is considered Rallied. If the die roll is greater than the value of the brigade/regiment HQ's value, then the brigade/regiment HQ's morale is considered broken and all battalion HQs of that brigade/regiment must immediately check morale.
18.81 Broken brigade/regiment headquarters may attempt to Rally themselves in any Friendly Indirect Fire Phase. The owning Player should roll one die. If the number rolled is less than or equal to the HQ's value, then the brigade has Rallied itself and is returned to normal. If the die roll is greater than the HQ's value then the unit remains broken.
18.82 If no brigade HQ is present in a scenario, broken battalion headquarters may attempt to Rally themselves using the same procedure as brigade/regiment HQs given in Case 18.81. However, 2 is subtracted from all die rolls when using this procedure. Battalion HQs whose chance of Rallying is 0 or less may not Rally.
18.83 There is no limit to the number of times that brigade/regiment and battalion headquarters may become broken, Rally, and become broken again.
18.84 If a broken brigade/regiment or battalion HQ is eliminated due to combat, then its replacement is also considered to be broken.
18.85 Brigade/regiment and battalion HQs may attempt to Rally only if both HQs are in Overwatch or Rally Command. Enemy direct or indirect fire has no effect on the abilities of these units to Rally, unless they are Suppressed (see Case 18.87).
18.86 If a brigade/regiment HQ is eliminated, it is immediately replaced in the same manner as an eliminated battalion headquarters (see Case 18.76). The replacement HQ may be placed with any battalion HQs of its brigade/regiment.
18.87 If brigade/regiment HQ is Suppressed, 2 is added to the Rally die roll when Rallying a battalion HQ or when Rallying itself.
18.88 Broken HQ units may only be given Withdraw and Rally Commands.
18.9 HQ Table
(See Charts and Tables section.)
18.91 How to Use the Headquarters Table: Each Player's initial battalion and brigade rating is listed in the scenario rules. The Player should roll one die for each of his headquarters units and locate the number rolled under the correct column on the Headquarters Table. He should then read across on that line to determine the headquarter's value.
Advanced Rules
(Sections 19.0 through 28.0 follow.)
19.0 Minefields
General Rule: In certain scenarios, a Player is allowed to deploy minefields in order to inflict losses on and impede the progress of Enemy units. There are three types of minefields: Hasty, Defensive, and Barrier, corresponding to the density and effectiveness of the mines within the hex.
Cases:
19.1 Placement of Mines
The scenario instructions will state which Player (if any) has minefields to deploy, and will indicate the number and type available. Before the start of the game the owning Player may place these minefields as he desires. The Player may also deploy the indicated number of dummy minefields on the map in order to mislead his opponent.
19.11 When deploying minefield counters, the Player must write down on a separate piece of paper the type of minefield being placed in each hex.
19.12 Minefields may not be placed in lake hexes. They may be placed in any other hex on the map.
19.13 No more than one minefield counter may ever be deployed in a given hex.
19.14 Once placed, minefield counters remain in the hex for the entire game. There is no way to completely remove a minefield, although they may be breached (see Case 19.4).
19.2 Entering and Exiting Minefields
The first time a ground unit enters a minefield hex, the minefield counter is flipped over to reveal whether the minefield is real or dummy. However, if the ground unit is a dummy the dummy is removed instead, and the minefield composition remains secret.
19.21 If the minefield is a dummy, the counter is immediately removed from the map, and the unit which entered the hex may freely continue its movement.
19.22 If the minefield is real, and the entering unit is a vehicle, the Player who placed the minefield must immediately resolve an attack on the moving unit (see Case 19.3). After this attack is resolved, the defending unit may continue its movement.
19.23 There is never any additional cost for vehicles to enter or leave a minefield hex. However, all vehicle units that enter such hexes will be attacked by the minefield, unless the minefield is breached (see Case 19.4).
19.24 When an infantry unit enters a real minefield, the owning Player must decide whether to proceed boldly or cautiously with the infantry unit through the minefield. Note the decision on the unit status sheet, or improvise a marker to note it.
19.25 When an infantry unit proceeds boldly through a minefield, it is attacked by the minefield immediately after the decision to move boldly is made (see Case 19.3). After this attack is resolved, the infantry unit may continue its movement, or remain in the minefield hex without being further attacked.
19.26 There is no additional cost for boldly moving infantry to enter or leave a minefield hex.
19.27 When an infantry unit proceeds cautiously through a minefield, it is not attacked by the minefield. Instead, the infantry unit is delayed by the minefield. If the minefield is artillery-delivered, the infantry unit must remain in the hex in Bound Command for an additional Friendly Movement Phase; if it is Hasty, for two additional Movement Phases; if it is Defensive, for three additional Movement Phases; if it is Barrier, for four additional Movement Phases. Players must keep track of Movement Phases spent in the minefield hex on the unit status sheet or a separate piece of paper. The infantry unit may leave the minefield, having been delayed as required, in any direction.
19.28 Once an infantry unit has chosen Cautious Movement, it may change to Bold Movement at the beginning of any subsequent Friendly Movement Phase in which it is still in the minefield hex. In such a case, the unit is immediately attacked by the minefield, and may, having survived the attack, exit it immediately.
19.3 Resolving Minefield Attacks
When resolving each minefield attack, the Player who placed the minefield should roll two dice and consult the appropriate Minefield Combat Results Table, depending on whether the defending unit is vehicle or infantry. If the defending unit is infantry, cross-index the die roll with the type of minefield in the hex. The number indicated is the number of steps lost by the infantry unit. If the defending unit is vehicle, determine whether the defending unit is a tank or not (this information is listed on the unit's data sheet). This will determine which line to use under the type of minefield column. Cross-index the die roll with the appropriate line. The number indicated is the number of vehicles lost by the defending unit.
19.31 No Loss Modification die roll is ever made for units undergoing minefield attacks. Terrain, target attitude, etc. have no effect on minefield attacks.
19.32 Each unit that enters a minefield hex is attacked separately by the minefield. The only exception to this is for mounted infantry and mounted engineer units; they suffer the same combat result as the vehicle unit which is transporting them.
19.33 Vehicle units that remain in a minefield hex at the end of a Friendly Movement Phase are also attacked by the minefield, as if they had just entered the hex. This attack is resolved after all final fire for the Phase has been carried out.
19.34 Minefields will attack all vehicle and bold infantry units that enter (or remain in) their hex. (Exception: see Case 19.4.) This is true regardless of whether the units are Enemy or Friendly.
19.35 Minefields are never "used up." They continue to make an unlimited number of attacks throughout the play of the game.
19.36 Anti-Infantry Minefield Combat Results Table (see Charts and Tables section).
19.37 Anti-Vehicle Minefield Combat Results Table (see Charts and Tables section).
19.4 Breached Minefields
Players may partially negate the effects of minefield hexes by breaching the minefield hex. This may be done either by vehicles equipped with mine plows (see Case 19.5) or by engineer units (see Case 29.6). In either case, units may enter breached minefields in column formation without being attacked by them.
19.41 Vehicular units must pay an additional cost of four Movement Points when entering a breached minefield hex.
19.42 There is no additional cost for an infantry unit to enter a breached minefield hex.
19.43 Units in column formation may remain in a breached minefield hex without being attacked by it.
19.44 Units may still choose to move "normally" (i.e., not in column and/or without paying any required additional Movement Point cost) through breached minefield hexes, but would be attacked by the minefield for doing so.
19.5 Mine Plows
Certain vehicular units may breach minefields through the use of mine plows. The availability of mine plows is listed in the scenario instructions. Vehicular units equipped with mine plows may enter minefield hexes without being attacked by them. The unit must be in column formation and must end the Movement Phase in the hex. At the end of the Phase the minefield counter is removed from the map and is replaced by a breached minefield counter.
19.51 After breaching a minefield, there is a chance that the vehicular unit's mine plow has been destroyed. At the end of a Phase in which a minefield is breached, the breaching Player must roll one die and consult the Mine Plow Damage Table. If the indicated number is rolled, the mine plow is immediately destroyed. Destroyed mine plows may not be used for the rest of the game. If no mine plows remain in the unit, that unit must exit the minefield by the same hexside it entered or be attacked by the minefield. Note: Only Soviet ROD units have more than one mine plow per platoon.
19.52 Mine Plow Damage Table (see Charts and Tables section).
20.0 Aircraft, Helicopters, and Air Defense
General Rule: Ground attack aircraft and helicopters have come to play an increasing role on the modern battlefield. In MechWar 2 such units have an Unlimited Movement Allowance, and do not pay terrain costs. However, they must still trace a contiguous path of hexes to their destination. Like ground units, aircraft and helicopters have numerous weapon systems, and may both attack and be attacked by Enemy units.
Cases:
20.1 Aircraft Movement and Combat
Like indirect fire, the use of aircraft must be plotted in advance during a Friendly Indirect Fire Phase (the numbers and types of aircraft available to a Player will be listed in the scenario rules). All aircraft attack by performing an Air Strike. All aircraft plots must be made three Game-Turns in advance. There are three types of air strikes, depending on the weapons systems carried by the aircraft: bombing, strafing and air-to-surface missile. Aircraft appear on the map only on Game-Turns they are plotted to perform strikes. These plots must be written on a separate piece of paper, and list the following information:
- (A) The type involved.
- (B) The Game-Turn in which the strike will occur.
- (C) If the strike is to be a bombing strike, the target hex of that strike.
20.11 The exact combination of weapons systems available varies from aircraft to aircraft, and is listed in the Exclusive Rules booklet. The method by which strikes are carried out is described in Cases 20.2, 20.3 and 20.4.
20.12 All aircraft movement takes place during the Friendly Indirect Fire Phase in which the aircraft are plotted to arrive. The aircraft may appear on any hex of the mapedge, but if appearing at a mapedge for which off-map Enemy air defenses are listed in the scenario, it must first be attacked by those defenses. Aircraft must enter the map one unit at a time and are not permanently displayed on the map. They must exit the map after completing their movement and combat. After this has been done, another air unit (if one is plotted) may enter the game.
20.13 While on the map, aircraft must be at either high or low altitude. Aircraft may switch freely between the two (flip the counter over to its appropriate side). Altitude affects an aircraft's Line of Sight and observation, as well as its defensive and offensive capabilities.
Aircraft Arc Example: (see printed diagram).
20.14 Aircraft using strafing or air-to-surface missiles may only attack units which they have sighted during that Phase. Such aircraft may only attempt to sight and/or attack units currently in their "forward arc" (see Case 20.6).
20.15 When aircraft move on the map they must travel a certain number of hexes straight forward before turning one hexside to the right or left. This is the aircraft's "turn mode" and is listed on the unit's data sheet. Aircraft may not turn more than one hexside in any hex.
20.16 After performing their strikes, all aircraft must exit the map. They may do so from any mapedge, but may be attacked by off-map air defense systems when doing so.
20.17 No commands (other than the required strike plot) are ever issued to aircraft. They are not subject to morale effects.
20.18 Aircraft performing strafing and/or using air-surface-missiles may attack any number of times in the same Phase, until their ammunition is depleted. However, aircraft may only fire a given weapon system once in a given hex. If they wish to repeat an attack they must "circle around" and try again. Such aircraft are subject to Enemy fire while doing so (see Case 20.7).
20.19 Aircraft may neither close assault, nor be close assaulted.
20.2 The Bombing Strike
To perform a bombing strike, the aircraft must move by any route of hexes to the plotted target hex. As soon as the aircraft enters this hex, all ground units in that hex are immediately attacked on the indicated column of the On-Target Artillery Combat Results Table. (This is listed on the air unit's data sheet.) Bombing strikes are never Scattered.
20.21 While moving to and/or from the target hex, the aircraft may also conduct strafing strikes against Enemy units (see Case 20.3). A given aircraft may only perform one bombing strike per game.
20.22 Smart Bombs: Aircraft equipped with smart bombs (those that can be directed to the target after release) need not actually enter the target hex to make their attack. Instead, they may "drop their bombs" in any hex within 10 hexes of the plotted target hex so long as the target hex is currently in the aircraft's forward arc. The ground units in the target hex are attacked as normal. Aircraft using smart bombs must do so from high altitude.
20.23 Aircraft equipped with smart bombs may attempt to destroy bridges and ferries by conducting a bombing strike on one of the bridge or ferry hexes. The strike is conducted normally, with the exception that a separate die roll is made when resolving the results of the air strike. If a combat result of 2 or 3 is obtained on the appropriate column of the On-Target Artillery Combat Results Table (14.31), then the bridge or ferry is considered to be destroyed. Any other result has no effect.
20.24 (Optional Rule) In scenarios using the U.S. Marines, the Players may agree to designate the Marines as equipped with Radar Assisted Bombing Forward Air Control (RABFAC). RABFAC allows fixed-wing air units to launch bombing or strafing attacks at hexes within focused observation range for moving vehicles of a designated Marine LVTP7 unit, provided that there is an unblocked line of sight from the LVTP7 to the target hex, in rain, fog, or falling snow (but not blizzard) conditions. The F4 air unit, which is the only NATO air unit in Mech War '80 which should be present in Marine scenarios, resolves bombing attacks on the Medium Howitzer column of the Artillery CRT, resolves strafing strikes against vehicles on the H column of the Main Gun CRT, and resolves strafing strikes against infantry on the 5 column of the Automatic Weapons CRT, when using RABFAC. Designation of the RABFAC LVTP7 must be done by the U.S. Player before the start of play; this designation may only be changed to another LVTP7 if the two vehicles are in the same hex.
20.3 The Strafing Strike
Procedure: Strafing represents a special form of direct fire. To perform a strafing strike, the aircraft may attack any ground unit exactly three hexes from the "front" of the aircraft, as indicated in the aircraft diagram printed in the rulebook. All vehicle units are attacked on the indicated column on the Main Gun/ATGM Combat Results Table (10.3). All infantry units are attacked on the indicated column on the Automatic Weapons Combat Results Table (9.3). (This information is listed on the aircraft's data sheet.)
20.31 Aircraft may only perform strafing strikes at low altitude.
20.4 Air-Surface-Missiles (ASMs)
Aircraft may also attack Enemy vehicular units with air-to-surface missiles (ASMs). Dismounted infantry units may not be attacked with ASMs. All ASMs are considered to have unlimited range, and may be fired at any Enemy vehicle unit within the Line of Sight and observation range of the firing aircraft (see Case 20.6). All ASMs attack using the S column of the Main Gun/ATGM Combat Results Table (10.3).
20.41 Aircraft may fire ASMs from either high or low altitude.
20.5 Helicopter Movement and Combat
Like aircraft, helicopters have an unlimited Movement Allowance. In most other respects, however, helicopters are treated as normal ground units. There are two types of helicopters: attack helicopters and transport helicopters. The former are used to attack Enemy ground units, while the latter may pick up and transport Friendly infantry units. Helicopters observe Enemy units in the exact same manner as ground units. They are assumed to be observed by any Enemy units who can trace a Line of Sight to them.
20.51 Helicopter units move only during Friendly Movement Phases, and must be given commands during Command Phases. Each helicopter unit is treated as a separate company for this purpose. Helicopters use their various weapon systems to conduct normal direct fire attacks on Enemy units. Attack helicopters will be equipped with ATGM, medium main gun, or rocket pod weapon systems, while transport helicopters have no weapons systems.
20.52 Helicopters must be at either low or nap of earth (NOE) altitude, and they may switch freely between the two (flip the counter over to its appropriate side). Altitude affects a helicopter's Line of Sight and observation as well as its defensive capabilities.
20.53 Helicopters at low altitude are assumed to fly two Height Levels above all blocking terrain in the hex; their Line of Sight is judged accordingly (see Case 7.1). Helicopters at NOE altitude are assumed to fly at the same Height Level as all blocking terrain in the hex. Their Line of Sight is judged accordingly (see Case 7.1).
20.54 Helicopters with Bound Commands may always use short halt fire at the end of their movement for any Indirect Fire Phase.
20.55 Helicopters remain on the map at all times during the game, and may only move when given a Bound Command. They may move freely in any direction, and have no "turn mode."
20.56 Helicopters may not enter defilade and never suffer any morale effects.
20.57 Helicopter units at NOE are attacked as normal ground units by all forms of indirect fire. Any result of S, 1, 2 or 3 destroys the helicopter (although the loss could be modified; see Case 20.8).
20.58 Helicopters do not count for stacking purposes. No more than one helicopter may end any Phase in a given hex.
20.59 Helicopter units may neither close assault, nor be close assaulted.
20.6 Aircraft Observation
Fixed-wing aircraft do not observe (sight) Enemy units in the same manner as either ground units or helicopters. Instead, they observe by "acquiring" individual Enemy units, on a unit-by-unit basis.
Procedure: As an aircraft unit moves across the map, the Phasing Player may choose an Enemy ground unit and attempt to acquire it. In order to do so, the aircraft must have the target unit continuously in its forward arc while the aircraft moves a minimum of five hexes. Once this has been done, the Phasing Player rolls one die. If the die roll is greater than the Loss Modification Value of the terrain in the hex occupied by the Enemy unit (see Section 12.0 for the Loss Modification Value of terrain), then the unit has been acquired by the aircraft. If not, the unit has not been acquired.
20.61 Aircraft may only attack acquired units, even if the Enemy units are currently being observed by Friendly ground units. Once acquired, units remain so for the remainder of the Phase. (If necessary, make a note on paper as to which units have been acquired by which aircraft.)
20.62 When aircraft successfully acquire face down units, these units are not flipped over. Instead, the acquiring Player is told only whether the unit is infantry or a vehicle. If the unit is a vehicle, he is also told the target profile of the unit. If the unit is a dummy, the Player is informed of this fact and the dummy is removed from the map.
20.63 A given aircraft may attempt to acquire a unit more than once, simply by starting the 5-hex "acquisition cycle" all over again.
20.64 Aircraft may not attempt to acquire targets more than 15 hexes away from them. Only aircraft at high altitude may attempt to acquire targets; aircraft at low altitude may never do so (although they may attack previously acquired targets).
20.65 Ground units which fire any of their air defense systems are automatically acquired by any Enemy aircraft within 15 hexes of them, provided that the aircraft is at high altitude.
20.66 Aircraft may not acquire units in any type of fog hex.
20.67 All ground units on the map are always assumed to have a valid Line of Sight to any aircraft at high altitude.
20.68 In order to observe aircraft at low altitude, ground units must trace a valid Line of Sight to them (remembering that the aircraft are considered to be at Height Level 6).
20.69 Weather conditions have no effect on the ability of air defense systems marked with an * on the Tracking Range Chart (20.73) to trace a Line of Sight. (These units have radar fire control systems.)
20.7 Air Defense Systems
With one exception (that of indirect fire attacking helicopters at NOE), air units may only be attacked by air defense systems. (These are various types of missile and gun systems and listed on the unit's data sheet.) Many ground units have one or more air defense systems. All gun air defense systems may fire at each Enemy aircraft (during the opposing Player's Indirect Fire Phase) once for every 5 hexes the aircraft moves within the unit's tracking range. Missile systems may fire at each Enemy aircraft once for every 15 hexes the aircraft moves within the unit's tracking range. Helicopters are attacked like "normal" units. That is, they may be attacked by a given air defense weapon system only once per Movement Phase, and do not have to be "tracked" by air defense systems in order to be fired on.
Procedure:
- Determine if the target air unit has moved the required number of hexes within the firing unit's tracking range.
- Consult the Air Defense Range Attenuation Chart (20.78). Cross-index the range in hexes between the firing unit (exclusive) and the defending unit (inclusive) with the firing weapon system. The number indicated is the firing unit's strength for the attack. This strength may vary, depending on the altitude of the target aircraft.
- The attacking Player should roll one die and consult the Ground-To-Air Combat Results Table (20.74). Determine the number of vehicles (or steps) in the firing unit, and the altitude, defense class and status of the target unit, and modify this die roll accordingly (see the Ground-To-Air Die Roll Modification Chart, 20.76, and the Air Defense Combat Strength Chart, 20.77).
- Cross-index the modified die roll with the attack strength of the firing unit. If the defending unit is hit, the defending Player must roll one die and consult the Air Unit Loss Modification Procedure (20.8).
20.71 Ground units must have a Line of Sight to the defending unit in order to attack. In addition, units in heavy woods hexes may not fire their air defense systems.
20.72 Only units with Overwatch Commands may fire their air defense systems.
20.73 Tracking Range Chart (see Charts and Tables section).
20.74 Ground-To-Air Combat Results Table (see Charts and Tables section).
20.75 Explanation of Ground-To-Air Combat Results Table:
- H = HIT. Defending air unit has been hit; the defending Player must roll one die and consult the Air Unit Loss Modification Table (20.8).
-
- = NO EFFECT. The attack has failed.
20.76 Die Roll Modification Chart (see Charts and Tables section).
20.77 Air Defense Combat Strength Chart (see Charts and Tables section).
20.78 Missile 3 and Missile 4 weapon systems may not be used at night or in medium or heavy fog, or rain or blizzard weather conditions.
20.8 Air Unit Loss Modification
When an air unit has received a hit result on the Air-To-Ground Combat Results Table, the defending Player must roll one die. If the die roll is less than or equal to the Loss Modification number of the defending air unit, then the aircraft has survived, and is not affected by the attack. If the die roll is higher than the Loss Modification number then the air unit is eliminated. (Immediately remove it from the game.) Note that the loss modification number will vary, depending on whether the air unit was hit by an Enemy missile or gun system. Air units that take (and survive) three or more hits in the same Phase may no longer conduct attacks of any kind, nor observe Enemy units. No Victory Points are awarded for such air units (unless they are shot down before they can leave the game), or unless the scenario specifies otherwise.
20.9 Helicopter Transport
Transport helicopters function in a manner similar to armored personnel carriers (see Section 17.0). Transport helicopters with a Bound Command may mount, transport, and dismount Friendly infantry platoons, ATGM teams, or engineer squads. The number of such platoons is listed on the unit's data sheet.
20.91 Mounting or dismounting operations have no effect on the movement abilities of helicopter units; that is, they may continue to move normally after embarking or disembarking their passengers. However, in any given Phase a helicopter unit is limited to either mounting or dismounting operations; it may not do both. Moreover, a given helicopter unit may not perform its mounting or dismounting operations in more than one hex in any given Phase. There is a cost of one Movement Point to the infantry unit to mount or dismount. To mount, the Player places the helicopter unit under the infantry unit. To dismount, he places the infantry unit underneath the helicopter unit. Transporting simply involves the Player moving the helicopter unit with its "passengers" underneath as one, just as though the Player were moving the helicopter alone. In other words, the mounted units just ride along with the helicopter units.
20.92 Helicopter units may only mount or dismount infantry units while at NOE altitude. Units may not mount or dismount in heavy woods hexes or hexes occupied by Enemy units.
20.93 Units must mount and dismount while in the same hex, although the infantry unit may begin or end the Phase in a different hex.
20.94 When a transport helicopter is eliminated due to combat, any infantry that it is carrying is also eliminated. No Loss Modification die roll would be made for the mounted infantry unit in such a case.
20.95 While mounted in helicopters, infantry units may only be issued Bound or Withdraw Commands. The two units (carrying helicopter and transported infantry) need not have the same command.
20.96 Only transport helicopters may carry infantry units; attack helicopters may never do so.
20.97 The number of platoons of infantry which may be carried by a transport helicopter unit is listed on the unit's data sheet. For purposes of helicopter transport capacity, one infantry platoon is equivalent to two engineer squads or two ATGM teams. Transport capacity may be distributed among these different types of infantry; thus an Mi8 Soviet helicopter could carry one platoon of infantry, an ATGM team, and an engineer squad all at once, being rated at two platoons' worth of transport capacity.
20.98 In a nuclear environment, a helicopter unit may be designated as "on the ground" if it does not move during a Game-Turn, by placing a defilade marker on top of the helicopter unit. This status is lost as soon as the helicopter unit is moved, or it may be removed during any Movement Phase by the owning Player; such designation is not a command and is not plotted during a Command Phase, nor is it affected by jamming. The only effect of being "on the ground" is that a nuclear burst will attack the helicopter unit on the Anti-Infantry Nuclear CRT (see Case 107.61) rather than on the Anti-Helicopter Nuclear CRT (see Case 107.64).
21.0 Short Halt
General Rule: By using short halt, vehicle units may both move and fire in the same Friendly Movement Phase.
Procedure: Vehicular units with a Bound Command may perform short halt by expending no more than one half of their Movement Allowance (fractions rounded down) during a Friendly Movement Segment. After completing the unit's movement, the owning Player should place a short halt marker on the unit.
21.11 Units performing short halt may fire during the Final Fire Segment of the Phase in which they have moved. However, such units do so after all units without short halt or fire-and-move designations have completed their direct fire (see the Sequence of Play, Section 4.0).
21.12 Units performing short halt are not considered to be moving when defending against direct fire attacks during the Final Fire Segment.
21.13 Friendly units defending against direct fire attacks by Enemy units performing short halt receive a modification of −3 on their Loss Modification die rolls (see Section 12.0).
21.14 Short halt is not a command, and need not be plotted in advance. Players may choose to have units with a Bound Command perform short halt entirely at their own option.
21.15 Helicopter units with a Bound Command may always use short halt, should they desire to do so. Since they have unlimited movement, they may continue to move normally while doing so.
21.16 Dismounted infantry units may not perform short halt; but see Case 17.18.
22.0 Ammunition Depletion
General Rule: Because units can only carry a limited amount of ammunition into battle, they must guard against the possibility of running out at crucial moments. To simulate this fact, most weapon systems at the start of the game are assigned an Ammunition Level, either 3, 2, 1 or 0. 3 is the maximum level of ammunition available. 2 and 1 indicate reduced amounts. 0 indicates the unit is out of ammunition for that weapon system, and may no longer fire.
Procedure: Each time a unit fires a weapon system, the owning Player must roll one die. If the die roll is less than or equal to the ammunition depletion number listed for that system, then the unit's Ammunition Level is reduced by 1. Any other result and the Ammunition Level is not affected.
22.11 Weapon systems without an ammo depletion number do not suffer ammunition depletion (i.e., they never run out of ammunition).
22.12 There is no way for units to receive more ammunition.
22.13 The ammunition level has no effect on the resolution of combat (except, of course, by prohibiting a weapon from firing in the first place).
22.14 The ammunition depletion rules should be used whenever air units (see Section 20.0) are included in the game.
23.0 Night
General Rule: Most armies are placing more emphasis on their night-fighting abilities. The main effect of night is to reduce visibility. To overcome this, a variety of searchlights and night vision devices have been developed. The scenario instructions will list whether it is night, and also provide information on the natural level of light (phase of the moon). Players should note that units attempting to observe at night still require a valid Line of Sight (see Section 7.0).
Cases:
23.1 Units With No Night Equipment
The observation range of units without any special night equipment is determined by the amount of natural light available, according to the current phase of the moon (see Case 23.11).
23.11 Night Observation Chart (see Charts and Tables section).
23.12 Vehicular units moving at night ordinarily have their Movement Allowance reduced by one-third (round fractions down). Infantry units may not move more than two hexes per Friendly Movement Phase at night.
23.13 Vehicular units which have been stripped of external systems have their movement allowance reduced by two-thirds (round fractions down).
23.2 Searchlights
Units equipped with searchlights may increase their observation range at night. These searchlights may be either infrared (IR) or white light (WL).
23.21 Searchlights are normally considered to be "off" (not in use) and are only turned "on" (come into use) at the owning Player's option. This decision is made individually, on a unit by unit basis, and is not announced to the Enemy Player. The owning Player may choose to turn the searchlight on or off at any time during the Game-Turn. (He need not record his intention of doing so on the unit's company command plot.) If the searchlight is on for any portion of a Phase it is considered to remain on until the end of that Phase.
23.22 Units using IR searchlights have an Observation Range of five hexes in all directions and observe all Enemy units within this range as if it were day, by using the Day Observation Table (see Case 7.1). Other Friendly units with passive IR may also observe all Enemy units (within five hexes of them) which are seen by the "first" Friendly unit's IR searchlight, also as if it were day, by using the Day Observation Table.
23.23 In addition to normal blocking terrain (including smoke), IR searchlights are blocked by any type of fog hexes. Additionally, they may not be used in rain, falling snow, or blizzard weather conditions.
23.24 Units using IR searchlights are themselves liable to be observed by Enemy units using passive infrared devices (see Case 23.3).
23.25 Units using WL searchlights have an observation range of seven hexes in all directions and observe all Enemy units within this range as if it were day, by using the Day Observation Table (see Case 7.1). Other Friendly units may also observe Enemy units which are seen by the first Friendly unit's WL searchlight, provided they are within daytime observation range and Line of Sight.
23.26 Units using WL searchlights may automatically "fix" one hex within their observation range and LOS in their searchlights. All units (both Enemy and Friendly) in such a hex have their observation range reduced to 1 (they're blinded by the glare); they may not fire at or "fix" any unit, including the one which is "fixing" them, if that unit is more than 1 hex away.
23.27 In addition to normal blocking terrain, WL searchlights are blocked by any type of fog hex. WL searchlights may not be used in rain, falling snow, or blizzard weather conditions.
23.28 Units using WL searchlights are automatically observed by any Enemy unit which can trace a valid Line of Sight to the unit. The only exception to this would be units currently fixed by WL searchlights; they would still have an observation range of 1.
23.29 Night devices are not subject to separate damage by automatic weapons fire.
23.3 Passive Observation
There are two types of passive observation devices: passive infrared (IR), and ambient light. Both systems are assumed to be "on" and functioning at all times. Unless otherwise stated, all units (whether vehicle or infantry) are assumed to be equipped with passive IR; units are equipped with ambient light systems only where noted. IR periscope is the same as passive IR for game purposes.
23.31 All units may automatically observe any Enemy unit to which they can trace a Line of Sight, provided that that Enemy unit is currently using an IR searchlight, using passive IR.
23.32 In addition to normal blocking terrain, passive IR is blocked by any type of fog hex. Additionally, passive IR may not be used in rain, falling snow, or blizzard weather conditions.
23.33 Units equipped with ambient light devices use the ambient light columns on the Night Observation Table (23.11). Such units may also use other visual aids normally.
23.4 Artillery Illumination (Starshell)
Instead of firing HE or smoke, certain artillery units may also fire illumination rounds (starshell). Each scenario specifies which units are starshell-equipped. This fact must be noted in advance on the Player's indirect fire plot, when requesting the fire. There is no load time required for starshell or for HE following starshell.
23.41 All artillery units, regardless of usual HE pattern fired, fire starshell in section impact patterns. (Illumination extends beyond the impact hex as described in Case 23.43.)
23.42 The arrival and Scatter of illumination rounds is resolved in the same manner as smoke shell (see Section 14.0). After resolving any Scatter the owning Player should place the appropriate starshell marker in the indicated hex. Note: most starshell fire missions will be unobserved and thus subject to a high degree of Scatter.
23.43 All starshell impact hexes immediately provide a "light pattern" of illumination. The size of this illumination varies with the caliber of the firing unit:
| Caliber of Firing Unit | Area of Light Pattern |
|---|---|
| Light mortar, light howitzer | Impact hex and two adjacent hexes in all directions |
| Medium mortar | Impact hex and three adjacent hexes in all directions |
| Medium howitzer | Impact hex and four adjacent hexes in all directions |
Note: No other calibers of artillery may fire illumination rounds.
23.44 There is no delay when plotting the indirect fire of illumination rounds. Such fire will impact on the map in the same Phase as it is plotted.
23.45 Enemy units within a light pattern may be observed as if it were day. Those units within a light pattern may only observe Enemy units that either:
- (A) are themselves in a light pattern (either the same pattern or a different one);
- (B) are within the observation range of the Friendly unit's WL or IR searchlight; or
- (C) have fired any of their weapon systems in the current phase.
23.46 Starshell has no effect in fog, rain, falling snow, blizzard, or in smoke hexes.
23.47 Starshell rounds may not be plotted for target hexes which are outside of the Line of Sight of a Friendly unit. All starshell Scatter, however, is resolved on the 61+ line of the Artillery Scatter Table.
23.5 Observing Units Which Fire
Enemy units which fired one or more of their weapon systems are automatically observed by any Friendly units which can trace a valid Line of Sight to them (see Section 7.0), subject to weather restrictions on the maximum observation range, during the Phase in which they have fired; thereafter they are observed only if they are within normal or focused observation range.
24.0 River Crossing
General Rule: Units may cross river hexsides by using either bridges, ferries, amphibious movement or snorkeling.
Cases:
24.1 Ferries
The location of ferries will be listed on the scenario instructions. Each ferry consists of a counter, placed adjacent to a specific river hexside. (See diagram in the printed rulebook.) Friendly units may use the ferry to cross the river hexside by spending one complete Friendly Movement Phase for small and medium rivers or two complete consecutive Friendly Movement Phases for large rivers doing so.
24.11 Only one unit may cross a ferry in a given Phase. Note: An infantry unit mounted in an APC counts as a total of one unit for purposes of this rule.
24.12 Units must be in column formation in order to use ferries.
24.13 Ferries also require the presence of Friendly engineer units in order to operate. (See Case 29.2.)
24.14 Ferries always begin the game in place, and may not be moved. They are automatically destroyed (remove the counter from the map) if an Enemy ground unit enters any ferry hex.
24.2 Fixed Bridges
The location of fixed bridges is listed in the scenario instructions, and they are placed on the map before the start of the game. All bridges are classed in one of five categories (0 through 4). This is indicated by placing the appropriate strength marker underneath the bridge counter to indicate its class. Do not place any strength marker under the bridge counter for 0 class (foot) bridges. Only vehicle units with a bridge value less than or equal to the class of the bridge may use that bridge. (This information is listed on the unit's data sheet.) Note: Dismounted infantry may use any (non-destroyed) bridge, regardless of its class.
24.21 Units must be in column formation to use bridges.
24.22 No more than three units (of any type) may cross a bridge during the same Phase. Infantry units mounted in APCs count as a total of one unit for purposes of this rule. There is an additional cost of two Movement Points for a vehicle unit to cross a bridge hexside.
24.23 Class 1-4 bridges may be destroyed by engineers (see Case 29.5), bombing strikes by aircraft using smart bombs (see Case 20.2), or artillery (see Case 14.73). Class 0 bridges may be destroyed by any unit in a hex adjacent to the bridge.
24.3 Bridging Units
In addition to fixed bridges, Players may also attempt to emplace mobile bridges across river hexsides through the use of bridging units. In all cases the bridging unit must first move adjacent to the river to be crossed, and then spend a certain number of Friendly Movement Phases in the hex with a Bound Command. Each bridging unit is considered to carry three "sections" of bridge. It costs a bridging unit three sections to bridge a large river, two sections to bridge a medium river, and one section to bridge a small river. Thus, for example, a bridging unit could place one bridge over a large river hexside or three bridges over small river hexsides. The number of bridge sections carried by a bridging unit must be noted on the unit status sheet. The amount of time necessary to emplace a bridge will vary with the bridging unit and the size of the river involved:
| River Size | AVLB/MTUSS | TPP | PMP |
|---|---|---|---|
| Small | 2 | 6 | 2 |
| Medium | 2 | 12 | 4 |
| Large | 2* | 16 | 8 |
*Number = number of consecutive Friendly Movement Phases required to emplace the bridge. * = AVLB units may only emplace bridges across large river hexsides if the hexside already contains a previously destroyed fixed bridge.
24.31 When bridging units have completed their bridging operations, the owning Player should place a bridge counter in the hex adjacent to the river hexside.
24.32 PMP and TPP units also require Friendly engineer units in order to complete their bridging operations. (See Case 29.2.)
24.33 All bridging units are treated as 3-vehicle platoons. If they lose a vehicle due to combat they immediately lose 1 bridge section.
24.34 Bridging units may not enter heavy woods hexes, light woods hexes, or rough 3 hexes, except on roads.
24.35 All mobile bridges are class 4 bridges.
24.36 Once emplaced, mobile bridges may not be moved.
24.37 After placing a mobile bridge across a hexside, the bridging unit may move normally.
24.4 Amphibious Movement
24.41 Units with amphibious designation on their unit data sheets may cross river and lake hexsides freely. Units must have a Bound Command to use Amphibious Movement.
24.42 Units other than LVTP-7 cross river hexsides by spending one complete Friendly Movement Phase for this purpose (at the end of the Phase move the counter from one side of the river to the other). If the unit is observed, the owning Player must announce the fact of Amphibious Movement.
24.43 Units other than LVTP-7 cross lakes by spending one complete Friendly Movement Phase in each lake hex.
24.44 LVTP-7 units cross river hexsides by expending 3 Movement Points in addition to the terrain cost of the hex entered. If fired upon while in the hex entered via the river hexside, the LVTP-7 is considered to be in amphibious movement for loss modification purposes.
24.45 LVTP-7 units cross lakes at a cost of 3 Movement Points per lake hex.
24.5 Snorkeling
Certain non-amphibious vehicles (see unit data sheet) may freely cross small or medium river hexsides by snorkeling. Vehicles may begin the game prepared for snorkeling, and have this fact noted on their unit status sheet.
24.51 Snorkeled vehicles may cross river hexsides as if they were amphibious (see Case 26.3). After crossing the river they may lose their snorkel status, and again function as normal units, or retain snorkel status, at the owning Player's option; this must be noted on the unit's status sheet.
24.52 While snorkeled, units may not be given Overwatch Commands or perform short halt, and are more vulnerable to Enemy direct fire attacks. Snorkeled units may not enter light or heavy woods hexes (except on roads), and must move in column formation.
24.53 Snorkeled units that receive any effect other than "no result" from any form of indirect fire immediately and permanently lose their snorkel status.
24.54 At the beginning of any Friendly Movement Phase, the owning Player may change the status of any snorkeled units to unsnorkeled, or normal. Once this is done, such a unit may never again be designated as snorkeled. A change from snorkeled status must be noted on the unit status sheet.
24.55 Units may not change status from normal to snorkeled while on map; snorkeled units must be set up or arrive as reinforcements in that status.
25.0 Positions of Advantage
General Rule: During the Final Fire Segment of each Movement Phase, units with Overwatch Commands (and those performing short halt or fire-and-move) engage in alternating final fire. The following rules provide for a more realistic sequencing of this fire, based on the actual positions of the units relative to each other on the map, within the priorities outlined in Case 4.1C(2).
Procedure: Within each round of priority during the Final Fire Segment of a Movement Phase, all firing units have their final fire sequenced according to the following priorities:
- (A) Height Level. All firing units in hexes at Height Level 4 may resolve their final fire combat before units on any other Height Level may do so. After this has been done, all units on Height Level 3 resolve their fire, and so on.
- (B) Defilade. Of those units on the same Height Level, all units in defilade may resolve their fire first.
- (C) Terrain. Those units on the same Height Level and in defilade may resolve their fire in priority according to the terrain in the hex occupied by each firing unit:
- heavy woods hex
- town hexes
- rough 3 hexes
- light woods hexes
- rough 1 hexes
- rough 2 hexes
- clear hexes
After all units in defilade at a certain Height Level have resolved their final fire, or passed, all units not in defilade at that Height Level may resolve their fire, according to the priority of terrain given in (C) above. After this has been done, Players may move on to resolve the final fire of units on the next highest Height Level. This procedure continues until all units on the map have resolved their final fire.
25.1 Rules of Use
25.11 If Enemy and Friendly units have an equal priority for fire at the start of a round of final fire, that unit belonging to the Phasing Player fires first. Thereafter, Enemy and Friendly units with an equal priority alternate their fire in the usual manner.
25.12 If more than one Friendly unit has an equal priority for fire, the owning Player chooses which of his units is to fire first.
25.13 Regardless of the priorities listed in this rules section, units must still resolve their final fire within the order of rounds of priority listed in the Sequence of Play (see Case 4.1C(2)).
25.14 When it is his turn to fire or pass in the alternating sequence of final fire, a Player may always substitute a fire of higher priority for one of the priority currently scheduled. Thus, if Main Guns on Height Level 2 in defilade are currently scheduled, and it is his turn, a Player may always commence fire with a previously passed-over Main Gun on Height Level 3 not in defilade.
26.0 Electronic Warfare
General Rule: Modern armies depend on reliable communications nets in order to function. These nets are vulnerable to Enemy interference, either in the form of jamming (blocking radio transmissions, as by generating electronic "noise" on all frequencies) or radio direction finding (determining the location of Enemy headquarters, artillery units, and anti-aircraft units with search radars from the amount and nature of their radio or radar traffic). Jammers are found in Red Star/White Star only.
Note: The use of jammers by Players is optional. The effects of jamming are indeed devastating, especially with regard to commands, morale, and artillery; however, most effects can be circumvented by careful planning. Players who choose to use the jamming rules will find that they increase playing time and record-keeping, in return providing a feel for one of the most important elements of modern combat. For the most complete simulation of the effects of jamming on the tactical battlefield, a multiplayer game is required; then one can easily see why a Player would gladly sacrifice an entire company to destroy an Enemy jammer unit.
Cases:
26.1 Radio Direction Finding
The ability of a Player to conduct radio direction finding is listed in the scenario instructions. If a Player has such a capability, during each Record Phase he may attempt to locate one on-map Enemy HQ, jammer, artillery unit or air defense system (air defense systems using search radar only) for each RDF-equipped HQ present on the map.
Procedure: If a Player is conducting radio direction finding (RDF) he must announce which unit he is attempting to locate (i.e., 3rd battalion HQ, 4.2" unit number 10xx, etc.) and roll one die for that unit. This is done before rolling for jammer breakdown. If the number rolled is equal to or less than the radio detection value of the unit whose location is being sought, then the unit has been located and the owning Player must immediately announce a hex within one hex of that unit. If the die roll is greater than the radio detection value of the unit sought, no information is revealed.
26.11 The radio detection value of units in the game varies by type and nationality, and is listed for each Player in the Exclusive Rules booklet.
26.12 Units located by RDF are not considered to be observed for Enemy direct or indirect fire, unless this would ordinarily be the case. Radio detection has no effect on units already spotted through the normal observation procedures.
26.13 Line of Sight, weather and the maximum range of observation have no effect on RDF.
26.14 On-map artillery units that have fired in their previous Indirect Fire Phase have their radio detection value increased by 1.
26.15 Friendly RDF may not be used on Game-Turns when Friendly jamming is in effect. Exception: Enemy jamming and air defense units may be located while Friendly jamming is in effect.
26.16 Enemy jammers may not be located by RDF unless they are operating successfully. HQ and artillery units may not be located through RDF if radio silence is being voluntarily observed by the Enemy Player's units. The effects of radio silence are in all respects the same as successful Enemy jamming (see Case 26.4). Radio silence must have been maintained throughout the current Game-Turn to prevent radio direction finding. The fact of radio silence must be announced.
26.17 Air defense units do not observe radio silence; when located by RDF, the exact hex in which they are positioned must be announced, rather than in any adjacent hex. Note that air defense units may be located by RDF only if they have a radio detection value assigned to them in the Exclusive Rules booklet. Air defense units may turn off their search radar to avoid RDF; to do so the search radar must have been turned off throughout the current Game-Turn, and the turning off or on of the specific air defense unit's search radar must be announced (air defense search radar is considered on unless an announcement is made that it is off). "Off" status must be noted on the Player's status sheet. Air defense units whose search radar is turned off may not fire. The command to turn search radar on or off must be given during a Friendly Command Phase.
26.18 A HQ unit may perform RDF only while on Overwatch Command.
26.19 RDF equipment may be transferred from one HQ unit to another during any Friendly Movement Phase in which the HQ units are in the same or adjacent hexes; this must be noted on the unit status sheet. A HQ unit already bearing RDF equipment may not receive RDF equipment from another HQ. If a HQ unit bearing RDF equipment is eliminated, the RDF equipment is also eliminated. A scenario may also specify that a unit other than a HQ bears RDF equipment, particularly if there is no HQ unit in the scenario.
26.2 Jamming Units
26.21 Electronic jamming is conducted by jamming units; the presence of jammers is determined in the scenario.
26.22 Jammers are considered to be 1-vehicle units. All jammers have Independent Command and are not subject to Morale states.
26.23 Jammers are subject to two commands which are unique to them: Assemble and Disassemble. A jammer may not be given a Bound Command unless it previously had a Bound or Overwatch Command, or had a Disassemble Command through four previous Friendly Command Phases. A jammer may not be given an Overwatch Command unless it previously had an Overwatch Command or had an Assemble Command through six previous Friendly Command Phases. Jammers may not be given a Bounding Overwatch Command and, not being subject to morale, are not given Withdraw or Rally Commands. Jammers set up at the beginning of play may be given any command prior to the first Friendly Movement Phase.
26.24 A jammer may only move on a Bound Command. A jammer must have an Overwatch Command in order to jam.
26.25 In order to commence jamming, a jammer on an Overwatch Command must get its gear to work. At any time during a Friendly Movement Phase, the owning Player may announce an attempt to commence jamming. He rolls one die following the announcement. For a NATO jamming unit, the jammer works on a roll of 1-3; on a roll of 4-6 it fails to work. For a Soviet jamming unit, the jammer works on a roll of 1-4; on a roll of 5-6 it fails to work.
26.26 Once a jammer has again failed to work, the owning Player may not attempt to commence jamming with that jammer for two full Game-Turns.
26.27 Once a jammer has commenced jamming, it is subject to breakdown. During the Record Phase the owning Player rolls one die for each jamming unit currently jamming. A Soviet jammer breaks down on a die roll of 1; a NATO jammer breaks down on a die roll of 1 or 2. Once a jammer has broken down, the owning Player may not attempt to commence jamming again with that jammer until the next Friendly Movement Phase following two full Game-Turns of non-operation.
26.3 Effects of Jamming
26.31 The effective range of a jammer covers all of the MechWar 2 maps, and extends off-map for 100 hexes in all directions.
26.32 The operation of jammers, either Friendly or Enemy, does not interfere with each other. Two Friendly jammers in operation have the same effect as one.
26.33 Friendly jamming does not affect Friendly units.
26.4 The Effects of Jammers on Companies
26.41 A jammed company has no communications with battalion HQ. Jammed companies or Independent Command units may only be issued one of the following commands, at the owning Player's option: (1) Overwatch; (2) Withdrawal; (3) a repeat of that company's previous command, regardless of what that command was. Players should note that companies may only be given these commands if they would ordinarily be able to so receive them. Jammed companies may, however, receive commands during close assault (see Case 13.28).
26.42 Jammed companies may not Rally.
26.43 Jammed companies may not change CP status except under the provisions of Case 106.34.
26.44 Jammed companies may not be given visual discipline orders except during dazzle effects.
26.45 Jammed companies suffer a column shift, when rolling for morale changes, of 1 to the right (Soviet) or 2 to the right (NATO).
26.46 Jammed companies with ambush designation must, if able, fire upon the first Enemy unit to enter the ambush hex; they may not fire at any other hex unless fired upon; if fired upon the ambush designation is dissolved. An ambush-designated company may have standing orders to dissolve its ambush designation in the event of Enemy jamming; if so, this must be noted on the unit status sheet.
26.5 Other Effects of Jamming
26.51 Jammed Indirect Fire Units may not receive load orders or fire plots. On-map indirect fire units may be given Bound orders, unlike companies, but may only fire at hexes which are visible to the indirect fire unit at the time. Indirect fire units may, of course, continue to execute orders and plots previously received but designated for specific Game-Turns. Thus, a Player may plot indirect fire in advance as a precaution against Enemy jamming, or may instruct indirect fire units to continue firing at their most recently received target plots until new plots are received, etc.
26.52 Jammed indirect fire and aircraft units must follow previously received written plot orders designating the Game-Turn, target hex, pattern and munitions to be fired. If no such orders exist, the unit does nothing.
26.53 Jammed artillery units are usually not able to receive registration reports from forward observers, thus, all jammed artillery Scatter is resolved using the 61+ column on the Artillery Scatter Table. Exceptions are as follows:
- (A) An on-map indirect fire unit may observe its own registration fire, see Case 14.65;
- (B) If a previous fire was observed (i.e., not jammed), and the indirect fire unit repeats that fire pattern on the same target hex (fire for effect, see Case 14.25) while jammed, the subsequent jammed "fire for effect" is resolved on the 0-20 column of the Artillery Scatter Table.
26.54 Jammed helicopters may not mount units for transport without first spending one Friendly Movement Phase in or adjacent to a hex containing a HQ superior to the unit to be transported. This effect may not be circumvented.
26.55 The targets of Swatter ATGMs and smart bombs benefit from a Loss Modification of −1 while Friendly jamming is in effect. If a bridge or ferry is the target, a special die roll is made after a 2 or 3 has been obtained on the CRT. If a 1 is rolled, the bridge or ferry is not destroyed (see Case 20.23). This effect may not be circumvented.
26.56 Air units may not be given load orders or bombing missions while Enemy jamming is in effect; this effect may not be circumvented.
26.57 A Friendly unit which has been spotted by one Enemy unit is not considered to be spotted by other Enemy units unless the other Enemy units are either themselves able to spot the Friendly unit (regular observation) or are in communication with at least one spotting unit via telephone, short-range radio, or visual signals (focused observation, see Case 8.18).
26.6 Circumvention of Jamming Effects — Telephones
Given the devastating effects of Enemy jamming, modern armies have established several ways of overcoming its effects. The most complete replacement for the radio is telephone communication.
26.61 If only Friendly units occupy a town, and no hex of that town is burning or devastated, those Friendly units are considered to be in telephone communication with each other.
26.62 A scenario may provide for certain hexes to be connected by buried field telephone; this would be true only for well-prepared sites. The buried telephone line runs in a straight line between the centers of the connected hexes. Any unit occupying a hex with a field telephone is considered to be in telephone communication with any unit which is also in a hex with a field telephone connected to the first unit.
26.63 A buried field telephone line is automatically cut if any nuclear device is detonated in a hex through which the line passes. Buried field telephone lines are also cut by a 3 result on the artillery CRT. Any Enemy engineer unit may also cut a buried field telephone line by spending an entire Movement Phase in a Bound Command in a hex through which the line passes.
26.64 A scenario may also specify that above-ground field telephone lines exist between certain hexes. In addition, an engineer squad may string an above-ground field telephone line while dismounted or mounted, in any hex entered by it in a Bound Command. Such lines may cross rivers only via bridges. No engineer squad may lay more than 20 hexes of telephone wire in any game. The Players must keep track of such lines. Any Friendly unit in a hex containing such a line is assumed to be in telephone communications with any other unit occupying a hex with a line connected to the first unit.
26.65 Above-ground field telephone lines may be severed as in Case 26.63. In addition, any Enemy unit automatically severs a line by entering the hex it passes through; any Friendly vehicle unit of bridge rating 3 or higher automatically severs a line by entering the hex it passes through, unless moving on a road in column. A severed above-ground field telephone line may be repaired by a Friendly engineer squad remaining in the severed hex for two Friendly Movement Phases in a Bound Command.
26.66 Suppressed units may not communicate via telephone.
26.67 Units with Bound or Withdraw Commands may not communicate via telephone. Only units with Overwatch or Rally Commands may communicate via telephone. In the case of a company with a Bounding Overwatch Command, only the platoon with Overwatch designation may communicate via telephone.
26.68 Units with telephone communications are exempt from all effects of jamming with respect to those other units with which they are communicating. Thus:
(A) If any platoon of a company (other than one which has Independent Command) is in communication with the headquarters of its battalion, the company may receive any order which it could have received without jamming; it may be Rallied; change CP status; be given visual discipline orders; and does not suffer the effects of Case 26.45 or Case 26.46.
(B) A mortar or howitzer unit which is in communication with the headquarters to which it is attached (or with the most prevalent type of vehicle in the case of units under battalion size in a scenario) may receive fire plots and load orders as it would without jamming.
(C) If a mortar or howitzer unit is in telephone communication with any unit which is subordinate (either directly or indirectly) to the headquarters to which the mortar or howitzer unit is attached, that unit may act as artillery spotter and hence avoid the effects of Case 26.53. (See Case 26.71.)
(D) Units which are in telephone communication may relay messages which they receive visually or via short-range radio.
26.7 Circumvention of Jamming Effects — Short Range Radio
26.71 Any unit which is stacked with or adjacent to another unit or 2 hexes away from that unit is considered to be in communication with that unit via short-range radio. Such communication cancels the effects of jamming in the same manner as telephone communications. (See Case 26.68.) Short-range radio may serve as a link in relay, but no unit other than a HQ may relay more than one order or message per Phase, and no more than four units may act as short-range radio relay stations for any particular message or order. The types of messages which may be relayed by short-range radio include orders from battalion HQ to companies or independent-command units, fire plots, load orders, "observed enemy" reports (for focused spotting, see Case 7.12), and, in multiplayer gaming, messages between units representing the Players. Artillery registration reports may also be relayed by short-range radio; in such a situation, Case 26.53 does not apply, and the column on the Artillery Scatter Table is dependent on the distance from the unit which begins the short-range radio relay chain to the target hex. The unit serving as artillery registration observer, however, must be subordinate (either directly or indirectly) to the headquarters to which the indirect fire unit is attached.
26.72 Short-range radio will not function if either unit is within 5 hexes of an operating Enemy jammer. It is up to the Enemy Player to announce that short-range radio is disturbed for any unit if he wishes to do so and his operating jammer is within 5 hexes (inclusive) of the affected unit(s).
26.73 Companies may not be Rallied via a short-range radio relay link; companies may only be Rallied if their short-range radio link to battalion HQ is direct and without need for relay.
26.74 If all platoons of a jammed company with ambush designation are within short-range radio communication with each other, either directly or via relay link, the company is exempt from the application of Case 26.46.
26.75 Short-range radio communication is considered to take place whenever needed in the Game-Turn sequence.
26.8 Circumvention of Jamming Effects — Visual Signals
26.81 Visual signals may be passed from one unit to another, provided that the sender is unsuppressed and the recipient is in observation range. The recipient may act simultaneously as a sender in a relay system.
26.82 Visual signals may be transmitted by hand by all units. The observation range for hand signals is the same as the observation range for moving infantry.
26.83 HQ units, mortars, howitzers, jammers, air defense units, engineers, vehicles in scout or recon detachments/companies/battalions (including U.S. armored and air cavalry), and all Soviet and German vehicles are capable of sending communications via signal flag or light while in Overwatch, or Rally Commands, provided they are not suppressed. Signal flags are used by day only; the observation range for signal flags is the same as that for moving vehicles. Signal lights are used by night only; the observation range for signal lights is the daytime observation range for moving vehicles under the same weather conditions, but with a maximum of 30 hexes. Signal lights may not be used by any unit in a starshell pattern or which is fixed by a whitelight searchlight. The scenario instructions may designate additional NATO vehicles to be equipped with signal equipment.
26.84 Units in communication by visual signal are exempt from the effects of jamming in the same manner as those in communication via telephone (see Case 26.68), except that they may not be Rallied if their only communications link to their HQ is a visual signal, and artillery remains subject to unobserved Scatter (see Case 26.53).
26.85 (Optional rule) Units sending visual signals are automatically spotted by any Enemy unit with a Line of Sight who is in transmission range of the signal. Exception: At night, the Enemy unit must be in a hex through which a straight line passes between the sender and the immediate recipient of the message. It is the duty of the signalling Player to inform the Enemy Player of such spotting situations. When a unit is spotted under this case during daytime, the unit is flipped over and remains spotted until the end of the next Friendly Movement Phase; if in focused observation range, it remains spotted thereafter. When a unit is spotted under this case at night, the unit is not flipped over. Instead, the owning Player simply informs the Enemy Player that a signaling unit is present, and does not tell him anything further about the unit. Exception: if the Friendly unit is within focused observation range of the Enemy unit intercepting the light signal, the Friendly unit is fully spotted by the intercepting Enemy unit and must be flipped over. If the intercepting Enemy unit is in Overwatch Command, it may immediately fire once at the signaling unit; this "interception opportunity" fire may even take place during a Friendly indirect fire or Friendly Command Phase, but in such a case there is no further fire in that Phase. The Enemy unit which fires at the Friendly signaling unit under this Case must (if previously unspotted) be flipped over at the beginning of the next Movement Phase, whether Friendly or Enemy, and is considered to have fired in that Movement Phase.
26.86 (Optional rule) For purposes of communicating via signal flag or light, hexes containing "high observatories" are considered to contain a tall structure extending 3 Height Levels above the terrain. Hexes containing "low observatories" are considered to contain a tall structure extending 2 Height Levels above the terrain. All other town hexes extend one Height Level above the terrain for this purpose. Units may not take advantage of this case to send or to receive unless they are: HQs, mortars, howitzers, infantry, engineers, reconnaissance units or jammers; they must be in Overwatch or Rally Command and unsuppressed. A unit may use this case to send a visual signal even if the recipient may not use this case to receive, so long as there is an unblocked Line of Sight from one to the other. Likewise a unit which must transmit from ground level (i.e., a Soviet tank platoon) may have its signal received by a mortar unit which is able to have a signalman in the tall structure.
26.87 Off-map artillery units are considered to have signalmen at Height Level 3 in all hexes in a hypothetical hexrow which is as many hexes from the mapedge as is specified in the scenario for the location of the artillery. Such units may always receive visual signals of all kinds if within range. Artillery units more than 50 hexes away from the signal are out of range even if the range is otherwise described as "unlimited" (as with daytime clear weather).
26.88 HQ units may transmit or receive visual signals from any hex adjacent to the one in which they are located as well as from or in the hex which they occupy. Brigade and regiment HQs may also transmit or receive visual signals from any hex two hexes from their actual location.
26.89 Visual signal communication is considered to take place whenever needed in the Game-Turn sequence.
26.9 Circumvention of Jamming Effects — Messengers
Messengers are another way of communicating during Enemy jamming, but they have the disadvantage of not being practically instantaneous. Thus messages often are delayed beyond the Phase in which they are sent.
26.91 Units on the map may always carry messages. Vehicles expend 1 Movement Point to either pick up or drop off a message. Messengers may carry any number of orders or messages and may deliver them to different destinations. A message may be transferred from one messenger unit to another, provided that both units are in the same hex, but the second messenger unit may not move with the message during the same Phase in which it received the message.
26.92 Helicopter units may carry messages from one hex to one other hex during any Friendly Movement Phase; to do so they must be at nap of earth in both pickup and delivery hexes.
26.93 Each HQ unit is equipped with motorcycle messengers. If Players wish to improvise counters for these motorcycles, they are 1-vehicle units having the same values as a Soviet motorcycle; regiment HQ has 4 of them and brigade HQ has 3. Ordinarily, however, they are not represented on the map. A scenario may provide for motorcycles attached to battalion HQ late in the war. The procedure for using "off-map" motorcycle messengers is contained in Case 26.94.
26.94 When using "off-map" motorcycle messengers, the Player, at the time the message is sent, calculates the number of Movement Points required for a motorcycle to travel under current weather conditions, without passing within five hexes of an Enemy unit, to the current location of the destination unit. Dividing this figure by the motorcycle's Movement Allowance, he obtains the number of Friendly Movement Phases required for the motorcycle to arrive at its destination hex. Movement of the destination unit after the calculation is made has no bearing on the time of arrival of the message. These "off-map" motorcycles always arrive and are never affected by units on or off the map; if sent to "off-map" locations, their return must also be calculated.
26.95 The procedure for sending a messenger is this: During a Friendly Command Phase, the Player writes down the message on an index card or slip of paper, together with its sender and destination and delivery vehicle. The message arrives at the destination unit in the next Friendly Command Phase following the Friendly Movement Phase of arrival of the messenger.
26.96 Messengers may carry orders to companies (which may be effectively received by any platoon of the company, provided it is not under Independent Command), orders to change CP status, and target plots and load orders to artillery. Messengers may not be used to Rally units or to circumvent the effects of jamming on artillery Scatter (see Case 26.53).
26.97 Motorcycle messengers moving to off-map artillery units must exit the map via a road or trail and are assumed to remain on that road or trail, at the same Height Level (in fog scenarios) as their exit hex; their destination is the same as the signalman described in Case 26.85.
27.0 Ambush
General Rule: Ambush is a special Command that may only be issued to certain companies before the start of the game. This will be listed in the scenario instructions.
Procedure: Companies assigned an Ambush Command may select any one hex within their Line of Sight as the "ambush hex." The location of this hex must be written down by the owning Player next to the command plot for that company before the start of the game. Units with an Ambush Command may only fire at Enemy units in the ambush hex or any hex adjacent to it (within the Line of Sight and observation range of the firing unit).
Cases:
27.1 How Ambush Works
27.11 Units with Ambush Commands using opportunity or overwatch fire have the fire of all their weapon systems resolved before any overwatching Enemy unit may fire. (This includes the ATGM systems of ambushing units.)
27.12 Units with Ambush Commands using final fire always have their fire resolved first during each round in the Final Fire Segment. (This is an exception to any normal priorities due to positions of advantage.)
27.13 Companies may maintain their Ambush Command only so long as all units of that company remain unspotted. At the end of any Phase in which a unit of that company has been spotted (for whatever reason), the company loses its Ambush Command and is assumed to have an Overwatch Command.
27.14 Units with Ambush Commands must roll for morale as normal due to any losses caused by indirect fire. The company may maintain its Ambush Command so long as it does not enter Morale State 3.
27.15 Units with Ambush Commands are not required to fire at Enemy units adjacent to the ambush hex. They may choose to withhold their fire, at the owning Player's option. However, if any one of the ambushing units fires, then all ambushing units assigned to the ambush hex must also fire (if they are physically able to do so).
27.16 The owning Player may change the command of the companies with Ambush Commands during any Friendly Command Phase, within the restrictions for normal companies. Once this is done however, the company may never be issued another Ambush Command.
27.2 Restrictions on Ambush
27.21 Units may not use any form of indirect fire while assigned an Ambush Command.
27.22 The owning Player may not change the location of a company ambush hex during the play of the game.
28.0 Camouflage
General Rule: Friendly units may make it more difficult for Enemy units to observe them through the use of camouflage. In some scenarios, units may begin the game in camouflage. When a unit is camouflaged this fact must be written down on the unit status sheet.
Procedure: Whenever a camouflaged unit would ordinarily be observed by an Enemy unit, the owning Player may roll one die and consult the Camouflage Observation Chart. If the number is less than or equal to the camouflage value indicated for a unit in the appropriate type of terrain, then the unit is not observed.
28.11 Only one die roll need be made for the effects of camouflage in a given Phase. If the unit is not observed, then it will remain so for the entire Phase (unless it moves, fires, or becomes involved in a close assault) regardless of the number of Enemy units that might ordinarily attempt to observe it in that Phase.
28.12 Camouflaged units are automatically observed if they fire any of their weapon systems, move from the hex they currently occupy or become involved in a close assault.
28.13 Once a camouflaged unit is observed it is no longer considered to be camouflaged.
28.14 Camouflaged units that leave the hex they currently occupy are no longer considered to be camouflaged.
28.15 Camouflage Observation Table (see Charts and Tables section).
28.16 The camouflage value of all camouflaged units is increased by 2 during night conditions, and by 1 during fog, rain, falling snow, blizzard.
28.17 Camouflaged units may not use IR or WL searchlights. (See Case 23.2.)
29.0 Engineers
General Rule: Engineer units are used to maintain Friendly ferry points, construct and destroy bridges, construct abatis, breach minefields, and aid Friendly units performing close assault in town hexes.
29.1 Engineer Squads
Engineer squads are one-step infantry units. When stacked in the same hex with a Friendly dismounted infantry unit, they are considered to be "part" of the infantry unit and may not be attacked separately. They may be eliminated only after all Friendly infantry units in the hex have been eliminated.
29.11 Engineer squads do not count for stacking purposes.
29.12 One engineer unit may be transported "for free" by a Friendly APC. (That is, it does not take up any "space.") However, if two or three squads are being transported by the same APC unit, then they are assumed to take up the same amount of space as a normal infantry unit. No more than three engineer squads may be transported in a given APC unit at any one time.
29.13 The values for engineer squads are listed on the Player's data sheets.
29.14 The close assault strength of engineer squads is used only if the squads are alone in a hex, or are in a town hex (see Case 29.3).
29.15 Engineer squads may not perform any of their engineering functions while Suppressed in defilade, mounted in APCs (Exception: see Case 26.64), engaged in close assault, or in CP 3.
29.16 Engineer squads may only perform their engineering functions while they have a Bound Command; this is considered to be a "change in status," and the units need not be moved during their Friendly Movement Phase.
29.2 Bridges and Ferries
29.21 In order for TPP and PMP bridging units to construct their bridges, they must be stacked in the same hex with a minimum of three Friendly engineer squads. After the required number of Phases have been spent in the hex, the engineer units may exit the hex if they desire, leaving the newly constructed bridge intact.
29.22 Ferry points may only be used so long as a total of at least three Friendly engineer squads are
in either (or both) of the ferry hexes.
29.3 Town Clearing and Defending
29.31 Dismounted infantry units stacked with Friendly engineer squads have +2 added to all of the defender's die rolls on the Loss Modification Tables when engaging in close assault in town hexes. The close assault strength of the engineer unit is added to that of one of the infantry units. There is no additional effect for having more than one engineer squad in the hex.
29.32 Dismounted infantry units accompanied by Friendly engineer squads have −2 added to all of their defending die rolls on the Loss Modification Table when defending against close assault in town hexes. There is no additional effect for having more than one engineer squad in the hex.
29.4 Abatis
Engineer units in a light or heavy woods hex may construct abatis (an anti-vehicle obstacle) by spending twelve consecutive, complete Game-Turns in the hex with a Bound Command.
29.41 While engaged in construction, the engineer units may not be attacked by any form of direct fire. If this occurs the attempt is abandoned and must begin from scratch.
29.42 Vehicle units entering a light woods hex containing abatis may not move any further in that Movement Phase.
29.43 Vehicle units may not enter a heavy woods hex containing abatis.
29.44 Abatis affects all vehicle units equally, regardless of whether they are Enemy or Friendly.
29.45 Abatis has no effect on dismounted infantry movement.
29.46 An engineer unit may remove abatis by spending one complete Game-Turn in the hex with a Bound Command. The unit may not be the target for any direct fire attacks during this period.
29.5 Bridge Demolition
29.51 Engineer units may prepare bridges for demolition by spending three consecutive, complete Game-Turns in a hex adjacent to the bridge hexside with a Bound Command. The units may not be the target of any direct fire attacks during this period. Once prepared, the bridge may be destroyed by any Friendly engineer unit adjacent to the bridge hexside. This may be done at any time during the Game-Turn. If units are crossing the bridge at the time of demolition, they are not affected — they are simply prevented from crossing the bridge.
29.52 Scenario instructions may also provide for bridges already prepared for demolition.
29.53 A bridge which has been prepared for demolition may be made unprepared for demolition by an Enemy engineer unit spending two consecutive complete Game-Turns in a hex adjacent to the bridge hexside with a Bound Command, not having been the target of any direct fire attacks during this period.
29.54 During the Rally Segment of the Enemy Indirect Fire Phase, Enemy units may attempt to remove the preparation for demolition of a bridge made by Friendly engineers (or provided by the scenario at the start of play). In order to attempt this, the Enemy unit must have been unsuppressed and in Overwatch in a hex adjacent to the bridge hexside throughout the previous Game-Turn (i.e., since the previous Enemy Indirect Fire Phase). Each such Enemy unit may roll a die once during the Rally Segment. Should the die roll result in a "1", the bridge is considered no longer prepared for demolition. If any other result is obtained, the bridge remains prepared for demolition. A unit may repeatedly attempt to change the preparation of a bridge for demolition, as long as it continues Game-Turn after Game-Turn to meet the criteria outlined in this Case.
29.6 Breaching Minefields
Engineer squads may breach minefield hexes by spending a certain number of complete Friendly Movement Phases in the hex. The number of Phases required varies with the type of minefield being breached:
| Type of Minefield | Engineer Movement Phases Required |
|---|---|
| Artillery-delivered | 1 |
| Hasty | 2 |
| Defensive | 3 |
| Barrier | 6 |
29.61 While engaged in breaching operations, engineer squads are not attacked by the minefield, either for entering or remaining in the hex.
29.62 If two or more engineer squads are engaged in breaching the same minefield hex, each one may contribute one Engineer Movement Phase to the breaching attempt.
29.63 Players must keep track of the number of Engineer Movement Phases completed for each minefield hex on a separate sheet of paper or by using number markers.
30.0 Fire-and-Move
General Rule: By using fire and move, vehicle units may fire in the Enemy Movement Phase and move in the subsequent Friendly Movement Phase.
Procedure: Vehicle units with a Bound Command may be designated for "fire-and-move" during the Command Phase; this is noted on the unit status sheet. Such units may fire during the Final Fire Segment of the Enemy Movement Phase which follows the Command Phase in which the designation was given. In the subsequent Friendly Movement Phase, such units must move at least one hex, but may not expend more than one half of their Movement Allowance (round fractions down) unless this is necessary to move one hex.
30.11 Units designated for fire-and-move may fire during the Final Fire Segment of the Enemy Movement Phase. However, such units do so after all units without short-halt or fire-and-move designations have completed their direct fire (see the Sequence of Play, Section 4.0).
30.12 Units performing fire-and-move are not considered to be moving when defending against direct fire attacks during the Final Fire Segment of the Enemy Movement Phase. They are considered to be moving when defending against direct fire attacks during the Final Fire Segment of the Friendly Movement Phase.
30.13 Friendly units defending against direct fire attacks by Enemy units performing fire-and-move receive a modification of −2 on their Loss Modification die rolls (see Section 12.0).
30.14 Fire-and-move is not a Command, but it must be plotted in advance. When one or two platoons of a company with a Bounding Overwatch order is to perform fire-and-move, the platoon so designated must be noted on the unit command sheet.
30.15 Helicopter units with a Bound Command may always use fire-and-move, should they desire to do so. Since they have unlimited movement, they may continue to move normally while doing so.
30.16 Dismounted infantry units may not perform fire-and-move.
[End of Standard Rules. The printed Designer's Notes (a commentary on the design of the game), the design credits, and the 1979 essays on Soviet doctrine and the anti-tank threat that follow in the printed booklet are not rules text and are not reproduced here.]
Red Star/White Star Exclusive Rules
(The Red Star/White Star Exclusive Rules and Scenarios follow. They are the rules that apply only to the Red Star/White Star game, in addition to the Standard Rules above.)
100.0 Introduction
In its full version, Red Star/White Star can be a very complex and rather slow-moving game. For this reason, it is not intended that all of the Advanced rules be in use all of the time. Instead, Players should initially learn the game by using some of the smaller scenarios given and then gradually introduce more units and Advanced rules into play. Some of the Advanced rules, such as positions of advantage or weather, require little in the way of additional time and effort; others, such as chemical and nuclear weapons, require a great deal more. Players must thus use their own discretion when deciding the scope of the scenario to be played, and are encouraged to make up their own scenarios. In fact, it is a good idea to start off just by pushing a few platoons or battalions around on the map, in order to get the "feel" of the game.
(The printed Summary of Unit Types, which is a counter and silhouette reference, and the Neutral Markers illustration are not reproduced as text. Note in the printed reference: M-60 counters are used to represent either the M60 A1 or the M60 A3.)
101.0 Special Terrain Features
Cases:
101.1 The Game Maps
The Red Star/White Star maps were developed from actual West German terrain. Map A depicts primarily open country, while map B shows a more closed and heavily wooded area. Although most scenario examples in the game are structured so that they may be played on one of the two maps, the maps themselves are in fact geomorphic and may be joined to create a larger playing area in any of the patterns shown in the printed rulebook. In order to join the maps the Players should first trim the mapedges, as shown, and overlap the two maps along the appropriate mapedge.
101.2 Lake Horloff
Lake Horloff (on map A) is a special terrain feature. The following rules apply to all lake hexes.
101.21 Non-amphibious units may never enter a lake hex.
101.22 Amphibious units (only) may enter lake hexes by spending one complete Movement Phase (with a Bound Command) to do so. (Exception: see Case 24.45.)
101.23 While in a lake hex, amphibious units may only be given a Bound (or Withdrawal) Command. They may not fire any of their weapon systems. When attacked, such units defend normally, as if they were in a clear terrain hex. For rather obvious reasons, units may not enter defilade while in a lake hex. (Exception: see Case 24.4.)
101.24 Lake hexes do not block the Line of Sight and are considered to be at Height Level 0.
101.25 Units may not enter lake hexes by snorkeling; nor may bridges of any sort be constructed across lake hexes.
101.26 Indirect fire impacting on a lake hex is resolved normally. Nuclear weapons impacting in a lake hex have their effects resolved normally with the exception that the impact hex does not become Rough 3 terrain; rather, it remains a normal lake hex, and is contaminated.
102.0 Special Units
Cases:
102.1 Soviet Engineer Platoons
Soviet engineer platoons are a special type of engineer unit. They are normally composed of three engineer squads and may perform the same functions as other engineers (see Section 29.0).
102.11 Engineer platoons are treated as normal infantry units for purposes of stacking and being mounted in APCs.
102.12 When performing any engineer function, each step of a Soviet engineer platoon counts as one single engineer squad.
102.13 If he desires, the Soviet Player may reorganize his engineer squads into platoons and vice versa. The former may be done by having two or three engineer squads spend one Friendly Movement Phase stacked in the same hex with a Bound Command; the latter by just having the platoon spend one Friendly Movement Phase in a hex with a Bound Command. In either case, at the end of the Phase the owning Player should place the newly formed unit on the map, removing the old counters.
102.14 For purposes of reorganization, one engineer squad equals one step of an engineer platoon, and vice versa.
102.15 Units may not reorganize while Suppressed, in defilade, CP3 status, mounted in APCs and/or in Morale States 2 or 3.
102.16 The Soviet Player's ability to reorganize his engineer units is limited by the number of platoons and squads in the counter mix.
102.2 ATGM Squads (Teams)
Both Players have special infantry units known as ATGM squads (or teams).
102.21 Soviet ATGM squads are one-step infantry units. However, when attacking Enemy units with their personnel anti-tank weapons, they are treated as a three-step unit.
102.22 US ATGM teams are considered to be standard infantry units except that they have only two steps, and have their automatic weapons strength halved (round fractions down) after taking a one-step loss. The only restriction placed on them is that they must always end a Phase stacked in the same hex as, adjacent to, or mounted in "their" APC (the vehicle unit which has the same designation as the unit). This restriction is removed if the APC unit is eliminated during the play of the game.
102.3 Beehive Rounds
US heavy main guns are equipped with Beehive, a special anti-personnel shell. When firing at Enemy infantry units such weapon systems always use the Beehive line on the Main Gun Anti-Infantry Combat Results Table (10.21).
102.4 Chobham Armor
Chobham is a new type of armor that has yet to be tested in combat. Its exact composition is still secret, but it is believed to be based on the "sandwich" principle, with layers of titanium mesh, ceramic sheathing, and titanium backing. Its only effect on play is that the units would use the Chobham column on the Vehicle Loss Modification Chart when defending against Enemy main gun/ATGM attacks.
102.5 Five Vehicle Platoons
Certain vehicle units may consist of five vehicles. As there are no 5 strength markers included in the game, Players should indicate a current strength of five vehicles by not putting any strength marker at all under the unit in question.
102.6 Motorcycles
102.61 Motorcycles move like vehicle units, but enter defilade without expending Movement Points, and are treated as dismounted infantry when fired upon. A motorcycle may always exercise the option of entering defilade immediately after the first fire on it has been resolved.
102.62 Moving motorcycles benefit from a Loss Modification die roll modification of −5 on roads, −4 on trails, −3 in clear terrain, −2 in towns (if not moving on roads) or light woods. This modification does not apply to the second and third rounds of close assault, but does apply to withdrawal fire. It supersedes the −2 modification for moving units. A motorcycle in the same hex as an Enemy unit without Attack Strength is not involved in close assault procedures with that unit. For convenience, Players may agree to conduct close assaults involving motorcycles quickly with an automatic result: the motorcycle unit loses 1 vehicle and withdraws (without withdrawal fire) to an adjacent hex; this will save time, while producing the average result.
102.63 Motorcycles may not enter heavy woods hexes, except on roads or trails.
102.64 Motorcycles are treated as vehicles for observation purposes. Motorcycles have neither stacking limit nor effect on stacking limits of other vehicles.
102.65 Suppressed motorcycles may not move and are considered in defilade. Motorcycles in CP3 status have their Movement Allowance halved (fractions rounded up). Motorcycles may change CP status from 2 to 3 or from 3 to 2 by expending half their Movement Allowance; they make other changes in CP status by expending their entire Movement Allowance.
102.66 Should a scenario provide more motorcycle units than the countermix allows, and additional counters cannot be improvised, eliminated motorcycle units may be placed back on the map with any of the highest class of HQs present until the full number has been used. If no HQ is present, they may be placed with any Friendly unit.
102.67 Motorcycles in mud and ground snow conditions (see Case 103.0) have their Movement Allowance halved (round fractions down) unless on roads. Motorcycles in falling snow and blizzard conditions have their Movement Allowance reduced to one-fourth (round fractions down) whether on roads or not; when reduced by falling snow or blizzard there is no additional reduction for ground snow. Otherwise, reductions are cumulative and are arrived at by multiplication; thus a motorcycle on a muddy trail in CP3 status would have its Movement Allowance reduced to one-quarter (one-half times one-half), fractions rounded down (from 30 to 7).
102.68 Motorcycles in Rough 1 and light woods expend 4 Movement Points for each hex they enter; in clear terrain and towns they expend 2 Movement Points per hex; on roads and trails they expend 1 Movement Point per hex. Motorcycles never enter column or dispersed formation.
102.69 Friendly vehicular units may move through a hex containing an Enemy motorcycle unit without stopping for close assault. If the Friendly vehicle ends the Movement Phase in the same hex with the Enemy motorcycle unit, however, it must engage in close assault.
102.7 NATO Artillery-Delivered Minefields
In certain scenarios, the NATO Player may have the ability to deliver (place) artillery-delivered minefields on the map during the play of the game.
Procedure: To place an artillery minefield, the NATO Player must first plot a normal fire mission for a Friendly 155mm medium howitzer unit equipped with artillery mines. He must also specify that the unit is in fact using artillery mines. The fire mission is then carried out normally, but when resolving the impact of the fire mission the owning Player must place a minefield marker in every hex of the artillery pattern (noting the type of minefield — artillery-delivered — on a separate piece of paper).
102.71 Artillery-minefield fire missions have their Scatter resolved normally. Scattered artillery minefields have the same effects as those that impact on-target.
102.72 Units in hexes affected by artillery minefields during the Indirect Fire Phase in which they are placed are immediately attacked by them, as if the units had just entered the hex. Thereafter, the hex is treated like an ordinary artillery-delivered minefield.
102.73 If two artillery minefields impact in the same hex at any time during the game, the minefield is considered to be "upgraded" to a "hasty minefield." There is no additional effect for more than two artillery minefields impacting in a hex.
102.74 Artillery minefields have no effect on ordinary minefield hexes or units in such hexes (though they would affect dummy minefield hexes).
102.75 Artillery minefields have no effect on lake hexes.
102.76 Artillery minefields cannot deliver dummy minefields.
102.8 Aircraft Weapons Loads
All aircraft (except those carrying nuclear weapons) are assumed to be able to carry out strafing strikes. In addition, each aircraft unit may be equipped with one of the following weapons systems. The exact weapons system carried is either specified in the scenario instructions or (if not specified), left up to the option of the owning Player:
- (A) conventional bombs
- (B) smart bombs
- (C) conventional air-to-surface missiles *
- (D) Maverick air-to-surface missiles (NATO Player only). *
* If conventional ASMs are carried, the Player should use the ASM ammo depletion number to the left of the slash on the aircraft's data sheet; if carrying Maverick ASMs (which are equally effective but much smaller), use the ASM ammo depletion number to the right of the slash.
102.9 Shillelagh Missiles
US M60A2 tanks carry Shillelagh missiles, which have an infrared laser guidance system. These missiles may not be fired during rain, falling snow, blizzard, or fog conditions.
103.0 Weather
General Rule: All battles do not occur under ideal weather conditions. The Standard Rules assume that the weather is clear and dry. When this is not the case the scenario instructions will list the appropriate weather conditions. Basically, adverse weather serves to reduce the movement abilities and observation range of units. The effects of each type of weather are given below.
Cases:
103.1 Fog
The fog represented in the game simulates the type of low-lying ground fog commonly experienced throughout Germany. There are three types of fog: light, medium, and heavy. Each of these types has separate effects. The type of fog listed in the scenario instructions always refers to its "density" at Height Level 0. Thereafter, it decreases one level for each level in height (i.e., if Height Level 0 has heavy fog, Height Level 1 has medium fog, Height Level 2 has light fog, and Height Level 3 is clear).
103.2 Rain and Mud
The only effect of mud is to slow movement. Rain mainly reduces the observation range.
103.3 Snow
There are three possible snow conditions: ground snow, falling snow and blizzard. Ground snow is literally that — snow from a previous snowfall. Falling snow reduces movement and the observation range, while blizzard conditions greatly reduce them.
103.4 Temperature
There are three possible temperature conditions: cool, warm, and hot. The only effect of temperature is on units in CP status. (See Case 42.2.)
103.5 Wind
There are four possible wind conditions: calm, light, moderate and heavy. The only effects of wind are on chemical weapons, spreading fires, and the use of artillery smoke. (See Case 106.6.)
103.6 Weather Effects Chart
(See Charts and Tables section.)
103.7 Advanced Observation Range Table
(See Charts and Tables section.)
103.8 Night and Weather
When a nighttime scenario includes any but clear weather, the worst effects on movement, observation, etc. are governing. Starshell may not be used in fog, rain, falling snow or blizzard. Artillery observation is the same at night as by day. That is, when observing for artillery, it is only necessary to have a Line of Sight to the target hex.
104.0 Independent Command
Cases:
104.1 The Concept of Independent Command
The command rules (Section 5.0) assume that all units are allocated to some specific company, and thus receive commands (and all other company status) on a company basis. However, some units operate under Independent Command and use the rules in Case 104.2. These units vary by nationality and are listed in Section 105.0.
104.2 Effects of Independent Command
104.21 Units with Independent Command are treated in all respects as separate companies and must be issued separate commands during each Friendly Command Phase.
104.22 Units with Independent Command do not enter morale states unless affected by electronic, chemical, or nuclear warfare. When this occurs, these units may be rallied like companies, using the HQ to which they are attached. In some scenarios, this HQ may be off-map.
105.0 Doctrine
Cases:
105.1 Soviet Doctrine
105.11 At the end of any Phase, all Soviet units without Independent Command must be within two hexes of a unit of their company. That is, there may be a maximum of one intervening hex between each of the platoons of a company. This restriction does not apply if the company (due to losses) is reduced to a single platoon or if the unit is in formation according to doctrine (see Case 110.5).
105.12 Soviet tank companies may not be issued a Bounding Overwatch Command. See also Case 105.22.
105.13 The following Soviet units always have Independent Command: BRDM, ASU-85, ASU-57, T-12, SP-74, 120mm, motorcycle, MTU-55, ZSU-23/24, SA-9, engineer squads, ATGM squads, engineer platoons, headquarters, helicopters, and aircraft. All of these units have a "0" somewhere in their identification numbers.
105.14 Soviet platoons which have been airlifted by transport helicopter have Independent Command for as long as they are three or more hexes away from another unit of their company. In considering morale for the remainder of the company these units are not considered part of the company.
105.2 NATO Doctrine
At the end of any Phase, all NATO units without Independent Command must be within three hexes (inclusive) of a unit of their company. That is, there may be a maximum of two intervening hexes between each of the platoons of a company. This restriction does not apply if the company (due to losses and/or regrouping) is reduced to a single platoon.
105.21 All NATO units may be issued the Bounding Overwatch Command.
105.22 Units with Bounding Overwatch Commands are considered to fulfill their doctrine requirements as long as they can trace a Line of Sight to a unit of their company at the end of a Phase. For purposes of this rule (only), smoke hexes are not considered to block the Line of Sight. They may also fulfill their requirements in the manner given above.
105.23 The following NATO units always have Independent Command: M-150, AVLB, M-551, M-125, 81mm, 4.2", Biber, Scorpion, 120mm, Scimitar, jeep, Roland, Chaparral, Vulcan, helicopter, aircraft, engineer squads, HQs, and Gepard. All of these units have a "0" somewhere in their unit identification numbers.
105.24 In addition to the units listed in 105.23, the NATO Player has the option of designating one platoon of each company to Independent Command. This must be done before the start of the game and cannot be reversed. The only disadvantage to this is that whenever the "remainder" of the company rolls for morale, the owning Player must shift one column to the right on the Morale Table.
105.3 Effects of Breaking Doctrine
105.31 At the beginning of any Friendly Movement Phase in which any units of a company do not fulfill their doctrine requirements due to movement in a previous Friendly Movement Phase, all units of that company (except those with Independent Command) immediately increase their morale state by 1.
105.32 If units of a company are forced "out of doctrine" due to losses in combat, the company has one Game-Turn (Phase to end of corresponding Phase) to remedy the situation. If the company is not in doctrine when the time to remedy the situation has expired, all units of that company (except those with Independent Command) immediately increase their morale state by 1. Henceforth such a company is also liable to the effects of Case 105.31.
106.0 Chemical Warfare
General Rule: Soviet doctrine includes the widespread use of various chemical agents in order to destroy Enemy forces. When using the chemical rules, all units are considered to be in one of three Chemical Protection (CP) states. Units in CP1 are completely unprotected against chemical attack, those in CP2 are partially protected, while those in CP3 are fully protected. CP1 is considered to be "normal" and has no special effects on the movement and combat of units.
Procedure: Units are assigned a CP state at the start of the game. Thereafter, they may change their status. CP status is assigned by company and all units of a given company must have the same CP status. This status is recorded for each company on the Player's unit status sheet.
Cases:
106.1 Vehicle Units
All vehicles in the game are listed (on their data sheets) as being either protected or unprotected as far as chemical warfare is concerned. Protected vehicles may be in either CP1 or CP3; unprotected vehicles in either CP1, CP2, or CP3.
106.11 Vehicles in CP3 may not mount or dismount infantry, nor use any of their externally-controlled weapons systems. All units attacked by vehicles in CP3 receive a die roll adjustment on the Loss Modification Tables (see Case 12.3). All chemically-protected vehicle units in CP3 status are considered Suppressed (see Case 8.6) as long as they remain in that status.
106.12 Vehicles in CP2 may mount and dismount infantry, and use their external weapons systems normally. However, all units attacked by vehicles in CP2 receive a die roll adjustment on the Loss Modification Tables (see Case 12.3).
106.2 Infantry Units
Like unprotected vehicles, infantry units can be either in CP1, CP2, or CP3.
106.21 In warm or hot weather, infantry in CP2 or CP3 status have their fatigue level increased by 2 when performing double-time. If such units charge, their fatigue level is increased by 2 and they take an immediate step loss. (This is done after completing their movement, and the unit's company must check morale for the loss.)
106.22 In warm weather, infantry units in CP3 status require 2 Segments of rest (see Case 6.76) to remove one level of fatigue. In hot weather, infantry units in CP3 status may remove one fatigue level only by taking a 1-step loss, in addition to the two segments of rest.
106.23 In hot weather, infantry units in CP3 status automatically increase their Morale Level by 1. This increase in Morale Level is cancelled whenever such infantry units change CP status; it is also cancelled for any company which has been attacked by chemicals and for all units in any battalion if both of the following conditions have been met: (A) any company of the battalion has been attacked by chemical weapons and (B) EW jamming is not in effect.
106.24 All units attacked by infantry in CP2 or CP3 receive a die roll adjustment on the Loss Modification Tables (see Case 12.3).
106.25 Infantry units in CP3 have their observation range reduced to 0 hexes during rain or snow conditions, or while in a heavy fog or smoke hex.
106.26 Infantry units which remain in close assault in CP3 status for three Game-Turns in warm weather and for two Game-Turns in hot weather take an automatic 1-step loss. Should such a unit remain in close assault in CP3 status it must take an additional step loss every second Game-Turn after its first step loss under this case. These step losses are effective at the end of the Close Assault segment. Players will have to keep track of how long infantry units have been in close assault in CP3 status on a separate sheet of paper.
106.3 Changing CP Status
A change in Chemical Protection is considered to be a "change of status" (see Section 5.0), but may be done under any Command.
106.31 Changes in CP status are done by company. Changes in CP status may require the expenditure of Movement Points as noted in the CP Status Change Chart (see Case 106.32).
106.32 CP Status Change Chart (see Charts and Tables section).
106.33 Infantry units may only change from CP1 to CP2 or from CP1 to CP3 only while in the same hex as a Friendly APC unit (any number of vehicles) or a Friendly HQ unit. Some scenarios may specify that due to absence of Chemical Protection equipment other restrictions are placed upon changes by infantry out of CP1 status.
106.34 Following a chemical attack on any unit of a company at the beginning of the next Friendly Movement Phase, all units of that company (regardless of command) automatically enter the highest CP status possible for them (see Case 106.33). They must expend Movement Points if required to do so by the CP Status Change Chart (see Case 106.32).
106.4 Delivery of Chemical Weapons
The availability of chemical weapons will be listed in the scenario instructions. They may be delivered onto the map by Friendly artillery, aircraft or missile unit. Players must load their delivery systems with chemical weapons and note this fact on the indirect fire plot in advance (see Case 106.46); however, the actual target hex coordinates may be plotted with the same delay as normal. Note that the loading and targeting of chemical weapons may be pre-plotted before the game begins. When chemical weapons are used, the Player must place the proper impact marker in the hex. Each delivery system is assumed to deliver one "point" worth of chemicals into each hex.
106.41 Chemical weapons delivered by aircraft are plotted like normal bombing strikes, and have their Scatter resolved as such.
106.42 Aircraft may deliver chemical weapons by conducting a normal bombing strike against a hex while carrying chemical weapons. Helicopters may never deliver chemical weapons.
106.43 There is no additional effect if more than one point of chemical weapons of the same type is placed in the same hex. Different chemicals have their presence noted separately.
106.44 The NATO Player may never plot the use of lethal chemical weapons on or adjacent to town hexes. The Soviet Player has no such restriction.
106.45 If specified in the scenario, infantry units may deliver non-persistent incapacitating chemicals (primarily tear gas) by hand grenade. This need not be plotted in advance, and may take place under an Overwatch Command or while using short halt under a Bound Command or while in close assault. The owning Player simply announces that gas grenades have been delivered to any hex containing or adjacent to any Friendly infantry unit equipped with such grenades. Gas grenades may not be delivered by infantry units in vehicles which are Suppressed. The effects of gas grenades (see Case 106.51) are felt immediately upon delivery. A given infantry unit may use incapacitating chemicals only once per game; mark this fact on the unit's status sheet.
106.46 Chemicals may be delivered by missile, rocket or aircraft beginning 10 Game-Turns after these delivery systems are loaded with chemicals. Chemicals delivered by mortars or grenades are not delayed due to loading. Chemicals delivered by artillery other than mortars may be delivered beginning 3 Game-Turns (Soviets) or 6 Game-Turns (NATO) after they are loaded with chemicals.
106.47 While loaded with chemicals, delivery systems may not be loaded with or fire any other type of munitions. After firing chemicals, a delivery system may not fire other types of munitions for 6 Game-Turns (missiles, rockets, aircraft), 2 Game-Turns (artillery other than mortars), or 1 Game-Turn (mortars).
106.5 Types and Effects of Chemical Weapons
There are two general types of chemical weapons: persistent (either gas or spray) and non-persistent. This determines how likely the chemical is to disperse once on the map. One type of chemical — persistent gas — may even drift from hex to hex on the map. Chemical weapons attack all units within a certain distance of their impact hex. The effects depend on whether the chemical is lethal or incapacitating. Chemical weapons affect all units in CP1 or CP2; they have no effect on units in CP3.
106.51 Incapacitating chemicals do not kill, but do prevent troops from functioning effectively. All companies whose platoons (any or all) are affected by incapacitating chemicals immediately enter Morale State 3.
106.52 All lethal chemicals will attempt to kill all units they affect. The "attacking" Player (the one who placed the chemical) should roll two dice for each affected unit, and consult the Lethal Chemical Combat Results Table (106.53). If the die roll is within the indicated range of numbers, the unit is immediately and completely eliminated (remove it from the map), regardless of the number of steps or vehicles in the unit. All units (and their companies) of units that undergo a lethal chemical attack while in CP1 status immediately enter Morale State 3.
106.53 Lethal Chemical Combat Results Table (see Charts and Tables section).
106.54 Any unit (in CP1 or CP2) entering the effectiveness zone of a chemical weapon is immediately attacked by it; likewise a moving gas effectiveness zone (see Case 106.63) immediately attacks all units (in CP1 or CP2) in hexes into which it moves or through which it passes.
106.6 Spread and Dispersal of Chemical Weapons
Once delivered on the map, chemical weapons remain in the hex until they drift or disperse. Chemicals that disperse are immediately removed from the map.
106.61 Non-persistent chemicals automatically disperse and are removed in the same manner as smoke.
106.62 During the Record Phase, the first Player rolls two dice for dispersion (removal) of persistent gas markers. If the result is a 2, and there is a moderate or heavy wind, all such markers are removed. If there is a light wind or calm, only markers at Height Level 4 or 5 are removed. If a 3 or 4 is rolled, and moderate or heavy wind is in effect, all such markers are removed. If the roll is 5, markers are removed only under heavy wind conditions. No dispersion dice roll need be made if winds are light or calm and there are no such markers at Height Level 4 or 5.
106.63 If persistent gas is not dispersed during the Record Phase by the procedure in Case 106.62 and there is any wind condition but calm, the gas will drift: 4 hexes in light wind, 8 hexes in moderate wind, 15 hexes in heavy wind. The direction of drift is the same for all persistent gas markers on the map. The drift pattern is determined during the Record Phase and is calculated hex by hex using the Chemical Drift Chart (see Case 106.64) to determine the path of drift from the starting hex to the first hex outward, then from the first to the second hex, etc., until the pattern has been established up to the number of hexes given above for the prevailing wind strength. That pattern is then applied to all persistent gas markers not dispersed
the impact hex (drift pattern) and all persistent gas markers not dispersed are moved accordingly.
106.64 Chemical Drift Chart (see Charts and Tables section).
106.65 Drifting gas attacks all units in CP1 or CP2 status into whose locations it drifts during the Record Phase; all results of these attacks are resolved immediately.
106.66 Persistent spray lethals do not disperse. They remain in their impact hex throughout the entire game.
106.67 Chemical weapons (any type) may not be used under rain or any type of snow weather conditions (see Section 103.0).
107.0 Tactical Nuclear Warfare
Commentary: The possible use of tactical (battlefield) nuclear weapons in a general European war has been much discussed in recent years, though more attention has been paid to the supposed deterrent value of the nuclear stockpiles maintained by both sides than to the practical questions surrounding their actual use to influence the immediate battle. While the strategic and political implications of tactical (10 kilotons or under) nuclear weapons are beyond the scope of MechWar 2, it is still possible to demonstrate how these weapons work on the battlefield. In the absence of published NATO doctrine relating to tactical nuclear weapons, the Player is put in the position of discovering for himself how to exploit, and defend against, this formidable weapon system. He may be warned that a nuclear environment radically affects battlefield tactics, and what he learned was most effective on the conventional battlefield may be most dangerous on the nuclear battlefield.
General Rule: All nuclear weapons have both prompt and delayed effects. They may be delivered onto the map by artillery, missile, rocket or aircraft through a procedure known as a nuclear fire mission. Each fire mission involves the use of a specific nuclear warhead of between ½ and 10 kilotons in yield, automatically set for airburst at the most effective altitude. The scenario instructions will state which Players, if any, have the use of tactical nuclear weapons, and will specify the warheads and delivery systems available.
Procedure: When requesting a nuclear fire mission, the Player must first load a specific warhead onto a specific delivery system. This requires a certain amount of advance planning. The necessary delay between the loading of a delivery system with a warhead and the actual delivery of that warhead is known as the load time. Once the order to load a warhead has been given and noted on the Player's Artillery Data Sheet, the Player may plot the intended impact hex for that warhead. This is also listed on the Player's Artillery Data Sheet. There is a minimum time interval between the assigning of target coordinates (impact hex) and the delivery of the warhead. This is known as delay time and may vary from the standard delay times for conventional and chemical munitions. Delay time and load time may run simultaneously. When the nuclear fire is due to impact on the map, the Player must check to see whether the mission has been aborted; if it has not been, the Player then announces the plotted impact hex, resolves the Scatter, places the nuclear impact marker on the actual impact hex, and resolves all prompt nuclear effects on nearby units and terrain. During the Resolution Segment of the next Friendly Indirect Fire Phase, the marker is then turned over to its radiation contamination side.
Cases:
107.1 Load Time
In order for a nuclear weapon to be delivered, it must first be loaded onto a specific delivery system. The number of Game-Turns required to complete the loading procedure varies with the delivery system, and may be found in Case 107.27.
107.11 A load order specifies both the warhead and the delivery system to be loaded, and is written on the indirect fire plot during the Plot Segment of the Indirect Fire Phase, together with the Game-Turn of the order and the Game-Turn of its completion (which is the first Game-Turn on which it may be delivered).
107.12 No warhead may be delivered until its load time has expired.
107.13 Once a load order has reached an air, rocket, missile, or section artillery delivery system, that delivery system is considered unloaded of any other munitions and may not be used for any other purpose. A load order, however, does not prevent the arrival of other munitions from that delivery system during the same Indirect Fire Phase in which the load order is received.
107.14 A load order may be cancelled at any time prior to its completion. Exception: see Case 107.24.
107.15 A new load order must be given for the second nuclear warhead in scenarios providing for more than one warhead for either Player.
107.16 If a load order for an air, rocket, missile or section artillery delivery system is cancelled, or a different load is to be put onto the already-loaded delivery system, the warhead must be unloaded before other munitions can be loaded onto the delivery system. This unload time must be added to the load time for the other munitions. Unload time is 2 Game-Turns for artillery, 3 Game-Turns for missiles or rockets, 4 Game-Turns for aircraft.
107.17 A scenario may specify a load order having been given prior to the Game-Turn in which play starts.
107.2 Plot Time
In order for a loaded nuclear weapon to be delivered, it must be plotted in advance to impact on a specific Game-Turn at a specific impact hex. The number of Game-Turns required between the plot order and the delivery of the warhead varies with the delivery system and may be found in Case 107.27.
107.21 A plot order specifies both the warhead loaded and the desired impact hex; it is written on the indirect fire plot during the Plot Segment of the Indirect Fire Phase, together with the Game-Turn of its delivery.
107.22 An invalid plot order may not be executed; the system remains loaded with the warhead until either a valid plot order is received or an unload order is received.
107.23 A plot order may be changed during the Plot Segment of any Friendly Indirect Fire Phase up until one Game-Turn before delivery. If a change in the plot order occurs before the minimum plot time specified in Case 107.27, the plot is changed and there is no delay. If a change in the plot order is ordered while the plot time is running, but before the cancellation point (the Game-Turn before delivery, see Case 107.24) is reached, the plot is changed and the delivery is delayed until the minimum plot time has taken place. A plot change can not be given after the Plot Segment of the Indirect Fire Phase of the Game-Turn preceding the scheduled delivery.
107.24 A plot may be cancelled at any time up until the cancellation point (the Indirect Fire Phase of the Game-Turn preceding the scheduled delivery). If this is done, the plot is cancelled and no delivery is scheduled, but the delivery system remains loaded with the warhead and ready to receive a new plot.
107.25 Once the cancellation point (see Case 107.24) has been passed, the Player loses control of that nuclear fire mission; all further processes are automatic.
107.26 Each warhead delivery requires a separate plot.
107.27 Nuclear Load and Plot Time Chart (see Charts and Tables section).
107.3 Mission Abort (Optional)
Nuclear fire missions may abort for a variety of reasons beyond the control of the commander represented by the Player in MechWar 2. These reasons range from higher levels of command through communications and technical problems with delivery systems to a battlefield dud.
107.31 During the Resolution Segment of the Indirect Fire Phase in which the nuclear fire is plotted to arrive, the owning Player should roll two dice. If the indicated number is rolled (for the delivery system being used), then the mission has been aborted, and does not occur. The warhead involved is considered to have been expended, and may not be used later in the game. The Player must make a separate die roll for each nuclear fire mission.
107.32 There may be no voluntary abort after the cancellation point (see Case 107.24) has passed.
107.33 All nuclear fire missions using artillery delivery systems abort on a die roll of 2, 3 or 12.
107.34 All fire missions using a missile or air delivery system abort on a die roll of 2 or 3.
107.4 Delivery Systems
In order to perform a nuclear fire mission, the Player must choose which of his delivery systems he wishes to use.
107.41 Artillery: Nuclear fire missions may be carried out by heavy howitzer artillery units of any pattern. The pattern of fire has no effect on a nuclear fire mission; the warhead is presumed to impact only in the impact hex which was plotted (and Scattered). A single howitzer unit, however, may deliver two warheads at once, onto the same or different target hexes if the scenario provides for two warheads available.
107.42 Missile: Nuclear fire missions may be carried out by Honest John, Lance or SCUD missiles or by FROG rockets.
107.43 Air: Nuclear fire missions may be delivered by Su-19, Mig-23, F-4, A-10, Tornado, or A-4 aircraft, but only if these planes are at high altitude. The fire mission is conducted in the same manner as a bombing strike. If any air unit carrying a nuclear warhead is eliminated, the owning Player rolls one die. On a 1-3, the warhead is eliminated and is out of the game. On a 4-6, the air unit continues on with the warhead towards its target. In this case the air unit may only carry out the nuclear fire mission, and is eliminated from the game as soon as the nuclear fire mission has been completed. See also the note at the end of Case 107.44.
107.44 Air units carrying out nuclear fire missions must remain at high altitude and may not carry out bombing or strafing. They must head directly towards the target hex already plotted from the mapedge hex in which they come on the map and must deliver the warhead to that hex and no other.
(Alternative to Cases 107.43 and 107.44.) Nuclear fire missions may be delivered automatically by additional bomber aircraft not represented in the game. In this case, the warhead is automatically delivered to the plotted impact hex. Note: This case is more realistic than Cases 107.43 and 107.44, but much less interesting to play.
107.45 Scatter for artillery delivery systems conducting a nuclear strike is resolved normally. An S result is the same as on target for nuclear weapons.
107.46 Scatter for FROGs is resolved normally.
107.47 Scatter for missiles (Honest John, Lance, SCUD) is resolved normally, unless Enemy EW jamming (see Section 26.0) is in operation. If EW jamming is in operation, the owning Player rolls two dice following the determination that the mission has not aborted (see Case 107.3). On a roll of 2 and 3, jamming has successfully interfered with the missile guidance system, and a further one-die roll is required to determine the effects of the interference. On a 5 or 6, the missile is a dud and the warhead does not explode. On a 1, the missile Scatters an additional 2 hexes. On a 2, the missile Scatters an additional 3 hexes. On a 3, the missile Scatters an additional 8 hexes. On a 4, the missile Scatters an additional 15 hexes.
107.48 Aircraft, which normally do not Scatter, roll for Scatter on the 21-40 column of the Artillery Scatter Table (14.27). An S result is the same as on-target for nuclear weapons.
107.5 Prompt Effects
After Scatter has been resolved, the Phasing Player should place a nuclear explosion marker in the actual impact hex. He must now roll two dice for every unit (whether Enemy or Friendly) within the prompt effect radius of the impact hex, and consult the appropriate Nuclear Combat Results Table. This radius will vary with the size of the warhead and the type of defending unit. Cross-index the die roll with the appropriate-sized warhead column to determine the correct combat result. Then determine environmental effects (see Case 107.7).
107.6 Nuclear Combat Tables
(See Charts and Tables section.)
107.61 Anti-Infantry Nuclear Combat Results Table.
107.62 Anti-Wheeled Vehicle Combat Results Table; External Systems Damage Table.
107.63 Anti-Tank, Anti-APC Nuclear Combat Results Table.
107.64 Anti-Helicopter Nuclear Combat Results Table.
107.65 Explanation of Results: If a number in the indicated range is rolled for a given defending unit, then that unit is completely eliminated (regardless of the number of steps or vehicles that it contained). Other defending units suffer no combat losses, but may be stripped of external systems (see Case 107.67). The companies to which surviving units belong must immediately enter Morale State 3. This applies even to units with Independent Command, if they survive a nuclear attack. A unit is considered a survivor of a nuclear attack if it is within possibly lethal range for that type of unit for that size warhead (there is a chance of a combat result under Cases 107.61 through 107.64) and is not eliminated as a result of the attack. An asterisk (*) next to the result refers to latent results under Case 107.8.
107.66 Defilade, Height Levels, terrain, weather, Chemical Protection status, Suppression, smoke, etc. have no effect on nuclear combat results. Units attacked by the prompt effects of nuclear weapons do not roll on the Loss Modification Tables.
107.67 After the immediate lethal effects of a nuclear fire have been resolved (see Cases 107.61-107.64) and the environmental effects have been resolved (see Case 107.7), external systems damage is determined for all surviving vehicular units using the table in Case 107.62, if such surviving vehicular units are within such a range as to make a result possible using the appropriate column on that table. This is done by the Phasing Player rolling two dice for each such vehicular unit separately. If the dice roll results in a number within the range of numbers given in that table, that unit is stripped of external systems. If the number is outside the range listed in that table, there is no further effect. All results are applied to the entire unit, and are noted on the unit status sheet.
107.68 External systems include: all externally-directed weapons systems (marked with an * on unit data sheets), all other external weapons systems (marked with a # on unit data sheets), searchlights, mine plows, laser range finding and amphibious capability.
107.69 EW jamming units, motorcycles, anti-aircraft units, jeeps and HQ units are considered eliminated if stripped of external systems under Case 107.67. All companies stripped of external systems under Case 107.67 are permanently jammed and subject to all the restrictions of Case 26.2. (The units have lost radio communications due to the elimination of aerials, etc.) If all of the weapons systems of a unit have been stripped, the unit may be retained for reconnaissance or infantry transport (APCs).
107.7 Environmental Effects
Nuclear fire missions have severe and varied effects on the physical environment within a certain distance of the impact hex. This radius varies with the size of the warhead. To determine the effects radius for environmental effects, see the table in Case 107.79. The effects are listed in the following cases:
107.71 Burning Trees: All light or heavy woods hexes within the effects radius listed in Case 107.79 become burning woods. All units in burning woods are eliminated. Additionally, units may not enter burning woods hexes.
Tree Blow-Down: In rain, mud, or any kind of snow conditions, the woods do not burn. Instead, they are blown down. Vehicular units may not enter blow-down hexes; infantry units may enter normally.
107.72 Crater: The impact hex of a nuclear fire becomes a Rough 3 hex immediately, unless it is a lake hex (see Case 101.26). There are no roads or trails (or anything else!) remaining in this hex.
107.73 Towns: Unless rain, mud or any type of snow is in effect, all town hexes within 2 the burning tree radius (fractions rounded up) become burning town hexes immediately. All units in burning town hexes are eliminated. Additionally, units may not enter burning town hexes. All town hexes within the range noted in Case 107.79 which are not burning become devastated. Vehicular units in devastated town hexes are considered eliminated. Infantry units in devastated town hexes lose one step. If rain, mud, snow is in effect, all town hexes within ½ of the burning tree radius (fractions rounded up) become burning town hexes immediately. If there is falling snow or rain, the fire is extinguished 4 Game-Turns after delivery, and the hexes become devastated.
107.74 Bridges: All affected bridges are destroyed; place destroyed bridge markers in place of permanent (civilian) bridge markers; military bridge markers are simply removed.
107.75 Wind: Whenever a nuclear warhead impacts on the map, all smoke, non-persistent gas, and persistent gas markers are removed from the map immediately. Such markers may not be placed for one full Game-Turn following a nuclear delivery including the whole next Friendly Indirect Fire Phase.
107.76 Electro-Magnetic Pulse: Whenever a nuclear warhead impacts on the map, E-M Pulse conditions are in effect for both sides until the end of the next Indirect Fire Phase of the Player who initiated the nuclear attack. Furthermore, Players may not attempt to initiate jamming for 3 Game-Turns following a nuclear blast. Telephone communication and short-range radio may not be used while E-M Pulse is in effect. E-M pulse will also destroy the effectiveness of delicate electronic equipment. Such equipment is divided into two classes. Class one includes jammer units, air defense units with search radar turned on at the time of the nuclear detonation, and HQ units. Class two includes all other air defense units. If within the damage radius of E-M Pulse, air defense units and jammer units are eliminated from the game; HQ units lose their ability to communicate by radio with other units, who are thus "jammed" with respect to the HQs. Such HQ units remain on the map, but may not exercise HQ functions such as giving new Bound Commands to companies or Rally companies, unless using the provisions of Cases 21.26 through 21.29, until the afflicted HQ unit has spent two entire Game-Turns in the same or an adjacent hex to another Friendly HQ. If there is no other Friendly HQ in the game, the afflicted HQ is considered eliminated from play and is replaced like any other eliminated HQ unit.
107.77 Dazzle: A unit affected by dazzle may not move, fire, rally, observe, or perform engineering functions. An MTU-55 or AVLB which has commenced bridge-launching operations may continue bridge-launching during dazzle. During daylight, dazzle affects all units on-map for two Game-Turns (Indirect Fire Phase to Indirect Fire Phase), except as noted below. Off-map artillery is not affected by dazzle. During nighttime, dazzle affects all units within 20 hexes of the impact hex at the time of detonation for four Game-Turns; all units from 21 to 30 hexes for three Game-Turns; all units further than 30 hexes, and on map, for two Game-Turns, except as noted below.
Once it has been determined how long dazzle affects a given unit, this determination is not changed by the unit's subsequent movement closer to an impact hex; thus a unit 32 hexes away from the impact when a nuclear detonation goes off at night is dazzled for two Game-Turns; if the unit moves on the third Game-Turn closer to the impact hex, it does not pick up extra dazzle Game-Turns.
Beyond the period of dazzle, there is an additional period of one Game-Turn during which units which were not in visual discipline (see below) may move and fire automatic weapons, but not other weapons systems. During this additional period (Indirect Fire Phase to Indirect Fire Phase) such units may not rally or perform engineering functions, may not observe Enemy units beyond regular observation range, and may not receive visual signals (if jamming is in effect) from beyond regular observation range.
If Enemy jamming is not in effect at the time of detonation, units of the Player who delivered the nuclear burst are automatically in visual discipline. If Enemy jamming is in effect, visual discipline is an order which must be given during a Command Phase and communicated to units; it is noted on the Command Sheet. Visual discipline may be ordered for some units and not ordered for others. A Player who is not delivering nuclear bursts may also order visual discipline.
On a visual discipline order, units may not move, fire, rally, observe, or perform engineering functions. An MTU-55 or AVLB which has commenced bridge-launching operations may continue bridge-launching while in visual discipline. A visual discipline order is not announced to the opposing Player. Visual discipline is automatic during full dazzle effects. This is important if more than one nuclear burst is detonated in a short time period. "Movement" as used in this Case includes changes in formation and defilade. As long as dazzle is even partially effective for any units on the map (two Game-Turns by day, five by night), air units may not be brought onto the map.
107.78 Spread of Burning Fire (Optional): Unless there is rain, mud, or any kind of snow condition, or it has rained recently, fires will spread. Players must keep track of this on a separate piece of paper. Fire will spread to adjacent town and heavy woods hexes during each Movement Phase (Friendly or Enemy). When using this case, Players must also use the wind rules. Fire will spread at the following rate:
| Wind Condition | With the Wind | Not With the Wind |
|---|---|---|
| Calm | 1 hex | 1 hex |
| Light | 2 hexes | — |
| Moderate | 4 hexes | 1 hex in Movement Phase of Player whose nuclear strike started fire |
| Heavy | 6 hexes | — |
Fire spread takes effect at the beginning of the Movement Phase. All units in a burning hex are eliminated; burning hexes are impassable to all units. Fire will spread to light woods hexes only in moderate or heavy wind and "with the wind" direction.
107.79 Nuclear Environmental Effects Radius Table (see Charts and Tables section).
107.8 Delayed Nuclear Effects
107.81 If a unit is attacked on a Nuclear Combat Results Table (see Cases 107.61-107.64) for lethality (not for external systems damage) and the range of dice results governing the combat results for that unit is marked with an asterisk (*), the men in the unit are assumed to have absorbed a fatal dose of radiation, even if the unit survives the nuclear attack. Such units remain in the game and function normally, and companies containing them do not count them as losses for morale purposes, but they are considered to be destroyed for purposes of Victory Conditions at the end of the game. Such units are worth only ¼ the amount of Victory Points (fractions rounded up, not down) as immediately destroyed units. Note: Men in such units would become functionally impaired in about two hours and dead within a few weeks. The effect of lethal dosages (presumably known through personal dosimeters) on morale is unknown.
107.82 During the Resolution Segment of the next Friendly Indirect Fire Phase following the Friendly Indirect Fire Phase in which the nuclear weapon was detonated, the Friendly Player inverts the nuclear blast marker to its radioactive contamination side.
107.83 The hex containing a radioactive contamination marker and all adjacent hexes constitute a radioactive contamination zone. All units moving through or into a radioactive contamination zone are attacked on the Radioactive Contamination Combat Results Table (see Case 107.84), with the Player who delivered the nuclear weapon rolling two dice for each such unit. Units remaining in such a zone are also attacked during each of their Movement Phases in which they remain in the zone.
107.84 Radioactive Contamination Zone Combat Results Table (see Charts and Tables section).
107.85 The following conditions produce die modifications on the Radioactive Contamination Combat Results Table (see Case 107.84):
- 10 KT warhead: +1
- Adjacent hex rather than impact hex: −2
- Hard or protected armor: −2
- Moving vehicle: −2
- Chemically protected vehicle in CP3 status: −1
107.9 Enhanced Radiation (Neutron) Warhead (Hypothetical)
If specified in the scenario, the NATO Player (only) may use a neutron warhead when making a nuclear fire mission, provided the delivery system used is a Lance missile, 8" howitzer, or aircraft. The effects of such a warhead are as follows:
107.91 All units with hard or Chobham armor within a radius of three hexes (exclusive) from the impact hex are eliminated.
107.92 All other units within a radius of four hexes (exclusive) from the impact hex are eliminated.
107.93 All units within six hexes (exclusive) of the impact hex assume a delayed fatal dose of radiation (see Case 107.8).
107.94 The following effects are modified by E.R.W.; there is no nuclear wind. Tree blow-down only applies in hexes adjacent to the impact hex. Bridges are only destroyed if any part of the bridge is in or adjacent to the impact hex.
107.95 The following effects do apply to E.R.W.: E-M Pulse (107.76), Dazzle (107.77), crater (107.72), contamination (107.82), tree burning (107.71), (tree burning radius 3 hexes only).
108.0 Scenario Design (Advisory Notes Omitted)
The printed Scenario Design section (Case 108.0) is advisory guidance for players who write their own scenarios: how to choose a general situation, weather, rivers and bridges, set-up and reinforcement lists, artillery and air availability, minefields, snorkeling, ambushes, electronic warfare, chemical and nuclear warfare, and victory conditions, together with the printed notes on organic and higher-level artillery and the off-map air defense listings. It contains no rules that govern play of the printed scenarios and is not reproduced here. The printed Cases 108.34 (Initial Battalion and Brigade/Regiment Ratings), 108.61 (artillery ranges by nationality) and 108.66 (radio detection values) are referred to by the rules; their tables are noted in the Charts and Tables section where they appear as sheets.
109.0 Multi-Player Games
MechWar 2 lends itself well to Multi-Player gaming. The roles and responsibilities of the different Players can be defined either by designing a scenario with two different NATO nationalities represented, or by allotting different HQs (and their subordinate units) to different Players. In the latter case, each Player might command a battalion, or even a company in a small scenario. If battalions are under separate command, assets from regiment or above should either be allocated to the battalions, or retained under the control of another Player representing higher headquarters. In smaller scenarios, the same may be done with units under Independent Command (see Section 104.0). A single Player may wear more than one "hat."
109.1 Communications Between Jammed Headquarters in Multi-Player Games
109.11 When Enemy jamming is in effect, communications between Allied Players are impossible except as governed by Cases 26.6 through 26.9.
109.12 Communication established by field telephone or short-range radio between HQ units allows the Players representing those HQs to freely communicate. Messages sent via short-range radio relay links between HQs are limited to ten words or numbers, are subject to all the restrictions of Case 26.71, and may only take place during a Command Phase, whether Friendly or Enemy. The content of such relayed messages, however, is not restricted. (See also Case 109.6.)
109.13 Players may not exchange messages via hand-signals.
109.14 Communications via signal flag or light are limited to messages which must be written down and handed to the recipient. If the message is to be relayed via visual signals by a non-HQ unit, rather than go directly from HQ to HQ, the content of the message must be limited to the following word-units: (any hex number), (any number), (any time or sequence designation, i.e., GT6, 2nd Enemy Movement Phase), APC, artillery, bad, battalion, bound, brigade, chemical protection status, company, destroy, enemy, fire, friendly, from, future, gas, good, halts, heavy, help, hill, HQ, I need, I offer, in, infantry, jammer, light, locate, long, morale, move, near, negative, no, nuclear, order, overwatch, pass, past, plural, rally, RD, regiment, reinforcement, remain, river, search, short, smoke, suppression, tank, to, town, vehicle, visual discipline, where, withdraw, woods, yes, ?, :, +, ...
109.15 Communications between Players using visual signals may only take place during Command Phases, whether Friendly or Enemy. Direct (HQ to HQ) visual signals may be unrestricted in content, in which case they are limited to 15 word-units per Command Phase; or they may be limited to the words noted in Case 109.14, in which case they are limited to 60 word-units per Command Phase. Relayed visual signals are restricted to the word-units noted in Case 109.14 and may not exceed 60 ÷ (x + 1) word-units per Command Phase, whereby x is the number of relay stations between sender and final recipient. A HQ may send or receive any number of messages via visual signals per Command Phase, as long as the limit on word-units is not exceeded with any other sender or receiver, including relay links.
109.16 Communications via messenger must be written down during a Friendly Command Phase, together with Addressee, Sender, and Command Phase of Arrival. The message is delivered to the Addressee, at the beginning of the Command Phase of Arrival. There is no restriction on the content of such messages, but no message may contain a text (excluding Addressee, Sender, Sender's position, time message is written, time of Arrival) longer than 60 words/numbers. Only one such message may be sent from any one HQ to any other HQ during any Command Phase.
Example of Message:
TO: RGT HQ FROM: 3RD BN: 4513; GT5/1ST CMD PHASE HAVE LOCATED ENEMY MORTARS AT 3916; REQUEST ARTILLERY FIRE: INTEND TO MOVE 1ST COMPANY INTO DURRENBUCK, 2ND COMPANY TO 4010 AREA; 3RD COMPANY REMAIN IN REICHENBACH. NEED REINFORCEMENTS.
A number counting as one word-unit of a message may have more than one digit. Thus, "3916" above counts as a single word for purposes of observing limits on the number of word-units in a message.
109.17 When units are spotted, the owning Player has the option of showing their face-up side only to Players whose units are doing the spotting. In this case, spotted units must be marked in some way for as long as they remain spotted.
109.18 When a HQ unit moves into signal flag/light, hand signal, short range radio, or field telephone communications range of the last reported position of another Allied HQ unit, the moving unit's Player may verbally request confirmation from the second unit's Player, to the effect that he is still in communications range, giving the new location of the moving HQ. This may also be done in writing. If the second HQ is, in fact, within range, communications may be commenced; if not, the first HQ is informed of that fact, but the location of the second HQ is not given.
109.2 Elimination of HQ Units
When a HQ unit is eliminated, the Player is eliminated from the game and another Allied Player assumes control of the eliminated Player's units. Application of this case may be waived by consensus of Allied Players.
109.3 Victory Points
Victory Points should in most cases be awarded to the team, but certain scenarios may provide for different objectives for different units and thus provide for different Victory Point totals for each Player.
109.4 Higher-Level Assets
If there is a Player representing a HQ higher than those of the other Players on his team, whether on or off map, that Player controls assets not organic to or attached to the smaller units. Thus, if there is a Soviet Regimental commander, he would control regimental HQ, air defense units, SP74s, regimental reconnaissance, engineer platoon, and all artillery not organic to the battalions (i.e., other than the battalion mortars). If there is a US brigade commander, he would control all but designated artillery, air defense units, engineer platoons, etc. In scenarios where the brigade/regiment commander is not allowed to see the map, on-map units theoretically under his control must be played by other Players designated by him. The regiment or brigade commanders can give orders to the battalion/team commanders, but not to companies; how the lower commanders use their companies in pursuit of objectives given to them by the higher commander is up to them.
109.5 Company Commanders
When playing with separate company commanders, the battalion commander issues the orders (Bound, Overwatch, etc.) to the company, but has no further control over the units in the company. This communication is subject to all the restrictions of interplayer communication in EW jamming situations and CP3 status.
Player's Note: When Allied Players are in communication, they may not spend more than 5 minutes per Game-Turn in joint discussion. Depending on the scenario, pre-game consultation may also be limited.
110.0 Fog of War Rules
MechWar 2 cannot hope to adequately simulate the problems of limited tactical intelligence on the modern battlefield. Abundant use of dummy counters helps, but slows down the game. At the same time, much of modern tactics depends upon ambushes, surprise, deception, and exploitation of unexpected opportunities.
In this section, Players are provided with suggestions which you may incorporate in your scenarios to introduce as much surprise, suspense, uncertainty, and realism in the Fog-of-War context as possible. The price is that this is likely to upset pre-planned Victory Conditions. But for Players who would like a rip-roaring game and aren't too particular about who comes out ahead on points, full speed ahead!
110.1 Random Selection
In order to take advantage of the provisions in this section, Players will need one or more decks of common playing cards and a number of envelopes. When picking cards, all cards are placed face down. The face of the chosen card is seen only by the picker of the card, who places it in an envelope marked as to the specific type of Random Event symbolized by the card. (Example: "reinforcements," "chemicals," etc.) The card is only shown when the event comes into play.
110.2 Scenario Details Subject to Random Selection
(Advisory. The printed Case 110.2 lists the scenario details, such as set-up order-of-battle alternatives, reinforcement alternatives, artillery and air support alternatives, chemical and nuclear alternatives and victory-condition alternatives, that a Player may vary by card selection, together with a key to second-player objectives and a table of combinations of first- and second-player objectives. These are scenario-design suggestions and are not reproduced here.)
110.3 Variable Weather
Your scenario may be livened up a bit by having a weather change in the midst of battle. Pick the new weather by assigning possible changed weather conditions to cards and rolling each Game-Turn to see whether a change is due. When a 2 is rolled on two dice (1 + 1), the weather will start to change 2 Game-Turns (all weather rolls are made during the Record Phase) later.
(Case 110.4, Notes on Soviet Tactics, is tactical commentary on motor rifle, tank and general Soviet practice and is not reproduced. Its cross-references to formations are in Cases 110.5 and 110.6 below.)
110.5 Soviet Formations
Tank Company Attack: Three platoons advance in parallel formations (line abreast) over a 3-hex front; or 2 platoons up over a 4-hex front and the third platoon either in the middle or covering a flank. Attached AFVs are 1 hex behind; engineers
company (one platoon), M.R. company — one platoon per hex, in that order of march.
D. (Parallel to BN HQ and off to either flank) M.R. platoon from second M.R. company.
M.R. Battalion Attack: Two companies advance in parallel formations (line abreast) over a 5 to 8 hex front, tanks with first echelon; third company (second echelon) 4 to 15 hexes behind, in column until committed. BN HQ is 2-3 hexes behind one of the leading companies. The second echelon may also be used as a holding force (see Case 110.43). Mortars are deployed 3 to 7 hexes behind the lead companies. Battalion may detach one platoon as a reserve. In a breakthrough attack, all 3 companies attack as one echelon.
Tank Battalion Meeting Engagement Deployment Column:
- A. One tank platoon.
- B. (5 hexes behind) One tank company, one M.R. platoon, one mortar (mortar, if present in OB, may be withheld at owning Player's option).
- C. (20 to 40 hexes behind — owning Player's option) One tank company — 5-10 hexes on both sides are the remaining two tank platoons of the company whose lead platoon is noted in A.
- D. (1 hex behind last platoon of tank company in C) BN HQ, engineer platoon, AA battery.
- E. (With D or one hex behind D) M.R. company, minus the platoon at B.
- F. (With or one hex behind D) Artillery-mortars (all but mortar in B).
- G. (With or one hex behind E) Last tank company.
- H. (5 or more hexes behind F) Recon platoon.
Note: This is a reinforced battalion.
Tank Battalion Attack: In company column to 20 hexes from Enemy; in platoon column (platoons abreast) by 15 hexes from Enemy; covers 5 to 10 hexes until Enemy is sighted, then spreads out to 15 to 25 hexes.
M.R. Regimental March Formation:
- A. Recon Co.
- B. (Variable distance behind A) M.R. BN, with ENG squad, anti-tank and anti-air elements.
- C. (5 hexes behind B) Remainder of regiment, except for D.
- D. (5-10 hexes behind C) One M.R. company.
M.R. Regiment Attack: Advanced guard consists of M.R. BN plus recon company, anti-air, engineer and anti-tank elements. First echelon is two battalions, with 1 M.R. Co. as advanced guard ahead of them; second echelon is third M.R. battalion, 15-30 hexes behind first echelon; 1 tank company is kept in reserve. Regt. HQ is either 5-10 hexes from the lead elements or near the second echelon battalion. A forward regiment receives from division's second echelon an advanced guard of one (tank-) reinforced battalion with anti-air, engineer and anti-tank elements. Anti-tank units are deployed on the flanks. Attack frontage is 20 to 30 hexes ordinarily, 10-20 hexes in a breakthrough operation, in nuclear environments; somewhat less in conventional environments.
Tank Regimental March Formation:
- A. Recon company.
- B. (Variable distance behind A) Motor-rifle battalion, often reinforced with tank company, engineers or ROD.
- C. (15-45 hexes behind B) Remainder of regiment, in two columns at least 15 hexes apart, with 10-25 hexes separating battalions in the same column; 1 platoon/hex in the daytime, 1 company/hex at night.
Tank Regimental Attack Formation: This is like a motor rifle regiment, but much more flexible.
Note: As long as units are in formation as described above, the requirements of Soviet doctrine (105.1) are considered met, even though a platoon may be at some distance from the rest of its company. In such a case, the Soviet Player may consider detached platoons to be under Independent Command.
110.6 NATO Formations
NATO formations are very flexible. For a Mech battalion on the defense, two companies in the front line may cover about 15 hexes. Each company has two platoons up front and one behind. The third company is either consolidated some 10 hexes behind the lead companies, or spread out 6-10 hexes behind. If the third company is tanks, it may be as much as 30 hexes behind. Armored and Panzergrenadier battalions may defend a front line covering 25 hexes, but without appreciable reserves.
110.61 West German battalions may cover up to 25 hexes in defense.
110.62 Air and armored cavalry units will deploy in front of the battalion front line, if available, according to U.S. tactics.
110.63 In the attack, NATO units move by Bounding Overwatch, not only at the platoon level, but also at the company level.
Notes: A scenario should never force a Player to maintain attack formation, though it may specify a set-up in which the units are already in attack formation. East and West both agree that combined-arms operations will be the norm in modern European combat. The US practices cross-attachment to achieve a combined arms combat force. Thus a Mech battalion and an armored battalion will trade one company, creating the task forces which are part of the standard O.B. below. If Players are willing to keep track of who belongs to whom, cross-attachment may also be practiced at the company level (giving a company with 2 platoons of one type and one platoon of the other). Players may also form "pure" battalions in this way. Soviet practice is not cross-attachment, but down-attachment. Thus the tanks of a T-62 battalion are distributed to BMP companies; the motor-rifle company does not give up any BMPs in this process. Down-attachment can work at all levels down to company; Soviet doctrine calls for virtually any unit with a combat mission to be reinforced with down-attached units; these usually come out of the "second-echelon" forces.
Scenarios (Red Star/White Star)
General Notes:
- All units have organic artillery (see Case 108.61 and Standard Orders of Battle).
- All artillery which may be designated as smoke- or starshell-capable (see Case 108.61) is so designated in the following scenarios unless otherwise specified.
- Scenarios are presented in roughly ascending order of complexity. Not all scenarios are evenly balanced, but each demonstrates a different aspect of modern warfare.
- Specific information is given only where needed. Unless otherwise specified, the wind condition is always light.
Available Forces:
- Refer to the section of the Available Forces Chart (pp. 26-27) which applies to the scenario being played to determine what forces are available and their status.
- After determining which forces are available, consult the appropriate Tables of Organization to determine precisely which units constitute the available forces.
- Forces which enter the scenario as reinforcements (if any) are indicated on the Available Forces Chart. The composition of reinforcing forces is also determined according to the Tables of Organization.
For purposes of Victory Conditions, a company (or other organization) is considered to fulfill a Victory Condition as long as one-half or more (round fractions down) of the vehicles and/or steps in that organization fulfill the stated Victory Condition (e.g., exit the map, remain west of a certain river, etc.).
111.0 A Chance Acquaintance
Commentary: The most frequent type of encounter between opposing forces in modern war, say the experts, is to be the meeting engagement.
Cases:
111.1 General Information
111.11 This scenario takes place on Map A.
111.12 The scenario lasts for 20 Game-Turns.
111.13 The main battle is on the other side of the Ottinger Forest, but two Soviet battalions — one motor-rifle and one tank — have been detached to form flank security and reconnoiter, moving in parallel towards the setting sun. Two US task forces, meanwhile, are heading north; they are supposed to relieve two exhausted battalions still fighting it out north of the forest.
111.2 Physical Environment
111.21 This scenario takes place in daylight. The weather is clear.
111.22 Both rivers are small rivers. There are Class 4 bridges wherever roads cross them, and Class 2 bridges wherever trails cross them.
111.3 Notes on Soviet Forces
111.31 The Soviet motor rifle battalion is set up along the road from hex 4104 to 5308, with the lead unit at 4104. The tank battalion, with T-62 tanks, is set up along the road from hex 5018 to 5511, with the lead unit at 5018.
111.32 The Soviet Player may deploy seven dummy counters.
111.33 Both Soviet battalions are set up in Column formation, in battalion column. (See Case 110.5.)
111.4 Notes on US Forces
111.41 The mech-heavy task force is set up along the road from hex 2528 to 2534; the armor-heavy task force is set up along the trail from hex 4127 to 4134. US tanks are M60A2.
Note: Players may want to try this scenario while reversing the set-up positions of the two US task forces, or with M60 A1 or M60 A3.
111.42 The US Player may deploy six dummy counters.
111.43 Both battalions are set up in Column formation, with two units per hex and two hexes between companies. Set-ups may extend off-map.
111.5 Reinforcements
Neither Player receives reinforcements.
111.6 Soviet Special Information
111.61 Artillery: There is no artillery available from higher HQ.
111.7 US Special Information
111.71 Artillery: Only the 4.2" mortars are smoke capable.
111.8 Victory Conditions
111.81 Each Player receives Victory Points for Enemy vehicles/steps eliminated as outlined in Case 108.9.
111.82 In addition, the Soviet Player receives 50 Victory Points if no US company in Morale 1 or 0 exits the North mapedge.
111.83 In addition, the US Player receives 25 Victory Points for each company in Morale State 0 which exits the North mapedge.
111.84 The Player with the most Victory Points at the end of the game wins.
112.0 Lost in the Black Forest
112.1 General Information
This scenario depicts a meeting engagement of two reconnaissance parties at night.
112.11 The scenario uses map B.
112.12 The scenario takes place in 15 Game-Turns.
112.13 The war is a month old, and the southern end of the front has been stable for over a week; after the Soviets and Czechs swept through Bavaria they had been halted in the Battle of Tubingen just to the south of Stuttgart. The Soviet Central Group of Forces army, however, has been resupplied and is planning to outflank Stuttgart by moving in force through the rugged Schwarzwald, the Black Forest of cuckoo clock and fairy tale fame.
SCGF has decided to gamble on an unexpected thrust by the veteran 31st Tank Division to the Rhine River. Under cover of darkness, the 31st has sent out its recon BN to prepare the way. Major D. Andrikanov, commanding the BN, has been given orders to proceed as far as he can without getting into a major fight, discover what forces lie between the division and the Rhine, and eliminate any Enemy units which are large enough to interfere with his mission but small enough for his battalion to handle. Speed is of the essence, for the main body of the 31st is to move out by midnight.
Assigned to screen this sector of the Black Forest is a troop of armored cavalry under the American VII Corps, commanded by Major Sturgis, who was recently airlifted out of the besieged garrison at Nuremberg and given command of the squadron. The squadron itself had arrived through the Reforger Program only a week ago and was thus assigned to the inactive Black Forest sector for training purposes. Major Sturgis' mission is to train his men and report any unusual events to VII Corps headquarters in Stuttgart.
112.2 Physical Environment
112.21 It is nighttime with a quarter moon.
112.22 The weather is clear and cool, the ground is dry.
112.23 The Wornitz is a small river. There are Class 4 bridges at 0310, 2602, and 6008; Class 3 bridges at 1203, 4710, and 6005; Class 2 bridges at 0508, 3002, and 3104; Class 1 bridges at 1304 (place the preceding where roads cross the river hexsides); Class 0 bridges at 0508/0509, 1902/2002, 3707/3708, 4410/4411/4412, 5710/5809.
112.3 Notes on US Forces
One tank platoon, one APC (with infantry) platoon and one TOW platoon may be set up in any hex in or west of the 45xx hexrow. The remainder of the squadron is set up in any town hex in or west of the 45xx hexrow, but with no more than one platoon of any type in the same town, and with all infantry dismounted. A maximum of 15 dummies may be used.
112.4 Notes on Soviet Forces
112.41 Units are set up in or east of the 60xx hexrow (extending off the map as in proper formation (see Case 112.43); off-map units expend Movement Points to reach the map as if there were additional hexrows) and in road or trail hexes or adjacent to them.
112.42 The Soviet Player may choose to withhold any of his set-up units. These withheld units may be brought on as reinforcements during any Game-Turn at a 61xx hexrow road or trail hex or from the third Game-Turn on at 4734, 4233, or 5301. He may also bring on a maximum of 15 dummies as if they were withheld units.
112.43 Units enter in column, with at least one hex space between companies; companies may enter on separate roads/trails; BN HQ enters one hex behind one of the BRDM-1 companies; motorcycles are placed at Player's option.
112.5 Reinforcements
The Soviet ROD enters any east mapedge road or trail hex in column formation (any order of units) beginning Game-Turn six.
112.6 Special Information (First Player)
112.61 Artillery: Beginning Game-Turn 5 the US will receive one battery of off-map 155mm howitzer support from the west mapedge. This battery will only reach hexes in or north of the xx22 hexrow and in or west of the 47xx hexrow.
112.62 Air Support: There is no US air support.
112.63 Minefields: The Americans may deploy 5 real defensive minefields and 5 dummies west of the Soviet set-up hexes. There are no mineplows.
112.64 Chemicals: All American units are set up in CP1 status. The American Player has no chemicals.
112.7 Second Player Special Information
112.71 Artillery: Soviet Player has one battery of light howitzer (122mm MRLs) off-map to the east.
112.72 Air Support: The Soviets have no air support.
112.73 Minefields: There are no Soviet minefields; each tank platoon has a lead tank with mineplows. Exception: ROD tanks all have mineplows.
112.74 Electronic Warfare: Soviet BN HQ includes radio detection gear.
112.75 Chemical Warfare: Soviet infantry have incapacitating gas grenades. The off-map MRL battery is stocked and loaded with non-persistent lethal gas in unlimited amounts.
112.8 Special Scenario Rules
There are no special scenario rules.
112.9 Victory Conditions
The U.S. Player receives Victory Points for destroying Soviet units as noted in 108.9, and (beginning with Game-Turn 10) an additional 5 Victory Points for each Game-Turn that the Soviet BN HQ has not exited the West mapedge. For each of his units exited off the West mapedge the Soviet Player receives Victory Points equal to the amount that the U.S. Player would receive for destroying that unit.
113.0 Custer's Last Stand
113.1 General Information
This scenario represents a Soviet mopping-up operation by a second-echelon motor rifle regiment against an armored cavalry troop.
113.11 The scenario is played on map A.
113.12 The scenario is played in 10 or fewer Game-Turns.
113.13 Everyone was stunned by the speed of the Soviet armored breakthrough, but for the 7th Armored Cavalry Troop, under Capt. Armstrong G. Custer, it meant a rude awakening to the fact that they were cut-off and surrounded. To Lt. Col. A. Sitya Ingbulyakov and his motor rifle regiment of the 57th Guards Motor Rifle Division, it was just another job.
113.2 Physical Environment
113.21 The scenario is played in daytime. The weather is clear, with no wind.
113.22 All rivers in the scenario are small. There are Class 4 bridges wherever roads cross and Class 2 bridges wherever trails cross.
113.3 Notes on Soviet Forces
113.31 The Soviet Player sets up anywhere on the map not within 10 hexes of an American unit. The 3rd platoon of the 3rd company of each battalion is down one vehicle/step; BRDM-2 vehicles have Sagger; the tank battalion is T-62s.
113.32 The Soviet Player has no dummies.
113.4 Notes on US Forces
113.41 The US Player sets up the armored cavalry troop at any hex of Height Level 2, 3, or 4 on the Kasberg (the mountain in the center of the map); or in the Hasenwald (the light woods around 3010). Tanks are M60A2.
113.42 The US Player may deploy 10 dummies.
113.5 Reinforcements
There are no reinforcements in this scenario.
113.6 Soviet Special Information
113.61 Artillery: The regiment has from higher headquarters a battalion of 122mm light howitzers and a battery of 152mm medium howitzers from the east mapedge. These patterns can't be broken down.
113.62 Air Support: The Soviet Player may deploy one Mi-24 helicopter unit.
113.63 Soviet artillery is equipped with non-persistent lethal chemicals in unlimited amounts, and may be pre-loaded with chemicals at the Soviet Player's option. Soviet units begin in any CP Status, at the owning Player's option.
113.7 US Special Information
113.71 Artillery: There is no higher-level artillery.
113.72 The US troop may be designated for ambush at the beginning of the game.
113.73 US units may be set up in any CP Status, at the owning Player's option.
113.8 Victory Points
113.81 The Soviet Player receives 100 Victory Points for wiping out every American unit.
113.82 The US Player receives 100 Victory Points for smiling at the end of the game.
113.83 If the Players agree to play this scenario twice, switching sides, the Player who as Soviet wipes out the Americans most quickly and with fewest losses wins.
114.0 The Gauntlet
114.1 General Information
This scenario depicts a US rear-guard action against a Soviet pursuit.
114.11 Both maps are used in this scenario, with the 61xx hexrow of map B overlapping the 01xx hexrow of map A.
114.12 The scenario is played until the last unit of the American battalion has exited the west mapedge of map B or has been eliminated.
114.13 Second battalion, a mech-heavy task force under Lt. Col. George Collier, is the sole survivor of the Battle of Weiden, where 3rd Brigade/1st Armored Division met its unhappy fate. Collecting various refugee units, the battalion is fleeing towards Nuremberg, to the west. In hot pursuit is the 1st Tank Regiment of the victorious 11th Guards Tank Division, 1st Guards Tank Army, commanded by Col. Yury Kuriyakin.
114.2 Physical Environment
114.21 The scenario takes place in daylight. The weather is clear.
114.22 All rivers in the scenario are small rivers. There are Class 4 bridges wherever roads cross rivers; there are Class 2 bridges wherever trails cross rivers; there are Class 0 bridges at A0314/0413; B5509/5510; B3809/3909; B3306/3406; B4410/4411/4412; B2001/2002; B0806/0807. None of the bridges is prepared for demolition except the ones at B5908 and B3104.
114.3 Notes on Soviet Forces
114.31 The Soviet Player sets up anywhere in or east of the A 47xx hexrow. Platoons of the 1st battalion are down 1 tank each.
114.32 Soviets do not deploy dummies.
114.33 Soviets deploy in battalion column (see Case 110.5).
114.4 Notes on US Forces
114.41 The US Player is the second Player.
114.42 The US Player sets up the 2nd battalion (mech-heavy task force) plus 3rd platoon/4th mech company, brigade HQ, 1st and 2nd platoons/5th tank company, and 2 x engineer squad, between hexrows A24xx and A4Ixx and within two hexes of the road between A2719 and A4120; these units are all down 1 vehicle/step, with M60A1 tanks. The US Player sets up the air cavalry reinforced team (using 7th company infantry) and armored cavalry troop (using M60A2 tanks) anywhere west of the A42xx hexrow.
114.43 The US Player may deploy any number of dummies.
114.5 Reinforcements
There are no reinforcements for either Player.
114.6 Soviet Special Information
114.61 The regiment has outrun artillery support from higher headquarters.
114.62 Regimental HQ and one battalion HQ have radio detection gear.
114.7 US Special Information
114.71 Artillery: The US has no artillery support from higher headquarters.
114.72 Air Support: The US Player may deploy the air cavalry's helicopter units.
114.73 The US Player may designate either the armored cavalry or the air cavalry, or both, as ambush-prepared.
114.74 The US battalion HQ is equipped with radio detection gear.
114.8 Special Rule
The morale of the US battalion is never better than Morale Level 1; the Movement Point Allowance of all of its vehicles is decreased by 2 Movement Points. These rules do not affect the armored cavalry or the air cavalry, and the Movement Point reduction does not affect 1-vehicle units, other than HQs, which are affected.
114.9 Victory Conditions
114.91 The Soviet Player receives Victory Points for each unit eliminated (see Case 109.9).
114.92 The US Player receives Victory Points for each unit eliminated (see Case 108.9). In addition, the US Player receives 50 Victory Points for exiting brigade HQ, 20 Victory Points for exiting battalion HQ, 5 Victory Points for exiting any other US unit, 20 Victory Points for each Soviet battalion which breaks (see 18.8), and 100 Victory Points for breaking regimental HQ. US units may only exit the west map B mapedge.
114.93 The Player with the most Victory Points at the end of the game wins.
115.0 From the Halls of Fremdingen to the Shores of the Riese
115.1 General Information
This scenario depicts an East German delaying action in the face of a US Marine landing.
115.11 The scenario is played on map A.
115.12 The scenario is played in 15 Game-Turns.
115.13 The war is already a year old, and NATO at last is going over to the offensive. An amphibious task force has landed the US 2nd Marine Division on the North Sea coast with orders to drive inland and cut off a large body of Soviet troops to the west. Lt. Col. R. Gresham's Marine Amphibious Unit is to advance to the Riese River and secure the bridges before the Warsaw Pact can mount a counterattack. Barring the way is Lt. Col. H. Jurgens with a battalion of East German troops on routine occupation duty; he has been ordered to delay the Marine advance and hold onto the Riese Bridges until a regiment from the East German 9th Tank Division can arrive on the scene.
115.2 Physical Environment
115.21 The scenario takes place in daylight. The weather is clear and dry with no wind.
115.22 The Riese is a medium-sized river. The Horloff River is a small river. Bridges at 5614/5715 and 5418/5519 are Class 4; bridges at 5024/5125, 4925/4926 and 4826/4827 are Class 1. All bridges are prepared for demolition.
115.3 Notes on US Forces
The US Player sets up north of the XX14 hexrow and west of the 06xx hexrow. Any or all of the U.S. units may be designated as reinforcements at the discretion of the US Player; units so designated may enter between 0104 and 0112 during any Friendly Movement Phase.
115.4 Notes on Warsaw Pact Forces (Second Player)
115.41 The East German sets up battalion HQ, 1 x engineer squad, 1 x T-62 platoon (4 tanks), and 1 company BMPs and infantry in Fremdingen and 1 company BMPs and infantry evenly distributed among Utzwingen, Schopflohe, and Buhlingen; the third company of BMPs and infantry are evenly distributed among Niederhofen, Ehingen, and Hausen. The second T-62 platoon (4 tanks) is set up in Hausen. Other battalion assets (mortars, ATGM team, 1 x BTR-60) may be set up in any town hex on the map.
115.42 There are 14 or fewer East German dummies, set up in any of the towns mentioned in Case 115.41.
115.5 Reinforcements
There are no reinforcements for either side.
115.6 Special Information — U.S. Player
115.61 The US Player has 1 battalion (which may be broken down into 3 battery patterns) of 105mm Light Howitzer, 1 battery of 155mm Medium Howitzers, and 1 battery of 175mm Medium Howitzers off-map to the west. In addition, the U.S. Player has 1 section of naval heavy howitzer and two batteries of naval medium howitzer off-map to the west. Naval gunfire is ineffective in hexes 0214, 0215, 0116, 0314, 0315, 0316, 0317, 0216, 0117, 1704, 1705, 1803-1808, 1902-1908, 2001-2008, 2101-2104, 2201-2202, 2301-2303, 2324-2328, 2423-2428, 2501-2502, 2519-2521, 2523-2529, 2601, 2617-2621, 2623-2629, 2761-2702, 2716-2722, 2726-2728, 2816-2821, 2916-2922, 3016-3022, 3117-3122, 3201, 3223, 3323, 3422-3424, 3501, 3523, 3524, 3601, 3701, 3814-3818, 3915-3918, 4013-4018, 4106, 4107, 4111, 4113-4119, 4205, 4206, 4213-4219, 4305-4311, 4313, 4314, 4318-4320, 4405-4414, 4417-4419, 4506-4514, 4606-4613, 4707-4709, 4712, 5009-5016, 5110-5112, 5114-5117, 5209-5211, 5214-5216, 5312, 5315-5317, 5803, 5804, 5903-5904, 6003-6004, 6103-6108. Naval gunfire is not smoke-capable.
115.62 The U.S. Player has three F4 air units available beginning Game-Turn 1. If any of these air units is eliminated, triple-damaged, or runs out of ammunition and is voluntarily removed from play, it is replaced by a fresh F4 four Game-Turns later. The Marines also have 2 x Cobra 1S and 2 x Cobra 1Q beginning Game-Turn 1.
115.63 The U.S. battalion is RD-equipped.
115.64 The U.S. infantry units have incapacitating gas grenades.
115.7 Special Information — East German Player
115.71 The East German Player has 2 batteries and 1 section of light howitzer to the east. Beginning Game-Turn 5 he also has 1 battery medium howitzer and an additional battery of light howitzer to the east.
115.72 The East German Player has no air support. His off-map air defenses are: East: 2 x missile 1 (4 vehicles); South: 1 x missile 1 (4 vehicles) — tracking range extends on map.
115.8 Special Scenario Rules
Case 105.11 does not apply to this scenario.
115.9 Victory Conditions
The U.S. Player wins if he has units occupying hexes 5715 and 5519; or either 5715 or 5519 plus both 5125 and 4926, at the end of the game. The East German Player wins if he prevents the U.S. Player from attaining his Victory Conditions. Either Player wins if the Enemy battalion is broken. This Victory Condition supersedes the conditions listed above.
116.0 Wacht am Wornitz
116.1 General Introduction
This scenario depicts a Soviet river crossing operation designed to seize a secure bridgehead as a prelude to further operations.
116.11 The scenario uses map B.
116.12 The scenario takes place in 15 Game-Turns.
116.13 Following the breakthrough operation at Kleinstadt by the 1st Guards Army, the 7th Motor Rifle Division was given the mission of destroying the remaining US Hercules missile site southwest of the breakthrough zone. Racing ahead of the main body of the division is Col. Yuri Gaganov's 1st Motor Rifle Regiment; Gaganov is to seize a bridgehead across the Wornitz River before the US can bring up corps reserves to form a defense line. With a bridgehead in place, the division should have no trouble driving through to the vital SAM site.
Defending the Wornitz River Line is Lt. Col. Bruce O'Conner's Mech-Heavy Task Force. His mission is simple: hold the river until help arrives from corps.
116.2 Physical Environment
116.21 The scenario takes place during daytime. The weather is clear and cool, with a light wind. The ground is dry.
116.22 The Wornitz is a medium river. There are Class 4 bridges at each of the following hexsides: 0508/0509, 1203/1204, 1304/1305, 2602/2603, 3104/3004, 4411/4412, 4710/4711, and 5908/6008.
116.3 Notes on Soviet Forces
The Soviet Player deploys in any hex at Height Level 1 or 2 north of the Wornitz River and east of the 4000 hexrow (inclusive). Units may be deployed in defilade.
116.4 Notes on US Forces
The U.S. Player deploys in any hex south of the Wornitz River and/or any hex in or adjacent to the town of Gerlofirigen (3002). These units may be deployed in defilade.
116.5 Soviet Reinforcements
All Soviet reinforcements enter from the north mapedge, on any hex east of the 4001 hex column (inclusive).
116.51 On Game-Turn 1 the Soviet Player receives 2 motorized rifle battalions plus the following units: 2 x SP-74, 2 x MTU-55, 1 x engineer platoon with BTR-60.
116.52 On Game-Turn 3 the Soviet Player receives 1 tank battalion (T-72).
116.53 On Game-Turn 6, the Soviet Player receives 1 motorized rifle battalion and 1 regiment HQ.
116.6 Special Information
116.61 The Soviet Player has 2 light howitzer battalions, 1 medium howitzer battalion, and 1 light rocket launcher battalion to the north.
116.62 The U.S. Player has 1 heavy howitzer section, and three batteries of light howitzer to the south.
116.7 Victory Conditions
The Soviet Player wins if he controls at least three intact bridges (of any kind) across the Wornitz River east of the 25xx hexrow (inclusive) and none of these bridges is in the Line of Sight of a U.S. unit. The U.S. Player wins by preventing a Soviet victory. Smoke does not block LOS when determining Victory.
117.0 Paratroopers Take a Stand
117.1 General Information
This scenario depicts Soviet airborne forces on the defensive.
117.11 This scenario is played on map A.
117.12 The scenario is played in 20 Game-Turns.
117.13 It is 1982, about a week after the war began. The main front lies to the east, where the Third Shock Army is battering its way through fierce Bundeswehr resistance. To the west lies the Ruhr. In hopes of crushing the West German 7th Panzergrenadier Division, the Third Shock has had the 5th battalion, 1st regiment, 106th Guards Airborne Division dropped off by helicopter just east of the key town of Fremdingen. The mission assigned to the battalion's Lt. Col. Bazhanov is simple: hold this stretch of the autobahn and the key bridges at 5519 against any breakout attempt by the West Germans, until relieved by the Soviet Army.
Unknown to Bazhanov and his hand-picked men, the 1st battalion, the Black Watch (Highlanders) Battlegroup of the British 4th Armoured Division is on its way to join the Germans at the front, and is marching down from the northwest. Lt. Col. MacCaskill, leading the Highlanders, is also unaware of the Soviet paradrop operation — that is, until he enters Fremdingen, where locals have heard rumours of Soviets dropped during the night. (It is 0715 hrs. as the Scots arrive.)
Off-map to the east, Brig. Gen. Kurt Hasenpfeffer's badly-battered 1st brigade of the 7th PG Division has disengaged from the pursuing Soviets and is moving to the west with orders to set up a new defensive line behind the Riese River. When will he arrive with his depleted brigade?
117.2 Physical Environment
117.21 The scenario takes place during daytime.
117.22 The weather is cool with light wind; there is mud on the ground. There is light fog at the outset. Fog changes are determined each Record Phase with a roll of one die: on a 1-3 the fog gets lighter, on a 4-5 it remains the same, and on a 6 it gets heavier. Once gone, it does not reappear.
117.23 The Horloff River is a small river; the Riese River is a large river. There are Class 4 bridges at 5519/5418 (two bridges) and 5715/5614; Class 2 bridges at 4925/4926 and 4826/4827; Class 1 bridges at 5024/5125; Class 0 bridges at 6010/6111, 5229/5230, 5732/5733 and 0413/0314. Any two bridges may be designated by the Soviet Player as prepared for demolition at the start of play. This is written down and not shown to the NATO Player until the bridges are blown.
117.3 Notes on NATO Forces
117.31 The complete British battlegroup comes on the map Game-Turn 1 at 0106 and 0108 in the following order:
- Entry hex 0106: 2 x Scimitar First Team, 5 hexes after Scimitars, one unit per hex, Chieftains in the lead. Fourth Team, 5 hexes after last unit of first team, one unit per hex.
- Entry hex 0108: 2 x Scorpion Second Team, 5 hexes after Scorpions, one unit per hex, Chieftain in the lead. Third Team, 5 hexes after last unit of Second Team, one unit per hex.
HQ may be placed with either Third or Fourth team. The Scimitars and Scorpions come with the maximum Movement Allowance, all others as described above. Units not able to be placed on map in any First Player Movement Phase are deferred to the next First Player Movement Phase.
117.32 One squad of engineers arrives with third and one with fourth teams.
117.33 The NATO Player may deploy a maximum of one dummy counter with each real unit he brings in.
117.34 The British enter in column formation, and must remain in column formation on roads with Bound Orders until one of the following conditions is met: (A) A Soviet unit is sighted; (B) A British unit reaches 0915 or 0816; (C) Soviet jamming goes into effect.
117.4 Notes on Soviet Forces
117.41 The Soviet Player sets up the complete airborne battalion plus 1 x ZSU-23 and 2 x 120mm, 1 x engineer platoon. One seasoned company is set up in Ehingen, another seasoned company is set up in Niederhofen. The ATGM team may be set up at any of the following locations: 4121, 4511, 5408, or in Ehingen or Niederhofen. The BRDM-2 unit may be set up at any of the following locations: 4833, 5115, 5906, or in Ehingen or Niederhofen. All other units may be set up anywhere between the Riese River and the 15xx hexrow.
117.42 The Soviet ATGM team has second generation ATGMs, as do BRDM-2s.
117.5 Reinforcements
117.51 There are no British reinforcements other than units listed in 117.32.
117.52 There are no Soviet reinforcements.
117.53 The arrival of West German reinforcements for the NATO Player is as follows: at the beginning of play, the NATO Player writes down on a slip of paper a single number, for example "3". Beginning with Game-Turn 6, during each Record Phase the NATO Player rolls one die for German reinforcements, and makes a note of the result. German reinforcements begin to enter three Game-Turns after the die roll matches the number previously written on the slip of paper.
First Game-Turn of German reinforcement arrival: 2 x Spahpanzer during the First NATO Movement Phase.
Second Game-Turn of reinforcement arrival: First NATO Movement Phase: 1 x Gepard, 1 company of Leopards. Second NATO Movement Phase: 1 company of Marders and infantry, 1 engineer squad.
Third Game-Turn of German reinforcement arrival: First Movement Phase: None. Second NATO Movement Phase: 2 companies of Marders and infantry, PG BN HQ.
Fourth Game-Turn of reinforcement arrival: First NATO Movement Phase: 1 company of Leopards, Panzer BN HQ, BDE HQ, 1 x Roland, 1 x Biber, 1 x engineer squad. Second Movement Phase: 1 x Gepard, 1 x Jaguar, 1 x mortar, 1 company of Marders and infantry, 1 x EW unit.
Fifth Game-Turn of reinforcement arrival: First NATO Movement Phase: 1 x company of Leopards, 1 x mortar, 3 x Kanone, 2 x Jaguar, 1 x Gepard, 1 x engineer squad.
There are 3 Marder vehicles per platoon and 3 Leopard vehicles per full-strength platoon. Losses are as follows: first company of Leopards to arrive is down 1 tank per platoon; last company of Leopards to arrive is down 2 tanks per platoon; last company of Marders and infantry to arrive is down 1 vehicle/1 step per platoon. Leopards have Chobham armor. The West Germans may deploy a total of 10 dummies. West German units may enter any hex between 6111 and 6130.
117.6 Special Information (NATO)
117.61 Artillery: British organic artillery may not be pre-plotted. Beginning 4 Game-Turns after the first Soviet unit is sighted or Soviet jamming is used, the British receive 2 sections light howitzer (20 hexes west) and 1 section medium howitzer (35 hexes west).
German organic artillery may not be plotted until the first Soviet unit has been sighted or RDF-located by German units. The organic SP howitzers are with brigade HQ. Beginning 4 Game-Turns after the first Soviet unit has been sighted or RDF-located by a German unit, or Soviet jamming is used, the Germans receive 1 battery light howitzer (40 hexes east) and 1 battery heavy howitzer (40 hexes east). Two Game-Turns later it also receives 1 battalion light howitzer (45 hexes north), and another battery light howitzer (40 hexes east), and 1 x Lance (200 hexes north) and 1 Honest John (65 hexes north).
117.62 Air Support: Beginning Game-Turn 8, the NATO Player has available 2 x Tornado and 3 x F-4; each of these air units may only appear once during the game.
117.63 Electronic Warfare: The West Germans have direction finding gear with each one of their HQs and one EW unit. This cannot be used from off-map.
117.64 Nuclear Warfare: The West Germans have one ERW loaded on the Lance missile; it may not be plotted before the Lance becomes available.
117.7 Special Information (Soviets)
117.71 Artillery: Soviets have a FROG section but may give it orders only when Enemy jamming is not in effect.
117.72 Air Support: Soviets have 2 x Mi-8 and one Mi-24 helicopter units, set up between 4107 and 4112. There are no Soviet off-map air defenses.
117.73 Minefields: Soviets have 4 hasty minefields and 10 dummy minefields, set up within 10 hexes of the Riese River.
117.74 The Soviet Player may designate any company, all of whose units are east of hex row 32xx, as ambush-prepared.
117.75 Soviet BN HQ contains direction-finding gear. The Soviets also set up one EW jamming unit with the airborne battalion.
117.8 Special Rules
117.81 Fixed-wing aircraft and helicopters have no effect on each other.
117.82 Case 105.11 does not apply to airborne companies (BMDs and infantry).
117.83 NATO may not use Case 14.7.
117.84 The road from 0106 through 2719, 4921 and 5519 to 6120 is autobahn. Units moving in column along autobahn for their entire Movement Phase receive 3 extra Movement Points.
117.9 Victory Conditions
117.91 The Soviet Player receives Victory Points for NATO vehicles/steps lost as in Case 108.9. In addition, the Soviet Player receives 20 VPs for each vehicle/step with ammunition remaining and in Morale State 2 or less within 5 hexes of the Riese River and north of xx26 hexrow at the end of the game; 10 VPs for each such unit within 13 hexes of the Riese River; 5 VPs for each such unit within 4 hexes of the Fremdingen-Belzheim road. The Soviet Player loses 20 VPs for each bridge demolished.
117.92 The NATO Player receives Victory Points for Soviet vehicles/steps lost as in Case 70.9. In addition, the NATO Player receives 20 Victory Points for each German company in Morale State 1 or better west of the Riese River; he receives 50 Victory Points if British BN HQ reaches any hex adjacent to German Brigade HQ; he receives 30 Victory Points (once) if any German unit exits the west mapedge while remaining entirely in road hexes from the Riese River west.
117.93 By subtracting the Soviet Victory Point Totals from the NATO Victory Points, a Victory Point Game Total is obtained.
Victory Point Game Total:
| Result | Victory Point Game Total |
|---|---|
| Soviet Heroic Victory | Less than 0 |
| Soviet Tactical Victory | 0-29 |
| Soviet Marginal Victory | 30-75 |
| NATO Marginal Victory | 75-100 |
| NATO Tactical Victory | 101-150 |
| NATO Glorious Victory | 151 or more |
117.94 When playing with separate British and German Players, only the British Player receives points for bringing his HQ adjacent to the German brigade HQ; only the German Player receives Victory Points for companies west of the Riese; the two NATO Players receive 15 Victory Points for exiting a German unit off the west mapedge. (See Case 70.92.) Victory Points for unit losses accrue to the firing unit.
118.0 Annex to "Paratroopers Take a Stand"
118.1 General Information
This annex continues the scenario "Paratroopers Take a Stand" with the arrival of the main Soviet forces. Section 118.0 contains the necessary modifications to Section 117.0. The case number at the beginning of each case delineates the case being modified. Players must decide whether or not they will use the annex before play begins.
117.11 In this scenario, map B is added to map A; the 01xx hexrow of map B overlaps the 61xx hexrow of map A.
117.12 The scenario is played in 50 Game-Turns.
117.13 Map B: The Wornitz, which is a continuation of the Riese, and is also a large river. The Kunigunde is a medium river. There are Class 4 bridges wherever rivers are crossed by roads on map B; and two Class 4 bridges each at 3004/3104 and 5908/6008; there are Class 1 bridges wherever trails cross rivers on map B. There are Class 0 bridges at 0607/0708, 1802/1902, 3708/3808, 2803/2802, 5608/5609.
117.53 German reinforcements begin to enter during the first NATO Movement Phase following the matching die roll described in Case 117.53 between B6102 and B6112.
117.52 A Soviet motor rifle regiment begins to arrive during the first Soviet Player Movement Phase of the eighth Game-Turn following the matching die roll of Case 117.53 at any east B mapedge hex. The regiment has T-62 platoons attached, and also 1st tank battalion (T-72), 4 x BRDM-1 and 3 x BMP (in a recon detachment), 2 x MTU-55, 3 x PMP, 1 x TPP. All Soviet ATGMs are second-generation; T-72s have laser sighting and Chobham armor. (This regiment is not the same which beat up the German brigade, but, following Soviet practice, is the former second-echelon regiment which has now become the first-echelon regiment.) Regiment enters in march formation, unless Enemy units can be seen from the mapedge, in which case they may enter in any formation. (See Case 110.5.) The arrival of the regiment should be spread out over several Movement Phases for the sake of realism.
117.62 NATO air units may not appear after Game-Turn 12. There is no NATO off-map air defense to the east, or south of the maps. NATO off-map air defense to the north is 2 x GUN1 (3 vehicles) and 1 x missile 2 (3 vehicles); to the west of map A is 2 x missile 2 (3 vehicles).
117.61B The organic West German medium howitzers may lay down up to 8 batteries of artillery-delivered minefields.
117.71 Beginning with the Game-Turn of their arrival, Soviets have full MR division artillery (the 1 FROG section attached to the airborne BN is from this group, and is available to regiment when out of contact with the AB BN). Plus one SCUD battalion, all at the maximum ranges given in Case 108.61 to the east.
117.72 Beginning Game-Turn 15, Soviets have 3 MiG-23s and 4 SU-19s, each of which may function during one Game-Turn. Soviet off-map air defense to the east of map B is: 2 x gun 1 (3 vehicles), 3 x missile 1 (4 vehicles), 3 x missile 5 (4 vehicles). The missile 1 units also cover map B.
117.75 The Soviet motor rifle regiment has 1 EW jammer (or 2 if the other Soviet jammer has been eliminated) and 2 RD-equipped battalions.
117.78 The Soviets may pre-load one SCUD or one FROG with a 5 KT nuclear warhead.
117.83 Germans may use Case 14.7 (artillery fire) but only against the Soviet regiment, not the airborne battalion.
117.84 The Autobahn continues on map B from 0120 along the road through B0611, 1305, 2704, 3104, 4709 to 6108.
117.91 The Soviet Player receives Victory Points for NATO vehicles/steps lost as in Case 108.9. In addition, the Soviet Player receives 50 VPs for each company in Morale State 1 or better which is exited off the west A mapedge between 0102 and 0113 before Game-Turn 25; 40 VPs if exited between Game-Turns 25 and 29; 30 VPs if exited between Game-Turns 30 and 40; 20 VPs if exited between Game-Turns 40 and 50.
117.92 The NATO Player receives Victory Points for Soviet vehicles/steps lost as in Case 108.9. In addition, he receives 10 Victory Points for each NATO company in Morale State 1 or better west of the Riese/Wornitz River and east of the 32xx hexrow at the end of the game.
119.0 Nuke Raid!
119.1 General Information
The scenario depicts a vital target raid.
119.11 The scenario is played on map B.
119.12 The scenario is played until one side or the other attains its Victory Conditions.
119.13 An American nuclear storage depot is located in Frankenhofen, defended by Major Bruce Wallace's armored cavalry troop. The mission given to Col. Alexei Gurzheyev and his Soviet tank regiment (1st Regiment, 51st Tank Division) is simple: destroy the depot at all costs.
119.2 Physical Environment
119.21 The scenario takes place at night, with a quarter moon. The weather is clear and cool with no wind.
119.22 The Wornitz and Kunigunde Rivers are small. There are Class 4 bridges wherever roads cross rivers, Class 1 bridges wherever trails cross rivers, Class 0 bridges at 0806/0907, 1902/2002, 3708/3807, 5709/5710. None of the bridges are prepared for demolition.
119.3 Notes on Soviet Forces
119.31 The Soviet Player has no set-up units, but brings in a tank regiment beginning with the first Soviet Movement Phase at the east mapedge. The regiment is reinforced with a motor rifle battalion; tanks are T-62s.
119.32 Each battalion has either a platoon or three squads of engineers and their vehicles.
119.33 Two MTU-55 units are attached to the regiment.
119.34 The Soviet Player has as many dummies as he needs.
119.35 The Soviet Player enters in battalion column, with the recon company preceding the remainder of the regiment by 10 hexes (see Case 110.5).
119.4 Notes on U.S. Forces
119.41 The US Player sets up an armored cavalry troop; its units may be in any town but Opferied; and in Frankenhofen he sets up 1 x M150, 1 x M60A2, 1 x 4.2", and 3 x infantry, and 1 x M113, organized into a heavy security company.
119.42 The US Player sets up as many dummies as he needs.
119.43 The US infantry are set up dismounted.
119.5 Reinforcements
119.51 There are no Soviet reinforcements.
119.52 The US receives one Mech-heavy task force (tanks are M60A1) reinforced with 2 x M150, 1 x engineer squad, Game-Turn 6 at any west mapedge hex. They may enter in column.
119.6 Soviet Special Information
119.61 Artillery: The Soviet Player has from the east mapedge a battalion or three batteries of 122mm MRL light howitzers and a FROG battalion. The Soviet Player may not take advantage of Case 14.7. The Soviet Player may, at his option, pre-load FROGs and MRLs with chemicals.
119.62 Air Support: Soviet eastern off-map air defense is 1 x gun 1 (3 vehicles) and 1 x missile 5 (4 vehicles).
119.63 Soviet tank platoons each have one mineplow.
119.64 Soviet tanks may be equipped for snorkeling at the Soviet Player's option; if so he must write this down before seeing the US set-up.
119.65 Soviets have RD gear with regiment HQ and one battalion HQ.
119.66 Soviets enter in CP1 status. Soviet infantry has incapacitating gas grenades. Soviet MRLs are equipped with 10 points of non-persistent lethal gas, FROGs are equipped with 3 points of persistent lethal spray.
119.7 US Special Information
119.71 Artillery: US units organic artillery is starshell- and smoke-capable only for the armored cavalry and security company mortars. Beginning Game-Turn 5, US has 1 section 155mm medium howitzer from the north, and 1 battery of the same from the west; only the section is smoke-capable.
119.72 Air Support: Beginning Game-Turn 10, the US has one F4 available to it. An additional F4 becomes available every third Game-Turn. Beginning Game-Turn 8, the US has 2 x Cobra AH-1S helicopters available. An additional 2 Cobra AH-1Q helicopters become available Game-Turn 12.
119.73 The US may deploy 5 barrier mines and 5 dummies within three hexes of Frankenhofen. US artillery does not have mines.
119.74 The security company's M113 is equipped with RD gear.
119.75 US set-up units are set up in CP1 status.
119.76 US has one Lance missile off-map to the west which is equipped with one 2 KT warhead; it is not loaded.
119.8 Special Rules
119.81 The US Heavy Security Company never checks for morale.
119.82 Soviet units may Bound even in Morale 2 Status. Soviet units benefit from a column shift of two to the left when checking for morale.
119.9 Victory Conditions
119.91 The Soviet Player wins if any Soviet engineer unit occupies hex 1515 and remains there in Overwatch Command for two Game-Turns.
119.92 The US Player wins if the Soviet regiment breaks or all its battalions are broken or all its companies are in Morale State 3 or if the Soviet Player has no units within three hexes of Frankenhofen by Game-Turn 30 or if the Soviet Player has not won by Game-Turn 40.
120.0 The Battle of the Riese
120.1 General Information
This scenario depicts a Soviet attempt to expand a bridgehead in the face of a NATO counterattack.
120.11 The scenario is played on map A.
120.12 The scenario is played in 30 Game-Turns.
120.13 Following a breakthrough on the Luneburger Heide of the North German Plains, the lead battalion of the 32nd Guards Motor Rifle Division raced ahead and managed to reach the Riese River, which is the last important water obstacle between the Soviets and the port of Bremen, before German engineers could blow the bridges. Under cover of darkness the battalion crossed the Riese and fought a pitched battle with a company of German defenders, driving them back to the Hasenwald. As the sun rises on the foggy landscape, the 31st Panzergrenadier Brigade of the 11th Panzergrenadier Division has rushed into the breach, with orders to destroy the Riese bridges. The tired Soviets, meanwhile, have dug in to await the arrival of the division's tank regiment. Can they hold out until the tanks arrive? Brig. Gen. Jurgen Arndt commands the Germans, with Lt. Col. Gregor Novaritch commanding the motor rifle battalion and Col. Ivanof Shchenkov leading the tank regiment.
120.2 Physical Environment
120.21 The scenario takes place in daylight.
120.22 The scenario starts out with medium fog. Each Record Phase, the NATO Player rolls one die: on a 1-2, the fog becomes one level lighter; on a 3-5 it remains the same; on a 6 it becomes one level heavier. There is a light wind, and the temperature is cool. Once the fog disappears, it will not return.
120.23 The Riese is a medium river; the Horloff is a small river. There are Class 4 bridges at 5418/5519 and 5614/5715. There are Class 1 bridges at 5024/5125, 4925/4926, and 4826/4827. There are Class 0 bridges at 0112/0211 and 5732/5733. All of the bridges are prepared for demolition.
120.3 Notes on West German Forces
120.31 The West Germans set up a depleted Panzergrenadier brigade plus 3 engineer squads in or west of the 37xx hexrow and south of the xx13 hexrow, and east of the 18xx hexrow. (Current organization.)
120.32 The West Germans have 10 dummies.
120.4 Notes on Soviet Forces
120.41 The Soviet Player sets up the motor rifle battalion, and tank regiment's recon company in or east of the 42xx hexrow. All BMPs, tanks and infantry platoons are down 1 vehicle/step. Four units may be camouflaged. Also, set up is a ROD at 6120 or 6125 and adjacent hexes or divided among both locations. The ROD is entirely under Independent Command; tanks are T-62s.
120.42 There are three engineer squads set up with the motor rifle battalion and three engineer platoons and BTR-60 units in the ROD.
120.43 The Soviet Player may set up as many dummies as he likes.
120.44 Units in the ROD may be set up in column formation.
120.5 Reinforcements
120.51 There are no West German reinforcements.
120.52 Beginning with Game-Turn 5, a Soviet T-72 tank regiment arrives at any east mapedge hex from 6111 to 6130 in regimental attack formation (see 110.5). The regiment is reinforced with a second motor rifle battalion (using 5th BN HQ for its HQ), 2 x SP-74, and 2 x T-12. Beginning with Game-turn 6, the Soviet Player may bring in 3 PMP and 1 TPP bridging units in the same area in which the regiment may arrive.
120.6 West German Special Information
120.61 Artillery: West Germans have the following higher-level artillery: 1 battery 175mm medium howitzer 100 hexes off-map to the south; 1 battery 110mm MRL (light howitzer) 60 hexes off-map to the south; 1 battery 8" heavy howitzer just off-map to the west. Artillery may be pre-plotted before the Soviet deployment is seen.
120.62 Air Support: West Germans have the following off-map air defenses: 1 x missile 1 (3 vehicles) to the west, extending its range to cover the map; 2 x missile 2 (3 vehicles) to the south along with 1 x gun 1 (3 vehicles); 1 x gun 1 (3 vehicles) to the north.
120.63 The West German Player may designate any tank platoons as prepared for snorkeling, but he must do so before seeing the Soviet set-up. This is marked on the unit status sheet.
120.64 The West German Player may designate 1 company from the Panzergrenadier Battalion as ambush-prepared.
120.65 The West German Brigade HQ and 1 of the battalion HQs have radio detection gear. The West Germans also have one jammer.
120.66 West German units are set up in any CP Status, at the option of the German Player.
120.67 The West German Player has a 2 KT warhead available for his 8" howitzers. He may not plot the warhead for delivery in any hex in violation of the restrictions of Case 108.68.
120.7 Soviet Special Information
120.71 Artillery: Soviet units have from division: its MRL battalion (light howitzers) at 80 hexes to the east and its FROG battalion at 120 hexes to the east. Army throws in 1 130mm medium howitzer battalion at a range of 110 hexes to the east, and a SCUD battalion for good measure at a range of 300 hexes. Front: weighs in with a second 130mm battalion at 100 hexes east, 1 180mm heavy howitzer battery at 140 hexes east. Shorter range artillery cannot reach the bridgehead. Artillery may be pre-plotted before the German deployment is seen.
120.72 Air Support: The Soviet Player has available 5 missions of MiG-23s and 3 missions of SU-19s; each mission constitutes one Game-Turn's appearance by a fresh unit. He also has an Mi-24 helicopter unit which he may bring on at any time; if it is shot down or runs out of ammunition, it is replaced 4 Game-Turns later by a second Mi-24.
120.73 Minefields: The Soviet Player may deploy 4 hasty minefield hexes and 5 dummy minefield hexes.
120.74 Snorkels: The Soviet Player may bring in any tank battalion equipped for snorkeling by delaying the arrival of that battalion by 6 Game-Turns.
120.75 Ambushes: The Soviet Player may designate all motor rifle companies set-up for ambush.
120.76 Electronic Warfare: The Soviet Player has radio detection gear with regiment HQ, the set-up motor rifle battalion HQ, and one other battalion HQ. He has two jammer units with the tank regiment.
120.77 Chemical Warfare: Soviet units are set up in CP1 or CP3 Status as the Soviet Player chooses; however, all set-up units must have the same chemical protection status when set-up. Soviet infantry units are equipped with incapacitating chemical grenades. The set-up mortar unit is equipped with 5 points of non-persistent lethal gas. MRLs are equipped with 10 points of non-persistent lethal gas. The 130mm units are each equipped with 5 points of persistent lethal spray and 5 points of persistent lethal gas, as well as with 5 points each of non-persistent lethal gas. Artillery may be pre-loaded with chemicals at the option of the Soviet Player.
120.78 Nuclear Warfare: The Soviet Player may choose one from among the following: a SCUD loaded with a 10 KT warhead, a FROG loaded with a 5 KT warhead, or a 180mm howitzer loaded with a 5 KT warhead.
120.8 Victory Conditions
120.81 The West German Player receives Victory Points for each vehicle or step lost by the Soviets as described in Case 108.9. In addition he receives 100 Victory Points for destroying the bridge at 5715; 125 Victory Points for destroying the bridge at 5519; 25 Victory Points for destroying any other bridge; 100 Victory Points if no Soviet tank company remains west of the Riese River and in Morale State 1 or 0 at the end of the game.
120.82 The Soviet Player receives Victory Points for each vehicle or step lost by the West Germans as described in Case 108.9. In addition, they receive 100 Victory Points if the West German Brigade's Morale breaks and 100 Victory Points for each unbroken battalion which exits 2 or more companies of Morale State 1 or better from the west mapedge between 0102 and 0113 by the end of Game-Turn 20; 50 Victory Points for each such unit exited by the end of Game-Turn 25; 30 Victory Points for each such unit exited by the end of the game.
121.0 All Quiet on the Western Front
121.1 General Information
This is a reconnaissance patrol scenario.
121.11 The scenario is played on map B.
121.12 The scenario is played until the end of the Game-Turn following the one in which one side or the other has attained 100 Victory Points.
121.13 It is New Year's Eve and the front in the mountains of southern Bavaria is inactive. Routine patrols, however, are a regular feature of wartime life. United States 2nd Lt. John Dinapoli is stuck with the task of taking his scout detachment out through the snow to make sure that no Soviets have moved into Furnheim, since the phone lines to Furnheim are down in the storm (or is it due to Enemy cutting?). Meanwhile, Capt. Danyel Neshchevskiy is given a similar mission: see if Americans have moved into Frankenhofen from their base in Weiltingen.
121.14 Special Rule: No units may enter Gerolfingen.
121.2 Physical Environment
121.21 The scenario takes place at night under overcast skies. The weather is blizzard.
121.22 There are Class 4 bridges wherever roads cross the Wornitz River and Class 1 bridges wherever trails cross the river.
121.3 Notes on US Forces
The US Player sets up one scout detachment from a mech battalion in Weiltingen.
121.4 Notes on Soviet Forces
The Soviet Player sets up one recon company from an MR regiment, reinforced with 2 x BMP but no infantry or motorcycles, in Reichenbach.
121.5 Victory Conditions
If US units enter any or all hexes of the following towns: Irsengen, Furnheim, Himmelstall, Bosacker, Vietsweiler and Frankenhofen, the US Player receives 100 Victory Points. If Soviet units enter all of the following: Irsengen, Frankenhofen, Himmelstall, Furnheim, Die Enge (4528) and hex 1927, the Soviet Player wins 100 Victory Points. If either Player spots a unit of the other, he wins 50 Victory Points. Both Players receive 10 Victory Points for destroying any Enemy vehicle or infantry step. The Player with the most Victory Points at the end of the game is the winner.
122.0 Breakthrough on the Front Line (Bonus Scenario)
122.1 General Information
This "campaign game"-sized scenario depicts a Soviet tank division's breakthrough attempt against a section of the front line which has at least temporarily stabilized, with heavy forces on both sides. The scenario uses virtually all of the units in MechWar 2, but to achieve a Soviet force preponderance sufficient to even contemplate an offensive, the NATO forces have been given several handicaps. As this scenario strains the countermix to the limit, Players will have to improvise markers, and may wish to improvise counters. The scenario is most suitable for Multiplayer use, and has been playtested with 6-10 Players.
122.11 Maps A and B are used in this scenario. The xx34 hexrow of map A overlaps the xx01 hexrow of map B.
122.12 The game continues until broken off by mutual agreement or all companies are in Morale 3 for either side or Game-Turn 30 + 2n, whereby n = number of Game-Turns in which nuclear warheads were detonated.
122.13 The war is two weeks old. The Soviet forces in Germany have exhausted themselves in bitter fighting all the way from Kassel to the outskirts of the Ruhr. With fresh troops arriving from Soviet Russia, however, another general offensive has been ordered for all fronts, together with secondary and diversionary attacks. Central Front headquarters has decided to try for a breakthrough in the Sauerland, just southeast of the Ruhr. The commander of the 8th Guards Tank Army has picked the valley of the Wornitz for his attack; one of the reasons for this choice, besides the Soviet foothold on the Bohmighohe, is the problem NATO has in co-ordinating the forces of three national armies. The American 3rd Brigade, 2nd Armored Division (a Reforger unit) has made its way northwest from the Westerwald; the 20th Panzergrenadier Brigade of the 7th PG Division is holding the center, not far from its peacetime barracks; and the 3rd Battlegroup, 5th British Field Force is holding the northern flank. Between these forces and the Ruhr there lies only a single home defense brigade: no match for a Soviet tank army. To the west lies a good road to the Rhine, bypassing the Ruhr. To spearhead the breakthrough attempt, 8th GTA has picked the 117th Guards Tank Division, veteran Lt. Gen. (2 star) Nikolayev Kurchenko in command. It is 4:30 a.m. as the preliminary artillery barrage begins.
122.2 Physical Environment
122.21 The scenario takes place at night from Game-Turn 1 through Game-Turn 8, under an overcast sky. Game-Turns 9-10 are "1/4 moon", 11-12 are "half moon", 13-14 are "full moon", and from 15 on are day. (This simulates dawn.)
122.22 The weather starts rainy and warm with a light wind. The ground is firm. Beginning at Game-Turn 3, roll one die during each Record Phase. When a 1 is rolled, the rain ends. If playing with a weather front, the dry or foggy weather, and later the clear weather, arrives at the mapedge from which the prevailing winds are coming. The map remains "wet" for purposes of applying nuclear rules throughout the scenario. When rain ends, the die is rolled again to determine whether light fog takes its place. On a roll of 1-4, light fog is present; on a roll of 5-6, there is no fog. Beginning three Game-Turns after the rain ends, the NATO Player rolls one die each Record Phase to determine whether the overcast has lifted sufficiently to allow aircraft operations. On a roll of 1, this is the case, and aircraft may begin operating (in the clear area of the map) in the second Game-Turn after the one in whose Record Phase the overcast-lifting die roll was made. In the same manner, but using a separate die roll, the Soviet Player rolls one die to determine whether the fog has lifted; this die roll immediately follows the overcast die roll. If no rain-ending die roll has taken place by the end of the Game-Turn 8 Record Phase, mud conditions take effect at the beginning of Game-Turn 9.
122.23 The Wornitz is a medium river except between 5110 and 5409, where it is a small river on both sides. All other rivers are small. There are Class 4 bridges at: B2602/2603, B1203/1204, B0310/0410; a Class 3 bridge at B1304/1305; Class 2 bridges at B3004/B3104, B0508/B0509; Class 0 bridges at A5732/5733, A0314/0413, B0508/0509, B3002/3003, B5608/5609, military bridges (treat as Class 4 civilian bridges) B5905/6005, B6009/6010, A5832/5833, and a ferry at B4910/4911. Nuclear radiation zones exist at A3927 and A5413. Neiderhofen is a devastated town, impassable to vehicles. Also devastated are: A4920, A4921, A5020, A4121, A4020. All Wornitz River bridges are prepared for demolition.
122.3 First Player Basic Information
122.31 The Soviet Player is the first Player.
122.32 The NATO Player sets up first.
122.33 The Soviet Player sets up every unit in the Soviet countermix, other than Mi-24 helicopters. The nine BMD counters, however, are not used as BMD units but as HQ units, as follows:
| No. of BMD Unit | HQ Designation For This Scenario |
|---|---|
| 1511 | T-72 Tank Regiment HQ |
| 1512 | T-62 Tank Regiment HQ |
| 1513 | 1st T-62 BN HQ |
| 1521 | 2nd T-72 BN HQ |
| 1522 | 3rd T-62 BN HQ |
| 1523 | 3rd T-72 BN HQ |
| 1531 | 4th T-62 BN HQ |
| 1532 | Recon BN HQ |
| 1533 | Division HQ |
The regular regiment HQ unit commands the motor rifle regiment; the regular 1st BN HQ commands the 1st T-72 BN; the regular 2nd-4th BN HQs command the 2nd-4th motor rifle battalions; the regular 5th BN HQ commands the airborne battalion.
All BRDMs, BMPs #1013-1016, and motorcycles are under the recon battalion. BRDM-2s are under the MR regiment. ATGM teams are ordinarily with MR battalions, but may be detached by the division to the airborne battalion, which, along with the recon battalion, is directly under division. ZSU-23 units, SA-9 units, the SP-74 units, the jammer units, and the bridging units are all directly under division, which may detach them to lower HQs. The three engineer platoons and their BTR-60s are divided among the three regiments. Airborne battalion controls the airborne infantry, ASU units, and helicopters. MR regiment controls the mortars and T-12s. Division may attach MR battalions from the MR regiment to the tank regiments, or otherwise reorganize before setting up.
All Soviet units are at full ammunition and strength levels. Troop quality is seasoned for the airborne battalion, first-line for the T-72 regiment, second-line for the rest. BRDM-2 units have 2nd generation Sagger. Beginning Morale Level is 0.
The Soviet units may be set up in any hex in or east of Soviet front lines, or they may be left off-map and brought in as reinforcements at any mapedge hex east of the Soviet front lines. Units set up on map may be set up camouflaged (up to 15 units) and in defilade. Dismounted infantry may also be set up within 3 hexes or less on the NATO side of the Soviet front lines, provided that no Soviet unit is within 3 hexes of the NATO front line.
The Soviet front line runs as follows, from North to South: A6115—6119—6019—6020—5821—5822—5623—5724—5727—5627—5628—5230—5130—4931—4830—4532—4431—4232—4031—3932—3934—B3901—3904—3804—3808—3909—3910—4412—4413—4614—4621—4422—4423—4426—4728—4734.
Players who are able to use counters from a duplicate counter set or from Suez to Golan for the Soviet HQ may also deploy the BMD units as BMDs.
122.34 Initial HQ ratings are: MR regiment: C; T-72 regiment: B; T-62 regiment: D; Recon BN HQ: B; MR battalion HQs: all C; T-72 battalion HQs: all C; T-62 battalion HQs: all D; Division HQ: B.
122.35 There are 8 dummies provided. Consider each of these dummies to be a 3-motorcycle unit; thus there are no fake Soviet units in the game.
122.4 Second Player Basic Information
122.41 The NATO Player is the second Player.
122.42 Soviet infrared night recon flights have thoroughly checked out the area, and most of NATO's deployment is static. Therefore the NATO Player first sets up one-third of each type of vehicular unit, with HQs, jammers, air defense units, mortars, and recon units (including Armored Cavalry) exempted, face up. For the US and West German companies, this unit would be the first platoon. The Soviet Player then examines this set-up and plots his artillery for Game-Turns 1 and 2. When this is done, the units are turned face-down, and the NATO Player sets up the remainder of his units and his mines. Finally the Soviet Player sets up his units, and play begins with the Soviet Indirect Fire Phase of Game-Turn 1. By agreement of both Players, set-up units of both sides which cannot be seen by Enemy units may be left off the map, provided that their location is noted in writing and that they are placed on the map if they move or come within sighting range of an Enemy unit; once placed on the map they may not be removed without taking them out of play. Units must be set up in accordance with section 105.0. Soviet units should be set up in standard formations (see 110.5), but this is not mandatory.
122.43 NATO units are set up as follows:
The British battlegroup is set up on map A in or behind the NATO lines and in or east of the A38xx hexrow. The British are at Morale Level 0, Ammunition Level 3; troop quality is seasoned; tank, APC, and infantry platoons are all down one vehicle/step; 8 British units may be camouflaged. The battlegroup is commanded by (Lt. Col.) Sir Jonathan Michaels, K.C.B. 24th Baron of Finchley and Edmonton.
The West German Panzergrenadier Brigade is set up on map A in or behind the NATO lines and west of the A38xx hexrow. The Germans are at Morale Level 0, Ammunition Level 3; troop quality is first-line; all units are at full strength and 15 units may be camouflaged. The brigade is commanded by Brig. Gen. Kurt von Schmerdlingen, whose summer villa is in hex A0418.
The US forces set up are 1st and 2nd battalions, brigade HQ, 1 x AVLB, 2 x Vulcan, 2 x Chaparral and an armored cavalry troop. The Americans set up on map B in or behind the NATO front lines. The second battalion must be south of the Bxx12 hexrow; the Armored Cavalry Troop within 5 hexes of the NATO front line. The Americans are at Morale Level 0, Ammunition Level 3, troop quality is second-line; all units are at full strength and 10 units may be camouflaged. M60A1 tanks are in use. The brigade is commanded by Brig. Gen. T. Roy "Bulldog" Perry, West Point '56.
The NATO front line runs as follows, from North to South: A6106—6006—6007—5609—5610—5511—5512—5412—5413—5214—5215—5216—5218—5018—5020—4921—4922—4721—4520—4321—4220—4121—4020—3921—3820—3524—3225—3233—B3201—3203—3104—3105—3306—3309—3409—3410—4013—4018—3919—3921—3523—3527—3728—4026—4529—4530—4331—4334.
All NATO infantry is set up dismounted.
122.44 HQ ratings are as follows: West German brigade: A; US Brigade: D; British Battalion: B; West German Panzer Battalion: B; West German Panzergrenadier Battalion: B; US 1st Battalion: D; US 2nd Battalion: E.
122.45 The NATO engineer squads are divided among the three armies present; if additional counters are available, each Battalion may be given a platoon.
122.46 NATO has 7 dummy counters, and may use LVT-7 units as motorcycle units (3 vehicles).
122.5 Reinforcements
122.51 Soviet Reinforcements: The Soviet Player may bring in his second-echelon tank regiment beginning Game-Turn 6. Players who have Suez to Golan may use a T-55 regiment. Players with a duplicate countermix may use a T-62 regiment. Players without either may at any time remove an entire tank regiment from the map (including an exited regiment) and bring it on as the second echelon regiment. Units removed in this fashion are not considered eliminated for purposes of NATO Victory Points. Reinforcements may arrive at any mapedge hex to the east of the Soviet front line as described in Case 122.33. The regiment has full ammunition and strength; crew quality is second-line; beginning Morale is 0. Regiment HQ is rated D, battalion HQs also rated D. If additional counters are not available, the ZSU-23 and SA-9 units, and engineer platoons, if eliminated, may be brought in immediately as reinforcements. In addition, they may also be brought in with the second-echelon regiment either after being eliminated a second time or being voluntarily removed.
122.52 NATO Reinforcements: Beginning Game-Turn 8, the US has an air cavalry reinforced
Beginning Game-Turn 8, the US has an air cavalry reinforced team available, entering on transport helicopters from the south map edge.
122.6 Special Information (Soviets)
122.61 Artillery: If mortar counters are unavailable for all MR battalions, assume that mortars are with battalion HQ.
Off-Map Artillery: The tank division's 3 battalions of 122mm light howitzer and its MRL battalion are located 1 hex off-map to the east. The division's FROG battalion is located 20 hexes off-map to the east. 8th Guards Tank Army's full artillery is present: 2 x 130mm medium howitzer battalions and one 152mm medium howitzer battalion are 5 hexes off-map to the east. Central Front has been kind enough to provide three SCUD battalions which are 100 hexes off-map to the east, 3 battalions of 130mm medium howitzers and 1 battalion of 152mm medium howitzers 10 hexes off-map to the east, 1 180mm heavy howitzer battalion 25 hexes off-map to the east, and 1 240mm mortar (super heavy howitzer) battalion is located 1 hex off-map. A RAG-assigned artillery battalion may fire either 1 battalion or 3 battery patterns. All other Soviet conventional artillery fires battalion patterns.
122.62 Air Support: Soviets may set up all their transport helicopters and these may be set up carrying infantry. Soviets receive 5 x SU-19 missions and 5 x MiG-23 missions. Each Game-Turn in which an airplane is used constitutes one mission; each mission has full ammunition. Once air superiority turns (see Case 122.82), only half (rounded down) of the unused air mission allotment may be used. Soviet off-map air defense is to the east. There are 6 x missile 1 (4 vehicles), whose effectiveness extends to on-map, 2 x gun 1 (3 vehicles), and 4 x missile 5 (4 vehicles).
122.63 Minefields: If minefield counters can be improvised, or if Players are willing to keep track of them on paper, Soviets receive 10 barrier mines, 20 defensive mines, and 30 dummies. These may be placed anywhere in or behind Soviet lines. First Soviet tank platoon in each tank company is equipped with one mineplow.
122.64 Snorkeling: The Soviet Player may, before the beginning of play, designate any of his tanks as prepared for snorkeling; this is done on the unit status sheet.
122.65 Ambushes: Any Soviet motor rifle or airborne companies may be ambush-designated by the Soviet Player before the start of play.
122.66 Electronic Warfare: The Soviets have two jamming units on map; one of these may be revived if eliminated and secretly placed within 5 hexes of division HQ, or a third jammer may be improvised and set up from the beginning. Division HQ, all regimental HQs, and 5 battalion HQs (designated by division) have radio detection gear. The Soviets have laid down underground field telephones connecting the following hexes: off map to A6120 to A5823 to A5931 to A6131 to off map and to B6106 to off map and to B5704 to B5002. Off-map connections go to artillery within 5 hexes of the map.
122.67 Chemical Warfare: All Soviet infantry are equipped with incapacitating chemical grenades. Unlimited stocks of all kinds of chemicals are available to off-map artillery units. All Soviet units set up on the map are set up in CP1 status.
122.68 Nuclear Warfare: The Soviets have one 10 KT warhead on a special air unit (see Case 107.44), a 5 KT warhead loaded on a FROG, and two 2 KT warheads available for loading by 180mm howitzers; these may be pre-loaded at the Soviet Player's option.
122.7 Special Information (NATO)
122.71 Artillery: The following off-map artillery is available to the NATO Player.
- British: 1 section 105mm light howitzer 20 hexes off-map to the north; 8" howitzer (for nuclear strike only), 55 hexes off-map to the north.
- German: 1 section 8" heavy howitzer 50 hexes off-map to the north, 1 section 110 MRL 45 hexes off-map to the north.
- American: 1 battery 155mm medium howitzer 50 hexes off-map to the south.
Beginning Game-Turn 4, the German off-map artillery changes to: 1 battery 8" heavy howitzer 50 hexes off-map to the north, 1 battery 110 MRL 45 hexes off-map to the north.
Beginning Game-Turn 8, the American off-map artillery changes to: 1 battalion or 3 batteries 155mm medium howitzer 50 hexes off-map to the south, of which only one battery is smoke capable.
Beginning Game-Turn 12, the British off-map artillery changes to: 1 battalion or 4 batteries 105mm light howitzer 20 hexes off-map to the north, of which one battery is smoke-capable; 1 battery 155mm medium howitzer 50 hexes and one battery 155mm medium howitzer 70 hexes off-map to the north; one section 8" heavy howitzer 55 hexes off-map to the north; 155mm is not smoke capable.
Beginning Game-Turn 25, German off-map artillery changes to: 1 battery 110 MRL 45 hexes off-map to the north, 1 battery 8" heavy howitzer 50 hexes off-map to the north.
Once air superiority has turned, the West Germans may perform a Tornado mission every other Game-Turn and an F-4 mission every other Game-Turn. These missions, if not used, may be saved up until used.
Off-map air defenses are as follows: on all sides and covering the maps: 2 x West German missile 1 (3 vehicles); to the north: 3 x West German missile 2 (3 vehicles), 3 x West German gun 1 (3 vehicles), 1 x British missile 2 (3 vehicles); to the west: 2 x West German missile 2 (3 vehicles); to the south: 1 x American missile 3 (3 vehicles).
122.72 Air Support: Beginning Game-Turn 8, the US has 3 x UH-1 (see 122.52). Beginning the Game-Turn after the rain ends, the West Germans have 1 x BO-105 and 1 x LOH and the US has its 4 Cobra units. (When playing with a weather front, the attack helicopters may not affect or be affected by the rainy area.)
122.73 Minefields: The West Germans may place all the mine counters in the countermix behind or in NATO lines; here half of the real mines are barrier and half are defensive. American 155mm howitzers are capable of delivering mines in any 5 Game-Turns. If more mine counters are available, or if the Players are willing to keep track of them on paper, the British may place 10 defensive mines and 10 dummies.
122.74 NATO tanks are not prepared for snorkeling.
122.75 Ambushes: Each NATO battalion may designate one company as ambush-prepared.
122.76 Electronic Warfare: The Germans have one EW jammer and the Americans have the other. The American Mech BN and the British Battle-Group are equipped with RD gear. Both brigades' HQs are also equipped with RD gear. Underground field telephone lines connect the following points:
- American Net: B3103 to B2702
- 1st British Net: A3920 to A4920
- 2nd British Net: A5511 to A5308
- German Net: A3030 to A2632 to A2624 to A2719 to A0915
122.77 Chemical Warfare: All NATO units are set up in CP1 status. German infantry is equipped with incapacitating gas grenades.
122.78 Nuclear Warfare: NATO has available, but not loaded, one German ERW on a Lance missile 300 hexes to the west; and two 2 KT warheads for German 8" howitzers; the US has one ERW available, but not loaded, on a Lance 450 hexes to the south. The British have already loaded a 1 KT warhead for their 8" howitzers. NATO may not endanger populated towns as in Case 108.68. Fremdingen, Weitigen, and Wornitzhofen are inhabited; all other towns are evacuated.
122.8 Special Rules
122.81 All Soviet airborne and all German companies benefit from a column shift of 2 to the left when rolling for morale changes.
122.82 Beginning with the Game-Turn following the one in which the overcast lifts, during the Record Phase of each Game-Turn, the NATO Player rolls two dice. If he rolls a 5, air superiority turns from Soviet to NATO and remains with NATO. Otherwise, air superiority remains with the Soviets.
122.83 Soviet doctrine calls for a surprise breakthrough attempt along a stable front to be preceded with an intensive 30-minute bombardment. During the Soviet Indirect Fire Phase of Game-Turn 1, the Soviet Player may deliver up to six Game-Turns' worth of indirect fire. NATO infantry units may mount vehicles after first round is delivered. Markers are placed on the map only for the final round. All fire for each round must be resolved before any artillery may be delivered from the next round. Following the final round of artillery fire, the Soviet Player may deliver nuclear strikes. Spotting for artillery fire during this Phase is governed by the usual rules, maximum spotting range being 10 hexes due to rain. All units are in visual discipline during any Soviet nuclear strike occurring in Game-Turn 1. All pre-game artillery attacks are resolved secretly by the defending Player if the affected units are not on the map.
122.84 Division HQ is a 3-vehicle HQ unit and is eliminated when the last vehicle is destroyed. In addition to the normal Soviet HQ air defense, the division HQ also has one missile 1 unit, which is destroyed if the second vehicle of the HQ is destroyed. Division HQ also automatically includes a 3-step platoon of infantry co-located with the HQ whenever the HQ is in Overwatch; it has no effect on the game when the HQ is in Bound Command, and is reduced by one step for each vehicle lost by division HQ. If counters are available, division HQ is set up with 13 messenger motorcycle units, each with 3 steps.
Orders to artillery not formed into RAGs are treated as if originating at division HQ when jamming is in effect.
If division HQ is eliminated, it is replaced with a new division HQ (using the same counter) which is set down in the same hex as or adjacent to any regimental HQ; at the same time all Soviet companies not under Independent Command increase their Morale Level by 1 automatically.
Broken regimental HQ may not rally themselves. Instead they may be Rallied by division HQ using the same procedures as are outlined in Case 18.8 for Rallying battalion HQ. Division HQ may be broken and Rally itself in the same manner as a regiment HQ under Case 18.8.
122.85 This scenario is particularly well suited for Multiplayer use. For most realistic play, one Player should be the Soviet division commander. If this Player is willing, the division commander should then never see the map, but rather rely upon briefings from his regimental commanders, who must follow his orders as much as possible. The division commander controls all unattached off-map artillery. He must, however, form the division howitzers into RAGs (regimental artillery groups) under the control of the regimental commanders, by Game-Turn 6, and may add higher-level assets to them. During Enemy jamming, all RAGs revert to division control. He may at any time reorganize a RAG. He controls all reinforcements until they are on-map and makes the decision to voluntarily remove the reinforcement regiment. He may also detach battalions from one regiment and attach them to another, prior to the beginning of play.
If play is at regimental level, one Player should command the units, the independent battalions (airborne battalion and recon battalion), the jammer units, and all other units not attached to regiments either organically or by the division. Players should place those units which the on-map division HQ can "see" (including units in direct communication with division HQ) on his maps. The division commander can, of course, also place other units on his map, based on reports received from his subordinates.
NATO has no over-all commander, but uses national commanders in Multi-Player gaming. Thus, 8 Players are sufficient for a good Multi-Player game; over 20 Players could provide a good game with battalion-level command. In Multi-Player play, command, plotting, artillery resolution, movement, and combat may all be done simultaneously by all Players on a team.
122.86 Should any NATO tank or APC company in Morale State 0 exit the east mapedge between A6115 and B6110 after all battalions of the second-echelon regiment have been brought onto the map, off-map artillery will be eliminated as follows:
| Distance from Mapedge | Game-Turns to Elimination |
|---|---|
| 1 hex | immediate |
| 5-10 hexes | 1 GT after exit |
122.87 Should any Soviet battalion whose companies are all in Morale State 0 exit the north mapedge between A1901 and A4601 at any time, northern artillery will be eliminated on the same timetable as is noted in Case 122.86, with the addition of: 11-20 hexes — 2 Game-Turns after exit.
122.88 All hexes constituting the Soviet front lines on map A and on map B from the north mapedge to and including the Bxx23 hexrow are considered trench hexes. The NATO Players, or the NATO Player acting for each in turn, may designate two hexes of their front line as trench hexes for each infantry platoon in the set-up OB of their nationality; this is done by national sectors of the front line. Such trench hexes are announced to the Soviet Player before he plots his artillery; they may be designated by improvised markers or may be noted on a separate piece of paper. Trench hexes have no effect on tracked vehicles; they are impassable to Enemy wheeled vehicles (motorcycles, 81mm, 120mm, T12, BRDM); they require the expenditure of +1 Movement Point by entering infantry in addition to terrain costs (this includes lateral movement along a trench line). An engineer squad may "fill in" or bridge a trench hex by spending one Movement Phase Unsuppressed in a Bound Command in that hex; Players must keep track of filled-in trench hexes on a separate piece of paper; bridging units may also bridge trenches. A bridged or filled-in trench hex has no effect on movement.
Dismounted infantry in trench hexes in defilade benefit from a modification of −4 on their Loss Modification die roll; they do not modify losses from indirect fire attacks. Dismounted infantry moving from trench hex to trench hex may remain in defilade while moving. Trench hexes do not block Line of Sight. Dismounted infantry in trenches are considered to be "wheeled vehicles" when defending against nuclear attack. When a trench hex is close assaulted, its die modification benefits the defending infantry only on the first round; thereafter the Enemy is assumed to be contesting the trenches.
122.9 Victory Conditions
122.91 Each Player receives Victory Points for Enemy vehicles/steps destroyed or incurring lethal radiation doses according to the schema in Case 108.9.
122.92 The Soviet Player wins 200 Victory Points once if during any Record Phase in the game there are more broken NATO battalions than there are broken Soviet battalions. Players should jot these down each Record Phase for later comparison. The NATO Player wins 200 Victory Points for each broken regiment; the Soviet Player wins 300 Victory Points for each broken brigade. A brigade or regiment may only yield Victory Points to the enemy by being broken once; if Rallied and broken a second time, no further Victory Points accrue.
122.93 Before plotting his artillery, the Soviet Player must choose his exit objective by chance. Objective A (the Ruhr) is any west mapedge hex north of AQ116. Objective B (the Rhine) is any west mapedge hex between B0120 and B0106. The Objective may be chosen by drawing one of three cards, or in some other fashion, such that there are two chances of drawing Objective A for every one chance of drawing Objective B. The Objective chosen is not revealed to the NATO Player until the end of the game, but should be written down in a sealed envelope.
122.94 For each tank, APC, or infantry company exiting 2 or more platoons at the proper Objective while in Morale 1 Status or better and whose battalion HQ, regiment HQ, and division HQ are all unbroken at the time of the company's exit, the Soviet Player wins 50 Victory Points. For each ZSU-23 or SA-9 vehicle exited at the proper Objective, the Soviet Player wins 20 Victory Points. For exiting an unbroken division HQ which has never been replaced under Case 112.84, the Soviet Player wins 500 Victory Points. For exiting each jammer unit, the Soviet Player wins 50 Victory Points.
122.95 If the Soviet Player can trace a path of contiguous hexes uninterrupted by an unbridged river hexside, from any second echelon entry hex (see Case 112.5) to any Objective exit hex without coming within the daytime Line of Sight of a platoon of a NATO company which is in Morale State 2 or better and which is not under Independent Command, he wins 500 Victory Points.
122.96 For each NATO company in Morale State 1 or better exited off the east mapedge between A6115 and B6110 before Game-Turn 12, the NATO Player wins 50 Victory Points.
122.97 For each Game-Turn, beginning with Game-Turn 10, in which the Soviet Player has not exited the majority of the companies of two separate, unbroken regiments in Morale State 1 or 0, the NATO Player wins 50 Victory Points.
122.98 For each use (including duds) of a nuclear warhead, the owning Player loses 100 Victory Points.
122.99 The Player with the most Victory Points at the end of the game is the winner. If the Margin of Victory is greater than 300 Victory Points, there is a Substantial Victory; if the Margin of Victory is greater than 500 Victory Points, there is a Decisive Victory; if the Margin of Victory is greater than 750 Victory Points, West Germany surrenders or the Red Army runs back to Russia.
General Notes on the Bonus Scenario: The mission of a Soviet tank division on the attack is to breakthrough or overrun the Enemy line, bypass strongpoints of resistance (leaving them for a second-echelon motor rifle division to mop up) and move like hell on wheels for its strategic objective (in this case, the Ruhr or the Rhine). According to Soviet doctrine, the attacking tank division receives first priority for higher-level resources; its attack frontage would be about 60 hexes. The first echelon battalions of both first echelon tank regiments should attack simultaneously. First direct fire weapons (tanks, assault guns, antitank guns, BMP/BMD guns) bring the Enemy under attack. Then, if Enemy antitank defenses are very strong, dismounted infantry close in under cover of rolling artillery fire. The dismounted infantry wipes out the first echelon of the defense, then remounts and continues the attack. Loss of two entire regiments is considered acceptable if breakthrough is achieved.
A division prefers to attack in two regimental columns in the first echelon. The third regiment may be left for the second echelon, may be used to protect flanks, may be distributed in support of the two lead regiments, or may make diversionary attacks. Local circumstances, however, may recommend a three-regiment attack.
Suez to Golan Exclusive Rules
(The Suez to Golan Exclusive Rules and Scenarios follow. They apply only to the Suez to Golan game, in addition to the Standard Rules above. The Standard Rules are the same as those for Red Star/White Star and are printed once, above. The printed Summary of Unit Types, a counter and silhouette reference, is not reproduced as text.)
200.0 Introduction
In its full version, Suez to Golan can be a very complex and rather slow-moving game. For this reason, it is not intended that all of the Advanced rules be in use all of the time. Instead, Players should initially learn the game by using some of the smaller scenarios and then gradually introduce those with more units and Advanced rules into play. Some of the Advanced rules, such as positions of advantage, require little in the way of additional time and effort; others, such as the air rules, require a great deal more. Players must use their own discretion when deciding the scope of the Scenario to be played, and are always encouraged to make up their own scenarios. In fact, it is a good idea to start off just by pushing a few platoons or battalions around on the map, in order to get the "feel" of the game.
201.0 Special Terrain Features
Cases:
201.1 The Game Maps
The Suez to Golan maps were developed from actual Middle Eastern terrain. The geographical features and place names shown on the map are real places, but in some cases their relationship to one another has been altered to provide as wide a range of terrain as possible. Map C depicts a portion of the Suez Canal and surrounding area in the Sinai; Map D does the same for the Golan Heights. Both maps have the following special features and rules.
201.11 Fortification Hexes: Dismounted infantry units in a fortification hex receive a −5 roll adjustment on the Infantry Loss Modification Table when defending against all attacks. Infantry units may not enter defilade in such a hex, and, if close assaulted by Enemy infantry units, only the Friendly infantry units "originally" in the hex receive the benefits of the fortification. Fortifications have no effect on vehicles and do not block the Line of Sight. Engineer squads treat fortification hexes as town hexes for purposes of defending and clearing (see Case 29.3). No more than 3 vehicles (in up to 3 vehicular units) may end a Phase in a fortification hex.
201.12 Firing Ramp Hexes: Vehicles in firing ramp hexes are automatically considered to be in defilade when defending against direct fire attacks whose Line of Fire goes through the ramp hexside. Vehicular units in firing ramp hexes are never considered Silhouetted by Enemy units whose line of fire goes through the ramp hexside.
201.13 Silhouetting: Vehicular units at Height Level 1, 2, or 3 are considered to be Silhouetted (see Case 8.7) if the Enemy line of fire does not eventually go through a hex at a Height Level higher than the defending unit.
Silhouetting Example: The T-55 unit in hex 3819 is silhouetted for all Direct Fire attacks from the M60 unit in hex 3419. The T-55 unit in hex 3817 is not silhouetted, because the M60's Line of Fire eventually goes through a hex at a higher Height Level (i.e., 4215).
201.2 Sinai Special Terrain
The following special terrain features are found only on map C.
201.21 Escarpment Hexsides: Vehicular units cannot cross escarpment hexsides. Such hexsides do not block the Line of Sight and have no other effects.
201.22 Trench Hexes: Dismounted infantry units in trench hexes are automatically considered to be in defilade and do not pay the additional one Movement Point to leave this status. Such units may move directly from trench hex to trench hex and remain in defilade while doing so. Trench hexes have no effect on vehicular units and do not block the Line of Sight.
201.23 Railway Embankment Hexsides: Vehicular units in hexes adjacent to railway embankment hexsides are automatically considered to be in defilade when defending against direct fire attacks whose line of fire goes through the embankment hexside. Such hexsides do not block the Line of Sight and have no other effects.
201.24 Bar-Lev Hexes: Bar-Lev hexes are treated the same as fortifications (see Case 201.11) except that each Bar-Lev hex is also considered to contain a firing ramp. No more than 6 vehicles (in up to 3 vehicular units) may end a Phase in a Bar-Lev hex.
201.25 Sweetwater Canal: The Sweetwater Canal is treated in all respects as a small river.
201.26 Clear Terrain: Vehicular units may not enter defilade in any clear terrain hex on map C. Infantry units may enter defilade in such hexes normally.
201.27 The Canal Escarpment: The canal escarpment is the line of escarpment hexes running along the east bank of the Suez Canal. These hexsides are treated in the same manner as normal escarpments, with the exception that they may be "cleared" by engineer squads. The procedure for this is the same as for clearing barrier minefield hexes (see Case 29.6). After spending the required six consecutive Friendly Movement Phases in any hex in the 1400 column, place a "breached minefield" marker in the hex. This indicates that all escarpment hexsides in (adjacent to) the hex have been cleared, and are thereafter treated as normal clear terrain hexsides.
201.28 Khatifs: There are two Khatifs on the map, Khatif Makhazin and Khatif el Khiel. Vehicular units may never begin a game deployed on a Khatif (i.e., hexes 4214-4217, and 4924-4926).
201.3 Suez Canal
The Suez Canal is a special terrain feature. The following rules apply to all canal hexes.
201.31 Non-amphibious units may never enter a canal hex.
201.32 Amphibious units (only) may enter canal hexes by spending one complete Movement Phase with a Bound Command.
201.33 While in a canal hex, amphibious units may only be given a Bound (or Withdrawal) Command. They may not fire any of their weapon systems. When attacked, such units defend normally, as if they were in a clear terrain hex. For rather obvious reasons, units may not enter defilade while in a canal hex. They may not be in column formation.
201.34 Canal hexes do not block the Line of Sight and are considered to be at Height Level 0.
201.35 Units may not enter canal hexes by snorkeling. Bridges and ferries may not be constructed across the canal during the game, but may be deployed in some scenarios before the start of the game. The ferry points for ferries across the canal are indicated by placing a ferry marker in the appropriate canal hex.
201.36 Indirect fire impacting on a canal hex is resolved normally.
201.4 Golan Special Terrain Features
The following special terrain features are found only on map D.
201.41 Prohibited Hexes and Hexsides: No ground units may enter prohibited hexes or cross prohibited hexsides. They do not block Line of Sight and have no other effects.
201.42 Anti-Tank Ditch Hexsides: Vehicular units may not cross anti-tank ditch hexsides. These hexsides may be bridged in the same manner as a small river (see Section 24.0). The anti-tank ditch does not block Line of Sight (see also Case 201.43).
201.43 Anti-Infantry Minefield: The anti-tank ditch is considered to contain a defensive minefield. These are mines within the anti-tank ditch itself. This minefield will attempt to attack all infantry units that cross any unbridged anti-tank ditch hexside. (They are automatically considered to be using Bold Movement — see Case 19.2.) This attack is resolved in the hex the moving unit enters. This anti-infantry minefield may be cleared (like a normal defensive minefield) by any engineer squads adjacent to the hexside.
201.44 Because the Golan Heights consist of a series of hills and escarpments rising sharply from the valley of the Jordan River there are two different 0 Height Levels on the map. The first represents the Jordan Valley (i.e., the 0100-0800 hex columns), and the second, the Golan Heights themselves (i.e., from each column 0900 and eastwards).
202.0 Special Units
202.1 Arab Commandos
Arab commandos are one-step infantry units. They use the following special rules.
202.11 When attacking Enemy vehicular units with any of their personnel anti-tank weapons, commando units are treated as a three-step unit.
202.12 The availability of commando units is listed in the scenario instructions. Commando units must be deployed secretly by the Arab Player before the start of the game. Their counters are not placed on the map; instead, the Player records the location of each of these units on a separate piece of paper. Commando units are considered to be observed and are placed on the map only when they (A) fire any of their weapon systems; (B) move from their initial deployment hex; or (C) have an Enemy unit enter the hex that they occupy.
202.13 In all other respects, commando units are treated as normal infantry units.
202.2 Israeli Mortar Carriers: All Israeli mortar carriers (see Section 200.0) are treated as "P" armor class vehicles when defending against direct fire attacks, and "L" armor class vehicles when defending against all forms of indirect fire.
202.3 Aircraft Weapons Loads: All aircraft are assumed to be able to carry out strafing strikes. In addition, each aircraft unit may be equipped with one of the following weapon systems. The exact weapon system carried is either specified in the scenario instructions or (if not specified), left up to the option of the owning Player:
- (A) Conventional bombs.
- (B) Smart bombs (Israeli Player only, in any scenario after 10/14/73).
- (C) Conventional air-to-surface missiles.
- (D) Maverick air-to-surface missiles (Israeli Player only, and only in scenarios after 10/14/73).
* If conventional ASMs are carried, the Israeli Player should use the ASM ammo depletion number to the left of the "/" on the aircraft's data sheet; if Maverick ASMs are carried, use the ASM ammo depletion number to the right of the "/".
202.4 Radio Detection Values: Israeli Radio detection values are as follows: Brigade HQ: 4, Battalion HQ: 2, On-map artillery units: 4.
202.5 Arab ATGM Squads: Arab ATGM Squads are one-step infantry units. When attacking Enemy vehicular units with their personnel anti-tank weapons, they are treated as a three-step unit.
203.0 Weather
The weather during almost all of October 1973 was clear and dry, and thus favorable to military operations. This might not have been the case, however, during other seasons of the year. All historical scenarios assume that the weather is clear and dry, with a light wind. For Players who wish to design their own scenarios and experiment with different effects of weather, we present the following rules. Basically, all adverse weather conditions serve to reduce the movement abilities and observation range of units.
203.1 Fog (Map D Only): The fog represented in the game simulates the general fog use conditions sometimes experienced in the Golan Heights. There are three "types" of fog: Light, Medium, and Heavy. Fog always extends through all Height Levels on the "plateau" (i.e., east of the 0900 hex column, exclusive) and has no effect on lower Height Levels (i.e., the Jordan Valley).
203.2 Mud and Rain (Map D Only): Mud serves to slow the movement and rain reduces the observation range of units.
203.3 Wind: There are four possible wind conditions: Calm, Light, Moderate, and Heavy. The only effect of wind is on smoke (see Case 16.4).
203.4 Weather Effects Chart (see Charts and Tables section).
203.5 Advanced Observation Range Table (see Charts and Tables section).
204.0 Independent Command
General Rule: The Standard Rules assume that all units are allocated to some particular company, and thus receive commands (and all other company assets) on a company basis. Some units, however, operate under Independent Command and use the following rules. These units vary by nationality, and are listed below.
204.1 General Information
204.11 Units with Independent Command are treated in all respects as separate companies and must be issued separate commands (and other company status) during the play of the game.
204.12 Units with Independent Command are never affected by morale, and do not enter Morale States.
204.13 The following Arab units always have Independent Command: 82mm, 120mm, PT-76, ATGM, BRDM, T-12, commando, engineer squads, bridging units, ZSU-23/24, HQ, aircraft, and helicopter units.
204.14 The following Israeli units always have Independent Command: 81mm, AT, RCCE, HQ, garrison infantry, aircraft, engineer squads, and bridging units.
205.0 Doctrine
205.1 Arab Doctrine
205.11 At the end of any Phase, all Arab units without Independent Command (see Section 204.0) must be within two hexes (inclusive) of some other units of their company. That is, there may be a maximum of one intervening hex between the platoons of a company. This restriction does not apply if the company (for whatever reason) has been reduced to a single platoon.
205.12 Arab companies may not be issued a Bounding Overwatch Command.
205.2 Israeli Doctrine
205.21 At the end of any Phase, all Israeli units without Independent Command (see Section 204.0) must be within two hexes (inclusive) of some other units of their company. That is, there may be a maximum of three intervening hexes between the platoons of a company. This restriction does not apply if the company (for whatever reason) has been reduced to a single platoon.
205.22 All Israeli units may be issued a Bounding Overwatch Command.
205.23 Units of companies with Bounding Overwatch Commands are considered to fulfill their doctrine requirements as long as they can trace a Line of Sight to a unit of their company at the end of a Phase. For purposes of this rule (only) smoke hexes are not considered to block the Line of Sight. Companies with Bounding Overwatch Commands may also fulfill their doctrine requirements in the manner given in Case 205.21.
205.24 In addition to the units listed in Case 204.14, the Israeli Player has the option of designating one platoon of each company to Independent Command. This must be done during the start of the game and cannot be reversed. The only disadvantage to this procedure is that whenever the "remainder" of the company rolls for morale, the Israeli Player must shift one column to the right on the Morale Table.
206.0 Scenario Format
General Rule: Suez to Golan is designed to be played on two levels. The first level is the standard scenario, which depicts an historical battle from the 1973 Arab-Israeli War. The second level is the ability for the Players to design their own scenarios (for this, see Section 210.0). The rules for each standard scenario will use the following format and rules.
206.1 Scenario Information: This section details the physical conditions under which the battle was fought, and gives the number of Game-Turns in the scenario. Because the historical weather was always clear and dry, with a light wind (i.e., no fog or rain), the scenario rules will list only if it is day or night. If it is night, the Phase of the Moon will also be given.
206.11 Unless otherwise stated, all units begin the game with the strength given in the Order of Battle Charts (see Section 207.0).
206.12 Units always begin the game with Level 3 ammunition.
206.13 The number of dummies to be included in a scenario is left up to the discretion of the Players. Players may also deploy a number of dummies up to the limit of the counter mix.
206.2 Player Deployments: These sections deal with the nationality of the first and second Player, and the initial forces available to them. Included in this Section are specific deployment restrictions, as well as the required battalion and brigade HQ ratings. (Before play begins, each Player must secretly roll a die to determine the actual value of each of his HQ units.) All units should be deployed face down on the map, and turned up only as they are observed during the play of the game.
206.3 Victory Points
206.31 Victory Point Chart. Each Enemy vehicle or step eliminated is awarded the following Victory Points:
| Unit | Victory Points Awarded |
|---|---|
| Regiment or brigade HQ | 60 |
| Battalion HQ; any air unit | 30 |
| M60, Centurion, T62, ZSU 23/24, 155, 712, PMP, TPP, Israeli paratroop infantry | 5 |
| Any mortar unit | 4 |
| BMP, M113, Israeli mechanized or garrison infantry | 3 |
| BTR-50, BTR-60, PT76, BRDM, Recce and ATGM vehicles, all Arab mechanized or foot infantry | 2 |
| Arab ATGM infantry, commandos | 1 |
206.32 In certain scenarios, Players may receive Victory Points for having Friendly units exit the map. When exiting the map, a unit must pay the Movement Point cost for the hypothetical hex it is presumed to be entering off the map. The terrain in this hypothetical hex is assumed to be the same as the terrain in the hex the unit currently occupies.
206.33 In certain scenarios, Players will receive Victory Points for "controlling" a certain hex at the end of the game. A hex is assumed to be controlled by the Player who last had a Friendly unit occupy or pass through the hex.
206.34 Certain scenarios require that a Player clear a certain area or terrain feature of Enemy units and their Lines of Sight. Smoke hexes are not considered to block the Lines of Sight for this purpose (although certain weather conditions might).
206.35 Units with Independent Command, units currently in Morale State 3 and units under Withdraw Commands have no bearing on any "Friendly" Victory Conditions. That is, the owning Player never receives Victory Points for exiting such units or having them control given hexes or trace a Line of Sight. Of course, such units would still provide the Enemy Player with Victory Points if they were eliminated.
206.4 Starting Sequence: This section describes the order in which Players deploy their units, and indicates whether or not a Player may pre-plot the arrival of his artillery and air strikes. After the starting sequence has been completed, both Players must issue current commands for all of their companies. Play then begins with the first Player Indirect Fire Phase of Game-Turn 1.
206.5 Special Rules: This Section provides any rules, limits, and restrictions that apply only to the scenario being played.
206.6 Reinforcements: This Section describes how reinforcements (additional units) enter the game. Units entering the map as reinforcements are always considered to have a Bound Command.
206.61 When not stated otherwise, units may be brought onto the map in any formation the Player wishes. The Player may use as many entry hexes as he desires; if more than one unit enters the map through the same hex, however, the units which do so are presumed to have been "staged back" during all or part of their movement.
206.62 Units which are staged back must first be deployed off the map, one behind the other (and/or stacked), with the lead unit positioned adjacent to the desired entry hex plus the additional cost for any hypothetical hexes that it would have to traverse to reach the entry hex. The terrain in such hexes is assumed to be the same as that in the entry hex.
206.63 Once Players have composed the order of units which are staged back, the relative positions of these units may not be altered until the units arrive on the map.
206.64 Depending on the number of units entering at a given hex, it may not be possible to enter all units onto the map during the first Game-Turn or Phase that they are available. Units that cannot enter in a given Friendly Movement Phase simply enter in some following Movement Phase. Units which are off the map are out of play for all game purposes; except, of course, to be moved by the Friendly Player in order to reach the map.
206.65 Players may choose to withhold some or all of the scheduled reinforcements off the map, at their option. These units are available to enter the map during any subsequent Friendly Movement Phase.
207.0 Orders of Battle
- Refer to the section of the Available Forces Chart which applies to the Scenario being played to determine what forces are available and what their status is.
- After determining what forces are available, consult the appropriate Tables of Organization to determine precisely which units constitute the available forces.
- Forces which enter the Scenario as reinforcements (if any) are indicated both in the Scenario and on the Available Forces Chart. The composition and status of such reinforcing units is also determined according to the Tables of Organization.
208.0 Sinai Scenarios
All Egyptian tanks are T-55; all Israeli tanks are M60. Egyptian brigade HQs have radio detection capabilities in all scenarios (see Case 26.1). When determining the apex hex of battery artillery patterns (see Case 14.1), the direction of fire of Egyptian artillery is from the west mapedge; Israeli artillery is from the east mapedge. The Bar-Lev positions in hexes 1406 and 1427 (only) begin all Scenarios set on October 6th or 7th with one (three-step) Israeli garrison infantry platoon occupying them.
208.1 Egyptian Expansion of the Bridgehead: 7 October 1973
208.11 Scenario Information. Environment: Day. Game Length: 16 Game-Turns.
208.12 First Player Deployment (Egyptian). Deployment: May deploy in any hex west of the 2000 hex column (inclusive). May not be deployed in defilade. Off-Map Artillery: 1 x battalion medium howitzer, 3 x battalion light howitzer.
208.13 Second Player Deployment (Israeli). Deployment: May deploy in any hex east of the 3100 hex column (inclusive). May be deployed in defilade. Off-Map Artillery: 3 x battery light howitzer.
208.14 Victory Conditions. The Egyptian Player wins if he is the last Player to have a Friendly unit occupy or pass through the Tasa crossroads (hex 5518) by the end of the game. The Israeli Player wins by preventing an Egyptian Victory.
208.15 Starting Sequence. (1) The Israeli Player deploys all his units on the map. (2) The Egyptian Player deploys his units on the map. (3) The Egyptian Player may pre-plot his artillery so that it impacts on Game-Turn 1.
208.16 Special Rules. (1) The Israeli First Armored Battalion has only 23 tanks, instead of the normal 27. The Israeli Player must distribute these four "losses" as he sees fit, to any of a number of his platoons. Israeli units are not subject to Morale rules. (2) Neither Player may use smoke; Israeli vehicles may not use HE shell (see Case 10.2).
208.2 Israeli Counterattack: 8 October 1973
208.21 Scenario Information. Environment: Day. Game Length: 24 Game-Turns.
208.22 First Player Deployment (Israeli). Deployment: May deploy in any hex east of the 4200 hex column (inclusive). May be deployed in defilade. Off-Map Artillery: 2 x battery light howitzer.
208.23 Second Player Deployment (Egyptian). Deployment: May deploy in any hex west of the 3000 hex column (inclusive). May be deployed in defilade. Off-Map Artillery: 2 x battalion medium howitzer, 4 x battalion light howitzer.
208.24 Victory Conditions. The Egyptian Player receives 100 Victory Points for control of the ferry (see Special Rules below) at the end of the game, and an additional 100 Victory Points for exiting any unit off the east mapedge. The Israeli Player receives 500 Victory Points for having any Friendly unit enter hex 1424 (thus destroying the ferry). The Player with the most Victory Points at the end of the game wins.
208.25 Starting Sequence. (1) The Egyptian Player deploys his units, including the secret deployment of the commando units (see Case 203.1). (2) The Israeli Player deploys his units. (3) Both Players may pre-plot their artillery so that it impacts in Game-Turn 1.
208.26 Special Rules. (1) All Israeli tank platoons are composed of two vehicles (instead of the normal 3). Israeli units are not subject to morale rules. (2) There is an Egyptian ferry deployed in hex 1324, between hexes 1323/1424. (3) All Egyptian companies begin in Morale State 1. (4) Neither Player may use smoke; Israeli vehicles may not use HE Shells (see Case 10.2).
208.3 Egyptian Breakthrough: 9 October 1973
208.31 Scenario Information. Environment: Day. Game Length: 15 Game-Turns.
208.32 First Player Deployment (Egyptian). Deployment: May deploy in any hex west of the 2900 hexrow (inclusive). May not be deployed in defilade. Off-Map Artillery: 2 x battalion light howitzer, 2 x battery light rocket launchers (LtHowz).
208.33 Second Player Deployment (Israeli). Deployment: May deploy in any hex east of the 3800 hex column (inclusive). May be deployed in defilade. Off-Map Artillery: 1 x battery light howitzer.
208.34 Victory Conditions. Each Player receives 300 Victory Points if there are no opposing units on or adjacent to any hex of the road running along the 5500 hex column at the end of the game. The Player with the most Victory Points at the end of the game wins.
208.35 Starting Sequence. (1) The Israeli Player deploys his units. (2) The Egyptian Player deploys his units. (3) The Egyptian Player may pre-plot his artillery so that it impacts on Game-Turn 1.
208.36 Special Rules. (4) Each Egyptian light rocket launcher battery may fire only once during the play of the game.
208.37 Reinforcements. Game-Turn 8: The Israeli second tank battalion may enter from any hex along the north mapedge, east of the 4200 hex column (inclusive). The battalion HQ rating is B. Game-Turn 10: The Israeli third tank battalion, accompanied by the first brigade HQ unit, may enter from any hex along the south mapedge, east of the 4200 hex column. Both the battalion and brigade commanders' ratings are C.
208.4 Egyptian Column Attack: 14 October 1973
208.41 Information. Environment: Day. Game Length: 20 Game-Turns.
208.42 First Player Deployment (Egyptian). Deployment: May be deployed in any hex west of the following north-south line (inclusive): 3201-3207; 3308-3320; 3420-3423; 3524-3525; 3625-3628; 3729-3730; 3830-3833. May be deployed in defilade. Off-Map Artillery: 2 x battalion medium howitzer, 3 x battalion light howitzer, 3 x battalion light rocket launchers (LtHowz).
208.43 Second Player Deployment (Israeli). Deployment: May be deployed (inclusive) in any hex east of the following north-south line: 4201-4221; 4322-4422; 4423-4523; 4524-4526; 4626-4727; 4728-4730; 4830-4833. May be deployed in defilade. Off-Map Artillery: 2 x battery light howitzer.
208.44 Victory Conditions. The Egyptian Player wins if he is the last Player to have a Friendly unit occupy or pass through the Tasa crossroads (hex 5518) by the end of the game. The Israeli Player wins by preventing an Egyptian Victory.
208.45 Starting Sequence. (1) The Israeli Player deploys his units. (2) The Egyptian Player deploys his units. (3) The Egyptian Player may pre-plot his artillery so that it impacts on Game-Turn 1.
208.46 Special Rules. (1) Neither Player may use smoke. (2) The Israeli ATGM detachment is armed with TOW ATGM. (3) The Egyptian light rocket launchers may only fire twice during the game, and may not fire on consecutive Game-Turns. (4) The Egyptian Player has off-map air defenses of 10 x missile 1 (each with 3 vehicles) and 10 x gun 1 (each with 2 vehicles) off the west mapedge. (5) Israelis shift 2 columns left on morale dice rolls.
208.47 Reinforcements. Game-Turn 2: The Israeli Player may plot 2 x F-4 strikes. These aircraft may not be armed with air-to-surface missiles.
208.5 Operation Gazelle: 16 October 1973
208.51 Scenario Information. Environment: Night, full moon. Game Length: 15 Game-Turns.
208.52 First Player Deployment (Israeli). Deployment: May be deployed in any hex between the 1400 and 2500 hexrows (inclusive), but not within seven hexes of the north or south mapedges (inclusive). May be deployed in defilade. Off-Map Artillery: 2 x battery light howitzer.
208.53 Second Player Deployment (Egyptian). Deployment: Enter as reinforcements. Off-Map Artillery: None.
208.54 Victory Conditions. The Israeli Player receives the standard Victory Point Value (see 206.31) for each of his vehicles or steps exited off the north mapedge at hex 0501. The Player with the most Victory Points at the end of the game wins.
208.55 Starting Sequence. (1) The Israeli Player deploys his units.
208.56 Special Rules. (1) The Israeli Player may deploy one ferry in any canal hex, at his option. The canal escarpment is considered cleared (see 201.27) from any three contiguous hexes of the Israeli Player's choosing. (2) Neither Player may use smoke. (3) The Egyptian Fifth Mechanized Infantry Battalion uses green troop quality. (4) There are Class 4 bridges across the Sweetwater Canal at hexsides 0805/0906, 0815/0915, 0823/0924, 0831/0932.
208.57 Reinforcements. Game-Turn 3: First and second companies, Egyptian First Tank Battalion may enter from any hex of the north mapedge between hex columns 1500 and 2900 (inclusive). They have no battalion HQ unit. The Fifth Egyptian Mechanized Battalion also enters in column from hex 0501, in column formation. Battalion HQ rating is H. The first company of the Egyptian Second Tank Battalion may enter from any hex of the south mapedge between hex columns 1500 and 3300 (inclusive). They have no battalion HQ unit.
208.6 The Chinese Farm: 17 October 1973
208.61 Scenario Information. Environment: Day. Game Length: 20 Game-Turns.
208.62 First Player Deployment (Israeli). Deployment: May enter the map from any hex along the east mapedge on Game-Turn 1. May be in column formation. Off-Map Artillery: None.
208.63 Second Player Deployment (Egyptian). Deployment: May be deployed in any hex north of the 0020 hexrow (inclusive) and west of the 4500 hex column. Off-Map Artillery: 1 x battalion medium howitzer, 2 x battalion light howitzer.
208.64 Victory Conditions. The Israeli Player wins if there are no Egyptian units with a Line of Sight on the road running from hex 6118 to hex 3422. (Smoke is not considered to block the Line of Sight for purposes of determining Victory.) The Egyptian Player wins by preventing an Israeli Victory.
208.65 Starting Sequence. (1) The Egyptian Player sets up his units. (2) The Israeli Player may pre-plot his artillery and air strikes so that they impact and arrive on Game-Turn 1.
208.66 Special Rules. (1) The Israeli Player may plot 2 x F-4 strikes. (2) The Egyptian Player has off-map air defenses of 3 x missile 1 (each with 3 vehicles), and 6 x gun 1 (each with 2 vehicles) off the west mapedge.
208.7 Expansion of the Israeli Bridgehead: 18 October 1973
208.71 Scenario Information. Environment: Day. Game Length: 15 Game-Turns.
208.72 First Player Deployment (Israeli). Deployment: The first battalion may deploy on or east of the following line of hexes: 1216-0619; 0619-0620; 0721-0725; 0625-0726; 0826-0927; 1027-1228. Remaining battalions may deploy in any hex east of the 1400 hex column (inclusive). Off-Map Artillery: 1 x battery medium howitzer, 3 x battery light howitzer.
208.73 Second Player Deployment (Egyptian). Deployment: May be deployed in any hex west of the line given in the deployment instructions for the First Israeli Battalion. May be deployed in defilade. Off-Map Artillery: None.
208.74 Victory Conditions. The Israeli Player receives the standard Victory Point Value (see 206.32) for exiting units off the north edge of the map between hex columns 0100 and 0800 (inclusive). The Egyptian Player receives 500 Victory Points for eliminating the Israeli ferry in hex 1325. The Player with the most Victory Points at the end of the game wins.
208.75 Starting Sequence. (1) Egyptian Player deploys his units. (2) The Israeli Player deploys his units. (3) The Israeli Player may pre-plot his artillery and air strikes so that they arrive on Game-Turn 1, if desired.
208.76 Special Rules. (4) There is an Israeli ferry (with six engineer squads) deployed in either or both of the ferry points. The ferry points are 1425 and 1224. The canal escarpment has been cleared from hexes 1425 and 1426. (2) There are Class 4 bridges across the Sweetwater Canal at hexsides 0805/0906, 0815/0915, 0823/0924 and 0831/0932. (3) Israelis shift 2 columns left on morale dice rolls.
208.77 Reinforcements. Game-Turn 1: First and Second Egyptian Tank Battalions may enter from any hex of the north mapedge between hex columns 0100 and 1200. The Third Egyptian Tank Battalion may enter from any hex along the south mapedge between hex columns 0100 and 1200 (inclusive). May enter in column formation. All battalions and Brigade HQ ratings are D. Game-Turn 1: The Israeli Player receives 1 x F-4 and 3 x A-4 airstrikes. They may be armed with air-to-surface missiles. (1) There are no off-map Egyptian air defenses.
209.0 Golan Scenarios
General Rule: Syrian tanks are specified as either T-62 or T-55; all Israeli tanks are Centurion. When determining the apex hex of battery artillery patterns (see Case 14.1), the direction of fire of Syrian artillery is from the east mapedge; Israeli artillery is from the west mapedge. The fortifications in hexes 5104, 5109, 5216, 5124, and 5130 begin all Scenarios set on October 6th or 7th (only) with one (three-step) Israeli garrison platoon occupying them.
209.1 Night Attack on the Purple Line: 6 October 1973
209.11 Scenario Information. Environment: Night, ¼ moon. Game Length: 15 Game-Turns.
209.12 First Player Deployment (Syrian). Deployment: May enter the map on Game-Turn 1 from any hex of the east mapedge. May be in column formation. Off-Map Artillery: 2 x battalion light howitzers, 1 x battalion medium howitzers.
209.13 Second Player Deployment (Israeli). Deployment: May deploy in any hex west of the anti-tank ditch (the 5300 hex column, inclusive). May be deployed in defilade. Off-Map Artillery: 2 x battery light howitzer.
209.14 Victory Conditions. The Syrian Player wins by having any unit east of the 3700 hex column (inclusive) at the end of the game. The Israeli Player wins by preventing a Syrian Victory.
209.15 Starting Sequence. (1) The Israeli Player deploys his units. (2) The Syrian Player may pre-plot his artillery so that it impacts on Game-Turn 1.
209.16 Special Rules. (1) Neither Player may use smoke. (2) There is an Israeli garrison infantry unit (with three steps) deployed in each Israeli fortification hex at the start of the game. (3) The anti-tank ditch rules (201.42) are in effect. (4) Before the start of the game, the Israeli Player may secretly place six permanent firing ramps (see Case 201.12) anywhere west of the Purple Line (the anti-tank ditch). The Player should note their location on paper. Israeli vehicular units in firing ramp hexes conducting direct fire attacks on Syrian units within 5 hexes inclusive of the 5300 hex column have +5 added to the Loss Modification Die Rolls of the defending Syrian units.
209.2 Night Meeting Engagement: 6 October 1973
209.21 Scenario Information. Environment: Night, ¼ moon. Game Length: 15 Game-Turns.
209.22 First Player Deployment (Syrian). Deployment: May enter the map from hex 3734 and/or 3334. The units must be in column formation. Off-Map Artillery: None.
209.23 Second Player Deployment (Israeli). Deployment: May be deployed in any hex north of the 0026 hexrow (inclusive). May be deployed in defilade. Off-Map Artillery: None.
209.24 Victory Conditions. The Syrian Player wins by exiting any unit off the north mapedge. The Israeli Player wins by preventing a Syrian Victory.
209.25 Starting Sequence. (1) Israeli Player deploys his units.
209.26 Special Rules. (1) Units may not move or deploy west of hex column 2400 (inclusive) or east of hex column 4200 (inclusive). (2) Syrian units may not enter a non-road hex or leave column formation until an Israeli unit has been observed. (3) The Israeli company may set up an ambush position before the start of the game (see Section 27.0).
209.36 Special Rules. (1) Units may not enter any hex west of the 1700 hex column or east of the 4000 hex column (inclusive). (2) Neither Player may use smoke.
209.4 Deepest Syrian Penetration: 8 October 1973
209.41 Scenario Information. Environment: Day. Game Length: 20 Game-Turns.
209.42 First Player Deployment (Syrian). Deployment: May be deployed in any hex east of the 4000 hex column. May not be deployed in defilade. Off-Map Artillery: None.
209.43 Second Player Deployment (Israeli). Deployment: May be deployed in any hex west of the 2700 hex column (inclusive). May be deployed in defilade. Off-Map Artillery: None.
209.44 Victory Conditions. The Syrian Player wins by having any unit west of the 0800 hex column at the end of the game. The Israeli Player wins by preventing a Syrian Victory.
209.45 Starting Sequence. (1) The Israeli Player deploys his units. (2) The Syrian Player deploys his units.
209.46 Special Rules. (1) None.
209.47 Reinforcements. Game-Turn 4: The Israeli Second Tank Battalion may enter the map from hex 0129. The units must be in column formation and the rating of the battalion HQ is B. Game-Turn 10: The Israeli Third Battalion may enter the map from hex 0129. The units must be in column formation and the rating of the battalion HQ is B.
209.3 Battle on the Yehudia Road: 7 October 1973
209.31 Scenario Information. Environment: Day. Game Length: 20 Game-Turns.
209.32 First Player Deployment (Israeli). Deployment: May enter from any hex of the north mapedge on Game-Turn 1. The units must be in column formation. Off-Map Artillery: 2 x battery light howitzers.
209.33 Second Player Deployment (Syrian). Deployment: May enter from any hex of the south mapedge on Game-Turn 2. Off-Map Artillery: 1 x battalion medium howitzer, 3 x battalion light howitzer.
209.34 Victory Conditions. The Syrian Player wins by exiting any unit off the north mapedge. The Israeli Player wins by preventing a Syrian victory.
209.35 Starting Sequence. (4) The Israeli units enter the map on Game-Turn 1.
209.5 Israeli Counterattack: 8 October 1973
209.51 Scenario Information. Environment: Day. Game Length: 20 Game-Turns.
209.52 First Player Deployment (Israeli). Deployment: May be deployed in any hex between the 2700 and 0900 hex columns (inclusive). May not be deployed in defilade. Off-Map Artillery: 2 x battery medium howitzers, 3 x battery light howitzers.
209.53 Second Player Deployment (Syrian). Deployment: May be deployed in any hex east of the 3500 hex column (inclusive). Units may be deployed in defilade. Off-Map Artillery: 2 x battalion medium howitzers, 3 x battalion light howitzers.
209.54 Victory Conditions. The Israeli Player wins by having any unit on or adjacent to a fortification hex at the end of the game. The Syrian Player wins by preventing an Israeli Victory.
209.55 Starting Sequence. (1) Syrians deploy their units. (2) The Israeli Player deploys his units.
209.56 Special Rules. (1) Neither Player may use smoke. (2) Each Player must deploy a total of five Class 4 bridges across any hexes of the anti-tank ditch. All minefields have been cleared from the anti-tank ditch.
209.6 Israeli Counterattack: 9 October 1973
209.61 Scenario Information. Environment: Day. Game Length: 20 Game-Turns.
209.62 First Player Deployment (Israeli). Deployment: May be deployed in any hex west of the 2400 hex column (inclusive). May be deployed in defilade. Off-Map Artillery: 2 x battery medium howitzer, 3 x battery light howitzer.
209.63 Second Player Deployment (Syrian). Deployment: May be deployed in any hex east of the 2500 hex column (inclusive). May be deployed in defilade. Off-Map Artillery: 1 x battalion medium howitzers, 3 x battalion light howitzers.
209.64 Victory Conditions. The Israeli Player wins by having any Friendly unit east of the 5300 hex column (inclusive) at the end of the game. The Syrian Player wins by preventing an Israeli Victory.
209.65 Starting Sequence. (1) The Syrian Player deploys his units. (2) The Israeli Player deploys his units. (3) The Israeli Player may pre-plot his artillery and air strikes so that they impact (arrive) on Game-Turn 1.
209.66 Special Rules. (1) Each Player must deploy a total of five Class 4 bridges across any hexes of the anti-tank ditch before the start of the game. All minefields have been cleared from the anti-tank ditch. (2) The Israeli Player may pre-plot his artillery and airstrikes so that they impact (arrive) on Game-Turn 1. The aircraft may not be armed with air-to-surface missiles. (3) The Syrian Player has off-map air defenses of 6 x gun 1 (each with 2 vehicles) and 3 x missile 1 (each with 3 vehicles) off the east mapedge.
209.67 Reinforcements. Game-Turn 1: 2 x Mirage; 1 x F-4 aircraft.