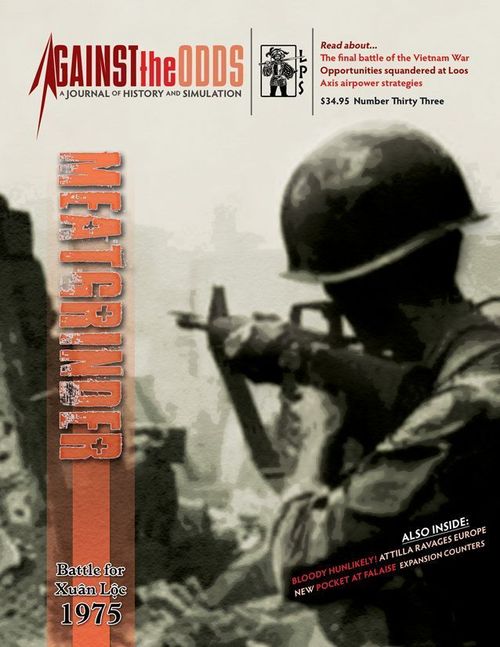
Meatgrinder: Battle for Xuân Lộc 1975
Meatgrinder: Battle for Xuân Lộc 1975 Rulebook
Table of Contents
Table of Contents
- Order of Battle
- Read This First
- 2.0 Components
- 3.0 Important Definitions
- 4.0 Stacking and Zones of Control
- 5.0 Supply
- 6.0 Sequence of Play
- 7.0 Command Control
- 8.0 Movement
- 9.0 Line of Sight (LOS)
- 10.0 Combat
- 11.0 Bombardment
- 12.0 Direct Fire
- 13.0 Close Assault
- 14.0 ARVN Helicopters
- 15.0 Disruption
- 16.0 Random Events
- 17.0 Initial Setup
- 18.0 Reinforcements
- 19.0 Victory
- Player Aid Charts
- Direct Fire Combat Results Table (12.0)
- Close Assault Combat Results Table (13.0)
- Artillery / Air Bombardment Table (11.3)
- NVA AA Fire (11.5)
- Artillery Scatter Distance (11.2.5)
- Terrain Effects Chart
- Sequence of Play (6.0)
- NVA Activation Table (6.1.4)
- Adjacency Attack Table (10.2)
- Daisy Cutter Bombing (11.4.11b)
- Errata Note
Order of Battle
ARVN
- 18th Division (Dao): 43, 48, 52 Regiments
- 1st Airborne Brigade (Dinh): Four battalions
- 8th Regiment/5th Division
- 82nd, 81st Ranger Battalions
- 33rd Ranger Group
- 322 Armor Task Force: 3 Cos. ACAV, 3 Cos. M-48 tanks
- 61st (105mm), 46th (155mm) Artillery Battalions
- 302 Engineer Battalion
- 3 Ranger Battalions
- 3rd and 4th Air Divisions (6 F5, 14 A-37)
- Two CBU-55 air-fuel bombs from Thailand
NVA IV CORPS
- 7th Division (209, 141, 165 Regiments, 210 Artillery Regiment)
- 6th Division (274, 812, 33 Regiments or 24, 207, 1 Regiments)
- 325th Division (18, 95, 101 Regiments) arrived April 15
- 320th Division (48, 64 Regiments) in reserve, not used
- 95th Regiment
- 75th Artillery Group (3 battalions)
- 210th Artillery Regiment
- 341st Division (101, 18, 95 Regiments)
- 94th Artillery Regiment
- 71st AA Regiment
Printed credits and "For Further Reading" references (Foss, Karnow, Pilger, Taylor, Vieth and Pribbenow, Welsh, and the Weyand assessment) are omitted; they are attribution and background, not rules.
Read This First
We've organized the overall structure of the rules of this LPS simulation game to follow this game's sequence of play in introducing concepts. The rules themselves are written in a format known as the Case System. This approach divides the rules into Modules (each of which deals with a major important aspect of play). Modules are numbered sequentially as well as possessing a title. Each Module is divided into Sections (that deal with a major sub-topic inside the Module) which are also numbered sequentially. Modules and Sections are introduced by some text that briefly describes the subject covered by that particular Module or Section. Finally, the majority of each Section consists of Cases. These are the specific, detailed rules that govern play. Each Case is also numbered sequentially. The numbering follows a logical progression based upon the number of the Module of which the Cases are a part. A Case with the number 7.51, for example, is the first Case of the fifth Section of the seventh Module of the rules. The numbering system is designed as an organizational aid. Use it to determine where a Case is located in the rules.
The example above is the number of the fourth Case of the first Section of the third Module of the rules. (The printed example reads 3.1.4.)
Learning to Play the Game
Begin by familiarizing yourself with all of the components listed for this game. Then skim through the charts and rules, reading all the titles of the Modules and Sections. Set up a game scenario or portion of a scenario (after reading the applicable Module) and play a trial game against yourself. During this trial game, try referring to the rules only when you have a question and remember the numbering system we employ makes it easy to look up rules when you do. While a trial game may take you an hour or two, it is the quickest and most pleasant way to learn (short of having an experienced friend teach you). We also don't recommend attempting to learn the rules word-for-word. Memorizing all the details is an effort that few can do. We've written these rules to be as comprehensive as possible, but they are not designed to be memorized. Taking in the rules in this way (as you play along) is the best approach to mastering this game. We're always open to suggestions on how to improve the comprehension of our rules. Write to us if you have an idea on how we can communicate better with you.
2.0 Components
Your game includes:
- This rule book
- Two counter sheets (240 counters)
- Two Player Aid Charts (PACs)
- One 22" x 34" game map
- A six-sided die is required to resolve combat and events using various tables printed on the PAC
2.1 The Game Map
One 22" x 34" map sheet that portrays the battle area, with a hex grid superimposed over it for unit movement and positioning. Woods or Hill terrain is assumed to be in the entire hex if that terrain is just partially in the hex.
2.2 Counters
The playing pieces or units are the historical air, ground, and command units that fought in the battle. These are your units to move and conduct combat with while attempting to secure your assigned victory objectives. Also included are informational markers to assist with game mechanics.
2.3 Game Scale
Each turn is one day of real time. Each hex is approximately 800 yards. Each combat unit is a company or battalion of men or tanks.
Gameplay Note: The non-HQ units of the NVA 95th Regiment and 325th Division are Battalion size units. They are noted with a "BN" in the lower center of the counter.
3.0 Important Definitions
- AIM Artillery Impact Marker.
- CF Combat Factor: This is the strength used when attacking or defending.
- DF Defensive Fire: Used by the non-phasing player in the same manner as the Phasing player uses Direct Fire or Ranged Fire in his Combat Phase. No roll is required; either fire type may be used at any one hex containing enemy units.
- Die Roll: All die rolls performed in the game are by rolling a single six-sided die.
- DRM: Die roll modifier.
- Formations: The NVA have 4 formations: 6th, 7th, 325th and 341st Divisions. The ARVN has 7 formations: 43rd, 48th, and 52nd Regiments of the 18th Division, 82nd Ranger Battalion, 1/1st Parachute Battalion, 315th Task Force plus the Marine Regiment.
- HQ: Headquarters.
- MA Movement Allowance: Printed in the lower far right portion of the counter, a unit's Movement Allowance is the maximum number of Movement Points (MPs) a unit may expend in a single Movement Phase as it moves from hex to hex. A clear terrain hex generally costs 1 MP to enter. Consult the Terrain Effects Chart (TEC) for a complete listing of all terrain MP costs.
- OF: Opportunity Fire.
- PAC: Player Aid Charts.
- Ranged Fire: Units with this capability may attack from non-adjacent hexes. They have a range value printed in the lower middle of their counter.
4.0 Stacking and Zones of Control
4.1 Stacking
Stacking is the act of having one or more friendly units in the same hex at the end of movement and during combat.
- 4.1.1 Four companies or one battalion can stack in a hex. (There are four companies in a battalion.)
- 4.1.2 2 battalions or 8 companies can stack in a hex of Xuan Loc.
- 4.1.3 HQ and Leader units stack for free.
- 4.1.4 Opposing units may never stack in the same hex.
- 4.1.5 Stacking limits apply at the end of the Movement Phase and after each combat.
- 4.1.6 If an over stack situation occurs, the owning player must eliminate units in the stack until legal stacking limits is achieved.
- 4.1.7 If a retreating unit ends up in an over stack situation, that unit must continue to retreat until it reaches a hex where it can legally stack. If it cannot legally retreat in this fashion, then the owning player must eliminate units of his choice to achieve legal stacking in the hex it ends up in.
4.2 Zones of Control (ZOC)
- 4.2.1 A battalion or three company-sized units stacked together exert a ZOC into the six hexes adjacent to the hex they occupy.
- 4.2.2 A ZOC does not extend into a woods, town, or up a hill hex.
- 4.2.3 ZOCs affects are defined in the pertinent sections of the rules they apply to.
- 4.2.4 Disrupted units, Leaders, and HQs have no ZOC.
- 4.2.5 If a hex has overlapping ZOCs extending into it, there is no further effect and each side mutually controls the hex.
5.0 Supply
5.1 General Rules
- 5.1.1 Supply is determined at the beginning of a unit's movement or combat.
- 5.1.2 Units are never lost due to being unsupplied.
- 5.1.3 Out of supply Armor, Mechanized, and ARVN "AA" units move at half of their printed rate. All others that are out of supply may move their full rate.
5.2 ARVN
- 5.2.1 Units must be able to trace a 5 hex (maximum) unobstructed path (no enemy units or ZOCs) across any terrain to a road and then along the road, which also is unblocked, to the west map edge or to Xuan Loc.
- 5.2.2 Units that can trace an unobstructed path of five hexes or less to Xuan Loc are always in supply.
- 5.2.3 Units that are out of supply attack at half strength, round fractions up.
- 5.2.4 Unsupplied unit's defense is normal strength.
5.3 NVA
- 5.3.1 NVA units are supplied when they can trace an unblocked path through any terrain type of 5 hexes (maximum) to an unblocked road that leads off the south, east, or north board edge, or to their HQ, which itself is in supply from a road. [Errata, Oct. 10, 2013: add to the last sentence "or the Division's entry hexes".]
- 5.3.2 The divisional HQ may only supply up to four of its battalions or equivalent in companies (16 companies).
- 5.3.3 NVA units that are not in supply may not attack, but they may defend and move normally.
6.0 Sequence of Play
Each turn is subdivided into a number of phases. All game activity must follow the sequence of play, as given, and may not be performed out of sequence.
6.1 Initiative Phase
- 6.1.1 Both players roll a die. The player with the higher die roll has the initiative for this turn and performs his activations first. If a tie occurs, the player who had initiative last turn has it for this turn again.
- 6.1.2 Add both player's die results together and consult the Random Events Table with the total's result to determine if a Random Event occurs.
- 6.1.3 On turns 1 and 2 of the game, the NVA player automatically has the initiative. Still roll the dice to see if there is a random event.
- 6.1.4 Both players can activate all their formations (NVA: divisions, ARVN regiments/brigades) during their turn. If they do not activate a formation, that formation is considered to be Regrouping (Section 7.5). Only activated formations can attack. Reinforcements entering the board are automatically activated on the turn they enter. [Errata, Oct. 10, 2013 (clarification): The phasing player will choose which formations he will activate before any movement is done. He then rolls for the Adjacency Attack Conditions for each activated formation (Section 10.2). Then the non-phasing player rolls the Adjacency Attack Conditions for each of his formations.]
- 6.1.5 Once an NVA Division has been designated to activate, roll 1D6. On a roll result of 1, all units of one regiment (player's choice) of the designated division may activate in the coming turn. On a roll result of 2-3, all units of two regiments (player's choice) of the designated division are activated. A roll result of 4-6, all units of the entire division may activate (Exception: Module 18.0). The HQ is always activated when the division is designated as active.
- 6.1.6 On turn 1 only, all regiments of the 341st NVA division are activated (do not roll).
- 6.1.7 The Initiative player is the first Active Player and performs phases 6.2 to 6.7, and then the non-initiative player is the second Active Player and does the same.
6.2 Active Player's Bombardment Phase
Available off-map artillery conducts bombardment (Module 11.0). From turn 4 to turn 6, ARVN determine how many aircraft they have available this turn and conduct Aerial Bombardments during their Bombardment Phase (Section 11.4).
6.3 Active Player's Movement Phase
The player may move any of his units. The following steps are performed:
- Both players determine if their adjacency will be voluntary or mandatory attacks (Section 10.2).
- Active player receives reinforcements.
- All activated or regrouping units of a formation can move if eligible (Module 8.0).
- Non-active player conducts Opportunity Fire attacks on moving enemy units (Section 8.4). [Errata, Oct. 10, 2013 (correction): the reference should be to Section 8.4 (the printed text cites Section 10.8).]
6.4 Non-Active Player's Defensive Fire Phase
The non-active player conducts any DF attacks against eligible enemy units.
6.5 Active Player's Combat Phase
The active player may conduct combat (Modules 10.0, 12.0 and 13.0).
6.6 Active Player's AFV Movement Phase
The phasing player may now move any AFV units (if any) again.
6.7 Active Player's Disruption Removal Phase
Flip all friendly units back to their undisrupted side. Flip all friendly Leaders that performed a rally back to their front sides. Rotate all the active player's units back to their normal facing.
When both players have performed 6.2 to 6.7, the game turn is over. Move the Turn Marker to the next turn box on the map and start the new turn. If this was the last turn of the game, determine victory.
7.0 Command Control
A unit may make a complete move and maintain its full combat strength if it is in command.
7.1 Tracing Command
- 7.1.1 Command for all friendly units is traced at the start of the friendly Movement Phase.
- 7.1.2 A unit is in command if it is able to trace a path of hexes, free of opposing units or their ZOCs, of an unlimited distance for any ARVN unit to any ARVN HQ, or up to 5 hexes in length for an NVA unit to its parent HQ.
- 7.1.3 Units that trace to a disrupted HQ are out of command.
- 7.1.4 AFV units may trace to any friendly HQ.
7.2 Effects of Out of Command
Note: See also Movement Restrictions (Cases 8.1.9 and 8.1.10) and Combat Restrictions (Module 10.0).
- 7.2.1 NVA units that are out of command may only move one hex and suffer a 1L (1 column left) shift if performing Close Assault or Direct Fire (of any type). For example, a 3-1 Close Assault involving such a unit would be resolved using the 2-1 column. If all the units can trace to their parent HQ, there is no shift.
- 7.2.2 ARVN units that are out of command may only move half their movement allowance. Their combat is not affected.
7.3 HQ Elimination
- 7.3.1 ARVN HQs return the next turn along the west board edge.
- 7.3.2 NVA HQs return 2 turns later along the east board edge.
If an HQ unit is eliminated, it is placed onto the turn record track (see below). They are brought back into play like reinforcements.
7.4 ARVN Leaders
- 7.4.1 A Leader stacks for free and has no ZOC.
- 7.4.2 Leaders cause the odds column to be shifted one in favor (left when defending, right when attacking) of the ARVN units they are stacked with. This applies to all types of combat except Bombardment. A Leader's shift never reduces the odds below the lowest column or above the highest column on either combat table.
- 7.4.3 Only one Leader may affect a combat should there be more than one in the same combat.
- 7.4.4 A Leader cannot be disrupted.
- 7.4.5 When a Leader is by himself in a hex that is entered by an NVA unit (movement or advance after combat) he is eliminated.
- 7.4.6 When a Leader is in the target hex of direct fire or bombardment where a friendly unit is eliminated, roll a die, and on a result of 1 he is eliminated and removed from the game.
- 7.4.7 Rally: If a Leader does not move, once per friendly player turn a Leader may roll once for each disrupted unit he is stacked with. If the result is "even" the unit is rallied and flipped to its undisrupted side. If the result is "odd" the unit remains disrupted. Immediately after he has performed this, flip him over to his Rally performed ("R") side. At the end of the turn, flip all Leaders that performed rallies during the turn back to their front side to indicate they can make a rally attempt again.
- 7.4.8 Movement: Leader counters use either Mechanized or Foot movement costs (player's choice) for their entire turn's movement and may only move when their formation is activated or regrouping.
7.5 Regrouping
- 7.5.1 If a formation is not activated, it is regrouping. The player is able to bring back some of his eliminated infantry (only) units of that formation. For each 3 infantry and/or support units of the formation that have been eliminated, 2 of them are permanently eliminated and 1 infantry (not support type) unit returns to play.
- 7.5.2 The formation's HQ unit must be on the board for the formation to be able to perform a Regroup.
- 7.5.3 Units that are brought back are placed on or within 1 hex of their formation's HQ unit at the end of the friendly Movement Phase not adjacent to an enemy unit.
Note: See also Movement Restrictions (Cases 8.1.9 and 8.1.10) and Combat Restrictions (Module 10.0).
8.0 Movement
Each unit has a Movement Allowance (MA), representing the number of Movement Points (MPs) a unit may expend in its Movement Phase.
8.1 General Rules
- 8.1.1 All units have their MA printed on the lower right of the counter.
- 8.1.2 AFV units can additionally move a second time during their friendly AFV Movement Phase.
- 8.1.3 See Case 5.1.3 for supply effects, Section 7.2 for Command effects, and Case 15.1.4 for disruption effects on movement.
- 8.1.4 Units move on the map from one hex to the next, paying the appropriate terrain MP costs as listed on the TEC (see PAC).
- 8.1.5 A unit may only enter a hex if it has sufficient MPs remaining to enter and is allowed by the TEC.
- 8.1.6 Friendly units may move through other friendly units during movement in violation of stacking limits as long as the limits are met at the end of the Movement Phase.
- 8.1.7 Units may not accumulate or lend their MPs to other units.
- 8.1.8 A unit that does not otherwise move in a Movement Phase may enter an adjacent hex, regardless of the MP cost to do so. However, the unit may not enter or cross impassible terrain or violate ZOC (Section 4.2) restrictions.
- 8.1.9 Units of a formation that is Regrouping (Section 7.5) may not move adjacent to an enemy unit.
- 8.1.10 Units of a Regrouping formation that start adjacent to an enemy unit may stay there but if they are moved, they must move away such that they are no longer adjacent to any enemy units. If unable to do this, they cannot move.
8.2 ZOCs and Movement
- 8.2.1 A unit that enters an enemy ZOC hex must cease moving for the remainder of the Movement Phase.
- 8.2.2 A unit that starts its Movement Phase in a hex that is in an enemy's ZOC may move only if the first hex it enters is not in an enemy's ZOC.
- Exception: A unit may move directly from one hex in an enemy's ZOC to another if a friendly unit starts the Movement Phase in the hex being entered by the moving unit and does not leave that hex during the phase. [Errata, Oct. 10, 2013 (clarification): In other words, this means that a unit in an enemy ZOC hex, which does not move this turn, negates the enemy ZOC for movement purposes.]
- Example: Unit A is next to an enemy ZOC. The owning player could move another unit B not in a ZOC passing him through unit A's hex into another hex in a enemy ZOC as long as unit A is not moved.
8.3 Roads
A unit moves along a road by following a continuous path of hexes directly connected by the road.
- 8.3.1 When moving by road, only the road MP costs are used; the regular terrain costs of hexes are ignored.
- 8.3.2 A unit may use both road and regular movement rates in a movement phase.
- 8.3.3 All units pay one movement point per hex entered when using a road.
- 8.3.4 Road Mode: A unit which performs its entire movement on roads and does not start or end its movement in an enemy ZOC receives a bonus of one MP.
8.4 Opportunity Fire (OF)
OF is a form of ranged Direct Fire (Module 12.0) conducted by the non-phasing player's units against in-range MOVING enemy unit(s).
- 8.4.1 When performing an OF, the movement of the phasing units is temporarily interrupted while the non-phasing player performs his attack.
- 8.4.2 Each unit may perform OF only once during an opponent's movement phase.
- 9.4.3 [Printed as "9.4.3"; the section's case is 8.4, so this is likely a misprint for 8.4.3, transcribed as printed.] Rotate the firing unit 90 degrees when it has performed its OF to indicate it has done so and thus can not OF again this movement phase or Defensive Fire during the Defensive Fire Phase.
- 8.4.3 A moving unit may only have OF performed once against it in a particular hex. But it can be fired on more than once while moving to different hexes.
- 8.4.4 A DR result for Opportunity Fire is treated as a DD result.
- 8.4.5 Units that are disrupted may no longer continue moving this phase.
9.0 Line of Sight (LOS)
Units with ranged fire ability and observers for Artillery Bombardment need to have an unobstructed LOS to their target hex. Certain terrain features and differing elevations may block this LOS. Units on a hill are at a higher elevation.
9.1 Determining LOS
- 9.1.1 LOS is judged from the center of the firing unit's hex to the center of the target's hex.
- 9.1.2 If any portion of a hex contains blocking terrain (Woods, City, Town, or Hill hexes) at the same level or higher, exclusive of the target or firing unit's hex, lies along this LOS, the target hex may not be direct fired on.
- 9.1.3 The LOS between a higher elevation firing unit or target unit is blocked if it passes through a Hill terrain hex of the same level or higher than the firing unit or target is on.
- 9.1.4 The LOS between a higher level unit is blocked if a lower level blocking terrain hex is in that LOS and closer to the target.
- 9.1.5 The LOS between a higher level target is blocked if a lower level blocking terrain hex is closer to the firing unit.
- 9.1.6 HQs and units have an 8 hex spotting range if observing from a non-hill hex. If on a hill or observing to a hill, they have an unlimited range until the LOS is blocked.
10.0 Combat
There are three main types of combat: Bombardment, Direct Fire (Adjacent and Ranged) and Close Assaults. Opportunity and Support Fire are forms of Direct Fire. Bombardment is always voluntary and represents the use of aircraft and off-map artillery versus enemy targets during the phasing player's Bombardment Phase. Ranged and adjacent direct fire occurs during the Movement and Combat Phases. Close Assault is performed during the Combat Phase.
Regrouping Formation units cannot perform any attacks during their turn.
During the combat phase, the phasing player's units may have to attack all adjacent enemy units by Direct Fire or Close Assault and may conduct ranged Direct Fire against opposing units that are in their unit's range and LOS.
The owning player always chooses any units that are to be eliminated.
10.1 Attacker/Defender
The phasing player is considered the attacker and the non-phasing player is the defender except for opportunity fire (a defender's units performing opportunity fire are the attackers against the phasing player's moving units—the defenders).
10.2 Adjacency Attack Conditions
- 10.2.1 Before the phasing player's movement starts, both players must make a die roll to determine each activated formation's unit's adjacency Attack Conditions for this player's turn. [Errata, Oct. 10, 2013 (correction): on the second line, "an active" should be "each".] Game Play Note: It can be one way for the first player's portion of the game turn and different for the next player's portion.
- 10.2.2 NVA
- Roll of 1-3: All combat is voluntary.
- Roll of 4-6:
- Opportunity Fire: All non-disrupted defending units must opportunity fire if able to.
- Defensive Fire: All the non-phasing non-disrupted player's units adjacent to a phasing player's must direct fire attack during the Defensive Fire Phase against at least one hex of the phasing player's adjacent units.
- Phasing Player's Combat Phase: All un-disrupted defending units adjacent to an attacker's unit must be attacked in some manner. All attacking units adjacent to an enemy unit must attack. [Errata, Oct. 10, 2013 (correction): this Phasing Player result paragraph is indented like the paragraphs above, as part of the 4-6 result.]
- 10.2.3 ARVN
- Roll of 1-2: All combat is voluntary.
- Roll of 3-6: Same as NVA roll of 4-6.
- 10.2.4 Regrouping Formations are exempt from these conditions since they are not active and cannot attack.
10.3 HQs and Combat
- 10.3.1 If stacked with other units involved in combat, an HQ takes no losses until all other units in its stack are eliminated.
- 10.3.2 An HQ unit may advance or retreat with its stack after combat.
- 10.3.3 HQs have only one Step of strength and are eliminated if forced to lose a Step.
- 10.3.4 They may not be independently targeted by any Direct Fire when stacked with other units.
- 10.3.5 When these units are eliminated, they return at a friendly map edge as per Section 7.3.
11.0 Bombardment
During his friendly Bombardment Phase, the phasing player attacks using his available off-map artillery and air power (ARVN only). Remove off-map artillery and aircraft markers only at the very end of the bombardment phase.
Note: Fortified, city, town, and road junction hexes are always considered spotted.
11.1 Off-Map Artillery
- 11.1.1 Each AIM represents a unit of artillery firing.
- 11.1.2 The NVA player has six AIM on turns 1 and 2. On turn 3 he has four AIM and 7 AIM from turn 4 onwards.
- 11.1.3 The ARVN player starts with 3 AIM to place in his Bombardment Phase (others come available due to reinforcement events).
- 11.1.4 AIM may be placed anywhere on the map. City, town, fort and crossroads hexes are always considered in LOS and thus are never unobserved fire (Case 11.1.7).
- 11.1.5 Any number of artillery markers may be placed in a single hex (player's choice).
- 11.1.6 All off-map artillery are considered to be unobserved fire if no LOS can be traced from an HQ or friendly unit to the targeted hex.
- 11.1.7 Subtract 2 from the scatter die roll's result whenever a player utilizes unobserved fire.
- 11.1.8 A disrupted HQ or unit cannot spot for Bombardment.
11.2 Artillery Scatter
After artillery markers have been placed, but before resolving artillery attacks, the phasing player must determine if the artillery attacks land in the desired hexes.
-
11.2.1 The phasing player refers to the "Bombardment Scatter" column of the TEC (see PAC) and uses the row indicating the terrain in the target hex that is most beneficial to the defender, then rolls a die for each hex containing one or more artillery markers.
-
11.2.2 Modify the die roll by a +1 DRM if the spotter is an HQ. Also, if the Bombardment marker is the NVA Rocket Artillery, apply a -1 DRM to the Scatter roll (this is also noted on their AIM marker).
-
11.2.3 If the modified roll's result is within the range of numbers listed for that hex's terrain type, the artillery marker(s) in the hex scatter.
-
11.2.4 If an artillery marker or stack of markers scatter, the phasing player rolls a die and refers to the Scatter Diagram on the map for the direction of the scatter.
-
11.2.5 After determining the direction of the scatter a die is rolled again for the distance of the scatter:
- 1-2: One hex
- 3+: Two hexes
Note: All artillery markers in a hex that scatter will scatter the same direction and distance.
11.3 Artillery Bombardment Resolution
Each artillery marker makes a separate attack.
- 11.3.1 After Scatter has been determined, the player rolls a d6 for each AIM in the hex to determine its strength. (Exception: Case 11.3.7)
- 11.3.2 For non-"+" units, the roll's result is the strength column used for the bombardment attack.
- 11.3.3 For "+" units, if the result is a 1-5, that is the strength column used for the bombardment attack. If the result is a 6, a second roll is performed. If that roll's result is a 1-4, add that value to 6 and the new total is the strength column used for that AIM's bombardment attack. If the second roll's result is a 5-6, the bombardment attack for that AIM is performed on the 6 strength column.
- 11.3.4 Shift the column one left if the target hex is a fort or city hex, but not below column 1.
- 11.3.5 After the column has been determined, roll a die and cross-reference the roll's result with the column and apply the result immediately.
- 11.3.5 [Printed numbering repeats "11.3.5"; the second case is the one that follows.] Bombardment attacks affect opposing or friendly units alike in a target hex.
- 11.3.6 After all off-map artillery bombardments have been resolved, the phasing player then rolls a die once for every non-original target unit in a clear terrain hex that is adjacent to an AIM. On a result of 5 or 6, the unit becomes disrupted (Module 15.0).
- 11.3.7 Each NVA Rocket AIM is automatically resolved on the 8 strength column of the Bombardment Table (the markers have this strength noted on their counter).
11.4 ARVN Aerial Bombardment
Historically, the ARVN air force flew extensively during the battle, dropping bombs, CBUs and Daisy Cutters.
- 11.4.1 During the ARVN's Bombardment Phase (turns 4 to 6), the ARVN player makes a die roll to determine how many aircraft bombardments he has available that turn:
- If the result is 1-5, the roll's result is the number of aircraft the ARVN will have available to use for Bombardment.
- If the result is a 6, he has no aircraft available this turn except any made available by a Random Event.
- 11.4.2 The ARVN randomly selects the number of aircraft determined by the die roll and places them during his Bombardment Phase into hexes that he wishes to bomb.
- 11.4.3 Each Aircraft marker can be used once to individually attack a target hex.
- 11.4.4 Any number of aircraft can be assigned to bomb a particular hex.
- 11.4.5 Resolve NVA AA Fire (Section 10.5) before resolving the aerial bombing attack. [Printed reference reads "Section 10.5"; the NVA AA Fire rules are Section 11.5.]
- 11.4.6 To determine the bombing attacks strength column on the Bombardment Table, make a die roll. The result is the column the attack is resolved on.
- Exception: Aircraft with a "+" symbol that roll a 6, roll a second die applying the results exactly similar to the method for artillery column determination (Case 11.3.3).
- 11.4.7 Shift the column one left if the target hex is a fort or city hex, but not below column 1.
- 11.4.8 Once the strength column has been determined, roll a die (modifying the roll if 11.4.8 applies) and cross-reference the roll's result with the attack's strength column. Apply the result immediately.
11.5 NVA Antiaircraft (AA) Fire
NVA units have AA ability that is represented in an abstract method.
- 11.5.1 Each ARVN air/helicopter unit bombing a hex or helicopter supporting an attack must first undergo AA fire.
- 11.5.2 Make a die roll once per air unit bombing.
- a) If the unit is a T-6, a roll of 1 or 2 forces the air unit to abort.
- b) If it is an F5 or A-37, a result of 1 aborts the air unit.
- c) If it is a helicopter, a result of 1-3 aborts the unit.
- 11.5.3 Aborted air units are placed back into the draw pile available for subsequent turns. Aborted helicopters are set to the side available next turn.
- 11.5.4 An Aircraft that was aborted and was designated with CBU munitions does not have the munitions amount reduced.
11.6 Collateral Damage
- 11.6.1 At certain concentrations of firepower and with certain die roll results, the Bombardment Results Table may specify a collateral damage result (via a colored cell, see PAC) that has additional effects that occur immediately.
- 11.6.2 Collateral Damage can only occur once per target hex during the Bombardment Phase (so if 3 Bombardment attacks each achieve Collateral Damage results for a given hex, it is only performed once for that hex in that phase).
- 11.6.3 Rubble: If the target hex was a town, fort or city hex, the target hex and all adjacent town, fort or city hexes are devastated by the bombardment and become Rubble. Place a Rubble marker in the target hex. (Printed with a stray period after the number, "11.6.3.".)
- a) Once a hex becomes Rubble, it remains so for the rest of the game.
- b) The terrain of the hex is now considered Rubble (see TEC).
- c) If an armored unit is in a hex on which a Rubble marker is placed, it cannot move for the rest of the game (it stays in that hex).
- d) Rubble prevents the movement of tank units into or through that hex and any adjacent town, fort or city hexes and actually strengthens the defense of that hex. (see TEC)
- e) VP locations that are marked with Rubble still count towards VP awards.
- 11.6.4 Next, the phasing player chooses any single stack of enemy units that is located within one hex (if aerial bombing) or within two hexes (if Artillery bombardment) that achieved the collateral damage result. That stack will suffer a bombardment attack on the same strength column as the original bombardment attack but no Collateral Damage is generated by this attack (ignore colored cell results on the table). The bombardment result is applied immediately to this collateral damage target hex.
- 11.6.5 Then, the non-phasing player chooses a phasing player's stack within range as described in Case 11.6.4 and performs an original column bombardment attack against it. Again, Collateral Damage results are ignored.
12.0 Direct Fire
Direct fire can occur from both adjacent hexes or by units with ranged ability from further away. This combat is performed during the Non-Active Player's Defensive Fire Phase or the Active Player's Combat Phase.
12.1 General Rules
- 12.1.1 The attacker may resolve these attacks in any order desired.
- 12.1.2 The attacking player may choose which attacking units will attack which target defending units.
- 12.1.3 No unit may attack more than once per phase.
- 12.1.4 No opposing unit may be attacked more than once per phase. (Exception: OF (Section 8.4) and SF (Section 13.3) versus moving units.)
- 12.1.5 Ranged fire must have LOS (Module 9.0) to the target unit to perform.
- 12.1.6 Ranged units may add their attack strength to friendly combat units conducting adjacent direct fire if they have LOS.
- 12.1.7 The range of a Ranged Weapon unit is counted exclusive of the firing unit's hex and inclusive of the defender's hex.
- 12.1.8 The attacker and defender each individually total the combat strength of all of their units involved in the combat (ranged and adjacent).
- 12.1.9 A Ranged fire attack can target one or more units in an enemy stack that is not adjacent to the firing units.
- 12.1.10 Modify the attacker's and defender's CFs for terrain, command, supply and disruption.
- 12.1.11 When defending in a hex with more than one type of terrain, the defender uses the most beneficial terrain modifier.
12.2 Explanation of Results
- 12.2.1 DE: One defending unit is eliminated. All other targeted units are retreated and become disrupted.
- 12.2.2 DD: The defending targeted unit(s) are disrupted (Module 15.0).
- 12.2.3 DR: The defending targeted unit(s) must retreat (Section 13.4).
13.0 Close Assault
Instead of Direct Firing at adjacent enemy units the phasing player can choose to close assault the hex.
13.1 General Rules
- 13.1.1 Each attacking unit in the combat must be adjacent to the hex it attacks.
- 13.1.2 The attacker totals the modified CFs of all his units assaulting the hex and announces his attack.
- 13.1.3 At this time, the defender may commit reserves (see Section 13.2).
- 13.1.4 If the defender commits reserves, the attacker can intervene with SF (Section 13.3) against the defender's reserves moving up.
- 13.1.5 After the defender has committed any reserves to a hex, the total value of the defending units is computed, each unit being modified by the most beneficial terrain in the hex as specified on the TEC for the hex they occupy (Exception: Case 13.2.9).
- 13.1.6 Terrain CF effects are cumulative until tripled. No unit can have its CF more than tripled.
- 13.1.7 Any disruption or supply effects are calculated after the terrain effects have been calculated (fractions dropped) to derive the unit's total strength.
- 13.1.8 Units in a single hex must be close assaulted as a single combined defense strength but their defense strengths are calculated individually.
- 13.1.9 No hex may be close assaulted more than once during a Combat Phase.
- 13.1.10 Close Assaults with odds higher than 3-1 are treated as a 3-1 attack. Odds of less than 1-2 are an attacker 1R2 result.
- 13.1.10 Once Defensive Reserves (Section 13.2) and Support Fire (Section 13.3) have been performed, the active player will resolve the Close Assault by performing the following steps:
13.2 Defensive Reserves
- 13.2.1 The decision to commit reserves is made by the defender as soon as the attacker has announced his attack and its strength on a particular hex.
- 13.2.2 Only units not adjacent to enemy units that are stacked with a HQ and within 2 hexes of the hex being Close Assaulted may be committed.
- 13.2.3 Only a number of reserve units can be sent so that stacking limits (Section 4.1) are observed in the hex being assaulted.
- 13.2.4 Headquarters units themselves are not reserves and cannot be dispatched to aid defending units.
- 13.2.5 Reserve units may be moved up to four hexes to reinforce a hex under Close Assault (to avoid possible Support Fire).
- 13.2.6 They may not enter and move through hexes in enemy ZOCs unless those hexes are occupied by friendly units.
- 13.2.7 All movement rules apply except that units dispatched as reserves do not expend MPs for the terrain hexes they enter.
- 13.2.8 Reserve units en route to the Close Assaulted hex are subject to the possible attacker's Support Fire.
- 13.2.9 Reserve units gain no defensive terrain bonus from the hex they reinforce.
- 13.2.10 Armor units cannot be used as reserves.
13.3 Support Fire (SF)
Support Fire is OF performed by the phasing player against the opponent's units performing reserve movement.
- 13.3.1 The attacker must be able trace a Line of Sight to the target hex from the units firing support.
- 13.3.2 Only defending units that are reserve moving may be subjected to SF.
- 13.3.3 Only undisrupted units that have not already fired (been rotated) and are not participating in a Close Assault may perform SF.
- 13.3.4 Once a unit has performed SF, rotate it 90 degrees to indicate it can not perform any further combat actions this phase.
- 13.3.5 The attacker announces whether and how he will use SF after the defender has declared any reserves and while he moves them to the Close Assault hex.
- 13.3.6 Resolve SF the same as Direct Fire (Module 12.0).
13.4 Retreats
- 13.4.1 Each player retreats his own units unless this is a Close Assault retreat, in which case the opponent retreats the units.
- 13.4.2 Retreats must be made in the direction of the owning player's unit's reinforcement entry hexes. ARVN units that start on the board retreat towards entry area E on the west board edge.
- 13.4.3 When the result is a retreat due to Fire Combat, make a die roll for each unit that must retreat to determine the number of hexes it must retreat. A result of 1-3: the unit retreats one hex. A result of 4-5: the unit retreats two hexes. A result of 6: the unit retreats three hexes. The unit is disrupted after the retreat.
- 13.4.4 Units which are forced to retreat from Close Assault are disrupted after they have retreated.
- 13.4.5 A retreat is not considered part of movement and does not expend MPs.
- 13.4.6 Units may not retreat into a hex that the retreating unit could not move into. If forced to do so the unit is instead eliminated.
- 13.4.7 Units may retreat into an enemy ZOC, but for each such hex retreated into, the stack suffers one additional unit eliminated.
- 13.4.8 An armor unit immobilized in rubble cannot retreat. If forced to retreat, it will simply become disrupted. If already disrupted, it will instead be eliminated.
- 13.4.9 Defending units in non-rubbled city, town, or fort hexes may ignore any retreat result and instead just become disrupted. If already disrupted, they suffer no additional effect.
- 13.4.10 A unit may be forced to retreat onto a stack of units in excess of stacking limits. When this occurs, the owning player has the option of eliminating the retreating unit or immediately retreating one of the other units in the hex being retreated into so as to facilitate valid stacking limits. When performing the latter, the newly retreating unit must follow all the retreat rules and becomes disrupted after retreating.
13.5 Combined Arms
- 13.5.1 If an AFV unit is stacked with a non-AFV unit when attacking or defending in Close Assault, the owning player gets a favorable 1 column shift (1 left if defending, 1 right if attacking). [Errata, Oct. 10, 2013 (correction): "AFV" should be "armor" and "non-AFV" should be "non-armor".]
- 13.5.2 Having more than one armor unit in the same stack with non-AFV units has no additional effect. [Errata, Oct. 10, 2013 (correction): "non-AFV" should be "non-armor".]
14.0 ARVN Helicopters
14.1 General Rules
- 14.1.1 These units may either bombard or support ARVN units once every player turn starting on turn 1.
- 14.1.2 If bombing, they are placed just like air units and use their printed CF on the counter as their bombardment column strength value to resolve their bombing attack.
- 14.1.3 If used to support a friendly unit's attack or defense, only one helicopter unit can be used per combat.
- 14.1.4 Place the helicopter unit on one of the NVA stack of units that they are supporting against. This provides a one column shift in favor of the ARVN if they are not aborted.
- 14.1.5 Whether bombarding or supporting, they are subject to NVA AA fire when attacking or defending against NVA units.
- 14.1.6 They may not be eliminated.
- 14.1.7 For each airfield that the NVA player controls, reduce the number of helicopter units available by one.
15.0 Disruption
15.1 General Rules
- 15.1.1 Whenever a unit becomes disrupted it is flipped to its disrupted side. A disrupted unit (or stack) that is disrupted more than once in the same turn does not suffer any additional effects.
- 15.1.2 A disrupted HQ or unit cannot spot for artillery or air bombardment.
- 15.1.3 Disruption effects are cumulative with unsupplied effects.
- 15.1.4 A Disrupted unit may only move one hex, and its move must be to get further away from the closest enemy unit and not remain adjacent to an enemy unit if possible.
15.2 When Unit is in Command
- May not fire its ranged weapons at greater than one hex (noted on counter).
- It loses its ZOC.
- Attacks at 1/2 strength (dropping fractions).
15.3 When Unit is Out of Command
- Cannot move or attack.
- Defends at 1/2 strength.
- Has no ZOC.
16.0 Random Events
Add together both player's Initiative roll results, reference this sum with the Random Events Table on the back page of this rulebook, and apply the outcome.
Transcriber's note: the Random Events Table is referenced as being on the back page of the rulebook, but it is not present in the supplied rules PDF (the back page carries the Victory section and a duplicate of it). The table is not transcribed here; it is not in the text layer or the page images that were supplied.
17.0 Initial Setup
Only the ARVN begins the game with units on the map. Regimental HQs not listed can set up with any unit of their command.
- Col. Hieu, 1/43/18 and 3/43/18 Battalions (8 units), one 10 [2] 8 AA unit in or adjacent to 1103 or 0804.
- 2/43/18 (4 units) in or adjacent to 1009.
- 82 R Battalion (4 units), 82 R HQ in or adjacent to hexes 1103 and 0804.
- One 10 [2] 8 AA unit, 18th Division HQ and Gen. Dao in Xuan Loc.
- Col. Cong. 1/48/18 Battalion (4 units) in or adjacent to hex 0611.
- 3/48/18 Battalion (4 units) in or within two hexes of hex 1403.
- Col. Dung, 1/52/18 Battalion (4 units) within two hexes of Dau Giay Cross roads (0922).
- 3/52/18 Battalion (4 units) within two hexes of 0521.
- 2/52/18 Battalion (4 units) in or adjacent to hex 1005.
- 5C/18 Mech Company (1 unit) in or adjacent to hex 0415.
- 5C/18 Mech and Armor Company (2 units) in or adjacent to hex 0807.
- The ARVN begins with two 105mm and one 155mm artillery chits.
- All 6 of the NVA non-rocket AIM are available to use at start.
- [Errata, Oct. 10, 2013 (addition): the second-last bullet ends "plus the 4 Helicopter units".]
18.0 Reinforcements
Unless noted otherwise, ARVN reinforcements enter via entry area E. NVA units enter via entry areas A, B, C, or D as designated. An NVA divisional HQ enters whenever its units enter for the first time. All reinforcing units are assumed to be in supply and command for both movement and combat purposes on the turn they enter. A reinforcing NVA regiment of a division is automatically activated on the turn it enters. [Errata, Oct. 10, 2013 (clarification): reinforcements enter during the movement portion of their entry turn.]
- Turn 1 (April 9): All units of the NVA 341 Division (25 units) enter from entry area A.
- Turn 2 (April 10): NVA: All of the 7th Division (33 units) - entry area B.
- Turn 3 (April 11):
- ARVN: Units labeled 315 (6 units). Add two 155mm ARVN AIM to those available to use.
- NVA: 274 Regiment of the 6th Division (13 units) - entry area C. Permanently remove 2 AIM from the NVA total.
- Turn 4 (April 12):
- ARVN: Place (airlifted) the 1st and 2nd Battalions of the 1st Parachute Brigade (8 units) + the 1st Parachute HQ within three hexes of hex 1403. Air support is now available and can be rolled for.
- NVA: 33rd Regiment of the 6th Division (12 units) - entry area C. The 24th Rocket Artillery (3 markers) becomes available for the NVA to use this turn onwards.
- Turn 5 (April 13):
- ARVN: Add two 130mm and one 105mm ARVN artillery chit to those available.
- NVA: 812 Regiment of the 6th Division (8 units) - entry areas C or D. 95th Regt (3 units) - entry area A. Four units of the 203rd Tank Regiment - entry area B.
- Turn 6 (April 14): ARVN: The 2/48/18 Battalion (4 units) + 3/1 Parachute Battalion (4 units) may be placed (airlifted) in any hex within five hexes of Xuan Loc (inclusive), but not next to an enemy unit.
- Turn 7 (April 15):
19.0 Victory
At the end of the game, total up the VPs for each side. The last side that had entered a town hex controls it for VP purposes.
19.1 ARVN
- 1 VP for each NVA unit eliminated (permanently or not).
- 2 VP for each town hex other than Xuan Loc.
- 4 VP each hex of Xuan Loc controlled.
19.2 NVA
- 1 VP each unit of the 6th Division that exits the west edge.
- 2 VP each ARVN unit or Leader eliminated (permanently or not) or that is unable to trace supply.
- 3 VP for each town hex controlled other than Xuan Loc.
- 5 VP for each hex of Xuan Loc controlled.
Subtract the ARVN total from the NVA total. If the result is 38 or less, it is an ARVN victory (of sorts). If more than 38, it is an NVA victory.
Player Aid Charts
Direct Fire Combat Results Table (12.0)
Odds across the top: 1-2, 1-1, 2-1, 3-1, 4-1, 5-1+. Die roll (DR) down the side. Odds of less than 1-2 are not allowed and if mandated are no effect.
| DR | 1-2 | 1-1 | 2-1 | 3-1 | 4-1 | 5-1+ |
|---|---|---|---|---|---|---|
| 1 | - | - | - | - | - | DD |
| 2 | - | - | DD | DD | DD | DR |
| 3 | - | DD | DD | DD | DR | DR |
| 4 | - | DD | DD |
- Modifiers: CF x 2 ranged unit versus adjacent enemy non-armor unit. CF x 1/2 versus enemy armor unit 2 hexes away. CF x 1/2 attacking ARVN unit out of supply. CF x 1/2 attacking unit Disrupted and in Command or defending unit Disrupted and Out of Command. May Not Attack NVA unit out of supply or any unit Disrupted and Out of Command.
- Column shifts: 1L Shift NVA Out of Command. 1R Shift ARVN Helicopter supporting ARVN fire.
- Results: DD = Targeted unit(s) are disrupted. DR = Target units retreat (1-3: 1 hex, 4-5: 2 hexes, 6: 3 hexes) and are Disrupted. If OF or SF, treat DR result as a DD result. DE = Target units are eliminated. All others in the hex are retreated and become disrupted.
Transcriber's note: the printed table is a shaded grid; the cell shading and the "-" entries were read from the page image, and the dash cells are transcribed as printed.
Close Assault Combat Results Table (13.0)
Odds across the top: 1-2, 1-1, 2-1, 3-1+. Die roll (DR) down the side. Odds of less than 1-2 are not allowed and if mandated are no effect; odds of less than 1-2 are an automatic Attacker 1R2 result.
| DR | 1-2 | 1-1 | 2-1 | 3-1+ |
|---|---|---|---|---|
| 1 | 1 / - | 1 / - | 1 / - | 1 / - |
| 2 | 1R2 / - | 1R1 / - | - / 1 | 1 / 1R1 |
| 3 | 1R1 / - | 1 / - | - / 1R1 | - / 1R1 |
| 4 | 1 / - | - / 1 | - / 1R2 | - / 1R1 |
| 5 | 1 / - | - / 1 | 1 / 1R2 | 1 / 1R2 |
Transcriber's note: the grid's cells were read from the page image; where a DR cell spans two rows or two columns in the printed chart, the value is repeated in each row or column it covers.
- Modifiers: CF x 1/2 Attacking ARVN unit out of supply. CF x 1/2 Attacking unit Disrupted and in Command or defending unit Disrupted and Out of Command. May Not Close Assault NVA unit out of supply or any unit Disrupted and Out of Command.
- Column shifts: 1R/1L Shift NVA defending/attacking unit(s) not in command. 1R/1L Shift Attacker/Defender has combined arms. 1R/1L Shift Benefit ARVN attack/defence when helicopter supporting. 1R/1L Shift Attack/Defense if friendly ARVN Leader participating.
- Results: Left of Slash = result applied to the Attacker. Right of Slash = result applied to the Defender. 1 = One unit is eliminated. 1R# = One unit eliminated and surviving units retreat that number of hexes and then are disrupted.
Artillery / Air Bombardment Table (11.3)
Bombardment effectiveness DR result, or mortar strength total, across the top: 1, 2(H), 3, 4, 5, 6, 7, 8(R), 9, 10. (H) = ARVN Helicopter Strength. (R) = NVA Rocket Battery Strength. Die roll (DR) down the side.
The printed grid is not reproduced here. It is a shaded chart with merged cells, keyed by the die roll (DR, rows 1-6) against bombardment strength columns 1, 2(H), 3, 4, 5, 6, 7, 8(R), 9 and 10, and the merged-cell layout does not survive text extraction. Read the grid from the printed PAC. Pink cells mark Collateral Damage (Section 11.6).
- Modifiers: +2 DRM for unobserved Bombardment attacks. +3 DRM to first die roll when Cluster Bombs chosen for Aerial Bombardment (11.4.11a). Column shift: 1 left if target is City or Fort (never below column 1).
- Results: D = All units Disrupted. DE = One unit is eliminated. R1 = All target hex units retreat one hex and are then disrupted. DE+D = One unit eliminated plus all others Disrupted.
NVA AA Fire (11.5)
| Target | Aborted on roll |
|---|---|
| Helicopter | 1-3 |
| T-6 | 1-2 |
| A-1 / A-37 / F5 | 1 |
Artillery Scatter Distance (11.2.5)
| DR | Distance |
|---|---|
| 1-2 | 1 Hex |
| 3-6 | 2 Hexes |
Terrain Effects Chart
| Terrain | MP cost Infantry | MP cost AFV (3) | Combat |
|---|---|---|---|
| Road (grey lines through hex) | 1 | 1 | Other terrain in hex |
| Clear (basic open green terrain in hex) | 1 | 2 | No Effect |
| Town (brown squares outlined in red) (4) | 2 | 3 | Defender x2 |
| City (grey squares outlined in red) (4) | 2 | 3 | Defender x2 |
| Fort (hex outlined in white) (4) | Other terrain in hex | Other terrain in hex | Defender x2 |
| Wood (dark green forest pattern in hex) | 2 | 4 | Defender x2 |
- (1) HQ units are considered infantry type units and if they are the spotters for a bombardment attack, a +1 DRM is applied to the scatter roll.
- (2) Apply a -2 DRM to the bombardment's scatter roll if no friendly unit has a LOS to the bombardment's target hex.
- (3) AFV (Armored Fighting Vehicles) are those units with an Armor, Mechanized or ARVN AA symbol.
- (4) See Case 13.4.9.
Transcriber's note: the chart's Bombardment Scatter column (the scatter range, 1-2, 1-3 or 1-4 by terrain, used with Case 11.2.1) is a shaded merged-cell column that does not survive text extraction. The values are not reproduced here; read them from the printed PAC. The Combat and MP columns above are read from the page image and merged cells are repeated per row.
Sequence of Play (6.0)
- Step 1 - Initiative Phase (6.1): Random Event (16.0); ARVN Aircraft Determination (11.4.1).
- Step 2 - Active Player's Bombardment Phase (11.0).
- Step 3 - Active Player's Movement Phase (8.0).
- Step 4 - Non-Active Player's Defensive Fire Phase (12.0).
- Step 5 - Active Player's Combat Phase (10.0).
- Step 6 - Active Player's AFV Movement Phase (8.0).
- Step 7 - Disruption Removal Phase (6.7).
Once the Initiative Player has conducted Steps 2-7 as the active player, the non-Initiative Player becomes the active player and performs Steps 2-7.
NVA Activation Table (6.1.4)
| DR | Regiments activated |
|---|---|
| 1 | 1 |
| 2-3 | 2 |
| 4-6 | 3 |
Adjacency Attack Table (10.2)
| ARVN die roll | NVA die roll | |
|---|---|---|
| Voluntary | 1-2 | 1-3 |
| Mandatory | 3-6 | 4-6 |
Daisy Cutter Bombing (11.4.11b)
| Die roll | Result |
|---|---|
| 1-3 | Unit eliminated |
| 4-6 | Unit disrupted |
Errata Note
Against the Odds Issue #33, combined addenda as of Oct. 10, 2013, is applied in-file above. The addendum also notes that the T-6 air unit silhouettes should have been T-28s (a counter correction, not a rules change), and it covers the bonus game Bloody Hunlikely!, which is not part of this rulebook.