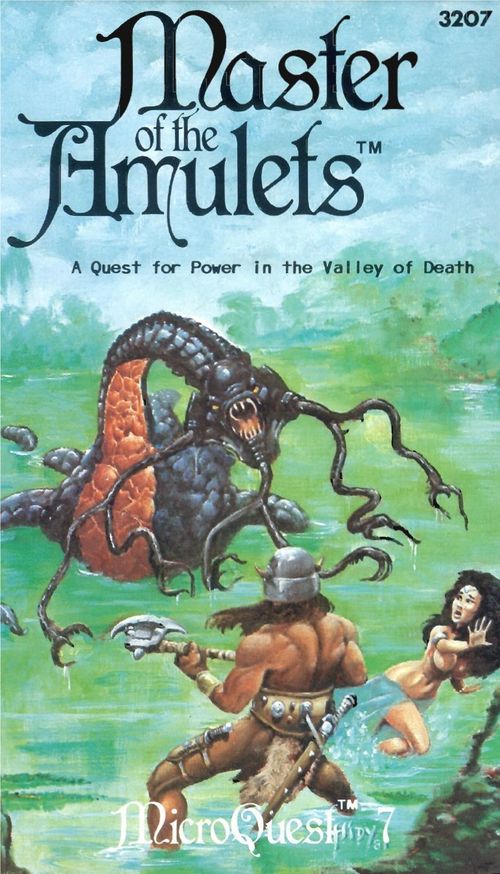
Master of the Amulets
Master of the Amulets Rulebook
Table of Contents
Table of Contents
- 2.0 How to Play
- 3.0 Entering the Valley
- 4.0 Time, Spells and Resting
- 5.0 Abandoning Companions or Amulets
- 6.0 Movement
- 7.0 Multi-Hex Creatures
- 8.0 Flight
- 9.0 Hidden Movement
- 10.0 Valley Creatures
- 11.0 Combat
- 12.0 Searching for Amulets
- 13.0 Amulets
- 14.0 Surviving the Valley and Experience
- 15.0 Restrictions on Advanced Wizard Spells
- 16.0 Optional Rules
- 17.0 Example of Play
- 18.0 Fantasy Master's Note
- Encounter Tables
- Terrain Key
- Creature Table
- Wizard Table
- Amulet Code Table
- Amulet Malfunction Table
- Monster Experience Table
- Amulet Experience Table
- Treasure Table
- Fighter Table
2.0 How to Play
2.1 DISCUSSION: MASTER OF THE AMULETS is an adventure of strategy and combat employing MELEE (or MELEE and WIZARD) rules of THE FANTASY TRIP game system. It can also be played using ADVANCED MELEE, ADVANCED WIZARD and IN THE LABYRINTH.
You must defeat creatures and warriors and locate magic amulets to escape from the Lost Valley, an enchanted land with only one entrance and one exit. The adventure can be played alone (using the proper combat/magic module as outlined above) or as part of an ongoing campaign, where one to six characters stumble into an ancient trap-gate set by Dirringar the Black.
Players using the advanced books of the TFT system will find necessary modifications to the rules of this game noted as part of the appropriate rules section herein.
Those using this adventure as part of their game mastered campaign may find it advisable to vary the number and/or strength of creatures and enemies encountered to better match the skill level of the player group.
2.2 MODES OF PLAY: MASTER OF THE AMULETS can be played solitaire or with up to seven players.
SOLITAIRE--one person plays both adventurer(s) and creatures.
TWO-PLAYER--one person plays the adventurer(s) and the other controls the denizens of the valley.
MULTI-PLAYER--one to six players create individual characters. Another person is the Game Master, playing the valley inhabitants and acting as referee. This can be part of a campaign or a separate game.
2.3 CREATING CHARACTERS: Use MELEE and/or WIZARD rules to create characters. Those players using the advanced books may create characters using the IN THE LABYRINTH rules.
Beginning characters may find the going very tough. You may wish to allow characters to advance via MELEE/WIZARD rules or create characters with higher attribute levels as an option.
3.0 Entering the Valley
One to six characters may enter at a time, coming in through one of Dirringar's scattered trap-gates to the common entrance hex at the south edge of the mapboard. The board represents the valley, with the exit gate at the extreme north end.
3.1 SETTING UP THE GAME: Invert the 18 chits lettered A through R and one set of the "X" chits marked 1 through 6. Shuffle them thouroughly and place them randomly, one each on the 24 spaces marked "X" on the map. Place the remaining set of "X" chits, 1 through 6, face up next to the board. Next, invert the 6 "X" ability counters and shuffle them, assigning one at random, unseen, to each "X" counter 1 through 6, placing the inverted ability counter alongside the numbered "X" chit next to the board. These will be revealed when an "X" amulet from the board is found and successfully deciphered.
3.2 MAP MOVEMENT: Place the appropriate party marker on the entrance hex. You will move this counter about the board to represent the party's location in the valley. Counters are also provided for use on the MELEE map during combat to represent individual creatures and other denizens of the valley. These larger counters are not used on the valley map itself--only on the MELEE map for combat.
4.0 Time, Spells and Resting
4.1 GAME TIME & SPELLS: Game turns represent one day when moving on the valley map. Spells (like protective spells) can be cast just before entering the arena map for combat. Spells are reenergized turn by turn when fighting combats, as per WIZARD rules. Spells cast in the arena, or otherwise as part of the game-turn, will fade before the beginning of the next game-turn if they are of limited duration. (For example, fire, wall, shadow and illusion spells...)
4.2 RECUPERATION: Strength (ST) lost by fatigue in spellcasting is regained only if a character rests one full day-turn in a valley hex without engaging in combat or evasion. (Negotiation is not considered an exhausting activity, and a character who is resting may engage in such activity without jeopardizing his rest.) A character who rests in this manner regains all ST lost due to spellcasting exhaustion, but not hits.
A physicker (see ITL talents lists) may take time immediately after a battle to perform his healing art on wounded characters. Otherwise, characters regain one point of ST lost due to hits by spending two consecutive days resting as above.
4.3 EXAMPLE: A wizard character of ST 12 casts spells costing him 4 points of ST during a combat, and takes 5 more points as hits during that same combat. After the conflict is over, his companion who is a physicker binds his wounds and treats him, regaining for the wounded wizard 2 of 5 ST he lost to hits. The party elects to remain in the hex for a day to rest. They roll no encounter, so at the end of the turn AFTER the combat, the wizard regains all of the ST lost to exhaustion (but not his remaining hits) bringing him back up to ST 10.
If the party remains in the hex for another day, and has no encounter requiring evasion or combat, the wizard can heal one more hit normally, bringing him to ST 11. Two more quiet days of rest in the same place would bring him to ST 12--full strength.
5.0 Abandoning Companions or Amulets
5.1 ABANDONING COMPANIONS: Wounded but living adventurers may be left behind if a party desires. If the party returns, roll one die. On a roll of 5 or 6, the character is gone and is never found. Otherwise, he is found in the same condition in which he was left. Abandoned characters do not heal wounds (although they do regain ST lost to spellcasting) because they are too active trying to fend for themselves while wounded.
5.2 ABANDONING AMULETS: Amulets may be dropped at any time, but a search (see SEARCH) is required to find them again, as the concealment spells of Dirringar begin working again as soon as the amulet is out of someone's possession. Any number of amulets may be left in a single hex, but each will require a separate search to recover them. (See also AMULETS DURING COMBAT.)
5.3 SPLITTING UP: Splitting a party during the game is not specifically prohibited, but it is dangerous and not recommended, especially since it causes the game to become burdened with die rolls.
6.0 Movement
6.1 CHARACTER MOVEMENT: Movement in the arena is standard MELEE movement. Movement in the valley is similar. Instead of expending one of your MA (Movement Allowance) per hex, you will spend a varying amount according to the terrain of the hex you're entering (see the TERRAIN KEY table).
For example, a player with MA=8 could move 4 hexes in rough terrain (terrain cost of rough=2). All movement must be to adjacent hexes. A player may spend all, some or none of his MA on a given turn. Unused MA cannot be accumulated (i.e. carried over into the next turn). Characters with the ITL running talent get the 2 MA bonus.
6.2 UNDIVIDED MOVEMENT: Movement cannot be split (e.g. move to a hex, search, then move to another hex). Once you stop movement you cannot move for the remainder of the turn. Exception: you can stop movement to use the BRIDGE amulet, then continue.
6.3 IMPASSIBLE TERRAIN: The only impassible terrain are river hexsides. These may only be crossed at bridges or by using the BRIDGE amulet. Of course a player can fly or teleport over a river if he has the capability to do so.
7.0 Multi-Hex Creatures
Giants and dragons are the only multi-hex creatures. Like one-hex characters, they have front, side and rear hexes (see illustration).
[Illustration: two multi-hex creature diagrams, a dragon and a giant, each showing its front (F), side (S) and rear (R) hexes.]
7.1 MULTI-HEX ENGAGEMENT: A multi-hex creature, being bigger, is harder to engage. A two, three or four hex creature is engaged only if it is in the front hexes of TWO or more one-hex creatures or characters. A creature larger than four hexes is not engaged unless it is in the front hexes of THREE or more one-hex characters.
7.2 "PUSHING": A multi-hex creature may end its movement, or take its "shift", by "pushing back" any number of one-hex characters, as long as the combined ST (at that moment) of the characters being pushed back is less than that of the creature doing the pushing.
PROCEDURE: The large creature moves one hex and stops; no character can be pushed back more than one hex per turn. The small character(s) that it moved onto must immediately make a saving roll: 3 dice against DX. If they succeed they step into any adjacent hex and may act normally that turn. If they fail, they FALL into any adjacent hex and may do nothing else that turn. If a small character has no adjacent empty hex to step to, a large character may not move onto it to push it back.
A multi-hex creature may push back small characters either at the end of its regular move (even if that move engaged it with them) or by shifting onto them while engaged.
7.3 MULTI-HEX MOVEMENT: The MA for a multi-hex creature is the maximum number of hexes ANY PART of the creature may move in one turn. For example, if a dragon moves in a straight line, all parts of it will move the same number of hexes. But, if its tail stays in the same hex and its head moves 4 hexes, or vice versa, the dragon moved 4 hexes.
Since a multi-hex creature must be in a front hex of TWO small characters to be engaged (3 if it's a 7-hex dragon) it does NOT stop movement if it enters a front hex of a single one-hex character. It DOES have to stop as soon as it occupies two at once, thus becoming engaged--and even then it may move one more hex to push the smaller characters back.
8.0 Flight
8.1 TERRAIN EFFECT: Creatures who can naturally fly have two numbers listed as their MA. The first number is their MA on the ground and the second is their MA while flying. In the valley, a player who has the capability to fly keeps the same MA but ignores terrain costs (i.e. treats all terrain as clear). In the MELEE arena, a player who can fly has MA = 12.
8.2 TAKING OFF: A grounded creature who wishes to fly "takes off" at the beginning of its movement. On its first turn in the air, it has only half its flying MA. Thereafter, it has its normal flying MA. A flier may land at any time, but may not move on the ground on the turn it lands.
8.3 ENGAGING: Flying creatures are NOT engaged by ground creatures unless they wish to be. A flier may freely go over another character, a fire, a wall, etc. Fliers DO engage one another unless BOTH wish not to be engaged; then they may cross at "different heights".
8.4 ATTACKS: Any attack on a flying (one-hex) creature is at -4 DX. For attacks on multi-hex fliers, the DX adjustment is -1. A player flying (by amulet or spell) will not be used to flight--so if he attacks while in the air, his DX will be adjusted by -2 for regular physical attacks and -4 for attacks with thrown or missile weapons. This is in ADDITION to the -4 DX mentioned above if a flying creature is the target attacked. If a flying player takes a swing at another flier his DX is -6; -2 because he's flying, and -4 because his target is.
9.0 Hidden Movement
9.1 GENERAL: When a character is invisible, hidden movement is allowed. An invisible character is taken from the board. Thereafter, its location is not revealed unless it: (a) makes any physical attack.
(b) becomes adjacent at any time to an enemy character, or
(c) is wounded or falls down.
9.2 POSITION REVEALED: When one of these events occurs, the location of the hidden character AT THAT MOMENT is revealed. It stays revealed only as long as the hidden character stays adjacent to an enemy character. Other events reveal its location only for an instant.
The player with the hidden character makes a note, each turn, where it moves. When the character becomes visible the counter is again placed on the map.
9.3 ATTACK: When an invisible character is attacked (even by a character who knows where it is), the attack is at -6 DX because you can't see it. An attack into a hex where you HOPE an invisible character is has the same -6 DX.
10.0 Valley Creatures
Creatures wander through the valley hunting for food and combat. Their sole purpose is to kill you, unless you are using optional Negotiation rules.
10.1 RANDOM ENCOUNTERS: At the beginning of each turn, roll a die to determine if something is encountered. Something is encountered on a roll of 1 or 2.
If a creature is encountered, roll two dice and consult the ENCOUNTER TABLE. Use one die for the row and the other for the column. Cross index the results to find the creature you will face.
Then, reference the NUMBER ENCOUNTERED table to see how many of that creature you encounter, based on the number of characters in your party.
Then, reference the CREATURE TABLE, FIGHTER TABLE or WIZARD TABLE, as indicated, for details on what you encountered.
10.2 EVADING CREATURES: Valley creatures can be avoided. If a creature's MA is the same or higher than your MA, you need a roll of 1 (on 1 die) to evade it. If the creature's MA is lower than yours, you need a roll of 1 or 2.
Use the lowest MA in your party and the highest MA in the group you encounter to determine evade.
11.0 Combat
11.1 MELEE/WIZARD RULES: All combat follows normal MELEE and/or WIZARD rules. Combat is resolved before movement in all but one case. If the attack is a result of the ATTACK amulet (see AMULETS), combat takes place immediately.
When a creature is encountered, and you have failed to evade it, you must fight it. (Exception--see OPTIONAL RULES; NEGOTIATION.) Place your character counter(s) in a starting hex on the MELEE map with opponent(s) on the opposite side starting hexes. Combat begins and continues until all of one side is defeated.
11.2 AMULETS DURING COMBAT: If you wish to use an amulet during combat, you may choose an ACTIVATE AMULET action, which may be performed by any disengaged character who moves no more than one hex, or by any engaged character who does no more than shift one hex.
To remove and drop an amulet during combat, a character that is disengaged may still move up to 1/2 his/her MA before dropping it, but may take no other action. An engaged character dropping an amulet is under the same restrictions as one trying to activate an amulet.
12.0 Searching for Amulets
12.1 PROCEDURE: When you enter a hex containing an amulet, you must first search for and find it before you can take it. To search, roll one die. A roll of 1 to 3 indicates a successful search and you are free to take the amulet. A roll of 4 to 6 means the search has failed and you must search again if you want to find it. There is no limit to the number of searches that may be made on a given amulet.
12.2 SEARCH ENCOUNTERS: As each search takes one game-turn, each time you search after the first, you must also make an encounter roll to determine if there is a valley creature present. If a creature is called for on an unsuccessful search, it must be defeated or evaded before another search can be made. If one is encountered on a successful search, you can take the amulet and proceed with combat or evasion. (See also OPTIONAL RULES; NEGOTIATION.)
12.3 FOUND AMULETS: If a search is successful, turn over the amulet counter and consult the AMULET TABLE to determine its power.
12.4 FREE SEARCH: When you first enter a hex with an amulet, you get one free search. A free search is a search with no accompanying Encounter roll. If the free search is unsuccessful, then revert to normal search procedures.
13.0 Amulets
13.1 DESCRIPTION: Each amulet is a bejewelled medallion of gold, inscribed with runes and mounted on a golden chain. There are 24 in all; 21 will have magical powers bestowable on the user and 3 will have no powers at all. The two types of Amulets are:
(1) Amulets whose powers are evident. That is, the runes inscribed on them can be deciphered. There are 18 of these. When one is found, consult the AMULET TABLE to determine its power.
(2) Amulets whose powers are secret. The runes cannot be translated. These are referred to as 'X' amulets (so named because X runes dominate the writings). There are 6 'X' amulets. The powers of these cannot be learned from the AMULET TABLE. They have to be revealed before you can know their nature. (See REVEALING X AMULETS.)
Amulets may be played at any time during the game within the restrictions entailed in the section--AMULETS DURING COMBAT.
13.2 AMULET ACTIVATION: Of such strange magicks are these artifacts made that, when more than four are brought together, adverse effects may result.
If a player (or group of players) should activate an amulet while carrying more than four, roll one die and consult the AMULET MALFUNCTION TABLE. Any effects resulting from this table are implemented immediately and armor does NOT absorb any of the hits taken.
Of course, players may drop amulets to get down to the four amulet limit, but a search is required to find each one dropped.
13.3 REVEALING "X" AMULETS: Upon finding an 'X' amulet, roll less than or equal to one character's IQ on 4 dice to reveal its power. (If not using WIZARD, a roll of 5 or 6 on one die is required.) If this fails, one of the three REVEAL X amulets must be used. (See also SURVIVING THE VALLEY...)
(Note: If using the ITL talents, a person with the SCHOLAR talent only requires a 3 die IQ roll to decipher 'X' amulet. ANALYZE MAGIC is useless.)
13.4 EXPLANATION OF AMULET ABILITIES: These letters are the codes used to explain usage of the Amulets listed below by alphabet letter.
D--played at your discretion H--counts as being held while in effect N--does not count as being held while in effect O--played once and removed from the game R--remains in effects for the rest of the game T--takes effect immdediately (i.e. once revealed)
13.5 AMULET LIST:
A) ATTACK--you are attacked by a creature from the ENCOUNTER TABLE. -- N, O, T
B) BRIDGE--creates a permanent bridge over any river hexside. You must be adjacent to the hexside the bridge will cross. (Place the bridge counter on the map to indicate its location.) -- D, N, R
C) BURDEN--your MA is halved (round down). If you have a group of adventurers, the whole party's MA is halved. -- N, R, T
D) DRAIN--subtracts 1 to 6 pts. from your ST (or one party member's ST). -- T
E) ENCHANT--gives one weapon or staff magical properties. It does 3 dice of damage and gives you a DX of 12 (unless yours is higher) when using it. The enchanted item can be broken but it gets a 3 dice saving roll of 12. -- D, H, R
F) FRIEND--you recieve a loyal fighter or wizard for the rest of the game (or until he dies). Roll 1 die, 1-3=fighter 4-6=wizard. Disregard wizard if you are not using WIZARD rules. Consult those tables for abilities. If the friend is mistreated he will turn on you and fight to the death. -- D, H, R
G. FLY--give you, or your party, the ability to fly. (See FLIGHT.) -- D, H, R
H) HEALING--adds 1 to 6 points, i.e. a one die roll, to one character's ST (but not to exceed original ST). -- D, N, O
I) INVISIBILITY--renders one party member invisible. It lasts one game-turn. If you are invisible before you encounter a creature, you evade on a roll of 1 to 5. (See HIDDEN MOVEMENT.) -- D, H, O
J) EXTRA-HEALING--as HEALING, but 2 to 12 points ST, i.e. a two die roll. -- D, N, O
K) FUMBLING--subtracts 3 from one character's DX. -- N, R, T
L) LOSE--you instantly lose one amulet (of your choosing). It is placed in the farthest unoccupied X-marked hex. If you have no amulets, the next one you find is affected. -- N, O, T
M) REMOVE CURSE--cancels the effects of BURDEN or FUMBLING. -- D, N, O
N) REMOVE CURSE--as above. -- D, N, O
O) REVEAL X--reveals the identitiy of any 'X' amulet. -- D, N, O
P & Q) REVEAL X--as above. -- D, N, O
R) TELEPORT--takes you (or entire party) to any hex on the map you currently occupy. If you are in the arena, you may choose any facing you like in the new hex. You do not have to see the hex you are going to, but if you come out in a hex with a solid object, you die--and so does the object, if it was alive. -- D, H, O
13.6 'X' AMULETS:
1.) CANCEL--one amulet, of your choosing, is instantly destroyed (including 'X' amulets). If you have no amulets, the next one you find is affected. -- N, O, T
2.) DEFEAT--totally destroys one enemy. -- D, H, O
3.) RETURN--this is the amulet that gets you out of the Valley. -- D, H
4.) NO ABILITY--there are 3 amulets that have no discernable ability at all.
14.0 Surviving the Valley and Experience
When you reach the exit hex, you may freely pass out of the Valley if you carry the RETURN amulet. You have survived.
If you are carrying an unrevealed 'X' amulet, you may turn over the ability counter for that 'X' amulet. If the amulet is RETURN, you have survived. If it is any other 'X' amulet, each party member takes 1 die of damage and the amulet is lost.
If you have more than one unrevealed 'X' amulet, this procedure is repeated for each amulet you choose to try. Once out of the Valley, all amulets remaining in the valley are rescattered.
14.2 EXPERIENCE: Experience in MASTER OF THE AMULETS is amassed differently than MELEE or WIZARD experience. Players are awarded points for fighting prowess and for limiting their use of the dangerously powerful amulets.
Those playing with the advanced rules or IN THE LABYRINTH may prefer to use that experience system rather that the one explained here. This will allow a more consistent campaign.
14.21 CREATURE EXPERIENCE: Each time a creature is defeated, players are awarded experience points. Consult the CREATURE EXPERIENCE TABLE. Keep a running total of creature experience points.
14.22 AMULET EXPERIENCE: After you leave the Valley, count the number of amulets you FOUND (not just USED). If you had a group of adventurers, add 2 to that total for each player that STARTED the game. Consult the AMULET EXPERIENCE TABLE. Add your creature and amulet experience totals to arrive at your final experience point total. These points may be used to "purchase" additional attribute points as per MELEE or WIZARD experience rules.
If you began the game as a group, the experience point total is divided by the number of players who STARTED the game and distributed evenly among the survivors. For example, if three players survive the game from a group of four and their experience point total is 200, each survivor gets 50 experience points (200/4=50).
15.0 Restrictions on Advanced Wizard Spells
Certain spells in ADVANCED WIZARD may not operate while in the valley, thanks to residual magical energy from the destruction of the Great Amulet. Spells not listed below work normally.
PERSUASIVENESS--See adjustments to NEGOTIATION TABLE.
REVEAL/CONCEAL--Will not reveal an amulet during SEARCH.
ANALYZE MAGIC--This spell is useless for deciphering an "X" amulet.
SPELL SHIELD--Does not protect against harmful effects of amulets.
WISHES and DEMON SUMMONINGS--These do not work in the valley at all.
PENTAGRAM--This is as useless as a SPELL SHIELD for screening harmful amulet effects.
ASTRAL PROJECTION--Astral bodies cannot search for or retrieve amulets, nor leave the valley.
DISSOLVE ENCHANTMENT--Does not work.
REMOVE CURSED OBJECT--Also fails to work.
CONTROL GATE--Will not affect the entrance or exit points of the valley, or allow you to escape without the RETURN amulet.
LONG DISTANCE TELEPORT--Works only for destinations within the valley. Magic items (other than the amulets themselves) do not operate at all within the valley, with the exception of Wizard's Staff or Staff of Power. These work in their basic function, but other spells contained in the same item will not function in the valley.
16.0 Optional Rules
Any or all of the following rules may be added as the players see fit.
16.1 AMULETS AS WEAPONS: Once per game any amulet carried by a player may be used to totally destroy one foe.
The amulet is treated just as a THROWN weapon. If the player makes his "to hit" roll, the creature is destroyed and ALL party members take 1 die of damage. If the player fails to hit the creature, the amulet is considered to have fallen in the target hex. It may be retrieved and thrown again (or used in its normal capacity) or another amulet may be thrown in its place.
16.2 LOCAL INHABITANTS: This rule is designed to "flesh out" the area by introducing some local personalities into the game. When an encounter is called for in a local inhabitant's hex, use this data instead of rolling on the ENCOUNTER TABLE. Players may use any or all of the creatures or add their own. (Most Valley inhabitants got here through trap-gates and remained and even like it here.)
16.21 HEX #1108 - BARZARK OF THUNDERCLIFF: In a cave high up in the mountains lives a mighty old dwarf who resents intrusion into his territory. However, on a roll of 6 on 1 die, Barzark has taken a liking to the player(s) and will let them pass without a fight.
ST=15 DX=15(11) IQ=10 MA=6. Chainmail, pike, ax, battleaxe. Negotiation Value=6.
16.22 HEX #1277 - WARRIOR HALFLINGS: A band of warrior halflings (hobbit types) live in the downs in this part of the valley. They are a rare breed of fierce halflings who crave battle. Roll 1-6 normal halflings with 2 points added to each character's attributes and with a Negotiation Value of 5.
16.23 HEX #1382 - HIGHWAYMEN OF SERPENT TONGUE VALLEY: Players who have an encounter in this hex will be waylaid by the Highwaymen of Serpent Tongue Valley. They are a band of robbers who demand one amulet each. If they are not appeased, they will attack. Use the NUMBER ENCOUNTERED TABLE and ENCOUNTER TABLE make this group. Their Negotiation Value is 3.
16.24 HEX #1605 - THE FEY ELF OF BLACKWOOD: A nameless, outcast elf who roams this part of the forest.
ST=14 DX=16(14) IQ=12 MA=10. Leather, longbow, broadsword. Negotiation Value = 1 die roll.
16.25 SERPENTS OF THE SWAMP (Any Swamp Hex): The serpents are a race of great tentacled beasts inhabiting the swamps.
ST=30 DX=11 IQ=6 MA=8 Armor:2 hits Damage:1 die per tentacle, up to 6 attacks per turn.
All players in combat in the swamp have an MA=4. The serpents' MA in the swamp is 8. All of the serpents' hexes are FRONT hexes. Although they are one-hex characters (the great bulk of their bodies lies below the surface), they are treated as multi-hex creatures (as a giant or small dragon) for purposes of movement and combat.
Serpents attack with six tentacled arms, each into one of its six adjacent hexes. Serpents can fight six foes at once. If fighting one enemy, they can bring the two adjacent arms into the hex of their foe and attack him with a total of three arms at once. If a serpent takes 8 or more hits from one attack, it does NOT fall down. Instead it loses one of the arms it is attacking with. (Note: SERPENTS DO NOT NEGOTIATE!)
16.3 NEGOTIATION:
Sometimes, negotiating with one's enemies is as effective as fighting them. This rule enables the more intelligent character to parley with stronger opponents instead of fighting them, be it through threatening gestures, clever double-talk or some other beguiling behavior.
16.31 WHERE ALLOWED: Any time players have moved to the MELEE map to face their foe(s), negotiation may be performed. It may be attempted only once per foe (or group of foes).
16.32 INITIATIVE LOSS: If your character or group chooses to talk to a foe, they will lose initiative should the foes decide to attack immediately. (On a result of "N" or "R".)
16.33 NEGOTIATION VALUE: The NEGOTIATION VALUE is the number following a creature's name on the ENCOUNTER TABLE. The Negotiation Value for Fighter(s) and Wizard(s) is determined by the roll of a single die.
16.34 PROCEDURE: Players select one character to negotiate for the party, no others may participate. The Negotiation Value is used as the column heading when referencing the NEGOTIATION TABLE. Roll two dice to determine the row. The letter at the row and column intersection is the negotiation result, explained below the table.
NEGOTIATION TABLE
| DIE ROLL | Negotiation Value 1 | 2 | 3 | 4 | 5 | 6 |
|---|---|---|---|---|---|---|
| 2 | F | N | F | F | F | N |
| 3 | R | F | S | N | S | R |
| 4 | N | N | R | S | N | N |
| 5 | F | S | S | R | R | R |
| 6 | S | S | N | R | R | N |
| 7 | S | N | N | N | N | R |
| 8 | N | S | S | N | R | R |
| 9 | F | S | R | R | R | R |
| 10 | N | R | R | N | N | N |
| 11 | S | S | F | S | N | R |
| 12 | S | F | S | F | S | S |
F = FLEE: Creature runs away, continue with turn.
S = STOP: Creature doesn't move or attack for 1 MELEE turn.
N = NO EFFECT: Creature unaffected, continue combat.
R = RAGE: Creature enraged, he now attacks with +2 "to hit" and does +2 damage.
16.35 NEGOTIATION ADJUSTMENTS: Adjustments change the column used when referencing the table. If adjustments result in a column values greater than 6 or less than 1 use those values instead.
TALENTS/SPELLS: The four Talents or Spells listed below are from IN THE LABYRINTH or ADVANCED WIZARD. They affect Negotiations as described.
CHARISMA talent--shift one column to the left if facing humanoid foes, no effect on snakes, wolves, bears, serpents or other animals.
DIPLOMACY talent--shift one column to the left, the same restrictions as Charisma.
ANIMAL HANDLER talent--shift one column to the left when fighting wolves, snakes (not serpents), bears or other 'non-special' animals.
PERSUASIVENESS spell--if cast immediately, shift one column to the left, same restrictions as Charisma.
IQ ADJUSTMENT: The negotiating character's IQ affects negotiations as follows:
- IQ = 3-8: shift one column to the right
- IQ = 9-12: no adjustment
- IQ = 13-15: shift one column to the left
- IQ = 16-20: shift two columns to the left
- IQ = 20+: shift three columns to the left
No adjustments if not using WIZARD or ITL.
16.4 MELEE TERRAIN:
16.41 TERRAIN TYPES: Players may deem it desirable to lay out a terrain on the MELEE map, corresponding to the terrain of the hex in which they have an encounter. Some examples are given but players should feel free to make up their own in any manner they wish.
[Illustration: a FOREST hex map for MELEE terrain layout.]
[Illustrations: ROUGH and HILLS terrain layouts for the MELEE map.]
[Illustration: MOUNTAIN terrain layout for the MELEE map.]
WHITE hexes are clear.
GRAY hexes are pits or chasms.
BLACK hexes are obstructions (trees, boulders, etc.).
16.42 MELEE TERRAIN MOVEMENT: Players may jump over pits (one-hex gray areas) by rolling less than or equal to their adjDX on 3 dice. To jump over gray areas larger than one-hex, add 1 die to the saving roll for each hex over one. For example, a player jumping over 3 hexes of gray area must roll 5 dice against his adjDX. A fall into a pit or chasm does 2 dice of damage, and takes the character out of the game for the rest of that combat. After combat, a fallen character may be rescued to rejoin the group.
16.5 TREASURE HUNT:
MASTER OF THE AMULETS can be played as a treasure hunt. All standard rules are in effect (as well as any optional rules players desire to use).
After your opponent(s) have been defeated, roll 1 die. A result of 5 or 6 indicates treasure is present. Players simply roll 3 dice on the TREASURE TABLE to determine the amount. Players need not search for the treasure, it is there for the taking.
A character must decrease his MA by one for every gold bar he carries. The weight of gems is insignificant, any amount may be carried without reducing MA.
17.0 Example of Play
Lute the Younger is a young man with a problem--that being his famous father Lute the Elder, who is a famous adventurer and warrior. At age 17, Lute Jr. leaves home to seek adventure of his own, tired of living in the shadow of his fathers reputation. In his search for great deeds to do, Lute stumbles into one of Dirringar the Black's ancient trap-gates and is transported to the Valley of the Amulets. An ancient tablet near the entrance reveals Lute's plight clearly. The message, left by an earlier traveller, lets Lute know that his only hope for escape lies in locating the RETURN amulet without running afoul of the valley's inhabitants, or the dangerous curse amulets.
Lute is a beginning character with ST=11 DX=13 (9) MA=6. He wears chainmail and carries a shortsword, a dagger and a small shield. He must brave the dangers of the valley alone. (And, as a beginning character alone, he will be very lucky to survive!)
Lute rolls one die for his ENCOUNTER roll. The result is a 1 so he has no creature to face. A hex containing an amulet is nearby the entrance hex so he moves to it and makes his FREE SEARCH roll. The roll is a 3 so he has found the amulet. Turning it over he sees an "H" on it. Checking the AMULET TABLE, he finds it to be the HEALING amulet. Having taken no damage, he slips it onto his neck.
On the next turn, Lute rolls a 2 on the ENCOUNTER roll. Going to the ENCOUNTER TABLE, he rolls 2 dice and gets FIGHTER. The NUMBER ENCOUNTERED TABLE shows one fighter for him. Now he rolls on the FIGHTER TABLE for the Fighter's attributes. The Fighter's MA is higher than his so Lute must roll a 1 to evade his foe. He rolls a 6 and must fight. Leaving the Valley map, they take their positions on opposite sides the the MELEE map. In the combat Lute takes a good deal of damage and decides to use the HEALING amulet. He is engaged so he can only shift during movement. The Fighter misses Lute and now he activates the amulet. He rolls 1 die, gets a 5 and adds it to his ST. Combat then continues and Lute kills his foe.
Lute now moves and again comes to an 'X' hex. His FREE SEARCH roll is 4 so he does not find the amulet. He decides to keep searching. He rolls a 3 on the ENCOUNTER roll and a 4 on the SEARCH roll. There is no creature present but he fails to find the amulet. He tries again. The ENCOUNTER roll of 1 indicates an encounter and he fails again to find the amulet on a roll of 5. His roll on the ENCOUNTER TABLE indicates a Troll, an evil creature and a mighty opponent. Lute rolls to evade. He needs a 1 since his MA is lower than the Troll's. He rolls a 1 and slips away from the dangerous beast.
Once again Lute searches. His ENCOUNTER roll of 1 again indicates a creature. His SEARCH roll is a 2 so he has also found the amulet. Checking the table, he finds the amulet to be ENCHANT. But according to his rolls on the ENCOUNTER TABLE, he now has a Fighter to deal with. He fails to evade on a roll of 3 so he moves to the MELEE map.
Lute's foe is an unarmored Elf. The Elf wins initiative and moves up to engage Lute. With his back to the wall, Lute shifts one hex. The Elf cannot attack this turn and Lute activates the ENCHANT amulet. His DX is now 12 (with the enchanted weapon) and his shortsword does 3 dice of damage. Lute cannot attack this turn, his action was activating the amulet. Combat continues and, with his powerful new weapon, Lute defeats the Elf.
Lute continues on with his quest. After some time, he has collected 4 amulets and now stands in a hex containing another one. His FREE SEARCH fails and now he tries again. Lute rolls a 1 on the ENCOUNTER roll and a 2 on the SEARCH roll. He turns over the amulet and sees its an 'X' amulet. He rolls a 4 on 1 die and cannot unravel the cryptic pendant's purpose. Rolling on the ENCOUNTER TABLE, he now faces a Giant. He fails to evade on a roll of 2 and moves to the MELEE map.
Lute wins initiative and moves one hex to his left. The Giant moves his full MA up to Lute, four hexes away. The Giant cannot act this turn so Lute activates the INVISIBILITY amulet he carries. Since he holds more than 4 amulets, he must consult the AMULET MALFUNCTION TABLE. He rolls a 3. The amulet does not operate and is destroyed.
On the next turn, the Giant wins initiative. He engages Lute, then pushes him back one hex. Lute makes his roll against DX to avoid being knocked down by the Giant and wins the roll to determine who acts first (since both of their DX's are the same). Lute knows he may not survive even one blow from his powerful opponent. In desperation he grabs one of the amulets from around his neck and throws it at the Giant. Treating it just like a thrown weapon, he subtracts 1 from his DX and rolls the dice. He hits his foe on a roll of 6. The Giant slumps to the ground dead and Lute takes 1 die of damage from the burst of magical energy.
After this ordeal Lute manages to get 5 days of consecutive rest before encountering a Fighter. The fighter's NEGOTIATION rating is 3, so Lute decides to negotiate hoping to salvage another days rest. Lute rolls an 11 on the NEGOTIATION TABLE. The Fighter flees in the face of Lute's bold threats. So with these 6 days of rest, Lute adds 3 to his ST and can save his EXTRA-HEALING amulet for later use.
Lute continues on and after some time, finds a REVEAL X amulet. Among the amulets he carries is the X-3 amulet so he decides to reveal it. He turns over the ability counter for X-3 and sees it is NO ABILITY. He discards both amulets and goes on his way. He carries one other 'X' amulet and being near the exit hex, he decides to try to leave the Valley. He turns over the ability counter for the 'X' amulet he carries. It is DEFEAT. The amulet vanishes in a thundering flash and Lute takes 1 die of damage from the blast.
Some time later Lute, badly injured, yields to the temptation of trying another 'X' amulet at the door. He carries two X's among his amulets. He knows that if the amulet he tries is not RETURN he is doomed. But he can't last much longer in the valley and chooses one. He turns over the ability counter and reveals its power--RETURN. Lute has survived, and returns home with a story far stronger than any his famous father has ever been able to tell.
18.0 Fantasy Master's Note
Experienced game masters of THE FANTASY TRIP, Fantasy Masters, will have noticed the introduction of some material in MASTER OF THE AMULETS that is not totally consistent with TFT rules modules.
In the development of a fun Microquest it is sometimes necessary to 'fudge' a few rules. This allows those who never go beyond Microquest play with MELEE and WIZARD to add to their adventures in some interesting ways.
The experienced Fantasy Master can regard these rules differences as variant material. They may choose to ignore these differences when incorporating MASTER OF THE AMULETS material into their own campaigns. This is the preferred method of TFT 'purists' who wish to take maximum advantage of TFT's rules consistency.
Or, you may 'pick-and-choose' the portions of variant material you find most valuable for inclusion in your own campaign. While variant material is not 'official' you are encouraged to use it, or not, in the way you deem fit. After all, it's your money, your campaign and your fun!
Based on response of Fantasy Masters to Microquest variant material, Metagaming will evaluate variant rules for possible future inclusion in the core TFT rules modules.
INTERPLAY: The Metagamer Dialogues will keep you posted on the status of TFT rules evolution. The Fantasy Master's Guild will allow you to actively participate in the development and evolution of TFT.
We hope you enjoy this Microquest. Let us know what you think.
GOOD GAMING!
Encounter Tables
ENCOUNTER TABLE
Roll two dice. The first die indicates the row and the second die the column. What your party encounters is at this row/column intersection. For example, a roll of 4 and 3 indicates 'OGRE-4'.
The number after creatures is their column reaction value for negotiation, as found on the NEGOTIATION TABLE. The Negotiation Values for Wizards and Fighters are found on their respective tables.
Reference the NUMBER ENCOUNTERED TABLE to find how many creatures you meet.
Treat a WIZARD result as a FIGHTER if using only MELEE rules.
| Row (die 1) | Col 1 | Col 2 | Col 3 | Col 4 | Col 5 | Col 6 |
|---|---|---|---|---|---|---|
| 1 | SM. DRAGON-5 | WOLF-3 | FIGHTER | FIGHTER | FIGHTER | FIGHTER |
| 2 | GARGOYLE-5 | TROLL-5 | FIGHTER | FIGHTER | FIGHTER | FIGHTER |
| 3 | GT. SNAKE-6 | TROLL-6 | FIGHTER | FIGHTER | WIZARD | WIZARD |
| 4 | GT. SNAKE-5 | OGRE-5 | OGRE-4 | OGRE-6 | WIZARD | WIZARD |
| 5 | GARGOYLE-3 | GIANT-3 | WOLF-6 | WOLF-5 | WOLF-4 | BEAR-4 |
| 6 | LG. DRAGON-6 | GIANT-4 | WIZARD | WIZARD | WIZARD | BEAR-5 |
NUMBER ENCOUNTERED TABLE
Find what you encountered. Read across to the column corresponding to the number of characters in your party. This value is the number of creatures you encounter.
For example, if you encounter Ogres and there are five in your party then threre are three Ogres.
Creatures are all the same, as per their values on the CREATURE TABLE. Fighters and Wizards are as detemined on their respective tables.
For variety players may mix Fighters and Wizards encountered. For Example, if Fighters are encountered every second or third enemy might be a Wizard and vice versa.
[Table layout: the printed heading reads "IF PARTY SIZE IS" over columns 1 to 6, so columns are party sizes.]
| Creature Encountered | Party 1 | Party 2 | Party 3 | Party 4 | Party 5 | Party 6 |
|---|---|---|---|---|---|---|
| LG. Dragon | 1 | 1 | 1 | 1 | 2 | 2 |
| SM. Dragon | 1 | 1 | 1 | 2 | 2 | 2 |
| Troll | 1 | 1 | 1 | 2 | 2 | 3 |
| Giant | 1 | 1 | 1 | 2 | 2 | 2 |
| Bear | 1 | 1 | 2 | 2 | 2 | 3 |
| Ogre | 1 | 1 | 2 | 2 | 3 | 3 |
| Gargoyle | 1 | 2 | 2 | 3 | 3 | 4 |
| GT. Snake | 1 | 2 | 3 | 4 | 5 | 6 |
| Wolf | 1 | 2 | 3 | 4 | 6 | 7 |
| Fighter | 1 | 2 | 3 | 4 | 5 | 6 |
| Wizard | 1 | 2 | 3 | 4 | 5 | 6 |
[Illustration: a fighter figure.]
Terrain Key
| Type | Name | Cost |
|---|---|---|
| Clear | CLEAR | 1 |
| Rough | ROUGH | 2 |
| Hills | HILLS | 2 |
| Forest | FOREST | 2 |
| Mountain | MOUNTAIN | 3 |
| Swamp | SWAMP | 3 (players' MA=4 when on MELEE map) |
| River | RIVER | IMPASSABLE |
| Bridge | BRIDGE | NO COST |
| X-hex | X-HEX | NOT APPLICABLE |
| Enter hex | ENTER HEX | NOT APPLICABLE |
| Exit hex | EXIT HEX | NOT APPLICABLE |
[Key illustrations for each terrain type are omitted; the type column names the hex.]
Creature Table
| Creature | ST | DX | IQ | MA | Armor | Damage |
|---|---|---|---|---|---|---|
| WOLF | 10 | 14 | 6 | 12 | 1 hit | bite: 1+1 |
| GT. SNAKE | 12 | 12 | 4 | 6 | none | bite: 1+1 |
| GARGOYLE | 20 | 11 | 8 | 8/16 | 3 hits | fist: 2 |
| OGRE | 25 | 10 | 8 | 8 | 1 hit | club: 2 |
| BEAR | 30 | 11 | 6 | 8 | 2 hits | claws: 2+2 |
| TROLL | 30 | 11 | 8 | 10 | none* | claws: 3 |
| SERPENT | 30 | 11 | 6 | 8 | 2 hits | tentacles: 1, up to 6 attacks/turn |
| GIANT | 30 | 9 | 8 | 10 | none | club: 3+3 or hands: 2-1 |
| SM. DRAGON | 30 | 13 | 16 | 6/16 | 3 hits | breath: 2 AND claws: 2-2 (AND tail) |
| LG. DRAGON | 60 | 14 | 20 | 8/20 | 5 hits | breath: 3 AND claws: 2 (AND tail) |
NOTE: DX-3 for opponents fighting snake.
REGENERATION: Trolls have the unique ability of gaining back lost or damaged body parts. After each turn roll 1 die and add the result to the troll's ST. The Troll cannot exceed his original ST. Once it's ST drops to zero the Troll cannot regenerate and is considered dead.
Wizard Table
When the ENCOUNTER TABLE indicates WIZARD or you use the FRIEND amulet, roll 3 dice and consult this table. Each Wizard has all IQ-8 spells in addition to those listed.
If more than one Wizard is encountered, as per the NUMBER ENCOUNTERED TABLE, all may be considered the same or you may roll for each one individually.
To determine the Negotiation value for the Wizard(s) roll one die.
| Die Roll | Wizard Data and Spells |
|---|---|
| 3-4 | ST=15 DX=14 IQ=16. Aid, shock shield, control animal, illusion, fireball, 3-hex shadow, flight, iron flesh, great rope, dragon. |
| 5-6 | ST=14 DX=13 IQ=13. Clumsiness, illusion, fireball, blast, break weapon, gargoyle, stop. |
| 7-8 | ST=12 DX=11 IQ=11. Wolf, trip, illusion, rope, control animal. |
| 9-10 | ST=12 DX=12 IQ=9. Wolf, clumsiness, avert. |
| 11-12 | ST=12 DX=12 IQ=8. All IQ-8 spells. |
| 13-14 | ST=11 DX=11 IQ=12. Wolf, shock shield, illusion, invisibility, create wall, freeze. |
| 15-16 | ST=15 DX=12 IQ=14. Avert, fire, dazzle, rope, 3-hex shadow, slippery floor, giant, lightning. |
| 17-18 | ST=15 DX=15 IQ=15. Trip, illusion, invisibility, gargoyle, lightning, spell shield, teleport, iron flesh, 7-hex shadow. |
Amulet Code Table
The code regulating use of each amulet follows that amulet's name. The letter to the left corresponds to the letter on each amulet counter.
D--player's discretion H--counts as held N--doesn't count as held O--played once R--remains in game T--takes immediate effect
A) ATTACK--N, O, T B) BRIDGE--D, N, R C) BURDEN--N, R, T D) DRAIN--T E) ENCHANT--D, H, R F) FRIEND--D, H, R G) FLY--D, H, R H) HEALING--D, N, O I) INVISIBILITY--D, H, O J) EXTRA-HEALING--D, N, O K) FUMBLING--N, R, T L) LOSE--N, O, T M) REMOVE CURSE--D, N, O N) REMOVE CURSE--D, N, O O) REVEAL X--D, N, O P) REVEAL X--D, N, O Q) REVEAL X--D, N, O R) TELEPORT--D, H, O X) CANCEL--N, O, T X) DEFEAT--D, H, O X) RETURN--D, H X) NO ABILITY (3)
Amulet Malfunction Table
Roll 1 die on this table when attempting to activate an amulet while carrying more than four. There are no adjustments for IQ if not using WIZARD.
| Die Roll | Result |
|---|---|
| 1-2 | operates properly |
| 3 | does not operate and is destroyed |
| 4-6 | does not operate, is destroyed and each player takes 1 die damage |
ADJUSTMENTS (for character's IQ):
- IQ=3-8: add 1 to roll
- IQ=9-12: no adjustment
- IQ=13-15: subtract 1 from roll
- IQ=16-18: subtract 2 from roll
Monster Experience Table
| Creature | Experience | Creature | Experience |
|---|---|---|---|
| GT. SNAKE | 15 | OGRE | 30 |
| HOBGOBLIN | 20 | GARGOYLE | 40 |
| WOLF | 20 | BEAR | 50 |
| FIGHTER | 25 | GIANT | 60 |
| SERPENT | 80 | TROLL | 70 |
| SM. DRAGON | 100 | LG. DRAGON | 200 |
| WIZARD | 25 |
Amulet Experience Table
| Amulets Found | Experience |
|---|---|
| 24 | 50 |
| 21-23 | 75 |
| 16-20 | 100 |
| 11-15 | 125 |
| 6-10 | 150 |
| 1-5 | 200 |
Treasure Table
| Die Roll (3 dice) | Treasure |
|---|---|
| 3 | 1-6 gems |
| 4 | 1-3 gems |
| 5 | 1-2 gems |
| 6 | 1 gem |
| 7 | 1-2 gold bars |
| 8 | 1-2 gold bars |
| 9 | 1 gold bar |
| 10 | 1 gold bar |
| 11 | 1 gold bar |
| 12 | 1 gold bar |
| 13 | 1-2 gold bars |
| 14 | 1-2 gold bars |
| 15 | 1 gem |
| 16 | 1-2 gems |
| 17 | 1-3 gems |
| 18 | 1-6 gems |
1 gold bar and 1 gem are equal in value. (About 200 silver pieces.)
Roll twice on the table for small dragons.
Roll three times on the table for large dragons.
Do not roll for wolf, snake or bear--these creatures do not hoard treasure.
Fighter Table
When the ENCOUNTER TABLE calls for a FIGHTER or you use the FRIEND amulet, roll 3 dice to determine which fighter is encountered. Each fighter has a shield, if any, and the first named weapon ready. All, except #4, #9 and #12, carry one dagger.
| Die Roll | Fighter |
|---|---|
| 3 | Human: ST15, DX15, adjDX11, IQ9, MA6. Chainmail, 2-handed sword, mace. |
| 4 | Human: ST12, DX16, IQ10, MA10. No armor, heavy crossbow, broadsword, main-gauche. |
| 5 | Orc: ST15, DX14, adjDX12, IQ10, MA8. Leather armor, pike axe, battleaxe. |
| 6 | Dwarf: ST11, DX16, adjDX12, IQ8, MA6. Chainmail, small shield, small axe. |
| 7 | Dwarf: ST15, DX11, IQ8, MA10. No armor, small shield, battleaxe. |
| 8 | Dwarf: ST12, DX14, adjDX12, IQ8, MA8. Leather armor, spear, hammer. |
| 9 | Hobgoblin: ST9, DX15, IQ8, MA10. No armor, javelin, rapier, main-gauche. |
| 10 | Hobgoblin: ST14, DX10, IQ8, MA10. No armor, small shield, morningstar. |
| 11 | Elf: ST12, DX12, adjDX10, IQ8, MA8. Leather armor, small shield, broadsword. |
| 12 | Elf: ST12, DX14, IQ10, MA10. No armor, lt. crossbow, broadsword, maingauche. |
| 13 | Hobgoblin: ST11, DX13, adjDX11, IQ8, MA8. Leather armor, spear, small axe. |
| 14 | Halfling: ST10, DX16, adjDX14, IQ12, MA10. Leather armor, horsebow, cutlass. |
| 15 | Halfling: ST11, DX17, adjDX15, IQ8, MA8. Leather armor, small bow, shortsword. |
| 16 | Orc: ST13, DX14, adjDX12, IQ11, MA8. Leather armor, halberd, morningstar. |
| 17 | Human: ST15, DX15, adjDX11, IQ11, MA6. Chainmail, battleaxe, morningstar. |
| 18 | Orc: ST14, DX18, adjDX12, IQ9, MA4. Plate armor, morningstar, 2-handed sword. |