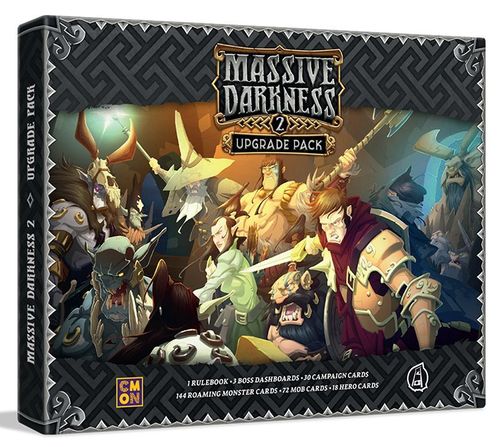
Massive Darkness 2: Massive Darkness Upgrade Pack
Massive Darkness 2: Massive Darkness Upgrade Pack Rulebook
Table of Contents
Table of Contents
- Gameplay
- Introduction
- Quest A: Scorched Earth
- Choose Your Path
- Quest B: Black Widow
- Quest C: The Immortal's Downfall
- Quest D: The Fiend's Treasure
- Treading the Path
- Quest E: Goblin War Drums
- Quest F: The Chosen One
- Quest G: Sparks in the Dark
- Quest H: Maze of Darkness
- Quest I: Big Game Hunting
- Quest J: The Heart of the Darkness
- Cyclopes Quest: Double Trouble
- Hellephant Quest: The Desolation of the Hellephant
- A Quest of Crystal & Lava: Additional Concepts
- Quest A: Crystal Cave
- Quest B (Crystal & Lava): Face the Heat
- Quest C (Crystal & Lava): Lost in the Music
- Quest D (Crystal & Lava): The Lava Bridge
- Quest E (Crystal & Lava): The Fire Circle
- Quest F (Crystal & Lava): Stairway to Hell
Gameplay
This rulebook contains versions of the Quests from the original Massive Darkness. All Quests in this rulebook can be played as one-shot Quests using the regular Massive Darkness 2: Hellscape rules. There are also 2 brand-new Quests, featuring Boss Fights against the Hellephant and the Cyclopes Duo.
Heroes
To include the Heroes from the original Massive Darkness, simply add them to the pool of available Heroes that can be chosen. Some Heroes have double-sided cards, with one side featuring a Class from Massive Darkness 2: Hellscape and the other featuring one of the Classes introduced in Massive Darkness 2 expansions.
Roaming Monsters
Roaming Monsters and Agents from the original Massive Darkness may be used as Roaming Monsters in Massive Darkness 2: Hellscape. To include them in the game, simply shuffle these cards into their corresponding decks.
Mobs
Mobs from the original Massive Darkness may be used as Mobs in Massive Darkness 2: Hellscape (the formerly called Bosses are now Leaders). To include them in the game, simply shuffle these cards into their corresponding decks.
Note: A Mob can't have more than 6 Minions at a time. Thus, even if there are more than enough miniatures of a given type (e.g. another Goblin Archer Mob), players shouldn't spawn more than 6 Minions.
Quests: Special Rules
For the Quests of this Pack (including when playing in Campaign Mode), players should add to their decks at least the following Enemies:
- The 4 Roaming Monsters from Massive Darkness 2: Hellscape (see the Lyidan exception note below).
- The 9 Roaming Monsters from the original Massive Darkness (includes the 3 Agents).
- The 8 Mobs from Massive Darkness 2: Hellscape.
- The 6 Mobs from the original Massive Darkness.
Players may add any other Mobs and Roaming Monsters from any other boxes and expansions as they wish.
Lyidan in Crystal and Lava Quests: The Tiles from Crystal and Lava have a unique distribution of Light and Shadow Zones that makes the Roaming Monster Lyidan, from Massive Darkness 2: Hellscape, not work as intended in certain cases. We recommend removing Lyidan from all Roaming Monsters decks when playing any Crystal and Lava Quest, including the Campaign.
Campaigns: There are 2 Campaigns in this book. The Prologue Campaign, which includes Quests from the original Massive Darkness, and the Crystal & Lava Campaign, which includes Quests from the original Crystal & Lava Campaign.
When playing any Campaign, players must use the setup and campaign rules as described in Massive Darkness 2: Heavenfall. Each Quest lists any specific changes, special rules, and campaign progression instructions.
Prologue Campaign Special Rules
Campaign Cards: The Prologue Campaign has its own deck of 28 Campaign cards, as indicated in their back.
Achievements: Use the following list of Achievements when playing the Prologue Campaign:
- Complete 3 Side Quests: Draw Campaign card 5.
- Interact with the Inventor Area: Draw Campaign card 6.
- Discard 5 Potion cards with different names at once, with no effect: Draw Campaign card 7.
- Kill an Agent Roaming Monster: Draw Campaign card 8.
- Lose the same Quest 2 times: Draw Campaign card 9. This Achievement may be accomplished at any moment, even out of the Town Phase.
Introduction
Draw Campaign cards 1, 2, and 3. During Setup of the first Quest, choose 1 of the 3 rings (Campaign cards 1, 2, 3) and give that ring to 1 of the Heroes as an additional starting item. Remove the other rings from the game.
Prologue Campaign flow chart: A, then Choose order of play (B, C, D in any order), then E and F, then G and H, then I, then J.
Quest A: Scorched Earth
Guile, the Tavern Keep, has been searching for adventurers around town for a mission. Monsters have been reported emerging from a nearby dungeon and the local townsfolk lack the means to defend themselves. Guile is willing to hand out a reward to any Heroes able to deal with this problem and defend the land!
Tiles needed (from MD1): 2R, 4R, 8R, 9V.
Quest Objectives
Complete the objectives in order:
- Find the Artifacts: Find and collect the 2 Artifact tokens.
- Destroy the Evil Nest: Reach the Library token Zone with the Heroes holding the 2 Artifact tokens. End the round there with no Enemies inside the Chamber.
Quest Special Rules
- Special Setup: Randomly place 2 Artifact tokens and 1 Lair token facedown in the Zones showing facedown tokens. Facedown tokens may be collected by spending 1 MP. When this happens, they are flipped.
- Dead Ends (Lair tokens): When a Hero collects a Lair token, they gain 5 XP. Then, the token is discarded.
- Artifacts: When a Hero collects an Artifact token, they keep it in their Inventory. It may be traded as an item.
Campaign Changes
- Dead Ends (Lair tokens): Heroes do not gain XP when collecting Lair tokens.
- Side Quest: No Stone Left Unturned. This Dungeon seems to have been unchecked by adventurers for quite a while. Maybe the Heroes can find some more loot!
- Condition: Collect all Lair tokens.
- Reward (only if players win): Unlock Campaign card 10.
Setup Components
- Hero Starting Zone
- Starting Mob Zone x2
- Spawn Token x6
- Closed Door x7
- Forge Token x1
- Regular Chest Token x1
- Greater Chest Token x1
- Roaming Monster Portal Token x1
- Portal Token (up to x2)
- Pillar Token x2
- Spike Trap Token x2
- Bridge x2
Required tokens from Massive Darkness 1: Artifact x2, Lair x2, Library x1.
Loot tokens are placed according to the number of Heroes: 1-2 Heroes: 1 loot token; 3-4 Heroes: 2 loot tokens; 5-6 Heroes: 3 loot tokens.
Quest A: Campaign Progression
Guile is not only the Tavern Keep, but was also the Town Librarian some years ago. He checks his books and tomes and finds the artifact in an ancient entry: This artifact is indeed connected to the Darkness. Only a Lightbringer could have had the power to destroy an evil nest as the heroes just did. Could this mean...
- Reward: Draw Campaign card 11.
- Distribute Experience amongst Heroes as they wish:
- 1-2 Heroes: 3 XP
- 3-4 Heroes: 7 XP
- 5-6 Heroes: 11 XP
- Update Treasure bag: Add 3 Rare tokens.
Next Quest: As the heroes realize that they may be the chosen Lightbringers, many more questions and doubts arise. What is this Darkness that must be dealt with? How can the party handle such a task? Some fieldwork and investigation are required.
Go to Choose Your Path, below.
Choose Your Path
Word spreads around. Now hailed by the townsfolk as Lightbringers, the party must help clear the realm of the three horrific monsters from the Darkness that have been roaming unchecked.
Players collectively choose the order in which to complete the following 3 Quests:
- Black Widow (Quest B): Near the old witch's house, there is a Dungeon where a Giant Spider has built its lair.
- The Immortal's Downfall (Quest C): The Immortal Troll is notorious, well, for not dying! This ancient servant of Darkness is resilient beyond measure.
- The Fiend's Treasure (Quest D): An adventurous Wizard managed to trap a Hellhound. It is now time for the Lightbringers to finish the job.
After completing all 3 Quests, go to Treading the Path (page 8).
Quest B: Black Widow
The local witch and potion master has been having problems getting to her herbs and mushrooms. A giant Black Widow spider has built its nest in the surroundings and won't let anything in or out...
Tiles needed (from MD1): 3V, 4R, 6R.
Quest B: Objectives
Complete the objectives in order:
- Cleanse the surroundings: Destroy all 3 Spider Nests.
- Kill the Black Widow: Kill the Giant Spider.
Quest B: Special Rules
- Special Setup: Spawn a Level 5 Giant Spider Roaming Monster in the indicated Zone (remove all other Giant Spider cards from the other Roaming Monster decks).
- Spider Nests: Spider Nests are represented by Lair tokens. Any Hero may spend 1 action in a Zone with a Lair token to destroy it. When any Lair token is destroyed, discard it and each Hero gains 5 XP.
- Wary Spider: The Spider may only be attacked or targeted by abilities and effects after all 3 Spider Nests have been destroyed.
- Spider Movement: Every round during the Enemy Phase, instead of its regular activation, the Giant Spider attacks the closest Hero, if possible, and then moves 1 Zone toward the Exit ignoring Heroes, abilities, and effects. The Giant Spider can't be moved by any effects or abilities, and is not affected by [blue token icon] tokens (discard the tokens with no effect).
- Spider Snack: When the Giant Spider moves, any Hero in its Zone that has a [blue token icon] token or is KO'd is moved along with it, ignoring Reaction Damage.
- Locked Doors: If an Enemy is in a situation where they need to move toward a Hero but they don't have an open path to any Hero (because of closed doors), that Enemy does not move.
- The Spider Escapes: When the Spider moves out of the Exit Zone, the Quest ends in defeat.
Quest B: Setup Components
- Hero Starting Zone
- Closed Door x5
- Spawn Token x4
- Regular Chest Token x2
- Forge Token x1
- Roaming Monster Portal Token x1
- Portal Token (up to x2)
- Pillar Token x1
- Bridge x2
Required elements from Massive Darkness 1: Giant Spider, Lair x3, Exit x1.
Loot tokens are placed according to the number of Heroes: 1-2 Heroes: 1 loot token; 3-4 Heroes: 2 loot tokens; 5-6 Heroes: 3 loot tokens.
Quest B: Campaign Changes
- Special Setup: Spawn a Giant Spider Roaming Monster 2 tiers above the current Dungeon Level instead of a Level 5 Giant Spider (still remove the other cards from the decks).
- Spider Nests (Lair tokens): Each Hero gains 2 XP, instead.
Side Quest: If the heroes are fast enough, they might capture this creature and free it from the corrupting influence of Darkness.
- Condition: Kill the Black Widow before the end of round 9.
- Reward (only if you win): Draw Campaign card 12.
Quest B: Campaign Progression
The witch and the townsfolk alike are appreciative of the Lightbringers having dealt with this menace. The witch decides to give the heroes a small gift.
- Reward: Draw Campaign card 13.
- Distribute Experience amongst Heroes as they wish:
- 1-2 Heroes: 3 XP
- 3-4 Heroes: 7 XP
- 5-6 Heroes: 11 XP
- Update Treasure bag: Remove 3 Common tokens and add 1 Epic token.
Next Quest: Go to Choose Your Path (page 4).
Quest C: The Immortal's Downfall
The Town's Blacksmith is grieving. The Immortal killed his brother, and no foul deed should go unpunished. He implores the Lightbringers to seek revenge, not just for his brother, but for all the townsfolk that have had to bury their loved ones because of this menace.
Tiles needed (from MD1): 1R, 2V, 6V, 7R.
Quest C: Objectives
Complete the objectives in order:
- Fireworks: Lure the Immortal to the bridge using Fireworks.
- You Shall Not Pass: Destroy the Pillars holding the bridge while the Immortal is standing on it.
(Continued on the next page.)
Quest C: Setup Components
- Hero Starting Zone
- Regular Chest Token x1
- Starting Mob Zone x1
- Spawn Token x4
- Closed Door x7
- Open Door x2
- Forge Token x1
- Roaming Monster Portal Token x1
- Portal Token (up to x2)
- Fountain Token x1
- Bear Trap Token x1
- Spike Trap Token x2
- Pillar Token x2
- Bridge x2
Required elements from Massive Darkness 1: High Troll, Library x1, Artifact x2, Lair x1.
Loot tokens are placed according to the number of Heroes: 1-2 Heroes: 1 loot token; 3-4 Heroes: 2 loot tokens; 5-6 Heroes: 3 loot tokens.
Quest C: Quest Special Rules
-
Special Setup: Spawn a Level 5 Goblin Archers Mob on the Library token and give it a Level 5 Dragon Crossbow from the Mob Item card deck instead of drawing a random weapon. Spawn a Level 5 High Troll Roaming Monster in the indicated Zone (remove all other Goblin Archers and High Troll cards from the other Mob and Roaming Monster decks).
-
Goblin Guards: The Goblin Archers that start on the Library Token do not Move during their activations. If they can't attack, they do nothing.
-
Firework Caches: Artifact or Library tokens can be collected by spending 1 MP. When they are collected, discard the token, the Hero that collected it gains 5 XP, and give them a number of Fireworks based on the token type:
- Artifact token: 1 Firework
- Library token: 3 Fireworks
-
Fireworks: Use Objective tokens to represent Fireworks. Fireworks may be traded as items. Fireworks may be placed in a Hero's Zone by spending 1 MP. At the end of each round, discard any Fireworks in the Dungeon.
-
Immortal: The High Troll that starts in the Dungeon is the Immortal. The Immortal cannot be attacked or targeted by abilities and effects.
-
Immortal Activation: During the Enemy Phase, instead of its regular activation, the Immortal moves 2 Zones toward the Lair token Zone. However, if there are any Fireworks in its LoS, it moves toward those Zones instead (players choose in case the Immortal sees more than 1 Firework).
During the Immortal's Activation, check in each Zone it passes through, including its starting Zone:
Quest C: Campaign Changes
- Special Setup: Spawn a Goblin Archers Mob 1 tier above the current Dungeon Level instead of a Level 5 Goblin Archers. Give it a random Mob Item card of the same tier (still remove the other cards from the decks).
- Firework Caches: Heroes do not gain XP when picking up Firework caches.
Side Quest: The heroes should try to take the fireworks to town and disassemble them. Maybe they can reproduce these contraptions.
- Condition: Win the Quest holding at least 1 Firework.
- Reward (only if you win): Draw Campaign card 14.
Quest C: Campaign Progression
Rejoice! The Immortal has been permanently defeated! Or so we hope. "My brother can finally rest in peace", says the Blacksmith, before handing you a hefty reward.
- Reward: Draw Campaign card 15.
- Distribute Experience amongst Heroes as they wish:
- 1-2 Heroes: 3 XP
- 3-4 Heroes: 7 XP
- 5-6 Heroes: 11 XP
- Update Treasure bag: Remove 3 Common tokens and add 1 Epic token.
Next Quest: Go to Choose Your Path (page 4).
Quest D: The Fiend's Treasure
The Wizard from the East Tower locked a Hellhound in a room inside the dungeon when exploring there but he wasn't able to kill it. He needs to keep exploring the Dungeon in his pursuit for deeper magical knowledge, and has asked the Lightbringers to help by killing the Hellhound.
Tiles needed (from MD1): 1V, 3R, 5R, 7R, 9R.
Quest D: Objectives
Complete the objectives in order:
- Hidden Keys: Find the 2 Keys.
- Unleash the Monster: Use the Keys to open the door to the last Chamber.
- Kill the Fiend: Kill the locked Hellhound.
(Continued on the next page.)
Quest D: Setup Components
- Hero Starting Zone
- Starting Mob Zone x2
- Spawn Token x6
- Closed Door x12
- Locked Door x1
- Forge Token x1
- Regular Chest Token x1
- Greater Chest Token x1
- Pillar Token x2
- Bear Trap Token x1
- Roaming Monster Portal Token x1
- Portal Token (up to x2)
- Spike Trap Token x2
- Fountain Token x2
- Bridge x2
Required elements from Massive Darkness 1: Artifact x2, Lair x3, Hellhound.
Loot tokens are placed according to the number of Heroes: 1-2 Heroes: 1 loot token; 3-4 Heroes: 2 loot tokens; 5-6 Heroes: 3 loot tokens.
Quest D: Quest Special Rules
- Special Setup: Spawn a Level 5 Hellhound Roaming Monster in the indicated Zone (remove all other Hellhound cards from the other Roaming Monster decks). Randomly place 1 Artifact token and 3 Lair tokens facedown in the Zones showing facedown tokens. Facedown tokens maybe picked up by interacting with them. When this happens, they are flipped.
- Locked Hellhound: The Chamber to the Hellhound is locked. It can only be opened once both Keys have been picked up. The Hellhound does not activate until its Chamber has been opened. The Hellhound cannot be attacked or targeted by abilities or effects until the Chamber to the Hellhound is opened.
- Dead Ends: A Hero that picks up a Lair token gains 5 XP. Then, discard the token.
- Keys: Keys are represented by Artifact tokens. They can be collected by spending 1 MP (there is 1 faceup and 1 facedown). Once both Keys have been collected, the special door to the Hellhound's Chamber can be opened by any Hero.
Quest D: Campaign Changes
- Special Setup: Spawn a Hellhound Roaming Monster 2 tiers above the current Dungeon Level instead of a Level 5 Hellhound (still remove the other cards from the decks).
- Dead Ends: Heroes do not gain XP when picking up Lair tokens.
Side Quest: Taking the extra time to study the effects of the Hellhound's lair and its dark magic may prove to be useful to the Heroes.
- Condition: Pick up all Lair tokens.
- Reward (only if you win): Draw Campaign card 16.
Quest D: Campaign Progression
Both the townsfolk and the Wizard are impressed by the Lightbringer's achievements. This is a true testament of their capabilities. The Wizard hands out a token of his appreciation.
- Reward: Draw Campaign card 17.
- Distribute Experience amongst Heroes as they wish:
- 1-2 Heroes: 3 XP
- 3-4 Heroes: 7 XP
- 5-6 Heroes: 11 XP
- Update Treasure bag: Remove 3 Common tokens and add 1 Epic token.
Next Quest: Go to Choose Your Path (page 4).
Treading the Path
One of the Lightbringers wakes up sweating. They sensed the presence of a powerful demon, apparently inside a maze of sorts. Worst yet, the Lightbringer realizes that a connection was made and the demon was able to feel their energy as well. After discussing amongst themselves, the Lightbringers agree that the most likely place for the demon to be is in the ancient labyrinth outside town. The Heroes know this won't be an easy task, and they must be well equipped for this venture. Luckily, Guile has found a tome describing the deeds of two ancient Lightbringers whom in times of old were able to banish the Darkness. He says that the paths of all Lightbringers must eventually cross, but there isn't enough time to tread them all! Choose one ancient Lightbringer and re-do their path.
Players collectively choose which of the following paths they will take, which determines their next 2 Quests:
- The path of King Joseph the Small, who decided to leave his throne in order to take the burden of fighting the Darkness on his own (Go to Quest E, page 9).
- The path of Sir Naldor, who joined the ranks against the Darkness as a testament of his own worth and love for a princess, his one true love (Go to Quest F, page 10).
Quest E: Goblin War Drums
King Joseph's first adventure was one of great risk but one that had to be done: To explore the evil dwelling that continuously reverberated the thunderous sound of war drums. This King, in his day, managed to send the drums back into the dark deep...
Tiles needed (from MD1): 1V, 6R, 7V, 8R.
Quest E: Objectives
Complete the objectives in order:
- Kill the Guard: Kill the Monster Sentry.
- Escape the Crumbling Dungeon: Escape through the Exit with all Heroes before the Dungeon caves in (by spending 1 MP on the Exit Zone).
Quest E: Quest Special Rules
- Special Setup: Place Hourglass tokens on the 4th, 6th, and 9th spaces of the Darkness track. Also, place a token on the arrow at the end of the track.
- Fateful Hour: When the Darkness track flips to the back side, place the Hourglass token that was on the arrow on the second space.
- Crumbling Dungeon: Every time the Darkness track reaches a number with an Hourglass token, discard it and remove from the map the Tile furthest from the Exit, killing every Enemy and Hero there. No XP is gained from those deaths. The Tiles are destroyed in the following order:
- Round 4: 6R
- Round 6: 7V
- Round 9: 8R
- Round 11: 1V
- Leave No One Behind: If any Hero is killed by the crumbling Tiles, the Quest ends in defeat.
- Monster Sentry: When any Hero first moves into the Zone with the Objective token, discard it and spawn a Level 5 Roaming Monster on the Roaming Monster Portal. This is the Monster Sentry.
Quest E: Campaign Changes
- Crumbling Dungeon: When a Tile is removed, each Hero gains 7 XP.
- Monster Sentry: Spawn a Roaming Monster of 1 tier above the starting Dungeon Level instead of a Level 5 Roaming Monster (players may place an Hourglass token next to the corresponding Roaming Monster deck in case they forget the starting Dungeon Level).
Side Quest: If the Lightbringers manage to kill the sentry and run away fast enough, they may have time to look for secret compartments on their way out.
- Condition: Escape before the end of round 9.
- Reward (only if you win): Draw Campaign card 18.
Quest E: Campaign Progression
The heroes find the King's crown! He truly was here! Why would he have left such an artifact behind? The heroes must keep pressing on with their journey if they wish to empower themselves.
- Reward: Draw Campaign card 19.
- Distribute Experience amongst Heroes as they wish:
- 1-2 Heroes: 13 XP
- 3-4 Heroes: 17 XP
- 5-6 Heroes: 21 XP
- Update Treasure bag: Remove 1 Common token, add 3 Epic tokens and 2 Legendary tokens.
Next Quest: Sparks in the Dark (Quest G, page 11).
Quest E: Setup Components
- Hero Starting Zone
- Objective Token x4
- Spawn Token x5
- Starting Mob Zone x1
- Regular Chest Token x3
- Greater Chest Token x3
- Closed Door x12
- Fountain Token x2
- Roaming Monster Portal Token x1
- Portal Token (up to x2)
- Pillar Token x2
- Spike Trap Token x2
- Forge Token x2
- Bridge x2
Required tokens from Massive Darkness 1: Exit x1.
Loot tokens are placed according to the number of Heroes: 1-2 Heroes: 1 loot token; 3-4 Heroes: 2 loot tokens; 5-6 Heroes: 3 loot tokens.
Quest F: The Chosen One
More visions! One of the Heroes has dreamt of the journeys of Sir Naldor. In the dreams, they are guided to a dungeon that was once explored by the valiant knight. The Lightbringer is told that they must hold a long-lost artifact and protect it from the creeping Darkness.
Tiles needed (from MD1): 5V, 6R, 7V, 8V, 9V.
Quest F: Objectives
Complete the objectives in order:
- Assemble the Artifact: Collect all Artifact Pieces to assemble the Artifact.
- Kill the Guard: Kill the Monster Sentry.
- The Chosen One Escapes: The Chosen One leaves the Dungeon through the Exit while holding the Artifact (by spending 1 MP on the Exit Zone).
Quest F: Quest Special Rules
- The Chosen One: When the Quest starts, players choose 1 Hero to be the Chosen One. If the Chosen One is KO'd, the Quest ends in defeat.
- Artifact Pieces: The 3 Objective tokens represent the Pieces of the Artifact. Heroes collect these by spending 1 MP while standing in its Zone. A Hero who does so gains 5 XP. When any Hero has all 3 Pieces, replace them by the Artifact token. The Artifact and its Pieces can be traded as items.
- Monster Sentry: When any Hero has all 3 Artifact Pieces, spawn a Level 5 Roaming Monster on the Roaming Monster Portal. This is the Monster Sentry.
Quest F: Campaign Changes
- Artifact Pieces: Heroes do not gain XP when picking up Objective tokens.
- Monster Sentry: Spawn a Roaming Monster of the current Dungeon Level instead of a Level 5 Roaming Monster.
Side Quest: If the Chosen One is able to follow the exact same steps as the knight from their dream, they may be able to create a special bond.
- Condition: The Chosen One collects all Objective tokens.
- Reward (only if you win): Draw Campaign card 20.
Quest F: Campaign Progression
The Lightbringers were able to rebuild the pieces of what seems to be a helmet. Was this worn by the Sir Naldor during his adventures?
- Rewards: Draw Campaign card 21.
- Distribute Experience amongst Heroes as they wish:
- 1-2 Heroes: 3 XP
- 3-4 Heroes: 7 XP
- 5-6 Heroes: 11 XP
- Update Treasure bag: Remove 1 Common token, add 3 Epic tokens and 2 Legendary tokens.
Next Quest: Maze of Darkness (Quest H, page 12).
Quest F: Setup Components
- Hero Starting Zone
- Objective Token x3
- Spawn Token x5
- Starting Mob Zone x2
- Closed Door x9
- Fountain Token x2
- Forge Token x1
- Regular Chest Token x1
- Roaming Monster Portal Token x1
- Portal Token (up to x2)
- Pillar Token x2
- Bridge x2
Required tokens from Massive Darkness 1: Artifact x1 (not in the map), Exit x1.
Loot tokens are placed according to the number of Heroes: 1-2 Heroes: 1 loot token; 3-4 Heroes: 2 loot tokens; 5-6 Heroes: 3 loot tokens.
Quest G: Sparks in the Dark
It seems that the King found out that the agents of Darkness were stockpiling artifacts for some nefarious reason. This hoard might be the best place to find equipment for the ensuing battles.
Tiles needed (from MD1): 1R, 2R, 3V, 5V, 6V, 8V, 9R.
Quest G: Objectives
Complete the objectives in order:
- Open the Gates: Activate both levers to open the locked Exit Door (only 1 lever needs to be activated in Single Player game).
- Safe Escape: Escape through the Exit with all Heroes (by spending 1 MP on the Exit Zone).
Quest G: Quest Special Rules
- Levers and Locked Door: The Exit is a locked Chamber. To open the locked door (marked in yellow), the levers must be pulled. At the start of the round, if there is at least 1 Hero in each Lair token Zone, they are pulled and the locked door opens. Do not draw a door card when the locked door opens. When the levers are activated, each Hero gains 5 XP.
- Dungeon Keeper: When the locked door opens, spawn a Level 5 Roaming Monster in that Chamber. This is the Dungeon Keeper.
Quest G: Campaign Changes
- Levers and Locked Door: Each Hero gains 10 XP when the levers are activated, instead.
- Dungeon Keeper: Spawn 1 Roaming Monster of the current Dungeon Level instead of a Level 5 Roaming Monster.
Side Quest: If the Heroes manage to kill the Dungeon Keeper, it will definitely send a message to all evil doers.
- Condition: Kill the Dungeon Keeper.
- Reward (only if you win): Choose 1 Hero to immediately gain a Level 10 skill.
Quest G: Campaign Progression
The King's Armor! This is surely surprising. The Heroes are on the right track. Just a little further and they'll be able to fight and possibly finish off the Darkness.
- Reward: Draw Campaign card 22.
- Distribute Experience amongst Heroes as they wish:
- 1-2 Heroes: 13 XP
- 3-4 Heroes: 17 XP
- 5-6 Heroes: 21 XP
- Update Treasure bag: Remove 2 Rare tokens and add 1 Legendary token.
Next Quest: Big Game Hunting (Quest I, page 13).
Quest G: Setup Components
- Hero Starting Zone
- Forge Token x2
- Spawn Token x5
- Starting Mob Zone x1
- Closed Door x14
- Locked Door x1
- Fountain Token x3
- Regular Chest Token x5
- Greater Chest Token x2
- Roaming Monster Portal Token x1
- Portal Token (up to x2)
- Pillar Token x2
- Bear Trap Token x1
- Spike Trap Token x3
Required tokens from Massive Darkness 1: Lair x2, Exit x1.
Loot tokens are placed according to the number of Heroes: 1-2 Heroes: 1 loot token; 3-4 Heroes: 2 loot tokens; 5-6 Heroes: 3 loot tokens.
Quest H: Maze of Darkness
It seems that the forces of Darkness have become aware of the Heroes' meddling. Knowing that the Lightbringers are hoarding powerful artifacts to banish it forever, it has found a way to trick the Lightbringers into a trap! There is only one way out: To survive this battle and protect the chest full of artifacts!
Tiles needed (from MD1): 1R, 2V, 3R, 4V, 5R.
Quest H: Objectives
- Protect the Artifact: If there's an Enemy on the Artifact token at the start of the Enemy Phase, the Quest ends in defeat.
- Kill all Enemies: Once the Enemies stop spawning, kill all Enemies to win.
Quest H: Quest Special Rules
-
Special Setup: Place the Rare Treasure token that is usually added in the 4th round in the Treasure bag. When the Darkness track reaches the 4th round, simply do not add the Rare Treasure token that would usually be used (place an Hourglass token above the Rare Treasure icon on the Darkness track as a reminder). Add the Treasure tokens to the 6th and 8th round as usual.
Spawn 1 Mob at each of the 4 Portals. Place Treasure tokens from the bag on each of the 4 Chamber Zones of the central Tile (3R) according to the number of players:
- 1-2 Heroes: 1 Treasure token per Zone
- 3-4 Heroes: 2 Treasure tokens per Zone
- 5-6 Heroes: 3 Treasure tokens per Zone
Place Corruption tokens on the 2nd, 4th, 6th, and 8th spaces of the Darkness track. Also, place a Spawn token on the 3rd, 7th, and 9th spaces of the Darkness track.
-
No Extra Reinforcements: Ignore any Enemy abilities or effects that spawn extra Mobs or Roaming Monsters.
-
Waves of Enemies: For this Quest, ignore any spawns from the Darkness track. Instead, every time the Darkness track reaches a space with a token, discard that token and resolve the corresponding effect:
- Corruption token: Spawn 1 Roaming Monster on the Roaming Monster Portal. After that, swap the position of the Roaming Monster Portal with the next Portal clockwise. The Roaming Monster Portal switches to the following Tiles:
- Round 2: 1R
- Round 4: 5R
- Round 6: 4V
- Round 8: 2V
- Corruption token: Spawn 1 Roaming Monster on the Roaming Monster Portal. After that, swap the position of the Roaming Monster Portal with the next Portal clockwise. The Roaming Monster Portal switches to the following Tiles:
Quest H: Campaign Changes
- Special Setup and Waves of Enemies: Instead of Treasure tokens, place 1 Loot token on each of the 4 Chamber Zones, regardless of the Hero count.
Side Quest: Protecting the natural magic barriers that exist in the Maze is a sacred duty. Anyone who protects it shall be blessed in return.
- Condition: Keep at least 1 Magic Barrier from being destroyed (at least 1 must be standing when the players win).
- Reward (only if you win): Choose 1 Hero to immediately gain a Level 10 skill.
Quest H: Campaign Progression
As the Enemies dwindle and retreat, the Heroes open the chest they were protecting and find inside the legendary armor used by the Knight! They can now press on.
- Reward: Draw Campaign card 23.
- Distribute Experience amongst Heroes as they wish:
- 1-2 Heroes: 3 XP
- 3-4 Heroes: 7 XP
- 5-6 Heroes: 11 XP
- Update Treasure bag: Remove 2 Rare tokens and add 1 Legendary token.
Next Quest: Big Game Hunting (Quest I, page 13).
Quest H: Setup Components
- Hero Starting Zone
- Objective Tokens x4
- Open Door x2
- Forge Token x1
- Fountain Token x2
- Roaming Monster Portal Token x1
- Portal Token x3
Required tokens from Massive Darkness 1: Artifact x1.
Quest I: Big Game Hunting
As the Lightbringers approach the place where the first ever source of the Darkness manifested, they realize that both Knight and King had met! They had joined forces in this place to battle the overwhelming assault of monsters. Unfortunately, they both perished. Now is the time to finish what they started.
Tiles needed (from MD1): 1R, 5V, 6V, 7R, 8V, 9R.
Quest I: Objective
Slay the Monsters: Destroy the Pillars that lead to the Enforcers and kill all 3 of these Roaming Monsters.
Quest I: Quest Special Rules
-
Special Setup: Draw 3 Level 5 Roaming Monsters cards and assign them randomly to each of the Lair token Zones on the map. Place their miniatures next to their Lair tokens but not yet in the Dungeon. For each of those Roaming Monsters, set aside all their cards from the Roaming Monster decks.
-
Pillars: Heroes can't move or attack through the Pillars (they may enter the Pillars' Zone). Pillars have 5 Health and no defense and can be attacked as if they were Enemies.
-
Enforcers: When the 2 Pillars of a Tile are destroyed, the corresponding Roaming Monster is spawned on the Lair token of that Tile. The Roaming Monster Level is determined by the order in which they are spawned:
- First 2 Enforcers spawned: Level 3-4
- Last Enforcer spawned: Level 5
When an Enforcer is spawned, add a Regular Chest token to its card as part of its treasure.
Quest I: Campaign Changes
- Enforcers: Spawn instead:
- First 2 Enforcers spawned: Current Dungeon Level.
- Last Enforcer spawned: 1 Tier above the current Dungeon Level.
Side Quest: By challenging all the enforcers simultaneously, the overwhelming Darkness may reveal something to the Lightbringers.
- Condition: Destroy all the Pillars before killing any of the Enforcers.
- Reward (only if you win): Draw Campaign card 24.
Quest I: Campaign Progression
As the party manages to slay all the beasts, they search the vicinity for the last artifact they were looking for. With this legendary equipment, they might actually prevail against the Demon they saw in the dream.
- Rewards:
- If players have cards 19 and 22, draw Campaign cards 25 and 26.
- If players have cards 21 and 23, draw Campaign cards 27 and 28.
- Distribute Experience amongst Heroes as they wish:
- 1-2 Heroes: 3 XP
- 3-4 Heroes: 7 XP
- 5-6 Heroes: 11 XP
- Update Treasure bag: Remove 2 Rare tokens and add 1 Legendary token.
Next Quest: The Heart of Darkness (Quest J, page 14).
Quest I: Setup Components
- Hero Starting Zone
- Regular Chest Token x3
- Starting Mob Zone x1
- Spawn Token x3
- Roaming Monster Portal Token x1
- Portal Token (up to x2)
- Fountain Token x2
- Forge Token x1
- Pillar Token x6
- Spike Trap Token x2
- Bear Trap Token x1
- Bridge x2
- Closed Door x10
- Open Door x3
Required tokens from Massive Darkness 1: Lair x3.
Loot tokens are placed according to the number of Heroes: 1-2 Heroes: 1 loot token; 3-4 Heroes: 2 loot tokens; 5-6 Heroes: 3 loot tokens.
Quest J: The Heart of the Darkness
The nightmares have intensified, and every night the Lightbringers are haunted by the Demon they saw. This beast is closer than even before, and now that the heroes are equipped, they enter the labyrinth, there to face the heart of the Darkness and bring it to an end!
Tiles needed (from MD1): 1V, 2V, 3R, 6R. Tiles needed (from MD2: Hellscape): 8A.
Quest J: Objective
Kill the Dark Emissary: Kill the 3 stages of the Dark Emissary, including the final Boss Fight.
Quest J: Quest Special Rules
- The Main Portal: The Portal in the Corruption Chamber (Tile 8A) is used only for the Boss Fight and is not active.
- Three Stages: This Quest is separated into 3 stages as the Heroes move deeper into the Dark Emissary's lair.
- Staircases: The different stages are connected by Staircases, represented by the Objective tokens. A Hero or Enemy may move from an Objective token Zone to its corresponding in another Tile, though there is no Line of Sight between them. However, Heroes may only move to the next stage once the current Dark Emissary has been defeated.
- The Dark Emissary: The Dark Emissary is represented by the Abyssal Demon. During setup, set aside all Abyssal Demon Roaming Monster cards from the decks. Some of them are used for special spawns:
- Stage 1: At the start of the Quest, spawn a Levels 3-4 Abyssal Demon Roaming Monster in the indicated Zone. When the Heroes manage to kill it, they each gain 10 XP.
- Stage 2: Once the stage 1 Abyssal Demon is killed, spawn a Level 5 Abyssal Demon in the indicated Zone of stage 2. When the Heroes manage to kill it, they each gain 15 XP.
- Stage 3: Start the Boss Fight. The Dark Emissary's topmost, passive ability is active at the start of the Quest, but it only starts performing regular activations after its Chamber has been revealed. Do not resolve Door cards for the Chamber containing the Dark Emissary.
During each stage, the Dark Emissary cannot be attacked or be targeted by abilities and effects until its Chamber has been revealed.
Quest J: Dark Emissary Boss Fight
As soon as a Hero enters the Corruption Chamber in the stage 3, place all Heroes in the Boss Fight Starting Zone. Place the Dark Emissary in the Main Portal Zone. Remove all Tiles that are not part of the Boss Chamber, including all components placed on them. Remove the Darkness Track and place the Abyssal Demon's Boss Dashboard next to the Dungeon with the Darkness Marker on the leftmost space of the Boss track. Heroes recover all Health and Mana to their maximum values.
Place 1 Corruption token per Hero in each Artifact Zone. Shuffle the Level 5 cards of the following Roaming Monsters: Giant Spider, High Troll, Hellhound, Ogre Mage, and Liliarch, and set them aside. Draw 1 and place it next to the Boss Dashboard: This is the Monster that the Dark Emissary has consumed. Then, perform a Level Up Phase and immediately start a new Hero Phase.
-
Evil Devour (Boss Ability): When this ability is activated, the Dark Emissary executes the activation pattern steps of the Roaming Monster he consumed. Use the attack and defense dice from the Dark Emissary Boss Dashboard, and the consumed Roaming Monster combat abilities to resolve any [claw icon] icon.
-
Opening the Main Portal: In order to send the Emissary back to where it came from, the Heroes must drive the Darkness into the Portal to open a connection to the very heart of Darkness. Any Hero may spend 1 MP in an Artifact's Zone to collect 1 Corruption token. Any Hero with a Corruption token in the Main Portal Zone may spend 1 MP to place it there. The Main Portal is open when all Corruption tokens are in the Portal Zone.
Important: A Hero can only carry 1 Corruption token at a time.
-
The Undying: The Dark Emissary can't be killed. No matter how many Wounds it takes, it never drops below 1 Health. In order to defeat the Dark Emissary, Heroes must first weaken it and send it back through the Portal while closing it. In order to do that, the Portal must be open and the Dark Emissary must be below 5 Health. As long as both requirements are met, any Hero standing in the Portal Zone may spend 1 action to send the evil creature back and close the Portal for good.
As soon as Heroes achieve that, the Quest ends in victory.
Quest J: Campaign Changes
- Do not place any Loot tokens during setup.
- The Dark Emissary: Spawn instead:
- Stage 1: Current Dungeon Level.
- Stage 2: 1 Tier above the Current Dungeon Level.
- Stage 3: Use the Campaign side of the Boss Dashboard.
- Boss Fight Setup: Use Roaming Monster cards from the Level 10 deck instead of Level 5 for the Dark Emissary to consume.
If the Players Win
Congratulations! At the end of a long and valiant battle across the many levels of the Emissary's lair, the Lightbringers were finally able to wear it down and bring it to the portal from which the Darkness was coming from. A singular ray of light struck the heroes when their final blow landed, and with an enraged howl, the Demon was sent back through the portal. The silence that followed was broken by a metallic clang on the ground: A ring of power from its chest was all that was left behind. The last tendrils of Darkness coiled into the portal and vanished. The realm and its peoples were saved, and an age of peace and prosperity shall begin.
- Reward: Draw Campaign card 4.
The players have unlocked a new rule for playing any Quest or Campaign.
From now on: During the setup, choose 1 of the 4 rings (Prologue Campaign cards 1, 2, 3, or 4) and give that ring to 1 of the Heroes as an additional starting item (when playing a Campaign, do this for the first Quest only).
Quest J: Setup Components
- Hero Starting Zone
- Boss Fight Starting Zone
- Gray Objective Token x2
- Color-Side-Up Objective Token x2
- Spawn Token x3
- Starting Mob Zone x1
- Regular Chest Token x2
- Greater Chest Token x2
- Closed Door x11
- Roaming Monster Portal Token x1
- Portal Token (up to x3)
- Spike Trap Token x1
- Fountain Token x3
- Forge Token x2
- Pillar Token x1
Required elements from Massive Darkness 1: Dark Emissary, Artifact x2.
Cyclopes Quest: Double Trouble
Two ferocious Cyclopians are wreaking havoc from their lair in a nearby cave and are disturbing the Dwarves' homes. They must be stopped before the dwarven settlement is destroyed.
Tiles needed (from MD1): 2V, 4V, 5R, 8V.
Cyclopes Quest: Objectives
Complete the objectives in order:
- Find the Traps: Collect all the Bear Trap stashes.
- Kill the Cyclopes: Kill both Cyclopes that are destroying the Dungeon.
Cyclopes Quest: Quest Special Rules
- Special Setup: Remove all of the Spearmaiden Cyclops' and Cliffbreaker Cyclops' Roaming Monster cards for this Quest.
- The Bear Traps: The Artifact tokens represent the Bear Trap stashes. Any Hero in a Zone with an Artifact token may spend 1 MP to collect it. When a Hero collects a Bear Trap stash, they discard the Artifact token, get 2 Bear Traps, and place them in their Inventory. In addition, every time an Artifact token is collected, each Hero gains 12 XP.
- The Last Door: The locked door (marked in yellow) leads to the Cave (formed by tiles 2V and 4V and which acts as the Boss Chamber). It can only be opened after Heroes have collected all Bear Trap stashes. When the door is opened, do not resolve a Door card.
Cyclopes Duo Boss Fight
As soon as a Hero enters the Cave, place all Heroes in any of the Boss Fight Starting Zones of their choice. Remove all Tiles that are not part of the Boss Chamber, including all components placed on them. Remove the Darkness Track and place the Cyclopes' Boss Dashboard next to the Dungeon with the Darkness Marker on the leftmost space of the Boss track. Heroes recover all Health and Mana to their maximum values and may distribute the Bear Traps amongst them. Then, perform a Level Up Phase and immediately start a new Hero Phase.
-
The Pillars: The Pillar Zones are inaccessible in this Map. They represent the Cave structures that the Cyclopes are destroying. Each Pillar has 4 Health and the Cyclopes can Wound them with their abilities. Once a Pillar loses all its Health, it is destroyed. A Destroyed Pillar Zone is still inaccessible (place a facedown Lair or Artifact token on it as a reminder). If all Pillars are destroyed, the Quest ends in defeat.
-
The Bear Traps: Bear Traps do not affect Heroes in this Quest. Heroes may spend 1 action to place a Bear Trap in their Zone. When a Cyclops enters a Zone with a Bear Trap, it immediately ends its current action without resolving any attack or Rage Roll.
(Note: If an effect places a Cyclops in the Zone they already are, they are considered to have entered the Zone. For example, if they placed adjacent to the closest Pillar and they are already adjacent to one.)
-
The Cyclopes Duo: Each Cyclops is considered a different Enemy. They are both considered to be Bosses (so they are not Roaming Monsters). Heroes need to defeat both Cyclopes to win. They each have the same values for defense, attack, and Health. Track their Health totals separately.
Each Cyclops has a separate activation during each Enemy Phase. The players may choose the order in which they activate. If one of them is killed, the other one performs 3 actions per activation for the rest of the Quest (instead of 1).
As soon as the Heroes kill both Cyclopes, the Quest ends in victory.
Cyclopes Quest: Setup Components
- Hero Starting Zone
- Spawn Token x4
- Starting Mob Zone x1
- Regular Chest Token x1
- Greater Chest Token x2
- Forge Token x1
- Roaming Monster Portal Token x1
- Portal Token (up to x2)
- Closed Door x5
- Locked Door x1
- Open Door x9
- Pillar Token x6
- Boss Fight Starting Zone x1
- Fountain Token x1
- Spike Trap Token x1
- Bridge x2
Required elements from Massive Darkness 1: Artifact x2, Cliffbreaker Cyclops, Spearmaiden Cyclops.
Loot tokens are placed according to the number of Heroes: 1-2 Heroes: 1 loot token; 3-4 Heroes: 2 loot tokens; 5-6 Heroes: 3 loot tokens.
Hellephant Quest: The Desolation of the Hellephant
The Lightbringers received word that a cruel Hellephant is on the loose in Crondar, and they say that it is vulnerable to mana. The heroes suspect that the Hellephant will try to drain as much mana as it can to prevent the heroes from bringing mystic energies to bear against it. To take on this ruinous pachyderm and use this weakness against it, the Lightbringers must take a highly delicate artifact known as Mana Collector and use it as an external source of mana that the Hellephant can't syphon away.
Tiles needed (from MD2: Hellscape): 4B, 6A, 7B, 8A.
Hellephant Quest: Objectives
Complete the objectives in order:
- Drain the Mana Stations: Fully drain both Stations.
- Transport the Mana Collectors: Get both Mana Collectors safely to the Boss Chamber.
- Defeat the Hellephant: Kill the Hellephant.
Hellephant Quest: Quest Special Rules
- The Mana Collectors: The Artifact tokens represent the Mana Collectors. At the start of the Quest, choose 2 Heroes to carry 1 of the Mana Collectors each. A Hero carrying a Mana Collector gains 1 Mana at the start of their turn. However, the Artifact is very delicate. If a Hero carrying it is KO'd, they must roll a [black die]. If the die results in any [claw icon], the Artifact explodes and the Quest ends in defeat.
- Mana Stations: Objective tokens represent Mana Stations. A Hero standing in a Zone with an Objective token and carrying a Mana Collector may spend 1 action to drain the Mana Station (remove the Objective token). Then, the current Hero places 3 Mana on the Mana Collector and each Hero gains 5 XP. Whenever a Hero with a Collector uses Mana, they can spend from the Mana Collector instead.
- The Hellephant Lair: The door with a yellow outline is locked and can only be opened when the Heroes have fully drained both Mana Stations. When a Hero opens this door, do not reveal a Door card. As soon as a Hero enters the Boss Fight Starting Zone, they immediately end their turn and do not take turns until all other Heroes have entered as well. When the 2 Heroes carrying the 2 Artifacts enter the Hellephant Lair (Tile 8A) the Boss Fight begins.
Hellephant Boss Fight
When the Boss Fight begins, place all other Heroes in the Boss Fight Starting Zone. Place both Artifact tokens in the corresponding Zones. Remove all Tiles that are not part of the Boss Chamber, including all components placed on them. Remove the Darkness Track and place the Hellephant Boss Dashboard next to the Dungeon with the Darkness Marker on the leftmost space of the Boss track. Heroes recover Health to their maximum value. They discard all Mana from themselves and any Mana left on the Collectors. Then, perform a Level Up Phase and immediately start a new Hero Phase.
- Mana Collectors: Each Mana Collector generates 1 Mana at the start of every Hero's turn. Place 1 Mana on each Artifact. A Hero who enters the Artifact Zone collects all Mana from that Artifact.
- Mana Break: The Hellephant can only be attacked if the Hero discards a certain amount of Mana before performing the Attack action. The amount of Mana needed is shown on the Boss track and increases as the battle proceeds. If a Hero doesn't have the amount of Mana needed, they can't perform an Attack action against the Hellephant.
Note: Heroes can still gain Mana from the Recover action, dice, and any other ability. Also, any miniature controlled by a Hero who performs an Attack action and doesn't have Mana tokens to spend (such as Shaman Spirits, Constructs, raised Skeletons, etc.) must still use Mana tokens from the Hero who is controlling them to perform the Attack action.
Hellephant Quest: Single Player
When playing with the Single Player Rules, the single Hero carries both Artifact tokens, but only one is active. The Hero only gains 1 Mana each turn. Use only 1 Artifact to hold the Mana from the Mana Stations (3 from each Station).
Hellephant Quest: Setup Components
- Hero Starting Zone
- Boss Fight Starting Zone
- Forge Token x1
- Spawn Token x5
- Starting Mob Zone x1
- Locked Door x1
- Closed Door x5
- Roaming Monster Portal Token x1
- Portal Token (up to x2)
- Greater Chest Token x2
- Regular Chest Token x4
- Bridge x2
- Spike Trap Token x3
Required elements from Massive Darkness 1: Artifact x2, Hellephant.
A Quest of Crystal & Lava: Additional Concepts
Introduction
The Singing Mountain is a sleeping volcano known for hosting a natural maze of crystal and molten rock. For centuries, artists, dreamers, and lovers have been known to wander around it, bathing in the Crystals' eerie light and listening to their "song". Any noise made near these Crystals, even just breathing, echoes in harmonic, entrancing tones.
The local townsfolk called upon the Lightbringers after several people went up to the Singing Mountain recently and were never heard from again. Thieves, maybe? Or agents of Darkness?
Despite being Lightbringers, none of the townsfolk volunteered to guide them through the mountains. These people are all either afraid or dead already. Two ways are known to enter the mountain. One through a crystal cave, and the other through the heat of lava.
Players collectively choose one of the following paths to take:
- Crystal Cave (Quest A, page 19): Exploring the Crystal Cave is a sure way to understand more about these crystals and their powers.
- Face the Heat (Quest B, page 20): How will the heroes endure Lava? The only way to know is by trying it out.
Crystal Zones
Crystal Zones are bathed in a greenish light and reverberate any sound into a sweet, soothing tune. Just be careful not to have your senses overwhelmed!
Crystal Zones are Light Zones, while all the corridors on the Crystal Tiles are Shadow Zones.
Any Hero that ends their turn in a Crystal Zone must roll a [blue die] and immediately apply the following effects according to the result:
- 0 [die symbol]: No effect.
- 1 [die symbol]: The Hero Heals 1.
- 2 [die symbol]: The Hero takes 2 Wounds and 1 [blue icon].
Enemies are adapted to living here, so they ignore this rule.
Lava Zones
This is hot ground, to say the least. Lava flows near the surface, burning feet and exuding toxic fumes.
Lava corridor Zones are Light Zones while all the Chambers on the Lava Tiles are Shadow Zones.
Any Hero that ends their turn in a Lava corridor Zone automatically takes 1 [fire icon].
Enemies are adapted to living here, so they ignore this rule.
Crystal & Lava Campaign Special Rules
- Treasure Bag: Instead of the regular number of Treasure tokens described in Campaign Mode Setup, at the start of the Crystal & Lava Campaign players place 10 Common Treasure tokens and 3 Rare Treasure tokens in the Treasure bag.
- Campaign Cards: The Crystal & Lava Campaign has its own deck of 2 Campaign cards as indicated in their back.
- Achievement: Use the following Achievement when playing the Crystal & Lava Campaign:
- Lose the same Quest twice in a row: Gain 1 Lifebringer token. This Achievement may be accomplished at any moment, even out of the Town Phase. Players start each subsequent Quest with 1 extra Lifebringer token until the end of the Campaign.
- Lyidan Reminder: Remove Lyidan cards from all Roaming Monster decks (see page 3).
Crystal & Lava Campaign
Flow chart: A and B, then C, then D, then E, then F.
Quest A: Crystal Cave
As the Lightbringers approach the mountains, they hear the crystal song, but it seems foul and distorted. The song of minions of Darkness. Their stench came soon after. Now it is time for the heroes to compose their own song. A song of blades and bravery!
Tiles needed (from Crystal & Lava): 10V, 11V, 14V.
Quest A: Objectives
Complete the objectives in any order:
- Kill the Monster: Kill the Roaming Monster that spawns in the Lair token.
- Cleanse the Lair: Place both Artifact tokens in the Zone with the Lair token.
Quest A (Crystal & Lava): Quest Special Rules
- Monster Lair: The Zone with the Lair token is infected with energies from Darkness and must be cleansed. When this Chamber is revealed, after resolving the Door card, spawn a Level 5 Roaming Monster in the Lair token Zone.
- Piece it Together! The Artifact tokens represent both halves of a magical artifact that must be united in the Lair's entrance to cleanse it. Any Hero standing in an Artifact token's Zone may spend 1 MP to collect it. Artifact tokens may be traded as items. Any Hero carrying an Artifact token may spend 1 action in the Lair Zone to place it on top of the Lair.
Quest A (Crystal & Lava): Campaign Changes
- Monster Lair: Spawn a Roaming Monster of the current Dungeon Level instead of a Level 5 Roaming Monster.
- Piece it Together! When a Hero collects an Artifact token, each Hero gains 12 XP.
Quest A (Crystal & Lava): Campaign Progression
It is done! The entrance has been cleansed of these beasts. The Lightbringers also managed to study the crystals and gained knowledge of their foes.
- Reward: Choose a Hero to gain Campaign card 1.
- Distribute Experience amongst Heroes as they wish:
- 1-2 Heroes: 3 XP
- 3-4 Heroes: 7 XP
- 5-6 Heroes: 11 XP
- Update Treasure bag: Remove 5 Common tokens, add 1 Rare token and 2 Epic tokens.
Next Quest: Lost in the Music (Quest C, page 21).
Quest A (Crystal & Lava): Setup Components
- Hero Starting Zone
- Spawn Token x3
- Starting Mob Zone x1
- Closed Door x4
- Fountain Token x2
- Forge Token x1
- Regular Chest Token x2
- Roaming Monster Portal Token x1
- Portal Token (up to x2)
- Pillar Token x1
- Bear Trap Token x1
- Bridge x1
Required tokens from Massive Darkness 1: Artifact x2, Lair x1.
Loot tokens are placed according to the number of Heroes: 1-2 Heroes: 1 loot token; 3-4 Heroes: 2 loot tokens; 5-6 Heroes: 3 loot tokens.
Quest B (Crystal & Lava): Face the Heat
Lightbringers are accustomed to fighting the forces of Darkness in damp dungeons. Fighting close to the molten lava from the mountain's core is unprecedented. As they approach, they notice that something is odd with the local outpost. They must investigate it!
Tiles needed (from Crystal & Lava): 12R, 14R, 15R.
Quest B: Objectives
Complete the objectives in any order:
- Destroy the Magma Stones: Destroy both Magma Stones.
- Take It Down: Kill the Roaming Monster that spawns on the Lair token.
Quest B: Quest Special Rules
- Magma Stones: The Objective tokens represent Magma Stones. Any Hero standing in a Magma Stone Zone may spend 1 action to destroy it (discard the Objective token).
- Monster Lair: When the Chamber with the Lair token is revealed, after resolving the Door card, spawn a Level 5 Roaming Monster in the Lair token Zone.
Quest B: Campaign Changes
- Magma Stones: When a Hero destroys a Magma Stone, each Hero gains 12 XP.
- Monster Lair: Spawn a Roaming Monster of the current Dungeon Level instead of a Level 5 Roaming Monster.
Quest B: Campaign Progression
Surviving the Monster that caught the Lightbringers by surprise, they finally have the time to inspect the singing lava. What a magnificent result of magic and nature!
- Reward: Choose a Hero to gain Campaign card 2.
- Distribute Experience amongst Heroes as they wish:
- 1-2 Heroes: 3 XP
- 3-4 Heroes: 7 XP
- 5-6 Heroes: 11 XP
- Update Treasure bag: Remove 5 Common tokens, add 1 Rare token and 2 Epic tokens.
Next Quest: Lost in the Music (Quest C, page 21).
Quest B: Setup Components
- Hero Starting Zone
- Objective Token x2
- Starting Mob Zone x1
- Spawn Token x3
- Closed Door x9
- Regular Chest Token x2
- Forge Token x1
- Pillar Token x1
- Roaming Monster Portal Token x1
- Portal Token (up to x2)
- Fountain Token x3
- Bear Trap Token x1
- Bridge x1
Required tokens from Massive Darkness 1: Lair x1.
Loot tokens are placed according to the number of Heroes: 1-2 Heroes: 1 loot token; 3-4 Heroes: 2 loot tokens; 5-6 Heroes: 3 loot tokens.
Quest C (Crystal & Lava): Lost in the Music
We dismissed the rumors about the crystal echoes driving people mad. Well, we've been listening to them for hours now. We feel dizzy, grumpy, and are obviously lost. Not for long, anyway: We found another monster nest. We'll kick the baddies, then interrogate them.
Tiles needed (from Crystal & Lava): 10R, 12R, 13V, 14R, 15V.
Quest C: Objective
Round Them Up: Capture 3 Roaming Monsters (see Special Rules).
Quest C: Quest Special Rules
- Teeming with Monsters: At the start of each Darkness Phase, if there are any Lair tokens available, roll 1 [yellow die]. If any [spawn icon] result is rolled, spawn 1 Roaming Monster on 1 of the available Lair tokens (players choose). After a Roaming Monster is spawned this way, flip the Lair token. This Lair is no longer available for spawning.
- If, at the start of a Darkness Phase, there are no Lair tokens available and there is less than 2 Roaming Monsters in the Dungeon, flip all Lair tokens faceup.
- A Net: Each Library and Artifact token represents a Net that can be used to capture a Roaming Monster (see below). Any Hero standing in a Net's Zone may spend 1 MP to collect it. The Hero who does so gains 5 XP. Nets may be traded as items.
- Capturing a Monster: A Hero in possession of a Net (Artifact or Library token) may attempt to capture a Roaming Monster standing in their Zone by spending 1 action and rolling 2 [orange die]. If the number of [sword icon] rolled is equal to or higher than the Roaming Monster's remaining Health, it is captured. Remove it from the Dungeon, discard the Net used, and the Hero who captured it gains XP and rewards as if they killed the Roaming Monster. If the capture attempt fails, the Net is not discarded.
Quest C: Campaign Changes
- A Net: When a Hero picks up an Artifact or Library token, each Hero gains 5 XP, instead.
Quest C: Campaign Progression
It seems these evil-doers are unaware of the greater scheme of things but they were able to inform us about a path crossing a battered bridge. It is unfortunate that the Lightbringers spent their time on this almost wild goose chase. But they must press onwards! The mystery hasn't been solved.
- Rewards: Draw 2 Treasure tokens from the bag. Gain that many Treasure cards from the corresponding decks and return the tokens to the Treasure bag.
- Distribute Experience amongst Heroes as they wish:
- 1-2 Heroes: 3 XP
- 3-4 Heroes: 7 XP
- 5-6 Heroes: 11 XP
- Update Treasure bag: Remove 5 Common tokens, add 4 Epic tokens and 2 Legendary tokens.
Next Quest: The Lava Bridge (Quest D, page 22).
Quest C (Crystal & Lava): Setup Components
- Hero Starting Zone
- Forge Token x2
- Fountain Token x3
- Open Door x1
- Spawn Token x5
- Starting Mob Zone x2
- Closed Door x14
- Regular Chest Token x2
- Greater Chest Token x1
- Roaming Monster Portal Token x1
- Portal Token (up to x2)
- Pillar Token x2
- Bear Trap Token x2
- Bridge x1
Required tokens from Massive Darkness 1: Artifact x2, Lair x3, Library x1.
Loot tokens are placed according to the number of Heroes: 1-2 Heroes: 1 loot token; 3-4 Heroes: 2 loot tokens; 5-6 Heroes: 3 loot tokens.
Quest D (Crystal & Lava): The Lava Bridge
Following the lead obtained from their prisoner, the Lightbringers press onward and reach the bridge. Although the Crystal's Song is soothing, the heat is nearly unbearable. Darkness seems to be brewing something in the volcano.
Tiles needed (from Crystal & Lava): 11R, 12V, 13R, 15V.
Quest D: Objectives
Complete the objectives in order:
- Recover the Map: Gather both parts of the Secret Map.
- Defeat the Bridge Guardian: Kill the Giant Spider.
- Cross the Bridge: Reach the Exit with all Heroes. Any Hero may escape through this Zone at the end of their activation, as long as there are no Enemies in it.
Quest D: Quest Special Rules
- Special Setup: Spawn a Level 5 Giant Spider on the indicated Bridge Zone (remove all other Giant Spider cards from the other Roaming Monster decks).
- Secret Map: The Artifact tokens represent parts of a Secret Map. Any Hero standing in a Map's Zone may spend 1 MP to collect it. The Hero who does so gains 5 XP.
- Guardian of the Bridge: The Giant Spider that starts on the Bridge may never move during its activation or be moved by any ability or effect. The Giant Spider cannot be attacked or be targeted by abilities and effects until all parts of the Secret Map have been picked up.
- Weak Bridge: At the start of each Darkness Phase, roll 1 [yellow die]. Each [sword icon] rolled deals 1 Wound to a Pillar. Once a Pillar takes a total of 4 Wounds, it is destroyed and Wounds start being dealt to the next Pillar. If all 3 Pillars are destroyed, the Bridge is removed from the Dungeon and the Quest ends in defeat. If the Heroes manage to kill the Giant Spider, stop rolling dice and dealing Wounds to the Pillars.
- Locked Doors: If at any moment an Enemy needs to move toward a Hero but does not have a open path to any Hero (because of closed doors), this Enemy does not move.
Quest D: Campaign Changes
- Special Setup: Spawn a Giant Spider Roaming Monster 2 Tiers above the current Dungeon Level instead of a Level 5 Giant Spider (still remove the other cards from the decks).
- Secret Map: When a Hero collects an Artifact token, each Hero gains 12 XP, instead.
Quest D: Campaign Progression
Crossing the bridge, the Lightbringers can see from afar that mobs are assembling. It seems an invasion is on the way. The heroes must act quickly!
- Rewards: Draw 2 Treasure tokens from the bag. Gain that many Treasure cards from the corresponding decks and return the tokens to the Treasure bag.
- Distribute Experience amongst Heroes as they wish:
- 1-2 Heroes: 3 XP
- 3-4 Heroes: 7 XP
- 5-6 Heroes: 11 XP
- Update Treasure bag: Remove 2 Rare tokens and add 1 Legendary token.
Next Quest: The Fire Circle (Quest E, page 23).
Quest D (Crystal & Lava): Setup Components
- Hero Starting Zone
- Spawn Token x5
- Forge Token x1
- Regular Chest Token x2
- Greater Chest Token x1
- Closed Door x12
- Roaming Monster Portal Token x1
- Portal Token (up to x2)
- Fountain Token x3
- Bear Trap Token x1
- Pillar Token x3
- Bridge x2
Required elements from Massive Darkness 1: Giant Spider, Artifact x2, Exit x1.
Quest E (Crystal & Lava): The Fire Circle
Close to their goal, the temperature is hardly bearable, even for the monsters. The floor, itself, moves with the lava below. There is no turning back, but they can still jump into a room if they want to stop. The only way is ahead and downward. Where will we end?
Tiles needed (from Crystal & Lava): 10R, 11R, 13R, 15R.
Quest E: Objective
Clear the Air: Kill all the Enemies that spawn inside the central Chamber.
Quest E: Quest Special Rules
-
Lava Flow: Any Hero that ends a Move action in a Lava Zone is immediately carried by the Lava Flow. If there are no Enemies in that Zone, move the Hero 1 Zone following the directions indicated on the image below. Enemies are not affected by this and they keep Heroes from being pulled out of their Zone by the Lava Flow.
-
Secure Chamber: The Chamber in the center of the Dungeon is locked and can't be opened as usual. To open the Locked door (marked in yellow), Heroes must first destroy all 4 Pillars scattered around the map. Pillars have 5 Health, no defense, and can be attacked as if they were Enemies. A Hero who destroys a Pillar gains 5 XP.
Immediately after destroying the last Pillar, the door automatically opens. Follow the regular rules for opening doors and after that, spawn a Level 5 Roaming Monster in the Lair token Zone.
Quest E: Campaign Changes
- Secure Chamber: When a Hero destroys a Pillar, each Hero gains 6 XP, instead. Spawn a Roaming Monster of the current Dungeon Level instead of a Level 5 Roaming Monster.
Quest E: Campaign Progression
Finally finding a way downwards into the heart of the volcano, the Heroes prepare themselves for the final battle.
- Rewards: Draw 2 Treasure tokens from the bag. Gain that many Treasure cards from the corresponding decks and return the tokens to the Treasure bag.
- Distribute Experience amongst Heroes as they wish:
- 1-2 Heroes: 3 XP
- 3-4 Heroes: 7 XP
- 5-6 Heroes: 11 XP
- Update Treasure bag: Remove 2 Rare tokens and add 1 Legendary token.
Next Quest: Stairway to Hell (Quest F, page 24).
Quest E (Crystal & Lava): Setup Components
- Hero Starting Zone
- Spawn Token x4
- Starting Mob Zone x1
- Regular Chest Token x2
- Greater Chest Token x1
- Closed Door x10
- Locked Door x1
- Open Door x2
- Fountain Token x4
- Pillar Token x4
- Forge Token x1
- Roaming Monster Portal Token x1
- Portal Token (up to x2)
- Bridge x1
Required tokens from Massive Darkness 1: Lair x1.
Loot tokens are placed according to the number of Heroes: 1-2 Heroes: 1 loot token; 3-4 Heroes: 2 loot tokens; 5-6 Heroes: 3 loot tokens.
Quest F (Crystal & Lava): Stairway to Hell
As close as possible to the core, the Lightbringers have uncovered what is happening: To please their master, the Darkness henchmen are trying to stir up the volcano. There is only one thing to do: disrupt the ritual and kill anyone foolish enough to cross their path. The mystics have locked themselves in a chamber. The Heroes must destroy the enchanted locks preventing them from entering, then end this once and for all. Darkness will soon learn that the Lightbringers are far more dangerous and more difficult to contain than lava.
Tiles needed (from Crystal & Lava): 10V, 11V, 12R, 13V, 14V, 15R.
Quest F: Objective
Defeat the Mystics: Kill both Roaming Monsters that are spawned in the Lair tokens.
Quest F: Quest Special Rules
- Crystal Doors: The 2 locked doors (marked in yellow) on the map are magically sealed. They cannot be opened until the Heroes manage to collect 4 Gems (see below).
- Finding the Gems: After a Hero kills a Leader or Roaming Monster, roll 1 [black die]. If a [claw icon] is rolled, the Heroes find 1 Gem. If a [claw icon] + [slash icon] is rolled, the Heroes find 2 Gems. Otherwise, nothing happens. Once 4 Gems have been collected, stop collecting Gems.
- The Mystics: When 1 of the Crystal Doors is opened, do not draw a Door card. Simply spawn 2 Level 5 Roaming Monsters, 1 on each of the 2 Lair tokens. These Roaming Monsters are harder to take down. They have double their indicated amount of Health.
Quest F: Campaign Changes
Do not place any Loot tokens during setup.
- Finding the Gems: When a Hero finds 1 or more Gems, each Hero gains 6 XP for each Gem found.
- The Mystics: Spawn 2 Level 10 Roaming Monsters instead of Level 5 Roaming Monsters.
Quest F: Setup Components
- Hero Starting Zone
- Spawn Token x5
- Starting Mob Zone x2
- Closed Door x12
- Open Door x1
- Locked Door x2
- Fountain Token x3
- Regular Chest Token x5
- Greater Chest Token x2
- Roaming Monster Portal Token x1
- Portal Token (up to x2)
- Forge Token x1
- Pillar Token x3
- Bear Trap Token x2
- Bridge x2
Required tokens from Massive Darkness 1: Lair x2.