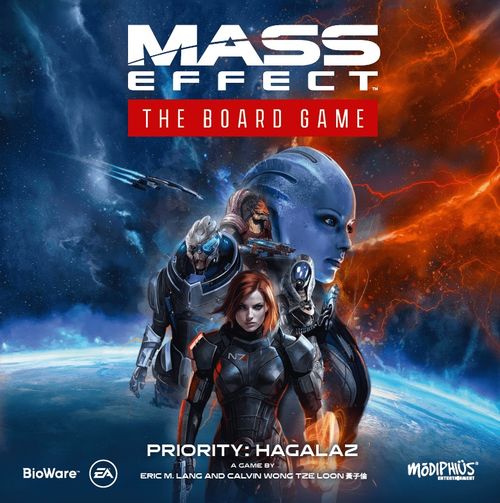
Mass Effect: The Board Game – Priority: Hagalaz
Mass Effect: The Board Game – Priority: Hagalaz Rulebook
Table of Contents
Table of Contents
Overview
Mass Effect: Priority Hagalaz is a co-operative tactical action game for 1-4 players, following the crew of the Normandy as they infiltrate a downed Cerberus cruiser. The game takes place over a campaign of three Main Missions and two optional Loyalty Missions (each taking around 45 minutes), which can be played in a single sitting or split across multiple play sessions.
Sharing Control
In a game with four players, each player will control a single Squadmate – but you still use four Squadmates, even if you have fewer players.
A solo game is easy – the player controls all four Squadmates.
If there are two players, each one controls two Squadmates.
In a three-player game, one player controls two Squadmates, and the others control one each.
The Squad
Each Mission always features four Squadmates: Commander Shepard, and three others chosen from Garrus, Liara, Tali and Wrex.
- Commander Shepard is a capable all-rounder whose leadership makes the squad more than the sum of its parts.
- Garrus Vakarian grants the squad several options for powerful, precise ranged attacks.
- Liara T'Soni unleashes powerful biotic effects to predict, negate and impede enemy actions.
- Tali'Zorah nar Rayya fights alongside her faithful combat drone, Chatika vas Paus, sabotaging defenses and unlocking doors.
- Urdnot Wrex is a master of close-ranged combat, and a defensive powerhouse.
You can use the same Squadmates in each Mission of your campaign, or change your line-up for each Mission – it's up to you. Also, players are free to change which Squadmate(s) they control between Missions.
War Readiness
At the end of the campaign, the players' level of success is determined by how many War Readiness points they have scored.
War Readiness is scored each time the squad completes a Mission, and can also be scored by completing Secondary Objectives during a Mission.
Victory and Defeat
Each Mission has clearly defined parameters for Victory and Defeat. Victory comes in two varieties: Paragon Victory (usually requires extra effort but scores higher War Readiness) and Renegade Victory (ruthless and efficient path to victory). Whether a Mission ends in Victory or Defeat, the squad will always advance to the next Mission and continue the campaign. However, if the first two Main Missions are failed, the squad fails in its assignment, and the campaign ends early.
Components
Commander Shepard
Just like in the Mass Effect video game, Commander Shepard is a versatile character.
As such, there are two different Commander Shepard miniatures. You only need to use one each time you play – leave the other in the box.
Both use identical rules, so this is simply a case of personal preference.
The box contains: a Rulebook (x1), a Mission Book (x1), a Narrative Book (x1), Squadmate miniatures (x6), a Campaign Map board (x1), Squadmate Sheets (x5), Enemy tokens (x86), Hazard cards (x64), Cerberus Minions (x30), Reaper Minions (x30), Unique Elite Enemies (x26), Downed Squadmate tokens (x4), Turret Status tokens (x6), Objective tokens (x7), Refugee tokens (x7), Damage / Biotic Effect tokens (x20), Tracking cubes (x15), Rage tokens (x5), Command tokens (x3), Proximity Mine tokens (x3), Renegade tokens (x8), an On Point token (x1), Loot tokens (x12), Locked Door / Unlocked Door tokens (x8), Medi-gel tokens (x5), Grenade tokens (x2), a Grenade Cache token (x1), Intel tokens (x4), Strategy dice (x12), Paragon dice (x2), an Enemy Bag (x1) and a Marker Pen (x1).
Squadmates and Enemies
Squadmates are represented during play by plastic miniatures, and have a corresponding Squadmate Sheet which lists their unique special rules.
There are two types of Enemies – Minions (numerous foes that appear in multiple Missions) and Elites (tough, boss-level adversaries). Both are represented by double-sided tokens.
Character is used throughout the rules as a catch-all term for Squadmates, Minions and Elites.
Marking Boxes
On the Campaign Map, Mission Book and Squadmate Sheets, there are boxes that can be marked to indicate progress, completed objectives and unlocked abilities.
To mark a box, fill it in using the wet-erase marker pen included in the game box.
When the campaign is over, clear all of the boxes by wiping them first with a lightly dampened cloth, then a dry cloth.
Marking Waypoints
The Campaign Map features Waypoints, the open dots with arrows leading to them like those at the bottom of Guns of Cerberus. When a mission is selected, tick the Waypoint at the bottom. After playing the mission, tick the Paragon, Renegade, or Failure box, then follow the arrows and select your next mission by ticking that Waypoint. This helps you remember which path you have selected between game sessions.
Enemy Tokens
Both kinds of Enemies – Minions and Elites – are represented by tokens. The front of an Enemy token is its Active side, and shows the Enemy's name and artwork, along with an Attack Value and a Shield Value.
The Active side of an Enemy token shows: the Enemy's name, its Attack Value, its Shield Value, its Tag, and its Challenge level.
Tags
Some Enemy tokens have a Tag, granting them an additional special rule. There are four Tags: Pin, Ranged, React and Rush. These will be explained in full later, in Additional Enemy Rules.
Stunned Enemies
The reverse of an Enemy token is its Stunned side, showing the Enemy is currently not Active. This side does not show an Attack Value or a Tag, but still shows a Shield Value. In addition, the Stunned side of each Minion token shows 1, 2 or 3 Challenge Rating icons; the more the token has, the more of a challenge it will present. Challenge Rating icons are used to determine which Minion tokens are used in each Mission, as described in the Mission Book section.
Elite Enemies
Elite Enemies vary from Mission to Mission, and have their own rules box on the Mission Rules page (as shown in the example in the Mission Book). This shows their token, their Spawn icon (which will be found on the map), and a special rule applying to them. Also, Elite Enemies have variable Shield Values; their token will show a variable shield, and their entry in the Elite Enemies section will show a Resilience Tracker with multiple spaces. This is explained later, in Additional Enemy Rules.
An Elite Enemy's rules box shows: the Elite Enemy's name, its Shield Track, its Special Rule, and its Tag.
Story Paragraphs
The Narrative Book contains a series of numbered Story Paragraphs. At various points, you will be instructed to read a specifically-numbered paragraph.
You should avoid reading any paragraphs that you have not been explicitly instructed to read.
Pay attention! Think of Story Paragraphs as cut-scenes in a video game. Don't skip them – you might miss out on some information vital to completing your Mission!
When you turn to a Story Paragraph:
- Read the narrative text at the top of the entry aloud.
- Then read and resolve the rules text that follows.
"Shepard, analysis of the crashed cruiser has isolated three primary objectives. The reactor, the research data core, and the kinetic barrier generator. You only have time to reach one of those before the storm arrives.
Accessing the data core will allow us to steal Cerberus' research, but they could salvage the ship's wreckage after the storm has passed.
Overloading the reactors will destroy the ship – and all hope of any data recovery or salvage.
I am also detecting signs of the captives Admiral Hackett mentioned. By diverting power from the research core, you can boost the ship's kinetic barriers long enough to preserve it and protect the prisoners until the Alliance arrives. However, if you do this, the data banks will be lost.
The storm is only a few hours away, Shepard. I recommend moving fast. Displaying potential routes to each objective.
The mission is yours."
– EDI
The Campaign Map
The Campaign Map tracks the squad's progress through the crashed cruiser, Mission by Mission.
Each Mission has its own box on the map, and they are split into three Stages. You will play one Mission from Stage One, one from Stage Two and one from Stage Three, following one of the Paths after each Mission to determine which one will come next.
- You will be instructed to mark Waypoints to show which Mission you will attempt next.
- The Paths between Main Mission boxes indicate the order in which Missions can be attempted. For example, after completing mission 2B Atlas Binary, the squad may choose to attempt a Loyalty Mission, and once that is completed, progress to 3A Reactor Control or 3B The Mainframe.
- Intel Caches can be found during Missions, and are tracked by marking these boxes. Every third box you mark lets a Squadmate unlock a new Ability.
- When a Mission ends, you will be instructed to mark one of its three Outcome Boxes: Paragon Victory, Renegade Victory, or Defeat.
- Filling in a Loyalty Waypoint indicates the team will attempt a Loyalty Mission before progressing to the next Main Mission.
- Each Squadmate has a unique Loyalty Mission that can only be attempted once. When selecting a Loyalty Mission, mark the corresponding Squadmate's box. You can only attempt two Loyalty Missions maximum during a campaign.
- Track your War Readiness across the campaign by marking these boxes. Can you get a perfect score?
Loyalty Missions
During the campaign, you will have the option to attempt up to two Loyalty Missions, which take place between the Main Missions. Each of Shepard's Squadmates has a unique Loyalty Mission. By undertaking their Loyalty Mission, Shepard builds a stronger bond with the Squadmate and – if the Mission is successful – unlocks a unique Ability for them.
Time is short, though, so you won't be able to attempt every Loyalty Mission in a single playthrough. Choose wisely!
If you prefer a shorter campaign, you can skip the Loyalty Missions entirely.
Charting a Path
When your campaign starts, you will be instructed to mark the Waypoint of a Stage One Mission. When you do this, also fill in the path leading up to that Waypoint.
Whenever you finish a Main Mission, you will be instructed to mark another Waypoint. When you do, fill in the path between the Mission you just finished, and the newly-marked Waypoint. This gives you a visual reminder of the route the squad has taken as it heads deeper into the crashed Cerberus ship.
In the rulebook's example, the squad started their campaign with Guns of Cerberus, then completed a Loyalty Mission. The next Mission they play will be Atlas Binary.
The Mission Book
The Mission Book is made up of a number of Mission Spreads – one for each Mission the squad can attempt. A Spread is made up of a Mission Rules page and a Mission Map page.
Mission Rules Page
The left-hand page of a Mission Spread is the Mission Rules page. It shows setup instructions, Enemy forces, Mission Objectives, and any special rules applicable to this Mission.
- A narrative introduction will be found here.
- This box shows any special rules that apply when setting up the Mission.
- Each Mission, you will face either Reaper or Cerberus forces. Information on Enemy forces is found in this box.
- This box lists any special rules that apply during this Mission.
- This section shows the Objectives for this Mission - the ways in which the squad can achieve victory.
- The Mission's Elite Enemy (or Enemies) will be shown here.
- A Mission is failed if time runs out, or if Shepard is Downed. This box explains how this can happen, and what to do if it does.
- Some boxes on this page may have Progress Boxes, which you will be instructed to mark under certain circumstances.
Mission Map Page
The right-hand page of a Mission Spread is the Mission Map page, which acts as the game board during play.
- Walls create a solid barrier between two hexes. Characters can't move or attack through walls, and the hexes either side of a wall never count as being Adjacent.
- During setup, doors are placed on these icons. Green icons represent unlocked doors, and orange icons represent locked doors.
- Spawn hexes indicate where Minions are set up at the start of a Mission, and where Enemy reinforcements will enter play.
- Objective tokens are placed on these icons at the start of a Mission, representing points of interest or key locations.
- Loot tokens are placed on these icons at the start of a Mission, representing useful items that can be collected.
- An Elite Spawn hex marks the starting position of a powerful Elite Enemy.
- Refugee tokens are placed on these icons at the start of a Mission, representing civilians that can be rescued.
- Turret Status tokens are placed on these icons at the start of some Missions, with their Active side showing.
- Obstacles sit between hexes like walls, but they only affect attacks - they don't impede movement or prevent the hexes from being adjacent.
- Start hexes indicate where the Squadmates are set up at the start of a Mission.
Hexes
The Mission Map is made up of a grid of hexes. Each hex can contain a single character (a Squadmate or an Enemy) as well as any number of tokens (Loot tokens, Objective tokens, Turret Status tokens and so on).
Map Iconography
Walls, Obstacles and Enemy Spawn hexes are clearly marked on the map, and remain in effect during the game. Other icons (Objective tokens, Loot tokens, Refugee tokens, Door tokens and Turret Status tokens) indicate where tokens are placed during setup, and have no effect once the Mission begins.
A full guide to map icons can be found on the back of the Campaign Map. You can place this next to the Mission Book during play, for ease of reference.
Interacting with the Mission Map
During play, characters can interact with the Mission Map in a number of ways.
Out of Bounds
Each Mission Map represents an enclosed area. Anything outside of the grid of hexes is Out of Bounds, meaning characters cannot move out of the grid unless a Mission rule specifically allows them to do so.
Adjacency
Any two hexes sharing a border are adjacent unless the border features a wall or locked door. This is important when resolving certain rules. Obstacles do not prevent hexes from being adjacent.
In Diagram 1, Garrus is adjacent to each of the four hexes containing a green checkmark. Note the Obstacle does not prevent this. The two hexes with red crosses are not adjacent to Garrus, due to the wall and the locked door.
Counting Distances
Sometimes, you will need to count the distance between two hexes. To do this, count the shortest route from the first hex to the second, moving only between adjacent hexes (you cannot pass through walls or locked doors). Count how many hex borders you cross – this is the distance.
Sometimes, a special rule will instruct you to count the distance between two hexes, ignoring walls and locked doors.
In Diagram 2, the Husk is four hexes away from Garrus. If the wall were not there, the Husk would be three hexes away from Garrus.
If the rules state something must be "within three hexes", this means the distance between those hexes can be no greater than 3 – in the example, the Husk and Garrus are within three hexes of each other only if the wall is ignored.
Line of Fire
Some rules allow a character to attack (or otherwise affect) a target within its Line of Fire.
Imagine six straight lines radiating out from the character's hex, as shown in Diagram 3. A target within one of these lines is within the character's Line of Fire as long as there are no walls, doors (locked or unlocked) or Obstacles directly between them.
Obstacles and doors bordering the attacking character's own hex are ignored, as are intervening characters.
In Diagram 4, Garrus' player wants to make an Attack.
- Husks 1, 5, 6 and 7 are in Garrus' Line of Fire, despite the intervening characters, and the Obstacle (which is ignored, as it borders Garrus' hex).
- Husk 2 is not, as there is an Obstacle in the way that does not border Garrus' hex.
- Husk 3 is not, as it is not in one of the six straight lines radiating out from Garrus' hex.
- Husk 4 is not, as there is a wall in the way.
Shrouded Areas
Some Mission maps are made up of multiple different areas, separated by walls and doors (whether they are locked or unlocked). At the start of a Mission, any area that does not contain at least one Squadmate is Shrouded.
Enemies in Shrouded areas do not Activate, and cannot be targeted by Attacks or Abilities. To represent this, they are placed so that their token's Stunned side is face-up.
A Shrouded area is revealed the first time a Squadmate stands in a hex bordered by an unlocked door leading into the area. When this happens, flip all Enemy tokens in the area to their Active side. The area no longer counts as being Shrouded.
Squadmate Sheets
Each Squadmate has a unique Squadmate Sheet, which sits in front of the player controlling them. This acts as a control panel of sorts, tracking various information and listing all of the Squadmate's special rules and their unique Abilities.
- During play, you will place dice on Action Slots to make Actions with the Squadmate. You can only place a die in a slot that has a matching icon.
- This box shows the Squadmate's Core Ability, which activates at the start of their turn. Each Core Ability uses a different unique element - for example, Garrus has the Aim Tracker.
- A Squadmate loses Shield Points when they are attacked. These regenerate fully at the end of each Round.
- A Squadmate with no Shield Points loses Hit Points instead. If their Hit Points drop to zero, they are Downed, and their Squadmate Sheet is flipped face-down.
- As Squadmates defeat Enemies, they earn Experience Points, which you will track by marking these boxes. There is one column for each Mission.
- In addition to their Core Ability, each Squadmate has a number of Ability Boxes. Each one contains an Action they can make (with its own Action Space) or a Special Rule that applies to them.
- At the start of the campaign, you can only use Abilities with solid blue backgrounds. Abilities with black backgrounds must be Unlocked first.
- To show that an Ability has been unlocked (and can be used), you will mark the box in the top-right corner.
- Ability boxes with red borders are Advanced, and cannot be unlocked until the required Ability or Abilities are unlocked.
- Each Squadmate has a special Loyalty Ability, which can only be unlocked by completing their Loyalty Mission.
Downed Squadmates
A Squadmate who runs out of Hit Points is Downed, and their Squadmate Sheet is flipped face-down. When this happens, follow the instructions on the sheet. As soon as another Squadmate revives you, you will be back in the fight!
Mission Commander
If Commander Shepard is Downed, the Mission ends in failure.
As such, Shepard's Squadmate Sheet does not have a Downed side. Instead, each side has identical rules text, but shows different artwork for Shepard, corresponding to the two different Commander Shepard miniatures. Use whichever side of the board matches your chosen miniature.
Setting Up a Mission
Welcome to Hagalaz
If you have not yet played the first Mission in your campaign, read Story Paragraph 76 before following the steps on this page.
1. Prepare Mission
A. Consult the Campaign Map to see which Mission you will attempt next (see Charting a Path).
B. Open the Mission Book to the Spread for that Mission, and place it in the center of the playing area.
C. Read the Additional Setup Instructions box on the Mission Rules page; if any instructions in the box contradict the ones below, the ones in the box take precedence.
Loyalty Missions: If the next Mission is a Loyalty Mission, choose a Squadmate whose Loyalty Mission box on the Campaign Map has not yet been marked, and read the Story Paragraph listed in the box. (For example, if you choose Garrus, read Story Paragraph 66, then mark his box).
2. Fill the Enemy Bag
A. Find the thirty Minion tokens that match those shown in the Enemy Forces box on the Mission Rules page. Place them face-down in the playing area, so their Challenge Rating icons can be seen, and return the other thirty Minion tokens to the game box.
B. If the Enemy Forces box shows a Low Challenge icon, return any tokens showing a Medium Challenge or Extreme Challenge icon to the game box.
C. If the Enemy Forces box shows a Medium Challenge icon, return any tokens showing an Extreme Challenge icon to the game box.
D. The numbers on the token icons in the Enemy Forces box indicate how many tokens of each type should be left. Place these into the Enemy Bag and shuffle by giving it a good shake.
Enemy Bag Setup Example: This Mission's Enemy Forces box shows the Cerberus Minion tokens - Assault Troopers, Guardians and Engineers - and a Medium Challenge icon. It also notes that there should be eight of each token.
Of the ten Assault Trooper icons, five have Low Challenge icons, and three have Medium Challenge icons. These are placed into the bag (x5 Low, x3 Medium). The two remaining tokens, which have Extreme Challenge icons, are returned to the box. This is then repeated for the Guardians and Engineers.
3. Prepare Enemies
A. Consult the Enemy Forces box on the Mission Rules page. Find the matching Hazard Deck (Cerberus or Reaper), shuffle it, and place it face-down next to the Mission Book. Return the other Hazard Deck to the game box.
B. Find the tokens for any Elite Enemies shown on the Mission Rules page and place them in the matching Elite Spawn hexes.
C. Place a random Minion token (drawn from the Enemy Bag) into each Spawn hex. Place them with their Active side face-up, unless they are in Shrouded Areas (see the Shrouded Areas sidebar).
4. Prepare Map
A. Shuffle the twelve Loot tokens together, face-down. Place one face-down on each hex that contains a Loot icon.
B. Place Objective, Refugee, Locked / Unlocked Door and Turret Status tokens on the map, as indicated by matching icons. Ensure Turret Status tokens are placed with their Active side showing.
C. Read the Additional Rules and Objectives boxes on the Mission Page.
5. Deploy Squad
A. Choose the three Squadmates who will accompany Commander Shepard for the Mission, and divide them among the players (see the Sharing Control sidebar). Return the unused Squadmate's components to the game box.
B. Each player takes the Squadmate Sheet and miniature for the Squadmate(s) they are controlling.
C. On each Squadmate Sheet, place a tracking cube on the furthest-right spaces of the Hit Point and Shield Point trackers.
D. Starting with Shepard and going clockwise around the board, place each Squadmate's miniature in a Start hex that does not already contain a Squadmate.
E. Follow any additional setup instructions shown in each Squadmate's Core Ability box.
F. Place the On Point token and the twelve Strategy Dice next to Shepard's Squadmate Sheet. Add 1 Paragon die for each Paragon Victory marked on the Campaign Map. Return any unused Paragon dice to the game box.
G. Each player takes a Renegade token for each Renegade Victory that is marked on the Campaign Map, and places them next to their Squadmate Sheet. Return any unused Renegade tokens to the game box.
Place any remaining components within reach. You are now ready to begin the Mission.
Playing a Mission
Sequence of Play
A Mission is split up into a number of Rounds, which follow a strict pattern of three Phases:
- Preparation Phase
- Squadmate Phase
- End Phase
The Phases always happen in this order. Once the End Phase has been completed, a new Round begins. This continues until the Mission ends in victory or defeat.
On Point: Each Round, one Squadmate is On Point. This is shown by placing the On Point token next to their Squadmate Sheet. They will take the first turn in the Round, and their player (the On Point player) may have some additional duties during play.
Commander Shepard is always On Point at the start of a Mission, but the On Point token passes to a new Squadmate at the end of each Round.
The Strategy Pool: The twelve Strategy Dice form the Strategy Pool. During their turn, each player rolls the Pool, then chooses three dice from it to make Actions. This means the Pool gets smaller over the course of the Round, so players whose Squadmate goes earlier will have more options available to them.
Strategy Die Icons: Each Strategy die shows the following icons: Move (2 Movement Points), Move (3 Movement Points), Standard Action, Enhanced Action, Move (2 Movement Points) or Standard Action, and Core Ability.
Preparation Phase
In the Preparation Phase, draw a Hazard card for each Squadmate, and place it face-down next to their Squadmate Sheet without looking at it. If a Squadmate is Downed (see Downed Squadmates), no Hazard card is drawn for them.
Then, the On Point player gathers the twelve Strategy Dice to form the Strategy Pool. Dice that are Locked by a Downed Squadmate (see Downed Squadmates) will reduce the size of the Pool.
Squadmate Phase
In the Squadmate Phase, each Squadmate takes a turn, starting with the On Point Squadmate and continuing clockwise around the table.
A Squadmate's turn has three steps, which happen in order:
a. Strategy Roll b. Actions c. Hazard card
Step A: Strategy Roll
The player picks up all of the dice that remain in the Strategy Pool, and rolls them.
Before a player rolls the Strategy Pool, they can choose to Lock a single die rolled by the previous player, keeping the result that it showed at the end of their turn.
This cannot be done for the On Point Squadmate's Strategy Roll; as they are going first in the Round, they must always roll all of the dice in the Pool.
Diagram 5 shows the dice at the end of the second Squadmate's turn. Before the third Squadmate picks up the dice to roll them, they could choose to keep the die showing an Enhanced Action, and roll the other five.
Core Abilities
Each Squadmate has a Core Ability on their Squadmate Sheet. This is a special rule which can trigger at the start of their turn:
- Shepard can Command the other Squadmates, leading them as a team and coordinating their efforts.
- Garrus can Aim, allowing him to place precision shots and take out significant threats.
- Liara can use Analysis, predicting enemy movements and averting hazards.
- Tali's Combat Drone, Chatika, can rove ahead to attack enemies and hack doors and Turrets.
- Wrex can unleash his Blood Rage to deal damage to multiple Enemies at once.
When a player rolls the Strategy Pool, each icon they roll will trigger the current Squadmate's Core Ability, as explained on the Squadmate Sheet. Once this has been resolved, the player re-rolls any dice showing icons. Repeat this process (trigger the Core Ability, then re-roll) until there are no results remaining.
Step B: Actions
A Squadmate can take up to three Actions on their turn.
To take an Action, the current Squadmate's player selects a die from the Strategy Pool, and allocates it to an Action Space on their Squadmate Sheet showing a matching icon (see Action Spaces). Then resolve the corresponding Action, as described below.
Each Action Space can only be used once per Round. To show this, the die is left on the space. (Note some Actions have more than one Action Space, so they can be used more than once).
Once there are three dice on the Squadmate Sheet, the Actions step of the turn is over. Note a Squadmate must always take three dice from the Pool on their turn; if they do not wish to make three Actions, they may place dice on matching Action Spaces without resolving the Actions themselves.
Action Spaces
There are three types of Action Space. Each one can only have dice showing specific icons allocated to it.
- A Move Action space can have any die showing a Move Action icon allocated to it.
- A Standard Action space can have any die showing a Standard Action or Enhanced Action icon allocated to it.
- An Enhanced Action space can only have a die showing an Enhanced Action icon allocated to it.
Basic Actions
At the top of each Squadmate Sheet, there are Action Spaces for three types of Basic Action: Move, Mission and Revive. These Actions are common to all Squadmates.
Move: When a die is allocated to this Action, the Squadmate can make a Move Action, using 2 or 3 Movement Points depending on which die icon was allocated.
Each Movement Point lets you move the Squadmate into an adjacent hex. Any points that are not spent by the end of the Action are lost.
A Squadmate can move into a hex containing another Squadmate, as long as it does not end its Action there. A Squadmate cannot move into a hex containing an Enemy. If a Squadmate is adjacent to an Enemy and moves so it is no longer adjacent to that Enemy, it will provoke an Opportunity Attack as described in Additional Enemy Rules.
The Pin Tag: Immediately after an Enemy with the Pin tag makes an Opportunity Attack, the Squadmate's Move Action ends, even if it still has Movement Points left.
Mission: A die can only be allocated to this Action if there is a rule on the Mission Rules page that allows this to happen. When this is the case, the rules will explain what happens when a die is allocated here.
Revive: When a die is allocated here, choose a Downed Squadmate in an adjacent hex. That Squadmate is Revived, following the instructions on the back of their Squadmate Sheet.
Ability Actions
In addition to the Basic Actions that are available to all Squadmates, each Squadmate has a number of unique Actions available in their Ability Boxes.
When a die is allocated to an Action Space in an Ability Box, resolve the text in the box.
Remember: at the start of the campaign, only the Ability Boxes with solid blue backgrounds (as shown in Diagram 6) are available. Ability boxes with black backgrounds must be unlocked before they can be used, as described in Additional Rules.
A detailed breakdown of each Squadmate's Abilities can be found in the Squadmate Commentary section.
Enhanced Actions: Some Actions provide an improved effect if an Enhanced Action die is used. For example, Commander Shepard's Shoot Action deals additional Damage when an Enhanced Action die is used. Shepard's player can use the Shoot ability from the start of the Campaign, without needing to unlock it.
Damaging Enemies
Many Actions allow Squadmates to deal points of Damage to Enemies. This is tracked by placing Damage tokens next to the Enemy.
If the total amount of Damage suffered by an Enemy equals or exceeds its Shield Value, the Enemy is Defeated. Defeated Minions are returned to the Enemy Bag, while Defeated Elites are simply removed from the board.
Defeating an Enemy using an Ability will also award 1 XP.
At the end of a Round, all Damage tokens allocated to Enemies are removed from the Mission Map, representing your foes' shields recharging. Make sure you pick your targets carefully!
Elite Enemies handle Damage a little differently, as explained in Additional Enemy Rules.
The React Tag: If an Enemy with the React Tag suffers Damage but is not Defeated, it moves one hex towards the Squadmate who attacked it.
The Ranged Tag: An Enemy with the Ranged Tag can Attack non-adjacent Squadmates, as long as they are within its Line of Fire.
Step C: Hazard Card
Once a Squadmate has made their Actions, their player flips the Hazard card next to their Squadmate Sheet so it is face-up, then resolves it, and finally places it face-up in a discard pile next to the deck. If the Hazard Deck runs out, shuffle the discard pile and turn it face-down to create a new deck.
Most Hazard cards will instruct the player to Activate one or more Enemies. When multiple enemies are Activated, do this one at a time, starting with the one that is closest to the Squadmate who just took their turn (referred to as the "current Squadmate" on the cards) and moving outwards. When there is a choice of Enemies to Activate, the player may choose. Enemies that are Stunned are not Activated.
An Activated Enemy will Attack a Squadmate if it is adjacent to one, or if it has a Ranged Tag and there is a Squadmate in its Line of Fire. If it cannot make an Attack, it will Advance instead.
Invalid Activations: If a Hazard card instructs you to Activate an Enemy type, and no Enemies of that type are currently on the board, Spawn a Minion at the closest empty Spawn hex to the current Squadmate. Do this once for each Enemy type that cannot be Activated.
Attacking
First, select a target for the Enemy. Each Squadmate that is adjacent to the Enemy is a potential target; if the Enemy has the Ranged Tag, each Squadmate in its Line of Fire is also a potential target. The Enemy will Attack whichever potential target has the fewest Hit Points remaining before they are Downed. If two or more potential targets have equally low Hit Points, the current Squadmate's player may choose.
When a Squadmate is Attacked, they suffer Damage equal to the Enemy's Attack Value, as described in the Squadmate Damage sidebar below.
Squadmate Damage: Each time a Squadmate suffers a point of Damage, they lose a Shield Point. Move the tracking cube on their Shield Point Tracker one space to the left.
Once the cube reaches the first space on the Tracker, the Squadmate's shields have failed. While this is the case, each point of Damage the Squadmate suffers causes them to lose a Hit Point instead. Move the tracking cube on their Hit Point Tracker one space to the left.
If a Squadmate's Hit Points are reduced to 0, they are Downed. If Shepard is Downed, the Mission immediately ends in failure. If any other Squadmate is Downed, flip their Squadmate Sheet over (set aside any dice in their Action Slots) and follow the instructions listed there.
Advancing
The Enemy Advances, using 2 Movement Points.
Each Movement Point lets the Enemy move into an adjacent hex. Any points that are not spent by the end of the Activation are lost. An Enemy cannot move into a hex containing another character.
The player must follow these instructions, but is otherwise free to choose where the Enemy moves:
- If possible, the Enemy must end its move so that it is in a position to Attack the current Squadmate.
- Otherwise, it must end its move so that it is in a position to Attack the nearest Squadmate.
- Otherwise, it moves as far as possible towards the nearest Squadmate.
The Rush Tag: An Enemy with the Rush Tag can use up to 4 Movement Points when Advancing, instead of 2.
Spawning Minions
Some Hazard cards will instruct the player to Spawn a Minion at a specific Spawn hex, usually the one that is closest to or furthest from the current Squadmate. Only empty Spawn hexes are counted; if a Spawn hex already contains a character (either an Enemy or a Squadmate), it is ignored.
To spawn a Minion, draw a random token from the Enemy Bag and place it in the selected hex, with its Active side showing.
If all Spawn hexes are occupied, Minions cannot be Spawned.
End Phase
In the End Phase, each Squadmate recovers all their Shield Points. Move the tracking cube on their Shield Track to the furthest-right space.
Then, remove any Damage and Biotic Effect tokens (see Biotic Effects) from all Enemy tokens, and flip any Stunned Enemies that are not in Shrouded areas to their Active side.
Finally, the On Point token is passed to the Squadmate whose sheet is to the right of the current On Point Squadmate. If that Squadmate is currently Downed, pass it to the right again, continuing until it reaches a Squadmate who is not Downed.
Then a new Round begins.
Additional Rules
Unlocking Abilities
Each Squadmate Sheet shows a number of Locked Abilities, which cannot be used until they have been unlocked. Once an Ability has been unlocked, mark the box in the top-right corner to show this; it can now be used for the rest of the campaign.
There are three ways that an Ability can be unlocked:
- The Squadmate earns enough XP (see below).
- An "Intel Gathered" box with an icon is marked (see Intel Cache Tokens).
- The players are instructed to unlock an Ability by a Story Paragraph.
As soon as one of these criteria are met, the Squadmate's player immediately unlocks an Ability of their choice.
Earning XP
At the top-right of each Squadmate Sheet is the XP Tracker, as shown in Diagram 7. This has a column for each Mission (three Main Missions, and two Loyalty Missions), each made up of three boxes. Each column is filled from top to bottom.
Whenever a Squadmate's Action causes an Enemy to be Defeated, they gain XP. To show this, mark one of the boxes in the current Mission's column of that Squadmate's XP Tracker. When all three boxes in a column have been filled, the Squadmate may unlock an Ability.
A Squadmate may only gain three Experience per mission. Additional enemy Defeats do not overflow to the next column.
Advanced Abilities and Loyalty Abilities
Some unlockable Abilities are Advanced, and cannot be unlocked until another specific Ability has been unlocked.
This is indicated by a red border, a text note indicating the required Ability, and an Ability Matrix indicating the location of the required Ability on the Squadmate Sheet.
Three of Shepard's Advanced Abilities require two specific Abilities to be unlocked, instead of one.
Each other Squadmate has one Loyalty Ability, which can only be unlocked by following the Story Paragraph instructions after completing their Loyalty Mission.
In Diagram 8, Krogan Battlemaster cannot be unlocked until What Krogan Do Best has been unlocked.
Paragon Dice and Renegade Tokens
When the squad achieves a Paragon or Renegade Victory, it will gain a bonus for the rest of the campaign. These come in the form of Paragon dice and Renegade tokens.
Paragon Dice
Each time the squad achieves a Paragon Victory, they gain a Paragon die. This is added to the Strategy Pool in each subsequent Mission.
On their turn, a Squadmate can select one or more Paragon dice from the Pool in addition to the three dice they are normally allowed to select. This allows them to make four (or even five) Actions in a turn.
When a Squadmate is Downed, any Paragon die on their Squadmate Sheet are set aside; at the start of the next Round, they are returned to the Strategy Pool irrespective of whether or not the Squadmate is still Downed.
Renegade Tokens
At the start of each Mission, each Squadmate receives a Renegade token for each Renegade Victory that has been marked on the Campaign Map.
After rolling the Strategy Pool at the start of their turn, but before triggering their Core Ability, a player can return one of their Squadmate's Renegade tokens to the game box, and then change the result of a single die to any result they choose.
Loot Tokens
When a Squadmate moves into a hex containing one or more Loot tokens, those tokens are flipped face-up and added to the squad's Inventory. Place them next to Shepard's Squadmate Sheet to show this.
Any Squadmate can use Loot tokens from the Inventory, following the rules below.
Grenade and Grenade Cache Tokens
At the start or end of any Action that a Squadmate makes, they can discard a Grenade or Grenade Cache token from the Inventory to throw a Grenade.
Pick a target hex in the Squadmate's Line of Fire, and within three hexes. Each Enemy in the target hex, or adjacent to it, suffers two damage if a Grenade token was discarded, or three damage if a Grenade Cache token was discarded. Then return the token to the game box.
Any Grenade or Grenade Cache tokens that are being carried at the end of a Mission are returned to the game box.
Medi-gel Tokens
At the start or end of any Action that a Squadmate makes, they can discard a Medi-gel token from the Inventory to use it on themselves or another Squadmate within two hexes.
The chosen Squadmate immediately recovers up to 2 Hit Points. Then return the token to the game box.
Any Medi-gel tokens that are being carried at the end of a Mission are returned to the game box.
Intel Cache Tokens
At the end of a Mission, for each Intel Cache token that is in the squad's Inventory, mark an empty Intel Gathered box on the Campaign Map. (These should be marked in order, from left to right).
If a box with an icon is marked, one Squadmate can immediately unlock a new Ability (see Unlocking Abilities).
Then return all Intel Cache tokens to the game box.
Turrets
When the squad faces Cerberus forces, the map will also show a number of Turrets, each with its own Turret Status token. Characters can freely enter a hex containing a Turret.
Each Turret has a Line of Fire in a similar way to a character. Unlike a character's Line of Fire, a Turret's Line of Fire includes its own hex, but only extends in a single direction, indicated by an arrow on the token. A Turret's Line of Fire never changes, so they can be avoided with relative ease.
Turrets are activated by Hazard cards, which will cause them to deal Damage to each Squadmate in their Line of Fire. If a Squadmate is in the Line of Fire of multiple Turrets, each one will deal Damage in turn, one at a time.
The amount of Damage the Turret deals will be shown on the Hazard Card.
When a Turret is Disabled (usually by a Squadmate's Ability), flip its token so that the Disabled side is showing. It no longer has a Line of Fire, and cannot deal Damage.
Additional Enemy Rules
Opportunity Attacks
If a Squadmate is adjacent to an Active Enemy, and it moves so it is no longer adjacent to that Enemy, the Enemy makes an Opportunity Attack. This deals Damage to the Squadmate equal to the Enemy's Attack Value.
If multiple enemies make Opportunity Attacks, they are resolved one at a time, starting with the Enemy with the highest Attack Value, and continuing in order from highest to lowest.
If a rule forces a Squadmate to move, this does not provoke Opportunity Attacks.
Tags
Some Enemy tokens show a Tag in addition to their Attack and Shield Values. There are four Tags, each with their own rules:
- Pin: Immediately after an Enemy with a Pin Tag makes an Opportunity Attack, the Squadmate's Move Action ends, even if it still has Movement Points left.
- Ranged: An Enemy with the Ranged Tag can Attack non-adjacent Squadmates, as long as they are within its Line of Fire.
- React: If an Enemy with the React Tag takes Damage and is not Defeated, it immediately moves one hex towards the Squadmate that inflicted the Damage, as though it were Advancing. The player controlling that Squadmate can choose the specific hex it moves into, as long as it ends the move as close to the attacking Squadmate as possible.
- Rush: An Enemy with the Rush Tag can use up to 4 Movement Points when Advancing, instead of 2.
Elites
Each Mission features one or more Elite Enemies which are harder to Defeat than Minions. To represent that they are tougher, they have a Resilience Tracker.
A Resilience Tracker is made up of a column of Shield Values, each with a progress box next to it. In order to Defeat an Elite Enemy, you must exhaust every level of Shield Value in its Resilience Tracker from top to bottom.
As soon as the Damage suffered by an Elite Enemy is equal to the current top Shield Value on its Resilience Tracker, that Shield Value is exhausted. Any excess Damage from that Attack is disregarded. Mark the Shield Value's progress box, and remove all Damage tokens from the Enemy. You must then exhaust the next level of Shield Value down, and so on, until none remain.
Once the last level of Shield Value has been exhausted, the Enemy is Defeated, and the Squadmate who inflicted the last point of Damage gains 1 XP.
Resilience Tracker Example: This Ravager suffered 4 Damage in the first Round, which exhausted its first level of Shield Value. It then suffered 6 Damage in the second Round, which exhausted its second level of Shield Value. It still needs to suffer 5 Damage in order to be Defeated.
Stunning Enemies
Some Actions allow Squadmates to Stun enemies.
When an Enemy is Stunned, flip it so its Stunned side is face-up. Stunned enemies cannot make Opportunity Attacks, and are never Activated.
In the End Phase, all Stunned enemies (that are not in Shrouded Areas) are flipped back to their Active side.
Biotic Effects
Some Squadmates have the ability to give Enemies Biotic Effect tokens. These are placed on the Enemy in the same way as a Damage token, and stay in place until the end of the Round.
An Enemy token with a Biotic Effect token counts its Attack Value as 2 lower, to a minimum of 0.
An Enemy token cannot have more than one Biotic Effect token.
Mission Objectives
Each Main Mission has a Paragon Objective, a Renegade Objective and a Secondary Objective:
Paragon Objectives (blue box) will end the Mission when completed, resulting in a Paragon Victory. This is usually more challenging, but scores more War Readiness.
Renegade Objectives (red box) will end the Mission when completed, resulting in a Renegade Victory. This is usually a more direct route to victory, but scores less War Readiness.
Secondary Objectives (yellow box) are optional. They have no bearing on the Mission's success or failure, but offer additional rewards if they are completed.
Paragon and Renegade Paths: Throughout the campaign you will have the option to choose Paragon or Renegade Mission Objectives. The outcomes are always mutually exclusive - you can choose only one.
Paragon Objectives involve altruism, heroism, and a desire to find a less confrontational approach. These Objectives require extra effort and self-sacrifice to ensure the safety of others, but will ultimately result in a more rewarding victory overall.
Renegade Objectives are achieved by approaching a mission with ruthless pragmatism and callous efficiency. These Objectives focus on achieving the primary mission, often forgoing side objectives that do not have an immediate, personal reward.
Loyalty Objectives
Loyalty Objectives (purple box) only appear in Loyalty Missions, in place of the Paragon and Renegade Objectives. Completing one will end the Mission, and score a small amount of War Readiness. Also, they allow the Squadmate whose Loyalty Mission is being attempted to unlock a special Ability.
Preliminary Objectives
Sometimes, a Paragon, Renegade, or Loyalty Objective is attached to a Preliminary Objective (gray box) by an arrow. The Paragon or Renegade Objective cannot be attempted at the start of the Mission, and any text in that Objective's box should be ignored for the moment.
When the Preliminary Objective has been completed, mark the box in its top-right corner. Now, the attached Paragon, Renegade, or Loyalty Objective can be attempted, and any text in its box comes into effect.
Ending a Mission
A Mission can end in one of four ways:
- The Paragon Objective is completed, resulting in a Paragon Victory.
- The Renegade Objective is completed, resulting in a Renegade Victory.
- Time runs out, resulting in a Failure.
- Shepard is Downed, resulting in a Failure.
In a Loyalty Mission, there is no Paragon or Renegade Objective, but if the Loyalty Objective is completed, the Mission ends in victory.
The Mission Rules page gives instructions on what to do in each case. Generally, when the Mission ends, you will be instructed to read a Story Paragraph, mark the outcome on the Campaign Map, and possibly receive an additional reward of some kind.
Saving Progress
You don't need to play through a whole campaign in a single sitting. Packing the game away between Missions is easy; your progress is recorded by the marks you've made on the Campaign Map and Squadmate Sheets.
If you prefer a more high-tech option (or if you wish to track multiple campaigns at once), a QR code in the rulebook will direct you to the Mass Effect: Priority Hagalaz Campaign Tracker.
Map Features
Some Mission Maps include icons which indicate the presence of certain special features.
Bonus Loot Icons
Bonus Loot icons may be referenced in the Additional Setup Instructions of certain Missions.
If this is not the case, a Loot token is placed into each hex with a Bonus Loot icon during setup, as if it were a regular Loot icon.
Fast Travel Icons
Some Missions feature transport shuttles, access panels, or similar. These are represented by matching pairs of Fast Travel icons.
A Squadmate in a hex with a Fast Travel icon can spend a Movement Point to move to the other hex that shares the same Fast Travel icon. This does not provoke Opportunity Attacks by Enemies.
Enemies cannot make use of Fast Travel hexes.
Inferno Icons
Some Missions feature areas of intense, scorching flame. These are Inferno hexes, and are marked with an Inferno icon.
When a Squadmate or Minion moves into an Inferno hex, it suffers 1 Damage.
In addition, at the start of the Round, each Squadmate or Minion in an Inferno hex suffers 1 Damage. Elites are unaffected.
When Activating a Minion, it will only move into an Inferno hex if there is no other way for it to fulfill its movement criteria.
Coolant Leaks
Some Missions feature jets of freezing gas, resulting from extensive damage to mechanical areas. These are Coolant Leak hexes, and are marked with a Coolant Leak icon.
When a Squadmate ends their turn in a Coolant Leak hex, they suffer 2 Damage. Enemies are unaffected by Coolant Leaks.
Terminal Icons
Some Missions feature computer terminals, indicated by Terminal icons. A hex containing a Terminal icon is a Terminal hex, and will have special rules indicated in the Mission Objectives.
Elevation Change Icons
Some Missions feature elevation changes, representing trenches or raised platforms. These are represented by Elevation Change icons, which sit on the border between two hexes.
The hexes on one side of an Elevation Change icon are High Ground, and the hexes on the other side are Low Ground, as shown in Diagram 9.
A character can move freely from High Ground to Low Ground across an Elevation Change icon, but cannot move from Low Ground to High Ground. Otherwise, the hexes on either side of an Elevation Change icon still count as being adjacent.
A character never counts as being in the Line of Fire of a character or Turret at a different elevation, unless they are in adjacent hexes.
Squadmate Commentary
This section gives additional clarifications and commentary on how certain Squadmate Abilities and components work during play.
Commander Shepard
Command Tokens: A Ready Command token is one that has been flipped so its Command side is face-up.
Warp: This Ability has no effect on enemies with a Biotic Effect token, as they cannot have more than one (see Biotic Effects).
Barrier: This Ability only triggers when you complete a Move Action. Other rules or Abilities letting you move Shepard – for example, the Adrenaline Rush Ability – do not allow you to regain a Shield Point.
Incinerate: The rules for counting distances can be found in Counting Distances.
Garrus Vakarian
Concussive Shot: The Enhanced version of this Action can only be used against Enemies 3 or more hexes away from Garrus, following the rules for counting distances (see Counting Distances).
In Diagram 10, Garrus is using Concussive Shot with an Enhanced Action die. Husk 1 is two hexes away, so is not a valid target for the Enhanced version of the Action; however, Garrus could still use the Enhanced Action die to perform the standard version of the Action, and deal 1 Damage.
Husk 2 is three hexes away, so can be dealt 3 Damage with the Enhanced version of Concussive Shot.
Turian Rebel: The number of Movement Points available when making this Action depends on the die icon you allocate to the Action Space, in the same way as a standard Move Action.
Overload: The rules for counting distances can be found in Counting Distances. This Ability can only Stun a Minion, not an Elite.
Proximity Mines: Garrus' Proximity Mine tokens are replenished at the start of each Mission once he has unlocked this Ability. If you unlock this Ability during a Mission, immediately take the three Proximity Mine tokens.
Calibrate: If your Aim Value is 2 or 3, the Concussive Shot, and Assassination Abilities can deal 1 additional Damage to the target. If your Aim Value is 4 or more, those Abilities can deal 2 additional Damage. You can only do this once per turn. Note this has no effect on the Armor-Piercing Rounds Ability.
Liara T'Soni
Analysis: You can decide whether to use Analysis after making your Strategy Roll and after moving the Analysis token one space to the right for each icon you rolled.
You can only choose Hazard cards face-down next to a Squadmate Sheet – you cannot choose ones still in the deck!
Stasis / Singularity: Remember only Minions can be Stunned, not Elites.
Pistol Shot: The rules for counting distances can be found in Counting Distances.
Lift / Warp Ammo / Biotic Explosion: Remember an Enemy can only have one Biotic Effect token (see Biotic Effects).
Pure Biotic: Remember to apply the rules for counting distances – you can only count via adjacent hexes, so this Ability cannot be used, for example, to target an Enemy behind a closed door.
Shadow Broker Intuition: You can use this Ability when an Enemy targets any Squadmate, not just Liara.
Asari Controller: Once you have unlocked this Ability, Enemies with Biotic tokens effectively count as having no Tags. This means enemies with the Ranged Tag cannot Attack Squadmates not adjacent to them, and will behave accordingly.
Tali'Zorah nar Rayya
Combat Drone: Chatika is a token, not a character. It cannot be damaged, and Enemies effectively ignore it.
Pistol Burst: The rules for counting distances can be found in Counting Distances.
Sabotage Turret: Disabled Turrets do not normally have a Line of Fire, but they temporarily gain one for the purposes of resolving this Ability.
Sabotage Enemy: If Liara has unlocked the Asari Controller Ability, you can still choose an Enemy with a Ranged Tag, even if it has a Biotic Effect token.
Energy Drain: If you have full Shield Points, you can still use this Ability to deal Damage – the other part of the rule, which lets you regain a Shield Point, is simply ignored.
Urdnot Wrex
Rage Tokens: Rage tokens are double-sided. An Enraged token is one that has its Enraged side face-up. A Calm token is one that has its Calm side face-up.
What Krogan Do Best: When determining whether an Enemy is closer to Wrex than it was at the start of its move, use the rules for counting distances (see Counting Distances).
Krogan Battlemaster: You cannot use this Ability if all your Blood Rage tokens are showing their Calm side. In addition, you can only use this Ability once per Action.
Lift Grenade: You can use this Ability on an Enemy that already has a Biotic Effect token, but remember that they can only ever have one Biotic Effect Token (see Biotic Effects).
Shoot It 46 More Times: The second time you resolve the Shotgun Blast Action using this Ability, you deal the same amount of Damage as the first. In other words, if you allocated a Standard Action icon, deal 2 Damage both times; if you allocated an Enhanced Action icon, deal 4 Damage both times.
Achievements
The rulebook lists three Achievements players can earn during the campaign: Detonator, Data Archivist and Preserver.
Icon Reference
Maps: Terminal, Terminal 1, Terminal 2, Fast Travel (A), Fast Travel (B), Minion Spawn, Elite Enemy Spawn (x3 variants), Start Hex, Start Hex (Shepard), Start Hex (Garrus), Start Hex (Liara), Start Hex (Tali), Start Hex (Wrex), Coolant Leak, Inferno, Map Exit.
Tokens: Objective, Refugee, Loot, Bonus Loot, Door (Locked), Door (Unlocked), Active Turret, Disabled Turret, Shield Value, Rage, Command, Attack Value, Damage, Biotic Effect, Proximity Mine, Tali's Drone: Chatika.
Enemy Tokens: Rush Tag, React Tag, Ranged Tag, Pin Tag, Stunned, Low Challenge, Medium Challenge, Extreme Challenge.
Cards: Spawn Nearby, Spawn Far Away, Activate, Activate Elites, Activate Enemy, Activate Spawned Enemy, Special instruction, Activate Furthest Enemy.
Dice: Standard Action, Move (3 Movement Points), Core Ability, Move (2 Movement Points), Enhanced Action, Move (2 Movement Points) -OR- Standard Action.
Squadmate Sheet: Health, Shield, Standard Action, Downed, Enhanced Action, Aim, Depleted Shield.