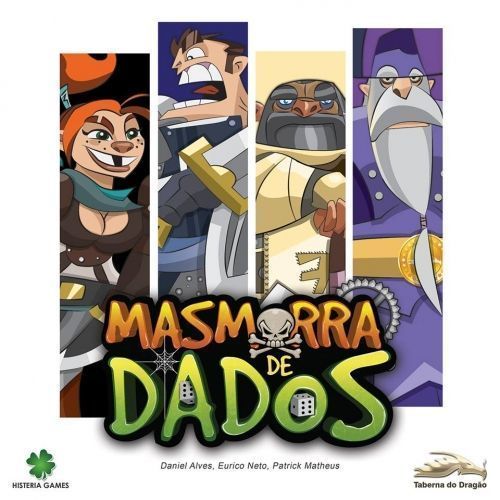
Masmorra de DADOS
Masmorra de DADOS Rulebook
Table of Contents
Table of Contents
- Components
- Setup
- Player's Book
- Dice and Symbols
- Animal Companions
- Abilities
- Dungeon Master Phase
- Monster Room Limit
- Rooms
- Treasure Cards
- Monsters
- Combat
- Monster Statistics: Second Monster Book
- Scoring and End of Game
- Example of a Turn
- Extras and Expansions
- Large Rooms Expansion
- Bosses
- Expansion: Third-Level Room and Final Boss
- Heroic Mode (Cooperative and Solo)
- Changes to the Turn Structure
- Changes to Actions
- Changes to Components
- Specific Rules for Cooperative Mode
- Specific Rules for Solo Mode
- Increasing the Difficulty of Heroic Mode
- Cooperative Variant
- House Rules
- Clarifications
Components
- [?] game cards (ability cards and treasure cards)
- [?] coins
- [?] plastic cubes (markers for [...])
- [?] dungeon room tiles
- [?] character sheets
- [?] dice
- 3 Dungeon Master tokens
- [?] time markers
- [?] rune markers
- Rulebook
Setup
- Separate the room stacks.
- Place the starting room.
- Separate the game components.
- Deal the treasure cards.
- Deal the character sheets.
- Place the character dice.
- Start the game.
Separate the room stacks. Set up the room stacks by level (1 and 2). Use the number of rooms indicated on the back of the rules for the number of players: [?] for two players, [?] and [?] for three players, and all rooms for a four-player game. This gives you two room stacks, one per level.
Shuffle each stack separately (rooms face down): the first-level stack and the second-level stack. Reveal the top room of the first-level stack. If it is a trap, set it aside and reveal a new room until the revealed room is not a trap.
Place the second-level staircase room on top of the second-level stack (green back).
The rules for the solo and cooperative modes differ from the basic game and are explained later in this book.
Place the starting room. Place the starting room with some free space on the table, and leave room for the second level of the dungeon as well. The first-level and second-level dungeon maps are built around the starting room and the second-level staircase room respectively.
Separate the components. Shuffle the treasure cards and place the pile where all players can reach it. Also place the coins and the minor and major monster dice within reach.
Deal the treasure cards. Each player receives two treasure cards.
Character sheets. Give each player a character sheet and the character's ability cards (the cards that show the character's picture). Place an experience marker on the "0" UP position. The ability cards are placed under the sheet; they are unlocked during the game.
Character dice. Place the dice in the colours of the classes present in this game on the starting room, with the six face up. These dice mark each character's life and position on the map.
Who starts. The player who last ran a roleplaying session decides who starts. If preferred, the players may use a dice roll to decide who starts.
The first player starts with the six action dice and the Dungeon Master token.
Dungeon Master token. In the basic game, the Dungeon Master token passes around the table only as a reminder for players to move the monsters at the end of the turn. Once players are used to Masmorra de Dados, they may play without this physical reminder.
In heroic mode the Dungeon Master token has an extra function: it tracks the game's time limit (explained in the "Heroic Mode" section).
Player's Book
On your turn, you take the action dice and roll them. The results define which actions and strategies are possible this turn.
"You bet that I'll come out..." -Alda Aeyflower
Each player starts their turn with one free Boot symbol (printed on the character sheet). The player may use this symbol at any moment of their turn, including before rolling the action dice.
Structure of a turn
Player phase
- If desired, the player may now use the free Boot symbol. This symbol may be used at any moment of the turn.
- Roll the six action dice, and re-roll any number of them up to two times.
- Use the dice to take actions. Set the used dice aside on your sheet as you go.
- Convert the unused dice into coins: five coins can be exchanged for one treasure card.
Dungeon Master phase (for rule purposes this phase is not considered the player's turn)
- Move up to two monsters one space each, or move one monster two spaces.
- Roll and place monster dice on empty monster rooms, on the levels that still have characters present.
- Pass the action dice and the Dungeon Master token to the next player.
Rolling the action dice. Roll the six dice. You may re-roll any number of them up to two times until you reach your final result. You may keep any die at any point between rolls. Once a die is kept, the player counts it as its symbol, or as the effect of the ability (see below).
Using the dice. Each die may be used to:
- Place the die on your sheet to gain a symbol equal to the die face on top, or
- Dock the die on an ability ("docar" in the original) to gain a better effect (see "Dice and Symbols").
Unused dice may be activated at any moment the player chooses. Symbols generated must be used in the room where the character is, and they are discarded when the character leaves that room. The Boot symbol is the only symbol that is not discarded when the character moves from one room to another. Once a Boot symbol is generated, it may be used at any time during the character's turn.
Using a die. When this book says "Die of [symbol]" (with [symbol] being one of the six symbols), it refers to a die whose top face shows that symbol. When this book says "[symbol] symbol" (or just the symbol name, without the word "symbol"), it refers to what is obtained by using a given die, ability or item. Examples: you obtain a Shield by using a Shield die. You obtain two Shields by docking a Boot die on the "Dodge" ability of Alda Aeyflower.
Dice and Symbols
Symbol functions
-
Boot: with a Boot symbol you may perform one of the following:
- Explore a new room: if there is a free space adjacent to the room where your character die is:
- Take the top room of the stack for the floor where your character is (if there are no more rooms on this floor, exploring is not an option).
- Place the new room on a free space adjacent to the room where your character die is, and move your character die to this new room.
- Gain one experience point (UP).
- Reveal the new top room of the stack. If it is a trap room, place it on one of the empty spaces adjacent to this newly explored room. If there are no empty spaces, place it on any available empty space on this floor of the dungeon.
- Repeat the step "reveal the new top room" until no trap room is revealed. You may open at most three traps while exploring.
- Check the description of Traps on page 4 for details.
- Move your character up to two already-explored rooms. Movement is between adjacent rooms only, orthogonally (no diagonal movement). You may not leave rooms that contain monsters without fighting them. You may not move through one room and explore another with only one Boot symbol. If you take an action or enter combat with a monster, you interrupt your movement.
- Explore a new room: if there is a free space adjacent to the room where your character die is:
-
Bow: the Bow symbol is used to fight monsters in the same room as your character at range. If you have a number of Bows equal to or greater than the monster's Defence, the monster is defeated and your character takes no attack damage from it. You may combine Bow symbols with Sword symbols to defeat monsters, but in that case the combat counts as melee and your character takes the monster's attack normally.
Melee and ranged combat
- Melee combat is any combat carried out with at least one melee symbol. In this type of combat you are subject to the monster's attack, even if you defeat it.
- Ranged combat is any combat carried out exclusively with ranged symbols. In this type of combat you are not subject to the monster's attack if you defeat it.
Animal Companions
Some characters have animal companions that give them an extra action die. Usually this extra die works like the common action dice, with some exceptions. If your abilities are cancelled, for example, you lose the use of this extra die for that turn. Also, if you have already made your rolls for the turn and then gain an animal companion, you roll this die only once.
Abilities
Each character gains a new permanent ability whenever the character crosses a line on the experience table (3, 7, 12 and 17 UP; numerals read from the cipher, see source note). Slide the chosen card up, so that the new ability is visible (the new ability cannot be used in the same turn).
Types of abilities. Abilities come in four types:
- Continuous effect
- Dock dice
- Pay coins
- Dock a die and pay a coin
Continuous effect. These effects give a game benefit to the character and are active from the moment the player gains the ability.
Dock dice. Physically place the appropriate die on the square symbol to obtain its effect. The symbols obtained this way must be used in the character's current room. Unused symbols are discarded when the character changes room or ends the turn. The Boot symbol is the only one that may be kept from one room to another. This type of ability can be used only once per turn.
Pay coins. Pay the indicated number of coins to obtain the effect. An ability marked with a colon (:) may be used more than once in the same turn, once for each payment.
Dock a die and pay a coin. Works like "Dock dice", but you pay one coin when you dock the die. This type of ability can be used only once per turn.
Unused dice. At the end of your actions, or when you decide to end your player phase, all unused dice are converted into coins. You may not hold more than six coins; any coins that would exceed six are not received. At any time you may exchange five coins for one treasure card.
Dungeon Master Phase
After the end of your actions, the Dungeon Master phase takes place, in which you control the movement and appearance of monsters on the map. You have the right to move monsters: move two monsters up to one space each, or one monster up to two spaces. Monsters stop their movement when they meet a character. It is not possible to move a monster that is in the same room as a character.
You may choose not to move monsters, or to move only one monster one space.
After this movement, roll the corresponding monster dice for the empty monster rooms on the levels that still have characters present: minor monsters for the skull symbols and major monsters for the dragon symbols, and place them on the rooms. You may choose where to place each rolled monster, as long as it matches the type indicated (minor or major).
A player who is defeated in their turn still has one final Dungeon Master phase. After that, pass the six action dice to the next player for their turn.
Monster Room Limit
Each room has a maximum capacity of three minor monsters (one major monster counts as two minor monsters). This capacity applies only to the number of monsters in the room; any number of players may share the same room.
Monsters may not be moved into a room that is already at its limit. If some other effect forces the limit to be exceeded in a room, remove from the dungeon the monster that gives the fewest UP, and repeat this as needed, until the limit is obeyed. If monsters are tied for the fewest UP, the player whose turn it is decides which one is removed.
Rooms
A player gains one experience point for each room explored.
The types of rooms and their effects, in addition to the UP gained for exploring them, are listed below.
Starting room. All characters (represented by the classic coloured dice) begin the game in this room. It is already open and does not give exploration UP to anyone.
Rune room. This type of room has no extra effect in the basic game mode.
"None of you will survive my dungeon! All of you will perish!" -Aelltis Durgan
Trap room. The trap room is a special case. It is not explored like other rooms: it comes into play adjacent to a newly explored room as soon as it appears on top of the stack. The exploring player may decide which free space adjacent to the explored room the trap is placed on. If the new room revealed on top is also a trap, it also comes into play. If there are no more free spaces adjacent to the newly explored room, the player chooses any other room on that level with a free space for the trap to be placed.
The trap affects all rooms adjacent to it. All characters present in the affected rooms immediately receive one point of damage when the trap comes into play.
While the trap is in play, each player who enters an affected room immediately receives one point of damage for each trap affecting that room. This trap damage cannot be prevented. In addition, the character may receive one more point of damage per active trap when leaving that room by moving with a Boot. Leaving a room by teleport effects does not cause this exit damage.
The player may disarm a trap affecting the room where their character is by docking the two dice specified on the trap room. Each disarmed trap grants two experience points. Turn over the trap rooms that have been disarmed. Monsters are immune to the effects of traps.
A disarmed trap no longer causes damage effects.
A trap room is surrounded by walls, so no character or monster can walk on it, whether disarmed or not.
Trap rooms are not normal rooms and do not give UP to whoever discovers them, only to whoever disarms them.
It is only possible to disarm a trap after combat (if there is combat).
Captions printed beside the trap illustration: 1) Active trap; 2) Disarmed trap.
Treasure room. When exploring this room, place a coin on it. Any player whose character is on a treasure room that still holds the coin may dock the die matching the symbol printed on the room (solving the riddle / opening the lock) to gain this coin and buy a treasure card. If the player does not do so, the coin remains and marks that this treasure has not yet been taken.
It is only possible to perform the docking action on the room after trap effects and combat (if they exist).
Portal room. A character may move from this room to any other already explored room by docking a magic die. This happens after trap effects and combat (if they exist).
Minor monster room. When explored, roll a minor monster die (red die) and place it on this room. If there are no more minor monster dice available, the player must take the minor monster die (not engaged in combat) that is farthest from their character and roll it. The character must fight the monster rolled. Whenever this room becomes empty, a new minor monster appears in it at the end of the current turn (at the end of the Dungeon Master phase).
First-level staircase room. A player in this room may move to the second-level staircase room as if it were an adjacent room.
Second-level staircase room. This room begins the game on top of the second-level room stack. A player in this room may move to the first-level staircase room as if it were an adjacent room. The rooms of the second-level stack are explored from this room.
Major monster room. When explored, roll a major monster die (white die) and place it on this room. If there are no more major monster dice available, the player must take the major monster die (not engaged in combat) that is farthest from their character and roll it. The character must fight the monster rolled. Whenever this room becomes empty, a new major monster appears in it at the end of the current turn (at the end of the Dungeon Master phase).
Treasure Cards
Whenever you defeat a monster, "solve the riddle / open the lock" in a treasure room, or exchange five coins, you buy a treasure card.
The hand limit is six cards. If a player already has six when buying a new card, they may choose to discard one in order to buy the new card.
There are two types of treasure cards, each with two sections:
Action card. A card that produces an effect when played:
- Usable as an interrupt (brown section)
- Usable on your turn (purple section)
Heroic card. A card with effects that differ depending on the game mode:
- In the competitive game (blue section): extra UP that is counted at the end of the game.
- In heroic game modes (red section): grant negative effects to the players (explained in the heroic mode rules; ignore this part of the card if you are playing the basic game).
Cards are kept secret in the player's hand and are revealed only when they are used or at the end of the game. At any time during your turn you may use an effect of an action card with a purple background: "gain" what is written on the card and place the card on a discard pile beside the treasure deck.
Effects of the interrupt type may be used at any moment the effect applies (some of them are executed at specific moments, and in that case the card says so). If more than one interrupt effect is used in sequence, they resolve from last to first (the last one played is the first to take effect).
Defeated characters. If a player causes the death of another player's character by using a card that causes damage, that player receives all the coins of the player whose character was defeated, and also one card drawn at random from among the cards that player holds. The other cards of a player defeated during the game are discarded to the discard pile.
Heroic cards have their effect only at the end of the game, granting extra UP to the players who hold them. The purpose of this is to keep the winner uncertain until the end of the game.
If necessary, reshuffle the discard pile.
Monsters
(Monster's Book)
Monster dice show two numbers (attack and defence), a special ability (marked with an asterisk, *), and how many experience points (UP) they give the character who defeats them.
- The first number is the monster's attack: how much damage it deals to a character in melee combat.
- The second number is the defence: the amount of damage needed to defeat the monster. If this number is not reached during the turn, the monster is not defeated and remains in play.
Whenever a monster is defeated, the character who defeated it gains UP (experience points) and also a treasure card.
Once a character reaches or passes the 7 UP mark, minor monsters that the character defeats grant one extra UP. The red die symbol at 7 UP on each character sheet is there to remind players of this rule.
The monsters of the basic game are listed below with their statistics, type, special abilities and the UP they grant. Statistics are written as Attack/Defence. Numerals were checked against the monster art on the printed page; see the source note.
Goblin
- Attack/Defence: 1/2
- Type: Humanoid
- Special abilities: Quick attack: attacks even if defeated at range.
- 2 UP
Cultist
- Attack/Defence: 2/2
- Type: Humanoid
- Special abilities: Steals a Heal.
- Before combat: prevents Heal dice from being used or modified with Magic.
- When combat begins: steals one Heal die from the player. If that is not possible, it steals one Heal symbol. (The loss cannot be prevented by using the die or modifying it with Magic; the die is set aside as used without generating its symbol or any other benefit to the player.) If the player has no Heal die or symbol during combat, the player loses nothing.
- 2 UP
Skeleton
- Attack/Defence: 2/2
- Type: Undead
- Special abilities: Immune to Bow damage. Any damage from Bow symbols is reduced to zero.
- 2 UP
Orc
- Attack/Defence: 3/2
- Type: Humanoid
- Special abilities: None.
- 2 UP
Spider
- Attack/Defence: 2/4
- Type: Animal
- Special abilities: Web. No character may leave a room that contains a Spider, except by using a teleport effect.
- 3 UP
Ghoul (Carniçal)
- Attack/Defence: 3/3
- Type: Undead
- Special abilities: Steals a Boot.
- Before combat: prevents Boot dice from being used or modified with Magic.
- When combat begins: steals one Boot die from the player. If that is not possible, it steals one Boot symbol. (The loss cannot be prevented by using the die or modifying it with Magic; the die is set aside as used without generating its symbol or any other benefit to the player.) If the player has no Boot die or symbol during combat, the player loses nothing. The Boot in the character's starting sheet may also be stolen this way.
- 3 UP
Ogre
- Attack/Defence: 3/3
- Type: Humanoid
- Special abilities: None.
- 3 UP
Giant Bat
- Attack/Defence: 2/3
- Type: Animal
- Special abilities: Quick attack: attacks even if defeated at range.
- Steals a Bow.
- Before combat: prevents Bow dice from being used or modified with Magic.
- When combat begins: steals one Bow die from the player. If that is not possible, it steals one Bow symbol. (The loss cannot be prevented by using the die or modifying it with Magic; the die is set aside as used without generating its symbol or any other benefit to the player.) If the player has no Bow die or symbol during combat, the player loses nothing.
- 3 UP
Gelatinous Cube
- Attack/Defence: 3/3
- Type: Ooze
- Special abilities: Can only be defeated with Magic. Damage from Sword and Bow symbols is reduced to zero. Each Magic symbol causes one point of damage (so you need three Magic symbols to defeat it at range).
- 3 UP
Major monsters
Apparition (Aparição)
- Attack/Defence: 3/3
- Type: Undead
- Special abilities: Steals one UP from the character unless it is defeated with three Heals. Immune to Bow damage: any damage from Bow symbols is reduced to zero. Can move through walls and trap rooms.
- 3 UP
Dark Observer (Observador Sombrio)
- Attack/Defence: 3/4
- Type: Aberration
- Special abilities: You may not use any ability of your character while in the same room as a Dark Observer.
- 4 UP
Young Dragon (Dragão Jovem)
- Attack/Defence: 4/4
- Type: Dragon
- Special abilities: Ignores the first point of Bow damage.
- 4 UP
Combat
If your character is in a room with one or more monsters during your turn, you must fight all the monsters present, even if you cannot defeat them (for example, because you have no dice left to use), before healing or moving to another room.
You defeat a monster by causing damage equal to or greater than its defence. Combat is all or nothing: either you defeat the monster, or it remains in the room as it was. Monsters do not carry damage from one turn to the next.
Remember that in melee combat the character receives the monster's attack.
When a character takes damage, update the character die with the new remaining life value.
If there is more than one monster in the room, you may choose the order in which you fight them. However, all abilities of the monsters present in the room are active.
Treasures are bought and UP added only after combat, and only if you defeated at least one monster.
Card effects may be used before or after combat. Symbols generated by cards before combat may still be used.
Healing happens only after combat. If a character loses all its life points in combat, it is eliminated, even if it has Heal symbols. If a character takes more damage than its life, remove its die from the map: you are eliminated from the game. "Another brave adventurer falls in the dungeon of Aelltis Durgan, but their next journey will begin soon!"
You may, if you wish, restart combat in a room where you have already fought.
Monster Statistics: Second Monster Book
"NO! The bridge is MINE! MINE! Want to cross? Pay the toll!" -Troll
Monster expansion (sold separately): you may play the game with only this expansion, in place of the monsters that come with the basic game, with all monsters populating the dungeon in alternation or drawn with the help of dice bags. Either option is valid.
The monsters of the monster expansion are listed below.
Minor monsters
Giant Rat (Rato Atroz)
- Attack/Defence: 1/1
- Type: Animal
- Special abilities: Does not count toward the monster limit in a room. Gives no treasure when defeated.
- 1 UP
Aobold
- Attack/Defence: 1/2
- Type: Humanoid
- Special abilities: If there are more monsters in the room, it gains [...]. Quick attack: attacks even if defeated at range.
- 2 UP
Zumbi (the name is partly garbled in the text layer, reading "]umbi")
- Attack/Defence: 1/3
- Type: Undead
- 2 UP
Gargoyle (Gárgula)
- Attack/Defence: 2/2
- Type: Elemental humanoid
- Special abilities: Can only be killed with Magic. Damage from Sword and Bow symbols is reduced to zero. Each Magic symbol causes one point of damage (so you need two Magic symbols to defeat it at range).
- 2 UP
Harpy (Hárpia)
- Attack/Defence: 2/2
- Type: Humanoid
- Special abilities: Quick attack: attacks even if defeated at range.
- Steals a die.
- Before combat: prevents one of the dice from being used.
- When combat begins: steals one die of the player's choice. (The loss cannot be prevented by using the die or modifying it with Magic; the die is set aside as used without generating its symbol or any other benefit.) If the player has no die during combat, the player loses nothing.
- 3 UP
Oxidising Insect (Inseto Oxidante)
- Attack/Defence: 3/3
- Type: Animal
- Special abilities: Steals a Shield.
- Before combat: prevents Shield dice from being used or modified with Magic.
- When combat begins: steals one Shield die from the player. If that is not possible, it steals one Shield symbol. (The loss cannot be prevented by using the die or modifying it with Magic; the die is set aside as used without generating its symbol or any other benefit.) If the player has no Shield die or symbol during combat, the player loses nothing.
- 3 UP
Major monsters (expansion)
Giant Lizard (Lagarto Gigante)
- Attack/Defence: 2/4
- Type: Animal
- Special abilities: May move two spaces for each point of [...].
- 3 UP
Troll
- Attack/Defence: 3/4
- Type: Humanoid
- Special abilities: Can also be defeated with three Magic symbols.
- 3 UP
Medusa
- Attack/Defence: 3/3
- Type: Humanoid
- Special abilities: Does not allow dice to be modified with Magic (Change Fate) while in the same room as her.
- 3 UP
Death Knight (Cavaleiro da Morte)
- Attack/Defence: 4/3
- Type: Undead
- Special abilities: Immune to Bow damage: any damage from Bow symbols is reduced to zero.
- 3 UP
Hydra
- Attack/Defence: 5/5
- Type: Magical beast
- Special abilities: Its attack is reduced by [?] for each Bow symbol used to fight it.
- 4 UP
Manticore (Mantícora)
- Attack/Defence: 4/4
- Type: Magical beast
- Special abilities: Quick attack: attacks even if defeated at range.
- 4 UP
Scoring and End of Game
Points are tallied during each turn, point by point, by the players. You earn points during the game by exploring rooms, defeating monsters and disarming traps. Mark each point gained on your character sheet, and gain an ability whenever indicated.
The game ends if only one player remains (and that player is the winner), or in the round in which any player reaches [?] or more Experience Points on their sheet. Players who have not yet taken their turn in that round still take their turns. After the last player finishes their turn, the game ends and the extra UP from the Heroic cards each player holds are counted.
The winner is the player with the highest total of Experience Points.
In case of a tie, the player with more coins wins. If the tie persists, the player whose character has more life points wins. If the tie still persists, the victory is shared.
Example of a Turn
Three players are in this game, one of them playing the cleric "Rufus Belfort."
The game begins with the players' dice in the starting room, and the first room revealed on the first level of the dungeon is a treasure room.
Rufus's player uses his free Boot to explore the treasure room, gaining 1 UP, placing a coin on the treasure room, and revealing a monster room on top of the stack. He will then roll his dice to face the monster in the next room: he wants at least one Boot and some combat symbols.
On his first roll, "Rufus" obtains the following results: (results shown in the printed example)
Next, the player keeps the dice and rolls the other three dice again. He obtains the following results on his second roll of these dice: (shown in the printed example)
Of these results, "Rufus" decides to keep one Magic and roll the other two dice, and obtains this result on them: (shown in the printed example)
The final result of "Rufus"'s rolls is then: (shown in the printed example)
He will use the Shield to dock it on the treasure room, and gain one coin and one card (in this case, card #4).
"Rufus" uses one of his Boot dice to move against a Cultist. In addition, the next room on top of the stack is a trap room, and the player must place it on a free space adjacent to the room where he is.
As he is playing in competitive mode, "Rufus" chooses to place the trap room so that it is also adjacent to the starting room, causing damage not only to his character but also to the characters of the opposing players.
And, to the hero's misfortune, the next room is also a trap room, so he must place it on one of the valid spaces of the location where he stands.
"Rufus" places the new trap room (taking the damage), and as soon as combat begins he loses one of his Heal dice that has not yet been used, because of the Cultist's ability. He uses one of his Magic dice to Change Fate and alter one of his unused dice into a Shield.
A combination of Sword + Shield deals enough damage to defeat the Cultist. Since the monster deals two damage (and the Shield prevents only one of these), the player suffers one damage for having fought the Cultist in melee. Upon defeating the monster, he gains 2 UP and a card. He decides to use card #4 from his hand right away to disarm the second trap that opened this turn, gaining 2 more UP.
If there were other free monsters in the dungeon, the player would move them in the Dungeon Master phase. Since these conditions did not occur on "Rufus"'s turn, he passes the action dice and the Dungeon Master token to the player on his left, and the game continues.
Extras and Expansions
(Items bought separately, or promotional rooms from the crowdfunding campaign.)
Promotional crowdfunding rooms. Do not add more than two of these rooms to the first level of the dungeon. Curses do not count toward this limit.
Major and minor monster room. When explored, roll a major monster die (white) and a minor monster die (red), and place them on this room. If there are no more dice of a given type available, the player must take the die of that type (not engaged in combat) that is farthest from their character and roll it. The character must fight the monsters rolled. Whenever this room is empty, new monsters of the indicated type appear in it at the end of the current turn (at the end of the Dungeon Master phase).
Curse rooms. These rooms do not enter play to compose the dungeon map. Their effects occur at the moment they are revealed on top of the stack. These effects cannot be prevented.
Web room. On entering this room the character has a Boot stolen. This works similarly to the Ghoul's ability. This room interrupts the movement of players who pass through it. Monsters in this room must spend two movement points to leave it. Spiders and Apparitions are immune to this.
Coin room. When explored, place two coins on this room. Any player whose character is on this room while it still holds the coins may take them. This can only be done after trap effects and combat (if these exist).
Fountain of Youth room. Any player whose character is on this room may dock Shield dice to receive two Heal symbols. This can only be done after trap effects and combat (if these exist).
Moat room. "Invent your own rule."
Aobold room. "Some Aobolds captured and imprisoned the Tavern Keeper, because he has wings and is a braggart!" When this room opens, place the Aobolds on the indicated spaces. If there are no more monsters in this room, you may take the Tavern Keeper marker for your character. At any moment during one of your turns, you may spend this marker to gain a symbol of your choice.
(The name of this room is partly garbled in the text layer: "Sala dos [...]".)
Large Rooms Expansion
To use the large rooms, follow these additional rules:
- Take the large rooms of the expansion and shuffle the first-level and second-level stacks separately.
- When a rune room would enter play, replace it with a large room: discard the small rune room and take a large room of the corresponding level from the bottom of the stack.
- Each large room has two faces. The player must draw which face will be used in the game. If you draw a face that uses monsters you do not have [...].
- Place the large room with one of its passages connecting to the room from which the character who explored it came. If needed, use the small room that would be discarded to connect it to the large room.
- Traps may still connect to the large room, up to the limit of three traps that may be opened during exploration. For extra traps opened during exploration, the player chooses any other room on that level with a free space to place them.
- A player who explores a large room receives two experience points.
- From the open passages of the large room it is possible to explore new rooms normally.
- Walls prevent movement, but do not prevent trap effects or card effects such as lightning and drain life.
- Rune symbols on large rooms only have an effect in the heroic game mode; ignore them in the basic game.
- Place the monster dice on the large room (with the face of the indicated monster up) and the boss markers indicated. Unlike the small major and minor monster rooms of the basic game, new monsters are not placed in large rooms during the Dungeon Master phase.
- Four monsters fit in a large room.
Note: with large rooms, we recommend ending the game at [?] experience points instead of [?].
Some large rooms have their own rules:
Hidden Ritual room. When this room is opened, place three Cultists on the indicated spaces. If at the end of the player phase at least one Cultist still exists, replace one of the Cultists with a Dark Observer. The ritual happens only the first time.
Catacombs room. When this room is opened, place two Ghouls on the indicated spaces. If at the end of the player phase one of these Ghouls [...] on the dotted spaces. Skeletons appear only the first time.
Bosses
Some rooms have special monsters, the "Bosses." When one of these rooms enters play, place the boss marker with its blue face up on the indicated dotted space.
Bosses are special monsters that must be defeated twice to be eliminated. When you defeat the first face, buy a treasure card and gain the experience points; turn the marker over to its opposite face (red). You only need to fight this new face on the next turn, but you may restart combat in that same turn if you wish. When you defeat the second face, gain experience points and buy a card.
Bosses are immune to abilities and cards that affect the other monsters. They count as major monsters for room capacity purposes, and they may move normally in the Dungeon Master phase. Each face may have different abilities and attack and defence values.
The abilities and values of the Bosses are listed below.
Tora, Aing of Orcs
Blue side
- Attack/Defence: 4/3
- Type: Humanoid
- Special abilities: Grants all the Orcs in the dungeon +[?] defence.
- [?] UP
Red side
- Attack/Defence: 4/3
- Type: Humanoid
- Special abilities: Grants all the Orcs in the dungeon +[?] attack.
- [?] UP
Nett Runer
Blue side
- Attack/Defence: 2/3
- Type: Animal
- Special abilities: Poison: the player loses one life at the start of combat.
- 3 UP
Red side
- Attack/Defence: 2/4
- Type: Animal
- Special abilities: Summons a Spider in this room when combat begins.
- 3 UP
Mr. Draco
Blue side
- Attack/Defence: 4/4
- Type: Dragon
- Special abilities: Causes one point of damage in this room and in all adjacent rooms as soon as it is revealed. Ignores the first point of Bow damage.
- 4 UP
Red side
- Attack/Defence: 5/4
- Type: Dragon
- Special abilities: Ignores the first point of Bow damage.
- 4 UP
Colossus Caçador
Blue side
- Attack/Defence: 4/5
- Type: Construct
- Special abilities: Immune to Bow damage: any damage from Bow symbols is reduced to zero.
- 4 UP
Red side
- Attack/Defence: 3/5
- Type: Construct
- Special abilities: Immune to Bow damage: any damage from Bow symbols is reduced to zero.
- 4 UP
Mummy Runicards (Múmia Runicards)
Blue side
- Attack/Defence: 3/4
- Type: Undead
- Special abilities: You may not use cards while in the same room as the Mummy. Quick attack: attacks even if defeated at range.
- 4 UP
Red side
- Attack/Defence: 3/5
- Type: Undead
- Special abilities: You may not use cards while in the same room as the Mummy. Quick attack: attacks even if defeated at range.
- 4 UP
Re-rollder
Blue side
- Attack/Defence: 4/4
- Type: Aberration
- Special abilities: If you are in a room with this monster, re-roll all action dice not yet used this turn. If you have not yet rolled the dice, roll them once only. Also re-roll all dice present in the room, both life dice and monster dice. The players get the new life rolled.
- 4 UP
Red side
- Attack/Defence: 3/4
- Type: Aberration
- Special abilities: If you are in a room with this monster, re-roll all action dice not yet used this turn. If you have not yet rolled the dice, roll them once only. Also re-roll all dice present in the room, both life dice and monster dice. The players get the new life rolled.
- 4 UP
Expansion: Third-Level Room and Final Boss
Playing with this room, the game ends if only one player remains, or when the final Boss is defeated.
There is no limit on experience points, and the experience marker returns to 0 UP: at the end, add up the points reached.
To play with this room in competitive mode, place the staircase room descending from the second level, shuffled, into the second-level stack. [Text garbled in the source: the rest of this sentence is not readable.] The other players [...] the starting part of the room (the one with the staircase).
Teleport effects do not work in this room. The player responsible for opening it gains three experience points.
Each of the five indicated areas functions as a room. When this room enters play, place the monsters on the indicated spaces: roll two minor monsters and one major monster to place on the indicated spaces, and place the Aelltis Durgan marker in his position (do not place the Dark Observer when the room opens).
To move from one area to another, Boot symbols are needed, as usual for movement between rooms. As normal for large rooms, new monsters are not placed on the dotted spaces during the Dungeon Master phase.
When only one of the four initial Cultists is in play, it is removed from the dungeon and a Dark Observer is placed on the indicated space in the central area.
In the part containing the chasm, a minor monster can be defeated automatically with one Boot symbol, and a major monster with two Boot symbols.
Aelltis Durgan has his own action die. At the start of each turn, roll this die twice:
- The first roll decides the type of monster (minor or major) to be drawn in the area containing the throne (as indicated at the upper right corner of this area).
- The second roll is the magic ray that Aelltis fires at the characters. The ray hits the areas indicated by the die symbol (for example, a Boot roll hits the central area and the starting area). Immediately cause one point of damage to the players present in the areas hit by the ray. This damage cannot be prevented in any way.
OBS: The Cultists do not move, and Aelltis does not leave his throne.
Aelltis Durgan
Blue side
- Attack/Defence: 2/2
- Type: Humanoid
- Special abilities: When he enters combat, he summons a major monster in his room (the throne area). He can only be defeated if he is the last monster in the room (the throne area).
- 5 UP
Red side
- Attack/Defence: 3/6
- Type: Monstrous humanoid
- Special abilities: None.
- 5 UP
Heroic Mode (Cooperative and Solo)
The heroic mode makes changes to the basic rules so that the game can be played cooperatively or solo. The rules common to solo and cooperative play are listed below. Rules not altered by the specific text below remain the same as in the basic game.
Objective. The objective of the game in heroic mode is to reach a total, summed across the group, of 32 UP for each character. In solo play the player uses two characters. Thus the target is [?] UP for two characters, [?] UP for three characters, [?] UP for four characters, and [...]. In addition, you must collect all the runes in the dungeon: three runes for two or three players, four runes for one, four or five players. These objectives must be reached within the time limit described below.
A player who is defeated keeps their UP, but no longer takes an active part in the game.
When playing with the third-level room expansion, there is an extra objective: after collecting all the runes, the players are teleported to that room and have two full rounds to defeat the final boss.
Time limit. Use the back of the Dungeon Master token and the time markers to track the rounds left until the end of the game. Start with [?] markers and, each time a round ends, remove one marker from the token. When the last marker is removed from the token, the game ends.
Changes to the Turn Structure
Dungeon Master phase. In this phase you move all monsters one room toward the players, following these priorities:
- Move the major monsters first.
- Then move the minor monsters.
In case of doubt about the order, move the monsters with more UP first. In case of a tie between different monsters, the player whose turn it is chooses which will be moved.
To resolve doubts about the direction of these monsters' movement, keep in mind that monsters move according to these priorities:
- Move toward the player [the wording of this priority is cut off in the text layer].
- Move toward the greatest number of players in the room.
- Move toward the next player.
If the monster cannot approach the nearest players, it stays still this turn.
Roll all monsters on free monster rooms, one at a time, starting from the room nearest to the next player to take a turn, through to the most distant. As in the normal game, you roll monsters only on free monster rooms of the levels that still have characters present.
To make this movement easier to organise, it helps if the player moves the monsters closest to their character first, according to the rules cited above.
Changes to Actions
Exploring. In heroic mode, exploring does not give experience points, and rooms are opened differently: the stacks are shuffled in the same way, but the top room of the stack is not revealed.
At the start of the game, reveal, one by one, the [...] rooms.
Each time a character ends its movement, including in the middle of its turn, open, one by one, rooms for the empty spaces adjacent to the room where it stands. Remember that the second-level staircase room is considered adjacent to the first-level staircase room, so it comes into play when a character ends its movement on the first-level staircase.
Rune rooms. When a rune room comes into play, place a rune marker on it. The players must collect a certain number of runes as one of the objectives for winning the heroic game. Each rune gives [?] UP to the player who took it.
A player may take a rune only after combat, and only if all monsters in that room have been defeated.
"Advance under my protection, my friends! The undead will not [...]" -Rufus Belfort
Changes to Components
Cards. Cards are limited to the effects on the lower part of the card. Ignore the upper part of all cards when playing in heroic mode. Each player's cards are kept [...] so that others cannot see them.
Action cards may be used [...]. Their effect occurs in the room where the character of the player who used it is located. Players whose characters are in the same room may [...] between them freely.
Teleport effects may affect any number of characters present in the same room.
Heroic cards make the game harder for the players. They can be of two types:
- Instant effect: when bought, they cause an immediate effect and are then placed on the discard pile (cards without icons).
- Continuous effect: they come into play when bought, and their effect becomes part of the rules until the end of the game. Place these cards on a spot on the table where everyone can see them.
Large rooms. If you are using the large rooms, the monsters that come with these rooms stay inside them, guarding the runes, and are not moved normally in the Dungeon Master phase.
Specific Rules for Cooperative Mode
Cooperating outside your turn. In cooperative play, each player starts the game with three coins instead of two cards.
A player may, when it is not their turn, spend two coins as if they were a die of their choice, and may thus generate a symbol, use it on abilities, or for any other effect that could be carried out with a die, such as disarming traps and activating portals. The symbols generated (and not the dice) [...] if this player is in the same room [...].
A Boot is a special case: for each one coin, the player may generate a Boot symbol (which, remember, is different from a Boot die). This rule is meant to allow greater mobility of characters in cooperative play.
Outside your turn, you may not leave rooms with monsters without fighting them.
If the player whose turn it is [...], they receive the combat damage from these monsters. Characters in the same room who [...].
You may start combat even outside your turn.
A player never gains coins from abilities outside their turn.
Recovering life. In addition to the usual option of healing yourself, a player may also heal another character who is in the same room.
Specific Rules for Solo Mode
In solo play, always play with the number of rooms for four players.
You control two characters, but you have only one die that marks the position and life of the pair. When gaining experience, choose which of the characters scores. You may use the abilities of both characters during your turn.
Your limit of coins is six, and your limit of cards in hand is also six.
Every two turns make one complete round. Do not forget to mark the time counter of heroic mode (back of the Dungeon Master token). Or, if you find it easier to measure time this way, mark with eight coins and count turn by turn.
Increasing the Difficulty of Heroic Mode
If you want to increase the difficulty of the game in heroic mode, choose any number of the adjustments below:
- All monsters move 2 spaces in the Dungeon Master phase.
- Complete [?] UP for each player instead of 32.
- Limit of one major monster per room, but it counts as the same as a minor monster for room capacity.
- Add the large rooms expansion.
- Add the third-level room expansion.
- All players must survive until the end.
Cooperative Variant
This variant is recommended only for those already familiar with the game. In this variant, the game takes on a greater flavour of "puzzle" and "optimisation."
In this rule, the whole group is represented by only one die (similar to solo mode).
The action dice are divided among the players and are rolled simultaneously. With two players, the player whose turn it is rolls four of these dice and the other rolls the other two. With three, four or five players, each player rolls one action die and the player whose turn it is rolls the rest. Each player may re-roll up to two times.
Players may use the abilities of the players to their left, as well as, of course, their own abilities.
The Change Fate action may be used to change the die of any player.
The symbols generated by the group are used for the actions of the turn.
The cooperative-game rule of using coins to generate dice and Boots is not valid in this mode.
Otherwise, the other rules work normally.
House Rules
Here are some optional rules that some groups may prefer to use in their games. Consider using some of these rules only after trying the traditional game.
Three Magic dice → new ability. Some may prefer a freer ability-evolution rule, independent of the character's UP progression. In that case, use the following: if you obtain three or more Magic dice on your final roll, evolve one ability this turn (slide one of the cards under the sheet until a new ability appears). You may still use these dice normally; they do not count as costs for unlocking a new ability. Magic may not convert another die into magic with Change Fate in this variant.
Coin → re-roll a die. At any time you may spend [...] coins to re-roll [...] dice.
Looting. When a character is defeated, it leaves all of its coins in the room where this occurred.
In the dark. Some may prefer a more unpredictable game, less under the players' control. In this variant, the top room of the stack is not revealed. Rooms are revealed only at the moment the player explores them.
Traps. Traps become more similar to [...] them, and the damage effect applies only to those who enter or leave the trap room, not to adjacent rooms as in the normal game. Use a coin to mark the traps that have not yet been disarmed.
Dice for traps. After many games, some players may become familiar with the specific symbols of the traps. If you have extra dice, you may roll two of these dice each time you open a new trap; the symbols obtained in this way become those required to disarm it, replacing the printed symbols.
Clarifications
Clarifications on character abilities
- Luna Mystica: The effect of Luna Mystica's special ability is identical to the teleport effect on the lower part of the [card].
- Lótus Deepwater: Ignores the spider's ability.
- Araan and Lótus: If a character's combat with some monster is optional, in heroic mode this will also be optional for [...].
Clarifications on specific cards (card numbers are shown as they appear in the text layer; see the source note)
- Card #3: On the upper part of the card, the effect may be cumulative (a player affected by more than one of these cards suffers the effect of all the cards used). On the lower part of the card, the card may be used to avoid combat.
- Card #9: The upper part of this card may not be used to steal the UP guaranteed by heroic cards.
- Card #: The straight line does not need to originate from your character; any straight sequence of rooms within the dungeon is a [...]. It may cross walls, empty spaces and traps. On the lower part, you do not gain the UP of the removed monster.
- Card #;: If a player uses the upper part of this card to steal a treasure that you would gain, you may use it to keep the treasure you are taking. For practical purposes, multiple copies of this card may be used on the same treasure, and this will go to the [...].
- Card #5: You may use the upper effect of this card even if you do not need to recover life points, using it only to cause the damage. Use it in your room [...] and adjacent.
- Card #3;: The upper effect of this card applies only to cards #3, #9, #; and #2. You may use the teleport effect on the lower part of the card to avoid a combat.
Clarifications on monsters
- Monster abilities that steal dice from players are [...] (for example, two Cultists in the same room as the player may steal two Heal dice).