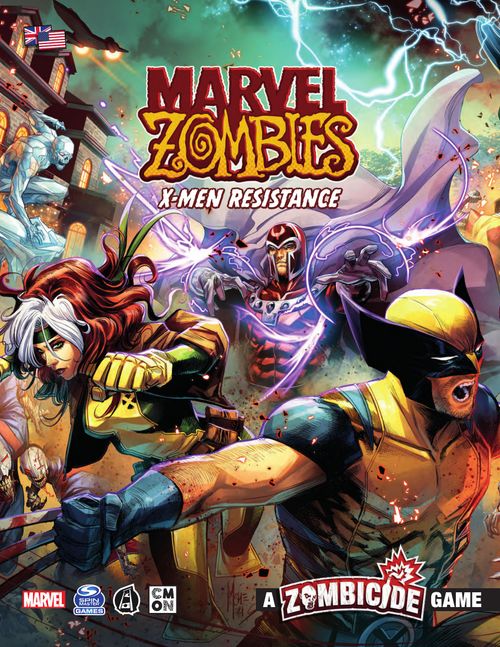
Marvel Zombies: X-Men Resistance
Marvel Zombies: X-Men Resistance Rulebook
Table of Contents
Table of Contents
Game Components
87 Game Pieces
- 6 Super Heroes: Wolverine, Mystique, Magneto, Storm, Colossus, Rogue
- 6 Zombie Heroes: Juggernaut, Psylocke, Dark Phoenix, Cyclops, Sabretooth, Iceman
- 12 Bystanders: Amanda Sefton, Abigail Brand, Bolivar Trask, Mariko Yashida, Moira MacTaggert, Senator Kelly, Callisto, Ka-Zar, Shanna, Valerie Cooper, William Stryker, Trish Tilby
- 63 Zombies: 35 Walkers (Multiple Man), 14 Brutes (Reavers), 14 Runners (Hellfire Soldiers)
9 Double-Sided Tiles
140 Cards
- 6 Super Hero ID Cards
- 45 Heroic Trait Cards
- 42 Spawn Cards
- 16 Bystander Cards
- 6 Zombie Hero Cards
- 1 Sentinel Hand Reference Card
62 Tokens
- Elevator Token: 1
- Sentinel Hand Token (charged/spent): 1
- Door Tokens (open/closed): 25
- Blue Door Token (open/closed): 1
- Green Door Token (open/closed): 1
- Open Window Tokens: 9
- Objective Tokens Red/Red: 7
- Objective Token Blue/Red: 1
- Objective Token Green/Red: 1
- First Spawn Point Token: 1
- Spawn Point Tokens Red/Red: 5
- Spawn Point Token Blue/Red: 1
- Spawn Point Token Green/Red: 1
- Exit Token: 1
- Activation Tokens: 6
Other Components
6 Plastic Dashboards, 6 Color Bases, 6 Dice, 12 Tracker Cubes
Zombie Mode Content
This box also contains the cards needed to use its Heroes and Bystanders in Zombie Mode. The Marvel Zombies core box is needed to play in Zombie Mode.
- 12 Bystander Cards
- 6 Zombie Hero ID Cards
- 6 Super Hero Cards
Hero Mode / Zombie Mode
The rules contained in this box are for Hero Mode, in which players control the last remaining Super Heroes against the ravenous Zombie Heroes. However, Marvel Zombies can also be played in Zombie Mode, with those roles reversed, by using the contents and rules from the Marvel Zombies core box.
Setup
-
Choose a Mission. Each Mission can be played with 4 Super Heroes, with additional instructions for 5-6 Super Heroes (controlled by 1-6 players). Any Mission may be played with fewer Super Heroes, but this increases the difficulty!
-
Place the Tiles as indicated on the Mission map.
-
Place any Spawn Points and other Tokens as well as any game pieces as indicated by the Mission.
-
Unless otherwise indicated by the Mission, remove both Secret Mission cards from the Bystander deck. Then, place 1 random Bystander Card facedown in each Zone featuring the Bystander icon.
-
Take and separate the following card types, identified by their unique card backs. Shuffle each of these into their own deck and place them facedown near the board:
a. Spawn Deck: These cards bring the Zombie hordes and Zombie Heroes players will face during the game.
b. Zombie Hero Deck: Each time a Zombie Hero card is drawn from the Spawn deck, a random Zombie Hero is spawned. Each Zombie Hero presents a unique challenge!
c. Heroic Trait Deck: A deck of abilities that the Zombie Heroes can tap into, unleashing their new power.
d. Bystander Deck: Notable characters that can appear during the game for players to rescue. Some already begin hiding on the board, but others can be spawned through special events!
e. Sentinel Hand Reference Card: This card is a reminder of the rules for this interactive item.
-
Gather the number of Super Heroes chosen to play with (4, 5, or 6) and distribute them among the players in any way they see fit. Players sit around the table in any order they choose, playing cooperatively against the game, forming a single team.
-
Players take 1 Dashboard for each of their Super Heroes, placing it in front of them, with the Super Hero's ID Card on it. Make sure the sliding tracker is on the 0 space of the blue area of the Danger Bar.
-
For each Super Hero, players take 2 Tracker Cubes and a Color Base of the chosen color. They place a tracker on the rightmost slot of their Health Bar and another tracker on the 0 slot of their Power Track. Then, attach the color base to the Super Hero game piece.
-
Place the game pieces representing the chosen Super Heroes in the Super Hero Starting Zone as indicated by the Mission.
-
Each player then takes 1 Activation token, placing it with its green (Unactivated) side faceup next to their Dashboard.
Game Overview
Winning and Losing
The game is won immediately when all Mission objectives have been completed. The game is lost at the end of any Game Round in which a Super Hero has been eliminated, or when a Mission-specific losing condition is met. This is a cooperative game, so all players win or lose together!
Game Rounds
Marvel Zombies: X-Men Resistance is played over a series of Game Rounds which proceed as follows:
Player Phase: This is the Phase in which the Super Heroes will perform various Actions, such as moving across the gameboard, performing Attacks, and Rescuing Bystanders!
Enemy Phase: Once all Super Heroes have activated, the Player Phase ends and the Enemy Phase begins. During this phase, any Enemies currently on the gameboard attempt to eliminate the Super Heroes and new Enemies are spawned.
End Phase: Each Mission, and some Skills, may list certain effects that happen during the End Phase. Most importantly, if any Super Hero has been eliminated, the players immediately lose the game when the End Phase is reached! Otherwise, once the End Phase is completed, a new Game Round begins.
The Basics
Before we get into specifics, here are some general rules that will aid players:
Useful Definitions
Enemy: This term refers to the various Zombie hordes and Zombie Heroes. This term includes all Walkers, Brutes, and Runners, as well as all Zombie Heroes. It does not include Bystanders!
Zombie Hero: A zombie Super Hero spawned and controlled by the game to fight the players.
Super Hero: A living Super Hero controlled by a player.
Zone: In exterior locations, a Zone is the area between linear markings (or linear markings and the board's edge) and the walls of buildings. In interior locations, a Zone is either a room (delimited by walls), or the area between linear markings and the walls inside a large room.
Line of Sight
Line of Sight defines whether two elements on the gameboard (Super Heroes, Enemies, Bystanders, etc.) can see each other.
In exterior Zones (also referred to as street Zones), Line of Sight is traced in straight lines that run parallel to the edges of the board. Line of Sight cannot be traced diagonally. Elements have Line of Sight through as many Zones as the line can pass through before reaching a wall or the edge of the board.
In interior Zones (also referred to as building Zones), Line of Sight can be traced to any room that shares an opening with the Zone the element is currently in. If there is an opening, the walls do not block Line of Sight between 2 rooms. However, Line of Sight into an adjacent room is always limited to the first Zone in the room.
Large rooms are rooms composed of multiple Zones. Line of Sight inside them can cross any number of Zones in a straight line, but never diagonally. Line of Sight does not extend to an adjacent room unless the element is in a Zone that shares an opening with the other room.
Line of Sight between an interior Zone and exterior Zones may be traced through any number of exterior Zones in a straight line, but only 1 Zone into the building.
Closed Doors and Windows block Line of Sight.
Enemies, Bystanders, and Super Heroes do not block Line of Sight.
IMPORTANT: All Super Hero Skills, Traits, and Abilities require Line of Sight unless specifically stated otherwise.
Movement
Game pieces such as Super Heroes, Enemies, and Bystanders can move from their Zone to an adjacent one. An adjacent Zone shares at least one unobstructed edge with their current Zone. Corners do not count. This means no diagonal movements!
In exterior Zones (also referred to as street Zones), movement from one empty Zone to another has no restrictions. However, game pieces must go through an open door or window to move from an exterior Zone to an interior Zone and vice-versa.
In interior Zones (also referred to as building Zones), game pieces may move from one room to another as long as their Zones are linked by an opening (such as an open door or window). The position of a game piece in the Zone and the layout of the walls do not matter as long as the Zones share an opening. Inside a large room, movement from one empty Zone to another has no restrictions.
Super Hero movement is hindered by Enemies in their Zone (see Move, below).
Fountain
The fountain Zone in front of the X-Mansion cannot be entered. However, it does not block Line of Sight.
Multiple Levels
Some Missions take place across different levels, represented by separate groups of tiles. The X-Mansion may be divided into the ground floor, upper floor, and the underground.
Each level is only considered active as long as there is at least one Super Hero on it. This has two consequences:
- At the end of the Player Phase, if there are no Super Heroes on a level, any revealed Bystanders on that level are eliminated (this triggers the Bystander Devoured effects, see Bystander Devoured!, below).
- During the Enemy Phase, if there are no Super Heroes on a level, do not activate any Enemy on that level, nor draw any card for its active Spawn Points.
Example: During the Enemy Phase, all the Super Heroes are on the underground level. Enemies, Bystanders, and Spawn Points on that level activate as usual. Since there are no Super Heroes on the upper floor, Sabretooth and the Brute don't activate, and no card is drawn for the Spawn Point.
Stairs
The Stairs allow game pieces to move between the ground floor and the upper floor. The Stairs themselves are not Zones that can be occupied, they are there only to indicate the connection between levels. Anybody standing in a Zone connected to Stairs may move 1 Zone to go to another Zone connected to Stairs located at the other level. This means Enemies can also use the Stairs to move between levels if they can't see anyone on their level and the closest target is on the other level (see Activate Enemies, below).
IMPORTANT: There is no Line of Sight between levels.
NOTE: The Stairs on the ground floor block Line of Sight and movement between the entrance Zone and the Zone behind the Stairs.
Example: By taking the Stairs, it's possible to move from the entrance Zone on the ground floor directly to one of the 2 landing Zones on the upper floor, and vice-versa (remember the Stairs themselves are not Zones).
Elevator
The Elevator is a quick way to move between levels. The Elevator token is essentially a room that can be moved between the elevator shaft Zones featured on each level. During their turn, as a free Action, a Super Hero adjacent to the elevator shaft can call the Elevator, placing its token on the shaft Zone on their level. Both Elevator doors are open while the Elevator is on a level, closing automatically when it moves elsewhere. Once inside the Elevator, a Super Hero may spend 1 Action to move the Elevator to any other level, carrying with it any Super Heroes, Enemies, and Bystanders standing inside (this is not a Move Action).
NOTE: The doors to the elevator shaft cannot be opened except by calling the Elevator.
Example: Rogue calls the elevator to the ground floor as a free Action and moves into it with a Move Action. Colossus uses a Move Action to move in as well, then spends 1 Action to move them down to the underground level.
IMPORTANT: Whenever a Super Hero enters a new level for the first time, be it through the Stairs or the Elevator, immediately spawn any indicated Enemies and Bystanders in the room(s) they've just accessed (see Spawning in Buildings, below).
Reading an ID Card
Each Super Hero has a unique ID card featuring the following information:
- POWER TRACK: Super Heroes are able to harness incredible Power from within themselves, which allows them to perform amazing feats. A Super Hero's Power increases at the start of every Round and can be further increased with Power-Up Actions (see Power-Up, below). Power can be spent to activate special effects or add extra Dice to Attacks (see Power, below).
- HEALTH: Each time a Super Hero is wounded, this track is reduced by 1. If it ever reaches 0, that Super Hero is eliminated.
- ATTACK: Each Super Hero has a unique Attack. Attacks are described in detail in Combat, below.
- SKILLS: Each Super Hero has their own unique Skills, unlocked as they gain Experience (see next section).
Experience, Danger Level, and Skills
Each time a Super Hero eliminates an Enemy, they gain 1 Experience Point (XP). Or, in the case of enemy Zombie Heroes, 1 Experience Point for each Toughness they had (see Zombie Hero, below). Whenever Experience is gained, advance that Super Hero's Danger Bar by that amount. Some Missions may also provide additional ways to gain Experience.
There are 4 Danger Levels on the Danger Bar: Blue, Yellow, Orange, and Red. Reaching a new Danger Level provides the Super Hero with a new unlocked Skill to help them on their Mission.
Gaining Experience has a side effect, however! When players draw a Spawn card, read the line that corresponds to the highest Danger Level achieved by ANY Super Hero (see Spawn Enemies, below). The more dangerous the Super Heroes become, the larger the zombie horde that rises to devour them!
- A Super Hero starts the game at the Blue Danger Level with 0 Experience Points and a single Skill. From the start of the game, the Super Hero can use their unique Attack.
- The Yellow Danger Level is reached with 7 Experience Points. The Super Hero gains a 4th Action to use every Turn.
- The Orange Danger Level is reached with 19 Experience Points, unlocking another Skill.
- The Red Danger Level is reached with 43 Experience Points. All Skills are now available.
Enemies
There are 4 types of Enemies. Most Enemies have only a single Action they perform when they activate. The exceptions to this are Runners and Zombie Heroes, who each have 2 Actions per Activation. An Enemy is eliminated as soon as it is assigned enough Hits during a single Attack Action to match its Toughness value. The Super Hero that eliminates the Enemy gains 1 Experience Point, except in the case of Zombie Heroes, which grant Experience equal to their Toughness value.
Walker – Multiple Man
James Madrox may not be the strongest or fastest zombie mutant, but there's always more of him around. He may multiply when you least expect it, creating hordes of Multiple Man walkers.
- Actions: 1
- Toughness: 1
- XP Reward: 1
Brute – Reaver
Cybernetically enhanced zombies, Reavers are literal tanks, slow and tough. But these brutes' overdrive assault can overpower Super Heroes, depleting their Power.
- Actions: 1
- Toughness: 2
- XP Reward: 1
Runner – Hellfire Soldier
Trained by the Hellfire Club, these zombies are relentless and efficient assassins. These runners use their speed to charge at Super Heroes and chase Bystanders.
- Actions: 2
- Toughness: 1
- XP Reward: 1
Zombie Hero
Each Zombie Hero is powerful and unique, but they are all taken over by the overpowering hunger that drives them to devour Super Heroes and Bystanders.
- Actions: 2
- Toughness: X — This is specific to each Zombie Hero, as indicated on their Zombie Hero card.
- XP Reward: Equal to their Toughness.
- Each Zombie Hero also has a unique Ability listed on their Zombie Hero Card which is in effect as long as they are on the gameboard.
Player Phase
During each Player Phase, the following steps must be taken, in order:
- Gain Power: All players increase their Power Track by 1.
- Refresh Activation Tokens: All players flip their Activation tokens to their green (Unactivated) side.
- Activate Super Heroes: All the Super Heroes are activated, one by one. Each Round, the players choose the order in which to activate each Super Hero. During their Turn, a Super Hero can perform up to 3 Actions at the Blue Danger Level (not counting any free Action their Blue Level Skill might give them). The Actions available to a Super Hero are as follows:
Move
The Super Hero moves from their Zone to an adjacent Zone (they cannot move diagonally, through walls, or closed doors and windows).
-
A Super Hero must spend 1 additional Action per Enemy standing in the Zone they're attempting to leave.
Example: Wolverine is in a Zone with 2 Walkers. To leave this Zone, he spends 1 Move Action +2 additional Actions (1 per Walker), for a total of 3 Actions. If there had been 3 Enemies in the Zone, Wolverine would have needed 4 Actions (1+3) to move.
-
Entering a Zone containing Enemies ends the Super Hero's Move Action (this is important for Skills or effects that allow Super Heroes to move multiple Zones per Move Action).
Open Door/Window
The Super Hero breaks open a door or window in their Zone. Place a Door token on its open side where the closed door was (or, in the case that there was already a Closed Door token there, simply flip it to its open side), or place an Open Window token where the window was.
NOTE: Once opened, doors and windows cannot be closed again.
- Some Missions feature colored doors. Usually, these cannot be opened until some condition is met, like finding a specific Objective. Read the Mission description to learn more.
IMPORTANT: Opening a building for the first time reveals all the Enemies and Bystanders waiting inside. This is explained in the Spawning in Buildings section, below.
Gain Trait
The player draws the top card from the Heroic Trait deck and places it in one of the 2 Heroic Trait slots on that Super Hero's Dashboard. A Super Hero can only perform a single Gain Trait Action per Turn, though other effects might grant them extra Heroic Trait cards.
- Each Super Hero may only have up to 2 Heroic Traits at any time. If they already have 2 when they draw a new one, they may discard the newly drawn Trait or discard and replace 1 of the 2 on their Dashboard.
- If the Trait deck ever runs out, reshuffle all the discarded cards to make a new deck.
- Heroic Traits have powerful effects but are discarded after a single use. Each Heroic Trait has specific instructions for its effects, so read each one carefully! Two Traits can be used together if their requirements are met.
Attack
The Super Hero attacks an Enemy they are able to target. Combat is explained in detail below.
Rescue Bystander
If they are in the same Zone as a Bystander and there are no Enemies in that Zone, the Super Hero may Rescue that Bystander. The Bystander game piece is removed from the board and the Super Hero gains their unique Bystander Card, placing it in the left slot on their Dashboard.
- A Super Hero may only have 1 Bystander card at any time. Should they Rescue another Bystander, they may replace the old card with the new one or discard the new one.
- When a Super Hero Rescues a Bystander, they immediately fill their Power Track to its maximum (whether they keep their card or not).
- Rescuing a Bystander typically does not award any Experience, but some Missions might modify this.
- Unlike Heroic Traits, Bystander cards are typically not discarded upon use, but instead offer a permanent ability for the Super Hero.
- Any time a Super Hero would suffer Wounds, they may discard their Bystander card to prevent 1 Wound. This should not be done lightly, though, as it triggers the Bystander Devoured effects (see Bystander Devoured!, below)!
Power-Up
While Super Heroes automatically gain 1 Power at the start of each Round, they may also, during their Turn, perform a Power-Up Action in order to increase their Power Track by 2. This can be done more than once per Turn.
- A Super Hero can only have 4 Power at most. Any gained beyond that is simply ignored.
- Many Skills and Traits require the spending of Power to use various effects, as described in their text.
- Power can also be used to gain extra Dice when a Super Hero performs an Attack (see Power, below).
Interact with Objective
The Super Hero takes and/or activates an Objective in their Zone. The specific effects of doing this are detailed in the Mission description.
End of Turn
A Super Hero does not need to perform all their Actions if they wish and may forfeit any remaining Actions and end their Turn.
Once a Super Hero has completed all their Actions (or forfeited any remaining ones) their Turn ends. Flip their Activation token to its red (Activated) side to indicate this.
Enemy Phase
Once all players have activated their Super Heroes, the Player Phase ends and the Enemy Phase begins. No single player controls the Enemies. They do it themselves, performing the following steps in order:
- Activate Enemies: All Enemies on the board activate and spend their Actions to either Attack a Super Hero or Bystander in their Zone or Move towards the closest Super Hero or Bystander if not currently in a Zone with one. Once all Enemies have activated, any Bystanders on the board activate as well (see Activating Bystanders, below).
- Spawn Enemies: After all Activations are done, new Enemies appear on all active Spawn Points on the board.
REMINDER: Enemies don't activate and don't spawn on levels containing no Super Heroes.
1. Activate Enemies
Attack
Each Enemy in the same Zone as a Super Hero or a Bystander spends their Action to perform an Attack. An Enemy's Attack is always successful, does not require any dice rolls, and inflicts 1 Wound.
The Super Heroes in the Zone share the Wounds in any way the players prefer, even if it means inflicting them all onto a single Super Hero! Any Bystander in the same Zone as the Super Heroes can only be assigned a single Wound.
When a Super Hero is wounded, their Health Bar's tracker is moved 1 space to the left per Wound they receive. A Super Hero is eliminated as soon as their Health Bar reaches 0. If this happens, the game will be lost during the next End Phase!
Bystanders Under Attack
Bystanders are eliminated if they receive 1 Wound. This is a heavy failure for the Super Heroes, triggering the Bystander Devoured effects (see Bystander Devoured!, below).
A Super Hero with a Bystander card on their dashboard may choose to discard it to ignore 1 Wound they would receive. This is a desperate act, which also triggers the Bystander Devoured effects.
Enemies fight together. All Enemies activated in the same Zone as a Super Hero or Bystander join the Attack, even if there are so many Wounds being dealt that it would be overkill.
Example 1: A Walker in a Zone with 2 Super Heroes inflicts 1 Wound during its Activation. The players choose which Super Hero takes the Wound.
Example 2: A group of 5 Walkers activates in the same Zone as 2 Super Heroes and 1 Bystander. Since both Super Heroes have 3 Health, the players choose to deal 2 Wounds to each Super Hero and 1 to the Bystander (eliminating it).
Move
Enemies that did not Attack (because there were no Super Heroes or Bystanders in their Zone) spend their Action to Move 1 Zone towards Super Heroes or Bystanders:
- Enemies always move towards the closest Zone with Super Heroes or Bystanders in their Line of Sight.
- If the Enemy does not have Line of Sight to any Super Hero or Bystander, they move towards the Zone with Super Heroes or Bystanders they have the shortest open path to (see Breaking Through Windows, below). If there are no open paths to Super Heroes or Bystanders, the Enemy doesn't move.
- If there is more than one closest Zone with Super Heroes or Bystanders, or more than one route of the same length to the closest Zone, Enemies split into groups of equal numbers, separated by type, to follow all possible routes. If it's not possible to split an Enemy type into groups of equal number, the players decide which group gets the extra Enemy.
- Enemies cannot open doors.
Example: A group of 4 Walkers, 3 Brutes, and 1 Zombie Hero activates at equal distance to 2 Zones occupied by Super Heroes. The Enemies want to target both Zones, so they split into 2 groups.
- 2 Walkers go one way. The other 2 take the other route.
- 2 Brutes go one way. The last one takes the other route (players choose).
- Players choose which route the Zombie Hero takes.
Breaking Through Windows
Unlike doors, Enemies are able to break through windows to get to where they want to go. If an Enemy has no Line of Sight to a Super Hero or Bystander, they trace their path to the closest target as if all windows were open. If their Move Action would have them go through a closed window in their Zone, they spend that Action breaking the window open instead. Place an Open Window token on that window, it is now an opening allowing movement and Line of Sight through it. If several Enemies would move through the same closed window, they all spend their Action breaking it open. In case an Enemy opens a building for the first time by breaking through a window, spawn in that building as usual (see Spawning in Buildings, below).
Runners and Zombie Heroes
Runners and Zombie Heroes each have 2 Actions per Activation. Each time they activate, they perform 1 Action, either Attacking or Moving with the rest of the Enemies, and then perform their 2nd Action, either attacking if they're now in a Zone with a Super Hero or Bystander or moving again if they are still not in a Zone with a Super Hero or Bystander.
2. Spawn Enemies
The Mission map shows where Enemies spawn at the end of each Enemy Phase. These are Spawn Points.
Spawn Point tokens mark the Spawn Zones on the gameboard. During the Spawn Enemies step, always start from the First Spawn Point, marked with a 1.
Starting with the First Spawn Point token, then proceeding clockwise, draw 1 Spawn card, reading the line that corresponds to the Danger Level of the Super Hero with the most Experience (Blue, Yellow, Orange, or Red). Place the indicated amount of the corresponding Enemy type in that Spawn Zone.
Repeat this for each active Spawn Point token.
Colored Spawn Points: Some Missions feature a Blue and/or Green-colored Spawn Point token. Unless otherwise stated, these Zones don't spawn Enemies until a specific event happens, dictated by the Mission. These Zones will only begin spawning Enemies once these conditions are met.
If the Spawn deck should run out, reshuffle all the discarded Spawn cards to make a new deck.
The Spawn deck features various types of Spawn cards:
Regular Spawn
This card spawns Walkers.
Example: Mystique has 5 XP, placing her in the Blue Danger Level. Colossus has 12 XP, which puts him in Yellow. In order to determine how many Enemies spawn, read the Yellow line, which corresponds to Colossus, as he has the most Experience.
Rush!
When a player draws an Enemy Rush card, the Enemies placed by that card immediately perform an Activation after being placed.
Extra Activation!
When a player draws an Extra Activation card, instead of spawning new Enemies, all Enemies of the listed type immediately Activate, performing their Action(s) as usual.
Hidden Bystander
When a player draws the Hidden Bystander card, draw the top card from the Bystander deck, spawning the indicated Bystander in the Zone (if a Too Late! card is drawn, simply ignore it). Keep the Bystander card faceup next to the board with the Hidden Bystander card tucked under it to help identify it. Then, draw another Spawn card for that Zone.
- Enemies ignore this Bystander for all purposes while they have the Hidden Bystander card associated with it.
- This Bystander activates as usual (see Activating Bystanders, below), but ignores all Enemies when they move, taking the most direct path to a Super Hero.
- At the end of each of their Activations, roll a die. On a 5+, they lose their Hidden Bystander card. Enemies now react to them as usual.
If the Bystander deck should run out, reshuffle any discarded Bystander cards to make a new deck. Looks like they didn't really die after all.
Special Action
There are a few Special Action cards in the Spawn deck, like Overdrive and Multiple Man Multiplication. Each one details its specific instructions when it is drawn.
Zombie Hero!
When a player draws a Zombie Hero Spawn card, draw the top card from the Zombie Hero deck, spawning the indicated Zombie Hero in that Zone. Note that each Zombie Hero has a unique Ability that is active as long as they are in play and a specific Toughness value, so keep their Zombie Hero card faceup within view of all players.
If the Zombie Hero deck should run out, reshuffle all the discarded Zombie Hero cards to make a new deck. It seems they weren't really put out for good!
Running Out of Enemies
Players may run out of game pieces of the indicated type when required to place an Enemy on the gameboard. In this case, the remaining Enemies of that type are placed (if there are any). Then, all Enemies of the indicated type immediately resolve an extra Activation. Multiple extra Activations may occur in a row. Keep an eye on the Enemy population!
Spawning in Buildings
Opening a closed building for the first time reveals all the Enemies and Bystanders waiting inside. A single building extends to all rooms and large rooms connected by openings, sometimes straddling several tiles. Closed doors create separations between buildings. A large room isolated from other rooms by closed doors is considered a single building.
Enemies waiting in a building only spawn in the Zones marked with the spawn icon. Draw and resolve 1 Spawn card for each of these Zones, one after the other, in any order the players choose (we suggest starting from the farthest to the closest).
Once all Enemies have been spawned, reveal any Bystander card inside that building, replacing it with the corresponding Bystander game piece and placing the card faceup next to the board.
Example: Wolverine just opened the door to the X-Mansion. Since the door to the kitchen started open, this means he opened the building comprised of the entrance hall and the kitchen. The other rooms in the mansion are still isolated by closed doors. A Spawn card is drawn for the first Zone. The most experienced Super Hero is at the Yellow Danger Level, so the yellow line is used to spawn. 1 Brute is placed in this Zone. An Extra Activation! card is drawn for the last Zone. All Walkers on the board immediately perform an extra Activation. That includes the ones that just spawned, even if they already had a Rush. Enemies spawn in all Zones, one after the other, in the order of the player's choosing. Finally, the 2 Bystander cards are revealed and replaced by their respective game pieces. Fortunately, they are only revealed after all Enemies have spawned!
Combat
When a Super Hero performs an Attack Action, they use their unique Attack, listed on their ID card. All Attacks feature the following information:
TYPE: Attacks fall into 2 categories: Melee or Ranged. The Melee and Ranged symbols are used to distinguish each type. Some Skills or effects might interact with these types specifically.
- MELEE: Melee Attacks are identified by the Melee symbol and can only be used against targets in the same Zone.
- RANGED: Ranged Attacks are identified by the Ranged symbol and can target Enemies in distant Zones within Line of Sight.
RANGE: This indicates the distance to the Zone(s) the Attack can target.
- A value of 0 limits the Melee Attack to the same Zone.
- Ranged Attacks usually display two values: The first is the minimum Range. The Attack cannot target Zones closer than the minimum. That value is usually 0, meaning it can target Enemies in the same Zone (it is still a Ranged Attack). The second value shows the maximum Range of the Attack. It cannot target Zones beyond its maximum Range.
DICE: Each Attack lists the base number of dice it rolls, though bonus dice can be added by other game effects (such as spending Power, see Power, below).
ACCURACY: Each die result that equals or exceeds the Accuracy value of the Attack scores 1 Hit.
To resolve an Attack, perform the following steps in order:
- Target a Zone: Select 1 Zone within the Range listed on the Attack (remember you must always also have Line of Sight to your target).
- You can use a Ranged Attack to target another Zone even if there are Enemies in your Zone. Any Enemies in a Zone between you and your target Zone are also irrelevant.
- Remember that for Ranged Attacks in interior Zones, Line of Sight is limited to the Zones that share an opening or inside the same large room (no diagonals). Line of Sight for exterior Zones goes in a straight line parallel to the board's edge until it meets a wall or the edge.
- Roll Dice: Roll the listed number of dice, plus any additional dice from Heroic Traits, Bystanders, Skills, or spent Power (see Power, below).
- Assign Hits: Assign any Hits scored to the targets in the attacked Zone, always following the Target Priority order (see below).
Enemies are eliminated when they are assigned a number of Hits equal to their Toughness value. Remember that Walkers and Runners have a Toughness value of 1, Brutes have a Toughness of 2, and Zombie Heroes have their Toughness listed on their card.
Enemies are only eliminated when they are assigned enough Hits to equal their Toughness during a single Attack Action. If not enough Hits are rolled to eliminate them, the assigned Hits do not carry over. It's all or nothing for each Attack!
Example: Magneto performs Ranged Attacks using his Shrapnel (Dice: 3, Accuracy: 4+). In the targeted Zone there are 2 Brutes, 1 Runner, and 1 Bystander.
- Magneto rolls 3 hits for his first Action, scoring 3 Hits. Following the Target Priority order, 2 Hits are needed to eliminate 1 Brute and the last Hit just bounces off the second Brute.
- Magneto rolls 2 hits for his second Action, scoring 2 Hits. The remaining Brute still requires 2 Hits to eliminate, so the Runner remains unharmed.
- Magneto rolls 2 hits for his third Action, scoring 2 Hits. 1 Hit is enough to eliminate the Runner. The last remaining Hit doesn't harm the Bystander since they are not affected by Super Hero Attacks.
Target Priority
When attacking, whether with Melee or Ranged Attacks, Hits must be assigned according to Target Priority order:
- Zombie Hero
- Brute
- Walker
- Runner
The Hits must be assigned to targets on the first Target Priority level until they have all been eliminated, then to targets of the next Target Priority level until they have all been eliminated, and so on (e.g., Zombie Heroes first, Runners last). If several targets share the same Target Priority level, players choose the targets hit among them.
NOTE: Other Super Heroes and Bystanders in the targeted Zone are not affected by your Attacks, even if you miss. You are Super Heroes, after all!
Power
Super Heroes draw Power from within themselves to accomplish amazing feats. But that Power is not an inexhaustible resource and must be generated through sheer force of will.
- The Power Track shows how much Power a Super Hero currently has at their disposal.
- Each Super Hero's Power Track automatically increases by 1 at the start of every Player Phase.
- During their Turn, a Super Hero may perform a Power-Up Action to gain 2 Power (see Power-Up, above).
- A Super Hero can only have 4 Power at most. Any gained beyond that is simply ignored.
- Having 0 Power has no consequence, other than not being able to spend Power to activate effects.
- Many Skills and Traits require spending Power to use various effects, as described in their text.
- Each time a Super Hero performs an Attack, before rolling dice, they may decide to spend any amount of Power they possess to add that many dice to their Attack.
Example: At the start of the Round, Storm has 0 Power. The Player Phase starts, automatically giving her 1 Power. During her Turn, she performs a Power-Up Action, increasing her Power by 2 to a total of 3. She then performs a Lightning Bolt Attack and decides to spend 2 Power on it, rolling a total of 4 dice (2 from the base Attack +2 from Power). Afterwards, she decides to spend her last Power to activate her Gust skill, moving all remaining Enemies out of her Zone.
Bystanders
Bystanders represent key characters the Super Heroes should try to Rescue from the zombies. See Rescue Bystander, above, for the full rules on Rescuing a Bystander. Besides that, Bystanders have numerous special rules that are outlined below.
Bystanders in Danger
When Enemies activate, they treat Bystanders as potential targets, just like Super Heroes. If a Bystander is their closest target, they will move towards it. If a Bystander is in their Zone, they will attack it. If different Bystanders or Super Heroes are equally eligible targets, the players decide who the Enemy targets.
- Identified by a symbol on their card, Combat Bystanders put up some resistance against the zombie hordes. Each time a Combat Bystander would suffer a Wound, they roll 1 die. On a 5+, they prevent that Wound.
- Bystanders are eliminated upon suffering 1 Wound. This triggers the Bystander Devoured effects (see below).
- If a Super Hero has a rescued Bystander card on their dashboard, they may choose to discard it in order to prevent 1 Wound they would suffer. This should not be taken lightly, though, as it triggers the Bystander Devoured effects (see below). Combat Bystanders don't get to roll a die when discarded this way.
- Bystanders are not Enemies and can never be harmed by Super Heroes.
Bystander Devoured!
If a Bystander is eliminated, they are removed from the board and their card discarded. This is a heavy blow for all the Super Heroes, as they have failed their primary purpose of protecting the innocent. Each Bystander that gets eliminated immediately triggers both of these effects:
- ALL Super Heroes lose 1 Power (if they have any).
- ALL Super Heroes must discard 1 Heroic Trait (if they have any).
Activating Bystanders
During the Enemy Phase, Bystanders attempt to flee the zombie hordes and reach the Super Heroes in order to be rescued. At the end of the Activate Enemies step but before the Spawn Enemies step, any Bystanders on the board are activated. They move 1 Zone towards the closest Zone with a Super Hero.
- If a Bystander has more than one closest Zone with Super Heroes, or more than one route of the same length to the closest Zone, the players decide which way the Bystander goes.
- If there are Enemies in their Zone or in the adjacent Zone they would move into, the Bystander does not move.
Interactive Objects
Missions might include Interactive Objects on the map. While in a Zone with an Interactive Object, Super Heroes may use them to perform a special Ranged Attack. Each Interactive Object is different, so see its associated Reference card. Marvel Zombies: X-Men Resistance features 1 Interactive Object, the severed Sentinel Hand, but expansions might feature others.
Sentinel Hand
The Sentinel Hand begins the game on its Charged side, allowing a Super Hero in its Zone to use its Plasma Blast Attack. This Attack may only be used once. After it's used, flip the token to its Spent side.
Each successful die roll from this Attack scores 2 Hits. Bonus dice such as those gained by spending Power do not apply. The Hits from each die may not be split among Enemies. Any excess Hit is ignored.
The spent Sentinel Hand may still be thrown once. After this Attack is used, remove the token from the gameboard.
Roll 1 die for each Enemy in the targeted Zone. Zombie Heroes are ignored for this Attack and bonus dice such as those gained by spending Power do not apply.
Missions: Hero Mode
MH1 – Ground Zero
Medium / 45 minutes. Tiles needed: 1V, 2R, 3V, 4R, 5V, 7V.
We'd heard the reports of super heroes turning into flesh-eating monsters, but who could really believe it? Once we were on the ground though, we were immediately attacked and separated. We need to regroup and figure this all out. This is madness. Surely there must be some way for us to contain it.
Objectives: Just in time. Escape via the Exit with all Super Heroes. Any Super Hero may leave through this Zone for free at the end of their Turn as long as there are no Enemies in it.
Special Setup:
- Anyone got a map? Place 1 of the Super Heroes in one of the Starting Zones and all other Super Heroes in the other.
- Lost keys. Place the Blue and Green Objectives randomly among the Red Objectives, facedown.
- 5-6 Super Heroes. Before the start of the game, draw 1 Spawn card for each active Spawn Point.
Special Rules:
- Gathering clues. Each Objective gives 5 XP to the Super Hero who takes it.
- Secret backdoor. The Blue Door can only be opened once both the Blue and Green Objectives have been taken.
- They heard us! The Blue Spawn Point becomes active once the Blue Objective has been taken. The Green Spawn Point becomes active once the Green Objective has been taken.
Map setup includes: Super Hero Starting Zone; Bystander Cards x6; Closed Doors x3; Locked Door; Exit Zone; Objectives x4; Spawn Points x3; Inactive Spawn Points x2. Tiles: 7V, 2R, 5V, 1V, 4R, 3V.
MH2 – Rescue Operation
Easy / 25 minutes. Tiles needed: 2R, 3V, 7V, 8R.
It was a plea for help, a desperate call over the emergency waves. Civilians need our assistance. They are defenseless against the zombie hordes and worse, our own former comrades. This is the ultimate test for us as super heroes. We cannot fail! We must get out there and we MUST save them!
Objectives: The way out. Accomplish these objectives in order:
- Rescue the Objective Bystander (see Special Rules).
- Escape via the Exit with all Super Heroes. Any Super Hero may leave through this Zone for free at the end of their Turn as long as there are no Enemies in it.
Special Setup:
- Trapped. Place a random Bystander on the indicated Zone. They are the Objective Bystander. Place an Objective token on its card to help identify that.
- 5-6 Super Heroes. The Green Spawn Point is only used in games with 5 or 6 Super Heroes.
Special Rules:
- Nowhere to run. The Objective Bystander cannot move. When this Bystander is rescued, ALL Super Heroes gain 5 XP. Players immediately lose if the Objective Bystander is devoured or discarded.
- Busy building. The Blue and Green Spawn Points become active once the Blue Door has been opened.
Map setup includes: Super Hero Starting Zone; Bystander; Bystander Cards x4; Exit Zone; Spawn Points x2 (+1 Spawn Point for 5-6 players); Closed Door; Inactive Spawn Point; Inactive Spawn Point. Tiles: 7V, 8R, 3V, 2R.
MH3 – Symbol of Hope
Easy / 45 minutes. Tiles needed: 2V, 4V, 5V, 6R, 7R, 9V.
The Avengers Tower serves as more than just a base of operations. In these troubled times, it is a bastion of safety for all those still in the city. We must spread the word that this is the place where we shall make our stand and that any who still rank among the living should rally here! We might be facing literal death, but we will not back down!
Objectives: Repair the beacon. Accomplish these objectives in order:
- Take the Blue and Green Objectives.
- Move the Avengers Sign to the Exit Zone.
Special Rules:
- In need of repairs. Super Heroes cannot interact with the Avengers Sign until the Blue and Green Objectives have both been taken.
- Collecting parts. The Blue and Green Objectives each give 5 XP to ALL Super Heroes when taken. Each Red Objective gives 5 XP to the Super Hero who takes it.
- The Beacon. The Avengers Sign may only be thrown once. While in the Zone with the Sign, a Super Hero may spend 1 Action to move 1 Zone, taking the Sign with them into that new Zone.
- Silver lining. The Blue and Green Spawn Points are active from the start of the game. The Blue Spawn Point is removed when the Blue Objective is taken. The Green Spawn Point is removed when the Green Objective is taken.
- 5-6 Super Heroes. Before the game begins, resolve a Spawn on each Spawn Point. During the Spawn Enemies step of each Enemy Phase, draw 1 additional Spawn card for the First Spawn Point.
Map setup includes: Super Hero Starting Zone; Bystander Cards x6; Avengers Sign; Exit Zone; Objectives x4; Spawn Points x4. Tiles: 2V, 5V, 6R, 7R, 9V, 4V.
MH4 – Stark's Plan
Easy / 25 minutes. Tiles needed: 1R, 3V, 6R, 7R, 8R, 9R.
Apparently, Tony Stark came up with some sort of plan to stop this infection involving nano-machines. We can't be entirely sure, as no one has been able to contact him for some time… Before we lost communication, though, he said he was handing the plans off to two people "he could trust". Our locator beacons show they are secured away in some nearby bunkers, but who knows how long those will last. We must rescue them and the intel they possess!
Objectives: Escape. Accomplish these objectives in order:
- Rescue both Trapped Bystanders (see Special Rules).
- Escape via the Exit with all Super Heroes. Any Super Hero may leave through this Zone for free at the end of their Turn as long as there are no Enemies in it.
Special Setup:
- Trapped. Remove the 2 Too Late! cards from the Bystander deck. Then, place 2 random Bystander cards facedown in the indicated Zones. They are the Trapped Bystanders. Do not place the regular Bystander cards in the other room of the Trapped Bystanders' buildings.
- 5-6 Super Heroes. The Green Spawn Point is only used in games with 5 or 6 Super Heroes. It is active from the start of the game.
Special Rules:
- Locked. The 2 Red Doors can only be opened once both Red Objectives have been taken. The Blue and Green Doors can only be opened once both the Blue and Green Objectives have been taken.
- Door keys. Each Objective gives 5 XP to the Super Hero who takes it.
- Too Late. The players lose if any Trapped Bystanders are devoured or discarded. Place an Objective token on their Bystander cards once they're revealed to help identify them as the Trapped Bystanders.
Map setup includes: Super Hero Starting Zone; Objectives x4; Spawn Points x3 (+1 Spawn Point for 5-6 players); Bystander Cards x6; Exit Zone; Locked Doors x4. Tiles: 8R, 6R, 7R, 3V, 1R, 9R.
MH5 – Longshot
Hard / 90 minutes. Tiles needed: 2V, 3V, 4V, 6V, 8V, 9V.
How could anyone have expected it to get this bad? Less than 48 hours ago, these were our friends and allies! And now, they've all become those… those flesh-eating things… We've received communication from S.H.I.E.L.D. They are setting up an extraction zone just outside the city… All we can do now is gather what survivors we can and whatever supplies we need and get out of here!
Objectives: Easier said than done. Accomplish these objectives in order:
- Take all Objectives.
- Escape via the Exit with all Super Heroes. Any Super Hero may leave through this Zone for free at the end of their Turn as long as there are no Enemies in it.
Special Setup:
- Incredible trouble. Place Hulk in the indicated Zone with his Zombie Hero card faceup next to the board.
- 5-6 Super Heroes. The Blue and Green Spawn Points are only used in games with 5 or 6 Super Heroes. They are active from the start of the game.
- Overrun. Before the game begins, resolve a Spawn on each Spawn Point.
Special Rules:
- Puny heroes. Whenever Hulk is eliminated, lay down his game piece and ignore him for all game effects. At the next End Phase, stand him up again. Hulk can only be eliminated for good by a Super Hero at the Orange or Red Danger Level.
- You are making me angry. Each Red Objective gives 5 XP to the Super Hero who takes it. When any Red Objectives are taken, Hulk can't activate that Round.
- Gathering supplies. The Blue and Green Objectives each give 5 XP to the Super Hero who takes it. Then, that Super Hero draws a Heroic Trait card for free.
Map setup includes: Super Hero Starting Zone; Objectives x6; Hulk; Closed Doors x4; Exit Zone; Spawn Points x3 (+2 Spawn Points for 5-6 players); Bystander Cards x6. Tiles: 3V, 6V, 4V, 9V, 2V, 8V.
Missions: Zombie Mode
These Missions require the rules and components found in the Marvel Zombies core box in order to be played.
MZ0 – Tutorial: Growing Hunger
Easy / 25 minutes. Tiles needed: 8R, 3V.
Once the infection takes you, there is no coming back. All you can do is accept this new existence… Accept this perpetual need to eat... If you let it go too long, then the hunger leads to uncontrollable madness… We don't want to eat them, but we need to be able to think, to figure this out… Maybe just one or two? Then we can formulate a plan… Yeah… Just a couple to keep the hunger at bay…
Objectives: A new existence. Accomplish these objectives in order:
- Devour all Bystanders. The game is lost if any Bystander escapes the map.
- Escape via the Exit with all Zombie Heroes. Any Zombie Hero may leave through this Zone for free at the end of their Turn as long as there are no Enemies in it.
Special Rules:
- Lockdown. The Blue Door cannot be opened until the Blue Objective has been taken. The Blue Objective gives 5 XP to the Zombie Hero who takes it.
Map setup includes: Zombie Hero Starting Zone; 2 Spawn Points; 2 Bystander Cards; Exit Zone; 1 Locked (Blue) Door; 1 Objective. Tiles: 8R, 3V.
MZ1 – The Hunger
Easy / 25 minutes. Tiles needed: 3R, 5R, 8R, 9V.
The infection was almost instantaneous, and with it came the endless hunger. Always there, always pushing you for your next meal. When it takes you over, it doesn't matter who you were, what your morals were, or who your friends and family were. If they are alive, they are food. This hunger, it cannot be sated, only suppressed…
Objectives: They can run but they cannot hide. Accomplish these objectives in any order:
- Devour all Bystanders. The game is lost if any Bystander escapes the map.
- Take all Objectives.
Then:
- Escape via the Exit with all Zombie Heroes. Any Zombie Hero may leave through this Zone for free at the end of their Turn as long as there are no Enemies in it.
Special Setup:
- 5-6 Zombie Heroes. The Green Spawn Point is only used in games with 5 or 6 Zombie Heroes. It is active from the start of the game.
Special Rules:
- The taste of flesh. Each Bystander gives 5 XP to the Zombie Hero who devours them.
- Be prepared. Each Objective gives 5 XP to the Zombie Hero who takes it.
Map setup includes: Zombie Hero Starting Zone; Bystander Cards x4; Objectives x4; Exit Zone; Spawn Points x2 (+1 Spawn Point for 5-6 players). Tiles: 3R, 8R, 9V, 5R.
MZ2 – Avengers Tower
Easy / 45 minutes. Tiles needed: 1R, 2V, 4V, 5V, 6V, 7R.
The Avengers Tower holds a wealth of comm arrays and tracking tools. Should we gain access to these, finding more meals would be a piece of cake... or… flesh. Let's leave the puns to Spider-Man… Unfortunately, it seems the tower has been put on lockdown. Fortunately, it appears some of the staff got stuck outside when the barriers went up… Perhaps one of them has an override card…
Objectives: Enter the tower. Accomplish these objectives in order:
- Find the Secret Mission Bystander (see Special Rules).
- Take both Red Objectives.
- Escape via the Exit with all Zombie Heroes. Any Zombie Hero may leave through this Zone for free at the end of their Turn as long as there are no Enemies in it.
Special Setup:
- The hidden access code. Place the Secret Mission #1 Bystander card randomly among the 4 Bystander cards that are NOT on tiles 5V or 6V.
- 5-6 Zombie Heroes. After Setup, resolve a spawn on each Spawn Point.
Special Rules:
- Rubble. The Red Door cannot be opened.
- Found it! When the Secret Mission #1 Bystander card is revealed, the Green and Blue Spawn Points become active. Spawn 1 Bystander in the Secret Mission card's Zone and tuck that card under the spawned Bystander's card to mark them as an Objective Bystander (if a Rescued! card is drawn, ignore it and draw a new card). The Green and Blue Doors can only be opened once the Objective Bystander has been devoured. If the Objective Bystander escapes, the game is lost.
- It's a learning process. Each Bystander gives 5 XP to the Zombie Hero who devours them. Each Objective gives 5 XP to the Zombie Hero who takes it.
Map setup includes: Zombie Hero Starting Zone; Bystander Cards x6; Sealed Door; Locked Doors; Avengers Sign; Objectives x2; Spawn Points x5; Exit Zone. Tiles: 4V, 2V, 7R, 1R, 6V, 5V.
MZ3 – Sanctum Defense
Medium / 45 minutes. Tiles needed: 1V, 3R, 5R, 6R, 7V, 8R.
The Sanctum Sanctorum holds magic portals to not only all corners of the globe, but the greater universe as well. If we can gain access to them, then the buffet would be endless! Of course, the resident Sorcerer Supreme and his allies will try to stop us… But they are just the h'orderves before the proper feast!
Objectives: The Sanctum defenders. Accomplish these objectives in order:
- Devour Wong.
- Defeat Doctor Strange (see Special Rules).
- Escape via the Exit with all Zombie Heroes. Any Zombie Hero may leave through this Zone for free at the end of their Turn as long as there are no Enemies in it.
Special Setup:
- Where's Wong? Place Wong's Bystander card randomly among the 5 Bystander cards that are NOT on tile 7V.
- The doctor will see you now. Place Doctor Strange in the indicated Zone with his Super Hero card faceup next to the board.
- 5-6 Zombie Heroes. The Green Spawn Point is only used in games with 5 or 6 Zombie Heroes. It is active from the start of the game.
Special Rules:
- Stay hidden. Bystanders are only revealed when a Zombie Hero enters their Zone.
- Wong's protection spell. Until Wong has been devoured, whenever Doctor Strange is eliminated, spawn him back in his starting Zone at the End Phase.
- Magic barrier. The Sanctum Sanctorum is sealed by Strange's magic. The Red Doors cannot be opened until Doctor Strange has been eliminated for good.
Map setup includes: Zombie Hero Starting Zone; Doctor Strange; Bystander Cards x6; Locked Doors x3; Exit Zone; Spawn Points x3 (+1 Spawn Point for 5-6 players). Tiles: 7V, 1V, 5R, 6R, 3R, 8R.
MZ4 – Valuable Tools
Medium / 60 minutes. Tiles needed: 1R, 2V, 3R, 4R, 5R, 6V, 7R, 8V, 9V.
In the chaos that ensued after the zombie outbreak, hiding and stashing potentially dangerous equipment became a hurried affair for the remaining heroes. Now, as the dust settles, obtaining these priceless pieces of tech has become a priority. Better keep these toys away from any potential threats, be they living or other zombie heroes. And if we can grab a snack or two along the way, even better.
Objectives: Tech race. Accomplish these objectives in any order:
- Each Zombie Hero must take at least 1 Objective.
- Each Zombie Hero must devour at least 1 Bystander.
Then:
- Escape via the Exit with all Zombie Heroes. Any Zombie Hero may leave through this Zone for free at the end of their Turn as long as there are no Enemies in it.
Special Setup:
- 5-6 Zombie Heroes. The Green Spawn Point is only used in games with 5 or 6 Zombie Heroes. It is active from the start of the game.
Special Rules:
- Fleeing snacks. Treat all Bystanders as Non-Combat Bystanders. They move 1 additional Zone per Activation. Each Bystander gives 5 XP to the Zombie Hero who devours them.
- Incorporating gear. Each Objective gives 5 XP to the Zombie Hero who takes it.
Map setup includes: Zombie Hero Starting Zone; Bystander Cards x9; Objectives x6; Exit Zone; Spawn Points x3 (+1 Spawn Point for 5-6 players); Avengers Sign. Tiles: 3R, 9V, 6V, 7R, 4R, 5R, 2V, 8V, 1R.
MZ5 – Madness at Oscorp
Medium / 45 minutes. Tiles needed: 2V, 3V, 4V, 5R, 8R, 9V.
Some of the scientists on Oscorp's R&D team hit the lab's panic button as soon as the zombie heroes started to ravage the city. They thought they would be safe inside the building, at least until all this "blows over". Little do they know, all they've done is turn themselves into canned food! Now, let's find a big can opener and clean this place out!
Objectives: Oscorpses. Accomplish these objectives in order:
- Take both Red Objectives.
- Take the Green and Blue Objectives.
- Escape via the Exit with all Zombie Heroes. Any Zombie Hero may leave through this Zone for free at the end of their Turn as long as there are no Enemies in it.
Special Setup:
- 5-6 Zombie Heroes. The Green Spawn Point is only used in games with 5 or 6 Zombie Heroes. It is active from the start of the game.
Special Rules:
- Dual custody keys. Each Red Objective gives 5 XP to the Zombie Hero who takes it.
- Oscorp. The highlighted building represents Oscorp. Its doors can only be opened once both Red Objectives have been taken.
- Barred Bugle. The Red Doors cannot be opened.
- Secret Exit. The Blue Door can only be opened once both the Blue and Green Objectives have been taken.
- Secret Studies. Each Zombie Hero that takes the Blue or Green Objective gains 5 XP. They also may draw 1 Bystander card and place it on their dashboard.
Map setup includes: Zombie Hero Starting Zone; Exit Zone; Bystander Cards x6; Objectives x4; Sealed Doors x2; Locked Door; Oscorp building; Spawn Points x3 (+1 Spawn Point for 5-6 players). Tiles: 5R, 4V, 9V, 3V, 2V, 8R.
MZ6 – Raiding Hell's Kitchen
Medium / 60 minutes. Tiles needed: 2R, 3R, 5R, 6R, 7R, 9R.
We got word of a large group of survivors holding out in Hell's Kitchen. Now that we've arrived, however, something seems off. Could it be that we were led into a trap? Not like it matters. What are a bunch of S.H.I.E.L.D. operatives going to do against the Earth's Mightiest (Zombie) Heroes?
Objectives: The raid. Accomplish these objectives in order:
- Take all Red Objectives and find the Exit.
- Escape via the Exit with all Zombie Heroes. Any Zombie Hero may leave through this Zone for free at the end of their Turn as long as there are no Enemies in it.
Special Setup:
- False intel. Place the Blue and Green Objectives randomly among the Red Objectives, facedown.
- Correct intel. Place the Secret Mission #1 and #2 Bystander cards randomly among the 6 Bystander cards that start on the board.
- 5-6 Zombie Heroes. The indicated Red Spawn Point is only used in games with 5 or 6 Zombie Heroes.
Special Rules:
- Informants. When the Secret Mission #1 or #2 Bystander card is revealed, players may choose an Objective anywhere on the board and flip it to see if it is Blue or Green. Then, draw a new Bystander card.
- Secret escape route. When the Green Objective is taken, place the Exit token in this Zone.
- To the rescue! When the Blue Objective is taken, immediately spawn 1 Super Hero in the Blue Spawn Point and it becomes active. When the Green Objective is taken, immediately spawn 1 Super Hero in the Green Spawn Point and it becomes active.
- Valuable intel. Each Objective gives 5 XP to the Zombie Hero who takes it.
Map setup includes: Zombie Hero Starting Zone; Opened Doors x2; Closed Doors x3; Objectives x5; Bystander Cards x6; Spawn Points x4 (+1 Spawn Point for 5-6 players). Tiles: 7R, 5R, 3R, 9R, 6R, 2R.
MZ7 – Divide and Conquer
Hard / 120 minutes. Tiles needed: 1V, 2V, 3V, 4R, 5R, 6R, 7R, 8V.
"The city is packed! Time for a feast! Let's devour as much as we can and use some good old strategy. Divide and conquer! We'll divide ourselves and conquer all of them. Wait… is that how that works? Maybe the missing part of my brain is starting to make a difference."
Objectives: Belly full of brains. Accomplish these objectives in any order:
- Each Zombie Hero must devour at least 1 Bystander.
- Each Zombie Hero must reach the Red Danger Level.
Special Setup:
- Divide. Divide the Zombie Heroes equally between the 2 Starting Zones.
- Thor's day. Place Thor in the indicated Zone with his Super Hero card faceup next to the board.
- Jackpot. Place the Green and Blue Objectives randomly among the Red Objectives, facedown.
- 5-6 Zombie Heroes. The Blue and Green Spawn Points are only used in games with 5 or 6 Zombie Heroes.
Special Rules:
- Conquer. Each Red Objective gives 5 XP to the Zombie Hero who takes it. The Blue and Green Objectives each give 5 XP to ALL Zombie Heroes when taken.
- Rolling thunder. If he's eliminated by a Zombie Hero at the Blue or Yellow Danger Level, Thor respawns in his starting Zone during the next End Phase.
- 5-6 Zombie Heroes. The Blue and Green Spawn Points become active once their respective Objectives have been taken.
Map setup includes: Zombie Hero Starting Zones; Avengers Sign; Bystander Cards x8; Spawn Points x4 (+2 Spawn Points for 5-6 players); Thor; Objectives x8. Tiles: 1V, 3V, 7R, 6R, 5R, 4R, 2V, 8V.
MZ8 – S.H.I.E.L.D. Trap
Hard / 30 minutes. Tiles needed: 1V, 2V, 4V, 6V.
We chased a squad of S.H.I.E.L.D. Agents into a seemingly abandoned building. Fast food, am I right? But suddenly, we found the place surrounded by a powerful forcefield. Heh, so this was all an elaborate ruse to trap us in here? They must really be getting desperate…
Objectives: Break the shield. Accomplish these objectives in order:
- Find and take the Blue Objective.
- Escape via the Exit with all Zombie Heroes. Any Zombie Hero may leave through this Zone for free at the end of their Turn as long as there are no Enemies in it.
Special Setup:
- Shield control. Place the Blue Objective randomly among the Red Objectives, facedown.
- Trapped! Do not place a Bystander card nor draw Spawn cards for the rooms in the tile where the Zombie Heroes start.
- Ambushed! Place 1 Guard and 2 Troopers in each of the two adjacent Zones, as shown.
- 5-6 Zombie Heroes. The indicated Spawn Point is only used in games with 5 or 6 Zombie Heroes.
Special Rules:
- Shield barrier. Zombie Heroes cannot move out onto the streets except through the Blue Door (see below).
- S.H.I.E.L.D. gear. Each Red Objective gives 5 XP to the Zombie Hero who takes it.
- Disabling the shield generator. The Blue Objective gives 5 XP to ALL Zombie Heroes when taken. Once taken, the Blue Door can be opened.
- They were expecting us. The Blue Spawn Point becomes active once a door accessing its tile is opened. The Green Spawn Point becomes active once a door accessing its tile is opened.
Map setup includes: Zombie Hero Starting Zone; Troopers x4; Guards x2; Closed Doors x8; Exit Zone; Bystander Cards x3; Locked Door; Objectives x4; Spawn Points x2 (+1 Spawn Point for 5-6 players); Inactive Spawn Points x2. Tiles: 6V, 1V, 4V, 2V.
MZ9 – Population Control
Hard / 60 minutes. Tiles needed: 1R, 3R, 5R, 6R, 7R, 9V.
The hunger is all-consuming and we have nearly picked the entire city clean… Before we move on, we think we may have found one last pocket of still-living civilians. The last remaining super heroes in the city have rallied here to save these last, precious morsels. No matter. Soon they will either join us or make a fine meal!
Objectives: Clean the plate. Accomplish these objectives in order:
- Devour all 5 Objective Bystanders (see Special Rules).
- Clear the game board of Super Heroes.
Special Setup:
- Leftovers. Take the 2 Rescued! cards out of the Bystander deck before placing 1 random facedown Bystander card under each Objective. Then, shuffle the Rescued! cards back into the deck.
- 5-6 Zombie Heroes. The Blue and Green Spawn Points are only used in games with 5 or 6 Zombie Heroes. They are active from the start of the game.
Special Rules:
- Leftovers. When a Zombie Hero takes an Objective, they gain 5 XP. The Bystander card under that Objective is revealed and replaced with that Bystander's piece. This is an Objective Bystander. Keep the Objective token on its card to help identify that.
- If they can't protect them, they'll avenge them: Each time ANY Bystander is devoured, spawn 1 Super Hero in that Bystander's Zone.
Map setup includes: Zombie Hero Starting Zone; Spawn Points x3 (+2 Spawn Points for 5-6 players); Bystander Cards x11; Objectives x5. Tiles: 6R, 3R, 7R, 5R, 9V, 1R.
MZ10 – Ticket to the Multiverse
Very Hard / 120 minutes. Tiles needed: 1R, 2R, 3R, 4V, 5V, 6R, 7R, 8V, 9V.
We got to thinking: Why stop at one world when we know there is an infinite number of multi-verses out there just waiting to be devoured? Unfortunately, the living know our plan and are desperate to stop us, hiding away the parts needed to build a dimensional portal (or perhaps they want to use them first?). Luckily, Stark knows of a locator nearby. Find it, get the parts, and let the multiversal feast begin!
Objectives: Assembling a portal. Accomplish these objectives in any order:
- Take all Objectives.
- Take all Secret Mission cards.
Special Setup:
- Parts Locator. Place the Blue and Green Objectives randomly among the Red Objectives, facedown. Place the 2 Secret Mission Bystander cards faceup as indicated on the map.
- Reinforcements. Remove all 6 Super Hero spawn cards from the Spawn deck.
- Standing guard. Place 6 Super Heroes in the indicated Zones.
- 5-6 Zombie Heroes. The Blue and Green Spawn Points are only used in games with 5 or 6 Zombie Heroes. They are active from the start of the game.
Special Rules:
- Silent guardians. Each Super Hero doesn't activate and their Ability is inactive until a door to their building is opened.
- The parts we need. Each Objective gives 5 XP to the Zombie Hero who takes it.
- Desperate defense. Each time a Zombie Hero reaches a new Danger Level, place 3 Troopers in the Spawn Zone closest to them.
- Secret Mission 1: Disruptor. Once the Blue Objective has been taken, the Secret Mission #1 card may be taken by spending 1 Action in its Zone. Once Secret Mission #1 is taken, ignore the Desperate defense Special Rule.
- Secret Mission 2: Upgrades. Once the Green Objective has been taken, the Secret Mission #2 card may be taken by spending 1 Action in its Zone. Once Secret Mission #2 is taken, all Zombie Hero Attacks (except Devour) gain +1 die.
Map setup includes: Zombie Hero Starting Zone; Bystander Cards x9; Avengers Sign; Super Heroes x6; Secret Mission Bystander Cards x2; Objectives x6; Spawn Points x4 (+2 Spawn Points for 5-6 players). Tiles: 9V, 1R, 2R, 4V, 3R, 8V, 6R, 7R, 5V.
Round Summary
1. Player Phase
- Increase Power Tracks.
- Refresh Activation Tokens.
- Activate Super Heroes. Super Heroes activate in any order. On their Turn, each Super Hero can perform 3 Actions.
- Move: Costs 1 extra Action per Enemy in their Zone.
- Open a Door/Window: When a building is first opened, Spawn in its Zones and reveal Bystanders.
- Gain Trait: Only once per Turn. Can't have more than 2 cards.
- Power-Up: Gain 2 Power.
- Rescue Bystander: No Enemies in their Zone. Fill the Super Hero's track.
- Interact with Objective
- Attack: Use their unique Attack.
- May spend Power to roll extra Dice.
- Deal Hits equal to a target's Toughness in a single Attack to eliminate them, always following the Target Priority order.
2. Enemy Phase
- Activate Enemies. Each Enemy activates and spends their Action(s) on either an Attack or a Move, depending on the situation. Runners and Zombie Heroes perform 2 Actions.
- Attack: Each Enemy in the same Zone as a Super Hero or Bystander performs an Attack, dealing 1 Wound.
- Move: Enemies that have not Attacked use their Action to Move 1 Zone towards the closest Super Hero or Bystander.
- Activate Bystander: After Enemies activate, all Bystanders move 1 Zone towards the closest Super Hero (unless Enemies are in their current or next Zone).
- Spawn Enemies. Starting from the First Spawn Point and going clockwise, draw and resolve 1 Spawn card for each Spawn Point token. Read the line corresponding to the highest Danger Level among Super Heroes.
Bystanders: Targeted like Super Heroes. Eliminated with 1 Wound.
- Sacrifice: Super Hero may discard their Bystander to ignore 1 Wound.
- Combat: Ignore 1 Wound per 5+ rolled.
- Devoured: If eliminated, all Super Heroes lose 1 Power and 1 Trait.
3. End Phase
Perform any effects indicated to take place during the End Phase. If any Super Heroes are eliminated, the players lose. Otherwise, start a new Round.
Targets Menu
| Target Priority | Name | Actions | Toughness | XP Reward |
|---|---|---|---|---|
| 1 | Zombie Hero | 2 | See card | Equal to Toughness |
| 2 | Brute | 1 | 2 | 1 |
| 3 | Walker | 1 | 1 | 1 |
| 4 | Runner | 2 | 1 | 1 |