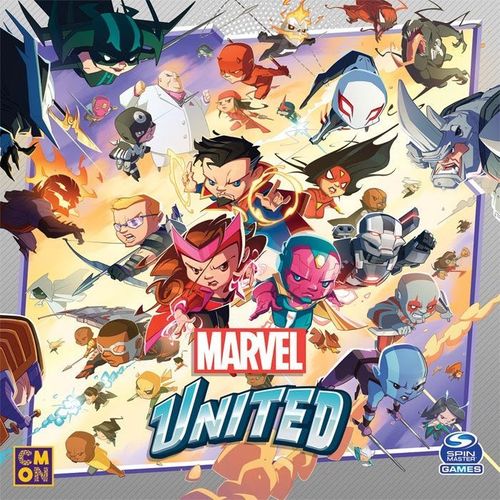
Marvel United: Kickstarter Promos Box (2022)
Marvel United: Kickstarter Promos Box (2022) Rulebook
Table of Contents
Table of Contents
- Villain Dashboards and Rules
- Dormammu
- Corvus Glaive
- Bullseye
- Venom
- Baron Zemo
- M.O.D.O.K
- Kingpin
- Carnage
- Hela
- Rhino
- Weak Spot Cards
- Hero Cards
- Equipment
- Hawkeye: Trick Arrow - Explosive
- Hawkeye: Trick Arrow - Pym Particles
- Hawkeye: Trick Arrow - Smoke Bomb
- Hawkeye: Trick Arrow - Wire
- Moon Knight's Suit (equipment)
- Ghost Rider: Hell Charger
- Ghost Rider: Hellfire Chain
- Mockingbird's Battle Staves
- Daredevil's Billy Club
- Blade's Sword
- War Machine: Deflector Shields
Villain Dashboards and Rules
Each villain in this box uses a Villain Dashboard. The Dashboard carries that villain's Special Rules, its BAM! effect, its Overflow effect and its Villainous Plot track. The Masterplan deck and the Threat cards for that villain follow the Dashboard's rules.
Dormammu
Dormammu Dashboard
Special Rules: Dormammu can never be damaged. However he is defeated after his last Master Plan card is resolved. When 2 Missions are completed, remove the top card of the Master Plan deck from the game. When a Hero is KO'd, Dormammu doesn't activate his BAM! Instead, advance the Ritual Track by the number of Heroes.
BAM!: Deal 2 damage to each Hero in Dormammu's Location.
Overflow: If a Civilian or Thug token can't be added to a Location, increase the Ritual Track by 1 for each token you couldn't add.
Villainous Plot - Ritual Track: Track from 0 to 20. When this track reaches 20, Heroes lose.
Dormammu Threat Cards
The Dormammu Threat deck has six cards: two Elemental Control, two Banishment and two Dark Dimension.
- Elemental Control (2 cards): Heroes that take damage in this Location take 1 extra damage.
- Banishment (2 cards): Each Civilian in this Location requires 1 extra Heroic Action to be rescued.
- Dark Dimension (2 cards): Each Thug in this Location requires 2 damage to be defeated.
Dormammu Masterplan Deck
The Masterplan cards are listed in the order they appear on the source sheet. Each card gives a Move value, a BAM! icon where printed, and the Civilian and Thug tokens placed in the left Location, Dormammu's Location and the right Location.
- Move 3. Place 1 Civilian in each of the three Locations. Ritual: Increase the Ritual Track by the number of Civilians and Thugs in Dormammu's Location.
- Move 3. Place 1 Civilian in each of the three Locations. Ritual: Increase the Ritual Track by the number of Civilians and Thugs in Dormammu's Location.
- Move 3. Place 1 Thug in each of the three Locations. Ritual: Increase the Ritual Track by the number of Civilians and Thugs in Dormammu's Location.
- Move 3. Place 1 Thug in each of the three Locations. Ritual: Increase the Ritual Track by the number of Civilians and Thugs in Dormammu's Location.
- Move 3. Place 1 Thug and 1 Civilian in each of the three Locations.
- Move 5. BAM!. Place 1 Thug and 1 Civilian in each of the three Locations.
- Move 0. BAM!. Place 1 Thug and 1 Civilian in each of the three Locations.
- Move 2. BAM!. Place 2 Thugs in each of the three Locations.
- Move 2. BAM!. Place 2 Thugs in each of the three Locations.
- Move 1. BAM!. Place 2 Thugs in each of the three Locations.
- Move 1. BAM!. Place 2 Civilians in each of the three Locations.
- Move 2. BAM!. Place 2 Civilians in each of the three Locations.
Corvus Glaive
Corvus Glaive Dashboard
Special Rules: When a Hero is KO'd they get a KO token.
BAM!: Deal 1 damage to each Hero in Corvus Glaive's Location.
Overflow: If 1 or more Civilian / Thug tokens can't be added to a Location, deal 1 damage to each Hero in that Location.
Villainous Plot: The Heroes lose when they have a number of KO tokens equal to the number of Heroes.
Hero-count table (printed in the lower left of the Dashboard, with no heading): 2 Heroes: 5; 3 Heroes: 8; 4 Heroes: 11.
Corvus Glaive Threat Cards
The Corvus Glaive Threat deck has six cards: two Hidden Traps, two Dangerous Terrain and two Civilians in Peril.
- Hidden Traps (2 cards): Heroes ending their turn in this Location take 1 damage.
- Dangerous Terrain (2 cards): Heroes that take damage in this Location take 1 extra damage.
- Civilians in Peril (2 cards): Discard all Civilians from this Location. If any Civilians are discarded this way, play another Master Plan card after resolving the current one.
Corvus Glaive Masterplan Deck
The Masterplan cards are listed in the order they appear on the source sheet. Each card gives a Move value (or * where the card gives no number), a BAM! icon where printed, the tokens placed in the left Location, Corvus Glaive's Location and the right Location, and any named effect. A card with no placement diagram places no tokens.
- Move 0. BAM!. No tokens placed.
- Move 2. BAM!. Place 2 Thugs in the left Location, 1 Thug in Corvus Glaive's Location and 2 Thugs in the right Location.
- Move 1. BAM!. Place 2 Thugs in the left Location, 1 Thug in Corvus Glaive's Location and 2 Thugs in the right Location.
- Move 4. BAM!. Place 2 Thugs in the left Location, 1 Thug in Corvus Glaive's Location and 2 Thugs in the right Location.
- Move 5. Place 1 Thug and 1 Civilian in each of the three Locations.
- Move 1. BAM!. Place 2 Civilians in the left Location, 1 Civilian in Corvus Glaive's Location and 2 Civilians in the right Location.
- Move 2. BAM!. Place 2 Civilians in the left Location, 1 Civilian in Corvus Glaive's Location and 2 Civilians in the right Location.
- Move 3. BAM!. Place 2 Civilians in the left Location, 1 Civilian in Corvus Glaive's Location and 2 Civilians in the right Location.
- Move
*. Slaughter: Deal 1 damage to each Hero in Corvus Glaive's Location. Move clockwise to the next Location with any Heroes. - Move
*. Glaive Attack: Move clockwise to the next Location with only 1 Hero and deal 2 damage to them. If there is no such Location, do not move and deal 1 damage to each Hero. - Move
*. Slaughter: Deal 1 damage to each Hero in Corvus Glaive's Location. Move clockwise to the next Location with any Heroes. - Move
*. Glaive Attack: Move clockwise to the next Location with only 1 Hero and deal 2 damage to them. If there is no such Location, do not move and deal 1 damage to each Hero.
Bullseye
Bullseye Dashboard
Special Rules: When a Hero is KO'd, Bullseye doesn't activate his BAM! Instead, the Hero gets a KO token.
BAM!: Deal 1 damage to each Hero in both Locations adjacent to Bullseye.
Villainous Plot: If a Civilian or Thug token can't be added to a Location, the Heroes lose. The Heroes also lose when they have a number of KO tokens equal to the number of Heroes.
Hero-count table (printed in the lower left of the Dashboard, with no heading): 2 Heroes: 5; 3 Heroes: 7; 4 Heroes: 10.
Bullseye Threat Cards
The Bullseye Threat deck has six cards: two Hiding Place, two Diversion and two Bullseye.
- Hiding Place (2 cards): If Bullseye is in this Location, he cannot take damage.
- Diversion (2 cards): As long as this Threat is in play, Heroes cannot defeat Bullseye nor win the game by any means.
- Bullseye (2 cards): Heroes that take damage in this Location take 1 extra damage.
Bullseye Masterplan Deck
The Masterplan cards are listed in the order they appear on the source sheet. Each card gives a Move value, a BAM! icon where printed, the tokens placed in the left Location, Bullseye's Location and the right Location, and any named effect. A card with no placement diagram places no tokens.
- Move
*. Master Assassin: Deal 2 damage to each Hero in both Locations adjacent to Bullseye. Move clockwise to the next Location with NO Heroes. - Move
*. Master Assassin: Deal 2 damage to each Hero in both Locations adjacent to Bullseye. Move clockwise to the next Location with NO Heroes. - Move 0. Impossible Shot: Deal 2 damage to each Hero in the Location opposite to Bullseye.
- Move 0. Impossible Shot: Deal 2 damage to each Hero in the Location opposite to Bullseye.
- Move 0. BAM!. No tokens placed.
- Move 1. BAM!. Place 1 Thug in each of the three Locations.
- Move 2. BAM!. Place 1 Thug in each of the three Locations.
- Move 4. BAM!. Place 1 Thug in each of the three Locations.
- Move 1. BAM!. Place 1 Civilian in each of the three Locations.
- Move 3. BAM!. Place 1 Civilian in each of the three Locations.
- Move 3. BAM!. Place 1 Civilian in each of the three Locations.
- Move 5. BAM!. Place 1 Civilian in the left Location, 1 Thug in Bullseye's Location and 1 Civilian in the right Location.
Venom
Venom Dashboard
Special Rules: When a Hero is KO'd, Venom doesn't activate his BAM! Instead, he plays another Master Plan card.
BAM!: Deal 1 damage to each Hero in Venom's Location (2 if they have any Crisis tokens). Then, each Hero there gets 1 Crisis token.
Overflow: If 1 or more Civilian / Thug tokens can't be added to a Location, 1 Hero gets 1 Crisis token.
Villainous Plot: The Heroes lose when all Heroes are out of the game. A Hero is out of the game when they accumulate this number of Crisis tokens: 2 Heroes: 8 Crisis tokens; 3 Heroes: 6 Crisis tokens; 4 Heroes: 4 Crisis tokens.
Hero-count table (printed in the lower left of the Dashboard, with no heading): 2 Heroes: 5; 3 Heroes: 8; 4 Heroes: 11.
Venom Threat Cards
The Venom Threat deck has six cards: two Infect, two Organic Fangs and two Shapeshifting.
- Infect (2 cards; the card carries an orange ability icon in its header): Give 1 Crisis token to any Hero (Heroes choose).
- Organic Fangs (2 cards): When taking damage, Heroes in this Location take 1 extra damage.
- Shapeshifting (2 cards): Heroes ending their turn in this Location get 1 Crisis token.
Note: the printed text on the Shapeshifting cards reads "thier" for "their"; it is transcribed here as "their".
Venom Masterplan Deck
The Masterplan cards are listed in the order they appear on the source sheet. Each card gives a Move value, a BAM! icon where printed, the tokens placed in the left Location, Venom's Location and the right Location, and any named effect. A card with no placement diagram places no tokens.
- Move 0. BAM!. No tokens placed.
- Move 3. Place 1 Thug and 1 Civilian in each of the three Locations.
- Move 5. Place 1 Thug and 1 Civilian in each of the three Locations.
- Move 1. Place 2 Civilians in each of the three Locations.
- Move 2. BAM!. Place 2 Civilians in each of the three Locations.
- Move 1. BAM!. Place 1 Thug in each of the three Locations.
- Move 2. BAM!. Place 1 Thug in each of the three Locations.
- Move 4. BAM!. Place 1 Thug in each of the three Locations.
- Move
*. Entangle: Give 1 Crisis token to 1 Hero in Venom's Location. Then BAM!. Move clockwise to the next Location with any Heroes. - Move
*. Entangle: Give 1 Crisis token to 1 Hero in Venom's Location. Then BAM!. Move clockwise to the next Location with any Heroes. - Move
*. Entangle: Give 1 Crisis token to 1 Hero in Venom's Location. Then BAM!. Move clockwise to the next Location with any Heroes. - Move
*. Entangle: Give 1 Crisis token to 1 Hero in Venom's Location. Then BAM!. Move clockwise to the next Location with any Heroes.
Baron Zemo
Baron Zemo Dashboard
Special Rules: A Hero with any Crisis tokens at the end of their turn must use each of these tokens to cover 1 symbol on the bottom of the card they played this turn (keeping any leftovers). Symbols covered by Crisis tokens do not grant actions to Heroes.
BAM!: Deal 1 damage to 1 Hero in Baron Zemo's Location and give 1 Crisis token to the Hero closest to it (going clockwise. In case of a tie, Heroes decide).
Overflow: If 1 or more Civilian / Thug tokens can't be added to a Location, give 1 Crisis token to the Hero closest to it (going clockwise. In case of a tie, Heroes decide).
Hero-count table (printed in the lower left of the Dashboard, with no heading): 2 Heroes: 3; 3 Heroes: 5; 4 Heroes: 8.
Gap: this Dashboard prints no Villainous Plot panel. The source sheet shows no win or loss condition on it.
Baron Zemo Threat Cards (Henchmen)
The Baron Zemo Threat sheet shows six cards: five Henchmen and one Masters of Evil card. Each Henchman card shows a Health value, a BAM! effect and the number of Heroic Action icons needed to defeat it in a single turn, where printed.
- Moonstone (Health 5): Deal 2 damage to each Hero in this Location and 1 damage to each Hero in adjacent Locations.
- Screaming Mimi (Health 3): Deal 1 damage to each Hero in adjacent Locations. Screaming Mimi can be defeated by using 2 Heroic Action icons in a single turn.
- Fixer (Health 3): Discard 1 Civilian from this Location. Fixer can be defeated by using 2 Heroic Action icons in a single turn.
- Goliath (Health 5): Deal 2 damage to 1 Hero in this Location. Goliath can be defeated by using 3 Heroic Action icons in a single turn.
- Beetle (Health 4): Discard 1 Thug from this Location. Beetle can be defeated by using 2 Heroic Action icons in a single turn.
- Masters of Evil (Threat card, no Health): As long as this Threat is in play, Henchmen cannot take any damage.
Note: the Masters of Evil card shows three Heroic Action icon slots, as printed on a Threat card.
Baron Zemo Masterplan Deck
The Masterplan cards are listed in the order they appear on the source sheet. Each card gives a Move value, a BAM! icon where printed, the tokens placed in the left Location, Baron Zemo's Location and the right Location, and any named effect. A card with no placement diagram places no tokens.
- Move 3. Thunderbolts!: Add 3 Thugs to Baron Zemo's Location, then BAM!.
- Move 3. Thunderbolts!: Add 3 Thugs to Baron Zemo's Location, then BAM!.
- Move
*. Citizen V: Discard all Thugs and Civilians in Baron Zemo's Location. Move clockwise to the next Location with the most Civilians. - Move
*. Citizen V: Discard all Thugs and Civilians in Baron Zemo's Location. Move clockwise to the next Location with the most Civilians. - Move 0. BAM!. No tokens placed.
- Move 1. BAM!. Place 2 Thugs in the left Location, 1 Thug in Baron Zemo's Location and 2 Thugs in the right Location.
- Move 4. BAM!. Place 2 Thugs in the left Location, 1 Thug in Baron Zemo's Location and 2 Thugs in the right Location.
- Move 4. BAM!. Place 2 Thugs in the left Location, 1 Thug in Baron Zemo's Location and 2 Thugs in the right Location.
- Move 1. BAM!. Place 2 Civilians in the left Location, 1 Civilian in Baron Zemo's Location and 2 Civilians in the right Location.
- Move 2. BAM!. Place 2 Civilians in the left Location, 1 Civilian in Baron Zemo's Location and 2 Civilians in the right Location.
- Move 3. BAM!. Place 2 Civilians in the left Location, 1 Civilian in Baron Zemo's Location and 2 Civilians in the right Location.
- Move 5. Place 2 Thugs and 2 Civilians in the left Location, 1 Thug and 1 Civilian in Baron Zemo's Location and 2 Thugs and 2 Civilians in the right Location.
M.O.D.O.K
M.O.D.O.K Dashboard
Special Rules: When M.O.D.O.K has to flip a Hero card, take the faceup Hero card closest to the start of the Storyline and flip it facedown. (Facedown cards are treated as blank.)
BAM!: Flip 1 Hero card.
Overflow: If 1 or more Civilian / Thug tokens can't be added to a Location, flip 1 Hero card.
Villainous Plot: The Heroes lose if all Hero cards in the Storyline are facedown.
Hero-count table (printed in the lower left of the Dashboard, with no heading): 2 Heroes: 4; 3 Heroes: 7; 4 Heroes: 10.
M.O.D.O.K Threat Cards
The M.O.D.O.K Threat sheet shows six cards: three Threat cards (Psychic Powers, Technopathy and Energy Projection) and three Henchmen (Spot, Chameleon and Living Laser). Each Henchman card shows a Health value of 4.
- Psychic Powers (Threat, 3 Heroic Action icons): Heroes starting their turn in this Location must play their card facedown in the Storyline (they get no benefit from their own card).
- Technopathy (Threat, orange ability icon): Heroes lose all their action tokens. If they have none, or wish to keep them, flip 2 Hero cards.
- Energy Projection (Threat, orange ability icon): Flip 1 Hero card.
- Spot (Henchman, Health 4), BAM!: Flip as many Hero cards as the number of Heroic Action icons at the bottom of the last 2 Hero cards in the Storyline.
- Chameleon (Henchman, Health 4), BAM!: Deal damage to 1 Hero in this Location equal to the number of Attack icons at the bottom of the last 2 Hero cards in the Storyline.
- Living Laser (Henchman, Health 4), BAM!: Deal damage to 1 each Hero in this Location. If there are no Heroes in this Location, flip 1 Hero card.
Gap: the Living Laser text is transcribed as printed ("Deal damage to 1 each Hero in this Location"); the card does not state the amount more clearly. The Spot and Chameleon icons are read from zoomed crops of the sheet.
M.O.D.O.K Masterplan Deck
The Masterplan cards are listed in the order they appear on the source sheet. Each card gives a Move value, a BAM! icon where printed, the tokens placed in the left Location, M.O.D.O.K's Location and the right Location, and any named effect. A card with no placement diagram places no tokens.
- Move
*. Preparation: Move M.O.D.O.K to the Heroes' starting Location. - Move 0. BAM!. No tokens placed.
- Move 1. Place 1 Thug in the left Location, 2 Thugs in M.O.D.O.K's Location and 1 Thug in the right Location.
- Move 2. BAM!. Place 1 Thug in the left Location, 2 Thugs in M.O.D.O.K's Location and 1 Thug in the right Location.
- Move 4. BAM!. Place 1 Thug in the left Location, 2 Thugs in M.O.D.O.K's Location and 1 Thug in the right Location.
- Move 3. BAM!. Place 1 Civilian in the left Location, 2 Civilians in M.O.D.O.K's Location and 1 Civilian in the right Location.
- Move 2. BAM!. Place 1 Civilian in the left Location, 2 Civilians in M.O.D.O.K's Location and 1 Civilian in the right Location.
- Move 1. Place 1 Civilian in the left Location, 2 Civilians in M.O.D.O.K's Location and 1 Civilian in the right Location.
- Move 5. Place 1 Thug and 1 Civilian in each of the three Locations.
- Move 3. BAM!. Consciousness Transferral: As long as this card is faceup in the Storyline, BAM! on the next cards flips 1 additional Hero card.
- Move 3. BAM!. Consciousness Transferral: As long as this card is faceup in the Storyline, BAM! on the next cards flips 1 additional Hero card.
- Move 0. BAM!. Super-Genius Intelligence: Accelerate the next Villain turn by 1 card.
Kingpin
Kingpin Dashboard
Special Rules: When a Hero is KO'd, Kingpin doesn't activate his BAM! Instead, he plays another Master Plan card.
BAM!: Deal 1 damage to each Hero in Kingpin's Location.
Overflow: If 1 or more Civilian / Thug tokens can't be added to a Location, deal 1 damage to each Hero in that Location.
Villainous Plot: The Heroes lose when Kingpin has discarded all 6 Plan tokens.
Hero-count table (printed in the lower left of the Dashboard, with no heading): 2 Heroes: 6; 3 Heroes: 8; 4 Heroes: 11.
Kingpin Threat Cards
The Kingpin Threat sheet shows six cards: one Bullseye Henchman, three Corrupted Elite Thugs and two Secrets.
- Bullseye (Henchman, Health 5): Deal damage to 1 each Hero in this Location and both adjacent ones. Discard 1 Civilian from each of these Locations without Heroes. (This Henchman card is printed on the Kingpin Threat sheet.)
- Corrupted Elite Thugs (3 cards):
- Card 1: Any Civilian in this Location is immediately turned into a Thug. Each Thug in this Location requires 2 damage to be defeated.
- Card 2: As long as this Threat is in play, any defeated Thugs are discarded instead of being placed on the Mission card.
- Card 3: As long as this Threat is in play, any defeated Thugs are discarded instead of being placed on the Mission card.
- Secrets (2 cards): As long as this Threat is in play, any rescued Civilians are discarded instead of being placed on the Mission card.
Gap: the card counts (three Corrupted Elite Thugs, two Secrets) are read from the sheet images. The Bullseye Henchman's Health is read from the zigzag icon on the card.
Kingpin Masterplan Deck
The Masterplan cards are listed in the order they appear on the source sheet. Kingpin's cards carry an Advance the Plan box in place of a Move value on cards 2 to 7: "Place him in the Location with the lowest-number Plan token and discard it." The sheets do not define Plan tokens beyond this text. Each card gives the tokens placed in the left Location, Kingpin's Location and the right Location, a BAM! icon where printed, and any named effect. A card with no placement diagram places no tokens.
- Move 0. BAM!. No tokens placed.
- Advance the Plan. BAM!. Place 1 Thug in each of the three Locations.
- Advance the Plan. BAM!. Place 1 Thug in the left Location, 2 Thugs in Kingpin's Location and 1 Thug in the right Location.
- Advance the Plan. BAM!. Place 2 Thugs in each of the three Locations.
- Advance the Plan. BAM!. Place 2 Thugs in each of the three Locations.
- Advance the Plan. BAM!. Place 2 Thugs in the left Location and 2 Thugs in the right Location.
- Advance the Plan. BAM!. Place 3 Thugs in the left Location.
- Move 1. Place 3 Thugs in the right Location.
- Move 4. Place 1 Civilian in the left Location, 2 Civilians in Kingpin's Location and 1 Civilian in the right Location.
- Move 5. Place 1 Thug and 2 Civilians in each of the three Locations.
- Move 2. BAM!. Place 1 Civilian in each of the three Locations.
- Move 3. BAM!. Place 2 Civilians in the left Location and 2 Civilians in the right Location.
Carnage
Carnage Dashboard
Special Rules: Whenever a Hero is KO'd, increase the Spawn track by 1.
BAM!: Deal 1 damage to each Hero in Carnage's Location. Then, place 1 Crisis token above each Civilian there.
Overflow: If 1 or more Civilian / Thug tokens can't be added to a Location, discard all Civilians with a Crisis token from the Location with the most Civilians (the first clockwise, in case of a tie). For each Civilian with a Crisis token that is discarded, increase the Spawn track by 1.
Villainous Plot - Spawn Track: Track from 0 to 10. When this track reaches 10, Heroes lose.
Hero-count table (printed in the lower left of the Dashboard, with no heading): 2 Heroes: 5; 3 Heroes: 8; 4 Heroes: 11.
Carnage Threat Cards
The Carnage Threat sheet shows six cards: three Symbiote Ambush Threat cards and three Carnage's Offspring Henchman cards (Health 4).
- Symbiote Ambush (3 cards): Each Civilian in this Location requires 1 extra Heroic Action to be rescued.
- Carnage's Offspring (3 cards, Health 4): Place 1 Crisis token above 1 Civilian in this Location (if present). Add 1 Civilian to this Location. Then, deal 1 damage to each Hero here.
Carnage Masterplan Deck
The Masterplan cards are listed in the order they appear on the source sheet. Each card gives a Move value (or a movement arrow where the card gives its own movement text), a BAM! icon where printed, the tokens placed in the left Location, Carnage's Location and the right Location, and any named effect. A card with no placement diagram places no tokens.
- Move 0. BAM!. No tokens placed.
- Move 1. BAM!. Place 1 Thug in each of the three Locations.
- Move 2. BAM!. Place 1 Thug in each of the three Locations.
- Move 4. BAM!. Place 1 Thug in each of the three Locations.
- Move 1. Place 2 Civilians in each of the three Locations.
- Move 2. BAM!. Place 2 Civilians in each of the three Locations.
- Move 3. Place 2 Civilians in each of the three Locations.
- Move 5. Place 1 Thug and 2 Civilians in each of the three Locations.
- Move clockwise to the next Location with the most Civilians. BAM!. Spawn of Evil: Add 1 Civilian to every Location.
- Move clockwise to the next Location with the most Civilians. BAM!. Spawn of Evil: Add 1 Civilian to every Location.
- Move clockwise to the next Location with the most Civilians. BAM!. Spawn of Evil: Add 1 Civilian to every Location.
- Move clockwise to the next Location with the most Civilians. BAM!. Spawn of Evil: Add 1 Civilian to every Location.
Hela
Hela Dashboard
Special Rules: Hela can't take any damage as long as the Fenris Wolf Threat is in play.
BAM!: Deal 1 damage to each Hero in Hela's Location.
Overflow: If 1 or more Civilian / Thug tokens can't be added to a Location:
- If Fenris Wolf is in play, he gains 1 additional Health (may go above his starting value).
- If Fenris Wolf is not in play, place a Necroswords Threat card on the first Location without a Threat (if possible).
Villainous Plot: The Heroes lose if all the Heroes are KO'd at the same time.
Hero-count table (printed in the lower left of the Dashboard, with no heading): 2 Heroes: 4; 3 Heroes: 7; 4 Heroes: 10.
Hela Threat Cards
The Hela Threat sheet shows six cards: five Necroswords and one Fenris Wolf (Health 4).
- Necroswords (5 cards): BAM!: Deal 1 damage to 1 Hero in this Location. If there are any Thugs in this Location, deal 2 damage instead.
- Fenris Wolf (Health 4): BAM!: Deal 1 damage to 1 Hero in this Location. Hela can't take any damage as long as Fenris Wolf is in play.
Hela Masterplan Deck
The Masterplan cards are listed in the order they appear on the source sheet. Hela's cards use a "Move to the Location with the Hero with the most cards in hand (if tied, Heroes choose)" box in place of a Move value, where printed. Each card gives a BAM! icon where printed, the tokens placed in the left Location, Hela's Location and the right Location, and any named effect. A card with no placement diagram places no tokens.
- Banished: Hela will enter play when resolving her first BAM! effect.
- No Move value, BAM! icon, text or token diagram is printed on this card's sheet image; the card shows artwork only. See the gap note below.
- Move to the Location with the Hero with the most cards in hand (if tied, Heroes choose). BAM!. Place 1 Thug in the left Location, 2 Thugs in Hela's Location and 1 Thug in the right Location.
- Move to the Location with the Hero with the most cards in hand (if tied, Heroes choose). BAM!. Place 1 Thug in the left Location, 2 Thugs in Hela's Location and 1 Thug in the right Location.
- Move to the Location with the Hero with the most cards in hand (if tied, Heroes choose). BAM!. Place 1 Thug in the left Location, 2 Thugs in Hela's Location and 1 Thug in the right Location.
- Move to the Location with the Hero with the most cards in hand (if tied, Heroes choose). BAM!. Place 2 Civilians in the left Location, 1 Civilian in Hela's Location and 2 Civilians in the right Location.
- Move to the Location with the Hero with the most cards in hand (if tied, Heroes choose). BAM!. Place 2 Civilians in the left Location, 1 Civilian in Hela's Location and 2 Civilians in the right Location.
- Move to the Location with the Hero with the most cards in hand (if tied, Heroes choose). BAM!. Place 2 Civilians in the left Location, 1 Civilian in Hela's Location and 2 Civilians in the right Location.
- Move to the Location with the Hero with the most cards in hand (if tied, Heroes choose). BAM!. Place 1 Thug and 1 Civilian in each of the three Locations.
- Move 0. Raise Undead Army: Add 2 Thugs to each Location. Then, if Fenris Wolf is not in play, place his Threat card in the first clockwise Location with no Threat.
- Move 0. Raise Undead Army: Add 2 Thugs to each Location. Then, if Fenris Wolf is not in play, place his Threat card in the first clockwise Location with no Threat.
Gap: card 2 of the Hela Masterplan shows artwork only on the sheet image, with no Move value, BAM! icon, text or token diagram. It is transcribed as printed (no effect). The source does not show what the card does, if anything. Card 1 is the Banished card.
Note: the printed Raise Undead Army text reads "Locarion" in the second sentence; it is transcribed here as "Location".
Rhino
Rhino Dashboard
Special Rules: When a Hero is KO'd, Rhino doesn't activate his BAM! Instead, give that Hero 1 Crisis token. If a Hero has any Crisis tokens, they must play their next card facedown in the Storyline. Then, discard all their Crisis tokens.
BAM!: Deal 1 damage to each Hero in Rhino's Location equal to the number of Locations he entered this turn. Then move all damaged Heroes 1 Location clockwise.
Overflow: If 1 or more Civilian / Thug tokens can't be added to a Location, draw another Master Plan card and add it facedown in the Storyline.
Hero-count table (printed in the lower left of the Dashboard, with no heading): 2 Heroes: 5; 3 Heroes: 8; 4 Heroes: 11.
Gap: this Dashboard prints no Villainous Plot panel. The source sheet shows no win or loss condition on it.
Rhino Threat Cards
The Rhino Threat sheet shows six cards: three Open Field and three No Cover.
- Open Field (3 cards): Heroes that take damage in this Location also get 1 Crisis token.
- No Cover (3 cards): Heroes ending their turn in this Location get 1 Crisis token.
Rhino Masterplan Deck
The Masterplan cards are listed in the order they appear on the source sheet. Each card gives a Move value (or a Rhino Charge box where printed), a BAM! icon where printed, the tokens placed in the left Location, Rhino's Location and the right Location, and any named effect. A card with no placement diagram places no tokens.
- Rhino Charge: Move clockwise to the next Location with any Heroes. BAM!.
- Rhino Charge: Move clockwise to the next Location with any Heroes. BAM!.
- Rhino Charge: Move clockwise to the next Location with any Heroes. BAM!.
- Rhino Charge: Move clockwise to the next Location with any Heroes. BAM!.
- Move 4. BAM!. Place 1 Thug in each of the three Locations.
- Move 2. BAM!. Place 1 Thug in each of the three Locations.
- Move 1. BAM!. Place 1 Thug in each of the three Locations.
- Move 1. BAM!. Place 1 Civilian in each of the three Locations.
- Move 2. BAM!. Place 1 Civilian in each of the three Locations.
- Move 3. BAM!. Place 1 Civilian in each of the three Locations.
- Move 5. Place 1 Thug and 1 Civilian in each of the three Locations.
- Move 0. Place 1 Thug and 1 Civilian in each of the three Locations.
Weak Spot Cards
The source sheet 34 shows the Weak Spot cards for this box. Each Weak Spot card names the Villain or Henchman whose damage it prevents, and its Heroic Action icon slots are shown as artwork. The text transcribed below is the printed name line.
- Carnage: Carnage can't be damaged until this is completed.
- Chameleon: Chameleon can't be damaged until this is completed.
- Demogoblin: Demogoblin can't be damaged until this is completed.
- Doppelganger: Doppelganger can't be damaged until this is completed.
- Green Goblin: Green Goblin can't be damaged until this is completed.
- Hobgoblin: Hobgoblin can't be damaged until this is completed.
- Lizard: Lizard can't be damaged until this is completed.
- Morbius: Morbius can't be damaged until this is completed.
- Morlun: Morlun can't be damaged until this is completed.
- Rhino: Rhino can't be damaged until this is completed.
- Scorpion: Scorpion can't be damaged until this is completed.
- Scream: Scream can't be damaged until this is completed.
- Shocker: Shocker can't be damaged until this is completed.
Hero Cards
The hero decks in this box are sheets of Hero cards. Most cards carry icons only, and their icons are not transcribed here. Every card that carries printed rules text is transcribed below under the Hero's name, with the card name in bold. Each Hero's deck is listed in the order it appears on the source sheet.
Adam Warlock
- Avatar of Life: The next Master Plan card will be played facedown with no effect.
- Quantum Magic: Look at the top 3 Master Plan cards and put them back on top in any order.
- Immortality: As long as this card is faceup in the Storyline, you cannot be forced to discard your last card.
Yondu
- Yaka Arrow Whirlwind: Starting from your Location and going clockwise, defeat 1 Thug in each Location. Only stop when there are no Thugs in the next Location.
- Yaka Arrow Flurry: Deal Attack, Attack, Attack split as you like in your and adjacent Locations.
- Turncoat: You may turn each Civilian into a Thug and each Thug into a Civilian in your Location.
Nick Fury
- Director of S.H.I.E.L.D. (4 cards): A Hero of your choice immediately performs Move, Move. (Card 4 of the deck; the sheet prints this text on one card.)
- Director of S.H.I.E.L.D. (card with Attack, Attack): A Hero of your choice immediately performs Attack, Attack.
- Director of S.H.I.E.L.D. (card with Heroic Action, Heroic Action): A Hero of your choice immediately performs Heroic Action, Heroic Action.
Note: the three Director of S.H.I.E.L.D. cards carry the same name, and the sheet does not number them. They are listed here by the icons printed on the card. The Move, Move card is card 4 on the sheet.
Hawkeye
- Longshot: Deal Attack, Attack in the opposite Location.
- Martial Artist: Until the beginning of your next turn, any damage you would take can be redirected to enemies in your Location.
- Master Marksman: This turn you can treat each symbol on the Storyline as Attack, Attack.
Iron Fist
- Chi Augmentation (3 cards): Deal Attack, Attack split as you like in your and adjacent Locations.
Mockingbird
- Battle Staves: Defeat 2 Thugs in your Location.
- Spymaster (2 cards): The next Master Plan card played cannot add any Civilians or Thugs to your Location.
Luke Cage
- Superhuman Strength: This turn, you have as many extra Attack as the number of cards in your hand.
- Regenerative Healing Factor: Draw 2 cards.
- Nigh-Invulnerability: Draw 1 card. You cannot take any damage until the beginning of your next turn.
Moon Knight
- Moon Knight's Suit: Until the beginning of your next turn, if you would take damage, ignore it and move to any Location instead.
- Dissociative Identity Disorder: Shuffle your hand and your deck together. Then, draw 3 cards.
- Konshu's Power: The card's icon (a colored card stack) for each of your Special Effect cards in the Storyline (including this one). Gap: the card shows its colored card-stack icon and no words in the sheet image, so the icon is transcribed as printed and not decoded.
Black Cat
- Cat Instincts (2 cards): Gain any combination of 2 Attack, Heroic Action or Move tokens.
- Cat Claws (2 cards): When the next Master Plan card is revealed you may put it on the bottom and draw another one instead.
- Cat Luck (2 cards): When the next Master Plan card is revealed you may put it on the bottom and draw another one instead.
War Machine
- Beam Weapon: Attack in an adjacent Location.
- Rocket Launcher: Attack, Attack in an adjacent Location.
- Strafing Run: Attack, Attack, then Move.
Ms. Marvel
- Appearance Alteration: Count all action symbols as the card-stack icon this turn. Gap: the card-stack icon is not decoded from the sheet image.
- Elongation: Your attacks may target enemies in adjacent Locations this turn.
- Morphogenetics: Swap any number of cards from your hand with any of your faceup cards in the Storyline.
Shang-Chi
- Master Martial Artist (3 cards): Double each Attack on the previous Hero card in the Storyline.
Blade
- Bloodbath: Defeat all Thugs in your Location.
- Vampiric Healing: Draw 1 card.
- Hunter Skills: Double each Attack you use against a single enemy this turn.
Jessica Jones
- Private Investigator: Reveal the top card of the Master Plan deck. You may move to any Location.
- Psionic Protection: You may draw cards until you have 3 in your hand.
- Expert Detective: Reveal the top card of the Master Plan deck. Gain the card-stack icon tokens equal to the movement number written on it. Gap: the token icon is not decoded from the sheet image.
Venom (hero deck)
- Symbiote Enhancement: Move, Attack (icons only, as printed).
- Regeneration: You may draw cards until you have 3 in your hand.
- Tracking: You can move to any Location and Attack there.
She-Hulk
- Transformation (4 cards): Attack plus another Attack for each Transformation card in the Storyline (including this one).
Ghost Rider
- Mystical Chain: Deal Attack, Attack, Attack to each Thug in your Location.
- Hellfire Manipulation: Deal Attack, Attack, Attack to a single enemy in your Location.
- Supernatural Awareness: Attack and Heroic Action, then draw a card.
Howard the Duck
- No More Mister Nice Duck!: Deal Attack, Attack to each enemy in your Location.
- Big Freaking Gun: Deal Attack, Attack in any Location.
- Neutron Disintegrator: Deal damage to a Villain or Henchman in your Location until they have 1 Health. You can't use any Attack this turn.
Drax
- Revenge (3 cards): Move to the next clockwise Location with any enemies and Attack there.
Mantis
- Psychic Healing: Another Hero draws 2 cards.
- Astral Projection: This turn, you may use each action as if you are in a different Location.
- Emphatic Manipulation: Cancel any BAM! on the next Master Plan card.
Okoye
- Accomplished Strategist: Reveal the top card of your deck. You may put it at the bottom of your deck.
- Dora Milaje: Until the beginning of your next turn, if another Hero in your Location takes damage, you can take it instead.
- Vibranium Spear: Attack, Attack in an adjacent Location.
Falcon
- Air Strike (3 cards): Move to any Location and Attack there.
Vision
- Solar Gem Blast: Add all Attack icons at the bottom of the last 4 Hero cards in the Storyline. Deal that much damage to a single enemy in your Location.
- Evolving Intellect: Gain 1 card-stack icon token for each Location with no empty Thug / Civilian slots.
- Intangibility: You cannot take any damage until the beginning of your next turn.
Nova
- I Am the Help (3 cards): Heroic Action icons in an adjacent Location, as printed: 3, 3 and 2 icons across the three cards.
Scarlet Witch
- Psionic Energy Blast: Attack, Attack, Attack against a single enemy in an adjacent Location.
- Psionic Energy Field: Cancel the first damage each Hero would suffer from the effects of the next Master Plan card.
- Chaos Magic: Another Hero can swap one card from their hand with one of their faceup cards in the Storyline.
Elektra
- Master Assassin: Attack, Attack.
- Ninja Training: Attack, Attack, OR you cannot take any damage until the beginning of your next turn.
- Sai: Deal Attack in both adjacent Locations.
Daredevil
- Blind Justice: Gain 1 Move token for each Thug you defeat this turn.
- The Man Without Fear: Gain 1 Move token for each Civilian you defeat this turn.
- Radar Sense: Gain either a Heroic Action token or an Attack token for each Location you enter this turn.
America Chavez
- Star Portal: The card shows two token icons and no rules text. Gap: the two token icons are not decoded from the sheet image, so this card's effect is not transcribed.
- Energy Infusion: Attack, Attack.
- Invulnerability: You cannot take any damage until the beginning of your next turn.
Spider-Man 2099
- Claws: Attack, Attack against a single enemy. Damage you deal this turn can't be reduced.
- Enhanced Senses: You cannot take any damage until the beginning of your next turn.
- Lyla Assistance: Heroic Action in any Location.
Spider-Man 2099 (Original)
- Spinnerets: As long as this card is faceup in the Storyline, if there are no Move symbols at the bottom of the 2 latest Hero cards in the Storyline, you may perform 1 free Move on your turn.
- Talons and Fangs: Attack, Attack.
- Entangling Webs: Attach a Stunned token to a Villain or Henchman in your Location. Next Villain turn, their BAM! is canceled and the token is discarded.
- Accelerated Vision: Reveal the top card of the Master Plan deck.
Squirrel Girl
- Night Vision: Reveal the top card of the Master Plan deck. You may put it at the bottom.
- Squirrel Army: Deal 1 damage to a single enemy in every Location.
- Common Sense: If the number of your Special Effect cards in the Storyline is greater than the Villain's current Health, the Heroes win the game. (The sheet prints "greater that"; transcribed here as "greater than".)
Doctor Strange
- Cloak of Levitation: Either Attack in an adjacent Location OR Move.
- Dimensional Portal: Move to any Location.
- Orb of Agamotto: As long as this card is faceup in the Storyline, the top card of the Master Plan deck is revealed.
- Eye of Agamotto: You may take any Master Plan card from the Storyline and reshuffle it into the Master Plan deck.
- Book of Vishanti: You may search the Master Plan deck, remove one card from the game, then reshuffle the deck.
Punisher
- Precision Shot: Attack, Attack, Attack, Attack against a single enemy. Damage you deal this turn can't be cancelled or reduced.
- Heavy Firepower: Attack, Attack in any Location and Attack, Attack in both adjacent Locations.
- Special Ops Training: You can move to any Location and perform Attack icons there, as printed. Gap: the number of Attack icons on this card was read at display resolution.
Spider-Woman
- Poison Blast (2 cards): Choose: Attack, Attack OR delay the next Villain turn by 1 card.
- Super Resistance: You cannot take any damage until the beginning of your next turn.
Quicksilver
- Superhuman Speed: You can move other Heroes with you this turn.
- Speed Fighting: You can defeat 1 Thug in each Location you enter this turn.
- Run to the Rescue: You can rescue 1 Civilian in each Location you enter this turn.
Nebula
- Regeneration Implant: You may draw cards until you have 3 in your hand.
- Image Projection: Every Hero can swap a card from their hand with one of their cards in the Storyline. Remove the top card of the Master Plan deck from the game.
- Electroshock Batons: Attack, Attack in both adjacent Locations.
Equipment
Hawkeye: Trick Arrow - Explosive
USE on your turn: Attack against up to 2 different targets in an adjacent Location. Then, turn this facedown.
Hawkeye: Trick Arrow - Pym Particles
USE on your turn: Attach a Stunned token to a Henchman in an adjacent Location. Next Villain turn, their BAM! is canceled and the token is discarded. Then, turn this facedown.
Hawkeye: Trick Arrow - Smoke Bomb
USE on your turn: Place this card in an adjacent Location. Next Villain turn, Heroes in that Location can't take any damage. Then, take back this card and turn it facedown.
Hawkeye: Trick Arrow - Wire
USE on your turn: Move, Heroic Action. Then, turn this facedown.
Moon Knight's Suit (equipment)
PERMANENT: During a Villain turn, you may discard 1 Action token to ignore the first damage you would take.
Ghost Rider: Hell Charger
USE on your turn: Move. Then, turn this facedown.
Ghost Rider: Hellfire Chain
USE on your turn: Attack against up to 2 different targets in your Location. Then, turn this facedown.
Mockingbird's Battle Staves
USE on your turn: Attack in your Location. Then, if you defeated 1 or more Thugs this turn, perform an extra Attack. Then, turn this facedown.
Daredevil's Billy Club
USE on your turn: Attack in your Location. Then, if you defeated 1 or more Thugs this turn, perform an extra Attack. Then, turn this facedown.
Blade's Sword
PERMANENT: You may perform 1 free Attack action per turn. If you don't perform at least 1 Attack action during your Action phase, you MUST discard 1 card at the end of your turn.
War Machine: Deflector Shields
USE on your turn: You can't take any damage until the beginning of your next turn. Then, turn this facedown.
War Machine: Stealth Field Generator
USE on your turn: Move, OR ignore the first damage you would take on the next Villain turn. Then, turn this facedown.
War Machine: Omnibeam
USE at the end of your turn if you didn't perform Attack: Deal unpreventable Attack, Attack, Attack against a Villain or Henchman in your or an adjacent Location. Then, you are KO'd and turn this facedown.