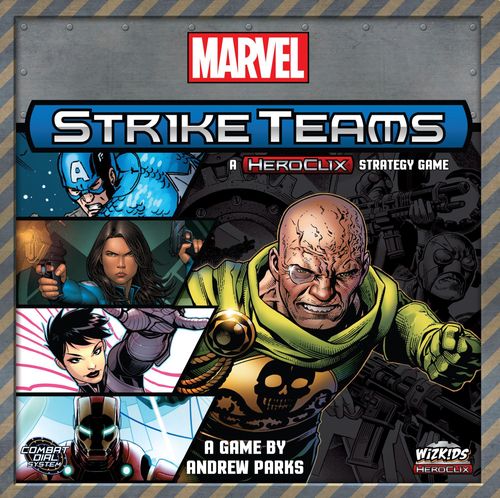
Marvel Strike Teams
Marvel Strike Teams Rulebook
Table of Contents
Table of Contents
- Components
- Object of the Game
- Component Details
- Character Figures
- Character Cards
- Action Cards
- Map Cards
- Scenario Cards
- Victory Card
- Map Tiles
- Character Tokens
- Objective Tokens
- Objective Point (OP) Tokens
- Status Tokens
- Round Tracker Tokens
- Duration Tokens
- Spawn Point Tokens
- Rubble Tokens
- Door Tokens
- Action Tokens
- Wound Tokens
- Command Dials
- Action Die
- Campaign Overview
- Playing a Campaign
- Winning a Campaign
- Mission Set Up
- Playing the Game
- Henchmen Rules
- Character Activation
- Movement
- Combat
- Reactions
- Inflicting Wound Tokens
- Multipart Attacks
- Destroying an Object, Door, or Wall
- Damaging an Objective Token
- Status Tokens (Trapped & Prone)
- Slamming Characters
- Hurling Objects
- Attacking Teammates
- Automatic Damage Effects
- Special Interactions on the Map
- Gaining Objective Points (OP)
- Respawning Defeated Characters
- Retreating from the Mission
- Ending the Current Stage
- Winning the Mission
- Continuing the Campaign
- Winning the Campaign
Components
- 13 Character Figures: 4 Hero Figures, 1 Mastermind Figure, 2 Villain Figures, 6 Henchman Figures
- 99 Cards: 8 Character Cards, 64 Action Cards, 7 Map Cards, 19 Scenario Cards, 1 Victory Card
- 30 Map Tiles: 4 Room Tiles, 26 Corridor Tiles
- 153 Cardboard Game Tokens: 20 Character Tokens, 16 Objective Tokens, 18 Objective Point (OP) Tokens, 22 Status Tokens, 12 Round Tracker Tokens, 25 Duration Tokens, 20 Spawn Point Tokens, 12 Large Rubble Tokens, 4 Small Rubble Tokens, 4 Door Tokens
- 80 Cubes: 20 Yellow Action Tokens, 60 Red Wound Tokens
- 2 Command Dials
- 1 Custom Action Die
The Full Rulebook contains the complete rules of the game. Players looking to jump right into the action should switch to the Quick-Start Tutorial Rulebook, which provides a modified ruleset designed to help you get started within a few minutes.
Object of the Game
The heroes are all part of the same team and work together to score Objective Points (OP). The Mastermind Player controls her own team of villains and tries to score OP and win the game on her own. Each team tries to score the most OP by the end of the mission by completing the requirements on the Scenario Cards and by defeating their enemies in battle.
The team that scores the most OP during the game earns a Victory Card that grants them a one-shot power up during the following game mission. In addition, both teams get to spend their acquired OP to "level up" their characters between missions. When playing a standard campaign of 6 missions, the team that wins the final mission of the campaign claims the mantle of victory for the entire campaign.
Component Details
Character Figures
Each character in the game is represented on the map by its own Character Figure. Each Character Figure includes a base dial that displays the character's current Level and Build Points. The base dials are only referenced at the start of each mission during set up and at the end of each mission when the characters Level Up (see page 27).
Character Cards
Each character in the game possesses its own Character Card, which is kept face up on the table in front of the player who is controlling that character. When playing with Henchmen Figures, such as the Hydra Soldiers included in the base game, all of the henchmen of the same type are represented by a single Character Card.
Move Box: A character's Move Box provides the details of the character's primary movement, including the movement's name, cost, and special features. You may also place Wound Tokens in the damage slots in this box, which reduces the character's movement capabilities.
Unit Number: Both the Hero Players and the Mastermind Player bring the same number of unit points to each mission. Most heroes and villains are worth 1 unit point each, but the mastermind character is worth 2 unit points. Henchmen are worth 1 unit point when representing 3 Henchmen Figures and 2 unit points when representing 6 Henchmen Figures; their Character Card is double-sided.
Action Box: A character's Action Box details the number of Action Points (AP) that the character gains each turn, as well as the number of Wound Tokens that the character removes if it chooses to rest.
Attack Box: A character's Attack Box provides the details of the character's primary attack, including the attack's name, cost, type (melee or ranged), and attack strength. You may also place Wound Tokens in the damage slots in this box, which reduces the character's attack capabilities.
Action Track: You keep track of your character's AP total by moving an Action Token on this track. While a character is in its own Starting Zone, it cannot exceed the number of AP indicated by the red box on the Action Track.
Defend Box: A character's Defend Box provides the details of the character's primary defense, including the defense's name, cost, type (armor or dodge), and defense strength. You may also place Wound Tokens in the damage slots in this box, which reduces the character's defensive capabilities.
Action Cards
Every character in the game features its own distinct set of 8 Action Cards. At the start of each mission, the players decide which Action Cards will be taken by each of their characters into the mission.
Character Icon: This icon shows which character corresponds to the Action Card. No character may use another character's Action Cards. A group of henchmen share the same set of Action Cards.
Build Cost: At the start of each mission, your character's Action Cards must have a Build Cost that is equal to or less than the number of Build Points shown on your figure's base dial. As characters Level Up, they can bring a wider variety of Action Cards into each mission.
Duration Icon: After activating an Action Card with a Duration Icon, you must place a Duration Token (DT) above that Action Card (see "Duration Tokens" on page 6). A Duration Token signifies that the Action Card cannot be activated again until after the duration expires. At the start of each of your character's turns, you must remove 1 DT from each of your Action Cards. Some powerful Action Cards require you to place 2 or even 3 Duration Tokens after activating them, which means it will be several turns before those cards can be activated again. Some Duration Icons also feature an effect starburst. This means that the card provides a game effect that persists for as long as there is at least 1 DT above the Action Card.
Action Point Cost: This icon indicates the number of Action Points (AP) that you must spend in order to trigger the abilities on the card. If you do not have enough AP, then you cannot trigger the Action Card. Some Action Cards feature a red reaction ring around the AP Cost. This indicates that the ability can be triggered in response to some other activity, such as an enemy's attack.
Effect Icons: Most Action Cards feature one or more Effect Icons that indicate what the card does once it has been activated. If there are no Effect Icons, then only the card text indicates what the card does.
Card Text: Card text provides additional details on what the card does or restrictions on how it works. Many cards feature a combination of both Effect Icons and card text.
Damage Slots: As you receive Wound Tokens, you must choose to allocate them to the damage slots on your Character Card and/or Action Cards. Wound Tokens make Action Cards more expensive to trigger and can even render them unplayable (see "Inflicting Wound Tokens" on page 18).
Map Cards
During set up, before you determine the Scenario Cards that will be used for the mission, you randomly select 1 Map Card and use it as a guide to assemble the mission map. The Map Card also shows the placement of Door Tokens and Spawn Point Tokens on the selected map.
On the Map Cards, each individual Map Tile and Door Token is surrounded by a dashed border to make it clear which pieces are used when creating the map.
Scenario Cards
During set up, when you are creating the game's mission, you draw 3 random Scenario Cards, each representing a different stage of the mission.
Stage Indicator: This signifies the Stage that the Scenario Card belongs to.
Scenario Title and Description: The scenario title is followed by a Scenario Description: an italicized paragraph that explains the scenario's backstory.
Scenario Rules: This section tells the players what steps must be taken to set up the scenario and what special rules are in effect during the particular stages affected by the scenario. Even though each Scenario Card is associated with 1 particular stage of the mission, the effects of a Scenario Card can actually last for several stages, as in the example on the card.
Objective Icon: This icon tells you which Objective Tokens to use for this scenario, if any.
OP Reward: This number indicates the number of Objective Points (OP) that the Hero Players will earn if they succeed at this part of the mission. If they fail this part of the mission, then the Mastermind receives the OP Reward instead.
Victory Card
During a campaign, the winner of each mission is awarded the double-sided Victory Card for use during the next mission. At the start of the next mission, the winning team determines whether they would like to use the power on the "Karma" side or the "Guardians" side for that mission. The players can only use the Victory Card during the very next mission and cannot save it for future missions.
Map Tiles
During each mission, the players assemble the Map Tiles as indicated on the selected Map Card (see "Mission Set Up" on page 8). The Map Tiles are double-sided and feature a Warehouse Map on one side and a Hydra Base Map on the other side. Four of the tiles represent large rooms, and the remaining tiles represent corridors of various sizes.
The Map Tiles also display various objects and walls. Each object and wall is marked with a Material Strength Icon that indicates its durability. These icons are important for times when characters seek to take cover behind an object or to break through a wall. Some Action Cards even allow characters to pick up and hurl objects at one another.
Character Tokens
Whenever a character is defeated for the first time during a mission, the opposing team receives the corresponding Character Token as a reminder that no more Objective Points can be earned for defeating that character. Character Tokens are also used to identify which characters take on special roles during certain scenarios. For example, it is possible for two heroes to be selected as "frenemies" who share an ongoing rivalry or for a villain to be selected as seeking to obtain cosmic power.
Hero Tokens have silver backgrounds. Mastermind, Villain, and Henchmen Tokens have gold backgrounds.
Objective Tokens
The Scenario Cards often indicate Objective Tokens that are included with that scenario. Objective Tokens represent special objects and innocent bystanders who may appear during the mission. The Scenario Cards indicate which player places these tokens during set up and how the tokens function during the mission.
Objective Point (OP) Tokens
When your characters complete scenarios and defeat their enemies, you earn OP Tokens that can be spent to Level Up your characters between missions. The team that earns the most OP during a mission is considered the winner of that mission.
Status Tokens
Some Action Cards have the potential to place a status on a particular character, such as becoming trapped or prone. When a character receives a status, place the indicated status token(s) beside the corresponding Character Figure on the map. You can spend 2 AP during your character's turn to remove 1 Status Token (see "Status Tokens" on page 20).
Trapped Token and Prone Token are the two status tokens.
Round Tracker Tokens
Each mission takes place over the course of 3 Stages, each consisting of 4 separate rounds (see "Playing the Game" on page 12). The 12 Round Tracker Tokens are used to keep track of the passing of time during the course of each mission.
Duration Tokens
Duration Tokens (DT) are used to mark Action Cards with a Duration Icon after the cards have been triggered. An Action Card with 1 or more DT above it cannot be triggered again until all of the DT have been cleared. If the Action Card's Duration Icon has an effect starburst above it, then the DT also signifies that there is an ongoing effect that persists for as long as the card has at least 1 DT above it.
Spawn Point Tokens
Character Figures enter the game through Spawn Points. The mission's Map Card outlines options for placing the Spawn Point Tokens based on the number of players in the game and whether or not any Henchmen Figures will be included in the game. Characters who are defeated during the game can respawn at these various locations.
The Spawn Point Tokens are the Hero Spawn Point (green), the Villain Spawn Point (red), the Henchman Spawn Point (white), and the Hybrid Spawn Point.
Rubble Tokens
Marvel Strike Teams allows characters to destroy objects in the game, either by attacking them directly or by picking them up and hurling them at opponents. A destroyed object is subsequently covered on the map by a large Rubble Token. In some cases, walls can also be destroyed by characters, in which case the smaller Rubble Tokens are used to mark the wall's breach. Rubble Tokens are double-sided, with Warehouse rubble on one side and Hydra Base rubble on the other.
Door Tokens
Door Tokens mark barriers for the heroes to overcome during each mission. The mastermind's characters can open any door by standing adjacent to it and spending 1 AP. Heroes, however, must either destroy the doors or stand adjacent to them and spend a number of AP equal to the door's Material Strength. Once a door has been opened, the Door Token is permanently removed from play and the door cannot be closed again during the same mission.
Action Tokens
Action Tokens mark the number of Action Points gained and spent by a character on its Character Card's Action Track. Action Tokens also keep track of which Character Figures on the map have already activated during a particular game round.
Wound Tokens
When your character is wounded, you use Wound Tokens to fill the damage slots on your Character Card and/or Action Cards. You also place Wound Tokens on Henchman Figure bases and on Objective Tokens that are capable of being damaged.
Command Dials
The Mastermind Player uses 1 Command Dial for all of her characters, and the Hero Players share the other Command Dial. Command Dials accumulate Command Points from one round to the next, creating a pool of bonus points that each team can spend as Action Points during the mission.
Action Die
The Action Die allows you to push your luck in an attempt to gain extra Action Points during your turn. One time during your character's turn, you may declare that you are "rolling for X AP," after which you attempt to roll "X" or higher on the Action Die.
Failure to roll high enough means that you don't receive the extra AP on your character's Action Track, and if you roll a negative (red) result, the opposing team will earn 1 Command Point on its Command Dial.
Action Die Results: The die has six faces. Two faces are red and show a negative 1 result; four faces are black and show positive results of 1, 1, 2, and 3.
Campaign Overview
While it is possible to play Marvel Strike Teams as a series of separate, disconnected missions, it is more rewarding to play the game as a campaign that allows you to track the progress of your characters from game to game.
Replaying the Tutorial
The first time that you play, it is recommended that you play the tutorial described in the Quick-Start Tutorial Rules. During the tutorial, each character begins at Level 0 and possesses two preset Action Cards.
You can also play the tutorial again in order to introduce friends to the game. The tutorial as written assumes that you will play 2 heroes vs. 6 henchmen, but you can increase the number of heroes and/or change the heroes themselves during subsequent plays. To do so, play the tutorial with the following changes:
- Scenario Card: Use the "Tutorial Mission Scenario Card" as a reminder of the mission's parameters. Only use this one Scenario Card, which is a single Stage that lasts for 4 rounds.
- Map Card: Use the "Warehouse Map Tutorial" Map Card to set up the mission. Unlike the map in the Tutorial Rulebook, this Map Card shows where to place Spawn Points when playing with more than 2 heroes:
- 3 Heroes: If playing with 3 heroes, add an extra Hero Spawn Point (for a total of 3) and 1 Villain Spawn Point to any of the possible spaces indicated on the Map Card. Let the Hero Players determine where to place the extra Hero Spawn Point and allow the Mastermind Player to decide where to place the Villain Spawn Point, as long as they are in the positions displayed on the Map Card. This game will pit 3 heroes against 1 villain and 6 henchmen.
- 4 Heroes: If playing with 4 heroes, add the fourth Hero Spawn Point and the second Villain Spawn Point to the spaces indicated on the Map Card. This game will pit 4 heroes against 2 villains and 6 henchmen.
- Character Cards & Action Cards: When adding heroes or villains to the tutorial, set each Character Figure to Level 0 and assign each character the two Action Cards that have a gold Build Cost in the upper left corner (instead of a white Build Cost). These cards are called Starting Action Cards (see example on the page). Every character in the game possesses 2 Starting Action Cards, so you can even choose to substitute Captain America and Iron Man for new heroes during the tutorial if you wish.
Once you have finished setting up the tutorial with these changes, then you should be able to play the tutorial without difficulty. Before playing with these changes, however, it is recommended that at least one player read the Full Rulebook in its entirety, as you may encounter situations that are not covered in the Quick-Start Tutorial Rules.
Playing Single Missions
If you prefer to play single missions instead of a campaign, or if you simply wish to gain some practice before launching your first campaign, the game system allows you to do so. Follow the rules for setting up a campaign mission (see "Mission Set Up" below), except that both teams can start with any characters that they want. Both sides must start, however, with the same unit point total (see "Unit Number" on page 3). The chosen unit point total must be 2, 3, or 4.
The players must also agree on what Level to assign to each of their characters. All characters during a single mission should have their figure bases set to the same Level, and every player should build her character's Action Cards by spending the Build Points shown on the base dial. Each player chooses Action Cards whose total Build Cost is equal to the Build Points indicated on her character's dial. Although it is recommended for new players to include their characters' Starting Action Cards (with the gold Build Cost) among their selected powers, the players are not required to do so.
Playing a Campaign
During the campaign, the players may choose to switch out different characters between missions, even if this means they will be bringing in a lower Level character than before. The mission rules provide bonus Command Points to a team if their characters are a lower Level than those of the opposing team (see "Compare Unit Levels" on page 10). The two teams may also agree to change the total number of characters on each side between missions, especially if certain players are not available to play their favorite characters.
A standard campaign in Marvel Strike Teams consists of 6 interconnected missions, although players are free to play campaigns with shorter or longer sets of missions if they prefer. All players should agree on the number of missions in the upcoming campaign before the campaign begins.
When playing a campaign, 1 player becomes the Mastermind Player and 1 - 4 other players become the Hero Players. The Mastermind Player controls the mastermind character as well as all of the villains and henchmen. The Hero Players each control 1 or more heroes at their discretion, as long as the total number of heroes is 2, 3, or 4. Each mission must include at least 2 unit points on each side (see "Unit Number" on page 3), which means that there must be at least 2 heroes in every mission, even if there is only 1 Hero Player to control them. Every character who enters the campaign for the first time does so at Level 1 on its figure dial. Level 0 is only used for the tutorial mission.
Winning a Campaign
Although players accumulate Objective Points to determine the winner of each mission and to Level Up their characters between missions, the winner of a full campaign is not the side that has accumulated the most Objective Points throughout the campaign. Instead, the winner of the campaign is the player who wins the final mission of the campaign. All of the missions up until that point set the stage and prepare the characters for the campaign's final showdown.
Mission Set Up
Because both the Mastermind and the Hero Players have certain advantages when making decisions during Mission Set Up, it is important for the players to set up the game in the order outlined below.
-
Create Mission Map: Draw a random Map Card and create the Mission Map using the Map Tiles shown on the card. Add Door Tokens as shown on the Map Card as well. Do not place Spawn Point Tokens until later (see steps 8 & 11 on page 9 & 10).
-
Determine Scenario Cards: The Mastermind Player separates the Scenario Cards by card backs into piles representing Stage 1, Stage 2, and Stage 3. She then draws 1 random Scenario Card for each Stage, and places the Stage 1 and Stage 2 Scenario Cards face up near her play area within view of all the players. She then peeks at the Stage 3 Scenario Card and places it face down below the Stage 2 card (see diagram on the page). The Hero Players do not get to see this card until after Stage 1 ends (see "Ending the Current Stage" on page 26).
The Mastermind Player then separates the 12 Round Tracker Tokens into 3 groups of 4 tokens, each numbered from top to bottom in ascending order (1 - 4, 5 - 8, and 9 - 12). She places each stack on the left side of a Scenario Card in the order shown on the page. Leave space on the right side of the Scenario Cards for expired Round Tracker Tokens.
All remaining Map Cards and Scenario Cards are returned to the box without being examined. Keep these cards separate from any cards that were permanently removed from the campaign at the conclusion of previous missions (see "Winning the Mission" on page 27).
-
Choose Characters (Mastermind): After reviewing the Scenario Cards, the Mastermind Player chooses her team of characters. She puts together a team whose total unit numbers equal the total unit points agreed upon by both sides (2, 3, or 4). She then places the corresponding Character Figures and Character Cards face up on the table in front of herself. Some Scenario Cards require the Mastermind to choose particular types of characters, such as the actual mastermind character or a certain number of henchmen characters. The Mastermind must read all of the Scenario Cards carefully, including the face down Stage 3 card, to determine if she is required to choose certain character types for this mission.
-
Choose Characters (Heroes): The Hero Players now choose which heroes they will bring to the mission. They put together a team whose total unit numbers equal the total unit points agreed upon by both sides. Each Hero Player then places her corresponding Character Figures and Character Cards face up on the table in front of herself.
-
Choose Action Cards (Simultaneous): Each player receives the collection of Action Cards associated with each of her characters. Both teams now secretly and simultaneously choose Action Cards for their characters.
First, each player consults the Level and Build Points displayed on her character's figure base. If this is the first mission of the campaign, each character should be set to Level 1 with 8 Build Points. If this is a later mission in the campaign, then it is possible that some characters will have Leveled Up during the campaign, which means their figure bases have advanced to a higher Level. This will result in a higher Build Point pool for those characters.
Next, each player chooses a set of Action Cards whose Build Costs are equal to or less than their character's Build Points. Although it is okay to spend less than the character's total Build Points, players should try to be as precise as possible since Action Cards also determine each character's total Health (that is, the number of damage slots that are available for the character to assign Wound Tokens to when it is damaged). The Hero Players are allowed to consult one another when choosing their heroes' Action Cards, although all table talk is public so they should be careful not to reveal too much information to the Mastermind.
Each player should place her character's chosen Action Cards in a face down stack above her Character Card until both sides have finished making their decisions. Then, when both sides are ready, everyone reveals their characters' chosen Action Cards and arranges them in a horizontal row above each corresponding Character Card.
-
Place Action Tokens: Each player places 1 yellow Action Token on the "0" space on her Character Card's Action Track.
-
Receive Command Dials: Each team receives 1 Command Dial. The Mastermind uses 1 Command Dial for all of her characters, and the Hero Players share the other Command Dial. Assign one Hero Player to manage the Command Dial for the entire team. Set both teams' Command Dials to "0" and place them within easy reach of the players. Command Dials are always kept face up within view of all the players.
-
Place Spawn Points (Mastermind): The Mastermind places Spawn Point Tokens for her villains and henchmen as indicated on the selected Map Card. The Mastermind only places a number of Spawn Points equal to the number of Character Figures that she is playing; the Map Card will indicate all of the available options to place these tokens. The mastermind and villain characters use the red Villain Spawn Points and the henchmen characters use the white Henchman Spawn Points. Sometimes there is an option to place either a Villain Spawn Point or a Henchman Spawn Point in a particular space on the map. When this occurs, a Hybrid Spawn Point will appear on the Map Card.
-
Place Character Figures (Mastermind): The Mastermind chooses how to arrange her figures on their appropriate Spawn Points. There should not be any empty Villain or Henchman Spawn Points left on the map; remove any that exist.
-
Place Objective Tokens (Mastermind): If the Stage 1 or Stage 2 Scenario Cards instruct the Mastermind to place specific Objective Tokens on the map during set up, the Mastermind does so now. Objective Tokens are always placed in a Battle Zone space. A Battle Zone space is any space that is not part of one of the Starting Zones, which are defined as Map Tiles where Hero and Villain Spawn Point Tokens are located (see "Starting Zones vs. Battle Zones" on page 13). NOTE: Henchman Spawn Points do not by themselves denote Starting Zones, although there may be Henchman Spawn Points alongside Villain Spawn Points within a particular Starting Zone.
Some Scenario Cards instruct the Mastermind to choose certain characters to assume a special role during the mission. Sometimes this choice is secret, in which case the Mastermind chooses the Character Tokens and places them face down on top of the relevant Scenario Cards. Sometimes this choice is public, in which case the Mastermind chooses the Character Tokens and places them face up on top of the relevant Scenario Cards.
-
Place Remaining Components: The Mastermind and Hero Players now distribute the remaining tokens into individual piles around the play area, including the Objective Point (OP) Tokens, Status Tokens, Duration Tokens, Rubble Tokens, Door Tokens, Action Tokens (yellow cubes), and Wound Tokens (red cubes). The Mastermind places the Action Die near her Command Dial.
-
Compare Unit Levels: When playing a campaign mission, it is possible for one side to have a team whose characters are, in aggregate, a higher Character Level than those of the other team. To determine if this is the case, each side must determine its team's total Unit Level. Multiply each character's unit points by its Character Level to determine the character's Unit Level. Add the Unit Levels of all your characters together to determine your team's total Unit Level.
If both teams have the same total Unit Level, then you are ready to begin the mission. If one team has a lower total Unit Level than the other, then the team with the lower total receives a number of starting Command Points on its Command Dial equal to the difference, multiplied by 2 (maximum of +6 Command Points).
For example, the Mastermind has two Level 1 villains, each with a Unit Level of 1 (1 unit point x Level 1 = 1). The Mastermind also has 6 Hydra Soldiers, who have advanced to Level 2. Since the Mastermind is using the "6 Hydra Soldiers" side of the henchman card and this side shows 2 unit points, the Hydra Soldiers have a Unit Level of 4 (2 unit points x Level 2 = 4). This means the Mastermind has a total Unit Level of 6 (1 + 1 + 4 = 6). Since the heroes have determined that they have a total Unit Level of 5, the difference between sides is 1 Unit Level. The heroes therefore start the mission with 2 bonus Command Points.
(The rulebook includes a Mission Set Up sample diagram on page 11.)
Playing the Game
Marvel Strike Teams is played over the course of 3 Stages. Each stage is represented by a Scenario Card that lasts for 4 game rounds. Each game round is further broken down into the following phases:
1) Command Phase
At the start of each game round, both teams add +1 Command Point to their respective Command Dials. No Command Dial can ever possess more than 12 Command Points at the same time; ignore any Command Points gained after that point.
During your character's turn, you may choose to spend 1 or more of the Command Points available on your team's Command Dial as additional Action Points for your character. The Mastermind may always do so at her discretion, but the Hero Players should discuss this decision before one of their heroes spends the team's Command Points in this manner. The final decision rests with the individual player, even if the other heroes disagree.
2) Mastermind Phase
During the Mastermind Phase, the Mastermind activates each of her characters one at a time in the order of her choice. Each activated character may spend Action Points to move, attack, and to trigger the powers located on its Action Cards. Each character that activates must complete its entire turn before the next character activates. Place an Action Token beside your Character Figure to show that it has already activated.
First Round Attack Restriction: The Mastermind's characters cannot attack any heroes during the first round of the mission. The heroes do not share the same restriction and may attack freely during the first round.
Henchmen: A group of henchmen activate together and share the same pool of Action Points, but each henchman must still be mobilized separately. You must complete each henchman's actions before mobilizing the next one. Place an Action Token beside each Henchman Figure on the map to show that it has already been mobilized for this round.
3) Hero Phase
During the Hero Phase, the Hero Players activate each of their characters one at a time in the order of their choice. Each activated character may spend Action Points to move, attack, and to trigger the powers located on its Action Cards. Each character that activates must complete its entire turn before the next character activates. Place an Action Token beside your Character Figure to show that it has already activated.
4) End Phase
The top Round Tracker Token is moved from the left side of the current Scenario Card to the right side of the card. When the fourth Round Tracker Token in the current Stage has moved to the right side of its Scenario Card, the current Stage ends and the players move on to the next Stage.
At the end of Stage 3, the game ends and the team that has acquired the most OP wins the mission (see "Winning the Mission" on page 27).
Henchmen Rules
Although hero, villain, and mastermind characters use most of the same rules for movement and combat, henchmen characters behave differently in many respects. The rulebook points out these differences in the appropriate sections, but this sidebar summarizes most of the rules that make henchmen unique.
- Respawn: A defeated henchman may respawn at any empty Henchman Spawn Point at a cost of 3 AP. Unlike other characters, newly spawned henchmen are not immune to attack during the opponents' next phase.
- Move: Henchmen have the ability to advance or march (not run). A single Henchman Figure cannot spend more than 6 AP to advance during the same activation.
- Attack: A single Henchman Figure cannot attack more than once during the same activation. This includes any form of attack, including primary attacks and special attacks.
- Damage: When a Henchman is damaged, place the Wound Tokens directly on the figure base. Wound Tokens are never placed on a henchman's Character Card or Action Cards.
- Defeat: Each Henchman has a Health of 3. Whenever a henchman sustains 3 or more Wound Tokens, it is defeated and removed from the map. Each time a henchman is defeated, the heroes receive 1 Henchman Token. The Hero Players collect 1 OP for every 3 Henchman Tokens that they collect. Heroes cannot collect more Henchman Tokens than there were starting Henchman Figures in the mission, no matter how many actual henchmen that they defeat during the mission.
Character Activation
When you activate one of your characters, follow the steps outlined below:
- Remove Duration Tokens: Remove 1 Duration Token from each of your character's Action Cards. If an Action Card no longer possesses any Duration Tokens, then any ongoing effects that the card generated end immediately and the card's abilities are ready to be triggered once again. If the Action Card still possesses 1 or more Duration Tokens, then any ongoing effects that the card generated continue to affect the game and the card's abilities cannot be triggered again for the time being.
NOTE: It is important that you only remove your individual character's Duration Tokens when your character activates and not at any other time (unless you have special card text that allows you to do so). This is important for tracking continuing effects on the map during your other characters' turns.
- Gain Action Points or Remove Wound Tokens: After removing your Duration Tokens, you must decide whether to add Action Points to your Action Track or to rest by removing up to 6 Wound Tokens.
To add AP, advance your Action Token forward on your Character Card's Action Track (at the bottom of your Character Card) a number of spaces equal to the bronze number located on the lower right portion of your Character Card. See the "Starting Zones vs. Battle Zones" section below to determine the maximum number of Action Points that your character can possess at any given time.
To rest, remove up to 6 total Wound Tokens from among your Character Card and Action Cards. You may still take a full turn and spend Command Points or AP left over from previous rounds. When a group of henchmen rest, you may remove up to 6 total Wound Tokens from among the characters' figure bases at your discretion. As with other characters, the henchmen may still take a full turn and spend Command Points or AP left over from previous rounds.
Starting Zones vs. Battle Zones (Maximum Action Points)
If you are in your team's Starting Zone when you add Action Points, you cannot exceed the number of Action Points marked by the red space on your Action Track. Ignore any Action Points that you gain beyond this number, no matter their source.
If you are in the main Battle Zone when you add Action Points, you can exceed the number of Action Points marked by the red space on your Action Track, but you cannot exceed the final space listed on your Action Track (usually 12).
Starting Zones are defined as any Map Tiles that possess at least 1 red or green Spawn Point Token. All other Map Tiles are defined as Battle Zones (even if they have white Spawn Point Tokens on them). Note that all of the spaces on the designated Map Tiles are considered part of the Starting Zone or Battle Zone, not just the spaces with the tokens on them.
- Spend Action Points (AP): During your character's turn, you may spend your Action Points to move and attack, and you may perform these activities as many times and in any order that you like (move, attack, attack, move, etc.), as long as you can afford to do so. You may also spend your AP to trigger the powers on your Action Cards. In addition to the AP available on your character's Action Track, you may choose to spend 1 or more of the Command Points available on your team's Command Dial. Command Points can always be spent as Action Points by your team.
When you are done spending Action and Command Points, you must announce that your character's turn is over. Your character cannot be activated again for the rest of the round, but you may spend Action and Command Points to react to something your opponent does (see "Reactions" on page 17). You may also save your character's AP for a later round. Place an Action Token beside your Character Figure on the map to show that it has already activated.
Rolling the Action Die (Optional)
Once during each of your character's turns, you may choose to roll the Action Die in an attempt to add Action Points to your Action Track. You may roll the Action Die at any point during your turn, even before you decide whether to add Action Points or rest. You are not required to roll the Action Die at all during your turn if you do not wish to.
If you choose to roll the Action Die, you must first declare the number of bonus Action Points that you are attempting to gain. You must then roll the Action Die and attempt to achieve a positive result (black) equal to or greater than your declared number. If you are successful, then you add precisely the declared number of Action Points to your Action Track, even if you actually rolled higher than this amount.
If you roll a positive result that was less than your declared number, then you do not gain the Action Points but there are no other consequences for your failure. If you roll a negative result (red), however, then you do not gain the Action Points and your opponent immediately gains +1 Command Point on her Command Dial.
For example, you declare that you are "going for 2 AP" and then roll the die. If you roll a positive "2" or "3," then you gain exactly 2 AP (even if you actually rolled a "3"). If you roll a positive "1," then you do not gain any AP but you receive no other penalty. If you roll a negative result, however, then you do not gain any AP and your opponent immediately receives +1 Command Point.
Henchmen & the Action Die: Henchmen can only roll the Action Die once during their entire group activation. They cannot roll the die for each individual Henchman Figure. Since henchmen usually begin their turn at maximum Action Points, they should wait until after they have spent some Action Points before rolling the Action Die. If they forget and roll the die before spending any Action Points, then they must spend those Action Points before they spend any others.
Movement
Moving one of your characters to an adjacent space on the map, including diagonally, costs 1 AP. This is called advancing. You cannot enter an enemy figure's space, but you can enter a space occupied by one of your allies as long as you do not end your movement in that space.
Movement Penalties
There are two movement penalties that must be paid when advancing:
- Entering Object Spaces: If you enter a space with an object printed on the map (such as a crate), you must pay a movement penalty of +1 AP in order to enter that space. You do not pay a penalty for leaving a space with an object.
- Leaving Adjacent Enemies: If you leave a space that is adjacent to an enemy figure (even diagonally), you must pay a movement penalty of +1 AP to leave that space. You do not pay a penalty for entering a space adjacent to an enemy.
You never have to pay a movement penalty more than once per space even if, for example, you are entering a space with an object while leaving a space adjacent to several enemies.
Advancing & Running (Heroes, Villains, and Masterminds)
If you only spend AP advancing during your turn, you get to move 1 extra space. This is called running. If you spend AP for anything else during your turn, including triggering movement powers on your Action Cards, you are not considered to be running and therefore do not get to move the extra space.
Running triggers the bonus movement symbol. Whenever you gain this symbol, including through special powers, then you can move the listed number of spaces without paying one of the movement penalties described above. In other words, you may enter a space with an object or leave a space adjacent to an enemy without penalty. However, the bonus movement symbol still does not allow you to enter an enemy figure's space.
Advancing & Marching (Henchmen)
As indicated in the Move boxes on their Character Cards, henchmen cannot run but instead have the option to march. Marching costs either 3 AP or 6 AP, as noted on the appropriate side of the Henchman Character Card. When you choose to march, each of your related Henchman Figures may immediately use 2 AP to advance on the map, no matter how many henchmen you have and regardless of whether or not they have moved previously during this activation. Each henchman must still pay movement penalties for entering spaces with objects or leaving spaces adjacent to enemies. Keep in mind that you must always pay the same base amount to march your Henchman Figures, even if you have fewer than your starting amount of henchmen left on the map.
Individual Henchman Advance Limit (6 AP): A single Henchman Figure can move from a variety of sources during the same activation, including advancing, marching, and using special powers on its Action Cards. However, a single Henchman Figure cannot spend more than 6 AP to advance by itself on the map. A henchman can still continue to gain movement from other sources, however. For example, the Mastermind spends 6 AP to march her Henchmen Figures on the map; each of her six henchmen uses 2 AP to advance on the map as normal. The Mastermind then spends 6 more AP to have one of his Henchman Figures advance further on its own. This is legal, but the Mastermind could not spend any more AP to advance that single Henchman Figure by itself during this activation.
Movement Powers
Many characters possess special movement powers on their Action Cards. These movement powers usually fall into one of three categories:
- Bonus Movement: A bonus movement symbol by itself allows the character to move up to the indicated number of spaces without paying any movement penalties for entering a space with an object or leaving a space adjacent to an enemy. The bonus movement does not allow the character to enter or move through an enemy's space. The character may choose to move fewer bonus spaces if it prefers.
- Bonus Movement in a Straight Line: A bonus movement symbol accompanied by a blue arrow allows the character to move up to the indicated number of spaces in a straight line (including diagonally) without paying any movement penalties for entering a space with an object or leaving a space adjacent to an enemy. The bonus movement does not allow the character to enter or move through an enemy's space. The character may choose to move fewer bonus spaces if it prefers, but all bonus spaces must follow the same straight line.
- Bonus Movement in a Straight Line (Exact): A bonus movement symbol accompanied by a blue arrow with the word "EXACT" allows the character to move the indicated number of spaces in a straight line (including diagonally) without paying any movement penalties for entering a space with an object or leaving a space adjacent to an enemy. The bonus movement does not allow the character to enter or move through an enemy's space. Unlike other movement powers, the character cannot choose to use this power unless it is able to move the full number of bonus spaces. All bonus spaces must follow the same straight line.
Breakthrough Maneuver (4 AP)
Some rare movement powers specify that a character can use them to move through an enemy's space. Without such a power, however, a character must perform a breakthrough maneuver in order to attempt to move through an enemy figure. A character adjacent to an enemy can spend 4 AP to attempt a breakthrough maneuver to advance to an empty space directly on the opposite side.
As part of the attempt, the charging character makes a single attack (melee or ranged) against the obstructing enemy. If the enemy successfully defends against the entire attack, then the charging character is rebuffed and does not make it through to the other side. If the enemy fails to defend the full attack, then the charging character succeeds in making its way through. The enemy does not sustain any actual damage during the maneuver.
The charging character may use either a melee attack or a ranged attack to attempt the breakthrough maneuver from an adjacent space even though ranged attacks do not normally allow a character to attack an adjacent character (see "Combat" on page 16). The charging character does not pay any additional AP to make the attack or to move during the breakthrough maneuver since both are considered part of the 4 AP cost to make the attempt.
The attack used to break through the opponent must be the primary attack listed on the charging character's Character Card; a character cannot use an attack power listed on an Action Card to attempt a breakthrough maneuver. The defending character may, however, use a defensive power listed on an Action Card to attempt to rebuff the breakthrough maneuver.
Example (page 16 diagram): Cap spends 4 AP to attempt a breakthrough maneuver to push through to the other side of the obstructing Hydra Soldier. Cap uses his "Slug" attack, which has an attack strength of 3, to attempt to make his way through to the other side. The Hydra Soldier chooses not to react, since his "Dodge" defense only has a strength of 1. The Hydra Soldier does not sustain any damage from the attack, but Cap breaks his way through to the empty space on the opposite side of the Hydra Soldier.
Combat
You may pay 2 AP to use the primary attack listed on your Character Card to attack another target on the map. The attack symbol on each Character Card specifies whether the character's primary attack is a melee attack or a ranged attack.
A melee attack can target any adjacent enemy, including diagonally. A ranged attack can target any enemy who is 2 or more spaces away but cannot target an adjacent enemy.
REMEMBER: The Mastermind's characters cannot attack heroes during the first round of the game.
Ranged Attacks (Distance Penalty & Aiming)
Although ranged attacks have no upper limit on range, ranged attacks have an optimal range of 2 - 3 spaces. When you attack a target that is more than 3 spaces away, your attack receives a distance penalty that causes the attack to lose 1 point of strength for each space beyond the third. You may compensate for this by aiming. Aiming allows you to reduce your attack's distance penalty by spending AP to lower the distance penalty on a 1 for 1 basis (see example below).
In the example on the page, Iron Man spends 2 AP to fire his Repulsor Ray at the Hydra Soldier. Because the Hydra Soldier is 5 spaces away, Iron Man's attack suffers a distance penalty of 2, which reduces the Repulsor Ray's attack strength from 3 to 1. If Iron Man chooses to spend +2 AP aiming (for a total attack cost of 4 AP), he will be able to direct his full attack strength of 3 against the soldier.
Aiming does not allow you to increase your attack strength under any other circumstances. It can only be used to reduce the distance penalty for attacking a target that is more than 3 spaces away. For example, Iron Man could not use aim to increase his attack strength to 4.
Some powers allow you to fire a volley of attacks. In this case, the distance penalty applies to every attack, and the attacker must decide whether or not to pay a separate cost to aim for each individual attack.
Ranged Attacks (Line of Sight)
In order to make a ranged attack, you must have line of sight to the target. To have line of sight to a target, you must be able to trace a straight imaginary line from the center of your square to the center of the target's square without crossing a closed door or a wall.
In the example on the page, Iron Man has line of sight to Hydra Soldiers #2 & #3, but he does not have line of sight to Soldier #1 because the imaginary line traced from the center of his square to Soldier #1's square crosses through a wall.
Ranged Attacks (Obstruction Defense)
If your target is adjacent to an object and your ranged attack passes through that object, then the target receives obstruction defense equal to the material strength listed on the object. Obstruction defense reduces the damage inflicted by the attacker accordingly (see "Inflicting Wound Tokens" on page 18). If the target is not adjacent to the object, however, then the target does not receive any defense from the object, even if the attack passes through it. Objective Tokens with a material strength also provide obstruction defense in this way. Note that a character standing on top of an object does not receive any obstruction defense from it.
In the example on the page, since Iron Man's attack passes through the barrels and the Hydra Soldier is adjacent to the barrels, the Hydra Soldier receives an obstruction defense of 3. Since Iron Man is not adjacent to the barrels, then he would not receive any obstruction defense if attacked by the Hydra Soldier. If Iron Man moves one space directly forward, then both he and the Hydra Soldier will receive obstruction defense from the barrels.
Similarly, if you make a ranged attack that passes through the square of another character (friend or foe), then the target receives +1 obstruction defense for every character's space that the attack carries through. This defense reduces the attack's strength accordingly (see "Inflicting Wound Tokens" on page 18). Unlike the case with objects, it does not matter whether or not the target is adjacent to the intervening character.
In one example on the page, Iron Man's attack passes through Captain America's space, so the Hydra Soldier receives +1 obstruction defense. In another, Iron Man's attack only touches the corner of Cap's space, so the Hydra Soldier does not receive any obstruction defense.
Reactions
If you attack a character, the target has a chance to react by using the defensive ability listed on its Character Card or by using a defensive ability listed on one of her Action Cards. In order to react to something during another character's turn, the ability must feature a red reaction ring around its AP cost, and the character must have saved AP (or Command Points) in order to pay for the ability.
Sometimes a defensive ability creates armor defense, and other times it creates dodge defense. Most of the time, this distinction doesn't matter, but sometimes an enemy will have an ability that reduces the effectiveness of certain types of defenses. For example, the Hydra Soldiers' "Trench Knife" Action Card specifies that it ignores 1 point of Armor Defense.
Captain America can spend 1 AP to use his shield to react to an attack.
Continuous Bonuses (Attack & Defense)
Some Action Cards provide a continuous defensive bonus, such as Iron Man's "Iron Armor." These powers do not have an Action Point cost, so they provide their defense against every attack. Some Action Cards trigger an effect that provides continuous attack and/or defense bonuses as long as the Action Card has at least 1 Duration Token above it, such as Captain America's "Hold the Line." While "Hold the Line" possesses at least 1 DT above it, its powers provide a +1 bonus to all of your melee attacks and a +1 defense against every attack made against you.
NOTE: "Hold the Line" does not provide an attack by itself. It simply provides +1 to all of your melee attacks for as long as it is active.
Multiple Defensive Abilities
You cannot trigger a particular defensive ability more than once against the same attack. For example, you could not spend multiple AP to use your Character Card's "Dodge" or "Block" ability more than once against the same attack.
You can, however, combine multiple defensive abilities against the same attack. This even allows you to combine both armor defense and dodge defense to mitigate the damage from a single attack. For example, Cap can spend 1 AP to trigger his Character Card's Dodge Ability for +2 Dodge Defense and also spend 1 AP to trigger his "Shield Block" Action Card for +4 Armor Defense. This would result in a total defense of +6.
Inflicting Wound Tokens
If the target does not react to your attack and does not receive any type of defense, then you inflict a number of Wound Tokens equal to the strength of your attack. For example, Iron Man's "Repulsor Ray" would inflict 3 damage against his target.
If the target does react to your attack and/or receives defense from any source, then you only inflict damage equal to the strength of your attack minus the total strength of your target's defenses. If your final damage is 0 or less, then you do not inflict any Wound Tokens against the target. If Cap uses his "Shield Block" to react, then he reduces the attacker's damage by 4 points.
When a hero, villain, or mastermind character receives Wound Tokens, it must place the tokens in the damage slots on its Character Card and Action Cards. The player may distribute them however she likes throughout the character's empty damage slots. Each damage slot on an Action Card that is filled with a Wound Token increases the cost to trigger that Action Card by +1 AP. If all of the damage slots on a particular Action Card have been filled, then the power cannot be triggered at all. In the example on the page, Iron Man has assigned 2 Wound Tokens to his "Pummel" Action Card. It will now cost +2 AP (for a total of 5 AP) to trigger this attack.
If you place a Wound Token in a damage slot on your Character Card, then the cost of all the character's relevant actions are increased, including those on your Action Cards. In other words, damage to the Character Card's Attack Box increases the cost of all attacks; damage to the Defend Box increases the cost of all defenses; and damage to the Move Box increases the cost of all movement.
In the example on the page, Iron Man has placed 1 Wound Token in the Attack Box on his Character Card. It will cost Iron Man +1 AP to use his "Repulsor Ray" primary attack as well as all of his other attacks, including those on Action Cards. Even melee attacks like "Pummel" are now more expensive to use.
If all of the damage slots in a particular box on the Character Card are filled with Wound Tokens, then you cannot perform that type of activity at all, including through the use of Action Cards. This even shuts down relevant Action Cards that have no Action Point cost, such as Iron Man's "Iron Armor."
In the example on the page, Iron Man fills all of the damage slots in his Character Card's Move Box. He now cannot move at all, either by advancing or by using his "Jet Boots" Action Card.
If all of the damage slots on your Character Card and Action Cards are filled with Wound Tokens, then your character is defeated and your Character Figure is removed from the map. You may enter play again during a later round (see "Respawning Defeated Characters" on page 25).
Henchmen in Combat
Henchmen follow slightly different rules in combat. First, each individual Henchman Figure can only attack once per round. This includes the henchman's primary attack as well as special attacks from Action Cards. Second, henchmen do not place Wound Tokens on their Character Cards or Action Cards. Instead, place Wound Tokens directly on each Henchman Figure's base. Every henchman has a health of 3, so each is defeated and removed from the map if it receives 3 or more damage.
Multipart Attacks
Some Action Cards feature attacks in multiple stages. Whenever an attack specifies that it attacks "additional targets within X spaces of the original target," then this is considered a multipart attack that works a little differently from other attacks. After the attack against the initial target is resolved, the additional attacks are made as if the first target is the source of the additional attacks. Distance, line of sight, and obstruction defenses are all determined as if the first target's space is the one from which the additional attacks are originating. The other difference from other ranged attacks is that it is okay if the additional targets are adjacent to the first target.
In the illustration on the page, Cap's "Hurl Shield" launches a ranged attack with a strength of 3 at Cap's first target (Soldier #1). From there, Cap chooses 2 additional targets, but all combat considerations for the additional targets assume that the first target's space is the one from which the new attacks are originating. Soldier #2 is a good choice since he is two spaces from the initial target, and this allows Cap to ignore the barrels that normally separate him from that soldier. Soldier #3 is a legal target even though he is adjacent to Soldier #1, because multipart attacks can hit targets that are adjacent to the first target. Soldier #4 could be a target, but he would not be a good choice because the additional attack would carry through the barrels, providing the Soldier with an obstruction defense of 3.
Destroying an Object, Door, or Wall
You may attack objects if they are within range of your attack. If you target an object with a single melee or ranged attack whose strength is equal to or greater than the object's material strength, then the object is destroyed and covered with a large Rubble Token. You can even target objects with multipart attacks, hitting the objects as either the first target and/or the additional targets of the attack. Destroyed objects no longer provide obstruction defense or impede movement.
Effects which reduce or ignore armor defense or dodge defense do not make it easier to destroy objects. An attack which inflicts less damage than the object's material strength has no effect. This means that a character cannot destroy an object by hitting it repeatedly with attacks that are less than the object's material strength since the object completely ignores each of these attacks.
Ranged Attacks vs. Objects: Although ranged attacks cannot normally affect adjacent enemies, ranged attacks can be used to attack adjacent objects without penalty. Ranged attacks are still affected by the distance penalty if the object is more than 3 spaces away from the attacker.
Doors: You may attack doors in the same way that you attack objects, except a destroyed door is permanently removed from the map and not replaced with a Rubble Token.
Walls: Attacking a wall on the edge of a Map Tile has no effect, but successfully attacking a wall in the middle of a Map Tile will cause a breach in the wall. In this case, you cover the destroyed section with a small Rubble Token. This section of the wall can now be bypassed freely by movement and attacks.
Damaging an Objective Token
Some scenarios require you to "damage" an Objective Token on the map, either once or multiple times. These Objective Tokens have a material strength just like objects and can be destroyed like objects. The main difference is that if an Objective Token must be damaged more than once, then you must inflict damage equal to the Objective Token's material strength each time you wish to place a Wound Token on it. As with objects, effects which reduce or ignore armor defense or dodge defense do not make it easier to damage Objective Tokens, and an attack that inflicts less damage than the Objective Token's material strength has no effect. Once the Objective Token has been damaged the appropriate number of times, the Objective Token is removed from the map.
In the example on the page, the Superweapon must be damaged three times. In order to damage the Superweapon, you must strike it with a single attack of 4 or higher. Each time you do so, you place a Wound Token on the Superweapon. Once the Superweapon receives its third Wound Token, it is completely destroyed and removed from the map.
NOTE: Objective Tokens without a Material Strength Icon cannot be damaged or removed from play.
Status Tokens (Trapped & Prone)
Some attacks specify that they bestow Trapped Tokens or Prone Tokens on their targets. These tokens are placed on the map beside their victims, bestowing the trapped and prone statuses respectively. A character with 1 or more Status Tokens can spend 2 AP on its turn to remove 1 of the tokens. It may do this multiple times, removing some or all of the tokens that have been placed beside it. An adjacent character can also assist by spending 2 AP on its own turn to remove a Status Token from an ally.
Trapped: A character with the trapped status cannot move or attack, even with the use of special powers. A trapped character can defend herself normally, however. Multiple trapped tokens do not have a cumulative effect on the character.
Prone: A character with the prone status must spend +1 AP to attack, defend, or move, even with the use of special powers. Multiple prone tokens do not have a cumulative effect on the character.
Slamming Characters
Attacks that cause a target to be slammed can be used to forcibly move another character a certain number of spaces, perhaps into other characters or objects. Only characters can be slammed, not objects or any other game elements. When a target is slammed, then the attacker pushes the target a number of spaces as specified on the Action Card. The attacker can choose to slam the target fewer spaces if she wishes, as long as she slams the target at least 1 space.
If the attacker is adjacent to the target, or is in a direct orthogonal or diagonal line to the target, then the target is pushed away from the attacker along that exact line. If the attacker is not perfectly lined up with the target, the attacker may choose in which of the available directions closest to an exact line to push the target.
In the example on the page, if Quake directs her "Thrust" attack at Hydra Soldier #1 or Hydra Soldier #3, then she pushes her target directly 1 space away from her. Since Hydra Soldier #2 is not in a direct line from her, then she would have to choose in which of the two available directions to push him.
If the spaces into which the target is slammed are empty (with no characters, objects, doors, or walls), then there is no additional effect. For purposes of slamming, a space is considered empty even if there is a Spawn Point Token or an Objective Token that does not contain a Material Strength Icon. Objective Tokens with a Material Strength Icon are not considered empty for these purposes.
If the target is slammed into an occupied space, then the target immediately stops moving and evaluates what happens. A target slammed into an occupied space ignores any additional spaces that the character would have been slammed into. In other words, a character slammed into an occupied space does not cause a chain reaction through several potentially occupied spaces.
Slamming into Another Character
If the target character is slammed into another character, this second character is referred to as the slam victim. When this occurs, the first target temporarily stops moving and evaluates what happens. After the first target receives the initial damage from the attack, the target and the slam victim immediately receive slam damage equal to half the initial damage (round down). The slam damage is based on the initial damage, which might have been reduced if the initial target reacted to the attack or had some other means of defense. However, once the initial damage is determined, the additional slam damage is automatic and cannot be reduced in any way for either character.
In the example on the page, Quake directs her "Thrust" attack at Baron Strucker and inflicts 4 damage. Strucker is slammed into a Hydra Soldier, and both Strucker and the Soldier receive an additional 2 slam damage (half of the original damage). Strucker therefore receives a total of 6 damage from the attack and the Soldier receives 2 damage. If Strucker had spent 1 AP to react to Quake's initial attack, his Dodge of 3 would have reduced the initial damage from 4 to 1. This means that both he and the Hydra Soldier would only split 1 damage (rounded down), which would result in 0 additional slam damage for both characters. Note that the slam occurs even if Strucker is defeated by the initial damage (before the slam is applied), as his unconscious body will still slam into the character behind him.
If the slam victim is defeated by the slam damage, then the slam victim is removed from the map and the initial target now moves into his space. If the slam victim is not defeated by the attack, then both characters remain adjacent to one another in the spaces they were in before they collided.
Slamming into an Object
If the target character is slammed into an object, then the target temporarily stops moving and evaluates what happens. After the target receives the initial damage from the attack, the target and the object immediately receive slam damage equal to half the initial damage (round down).
If the object receives slam damage less than its material strength, then the object is not destroyed. In this case, the target and the object remain adjacent to one another in the spaces they were in before they collided.
If the object receives slam damage equal to or greater than its material strength, then the object is destroyed and covered with a Rubble Token, and the target moves into the object's former space.
Slamming into an Objective Token
If the target character is slammed into an Objective Token without a material strength, then the character is pushed into that space as if the space were empty and does not receive any additional slam damage.
If the target character is slammed into an Objective Token that has a material strength, then the target temporarily stops moving and evaluates what happens. After the target receives the initial damage from the attack, the target and the Objective Token immediately receive slam damage equal to half the initial damage (round down).
If the Objective Token receives slam damage less than its material strength, then the token is not affected by the damage. In this case, the target and the token remain adjacent to one another in the spaces they were in before they collided.
If the Objective Token receives slam damage equal to or greater than its material strength, then the Objective Token is damaged. If the scenario only requires the Objective Token to be damaged once, then the token is removed from play and the target character moves into the token's former space. If the scenario requires that the Objective Token be damaged multiple times, then the Objective Token receives a Wound Token as normal (see "Damaging an Objective Token" on page 20). If the Wound Token does not cause the Objective Token to be removed from play, then the target character and the token remain adjacent to one another in the spaces they were in before they collided. If the Wound Token does cause the Objective Token to be removed from play, then the target moves into the token's former space.
Slamming into a Wall or Door
If the target character slams into a wall on the edge of the map, then the target stops moving and receives slam damage equal to half the initial damage (round down). The wall itself is not damaged in this case.
If the target character slams into a wall in the middle of the map, then the target temporarily stops moving and evaluates what happens. After the target receives the initial damage from the attack, the target and the wall immediately receive slam damage equal to half the initial damage (round down). If the wall receives slam damage less than its material strength, then the wall is not destroyed. In this case, the target and the wall remain adjacent to one another in the spaces they were in before they collided.
If the wall receives slam damage equal to or greater than its material strength, then the wall is destroyed and covered with a small Rubble Token. If the space beyond the destroyed wall is occupied, then the target remains in its original space and nothing else occurs. If the space beyond the wall is empty, then the target moves into the empty space.
Slamming into a door works the same way as slamming into a wall in the middle of the map. The main difference is that if the door is destroyed, it is simply removed from the map and not replaced with a small Rubble Token.
Hurling Objects
Some characters have an Action Card called "Hurl Object." This action allows you to pick up an adjacent object and hurl it at a target. To simulate this, you destroy an adjacent object and then make a ranged attack whose attack strength is equal to the material strength of the object being hurled. This allows you to clear the way to an opponent and launch an attack at the same time.
When you destroy the object, replace it with a "blank" Rubble Token (that does not feature any physical rubble). If the opponent is in a space with no other objects, you place a splintered Rubble Token in that space to show where the object landed. If the space had any objects, you do not place a Rubble Token there.
In the example on the page, Radioactive Man cannot get a clear shot with his Radioactive Blast at Agent May, who would receive 2 points of obstruction defense from the intervening crate. Radioactive Man does not want to spend 2 AP destroying the crate, nor does he want to have his attack against Agent May reduced by obstruction defense. He therefore activates his "Hurl Object" Action Card, which allows him to spend 1 AP to simultaneously destroy the crate and attack Agent May with a Ranged Attack of strength 2 (which is the material strength of the crate). He places a "blank" Rubble Token over the crate to show that it is no longer in the game and, since there are no other objects in Agent May's space, he places a splintered Rubble Token beneath her figure.
Attacking Teammates
Some scenarios create situations where the heroes need to damage one another in order to fulfill part of their mission objectives. Other times, characters may simply find a strategic advantage to targeting one of their teammates with an attack. For example, Cap might want to direct his "Hurl Shield" attack at a resilient ally in order to bounce the follow-up attacks into some well positioned foes.
Characters can always target one of their teammates with an attack or power, as long as the related Action Card does not specify that it affects an "enemy."
Automatic Damage Effects
Any game effects that specify that a character receives a specific amount of damage inflict their damage automatically. This means that the target of such an effect cannot react or defend against the damage in any way, unless the target uses an ability that specifies that it resists "automatic damage."
A character who receives slam damage, for example, cannot defend against this type of automatic damage (see "Slamming into another Character" on page 21).
As another example, the Winter Soldier's "Deflect" Action Card (see above) inflicts 1 automatic damage against his attacker. The attacker cannot defend against this damage.
Special Interactions on the Map
Interacting with Objects and Tokens Outside of Combat
There are times when a character will need to bust open a door, destroy an object, or damage an Objective Token without being able to inflict enough damage to do so. That is because these elements ignore any damage that is less than their material strength. Characters cannot get around this restriction by hitting the object multiple times with smaller attacks; each of these attacks is completely ignored by the object in question. However, it is possible for a character to take her time to dismantle such obstacles without attacking them.
If a character is adjacent to an object or token, the character can spend AP equal to the material strength of the object in order to interact with it. This usually takes longer than simply destroying something, but it creates the possibility for success when there is no other option available.
- Objects: A character adjacent to an object on the map can spend AP equal to its material strength to dismantle the object and replace it with a Rubble Token.
- Doors: A hero adjacent to a Door Token can spend AP equal to the material strength of the door to jury-rig the locking mechanism and open the door. This removes the Door Token permanently from play. Note that characters controlled by the Mastermind can always open a door by spending 1 AP while adjacent to the door. That is because the Mastermind owns the warehouse or base, and her followers know the codes to open all of the doors. Of course, the Mastermind's characters are also free to attack doors if they wish.
- Objective Tokens: A character adjacent to an Objective Token with a Material Strength Icon can spend AP equal to the Objective Token's material strength to damage the token as per the scenario's requirements. Objective Tokens without a material strength cannot be damaged or removed from the map unless done in a way that is specifically required by the Scenario Cards.
In the example on the page, Agent May does not possess an attack strong enough to damage the Prison Token, so she spends 4 AP while adjacent to the prison to jury-rig the prison door, effectively damaging the token and removing it from play.
- Walls: Unlike other objects and tokens, a character cannot destroy a wall simply by interacting with it. The only way to create a breach in a wall is to inflict damage that is equal to or greater than the wall's material strength with a single attack.
Special Objects
Most objects that appear on the map simply provide cover for defending characters or provide ammunition for "Hurl Object" and similar effects. The Hydra Base Map Tiles feature two special objects, as described below.
Gun Turret: This object functions just like a regular object with a material strength of 3; it provides cover to those adjacent to it and exacts a +1 movement penalty against those who wish to enter its space. In addition, a character standing in the gun turret's space can spend 2 AP to make a ranged attack with a strength of 4. This counts as an attack for all game purposes, including the limit on henchmen being able to attack only once per round. It is important to note that, like other objects, a character standing in the same space as the gun turret does not receive obstruction defense from it.
Ammunition Crate: This object functions like other crates, but when it is destroyed it inflicts automatic damage to those around it. Any character standing on the ammunition crate when it is destroyed receives 3 damage; those adjacent to the crate receive 2 damage; and those two spaces away from the crate receive 1 damage as long as they have line of sight to it. If a character hurls an ammunition crate at another target, then the crate explodes in the same space as the target, unleashing its destruction on the target and all nearby characters, in addition to the normal damage for being a hurled object.
Gaining Objective Points (OP)
During the course of a mission, the players acquire Objective Point (OP) Tokens for defeating their enemies and accomplishing the goals on the Scenario Cards. Players keep a running tally of their OP by placing each OP Token (as well as a token indicating the OP's source, if possible) in an area within full view of all the players.
Defeating Enemies
Heroes: The first time that a hero is defeated during a particular mission, the Mastermind earns the corresponding Hero Token, as well as 1 OP Token. The Mastermind cannot earn more than 1 OP for defeating the same hero, no matter how many times she defeats that hero during the same mission.
Villains: The first time that a villain is defeated during a particular mission, the Hero Players earn the corresponding Villain Token, as well as 1 OP Token. The Hero Players cannot earn more than 1 OP for defeating the same villain, no matter how many times they defeat that villain during the same mission.
Mastermind: The first time that the mastermind character is defeated during a particular mission, the Hero Players earn the corresponding Mastermind Token, as well as 2 OP Tokens. The Hero Players cannot earn more than 2 OP for defeating the mastermind character, no matter how many times they defeat the mastermind during the same mission.
Henchmen: Each time a henchman is defeated, the heroes receive one of the corresponding Henchman Tokens, but the Hero Players only earn 1 OP for every 3 henchmen that they defeat. If the Mastermind began with 3 henchmen in play, then the Hero Players cannot earn more than 1 OP for defeating henchmen during the mission, no matter how many henchmen that they defeat. If the Mastermind began with 6 henchmen, then the Hero Players can earn up to 2 OP for defeating henchmen.
Completing Objectives on Scenario Cards
Whenever the Hero Players succeed at a particular stage of the mission, they earn the OP listed in the lower right corner of the Scenario Card. Whenever they fail at a particular stage of the mission, the Mastermind earns the OP instead.
For example, during the "Rescue the Prisoner" scenario, if the heroes damage the Prison during Stage 1 and then escort the Prisoner to a Hero Spawn Point during Stage 2 or 3, then they succeed at the mission and gain 4 OP. If they fail the mission, either because they did not destroy the Prison during Stage 1 or because they did not escort the Prisoner out of the base by the end of Stage 3, then the Mastermind earns the 4 OP instead.
Retrieving an Objective Token: Some Objective Tokens, such as the Prisoner in "Rescue the Prisoner" and the Dossier in "Retrieve the Dossier," need to be retrieved from the map by the heroes. To retrieve an Objective Token, a hero must either enter the space with the token or spend 1 AP while adjacent to the token. Another character in the same space as the token will not prevent a hero from retrieving it.
Special Notes on "Rescue the Prisoner": The setup of "Rescue the Prisoner" requires the players to select a random Hero Token representing a hero not in the mission. When playing with 4 heroes and just the base game, there are only 4 different heroes so this will not be possible; the players should simply use the Prison Token to represent the rescued Prisoner instead. In either case, to escort the Prisoner to safety, take the token representing the Prisoner and place it on the Character Card of the escorting hero. If the escorting hero is defeated, leave the Prisoner in the defeated hero's space where the Prisoner can be retrieved by another hero later in the mission. If the escorting hero reaches a Hero Spawn Point, then the Prisoner is freed immediately and the heroes succeed at the mission. The Mastermind's characters cannot affect the Prisoner on the map in any way.
Respawning Defeated Characters
Heroes, Villains, and Masterminds
When all of the damage slots on your Character Card and Action Cards are filled with Wound Tokens, then your character is defeated and immediately removed from the map. If this is the first time your character is defeated, your opponent receives your Character Token and the appropriate number of OP as specified under "Defeating Enemies" on page 24.
On the defeated character's next turn, it removes all of its Wound Tokens and respawns on the related Spawn Point of your choice (green for heroes, red for villains and the mastermind). The character does not receive Action Points and cannot move, attack, or be attacked under any circumstances until the start of its next turn. This means that the character is effectively out of play for one round following its return to the mission, although Duration Tokens are still removed from the character's Action Cards as normal.
Henchmen
When a henchman receives 3 Wound Tokens on its figure base, it is defeated and removed from the map. Each time a henchman is defeated, the Hero Players receive a Henchman Token. When the Hero Players have collected 3 Henchman Tokens, they receive OP as specified under "Defeating Enemies" on page 24.
The Mastermind can respawn defeated henchmen on any available Henchman Spawn Points at a cost of 3 AP each. Henchmen cannot spawn on an occupied Spawn Point (regardless of whether there is a henchman or other character on the Spawn Point). There can never be more Henchmen Figures on the map than there were at the start of the game. Like other characters, henchmen cannot move or attack under any circumstances during the same round that they respawn. However, unlike other characters, respawned henchmen can be attacked by other characters before their next turn.
Occupying Spawn Points
Any character may end its movement on a Henchman Spawn Point at any point during the game, thereby effectively blocking henchmen from respawning at that point. However, only heroes may end their movement on Hero Spawn Points, and only villains and masterminds can end their movement on Villain Spawn Points. These characters cannot be blocked by their enemies from reentering the game.
Retreating from the Mission
Tactical Retreats (Heroes, Villains, and Masterminds)
There may be times when your non-henchman character is so wounded or undergoing such a difficult circumstance that even if you rest during your turn, you will not be able to effectively contribute to the mission going forward. At the start of your character's turn, before you have done anything else, you may declare that your character is making a tactical retreat. Once this is declared, your character is considered defeated and is immediately removed from the map. You may do nothing else that round other than remove Duration Tokens from your character's Action Cards. On your next turn, your character does nothing but heal and respawn. If this is the first time during this mission that your character was defeated, then the opposing team receives your Character Token and the appropriate number of Objective Points as normal.
Strategy: Although repositioning yourself and removing all of your Wound Tokens is often a good strategic move, keep in mind that it takes slightly longer to return to the game when you make a tactical retreat. This is because making the tactical retreat takes your whole turn, and your entire next turn will be spent respawning, so your character will be out of action for two entire rounds. When you are defeated normally, you are only out of play for one round (the round that you respawn).
Extractions (Heroes, Villains, and Masterminds)
Some Scenario Cards require characters to be "extracted" in order to succeed at a mission objective. You may also choose to extract one of your non-henchman characters in order to permanently remove it from the mission. This is usually a good idea when your character has not yet been defeated and is no longer capable of scoring Objective Points.
If your character begins its turn on top of one of its Spawn Points, then you may choose to extract it from the mission. Your character is not considered defeated but you cannot return it to the game for the rest of the mission.
Extracting Respawned Characters: You cannot choose to automatically extract a character after it has been defeated. If your character is defeated, you must respawn your character on your next turn, even if you performed a tactical retreat to remove it from play. Furthermore, you cannot choose to extract your character on the very next round after it respawns on the map (that is, during the round when it cannot be attacked by its opponents). A respawned character must remain on the map for two entire rounds before you may choose to extract it from the game.
For example, during the first round of Stage 3, Agent May makes a tactical retreat and is removed from the map. During the second round, you must respawn her on one of the Hero Spawn Points. During the third round, you cannot choose to extract Agent May yet; you must keep her on her Spawn Point and protect her as much as possible so she can be extracted during the following round. On the fourth round, if Agent May has not been defeated, she may be successfully extracted from the game.
Ending the Current Stage
At the end of every fourth round, the current Stage of the mission is over. At this point, you should check the conditions listed on the available Scenario Cards to see if any of the objectives have expired. If the heroes failed to accomplish a particular objective within the scheduled timeframe, then the Mastermind receives the Objective Points for that objective. You should also check the Scenario Cards to see if any new Objective Tokens enter the game at the start of the next Stage.
Revealing the Stage 3 Scenario Card (end of Stage 1): At the end of Stage 1, the Stage 3 Scenario Card is revealed. Flip it face up and read its instructions. There will often be text that immediately triggers when the scenario is "revealed."
Ending the Mission (end of Stage 3): At the end of Stage 3, reward any final Objective Points as specified on the Scenario Cards. Afterwards, the mission ends and the players count up their total Objective Points to determine the winner.
Winning the Mission
The team that has acquired the most OP by the end of the mission wins the mission. If the teams are tied, the mission is considered a draw; there is no tiebreaker.
If you are playing a campaign, it is recommended that you remove the Scenario Cards and Map Card that you used during this mission permanently from the campaign. In this way, you will experience completely different missions throughout each step of the campaign.
Victory Card: The team that wins the mission secures the Victory Card for the next mission. At the start of the next mission, the winning team decides whether to place the Victory Card with the "Karma" side face up or the "Guardians" side face up. The team can use the one-shot ability on the face up Victory Card during the next mission. The Victory Card cannot be saved for future missions.
Continuing the Campaign
Leveling Up Characters
At the end of the mission, each team must now spend its Objective Points to Level Up its characters. The Mastermind decides which of her own characters to Level Up, and the Hero Players decide together how to divide up their Objective Points among themselves. Each team must pool its newly acquired OP with any reserve OP it has saved from previous missions. Each team must choose to Level Up its characters until the team can no longer afford to do so. Leftover Objective Points can be reserved for future missions, but the players can only save points if they are no longer able to Level Up any of the characters who took part in the most recent mission.
To Level Up a character, you look at the character's current Level as depicted on the character's figure base. In order to advance that character to the next level, you must spend a number of OP equal to the value of the next Level. For example, to advance a Level 1 character to Level 2, you must spend 2 OP. To advance a Level 2 character to Level 3, you must spend 3 OP. To advance a Level 1 character directly to Level 3, you must spend 5 OP (2 + 3 = 5).
When you Level Up a character, click the figure base forward to the next Level on the dial. This will increase the character's Build Points when you select Action Cards at the start of the next mission. You may Level Up the same character more than once if you wish, although you are not required to do so. It is recommended that each character on your team be Leveled Up at least once if you can afford it, but the players may decide to Level Up their characters however they wish. When you feel that you are done Leveling Up your team's characters, count up your leftover OP and check the Levels of each of the characters who participated in the mission. If you have enough OP to Level Up any of these characters, then you must do so. You can only save OP if you do not have enough left to Level Up any of your participating characters.
Masterminds & Henchmen: Even though masterminds and henchmen are worth more unit points than the other characters, you still pay the same amount of OP to Level Up these characters. All henchmen of the same type Level Up at the same time. All 6 henchmen Level Up even if you were only playing with 3 of the related henchmen during the most recent mission.
Important Note: You can only spend OP to Level Up the characters who participated in this mission. You cannot Level Up any of your other characters, even if they participated in previous missions during the current campaign.
Preparing for the Next Mission
Between missions, store all of your Character Figures and unspent OP Tokens separately from those of other players so that your characters can stay organized throughout the campaign.
You may choose to bring the same or different characters into the next mission at your discretion. Whenever a new character enters the campaign, it does so at Level 1. If you bring the same characters into future missions, you are not required to bring the same set of Action Cards for those characters. You can choose a different set of Action Cards for your characters at the start of every mission.
Winning the Campaign
At the start of the campaign, the players should have agreed upon a certain number of missions (see "Playing a Campaign" on page 8). Six missions is a good choice for a standard campaign since it will allow you to go through the full range of Scenario Cards and Map Cards without encountering any duplicates.
The team that wins the final mission of the campaign wins the entire campaign. If the final mission is a tie, then the players can either accept the tie or keep playing missions until one team wins a decisive victory.