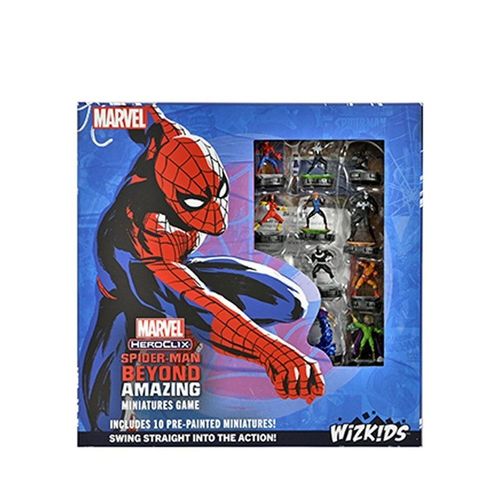
Marvel HeroClix: Spider-Man Beyond Amazing Miniatures Game
Marvel HeroClix: Spider-Man Beyond Amazing Miniatures Game Rulebook
Table of Contents
Table of Contents
- Basic Concepts
- Scenario Play Rules
- Setting Up Scenario A
- The Teams
- Key Concepts
- Turn Overview
- Actions
- Moving
- Attacking
- Resolving Combat
- Power / Trait Actions
- Terrain
- Example Attack
- Terrain Markers
- Destroying
- Bystanders
- Miscellaneous Concepts
- Building Your Own Team
- Standard Setup
- Inherent Abilities
- Powers and Abilities Reference
Basic Concepts
The Combat Dial System
Each character in HeroClix is represented by a figure and a character card. Each figure has a dynamic sculpt atop our patented Combat Dial, which features the character's combat values and abilities.
The character card displays additional information about the character that doesn't fit on its base, including keywords and powers.
The Combat Dial is a rotating disk inside of the figure's base. By turning the dial — or "clicking" — the combat values and powers that appear in the window of the Combat Dial will change. For each "click" of damage a character takes, their dial may change or weaken. If a click reveals a KO, that character is knocked out!
Basic vs. Advanced Dials: The characters in this set have two different sets of clicks. The Basic dial contains abilities that are better for players learning the game, while the Advanced dial contains more complex abilities for players more familiar with HeroClix. Characters with Basic and Advanced Dials have this information (and the starting clicks for both dials) shown on their character cards.
Clicking
A single position on the Combat Dial is called a "click," and is identified by a small red "click number." Turning the dial is called "clicking."
When your character takes damage, click their dial once for each 1 damage taken, in the direction of increasing click numbers. When a character is healed, click the dial in the direction of decreasing click numbers instead.
Combat Values
A character has five combat values represented by the symbols printed next to them.
Four of these values appear in the window of the Combat Dial: Speed (boot symbol), Attack (fist symbol), Defense (shield symbol), and Damage (burst symbol). These values can change as your character takes damage or is healed.
The fifth value is Range, which is printed on the character's base next to one or more Bolt (lightning bolt) symbols.
Powers
Each character in HeroClix has access to a set of powers which provide a number of different game effects.
The Standard Powers available to a character are determined by the colored boxes of that character's Speed, Attack, Defense, and Damage values that are currently displayed on its Combat Dial.
A character's available Standard Powers vary across click numbers. In this way, characters will lose or gain access to some Standard Powers as their dial is clicked when taking damage or healing.
Each character's card lists all of that character's Standard Powers, with a colored circle containing the relevant Combat Value for each. All of the Standard Powers and their effects are listed on the Powers and Abilities Card.
The Powers and Abilities Card includes effects that can be found on figures from other HeroClix sets and boosters. The back page of this rulebook has a Quick Reference of Powers and Abilities to help new players focus on the specific Powers and Abilities found on the characters in this set.
Example (printed as a panel with the Combat Dial diagrams):
As seen above, Spider-Man is on Click Number 1. He has 7 Speed, 11 Attack, 18 Defense, and 3 Damage.
Spider-Man took 3 clicks of damage so now he's on Click Number 4. His Speed becomes 6, his Attack becomes 10, his Defense becomes 17, but his Damage remains 3. You'll also notice that his Standard Powers have changed.
Good news! Spider-Man healed 1 click from the last panel. So now he's on Click Number 3. His Speed becomes 7, but his Attack stays 10, his Defense stays 17, and his Damage stays 3. His Standard Powers remain the same.
Scenario Play Rules
For your first few games of HeroClix, we recommend starting with Scenario A and proceeding through the scenario cards according to the results of each game.
Setup
- Place the chosen Scenario Card next to the map.
- Determine which player will be the Hero and which will be the Villain player for the scenario. Turn all characters to their Basic dial starting click (represented by Click Number 1 and a green starting line).
- Determine player order. Each player rolls two d6. The player with the highest result is the first player this game; the player with the lower result is the second player this game.
- Set up the map listed in the scenario.
- Choose Starting Areas, starting with the second player. Each player, starting with the first player, puts their team on the map in their chosen Starting Area.
- Start the game! Any effects that happen at the start of the game occur now, then the first player takes their first turn.
NOTE: The Quick Reference on the back of this rulebook provides essential information about your characters!
Play Areas
Map: This is where gameplay takes place. Characters will move and attack each other in different squares of the map. Maps include Starting Areas which are the squares along the edge of the map where a player chooses to place their characters at the start of the game.
Sideline: A place separate from the map, for characters and other gameplay elements forming a part of a player's force that are not in play but may enter the game through certain effects.
KO Area: When a character is KO'd (its dial reads KO), it is placed in that player's KO Area.
Setting Up Scenario A
The Hero player plays Spider-Man, Spider-Woman, and Spiderling at 30 points each.
The Villain player plays Mysterio, Shocker, and Hydro-Man at 30 points each.
Example (printed as a panel): You and your opponent each roll 2d6 to determine the starting turn order. You rolled [2][4]. Your opponent rolled [1][2]. The scenario says to use Construction Site (A1 - H8). You rolled highest, so your opponent will pick their starting area and place their figures first, and you'll take the first turn of the game.
The diagram on this spread shows the Construction Site map with Terrain Markers, Starting Areas, Dropped Loot Markers, and the Hero Player's and Villain Player's KO Areas, along with the Scenario Card A and Loot Card.
Scenario Card A: Crime, Interrupted
Their latest robbery foiled, the Sinister Six are fleeing from Spider-Man with what riches they could grab. Spider-Man and his friends are in pursuit, trying to reclaim the stolen money and bring the villains to justice!
Spider-Man Team: Spider-Man (30 points), Spider-Woman (30 points), Spiderling (30 points)
Sinister Six Team: Shocker (30 points), Mysterio (30 points), Hydro-Man (30 points)
Map: Construction Site, use only the map tile containing squares A1 - H8.
Actions: 2
Loot Card
In Scenario A, players may end the game with a count of Dropped Loot markers.
For the Spider-Man team this means greater renown and acceptance from the city, for the Sinister Six this means more cash to fund their criminal enterprises.
At the start of each Scenario, beginning with the first player, each player may spend one Dropped Loot marker to turn a 30 point character on their force to their 40 point line. Spent markers don't return.
The Teams
Hero Player's Team
Spider-Man: Once a shy science nerd, Peter Parker's life was changed forever when the bite of a radioactive spider granted him amazing arachnid-like powers. He has since devoted his life to protecting New York City and its citizens as the Amazing Spider-Man! Spider-Man uses Super Senses to quickly dodge attacks while using webs to Incapacitate his foes! This slippery web-slinger will be tricky to pin down.
Spider-Gwen: In an alternate universe, a twist of fate caused Midtown High student Gwen Stacy to receive the bite of a radioactive spider instead of Peter Parker. Gwen uses her powers to protect the innocent, balancing her life as a superhero with the challenges of teenage life. Able to make tiny hops between dimensions, Spider-Gwen is able to quickly Teleport around the map to Perplex her foes and surprise them with a Flurry of attacks!
Spider-Woman: After being brainwashed to be an agent of Hydra, Jessica Drew was rescued by Nick Fury and had her true memories restored. Adopting the name Spider-Woman, Jessica started a journey of both self-discovery and heroism that continues to this day. Thanks to her time as an agent, Spider-Woman comes to the party with plenty of gadgetry to Exploit Weaknesses of her opponents. Energy Shield/Deflection and Combat Reflexes make her one of the most resilient members of the Spider-Man Family!
Spiderling: Anna-May Parker is the highly intelligent and headstrong daughter of Peter Parker and Mary Jane Watson. Inheriting spider powers from her father, she strives to follow in his footsteps as a responsible and selfless superhero! Spiderling uses her careful planning and analytical skills to Support your team with Probability Control, ensuring the tide turns in your favor! Sidestep around dangerous foes and Incapacitate them to stop them in their tracks!
Miles Morales: Hailing from an alternate world in which Peter Parker sacrificed his life to protect the city, Miles Morales inherited the mantle (and powers) of Spider-Man when he was similarly bitten by a genetically altered spider. Though his predecessor's departure left a pair of heroically large shoes to fill, Miles is up to the task. Unique to Miles is his Spider-Camouflage, allowing him to turn invisible and Charge into or out of the action while remaining in Stealth! His clever tactics allow him to use terrain to Outwit and get the jump on his opponents.
Villain Player's Team
Venom: An amorphous costume-like entity, the symbiotic being known as Venom is capable of mimicking Spider-Man's unique powers and endowing new hosts with massive strength. If Plasticity and Toughness didn't already make Venom your front-line villain of choice, his ability to Steal Energy and Shape Change make him a formidable member of any team.
Bullseye: A mercenary with deadly accuracy, Bullseye has often been the go-to hire for masterminds like Kingpin when precision is required. His cold and calculating nature makes him a deadly opponent. Known for never missing when it counts, Precision Strike is Bullseye's middle name. A combination of Ranged Combat Expert and Running Shot make him a terror from a distance and forces heroes to get up close and personal.
Mysterio: Frustrated he wasn't getting the fame and recognition he deserved, Quentin Beck used his expertise as a Hollywood special effects artist to become the master of illusions known as Mysterio. One of the true Masterminds of the Sinister Syndicate, Mysterio uses his illusions to trap opponents in a Smoke Cloud and Shape Change to confuse them in combat. His ability to Mind Control his enemies makes him a valuable strategic member of any team.
Shocker: With an ear out for any and every criminal scheme that might turn a profit, the Shocker has been a constant thorn in the side of Spider-Man and other Big Apple-based Super Heroes for a long, long time. Shocker's powerful gauntlets strike foes with a massive Force Blast that often sends them flying into terrain or other characters. Stand clear of his devastating Pulse Wave, especially if he is still Invincible!
Hydro-Man: Blaming Spider-Man for the unfortunate accident that turned him into living water, Morrie Bench turned to a life of crime while seeking revenge against the friendly neighborhood web-slinger. Hydro-Man is able to manipulate his body of water giving him Regeneration and the ability to Shape Change at will. The Tsunami of water he leaves in his wake traps his opponents while giving him the ability to move freely around the map!
Key Concepts
Force
Your force is all the game elements you're playing with, including your characters and any objects and special items (don't worry about objects or items just yet).
"Friendly" and "Opposing"
Characters on your force are "friendly" to themselves and each other. Characters on your opponent's force are considered "opposing."
Adjacency
Squares on the map that touch each other (even diagonally) are considered adjacent to one another. Game pieces are adjacent to one another if they're in adjacent squares on the map.
In this example, the blue and red squares are adjacent to each other. The blue and white squares are adjacent to each other. The red and white squares are NOT adjacent to each other.
Success and Failure
Some effects will cause you to roll a six-sided die (d6) to determine whether it occurs. The effect will tell you the range of rolls (like, 5–6) that results in a "success" and what the benefit is. All other results are considered failures.
A roll of 1 is always considered a failure and a roll of 6 is always a success.
How to Win
Normally, your objective will be to KO (knock out) your opponent's force, leaving them with no characters on the map. A character is considered KO'd when a KO is revealed on a character's Combat Dial as a result of a click.
If you're playing with a scenario, however, you can instead win if you complete the scenario win condition!
Turn Overview
Your turn in HeroClix is made up of four phases:
Phase 1: Beginning of Turn
Some effects trigger or end during this phase. Watch for wording like: "At the beginning of your turn" or "At the beginning of each turn."
Phase 2: Action Phase
In this phase you may take a number of actions up to your Action Total and any number of different free actions. For most games the Action Total is 3, but some effects like scenarios or the Leadership power can change it.
Phase 3: End of Turn
Some effects trigger or end during this phase. Watch for wording like: "At the end of your turn," "At the end of each turn," or "Until the end of your turn."
Phase 4: Clear Phase
Clear (remove) all action tokens from all of your characters that did not receive an action token this turn.
Actions
Most of the gameplay in HeroClix occurs in the Action Phase in the form of actions.
After taking an action, a character gains an action token unless it was a FREE action.
When a character gains a second action token, they can no longer perform any actions (except FREE actions) until their action tokens are Cleared. If you have fewer than 3 characters on your team, you won't be able to use all 3 of your actions.
There are five different types of actions. Every character always has three basic actions available to them: MOVE, CLOSE, and RANGE.
MOVE: Allows a character to move around the map.
CLOSE: Allows a character to perform a Close attack.
RANGE: Allows a character to make a Range attack.
The fourth action, POWER, comes up most often in the context of Standard Powers (see Standard Powers on the Powers and Abilities Card). These will appear with the phrase "POWER:" before the text explaining the action's effect.
Last, FREE actions are actions that do not give a character an action token. A character can perform multiple FREE actions during a turn, but never the same one twice. These will appear with the phrase "FREE:" before the text explaining the action's effect.
Moving
Characters can move in one of two ways:
- Using a basic MOVE action to move a number of squares up to their Speed (boot symbol) value.
- Using a power with MOVE, which may use or modify the character's Speed (boot symbol) value.
A character moves one square at a time into any of the squares adjacent to their current square (including diagonally).
Other Characters
Two characters cannot occupy the same square. Your characters can move through squares with friendly characters but they may not stop in those squares.
Be careful: If a character enters a square adjacent to an opposing character their movement stops! To move away, that character will need to Break Away!
Breaking Away
If a character is adjacent to one or more opposing characters, they must first attempt to Break Away before they are able to move.
To attempt to Break Away, roll a die:
- A roll of 4–6: Success! The character Breaks Away from all adjacent opposing characters and may move without having to Break Away from those characters for the remainder of this action.
- A roll of 1–3: The character fails to Break Away and does not move. If they would receive an action token for this move, they still do.
Example (printed as a panel): Spider-Gwen moves. She passes through the square occupied by friendly character Spider-Man. Spider-Gwen continues moving until she is adjacent to opposing character Venom. She must stop moving at that square. This is a complete action, so Spider-Gwen gets an Action Token.
Example (printed as a panel): Spider-Gwen tries to break away. Roll 1d6... Oh no! A roll of 2. Spider-Gwen cannot move out of this square and gets a second Action Token, the maximum amount.
Example (printed as a panel): On a later turn, Spider-Gwen's Action Tokens are cleared. She tries to break away from Venom again. Just roll 1d6... Hooray! A roll of 5! Spider-Gwen can now move freely through the squares adjacent to Venom during her MOVE action.
Attacking
There are two types of attacks: Close attacks and Range attacks.
Close Attacks
Close attacks represent melee attacks like punching, kicking, and clawing.
A character may perform a Close attack by using a basic CLOSE action or through certain Standard Powers.
When making a Close attack, a character may attack a character in an adjacent square.
Example (printed as a panel): Black Cat has Range 0, so she can only make close attacks. She may attack targets occupying any of the squares highlighted in purple. She may attack Shocker because he is in an adjacent square.
Range Attacks
Range attacks are attacks from a distance like beams, boomerangs, or arrows.
A character with a Range value greater than 0 may perform a Range attack by using a basic RANGE action or through certain Standard Powers.
Characters making a Range attack can only attack characters within their range and line of fire.
Determine a character's range by starting with a count of 0 in the square the character occupies and counting outward in all directions, including diagonal.
Example (printed as a panel): Spider-Man (center) has Range 6, so he can make range attacks. Spider-Man may attack targets occupying any of the squares highlighted in purple. He may attack opposing character Mysterio because he has a clear line of fire and is within range. He cannot attack Shocker. Even though Shocker is within range, Miles Morales is blocking the line of fire. He cannot attack Venom because he is out of range.
Adjacent opposing characters: As a general rule, characters may not make range attacks when they are adjacent to an opposing character. However, there are certain special abilities that allow them to either target an adjacent opposing character with a range attack or target other opposing characters that are not adjacent while they are adjacent to an opposing character.
Line of Fire
Line of fire represents a character's ability to see a character they wish to engage with.
To determine if a square is within a character's line of fire, draw an imaginary line from the center of the attacking character's square to the center of the square you are targeting (ignoring any effects of the character's square itself, like terrain bonuses).
Line of fire is blocked if:
- It intersects a square occupied by a character not occupying one of the two squares you're drawing between.
- It intersects blocking terrain.
- The attacking character and their target are on different levels of elevation (except when the character at higher elevation is on the Rim, see p. 11).
Characters always have a line of fire to themselves.
Example (printed as a panel): The brown squares represent elements of the map that would block his line of sight, like walls or other characters.
Resolving Combat
All combat, whether Close or Range, is resolved by following these steps:
1. Determine Targets
Choose one or more targets for your character's attack.
Every character has a Bolt (lightning bolt) value next to their Range value. This is how many characters they may target at once with their attack.
Some attacks can have more than one target, but all attacks must have at least one target. The same attack can't target a character more than once.
Targets of a Close attack must be adjacent to the attacking character; targets of a Range attack must be within range and line of fire of the attacking character.
If an opposing character is adjacent to your character, your character cannot perform a Range attack (unless they have a special ability that allows them to do so).
2. Determine Hits
Roll dice to determine if a defending character is hit.
Roll 2d6, and add the result to your character's Attack (fist symbol) value. Then, compare that total to your targeted character's Defense (shield symbol) value:
- If the attack total is equal or higher than the defense total value, the attack succeeds. The target is "hit."
- If the attack total is lower, the attack fails. The target was "missed."
An attack with multiple targets can be both a hit and a miss at the same time for different targets.
Rolling 6-6 is a critical hit which deals 1 additional damage to each character hit by the attack. The target(s) of the attack become hit (they can't evade with another effect).
Rolling 1-1 is a critical miss. The attack misses, and the attacking character takes 1 unavoidable damage.
Rolling 2-2, 3-3, 4-4, 5-5 or 6-6 causes knockback if that attack is a hit, which is resolved in step 5 below.
3. Modify Damage
Use any abilities that increase or reduce damage.
Your character will deal damage equal to its Damage (burst symbol) value to hit characters. If more than one character has been hit, you choose how this damage is split up.
A critical hit adds 1 to the damage dealt to each hit character.
The hit characters may use powers to reduce damage, and the attacking character may use powers to increase or alter the damage.
4. Deal Damage
Deal damage to hit characters, and check for KOs.
Once the damage is finalized, the hit characters take damage by clicking the appropriate number of clicks (so that the Click number increases).
Check for KOs: If a character's Combat Dial shows a "KO" in its window, that character is KO'd and is removed from play.
5. Resolve Knockback
Check if a character is pushed away by knockback.
A hit character is knocked back if either of the following applies:
- The attacking character has the KNOCKBACK keyphrase as part of a power.
- The attacking character rolls doubles on an attack roll that hits.
When a character is knocked back, the attacking player places them up to 3 squares away from the character that hit them.
- If a character would be knocked back into a square occupied by another character, they aren't knocked back any further.
- If a character would be knocked back into a wall, blocking terrain, or square of higher elevation they aren't knocked back any further and deal that character 1 damage.
- If a character is knocked back into a square of lower elevation, their knock back is stopped after they cross the red boundary line. Deal that character 1 damage.
Power / Trait Actions
Beyond the basic MOVE, CLOSE, and RANGE actions, characters can perform actions based on their available powers and traits.
If a power or trait has MOVE, RANGE, CLOSE, or POWER, it takes an action to use.
If it has FREE, it's a free action. It can be performed by a character during the Action phase, without gaining an action token.
If a power or ability is not a MOVE, CLOSE, RANGE, POWER, or FREE action, it is one of the following:
- Triggered effects are caused by something else. For example, an ability that says "When this character would be targeted by an attack..." it is triggered when they're attacked. The power would continue to say what happens when triggered.
- Passive effects are always in effect. For example, Toughness always reduces damage taken by 1 and Leadership always increases your Action Total by +1.
NOTE: Characters can take any number of different FREE actions during their turn, and still take a non-FREE action (but each FREE action may only be taken once).
Traits
Some characters will have traits or special powers. A character's traits are designated by a star on the Combat Dial, which means that they are always available to your character. The effect of the trait will be described on the character's card.
Other Abilities
Improved Abilities: Improved Abilities let a character move or target in ways they normally can't. Improved Abilities will have MOVEMENT (symbol) or TARGETING (symbol) followed by a colored symbol. The Powers and Abilities Card explains what each one does.
Team Abilities: Team Abilities are indicated by a full-color symbol on a character's base and explained on the character's card.
Keyphrases: Keyphrases are terms in HeroClix with a special meaning. Each one is explained on the Powers and Abilities Card.
Terrain
HeroClix maps have special colors around the squares that let you know about the special properties of that square. Squares without terrain are called Clear Terrain.
There are 3 main kinds of terrain: Blocking, Hindering, and Elevated.
Blocking
Blocking terrain is impossible to traverse or see through, such as pillars, statues, and boulders.
Blocking terrain that is printed on the map has a Destroy value of 3 (it may be destroyed by characters with a damage value of 3 or more). See "Destroying" on page 13 for more details.
- Movement: Characters cannot move into or through blocking terrain.
- Line of Fire: Line of fire is blocked by blocking terrain.
Walls
Walls are a subset of blocking terrain and follow similar rules, but instead of being a full square on the map they are found along the boundary between squares.
Walls printed on the map have a Destroy value of 3 (they may be destroyed by characters with a damage value of 3 or more). See "Destroying" on page 13 for more details.
- Movement: Characters cannot move through walls.
- Line of Fire: Line of fire is blocked by walls.
Hindering
Hindering terrain makes it more difficult to target opposing characters. Examples of hindering terrain include thick trees, tall grass, and debris.
- Movement: Not affected.
- Line of Fire: If a line of fire is drawn through any hindered terrain to a target of an attack, that target gains +1 defense for the attack.
Elevated
Elevated terrain is an area that is higher up than the rest of the battlefield and may provide a tactical advantage, but is difficult to climb onto such as the roof of a low building, the top of a tractor trailer or a small cliff.
- Movement: Characters must end their movement when they cross a (red) elevated terrain boundary unless they are moving from one square with a transition indicator into the square connected by that transition indicator.
- Close attacks: Characters may make close attacks targeting opposing characters occupying a square connected to their square by a transition indicator.
- Line of Fire: A line of fire cannot be drawn from a square at low elevation to another square at the same elevation through terrain at high elevation (representing the fact that a character cannot shoot through a building). However, a line of fire can be drawn from a square at high elevation to another square at the same elevation through terrain of lower elevation (representing the fact that a character can shoot an arrow from one rooftop to another).
The Rim
Squares along the boundary of elevated terrain that are adjacent to lower terrain are collectively called the "Rim." Characters on the Rim can be targeted by characters from lower elevation and vice versa, but only if the Line of Fire does not intersect another square of elevated or blocking terrain.
Example Attack
Spiderling is sparring against training dummies. She is at Click Number 1 with these combat values. Even though her range is 4, she can't make a range attack while adjacent to opposing characters. She picks the dummy on the right as her target. It has Defense 15.
Roll 2d6 for this attack. Let's look at the possible outcomes of this roll: a critical miss, a miss, a hit, and a critical hit.
Critical Miss: [1][1], a critical miss. The attack misses and Spiderling takes one damage, moving her dial to Click Number 2.
Miss: [1][2], a miss. Added to Spiderling's Attack (fist) 10, the attack total is 13. That is less than the dummy's Defense value, so the attack misses.
Hit: [2][3], a hit. Added to Spiderling's Attack (fist) 10, the attack total is 15. This attack hits! Spiderling has Damage (burst) 3, so she deals 3 damage to the dummy.
Critical Hit: [6][6], a critical hit. Added to Spiderling's Attack (fist) 10, the attack total is 22. This attack hits! Furthermore, because you rolled double 6s, this is a critical hit! Spiderling has Damage (burst) 3, so she deals 3 damage to the dummy. Because this is a critical hit, she also deals 1 additional damage to the dummy, for a total of 4 damage. All hits that have doubles cause knockback, so you may push the dummy up to 3 squares away from Spiderling.
Terrain Markers
Terrain markers are various items on the battlefield that characters can interact with during a game, from small everyday objects to cars, heavy machinery and outbuildings. Some terrain markers come with their own card and have special effects in that game!
Terrain markers have values indicating how far they can be thrown, how much damage they cause in attacks, and how much damage it takes to destroy them. These are indicated on the object as:
- Bolt / Giant Reach (range): The first number listed (before the "/") is the range that the terrain marker can be thrown in a RANGE Terrain Action. The second number listed (after the "/") is the Giant Reach: X value that the terrain marker grants when used in a CLOSE Terrain Action (see Giant Reach: X on the PAC for more details).
- Burst (damage): The first number listed is the damage that the terrain marker deals when used in a RANGE Terrain Action. The second number listed (with the +) is the amount the terrain marker modifies the damage of the attacker when it is used in a CLOSE Terrain Action.
- Destroy: The number listed is the damage required to destroy the terrain marker in a CLOSE or RANGE Destroy Action. If this says "Indestructible" then this terrain marker can't be destroyed with a CLOSE or RANGE Destroy Action (but still can be destroyed when used as part of an attack with a CLOSE/RANGE Terrain Action).
Terrain markers with rounded edges are called "objects" and represent smaller items found on the battlefield that any character can lift (like a moderately full garbage can). These are small enough that they do not affect a character's movement or line of fire, but can be picked up and used in attacks.
Terrain markers with square edges represent larger or heavier items found on the battlefield that only someone with superhuman strength could lift (like a dumpster or a small car). These markers affect characters movement and line of fire as the terrain type indicated by its color border. Only characters with the "Super Strength" or "Telekinesis" powers can pick them up, move them around the map and use them in attacks.
Characters can only hold one terrain marker at a time. Any character that is holding a terrain marker can attack with that marker by performing the following actions:
- Once per move: any character may do one of the following:
- Pick up an object in a square they move through, or a square adjacent to one they move through.
- Put down an object in any square they move through or a square adjacent to one they move through.
- CLOSE Terrain Action: CLOSE: If this character is holding a terrain marker, make a close attack modifying damage by the terrain marker's Burst modifier (indicated by the +X). If a terrain does not have a printed Damage modifier, the default modifier is +1. After resolutions, destroy that terrain marker without generating debris.
- RANGE Terrain Action: RANGE: If this character is holding a terrain marker, make a range attack targeting a single character within line of fire and the terrain marker's Range (bolt) value. Instead of normal damage, deal damage equal to the terrain marker's Burst value (indicated by the first listed number.) If a terrain does not have a printed Range value, the default is 4. If a terrain marker does not have a printed Damage value, the default value is 2. After resolutions destroy that terrain marker without generating debris.
Destroying
A character can destroy printed blocking terrain (including walls) or a terrain marker if they have a Damage (burst) value equal or greater than the Destroy value of that terrain. Printed Blocking terrain always has a Destroy value of 3.
When trying to destroy something, your character must do one of the following:
- CLOSE Destroy: Occupy an adjacent square and perform a basic CLOSE action.
- RANGE Destroy: Perform a basic RANGE action targeting a wall within range and line of fire.
To destroy a wall from range, your character must have range to the square on the opposite side of the wall (the section of the wall you are destroying does not block line of fire to that square.)
After destroying blocking terrain or a wall printed on the map, place debris markers as described below:
- Blocking terrain: Put a debris marker in that square. That square is now hindering terrain.
- Wall: Place a debris marker on either side of where the wall used to be.
If you destroy a terrain marker using a CLOSE or RANGE Destroy Action or with the standard power Quake, flip the marker to its destroyed side. It is now considered a debris marker.
Example (CLOSE Destroy, printed as a panel): Spiderling wants to remove the obstacles in front of her. Because she has Burst 3, she can deal enough damage to destroy the obstacle within her attack range. Spiderling uses a CLOSE Destroy action to remove the obstacle from the map. Replace the obstacle with a debris token as shown.
Example (RANGE Destroy, printed as a panel): Spiderling wants to remove the wall in front of her from range. To do so, she needs to draw range and line of fire to the square behind the wall (the wall being destroyed doesn't block this line). With her range of 4 she can count to the square behind the wall, and her damage of 3 is enough to destroy it! Spiderling uses a RANGE Destroy action to destroy the wall. Place a debris marker on either side of where the wall used to be.
Bystanders
Bystanders are characters with combat values but no combat dial, therefore they cannot click. Most bystanders are generated by game effects, but some are separate game elements with point values.
A bystander can't be healed, and if it takes any damage, it is KO'd.
Bystanders don't have starting lines, click numbers, or non-KO clicks. They do not trigger or count for any effects that reference those game terms.
A bystander's single "click" is considered its starting click.
Miscellaneous Concepts
Names Used in Effects
When an effect looks for a character's name, it looks for an exact match.
Generate
Some effects will "generate" something, like a token or object, from outside the game or from your Sideline.
Generated game elements are added to the map adjacent to whatever generated it (usually a character).
Generated game elements are always linked to the character or game element that generated them. For example, if a character can generate hindering terrain markers from the "Smoke Cloud" power, that power's effect would only apply to the markers they generated (and not hindering terrain markers generated by a different character).
Placing
Placing is when you take a game element on the map and place it in another square on the map. Placing characters isn't considered a move for the purposes of other game effects.
For example, a character that is placed does not have to break away from adjacent opposing characters.
Building Your Own Team
Building your own team is one of the most fun parts of HeroClix, because you can combine your favorite characters from different sets and universes, then bring them to the table to square off against your friends! Your team consists of three components: your characters, your maps, and your objects.
Note: None of the characters contained in this box are Prime or Unique.
Starting Force
Your Starting Force consists of your characters and any game elements you will start the game with (such as objects and equipment).
Each character in HeroClix has a point value printed on its base and character card. This is how many points it costs to include on your Starting Force.
A standard Starting Force in HeroClix has a maximum of 300 points. You and your opponent should each build your teams to be as close as you can get to the 300 point maximum (it's okay if you don't have exactly 300).
Team Building Restrictions
Prime figures: A team can only have one Prime figure (denoted by a green ring around the edge of its base and its character card image).
Unique figures: A team can only have one copy of each Unique figure (denoted by a silver ring around the edge of its base, and its character card image), but your team can have multiple different Unique figures.
Themed Teams
Every character has one or more keywords, found below their name on their character card. If all of the characters on your team share a keyword, you can pick that keyword as your team's "theme." If they share more than one keyword, pick only one. Themed teams provide two bonuses:
Initiative Bonus: When deciding who is going first, players with themed teams gain an initiative bonus: Add the number of characters with their chosen keyword to their 2d6 die roll. This bonus cannot exceed 3 more than an opponent.
Example (printed as a panel): For example, you have a Theme Team with three characters. You roll 3-3, for a total of 9. Your opponent does not have a Theme team, so would need to roll a 10 or higher to go first.
Standard Setup
- Greet your opponent.
- Reveal your team. Announce any Themed Teams, if any. Turn all characters to their starting click.
- Determine player order. Each player rolls 2d6 and adds their Initiative Bonus. The player with the highest result may choose to be either the first or second player this game; the player with the lower result gets whichever option the player with the highest result didn't choose.
- The second player picks a map.
- Choose Starting Areas, starting with the first player. The first player chooses an edge of the map to be their Starting Area. The second player's Starting Area will be the edge of the map opposite the first player's starting area.
- Setup Characters and Terrain Markers. The first player places their Starting Force in squares along the edge of the map that is their Starting Area, then places up to 3 terrain markers in squares outside of any Starting Area. Then, the second player does the same thing.
- Start the game! Any effects that happen at the start of the game occur now, then the first player takes their first turn.
Inherent Abilities
Inherent abilities are the things every character can normally do on a turn. These are also listed on the Powers and Abilities Card:
- A basic MOVE, CLOSE, or RANGE action.
- Carry another character: Before beginning movement, you may choose one adjacent friendly character of smaller size. Immediately after moving, place the chosen character (adjacent if possible); it cannot take a non-FREE action this turn. To carry, neither character can be holding an object, or pick one up.
- Pick up, put down, or perform a CLOSE or RANGE Terrain Action with an object (NOTE: As they represent larger/heavier items, only characters with certain standard powers can pick up, put down, or perform a CLOSE or RANGE attack with terrain markers that are not objects).
- Destroy a terrain marker (including an object) or printed blocking terrain/walls using a CLOSE or RANGE Destroy Action.
Powers and Abilities Reference
This reference includes only powers and abilities found on the characters and bystanders in this set. After players expand their collection to include additional characters, they should reference the separate, trifold Powers and Abilities Card.
Editor's note: several entries below contain colored dial-symbol icons (for example the Range/Bolt icons in Pulse Wave and the movement icons in Leap/Climb and Phasing/Teleport). The text layer of the source does not carry those glyphs, so they appear here as "(icons)" and should be read against the printed card.
Speed
- Flurry (CLOSE): Make up to two close attacks.
- Leap/Climb (icons): When this character moves, they can change elevation without using transition squares, can move through outdoor blocking terrain, and can move through squares occupied by or adjacent to opposing characters without stopping. They still must break away.
- Phasing/Teleport (MOVE, icons): For this action, this character automatically breaks away, can change elevation without stopping movement, can move through blocking terrain but can't end movement in blocking terrain, and can move through squares adjacent to or occupied by opposing characters without stopping. Move.
- Charge (POWER): Halve speed. Move, then CLOSE as FREE -or- make a close attack.
- Mind Control (CLOSE/RANGE): Minimum range 4. Make a close/range attack. Instead of normal damage, each hit character halves speed and becomes friendly to your force and, one at a time, may in either order: Move and/or make an attack, then it reverts forces.
- Plasticity: This character breaks away on any result except a 1. Adjacent opposing characters that can't use Phasing/Teleport, Plasticity, Leap/Climb, or Hypersonic Speed only break away on a 6.
- Sidestep (FREE): Move up to 2 squares.
- Hypersonic Speed (POWER): Halve range, (icons). (For this action, this character halves range, can't carry, and can move through squares occupied by or adjacent to opposing character without stopping. They still must break away.) Move, then make an attack, then move up to your speed value minus the number of squares just moved.
- Stealth: When it's not your turn, hindered lines of fire drawn to this character by non-adjacent characters are blocked.
Attack
- Energy Explosion (RANGE): Make a range attack and all other characters adjacent to an original target also become targets. Hit characters are dealt 2 damage instead of normal damage.
- Pulse Wave (RANGE): Range 4, (icons). Other characters within range can't use powers or abilities (for this action). Make a range attack targeting all other characters within range and line of fire, including at least one opposing character, using printed defense values for each targeted character. Each hit character is dealt 1 damage instead of normal damage.
- Quake (CLOSE: KNOCKBACK): Destroy all terrain markers and printed pieces of blocking terrain within 1 square, then make a close attack targeting all adjacent opposing characters. Each hit character is dealt 2 damage instead of normal damage.
- Super Strength: KNOCKBACK during close attacks. This character can pick up, hold and put down non-object terrain markers (excluding Smoke, Debris or Water markers).
- Incapacitate: When this character makes an attack, instead of normal damage, you may give each hit character an action token.
- Penetrating/Psychic Blast: Damage dealt by this character's range attacks is penetrating damage.
- Smoke Cloud (POWER): Minimum range 4. Generate up to 6 Smoke terrain markers, one at a time, in distinct squares within range. Other than the first, each marker must be adjacent to at least one other, and at least one must be within line of fire. Opposing characters occupying one or more of these markers modify attack -1. At the beginning of your next turn, (even if this is lost) remove them.
- Precision Strike: Damage from this character's attacks can't be reduced below 1. // When this character attacks, opposing characters decrease their Super Senses result by -1.
Defense
- Super Senses: When this character would be hit, you may roll a d6. 5–6: Evade.
- Toughness: Reduce damage taken by 1.
- Combat Reflexes: Modify defense +2 against close attacks.
- Energy Shield/Deflection: Modify defense +2 against range attacks.
- Mastermind: When this character would be hit by an opponent's attack that deals damage, you may choose an adjacent friendly character that wouldn't be hit by this attack and that is less points or shares a keyword. That friendly character instead becomes a hit target of the attack, even if it's already a target (or would be an illegal target).
- Willpower: At the beginning of your turn, you may roll a d6. 5–6: Remove an action token from this character.
- Invincible: Reduce damage taken by 2. // Can reduce penetrating damage.
- Impervious: Reduce damage taken by 2. // When this character is dealt damage from an attack, you may roll a d6. 5–6: Damage taken is reduced to 0.
- Regeneration (POWER): Roll a d6. Heal a number of clicks equal to half the result (rounded up).
Damage
- Ranged Combat Expert: This character modifies attack and damage +1 while making a range attack or using RANGE destroy.
- Support (POWER): Choose an adjacent friendly character and roll a d6. Heal that character a number of clicks equal to half the result (rounded up).
- Exploit Weakness: Damage dealt by this character's close attacks is penetrating damage.
- Probability Control: Once per turn, you may reroll a target character's attack roll or break away roll. A targeted character must be within range and line of fire, minimum range 4.
- Shape Change: When this character would be targeted by an attack, you may roll a d6. 5–6: This character can't be targeted by the attacker this turn and the attacker may choose a different target instead.
- Close Combat Expert: This character modifies attack and damage +1 while making a close attack or using CLOSE destroy.
- Empower: Adjacent friendly characters modify damage +1 while making close attacks or using CLOSE destroy.
- Perplex (FREE): Minimum range 4. Choose a target character within range and line of fire. Modify one of that character's combat values other than damage +1 or -1 until your next turn.
- Outwit (FREE): Minimum range 4. Choose a target opposing character within range and line of fire and then choose one: any standard power -or- a special power printed on the target's card. The target can't use the chosen power until your next turn.
Keyphrase Abilities
| Keyphrase | Symbol | Description |
|---|---|---|
| Flight | (flight icon) | (Movement icons):1 (When this character moves, they can do not have to end their movement when crossing a boundary of Elevated terrain., can move through outdoor blocking terrain, and can move through squares occupied by or adjacent to opposing characters without stopping. They still must break away. This character can use the Carry ability to carry up to 1 characters, including characters that are the same size). [Printed text reproduced as-is, including the "they can do not have to" and "up to 1 characters" wording.] |
Inherent Abilities
| Ability | Description |
|---|---|
| Carry | Before beginning movement, you may choose one adjacent friendly character of smaller size. Immediately after moving, place the chosen character adjacent if possible and it can't be given a non-FREE action this turn. To carry, neither character can be holding an object or pick one up. |