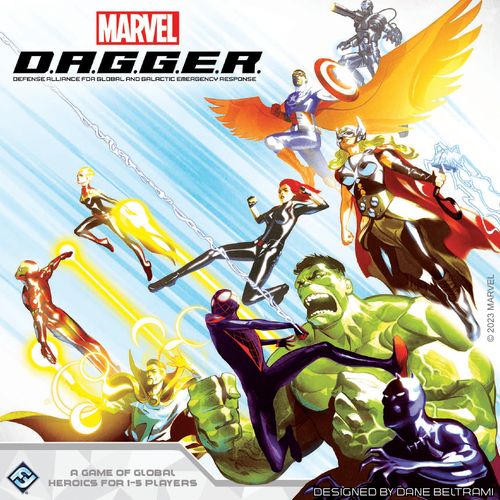
Marvel D.A.G.G.E.R.
Marvel D.A.G.G.E.R. Rulebook
Table of Contents
Table of Contents
Components
- 1 Game Board
- 20 Hero Standees
- 4 Nemesis Standees
- 60 Enemy Standees
- 6 Aspect Stands
- 1 Nemesis Stand
- 13 Plastic Stands
- 5 Hero Dice
- 10 Double-Sided Hero Sheets
- 4 Nemesis Sheets
- 6 Aspect Sheets
- 10 Team-Up Cards
- 40 Support Cards
- 28 Enemy Cards
- 42 Event Cards
- 5 Reference Cards
- 20 Hero Mission Cards
- 20 Side Mission Cards
- 12 Nemesis Mission Cards
- 6 First Strike Mission Cards
- 1 Threat Tracker
- 1 Threat Target Tracker
- 1 Team-Up Tracker
- 30 Aspect Tokens
- 20 Double-Sided Combo Tokens
- 44 Progress Tokens
- 41 Damage Tokens
- 5 Mission Tokens
- 5 Overrun Tokens
- 1 First Player Token
Setup
To set up a game of Marvel D.A.G.G.E.R., perform the following steps in order:
-
Choose Heroes: Each player chooses a hero sheet. Each hero sheet represents a pair of heroes that share several types of hero cards. Each player chooses one side of the sheet to play, and places it in their play area with the chosen hero faceup.
Then, each player takes the components that match their hero's art and places them as indicated in the diagram below:
A. One hero standee.
B. One team-up card with the chosen hero's portrait in the lower-right or lower-left corner. Place it with the grayed-out side faceup.
C. Two support cards with card backs that match both heroes from the chosen hero sheet. Choose one card to place faceup and place the other facedown.
D. One support card with a card back that matches only the chosen hero. Place it facedown.
E. One hero mission card with a card back that matches the chosen hero. Keep it facedown in your play area for use later in the game.
-
Choose Aspect: Each player chooses an aspect (see the sidebar on the next page for a summary of each). Then, each player takes the following aspect-specific components and places them as indicated in the diagram below:
F. One aspect sheet. Place the shattered side facedown (the shattered side can be identified by the word "shattered" in the black title bar).
G. One boosted (colored border) and two standard (gray border) aspect tokens that have the chosen aspect's icon.
H. One aspect stand that matches the color of the chosen aspect sheet.
Each player places their aspect sheet near their hero sheet along with two standard aspect tokens and their boosted aspect token. Then, the player attaches their aspect's base to their hero's standee.
Note For Two-Player and Solo Games: For games with only two heroes (including solo players using two heroes), each hero begins the game with an additional standard aspect token, for a total of one boosted and three standard aspect tokens.
-
Unfold the game board and place it in the center of the play area. Then, place the threat tracker and team-up tracker on space "0" of their respective tracks. Place the Bifrost token on its slot on the Asgard space.
Aspects
Each of the game's aspects is identified by a unique color and symbol, and is represented by a double-sided sheet that contains both standard and specialized actions as well as a unique passive ability. Any hero can be played with any aspect, but for the players' first game, we recommend choosing Aggression and Justice as two of your aspects.
Aggression — This aspect excels at going on the offensive. The Aggression aspect's move and fight actions allow the hero to deal extra damage.
Protection — This aspect excels at protecting allies with a mighty defense. The Protection aspect's move and rest actions allow the hero to rescue and heal allies.
Justice — This aspect excels at disrupting the nemesis. The Justice aspect's fight and defy actions allow the hero to progress missions quickly and efficiently.
Leadership — This aspect excels at providing assistance to the team. The Leadership aspect has special rest and defy actions and can allow other heroes to take additional actions.
Vigilance — This aspect excels at planning ahead and orchestrating combos. The Vigilance aspect has unique move and rest actions and specializes in coordinating team members.
Determination — This aspect excels at succeeding in the face of difficult odds. The Determination aspect's fight and defy actions grant additional dice and rerolls under certain conditions.
Fundamental Concepts
This section provides foundational context that assists players as they learn the game.
Heroes
Each player controls a hero that is represented by a hero sheet, a team-up ability, and several support cards. A hero sheet contains that hero's health value, their three basic attributes (attack, defiance, and tactic), and their unique hero abilities.
Hero vs. Player
For the remainder of this rulebook, the term "hero" is used to refer to both a hero and the player playing them.
Aspects
There are six aspects, each of which represents a hero's specialization and helps to define their role on the team. Each aspect may be paired with any hero and some aspects will naturally be better at performing certain tasks than others.
An aspect is represented by an aspect sheet which provides a hero with their basic actions: move, fight, defy, and rest. Two of these actions are augmented in a special way unique to that aspect, as indicated by a colored border that matches that aspect's color.
Each aspect also has a passive identity ability on the right of the sheet that provides a hero with a unique effect that is active throughout the game.
The Nemesis
The nemesis is the main antagonist of the game whom the heroes are trying to stop. Each nemesis has its own sheet, standee, enemy card, and missions. The heroes' primary goal is to complete all of the nemesis missions and then defeat the nemesis during a final showdown.
Nemesis Missions
The backbone of the game's mission structure is the stack created during setup that contains the first strike card and the nemesis mission cards. Faceup mission cards are ACTIVE MISSIONS. The first active mission is always the first strike card, and it must be completed before the nemesis missions become active.
The next mission in the nemesis mission deck becomes active as the previous mission is completed. A mission is either passed by gaining enough progress, or failed by gaining too much threat. Players may wish to place the threat target tracker on the threat track as a reminder for when the active nemesis mission would fail. After all nemesis missions have been completed (whether they are passed or failed), the heroes and nemesis face off in a final showdown. Missions and the final showdown are described in more detail later.
Game Board
The game board represents a map of the world and is made up of a series of connected spaces. Most spaces are identified by a name and a number, but the board also contains ocean spaces and spaces called BASES, which contain an image of a special location. Two spaces that are connected by a line are adjacent to each other. This includes the spaces connected by the A, B, and C lines; for example, the A line shows that North America (1) is adjacent to East Asia (14).
Threat Track
Threat is tracked on the game board. If threat reaches a certain threshold (which varies depending on the active nemesis mission or first strike card), the heroes fail the active nemesis mission, making the game harder for them.
Team-Up Track
Team-Up is tracked on the game board. Team-up is a resource that the heroes can spend to activate their team-up abilities (see "Team-Up Abilities" on page 17).
Regions
The game board is split into distinct regions. The spaces of a single region, including its base, all share a color. Many game effects, such as events, hero abilities, and enemy movement, may refer to these four regions.
The Iliad belongs to whichever region is associated with the numbered space where it is currently placed. Atlantis and all ocean spaces are part of the ocean region. Asgard does not belong to a region.
Asgard and the Bifrost
Asgard is a special space that is inaccessible at the beginning of the game. It serves as the home of the Bifrost—a rainbow bridge that allows those who pass through it passage to any location of their choosing. Its associated Bifrost token begins the game placed on the Bifrost token slot.
Certain hero abilities or game effects allow heroes or enemies to move to the Asgard space or move the Bifrost token to another space. The Asgard space is considered to be adjacent to the space that contains the Bifrost token. Asgard is not considered to be a base.
When a hero performs a rest action on Asgard, they may move the Bifrost token to any space, as per the ability on the Asgard space on the board.
Attribute Tests
At any point during the game, a hero may be called upon by various game effects to perform attribute tests. Each hero has three attributes—ATTACK, DEFIANCE, and TACTIC. To test an attribute, a hero rolls a number of dice equal to that attribute's value on their hero sheet. They gain a success for each die icon that matches the tested attribute. A WILD result counts as a success for any test. The hero then uses their successes as indicated by the test.
The hero tests their ATTACK attribute. They roll 3 dice and obtain 3 successes.
Additionally, if a hero rolls any WILD results during an attribute test (regardless of the tested attribute), they may resolve their region's D.A.G.G.E.R. effect.
D.A.G.G.E.R. Effects
As the heroes perform attribute tests, D.A.G.G.E.R. may provide them with operational support. After a hero resolves a test, for each WILD result, that hero may resolve a D.A.G.G.E.R. effect that is associated with a base in their region.
A base's D.A.G.G.E.R. effect is displayed on its space on the game board and can be used to affect any enemy or hero on the game board, as appropriate.
If a hero's region contains the Iliad and thus contains multiple bases, they choose which base's effect to resolve for each WILD result. If the hero resolving the test is on Atlantis or an ocean space, they resolve Atlantis's D.A.G.G.E.R. effect.
If the hero is on Asgard or a space in a region with only overrun bases, they cannot resolve D.A.G.G.E.R. effects (see "Overrun" on page 19).
Warning Icon
Some components have warning icons. Read these components immediately, as they may have effects that need to be resolved or contain information vital to playing the game.
Playing the Game
A game of Marvel D.A.G.G.E.R. is played over a series of rounds. Each round consists of two phases, which repeat until the Final Showdown has been completed or until the heroes lose the game.
-
Hero Phase — During this phase, the heroes take turns performing actions on the game board.
-
Nemesis Phase — During this phase, an event is resolved, and enemies move, attack, and use powers against the heroes.
Hero Phase
During the hero phase, each hero takes a turn, beginning with the first player and proceeding clockwise. Each turn consists of a hero spending an aspect token to perform a single action. After each hero has taken a turn, play returns to the first player and continues in the same order until each hero has spent all of their aspect tokens.
Each hero begins the game with two standard aspect tokens and one boosted aspect token.
Note: Each hero in a two-player or solo game receives one additional standard aspect token during setup.
A hero performs an action by placing an aspect token on an aspect token slot that is available to them. There are aspect token slots on a variety of cards and components as detailed in the following sections.
Each slot can only contain a single aspect token. If there is already an aspect token on a slot, another aspect token cannot be placed on the same slot. When a hero places an aspect token, they resolve the effects that are associated with that slot. Some actions provide additional benefits if a hero spends a boosted aspect token (see "Boosted Actions" on page 16). These abilities are prefaced with the "BOOST:" keyword.
Heroes cannot pass or save their aspect tokens for later. They must perform an action when it is their turn if they have any remaining aspect tokens.
At the start of each hero phase, the heroes return all of their spent aspect tokens to their play area, which can then be spent to perform actions in the new hero phase. Additionally, the first player passes the first player token clockwise to the next hero.
Aspect Actions
The aspect sheet provides a hero with their primary actions. When a hero places an aspect token on a slot on their sheet, they resolve the text of the associated aspect action. Each of these actions has two aspect token slots, which means that each hero can perform that aspect action up to twice per hero phase. Aspect actions allow the heroes to move, fight, defy, and rest.
To perform a fight action, a hero places an aspect token on an empty "Fight" action slot on their aspect sheet.
Move
The move action allows a hero to move around the game board. To resolve a move action, the hero moves their standee from the space it occupies to an adjacent space (adjacent spaces are connected by dotted lines). They can do this a number of times up to the MOVE value presented by the "Move" action on their aspect sheet.
A hero in Wakanda that resolves "MOVE 2" can move up to two spaces.
Fight
The fight action allows a hero to attack an enemy in their space. To resolve an attack, the hero tests their attack value. For each success, the attacked enemy suffers 1 damage (see "Damage and Defeat" on page 19).
The hero makes an attack. They roll 3 dice and obtain 3 successes, dealing 3 damage to an enemy.
Defy
The defy action allows a hero to place progress on a mission that requires a defy action. To defy a mission, the hero tests their defiance value. Then, they apply their successes as described by the mission they are defying (see "Missions" on page 18).
The hero tests their DEFIANCE attribute. They roll 4 dice and obtain 4 successes.
Rest
The rest action allows a hero to recover damage and charge support cards. To rest, a hero tests their tactic value. They add the number of successes to automatic successes granted by their rest action and split the total between recover and charge effects as they see fit.
To recover damage, the hero removes a number of damage tokens from their hero sheet equal to the value of the RECOVER effect (see "Damage and Defeat" on page 19).
To charge support cards, the hero distributes a number of progress equal to the value of the CHARGE effect among their exhausted support cards (see "Support Cards" on page 16).
Hero Abilities
Each hero sheet has abilities. If an ability has an aspect token slot, it is an action. When a hero places an aspect token on a hero sheet slot, they resolve that action.
If a hero ability does not have an aspect token slot, it is not an action. These abilities are either always active or can be triggered when the condition in the ability's text is satisfied.
Some abilities on hero sheets have a PRIMED or EMPOWERED icon. These abilities cannot be resolved without a primed or empowered token (see "Combo Abilities" on page 17).
D.A.G.G.E.R. Actions
If a hero is on a base, they can place an aspect token on that base's aspect token slot to perform a D.A.G.G.E.R. action. They resolve that base's D.A.G.G.E.R. effect and may place their hero mission into the hero mission slot if no mission is currently present (see "Hero Missions" on page 18).
Normally, a base is OPERATIONAL. However, if there is an overrun token on the base, it is OVERRUN (see "Overrun" on page 19). D.A.G.G.E.R. actions can still be performed at overrun bases if called for by a mission, but overrun bases cannot be used to resolve D.A.G.G.E.R. effects or place hero missions into play.
Note: Asgard is a not a base and cannot be overrun.
End of the Hero Phase
Once the heroes have spent all of their aspect tokens, the game continues to the nemesis phase. All aspect tokens must be spent before the hero phase ends.
Nemesis Phase
After all of the hero turns in the hero phase are complete, the nemesis phase begins. To resolve the nemesis phase, perform these steps, which are described in the following sections:
- Advance Threat
- Check Nemesis Mission
- Resolve Event Card
Step 1—Advance Threat
As threat advances, it can cause the heroes to fail the top mission of the nemesis mission deck. To keep threat low, it is important for heroes to defeat enemies and prevent bases from being overrun.
During this step, threat advances by:
- The THREAT value on the nemesis sheet
- One for each non-nemesis enemy in play
- One for each overrun base (see "Overrun" on page 19)
- The THREAT value of any side or hero missions that have a threat value
As threat advances, move the threat token on the threat track by the appropriate amount.
Threat advances by 5. Specifically, it advances by 3 for the nemesis sheet value and 1 for each of the 2 enemies in play.
Step 2—Check Nemesis Mission
At the start of this step, check the top card of the nemesis mission deck to determine whether or not it is completed. It can be completed in two ways—pass or fail—as described below. If that mission was neither passed nor failed, it is not completed this round.
First, check the mission's progress. If the number of progress tokens equals or exceeds the progress value on the mission, the heroes have passed that mission. A mission's progress value is printed in the upper-right corner of its card. If that number is accompanied by a per player icon, its progress value is equal to the number on the card multiplied by the number of heroes playing.
There is a total of 8 progress on this mission in a two-player game—this mission was passed.
If the passed mission was the first strike, remove it from the game, revealing the first nemesis mission. Otherwise, flip the completed mission and slide it under the top of the game board so that only the effect with the green check mark is showing, and resolve that effect as instructed.
If the mission was not passed, check threat. If the amount of threat on the threat track equals or exceeds the mission's threat value, the mission is failed.
If the failed mission was a first strike card, remove it from the game, revealing the first nemesis mission. Otherwise, if it was a nemesis mission, flip it and slide it under the top of the game board so only the effect with the red X is showing, and resolve that effect as instructed.
Additionally, each time a first strike or nemesis mission is completed—whether it was passed or failed—reset the threat track by moving the threat token back to "0." If the mission was a nemesis mission, also resolve the SPAWN SIDE MISSION icon present on the slot at the top of the game board (see "Missions" on page 18) by spawning a new side mission.
Step 3—Resolve Event Card
During this step, draw the top card of the event deck and resolve it. If there are no event cards in the event card deck at the start of this step, the heroes lose the game. To resolve an event card, perform the following steps in order.
A—Resolve Event
Read the ability text of the event card and resolve its effect, making any choices as instructed by the card.
B—Resolve Event Icons
During this step, resolve each event icon on the left side of the event card, from top to bottom. Event icons are described below:
-
Resolve Ongoing Effects. Resolve the ongoing mission effects found at the bottom of all active missions that have them, if any (see "Missions" on page 18).
Ongoing Mission Effect: Each hero suffers 1 damage.
-
Spawn Side Mission. Draw the top card from the side mission deck and place it faceup on an empty side mission slot. Side missions have three slots, represented by green, purple, and blue exclamation points (see "Missions" on page 18). If there is not an empty slot, do not draw a card; instead, advance threat by one plus the number of heroes playing the game.
-
Nemesis Ability. Resolve the ability on the nemesis sheet that matches the icon.
C—Activate Enemies
During this step, resolve the activate enemies indicator in the lower-left corner of the event card.
Each enemy on the board activates in the following order: rank 1, rank 2, rank 3, nemesis-specific, Elite, Nemesis
If there are multiple enemies of the same rank, the heroes choose the order in which those enemies activate.
When an enemy activates, it resolves only the first action that it is able to resolve from the following list, unless another effect specifies otherwise:
- Attack a hero in its space
- Overrun a base in its space
- Move
Each of these actions is described in detail in the following sections:
A. Attack a Hero: If an enemy is in a space with a hero, it attacks that hero. If the enemy is in a space with multiple heroes, the heroes choose which hero is attacked.
When a hero is attacked, they suffer damage equal to the power value on the enemy's card (see "Damage and Defeat" on page 19).
B. Overrun a Base: If an enemy is on an operational base without a hero, it attacks that base, causing that base to become overrun (see "Overrun" on page 19). When a base is overrun, an overrun token is placed on the text of that base's action.
C. Move: If an enemy cannot attack a hero or overrun a base in its space, it moves one space toward the nearest operational base in its region. If multiple bases in its region are tied as nearest, the first player chooses which base the enemy moves toward.
If there is no operational base in an enemy's space or region, it moves toward the nearest operational base in another region instead.
The Nemesis
The nemesis follows the same rules as standard enemy activation with the following exceptions: if the nemesis attacks a hero, it attacks all heroes in its space, not just one. If the nemesis is stunned (see "Damage and Defeat" on page 19), the nemesis cannot move, attack, or overrun a base. Instead, it removes its stun token and ends its activation.
D—Spawn Enemies
During this step, resolve the spawn enemy icons on the bottom of the current event card. For each spawn enemy icon that shows pips equal to or less than the number of heroes, place an enemy of the indicated rank in the indicated space. If all enemies of that rank are already on the board, no enemy of that rank is placed. Instead, advance threat by that enemy's rank; for a nemesis-specific enemy, advance threat by the threat value on the nemesis sheet.
Note: Not all event cards spawn enemies.
Finally, discard the event card and proceed to the next hero phase.
Winning the Game
The heroes win the game by completing the three nemesis missions and then defeating the nemesis in the final showdown. During the nemesis phase, if the final nemesis mission is completed, the nemesis sheet is flipped over and the final showdown begins immediately.
Each nemesis mission that was passed makes the final showdown easier, and each nemesis mission that was failed makes the final showdown harder.
All other missions and enemies remain in play and continue to function as normal during the final showdown.
The Final Showdown
After the nemesis sheet is flipped to its final showdown side, discard the stun token and all damage tokens from the nemesis. All other tokens that were on the nemesis sheet before it was flipped remain, unless otherwise specified.
Then, heroes read the nemesis sheet and follow its unique final showdown rules until the end of the game.
Completed Mission Effects
At the start of the final showdown, the heroes should check their completed missions for any effects that trigger at the start of the final showdown.
Suppression Tokens
Some effects, mostly found on passed nemesis missions, allow the heroes to place a suppression token onto the nemesis sheet. Suppression tokens have an effect on the nemesis during the final showdown. Each nemesis sheet has rules for how to resolve these tokens.
Nemesis Activation
The reverse side of each nemesis sheet has new, unique rules that govern its activation during the final showdown. These rules replace the normal activation rules for the nemesis.
Winning and Losing the Game
If the heroes defeat the nemesis by dealing enough damage to reduce its health to zero, they win the game.
If threat reaches 20, if all five bases are overrun, if an event is unable to be drawn, or if all heroes are defeated while the shattered side of their aspect sheet is faceup (see "Damage and Defeat" on page 19), the nemesis wins the game, and the heroes lose the game.
Additional Rules
This section describes additional rules that are required to play the game.
Boosted Actions
Some actions—typically aspect actions—can be boosted. These effects are prefaced by the keyword "BOOST."
BOOST: If this action defeats an enemy, place 2 progress tokens on any mission.
If a hero spends a boosted aspect token to resolve an action, that hero resolves the action's standard effect as well as its Boost effect. Heroes can still resolve the effects of an action that can be boosted without spending a boosted aspect token, but do not resolve the "Boost" portion of the ability. Likewise, a hero may use a boosted aspect token to resolve an ability that does not have a "Boost" effect.
Support Cards
Each hero begins the game with two support cards that provide them with additional abilities they can resolve according to the text on the cards. Each support card is either ready (faceup) or exhausted (facedown). A ready support card is available for a hero to use. An exhausted support card cannot be used until it is ready.
If an effect allows a hero to CHARGE, they place progress tokens on one of their exhausted support cards equal to the CHARGE value of the effect.
If an exhausted support card has a number of progress tokens on it equal to the number displayed on the back of the card, the player flips the card faceup and discards all progress tokens from it.
Hero-Specific Support Cards
Each hero begins the game with one hero-specific support card. This card begins the game facedown and cannot be charged. After a hero's hero mission is completed (see "Missions" on page 18) that hero will be instructed to gain their hero-specific support card. It is then flipped faceup and is available to be used for the remainder of the game and cannot be exhausted by any game effects.
Empowered and Primed
Some abilities cause heroes to become EMPOWERED or enemies to become PRIMED, opening up several new strategic options for the heroes, including the use of special combo abilities. When a hero becomes empowered, an empowered token is placed on their hero sheet. When an enemy becomes primed, a primed token is placed near their standee on the game board.
If a hero would become empowered but already has an empowered token, they do not gain a second token. If an enemy would become primed but already has a primed token, they do not place a second token near that enemy.
Spending empowered and primed tokens is described in the following sections. Spending a token to resolve these effects is always optional. Heroes may always opt to save the tokens to use at a later time.
Empowered
After an empowered hero rolls a die, they can spend their empowered token to add one success to their result. Alternatively, a hero can spend an empowered token to resolve certain combo abilities and advance the team-up track (see "Team-Up Abilities" on page 17).
Primed
After a hero attacks a primed enemy, they can discard that enemy's primed token to add one success to their result. Alternatively, a hero can discard a primed token from an enemy to resolve certain combo abilities and advance the team-up track (see "Team-Up Abilities" on page 17).
Combo Abilities
Combo abilities are unique abilities that are identified by a blue border and star icon in the upper-left corner.
FINISHER — EMPOWERED: Perform your fight action twice; add 1 additional success for each WILD result.
Like other hero abilities, some combo abilities are actions and require an aspect token to be placed on their slot to be performed. Other combo abilities can be triggered when certain conditions are met, as described by the ability's text.
Whether a combo ability is an action or not, all combo abilities require a primed or empowered token to be spent, as indicated by the "PRIMED:" or "EMPOWERED:" keywords in the text of the ability itself. Additionally, each time a combo ability is resolved, advance the team-up track by one.
To resolve an empowered combo ability, a hero must spend an empowered token from their hero sheet. Then, they can resolve the ability and advance the team-up track by one.
To resolve a primed combo ability, a hero must discard a primed token from each enemy that the ability affects. Then, they can resolve the ability and advance the team-up track by one.
If a hero is not empowered, a combo ability that requires that hero to be empowered cannot be used. Similarly, if an enemy is not primed, a combo ability that requires that enemy to be primed cannot be used.
Nearby
Many game effects use the term "nearby." Nearby means that the space, hero, or enemy in question is in the same space or an adjacent space as the subject of the effect. For example, an enemy is nearby a hero if it is in that hero's space or an adjacent space.
A hero, enemy, or space is not nearby to itself.
Team-Up Abilities
The game board has a team-up track, which represents the heroes' training, synergy, and camaraderie. The team-up track is a shared resource that heroes can spend to resolve powerful team-up effects.
The team-up tracker starts on "0" and advances as the heroes resolve combo abilities and complete side missions.
Players can spend team-up at any time to ready their team-up cards, which can then be used as described on the card. To ready a team-up card, the hero reduces the team-up track by the number on that team-up card's back and flips it to its ready side. Using the ability on the team-up card's ready side exhausts the card once more, and team-up would need to be spent again to resolve the ability additional times.
The heroes spend 5 team-up to ready the "S.H.I.E.L.D. Backup" team-up ability.
Unless otherwise specified, team-up may be spent and team-up abilities may be used at any time, even to interrupt other game effects.
Missions
Each mission card describes how the heroes can place progress on that mission. If a mission has a progress value, it must have a number of progress tokens that equals or exceed its progress value before it is passed.
If a mission's progress value is accompanied by a per player icon, its progress value is equal to the number on the card times the number of heroes playing.
In a three-player game, this mission card must have 12 progress tokens on it before it can be completed.
If a mission's progress value shows an asterisk (instead of a number), that mission is completed when that card's condition is met (as described by its text).
There are three types of missions: side missions, hero missions, and nemesis missions, each of which have some unique rules which are described in the following sections.
Side Missions
Each game begins with one active side mission. Additional side missions are revealed from the side mission deck each time a completed nemesis mission is placed in a slot beneath the top of the board, or when an event card instructs the heroes to do so.
When a side mission is revealed, place the top card of the side mission deck on an empty side mission slot (green, purple, or blue) on the game board. If the mission indicates a particular space on the game board, place that slot's mission token on that space as a reminder of where that mission can be progressed.
If there is not an empty slot for an additional side mission, do not draw a card; instead advance threat by one plus the number of heroes playing the game.
Some side missions pit the heroes against elite enemies. When an elite enemy side mission is put into play, place that elite enemy's standee on the space indicated in the lower-right corner of the mission card.
A side mission is completed immediately when it has enough progress tokens on it, when its condition is met, or—if it is an elite enemy—when that enemy is defeated. When a side mission is completed, the team-up track is advanced by a number of spaces equal to the team-up value in the upper-left corner of the mission card (or lower-left corner for an elite enemy). Then, the mission card is discarded.
Hero Missions
Hero missions begin the game in a hero's play area. When a hero performs a D.A.G.G.E.R. action at a base, they may also place their hero mission faceup in the active hero mission slot (yellow) if the slot is empty.
Like side missions, a hero mission is completed immediately when there are enough progress tokens on it or its condition is met. When a hero mission is completed, it is discarded and the hero to which that mission corresponds gains their hero-specific support card, allowing it to be used.
After completing the active hero mission, another hero can put their hero mission into play by performing a D.A.G.G.E.R. action. Even though each hero mission corresponds to a specific hero, any hero can help complete any hero mission, unless otherwise specified.
Nemesis Missions and the First Strike Mission
There are three missions that make up the nemesis mission deck and are unique to the nemesis. In order to complete these missions, players must first complete the first strike mission, which begins the game as the top card of the nemesis mission deck.
Unlike side and hero missions, nemesis missions are only completed during the nemesis phase and can be failed as threat advances (see "Nemesis Phase" on page 13).
Damage and Defeat
Enemies and heroes can suffer damage and be defeated. An enemy or hero is defeated when they have a number of damage tokens that equals or exceeds their health value. Standard enemies, nemeses, and heroes have different rules following their defeats.
Standard Enemies
Each standard enemy has a health value in the upper-left corner of its enemy card.
When an enemy suffers damage, place damage tokens equal to the damage dealt near that enemy's standee. If an enemy ever has a number of damage tokens near its standee that equals or exceeds its health value, that enemy is defeated, and its standee is removed from the game board.
Nemesis
Each nemesis has a health value on its sheet (below its threat value).
When the nemesis suffers damage, place a damage token on its sheet. If the nemesis ever has a number of damage tokens that equals or exceeds its health value, the nemesis is defeated; the stun token is placed on the nemesis sheet. The nemesis can continue to suffer damage beyond this point (though all damage will be recovered during the nemesis phase). Additionally, when the stun token is placed on the nemesis, the active player may choose a space adjacent to the nemesis and move the nemesis to that space.
When a stunned nemesis activates, it cannot attack, overrun a location, or move normally. Instead, it removes its stun token and all of its damage tokens and ends its activation.
During the final showdown, the nemesis's health value is accompanied by a per player icon, indicating that its health value is equal to the printed value times the number of heroes in the game.
If the nemesis is defeated during the final showdown, the heroes win the game (see "Winning the Game" on page 15).
Heroes
Each hero has a health value in the upper-left corner of their hero sheet. They cannot have damage placed on their hero sheet in excess of this value (damage in excess of their health value is returned to the supply).
When a hero suffers damage, place damage tokens equal to the damage taken on their hero sheet. If a hero ever has a number of damage tokens that equals their health value, that hero is defeated.
When a hero is defeated, perform the following steps in order:
- Advance the threat track by the number of heroes in the game (including the defeated hero).
- Return that hero's standee, mission card, and any hero-specific support cards they have unlocked to the box (shared support cards remain as they are).
- Remove all tokens from that hero's sheet.
- Flip that hero's aspect sheet to its shattered side and hero sheet to its other side.
- Ready the new hero's team-up card for free (ignoring the team-up track).
At the start of the next hero phase, a new hero takes up the mantle of the fallen hero. Place the new hero's standee on any base.
If this new hero is defeated, the player does not choose another hero to play. Per player effects still count the eliminated player, and the remaining heroes have until the end of the next hero phase to begin the final showdown. Otherwise, they lose the game.
Overrun
When an enemy attacks a base, it becomes overrun. When a base is overrun, an overrun token is placed on that base.
While a base is overrun, its D.A.G.G.E.R. effect cannot be resolved and hero missions cannot be put into play there. Its D.A.G.G.E.R. action, however, can still be resolved if a mission calls for it.
If all bases are overrun, the heroes lose the game.
Variant Rules
This section contains several rule variants for players who wish to customize their gameplay.
Two-Player Games
When playing the game using only two heroes, each hero takes an additional standard aspect token during setup. Each hero will have four actions per hero phase instead of three.
Solo Game
Players who wish to play the game solo may do so by controlling two heroes and following the rules for a two-player game listed above.
Variable Difficulty
Players may optionally wish to make the game more or less challenging.
To decrease the difficulty of the game, treat all enemy spawn and per player icons as if there were one less player. Enemy spawns for two-player games are not adjusted.
To increase the difficulty of the game, treat all enemy spawn and per player icons as if there were one additional player. Enemy spawns for five-player games are not adjusted.