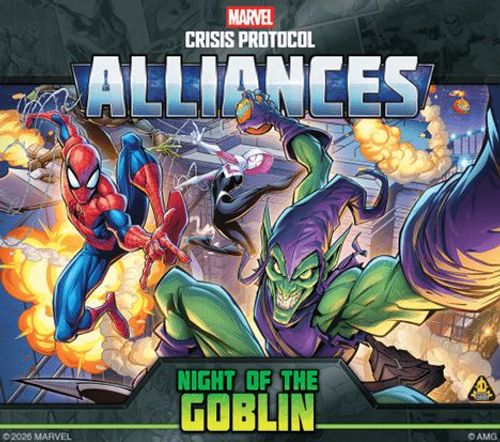
Marvel: Crisis Protocol Alliances – Night of the Goblin
Marvel: Crisis Protocol Alliances – Night of the Goblin Rulebook
Table of Contents
Table of Contents
Game Overview
Marvel: Crisis Protocol—Alliances is an adventure miniatures board game for one to four players in which carefully chosen squads of characters clash against powerful foes and attempt to thwart their best-laid plans by completing various objectives.
Before the game, players work together to recruit a team of characters, creating a squad. In addition to choosing characters, players collectively select two Standard Stages and one Boss Battle, creating the overall mission for the game from their Marvel: Crisis Protocol—Alliances collections.
Once players have chosen a squad and a mission, they gather their miniatures and tokens, set up the first Stage, and jump right into the action!
Marvel: Crisis Protocol—Alliances is played over a number of Stages. The game ends when the Boss Battle is completed or when a Character is KO'd.
Rules Priority
This rulebook gives the core rules for Marvel: Crisis Protocol—Alliances. Some special rules, skills, or Level-Up Cards will contradict these rules. When they do, the special rule takes precedence over the rules found here.
Key Concepts
This section describes the fundamental concepts around the core gameplay of Marvel: Crisis Protocol—Alliances.
Stages and Missions
In Marvel: Crisis Protocol—Alliances, players work together to complete a Mission made up of three Stages. Each Stage includes a Stage Board, Stage Card(s), and tokens that characters interact with to meet their goals and achieve victory. There are two types of Stages: Standard Stages and Boss Battles.
Players create a Mission by combining two Standard Stages, one Boss Battle, and one Minion of each Type other than Mini-Boss (Brute, Goon, and Sentry). Each Marvel: Crisis Protocol—Alliances expansion includes a number of Boss Battle Cards, Stage Cards, and Minion options to choose from. These are interchangeable, creating nearly endless possibilities while setting up your games. Each Stage has its own board and special rules that detail how players complete the Stage. Each Minion has its own Enemy Stat Card detailing its rules. For more information on setting up Missions, see pg. 10.
Example Play Area
Marvel: Crisis Protocol—Alliances is played using a variety of components that will be described in detail in the following sections. The play area shown below is an example of a Stage that has been fully set up and is ready to be played. That play area consists of the following parts:
- Stage Board
- Stage Cards
- Objective Tokens
- Enemy Miniatures
- Character Miniatures
- Terrain Features
- Enemy Tracker
- Enemy Stat Cards
- Enemy Modifier Card
- Pitfall Card
- Character Dashboard
- Character Stat Cards
- Level-Up Cards
- Activation Tokens
- Dice
- Stage Tokens
- Other Tokens
- Rules Reference Card
Stage Boards and Stage Cards
Stage Boards are the battlefields where Characters face off against their foes and battle for victory. These boards can represent anything—from the streets of New York City to abandoned military facilities, and even brand-new worlds never seen before! Each Stage Board details the location of various objectives, Terrain, and Spaces that are used during the Stage. Stage Cards describe the Stage and detail its special rules.
Each spot on the Spawn Tracker contains the following information:
- Starting Enemy: If there is a symbol here, the Enemy indicated by that symbol is put in this spot at the start of the Stage.
- Number of Spawns: Indicates the number of dice rolled when Enemies Spawn.
Parts of a Stage Board
Stage Boards contain the following:
- Expansion Symbol: The board's expansion.
- Stage Symbol: The Symbol identifying the Stage. The same symbol appears on the matching Stage Card(s).
- Activation Tracker: A tracker for players to place Activated tokens, showing how many actions each Character has taken.
- Spawn Tracker: A tracker containing the Enemies that will Spawn during the game.
- Battlefield: Battlefields are made up of Spaces and indicate where Characters, Enemies, and Tokens are positioned at the start of the Stage.
Parts of a Stage Card
Stage Cards contain the following:
- Stage Name: The title of the Stage.
- Expansion Symbol: The card's expansion.
- Stage Symbol: The Symbol identifying the Stage. The same symbol appears on the matching Stage Board.
- Stage Description: A narrative description of what is happening during the Stage.
- Stage Rules: A list of instructions and special rules that apply to the Stage.
Each Space on the Battlefield is classified as one of the following types:
- Spawn Spaces: Outlined red. Where Enemies Spawn at the start of the Stage and during gameplay.
- Objective Spaces: Outlined blue. The location of Objective tokens at the start of the Stage.
- Terrain Spaces: Outlined yellow. Indicate where Terrain Features are set at the start of the Stage.
- Deployment Spaces: Outlined green. Where characters can Deploy at the start of the Stage.
- Blank Spaces: Nothing is set here at the start of the Stage.
Boss Battle Cards
Each Boss Battle includes Boss Battle Card(s) in addition to Stage Card(s). The Boss Battle Card(s) details the Boss's behavior.
Just like in the varied stories they are drawn from, each Character in Marvel: Crisis Protocol—Alliances brings with it a host of special abilities, referred to as attacks and skills. Each Character's attacks and skills are listed on its Stat Card.
Parts of a Boss Battle Card
Boss Battle Cards contain the following:
- Stage Name: The title of the Boss Battle Stage.
- Expansion Symbol: The card's expansion.
- Stage Symbol: The Symbol identifying the Stage. The same symbol appears on the matching Stage Board.
- Boss Behavior: Describes how the Boss activates and attacks during the Boss Battle.
Miniatures
Each Character and Enemy is represented by one or more highly detailed miniatures on a single base. Players assemble and paint their miniatures to create a collection that is truly their own.
Objects
Characters, Enemies, Terrain Features, and Mission tokens are referred to collectively as objects.
Enemy Stat Cards
Enemy Stat Cards contain all the information (known as Stats) players need to use that Enemy.
Parts of an Enemy Stat Card
Enemy Stat Cards contain the following:
- Expansion Symbol: The card's expansion.
- Enemy Name: The Enemy's name.
- Type: Indicates the type of Enemy. The types of enemies are Goon, Sentry, Brute, Mini-Boss, and Boss.
- Maximum Stamina: The amount of Damage the Enemy must suffer to be Knocked Out (KO'd).
- Speed: The maximum number of Spaces the Enemy can move.
- Attack Range: The maximum Range of the Enemy's attacks.
- Strength: The amount of Strength the Enemy contributes when Enemies Attack.
- Defense: The number of successes the Enemy cancels when defending against a Character's attack.
- Attack Type: The Enemy's attack type: Physical, Energy, or Mystic.
- Special Rules: The Enemy's special rules, if any.
Enemy Types
The Enemy types are Goon, Sentry, Brute, Mini-Boss, and Boss.
Mission Tokens
Mission Tokens indicate various things that Characters come across while facing off against their foes. There are two types of Mission Tokens: Objective tokens and Stage tokens.
Objective Tokens
Each Objective token is double-sided. The Objective tokens marked with the Critical, Wild, Hit, Block, and Failure symbols are used when setting up a Stage unless the Stage Card specifies differently in its Setup section.
Stage Tokens
Each Stage token shows any icons referenced by the Stage special rules.
Terrain Feature
A token that depicts Terrain.
Challenge Token
Players that are looking for a more challenging experience may use Challenge tokens to increase the difficulty of the Stage. For more information on the Challenge token, see pg. 11.
Characters and Enemies
In Marvel: Crisis Protocol—Alliances, players assemble and control a team of Characters drawn from across the Marvel Universe. These Characters face off against Bosses and Minions, collectively referred to as Enemies.
Enemy Tracker
The Enemy Tracker organizes Enemy Stat Cards, the Enemy Modifier Card, and the Pitfall Card.
Parts of an Enemy Tracker
The Enemy Tracker is used to track the following:
- Enemy Stat Card: Put the Enemy Stat Cards here.
- Enemy Modifier Card: Put the Enemy Modifier Card here.
- Pitfall Card: Put the Pitfall Card here.
Enemy Modifier Cards
Each Boss comes with an Enemy Modifier Card that grants a special rule to all Enemies.
Pitfall Cards
Each Boss comes with a double-sided Pitfall Card that details its Stage and Boss Battle Pitfalls, one on each side of the card. Pitfalls are recurring effects that take place during Stages.
Parts of a Pitfall Card
Each side of a Pitfall Card contains the following:
- Expansion Symbol: The card's expansion.
- Boss Name: The Boss's name.
- Type: Each side of the card has a different type of Pitfall. Standard Pitfalls are used for Standard Stages. Boss Battle Pitfalls are used during the Boss Battle instead of the Standard Pitfall.
- Pitfall: The rules for a recurring effect that takes place during a Stage.
Parts of an Enemy Modifier Card
Enemy Modifier Cards contain the following:
- Expansion Symbol: The card's expansion.
- Card Type: Shows that this is an Enemy Modifier Card.
- Boss Name: The Boss's name.
- Special Rules: The special rule(s) granted to all Minions.
Character Dashboard
A Character Dashboard organizes a Character's Stat Card, Level-Up Cards, tokens, and all other information related to that Character.
Parts of a Character Dashboard
A Character Dashboard contains the following:
- Character Stat Card: A place for the Character's Stat Card.
- Activation Tokens: A place for unused Activation tokens.
- Special Conditions: Space to track the special conditions the Character currently has.
- Stamina: Track the Character's Stamina here.
- Power: Track the Character's Power here.
- Experience: Track the Character's Experience (XP) here.
- Inventory: Put any other tokens related to the Character here.
Parts of a Character Stat Card
Character Stat Cards contain the following:
- Character Name: The Character's name.
- Attacks: A list of attacks available to the Character. There are three types of attacks: Physical, Energy, and Mystic.
- Skills: A list of skills the Character has. There are three types of skills: Active, Reactive, and Innate.
- Maximum Stamina: The maximum amount of Damage the Character can take before becoming Dazed or Knocked Out (KO'd).
- Speed: The maximum number of Spaces the Character can Advance. Indicates if a Character has the Flight or Wall Crawler skills using a symbol. Those skills are explained in greater detail on pg. 16.
- Physical Defense: Represents the Character's ability to withstand Physical attacks like punches and ballistic gunfire. This is the number of dice the Character rolls when targeted by a Physical attack.
- Energy Defense: Represents the Character's ability to withstand Energy attacks like laser blasts and lightning bolts. This is the number of dice the Character rolls when targeted by an Energy attack.
- Mystic Defense: Represents the Character's ability to withstand Mystic attacks like mental illusions and magic spells. This is the number of dice the Character rolls when targeted by a Mystic attack.
Rules Reference Card
Rules Reference Cards contain a selection of rules from this rulebook so that players can quickly reference them during play.
Tracking Cubes
Tracking Cubes are used to track Stamina, Power, and Experience (XP) on the Character Dashboard.
Priority Token
The Priority Token is used to track the Priority Player. For more information on Priority, see pg. 11.
Character Stat Cards
Character Stat Cards list a Character's Stats.
Character Stat Cards have two sides: Healthy and Injured. A Character always starts the game with the Healthy side showing. You can tell which side is which by the color of the Maximum Stamina icon. If the icon is teal, the Character is Healthy. If the icon is orange, the Character is Injured. During play, a Character that suffers enough Damage may become Injured and flip its Stat Card to show its Injured side. Damage and Injury are explained in greater detail on pg. 18.
Level-Up Cards
Level-Up Cards detail an attack or skill that a Character gains when they Level-Up.
Level-Up Card Improvements
Some Level-Up Cards improve existing attacks and skills instead of adding completely new ones. The improved version of the attack or skill replaces any previous versions shown on the Stat Card or lower level Level-Up Cards. When a Level-Up Card details an improvement, the changes are shown in bold and italics. When the special rule of an attack has been improved, the name of that special rule is shown in bold and italics and the rest of the special rule is shown in italics.
Parts of a Level-Up Card
Level-Up Cards contain the following:
- Character Name: The Character's name.
- Level: The Level at which this Level-Up Card can be gained.
- Attack or Skill: The attack or skill granted by this Level-Up Card.
Dice
Marvel: Crisis Protocol—Alliances uses unique eight-sided dice to determine the outcome of many game effects, most commonly Characters attacking and defending. These dice have the following sides:
- Critical: Criticals add dice during attack, defense, and dodge rolls. They usually count as successes.
- Wild: Wilds often trigger special effects or are referenced in special rules. They usually count as successes.
- Hit: When attacking, hits are usually successes that don't trigger other effects.
- Block: When defending, blocks are usually successes that don't trigger other effects.
- Blank: Blanks have no icon on the die and usually have no effect.
- Failure: Failures can't be rerolled or modified.
Some game effects say that a Character or Enemy can or does do something or that an effect can or does happen, while others say that a Character or Enemy cannot do the same thing or say that the same effect cannot happen. In all cases where these effects apply to the same Character or Enemy at the same time, effects that state that something "cannot" happen override effects that state that something "can."
Some effects tell a player to halve a Character's or Enemy's Stat or the number of dice rolled. Whenever a number is halved, always round the final result up.
Effects
Effects are things caused by skills, attacks, or special rules. When a rule references an "enemy effect," it is referring to an effect caused by an Enemy or an Enemy's special rules. Stage effects and Pitfalls are enemy effects. Similarly, when a rule references an "allied effect," it is referring to an effect caused by a Character or a Character's special rules.
Sometimes an effect will only happen after something is resolved. This means that the first effect must be complete before the new effect will occur.
Character Attacks
A Character's attacks represent its battle prowess. From heavy artillery to roundhouse kicks, all attacks have the following properties:
- Type: The type of attack: Physical, Energy, or Mystic.
- Name: The name of the attack. This can be referenced by special rules.
- Range: The maximum distance the target can be away from the attacker.
- Strength: The number of dice rolled for the attack.
- Power Cost: The amount of Power that must be spent to make the attack.
- Special Rules: Any special rules related to the attack. To learn more about attack special rules, see pg. 18.
Skills
Characters in Marvel: Crisis Protocol—Alliances are extraordinary individuals. Whether the result of intense physical and mental training, customized gear and equipment, scientific mishap, or divine intervention; each of them are capable of astounding feats. All skills have the following properties:
- Type: The type of skill: Active, Reactive, or Innate.
- Name: The name of the skill. This can be referenced by special rules.
- Power Cost: The amount of Power that must be spent to use the skill. Not all skills have a Power cost.
- Special Rules: The skill's effects and any requirements for using it.
A skill's type, identified by its corresponding icon, denotes when it can be used.
Active Skill: Active skills can be used at any time during a Character's Activation. Some Active skills require a Character to spend an action to use. When this is the case, the effect of the rule will be preceded by "Action:".
Reactive Skill: Reactive skills require a triggering event to occur. Triggering events are requirements listed in that skill's special rules. For each triggering event, each Reactive skill can be used only once. If multiple Reactive skills share the same triggering event, each one may be used, but each Reactive skill must be fully resolved before a new Reactive skill with the same triggering event may be resolved.
Innate Skill: Innate skills do not have to be activated and never cost Power. Characters that have a Dazed token don't benefit from their Innate skills.
Stacking Effects
Each object can only be affected by the same named effect once per triggering event.
The Tag Team Innate skill allows Ultimate Spider-Man to choose 2 characters to receive each Heroic Assist he makes. Because the same effect can only affect an object once per triggering event, Ultimate Spider-Man could not choose the same character twice.
"Any Time" Effects
Whenever the rules say an effect may be used "at any time," it doesn't mean literally any time the player wishes. These effects may be used before or after an action is taken or an effect is resolved but can't interrupt an action or another effect.
Power
Whether unleashing a devastating wave of destructive energy or hurling debris onto the head of an enemy, every Character in Marvel: Crisis Protocol—Alliances relies on a special resource called Power to use its strongest attacks and skills.
A Character's Power is tracked on the Character Dashboard using the Character Power track. Characters can have a maximum of 10 Power; any Power gained beyond 10 is lost. A Character can't spend or lose more Power than it has available on its Character Dashboard. If a Character doesn't have enough Power to pay the Power cost of an attack or skill, it can't use that attack or skill. If an effect causes a Character to lose more Power than it has on its Character Dashboard, it loses all available Power instead.
The most common way Characters gain Power is by taking Damage from enemy effects. Characters can also gain Power through special rules, objectives, skills, and other effects.
Power from Effects
When a Character takes Damage from a non-Enemy effect, it does not gain Power.
Measurement
Distances are measured in Marvel: Crisis Protocol—Alliances by counting adjacent Spaces on the Stage Board. The distance between any 2 Spaces is equal to the lowest number of adjacent Spaces that can be counted starting from the first Space and ending on the second. The distance between objects is equal to the distance between the Spaces they are in. Any distance can be measured at any time.
Range is the maximum distance at which an effect can be used. An object is within Range of another object or Space if the distance between them is less than or equal to that Range. An object is always within Range of itself and is always within Range of the Space it occupies.
Measuring in a Straight Line
Some rules indicate that a distance should be measured in a straight line. To measure a distance in a straight line, choose one side of the starting Space and draw an imaginary line in the direction you wish to measure, perpendicular to the center of the chosen side and count each Space it passes through up to the specified number. While measuring in a straight line, you may never count the same Space more than once.
Getting Ready to Play
Before the game can commence, players must create their Mission, choose their Squad of Characters, and set up the play area. Here you will find the rules for building Missions, building Squads, setting up the play area, and starting the game.
Building a Mission
Before choosing Characters, the players need some formidable threats to face! To build a Mission, players collectively choose a single Boss Battle and two Standard Stages. This can be done randomly or Stages may be chosen deliberately, if the players wish to tell a specific story. Players then select which Standard Stage to complete first. Players also choose 1 Minion of each of the following types: Goon, Sentry, and Brute.
Gather the components for each choice. Each Boss Battle has an associated Stage Board, Stage Card(s), Boss Battle Card, Mission tokens, Pitfall Card, Enemy Stat Card for the Boss, Enemy Modifier Card, and miniature(s) to represent the Boss. Each Standard Stage has an associated Stage Board, Stage Card(s), and Mission tokens. Each Minion has an associated Enemy Stat Card and miniatures to represent them.
Mission Length
Players who wish to have a longer game can choose to play three Standard Stages leading up the Boss Battle, instead of the normal two Standard Stages.
Building a Squad
After the Mission has been built, the players build a Squad. A Squad in Marvel: Crisis Protocol—Alliances contains any four Characters from the players' Marvel: Crisis Protocol—Alliances collections. When building a Squad, there are no restrictions on pairing traditional villains with heroes or vice versa. After all, the Marvel Universe is a big place and has been witness to an almost infinite number of team-ups, with even the greatest archnemeses putting aside their differences to deal with a greater threat. Each Character is controlled by one player. If there are less than four players, the players decide which player(s) control more than one of the four characters in the Squad. Each player chooses the character(s) that they will control.
Gather the following components associated with each character: Character Dashboard, Character Stat Card, Level-Up Cards, Activation tokens, and miniature to represent them.
Setting Up the Character Dashboards
Players set up a Character Dashboard for each of their chosen Characters. Place the chosen Character's Stat Card, two Activation tokens, and the cubes representing Stamina, Power, and Experience (XP) on that Character's Dashboard. Characters start with 0 Experience (XP), 0 Power, and the Maximum Stamina shown on their Character Stat Card. Set the chosen Character's miniature and their deck of Level-Up Cards next to their Character Dashboard. Before setting up the first Stage, each Character randomly draws two of their Level 1 Level-Up Cards. That Character chooses one of the newly drawn Level-Up Cards and gains it. Remove the other Level-Up Card from the game. See pg. 19 for more information on Leveling-Up during the Mission.
Setting Up a Stage
Put the chosen Stage Board in the center of the play area. This is the current Stage Board. Put the matching Stage Card(s) next to it. If the Stage is a Boss Battle, be sure to put the Boss Battle Card next to the Stage Board as well. The Stage Boards for the remaining Stages are set aside and are used after the Characters complete the first Stage.
Setup the Stage Board
Each Stage will detail any unique modifications to the following process on its Stage Card in the "Setup" section. Any time that a Stage Card contradicts this process, the instructions on the Stage Card take precedence.
To set up a Stage Board, players put Objective tokens, Terrain Features, and Enemies as indicated by the current Stage Board as follows:
- Players randomize the Objective tokens for the chosen Stage, putting one on each Objective Space.
- Players put one Terrain Feature in each Terrain Space until all Terrain Spaces have been filled. Any remaining Terrain Features are set aside.
- Players put the Enemy indicated by each Spawn Space into that Space, if any.
- For each spot on the Spawn Tracker that has an Enemy type icon, put the corresponding enemy in that spot.
Setup the Enemy Tracker
Put the Enemy Tracker next to the current Stage Board. Then put the Enemy Stat Cards, Enemy Modifier Card, and Pitfall Card in the indicated spots on the Enemy Tracker. If this is a Standard Stage, use the Mini-Boss side of the Boss's Stat Card and the Standard Pitfall side of the Pitfall Card. If this is a Boss Battle, use the Boss side of the Boss's Stat Card and the Boss Battle Pitfall side of the Pitfall Card.
Setup the Play Area
Put the dice and remaining tokens in reach of the players to finish setting up the play area.
Stage Difficulty
After putting enemies on the Spawn Tracker, Players that are looking to increase the difficulty of the Stage may add any number of Challenge tokens to the Spawn Tracker, one per spot. These tokens move toward the start of the Spawn Tracker as if they were Enemies, occupying those spots. This increases the rate that Enemies Spawn during the Stage.
Determine Priority
After the play area is ready, players decide which Character starts the game with the Priority token.
If a majority of players agree that a Character will start the game with the Priority token, that Character is given the Priority token. Otherwise, the players roll off to determine which Character is given the Priority token.
To roll off, each player rolls five dice. The player with the most Criticals, Wilds, and Hits total takes the Priority token and gives it to one of the Characters they control. In case of a tie, the Priority token goes to the player with the most Criticals. If necessary, continue this process with Wilds and then Hits. If there is still a tie at this point, the tied players reroll the dice and follow the above rules until the tie is broken.
Priority Player
The player whose Character has the Priority token is the Priority Player.
Player Decisions
When a rule references the players' decision, the Priority Player is responsible for determining what to do. Other players can suggest a course of action, but the Priority Player must ultimately make the decision.
Deployment
Players deploy Characters starting with the Character with the Priority token and continuing clockwise around the table. To deploy a Character, that Character's controlling player puts it on a Deployment Space. Once all Characters are deployed, the game is ready to begin. Start the first Round of the game with a Power Phase.
Game Mechanics
This section lists the rules that give the specifics of how to play the game.
Parts of a Round
Marvel: Crisis Protocol—Alliances is played over a series of Rounds. Each Round is broken down into three phases: Power, Activation, and Cleanup.
Round Overview
- Power Phase
- Activation Phase a. First Turn b. Character Activation Step c. Enemies Move Step d. Enemies Spawn Step e. Enemies Attack Step f. Pass Priority Step g. Second Turn a. Character Activation Step b. Enemies Move Step c. Enemies Spawn Step d. Enemies Attack Step e. Pass Priority Step
- Cleanup Phase
Power Phase
The Power Phase happens at the start of a Round. The Power Phase has the following steps that must be resolved in order:
- All Characters gain 1 Power.
- Resolve any allied effects that occur during the Power Phase.
- Resolve any enemy effects that occur during the Power Phase.
Activation Phase
The Activation Phase is where most of the action of the game takes place. Each Activation Phase consists of 2 Turns.
Turns
Turns occur twice per round, tracked by the Activation tokens on the Stage Board, and consist of the following steps:
- Character Activation
- Enemies Move
- Enemies Spawn
- Enemies Attack
- Pass Priority
Character Activation Step
Four Character Activations are resolved during each Character Activation step.
For each Character Activation, the players choose any Character that has at least 1 Activation token on their Character Dashboard to Activate. That Character's controlling player Activates it. At the start of a Character's Activation, if it has a Dazed token, remove all special conditions and the Dazed token from that Character's Dashboard, flip that Character's Stat Card over to the Injured side, and set the Stamina of that character to the Maximum Stamina shown on its Character Stat Card.
Each Character may make 1 action when it Activates. The common actions available to every Character are:
- Move: The Character may Advance a number of Spaces up to its Speed. The rules for Advancing are on pg. 16.
- Attack: The Character makes one of its listed attacks. The rules for attacking are on pg. 17.
- Shake: Remove one special condition from the Character.
- Skill Action: Some skills require the use of an action. The rules for skills are on pg. 8.
Some special rules and skills grant actions. If an action is granted by an effect, that action is made in addition to the Character's chosen action for that Activation.
After a Character has made its action and used any skills, Interact abilities, or other special rules it wishes, or when that character becomes Dazed during its Activation, its Activation ends. When a character's Activation ends, move 1 of its Activation tokens from its Dashboard to the next available spot on the Activation Tracker. A Character without an Activation token on its Dashboard cannot be chosen to Activate again this Round.
Enemies Move Step
When Enemies Move, resolve the following steps in order:
- If the current Stage is a Boss Battle, activate the Boss according to the Boss behavior printed on its Boss Battle Card.
- Each Minion Advances its Speed Toward the nearest non-Dazed Character. When an Advancing Enemy enters a Space occupied by a Terrain Feature, its Advance immediately ends.
Nearest
The nearest object is the object with the least distance between it and the object being measured from. If two objects are the same distance from the object being measured from, the players decide which object is nearest.
Spawning
Spawning puts Enemies onto the battlefield. Most Spawns happen during the Enemies Spawn step.
Open Spawn Space
A Spawn Space that is not occupied by an Enemy or Character is an Open Spawn Space.
Other Spawns
Some effects will cause enemies to Spawn at other times than the Enemies Spawn step. Unless otherwise noted by the effect, the first (leftmost) Enemy on the Spawn Tracker is Spawned into the Open Spawn Space that is nearest to the Character with the Priority token. After Spawning, move each remaining Enemy in the Spawn Tracker toward the start, in order, until there are no empty spots at the start of the tracker.
Minions
Goons, Sentries, Brutes, and Mini-Bosses are all Minions. When a Minion that is not a Mini-Boss is KO'd, it is put into the first empty spot on the Spawn Tracker and can be Spawned again that Stage.
Empty Spawn Tracker
When an Enemy would Spawn and there are no Enemies in the Spawn Tracker, each enemy Advances 1 Space Toward the closest non-Dazed Character instead.
Full Spawn Tracker
Since Spectacular Spider-Man has the Priority token, the player controlling him rolls dice to Spawn Enemies. Since the last spot on the Spawn Tracker with an Enemy in it shows 3 Spawns, that player rolls 3 dice. The results are 2 Failures and 1 Critical. Since at least one Failure result was rolled, the Pitfall, Bombing Run, is resolved. Following the instructions on the card, the Green Goblin Mini-Boss is Spawned into the Open Spawn Space closest to Spectacular Spider-Man. Continuing to follow the instructions, the Enemies Frenzy. When the Enemies Frenzy, each Enemy Advances 1 Space toward the nearest character, then the first enemy on the Spawn Tracker is Spawned into the Open Spawn Space closest to Spectacular Spider-Man.
The Pitfall is now resolved, and Enemies continue Spawning based on the results rolled. Since an additional Failure result was rolled, the first enemy on the Spawn Tracker is Spawned into the Open Spawn Space closest to Spectacular Spider-Man. Then the Critical result is resolved, and the first enemy on the Spawn Tracker is Spawned into the Open Spawn Space closest to Spectacular Spider-Man that is marked with a Critical. Finally, each Enemy is moved up the Spawn Tracker, in order, so that there are no empty spots at the start of the tracker.
When a KO'd Enemy would be put into the Spawn Tracker and there are no empty spots, Spawn the first Enemy in the Spawn Tracker before putting the KO'd Enemy into the last spot of the Spawn Tracker.
Enemies Spawn Step
When Enemies Spawn, the Priority Player rolls 1 die for each Spawn symbol shown on the last (rightmost) spot on the Spawn Tracker with an Enemy in it. Enemies Spawn, based on that roll, as follows:
- If at least one Failure result is rolled, resolve the Pitfall.
- For each additional Failure result and for each Blank result, Spawn the first Enemy on the Spawn Tracker into the Open Spawn Space that is nearest to the Character with the Priority token.
- For each other result, Spawn the first Enemy on the Spawn Tracker into the Open Spawn Space marked with the matching result that is nearest to the Character with the Priority token. If none of the Spawn Spaces marked with the matching result are Open, Spawn the Enemy into the Open Spawn Space that is nearest to the Character with the Priority token.
- Move each remaining Enemy in the Spawn Tracker toward the start, in order, until there are no empty spots at the start of the tracker.
When an Enemy would be Spawned but there are no Open Spawn Spaces, Enemies Frenzy instead.
Enemies Frenzy
When Enemies Frenzy, each enemy Advances 1 Space Toward the closest non-Dazed Character. Then Spawn the first Enemy on the Spawn Tracker into the Open Spawn Space that is nearest to the Character with the Priority token. If there are still no Open Spawn Spaces, Enemies Attack.
Enemies Attack Step
Enemies attack in a different way than characters. They combine their strength together to bring down a mighty foe: You!
When Enemies Attack, each Enemy attacks each Character within its Attack Range. For each Character that is attacked by one or more Enemies, resolve an Enemy attack. In addition to the Enemies Attack step, other effects might cause an Enemy Attack.
Enemy Attacks are resolved using die rolls. The Enemies making the attack (the attackers) add together their Strength to determine the Attack Strength. The Character targeted by the attack (the defender) creates a pool of dice (the defense pool) based on their Stats and any applicable special rules.
When a Character is targeted by an Enemy Attack, resolve the following steps in order:
- Target the Defender and Measure Range: The attackers measure Range from themselves to the defender. Starting with allied effects, resolve any effects that trigger when a Character has been targeted by an attack.
- Determine Attack Strength: Add together the Strength of each Enemy attacking that Character.
- Determine Attack Type: Find the first (leftmost) Enemy Stat Card on the Enemy Tracker, that matches at least one of the attackers. The Attack Type of this attack is the Attack Type shown on that card.
- Create the defense pool: The defender notes the type of attack targeting them (Physical, Energy, or Mystic) and creates a defense pool with dice equal to their Defense Stat of that type. Apply any effects that add dice to or remove dice from the defense pool. A defense pool can never be reduced to fewer than one die.
- Roll the defender's dice: The defender rolls the dice in the defense pool. This is the initial defense roll.
- Resolve any Critical results: The defender rolls an additional die for each Critical result in their initial roll. Further Criticals rolled in this step are not part of the initial roll and do not add further dice to the roll.
- Modify Dice: Beginning with allied effects, resolve any effects that reroll or change the dice. Criticals rolled in this step are not part of the initial roll and do not add further dice to the roll.
- Calculate Success or Failure: The defender counts each Critical, Wild, and Block result on their dice. The defender's total is then subtracted from the Attack Strength to determine the final Attack Strength.
- Resolve effects that occur before Damage: Beginning with allied effects, resolve any skills or effects that trigger before Damage is dealt.
- Apply Damage and resolve the attack: If the attackers' final Attack Strength is greater than zero after resolving any effects that trigger before Damage is dealt, the defender suffers Damage equal to the final Attack Strength. A Character can only suffer Damage equal to its Stamina; any excess Damage is ignored. Full rules for resolving Damage are found on pg. 18.
- The attack is resolved.
- Resolve effects that occur after an attack: Beginning with allied effects, resolve any skills or effects that trigger after an attack has been resolved.
These attacks are resolved simultaneously.
The following Enemy stat cards are printed in the rulebook beside this step:
Spider-Slayer (Sentry)
- Protection Programming: After Enemies Attack: Each Spider-Slayer that attacked 1 or more Characters Advances 1 Space Toward the nearest Objective token.
Goblin Army (Goon)
- Goblin War Cry: When Enemies Frenzy: Each Goblin Army Advances 3 Spaces instead of 1 Space.
Enemies Attack! Ultimate Spider-Man and Black Cat are surrounded by 2 Spider-Slayers and a Goblin Army. The Enemy Stat Cards show that the Spider-Slayers have an Attack Range of 3 and the Goblin Army has an Attack Range of 1. Both Spider-Slayers are within Range 3 of Ultimate Spider-Man and Black Cat, so they attack both Characters. The Goblin Army is only within Range 1 of Black Cat, so it will only attack her.
Black Cat is being attacked by 2 Spider-Slayers and 1 Goblin Army! To resolve the attack, the players go through the steps of the Enemy Attack in order. Both the Spider-Slayers and the Goblin Army have a Strength of 1, so the total Attack Strength is 3. The Spider-Slayer's Enemy Stat Card is the first on the Enemy Tracker, so its attack type, Energy, is used. Black Cat's Energy Defense is 3, so she rolls 3 Defense dice. The results are 1 Critical and 2 Blank results. She rolls an additional die to resolve the Critical and gets a Block result. Counting the results, she has 2 successes and subtracts that from the Attack Strength of 3, making the final Attack Strength 1. There are no effects that occur before Damage, so Black Cat suffers 1 Damage and gains 1 Power. The attack is resolved, and there are no other effects that occur after it.
Ultimate Spider-Man is only being attacked by 2 Spider-Slayers. The total Attack Strength is 2. Ultimate Spider-Man rolls a number of dice equal to his Energy Defense and gets 3 successes! After subtracting his successes from the Attack Strength, the final Attack Strength is less than 0. There are no effects that occur before Damage, Ultimate Spider-Man doesn't suffer any Damage, and there are no effects that occur after the attack is resolved.
Enemy Special Rules
Each Enemy has a special rule listed at the bottom of its card as well as a special rule on the Enemy Modifier Card. These rules will tell you how and when to resolve any effects of that special rule.
Passing Priority
The Priority Player passes the Priority token to the next character in clockwise order. This should cause each character to gain the Priority token before any character gains it a second time.
Ending the Turn
Place an Enemy Activation token on the Activation Tracker. If all the spots on the Activation Tracker are filled, begin the Cleanup Phase. Otherwise, begin the next Turn.
Cleanup Phase
After completing both Turns, the Cleanup Phase begins. Resolve the following effects, in order:
- Resolve any allied effects that occur during the Cleanup Phase.
- Resolve any enemy effects that occur during the Cleanup Phase.
- Each Character with a Dazed token removes all special conditions and the Dazed token from themselves, flips their Character Stat Card over to the Injured side, and sets their Stamina to their Maximum Stamina.
- Players remove the Activation tokens from the Activation Tracker. Move each Character's Activation tokens to their Character Dashboard.
Begin the next Round, starting with a Power Phase.
Completing a Stage
At the end of each Turn, check the Stage Card. If the players have completed the requirements listed in the End of Stage section, they complete the Stage. Then the Characters Rally. For more information on Rallying, see pg. 19. After the Characters Rally, the next Standard Stage is set up. If there are no remaining Standard Stages, the Boss Battle is set up instead. After the next Stage is set up, players Deploy their Characters and begin the new Stage, starting with a Power Phase.
Winning and Losing the Game
When the players complete the Boss Battle, the Mission is a success, and they win the game! If any Character in the players' Squad is KO'd, the players fail the Mission and lose the game.
Mission Tokens
Some Stages involve Characters Interacting with Mission tokens. Mission tokens have two types: Objective tokens and Stage tokens.
Stage Tokens
When a Stage allows Characters to Interact with Mission tokens, it will include an Interact ability in its special rules. At any time during a Character's Activation, while it is within Range 1 of a Mission token, that Character may spend 1 Power to Interact with that token. A Character may Interact with multiple Mission tokens in the same Turn but cannot Interact with the same Mission token more than once per Turn, unless otherwise stated. What happens when a Character Interacts with a Mission token is listed in the Stage Card's special rules.
Mission tokens do not obstruct Character or Enemy movement. Characters and Enemies may occupy the same Space as Mission tokens.
Stage Tokens: Stage tokens cannot be Contested unless a Stage's special rules specifically mention that they can.
Objective Tokens
Objective tokens are a special type of Mission token that have the following additional rules:
- A non-Dazed Character or Enemy that is within Range 1 of an Objective token is Contesting it.
- Characters cannot Interact with an Objective token that one or more Enemies are Contesting.
- While a Character is Contesting an Objective token that no Enemies are Contesting, that Character is Securing that Objective token.
- When an effect caused by a Character causes an Objective token to be removed from the battlefield, that Character Completes an Objective and makes a Heroic Assist.
Picking Up and Holding Tokens
Some rules allow Characters to pick up tokens. A Character that picks up a token is holding that token. Put the token on that Character's Dashboard. When a Character is Dazed, they drop any tokens they are holding. When a Character drops a token, Place that token in the Space that Character occupies.
Ultimate Spider-Man Interacts with a Stage token within 1 Space using the special rules on the Stage Card. He picks up the token. He is now holding the token, and his controlling player puts it on their Character Dashboard.
Token Pools
Some Stages instruct players to build a pool of facedown tokens. When they do, they will also instruct players how to use those tokens.
Movement
There are several ways Characters and Enemies can move:
- Advance: Movement that represents maneuvering around the battlefield.
- Throw: Movement from being thrown through the air, usually as the result of an attack, skill, or special rule. Throws can cause collisions.
- Push: Movement from being pushed along the ground, usually as the result of an attack, skill, or special rule. Pushes do not cause collisions.
- Place: Movement that represents suddenly appearing in a location. Places can represent things like teleporting, tricking a Character's senses, or manipulating time and space.
A Character can never move off the battlefield. If a Throw or Push would cause a Character to move off the battlefield, the Character stops that movement at the last Space possible while following the movement rules. If that movement was a Throw, that Character suffers a collision.
Advance
When a Character or Enemy Advances, it moves a number of Spaces up to its Speed. When an Advancing Character or Enemy enters a Space occupied by a Terrain Feature, its Advance immediately ends. An Advancing Character can move through but may not end an Advance in a Space occupied by another Character. Advancing Characters cannot move through Spaces occupied by Enemies. Similarly, Advancing Enemies can move through but may not end an Advance in a Space occupied by another Enemy. Advancing Enemies cannot move through Spaces occupied by Characters.
Throw
No epic battle would be complete without Characters and Enemies hurling each other and anything not nailed down across the battlefield to smash into their foes. With this in mind, there are several effects and attacks in Marvel: Crisis Protocol—Alliances that can throw Characters, Enemies, and Terrain Features, sending them flying across the battlefield and crashing down with devastating results!
Throwing a Character or an Enemy
When making a Throw, measure the distance the Character or Enemy is Thrown in a straight line, moving that Character or Enemy into each Space as it is counted. For more information on measuring in a straight line, see pg. 9.
Overlapping: Overlapping is when an object occupies the same Space as another object. Characters and Enemies cannot overlap other Characters or Enemies.
Collisions
As a Thrown Character or Enemy moves, if it would overlap another Character, Enemy, and/or Terrain Feature, it stops in the last Space where it would not overlap. Then the Thrown Character or Enemy suffers a collision. Ignore the character making the Throw and any terrain features the Thrown character started overlapping when determining a Thrown character's collisions. If the Thrown Character or Enemy does not collide with anything, it moves the full distance.
A Thrown Character or Enemy that collides with another Character or Enemy, a Terrain Feature, or both occupying the same Space suffers 1 Damage.
If a Thrown object collides with a Terrain Feature, the Terrain Feature is destroyed and removed from the board. If a Thrown object collides with another Character or Enemy, that Character or Enemy must Dodge to avoid being damaged by the Throw.
If a Thrown Character or Enemy would move off the battlefield, it stops in the last Space where it would not move off the battlefield. The Thrown Character or Enemy collides with the edge of the battlefield and suffers 1 Damage.
For information on Dodge rolls and Throwing Terrain Features, see pg. 19.
Flight and Wall Crawler: Characters with the Flight and Wall Crawler skills aren't hindered by Terrain Features. When an Advancing Character that has either the Flight skill or Wall Crawler skill enters a Space occupied by a Terrain Feature, its Advance does not immediately end.
Push
A Character or Enemy that is Pushed follows all the rules for a Character that is Thrown, except that it doesn't cause collisions with other characters or objects.
Place
Some effects can cause an object to be Placed within a certain Range. Unless the effect says otherwise, measure Range from the object being Placed. Choose any Space within the specified Range and put the object in that Space. A Character or Enemy cannot be Placed into a Space that is already occupied by another Character or Enemy.
Toward and Away
When an effect results in an object moving Toward another object, first measure the distance between those objects. Then resolve the movement, with the following restrictions:
- If the movement is an Advance, at the end of that movement, the distance between the objects must be less than it was at the start of the movement.
- If the movement is a Push or a Throw, the first counted Space of that movement must decrease the distance between the objects.
When an effect results in an object moving Away from another object, first measure the distance between those objects. Then resolve the movement, with the following restrictions:
- If the movement is an Advance, at the end of that movement, the distance between the objects must be greater than it was at the start of the movement.
- If the movement is a Push or a Throw, the first counted Space of that movement must increase the distance between the objects.
Character Attacks
When a Character makes an attack action, it chooses one of the attacks listed on its Stat Card and an Enemy to target. A Character can never make an attack without a target.
Each attack has a Range that represents the maximum distance the attack can reach. An Enemy must be within the Range of an attack in order to be the target of that attack.
Character attacks are resolved using die rolls. The Character making the attack (the attacker) creates a pool of dice (the attack pool) based on their Stats and any applicable special rules. Then they roll the attack pool. The attack deals Damage equal to the final number of successes minus the Enemy's Defense Stat. If the number of successes in the attack pool is equal to or less than the Enemy's Defense Stat, the attack deals no Damage but the other effects of the attack are still resolved.
When a Character makes an attack action, resolve the following steps in order.
- Choose an attack: The player chooses one of the attacks listed on their attacking Character's Stat Card. If the attack has a Power cost, the Character must have enough Power to pay that cost. If the Character doesn't have sufficient Power to pay for the attack, it can't select that attack to use.
- Declare a target for the attack and measure Range: The attacker measures Range from itself to any number of Enemies. The attacking Character chooses one Enemy within Range to be the target of the attack. Starting with allied effects, resolve any effects that trigger when an Enemy has been targeted by an attack.
- Pay Power for the attack: If the chosen attack has a Power cost, the attacker spends Power equal to the listed cost. If it cannot, the attack ends.
- Create the attack pool: The attacker creates an attack dice pool with dice equal to the Strength of the attack. Apply any effects that add dice to or remove dice from the attack pool. An attack pool can never be reduced to fewer than one die.
- Roll the attacker's dice: The attacker rolls the dice in the attack pool. This is the initial attack roll.
- Resolve any Critical results: The attacker rolls an additional die for each Critical result in their initial roll. Criticals rolled in this step are not part of the initial roll and do not add further dice to the roll.
- Modify Dice: Beginning with allied effects, resolve any effects that reroll or change the dice. Criticals rolled in this step are not part of the initial roll and do not add further dice to the roll.
- Calculate Success or Failure: The attacker counts each Critical, Wild, and Hit result on their dice. The defender's Defense Stat is then subtracted from the attacker's total.
- Resolve effects that occur before Damage: Beginning with allied effects, resolve any skills or effects that trigger before Damage is dealt.
- Apply Damage and resolve the attack: If the attacker still has successes remaining after comparing their successes with the defender's Defense Stat and resolving any effects that trigger before Damage is dealt, the defender suffers Damage equal to the attacker's remaining successes. An Enemy can only suffer Damage equal to its Stamina; any excess Damage is ignored.
- The attack is resolved.
Character Attack Special Rules
Some Character attack special rules have icons before their name, such as "Bleed." If a special rule has one or more icons before their name, and the final attack roll contains at least that many dice showing those icons, the effect of the special rule is applied to the attack.
Beam Attacks
Beam attacks are a special kind of attack that damages all Enemies within Range of the beam. A beam attack has "B" included before the number denoting the Range of the attack, such as "Range B2." Instead of measuring Range normally, the Range of Beam attacks must be measured in a straight line and must be measured to their full Range, if possible. Each Enemy who occupies a Space in that Range is targeted by the attack.
To use the attack, pay the Power cost once and then make a series of attacks targeting each Enemy that is within Range. These attacks are resolved in the order of the attacking player's choice. Completely resolve each attack before moving on to the next.
When an effect causes a Character to make a Beam attack targeting a specific Enemy, they must measure Range to that Enemy in a straight line. If this is not possible, or the specified Enemy is not within that Range, the attack cannot be made.
Area Attacks
Area attacks are a special kind of attack that damages all Enemies within the defined area around the attacking Character. An area attack has "A" included before the number denoting the Range of the attack, such as "Range A1." The attacking Character doesn't declare a target for an area attack. Instead, all Enemies within the listed Range of the attacking Character are targeted by the attack.
To use the attack, pay the Power cost once and then make a series of attacks targeting each Enemy that is in Range. These attacks are resolved in the order of the attacking player's choice. Completely resolve each attack before moving on to the next.
When an effect causes a Character to make an Area attack targeting a specific Enemy, that Enemy must be within Range of the attack. If it is not, the attack cannot be made.
Ghost-Spider makes a Whiplash Web Solo attack. The 3 enemies within Range 1 of her are targeted by the attack.
Character Damage
When a Character is damaged, reduce the Stamina on its Dashboard by an amount equal to the Damage it received. A Character can never have a Stamina below zero; any additional Damage is ignored.
Whenever a Character suffers Damage as a result of an Enemy effect, that Character gains Power equal to the amount of Damage suffered. This Power gain represents the Character drawing on their anger, determination, or dogged resolve to strike back and win the fight.
When a Character's Stamina becomes 0, it has been Dazed or Knocked Out (KO'd).
- If the Character's Stat Card has the Healthy side up, place a Dazed token on its Dashboard. A Character with a Dazed token can't move or be moved for any reason and can't be targeted by attacks or be affected by special rules or skills. Dazed Characters can't make attacks and don't have skills. If a Character becomes Dazed during their Activation, their Activation immediately ends.
- If the Character's Stat Card has the Injured side up, the Character has been Knocked Out (KO'd) and is out of the fight. The players lose the game.
Removing Damage
When a Character removes Damage from itself, increase that Character's Stamina by the amount removed. A Character's Stamina cannot exceed its Maximum Stamina.
Enemy Damage
When an Enemy is damaged, place a number of Damage tokens next to that Enemy's miniature equal to the amount of damage it suffered. An Enemy can never have Damage tokens in excess of its Stamina; any additional Damage is ignored. When a Minion has Damage tokens equal to its Maximum Stamina, it has been Knocked Out (KO'd). All effects on the Minion expire, then it is removed from the battlefield. When a Minion that is not a Mini-Boss is KO'd, they are put in the next empty spot on the Spawn Tracker. When a Mini-Boss is KO'd, they are removed from the Stage instead of being added to the next available spot on the Spawn Tracker, and each Character gains 2 Experience (XP).
When a Boss has Damage tokens equal to its Maximum Stamina, it has been Dazed. Place a Dazed token on it. A Boss with a Dazed token can't move or be moved for any reason and can't be targeted by attacks or be affected by special rules or skills. At the end of the Enemies Attack step, remove the Dazed token.
Character Level and Experience
Characters gain Experience (XP) when they accomplish notable goals. When they have gained enough Experience (XP), they Level-Up!
Gaining Experience
A Character gains Experience (XP) in the following ways:
- A Character gains 1 Experience (XP) when they make a Heroic Assist.
- Each Character gains 2 Experience (XP) when a Mini-Boss is Dazed or KO'd.
- Each Character gains 2 Experience (XP) when an Objective is Completed.
- A Character's Attacks or Skills may cause that Character to gain Experience (XP).
Heroic Assists
When a Character KO's an Enemy, Dazes a Boss, or Completes an Objective, after the effect is resolved, that Character makes a Heroic Assist. When a Character makes a Heroic Assist, it gains 1 Experience (XP). Then that Character's controlling player chooses another non-Dazed Character to receive that Heroic Assist. The chosen character may remove 1 Damage, remove 1 special condition, gain 1 Power, or Advance 1 Space.
Leveling Up
Characters start the first Stage at Level 1. Additionally, Characters Level-Up as soon as they have gained enough Experience (XP) to reach the next Level, as shown in the table below:
| Level | Experience (XP) Needed |
|---|---|
| 2 | 10 |
| 3 | 15 |
| 4 | 20 |
When a Character Levels-Up, they lose the amount of Experience (XP) needed to gain that Level. Then that Character removes all special conditions and any Dazed tokens from themselves, flips their Character Stat Card over to the Healthy side, and sets their Stamina to their Maximum Stamina. Then they randomly draw two of their Level-Up Cards, matching the Level they just gained. That Character chooses one of the newly drawn Level-Up Cards and gains it. Remove the other Level-Up Cards matching that Level from the game. After Leveling-Up, each Character will have 1 Level-Up Card for each Level they have reached that game.
Special Conditions
Some attacks and skills inflict special conditions on Characters or Enemies. When an attack or skill states that a Character gains a special condition, put a token representing that condition in the matching spot on its Character Dashboard. When an attack or skill states that an Enemy gains a special condition, put a token representing the condition next to that Enemy's miniature. Characters and Enemies cannot be affected by multiples of the same special condition at once. If a Character or Enemy would gain a special condition it already has, it doesn't gain that special condition. Special conditions are not enemy or allied effects. See Appendix B for a list of special conditions and their effects.
Characters Rally
After the players complete a Standard Stage, before the next Stage is set up, the Characters Rally. Each Character loses all Power. For every 3 Power lost in this way, that Character resolves one of the following effects:
- Remove 1 Damage
- Remove 1 special condition
- Gain 1 Experience (XP)
Characters may resolve the same effect more than once. Characters start the next Stage with the Stamina and special conditions they have after Rallying. Then the next Stage is set up and begins, starting with a Power Phase.
Terrain
The battlefield where Characters fight can have as dramatic an impact on the course of a battle as the abilities of the Characters themselves. In Marvel: Crisis Protocol—Alliances, most of the Terrain is interactive, which means it can be used during the game as weapons or cover.
Unless otherwise noted, Terrain Features—from lampposts and cars to market stands—are interactive Terrain. Many Characters have skills allowing them to Throw interactive Terrain Features across the battlefield or Throw Enemies into them. Additionally, some Terrain Features have special rules listed on Stage Cards.
Interactive Terrain can be destroyed. When this happens, remove the destroyed Terrain Feature from the board. If a Character or Enemy is overlapping a Terrain Feature, it can still be destroyed. See below for more information on Throwing interactive Terrain.
Non-interactive Terrain Features, referenced in some specific Stages, can't be Thrown or destroyed and will have an effect on the game in other ways described in the Stage's special rules.
Throwing a Terrain Feature
When a Terrain Feature is Thrown, that Terrain Feature is destroyed and removed from the board. Then measure the distance of the Throw in a straight line from the Space the Throwing Character or Enemy occupies. The first Terrain Feature, Character, or Enemy that occupies a Space in that line suffers the effects of a collision with the Thrown Terrain Feature. If the Thrown Terrain Feature collides with another Terrain Feature, that Terrain Feature is also destroyed and removed from the board.
If the Thrown Terrain Feature collides with a Character or Enemy, that Character or Enemy dodges to avoid being damaged by the Throw.
Dodging
When a Terrain Feature, Character, or Enemy collides with a Character or Enemy, there is a chance for the non-Thrown Character or Enemy to dodge out of the way to avoid some or even all the damage!
When a Character dodges, that Character rolls dice equal to its Physical Defense Stat. Add an additional die to the dodge roll for each Critical in the initial roll and then apply any dice modifications from special rules and effects. The dodging Character suffers 3 Damage, reduced by 1 for each Critical, Wild, or Block in the final dodge roll.
When an Enemy dodges, it suffers 3 Damage, reduced by the value of its Defense Stat.
Cover
Characters and Enemies occupying the same Space as a Terrain Feature benefit from Cover.
During the Modify Defense Dice step of an attack, a defending Character benefiting from Cover (from Terrain or otherwise) may change the result of one defense die to a Block.
During the Calculate Success or Failure step of an attack, a defending Enemy benefitting from Cover (from Terrain or otherwise) increases its Defense Stat by 1.
Appendix A: Timing
If players attempt to use Reactive skills at the same time, players decide the order in which those skills are resolved. If at any point multiple effects occur simultaneously and the rules do not give instructions to their order, the players decide the order in which those effects occur. After all allied effects are resolved, resolve all enemy effects in the order chosen by the players. Resolve the effects of Stage Cards after all other effects.
Character Attack
Here is a detailed, step-by-step breakdown of how to make a Character attack:
- Choose an attack A. The attacker can't choose an attack if it can't pay its Power cost.
- Declare a target for the attack and measure Range. A. Choose an Enemy to be the target of the attack. B. Measure the Range to the target of the attack. C. If the target isn't within Range, choose one of the following: i. Choose a different target for the attack. ii. The attack ends. D. If the target is in Range, resolve effects that happen when an Enemy is targeted, starting with allied effects.
- Pay Power for the attack, if applicable. If the Power cost cannot be paid, the attack ends.
- Create the attacker's dice pool. A. Add a number of dice equal to the Strength of the attack to the dice pool. B. Apply effects that add or remove dice. A dice pool can never be reduced to fewer than one die.
- Roll the attacker's dice pool. This is the attack roll.
- Resolve Critical results rolled. A. The attacker rolls an additional die for each Critical in the initial attack roll.
- Modify Dice. A. Apply allied effects that change the attacker's die results to the attack roll. B. Apply enemy effects that change the attacker's die results to the attack roll.
- Calculate Success or Failure. A. Total the number of the attacker's Criticals, Wilds, and Hits. This is the number of the attacker's successes. B. The number of defender's successes is equal to its Defense Stat. C. Subtract the total number of the defender's successes from the total number of the attackers' successes. If the result is 0 or less, the attack is a failure. If the result is greater than 0, the attack is a hit. The remaining number of successes is the amount of Damage the attack deals in the Apply Damage step.
- Resolve effects that occur before Damage is dealt. A. Apply allied effects. B. Apply enemy effects. C. Apply the effects of Stage Cards.
- Apply Damage. A. The defender suffers Damage from the attack. An Enemy can only suffer Damage equal to its Stamina; any excess Damage is not applied.
- The attack is resolved.
- Resolve effects that occur after the attack. A. Apply allied effects. B. Apply enemy effects. C. Apply the effects of Stage Cards.
Enemy Attack
Here is a detailed, step-by-step breakdown of how to make an Enemy attack:
- Target the Defender and Measure Range. A. The attackers measure Range to the defender. B. Resolve effects that happen when a character is targeted, starting with allied effects.
- Determine Attack Strength. A. Add together the Strength of each Enemy attacking the Character.
- Determine Attack Type. A. Find the first Enemy Stat Card on the Enemy Tracker that matches at least one of the attackers. The Attack Type of this attack is the Attack Type shown on that card.
- Create the defender's dice pool. A. Add a number of dice equal to the Defense Stat that matches the attack's type. B. Apply effects that add or remove dice. A dice pool can never be reduced to fewer than one die.
- Roll the defender's dice pool. This is the defense roll.
- Resolve Critical results rolled. A. The defender rolls an additional die for each Critical in the initial defense roll.
- Modify Dice. A. Apply allied effects that change the defender's die results to the defense roll. B. Apply enemy effects that change the defender's die results to the defense roll.
- Calculate Success or Failure. A. The number of attackers' successes is equal to the Attack Strength. B. Total the number of the defender's Critical, Wild, and Block results. This is the number of the defender's successes. C. Subtract the total number of the defender's successes from the Attack Strength. If the result is 0 or less, the attack is a failure. If the result is greater than 0, the attack is a hit. The final Attack Strength is the amount of Damage the attack deals in the Apply Damage step.
- Resolve effects that occur before Damage is dealt. A. Apply allied effects. B. Apply enemy effects. C. Apply the effects of Stage Cards.
- Apply Damage. A. The defender suffers Damage from the attack. A Character can only suffer Damage equal to its Stamina; any excess Damage is not applied. The defender gains an amount of Power equal to the amount of Damage suffered.
- The attack is resolved.
- Resolve effects that occur after the attack. A. Apply allied effects. B. Apply enemy effects. C. Apply the effects of Stage Cards.
Appendix B: Special Conditions
Here you will find a list of special conditions and their effects on Characters.
- Bleed: At the end this Character's next Activation, it suffers 2 Damage. Then remove the Bleed special condition.
- Hex: This Character doesn't roll additional dice for its Critical results during attack, defense, and dodge rolls. When this Character rolls dice as part of an attack, defense, or dodge roll, after the effect is resolved, if the roll contained one or more Critical results, remove the Hex special condition.
- Incinerate: The next time this Character defends, it rolls 2 fewer dice. Then remove the Incinerate special condition.
- Shock: The next time this Character attacks, it rolls 2 fewer dice. Then remove the Shock special condition.
Enemy Special Conditions
Special conditions applied to Enemies have different effects than they do on Characters. Here you will find a list of special conditions and their effects on Enemies.
- Bleed: At the end of the Enemies Attack step, this Enemy suffers 2 Damage. Then remove the Bleed special condition.
- Hex: When this Enemy is attacked, the attacker rolls 2 additional dice for each Critical result instead of 1. When additional dice are rolled in this way, after the attack is resolved, remove the Hex special condition.
- Incinerate: The next time this Enemy defends, reduce its Defense Stat by 2. Then remove the Incinerate special condition.
- Shock: The next time this Enemy would attack, it does not attack. Then remove the Shock special condition.
Appendix C: Stage Examples
Here you will find examples showing how to resolve the Special Rules of Stage Cards and Boss Behavior.
At the beginning of the Enemies Move step, the players follow the instructions on the Boss Battle Card and activate Green Goblin according to his Boss Behavior. Green Goblin Advances his Speed of 6 in a straight line Toward the Target token. After moving 3 Spaces, he overlaps the Target token, so the Priority Player rolls a die. A Blank is rolled. The players Place Green Goblin in the Space that has a Blank icon and contains an arrow. Then the Target token is Placed by following the arrow in that Space to the Battlefield edge and Placing it in the last counted Space. Finally, Green Goblin finishes resolving the 3 remaining Spaces of his Advance. When he would move into the Space occupied by Ghost-Spider, Ghost-Spider suffers 2 Damage and Ghost-Spider's controlling player Places her into another Space as close as possible to her current position before Green Goblin continues that Advance.
Printed Card Text
The following card text is printed in full in this rulebook's Components and Stage Examples pages.
Green Goblin: Boss Battle Card ("Green Goblin Always Has the Last Laugh")
Boss Behavior
- Before Enemies Move, if Green Goblin isn't on the board, roll a die. Spawn Green Goblin into the Space whose icon matches the result and contains an arrow. Then count Spaces in a straight line as indicated by the arrow on that Space until you reach a battlefield edge. Place a Target token in the last counted Space.
- When Enemies Move, Green Goblin Advances his Speed in a straight line Toward the Target token. If Green Goblin overlaps the Target token, roll a die. Place Green Goblin in the Space whose icon matches the result and contains an arrow. Place the Target token using the process described above then continue Green Goblin's Advance. Green Goblin cannot be moved by any other effects.
- When Enemies Frenzy, Green Goblin removes all special conditions from himself instead of Advancing.
- When Green Goblin would move into a Space occupied by a Character during an Advance, that Character suffers 2 Damage and Places itself into another Space as close as possible to its current position before Green Goblin continues that Advance.
- When Green Goblin would move into a Space occupied by another Enemy during an Advance, Place that Enemy into another Space as close as possible to its current position before Green Goblin continues that Advance.
- When Green Goblin would be Thrown, he is not Thrown and suffers 1 Damage instead.
- When Green Goblin is Dazed, remove him from the battlefield and Place a Dazed token on the Boss Daze Tracker.
Green Goblin: Boss Battle Pitfall ("Turbo Boost")
Green Goblin removes all special conditions from himself then Advances as described on the Boss Battle card when Enemies Move. If the Green Goblin passes through one or more Web Lines during this Advance, he ignores the Along Came a Spider special rule, and the Braces that were used to create that Web Line are turned to their starting position. Then Enemies Frenzy.
Green Goblin: Enemy Modifier Card ("Oscorp Weaponry")
After an Enemy Is Attacked: If there are 1 or more Failure results in the attack roll and that Enemy is not Dazed or KO'd, that Enemy deals 1 Damage to the attacking Character.
Oscorp Lab: Come Into My Lair Said the Goblin to the Spider (Stage Card)
The Green Goblin is poisoning the populace of New York with his Goblin Serum! Our friendly neighborhood heroes must gather samples from the Green Goblin's minions and synthesize them into an anti-serum using Oscorp Labs equipment!
Setup: When setting up Samples (Objective tokens) for this Stage, only use the tokens marked with the Critical, Wild, Hit, and Block symbols. At the end of Setup, randomize the 12 Ingredients (Stage tokens) and put them near the play area, face down, to create the Ingredient Pool.
Objective Rules: Interact (Sample): Place any number of Ingredients this Character is holding on a Sample marked with the matching symbol. When a Sample has 2 of its matching Ingredients on it, that Sample is Synthesized. Remove it from the battlefield.
Stage Special Rules:
- Scientific Method: When a Character would KO a Minion, before that Minion is removed from the board, that Character's controlling player reveals a random token from the Ingredient Pool and Places it in the Space that the Minion occupies.
- Interact (Ingredient): Put this Ingredient on this Character's Dashboard. This Character is holding that Ingredient. A Character can hold a maximum of 2 Ingredients at a time. Before a third Ingredient would be put on a Character's Dashboard, choose an Ingredient that Character is holding and Place it within 1 Space of that Character. When a Character that is holding 1 or more Ingredients is Dazed, its controlling player Places those Ingredients within 1 Space of that Character.
- Lab Partners: During a Character's Activation, if another Character within 1 Space is holding 1 or more Ingredients, the activating Character may Interact with those Ingredients as long as both Characters' controlling players agree.
End of Stage: At the end of any Turn, if 3 or more Samples are Synthesized, the Characters complete this Stage!
Enemy Stat Cards Printed in the Rulebook
- Spider-Slayer (Sentry), Protection Programming: After Enemies Attack: Each Spider-Slayer that attacked 1 or more Characters Advances 1 Space Toward the nearest Objective token.
- Goblin Army (Goon), Goblin War Cry: When Enemies Frenzy: Each Goblin Army Advances 3 Spaces instead of 1 Space.