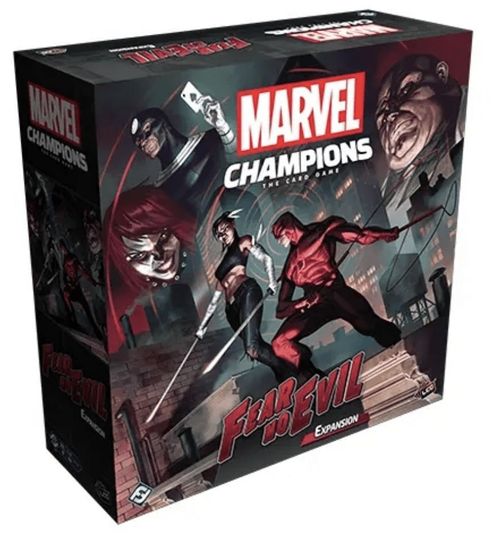
Marvel Champions: The Card Game – Fear No Evil Expansion
Marvel Champions: The Card Game – Fear No Evil Expansion Rulebook
Table of Contents
Table of Contents
- Components
- Featured Keywords
- Featured Terms
- Victory Display
- Alternate Encounter Card Back
- Amplify Icon (Updated)
- Player Side Schemes
- Attacks Against Allies
- Forced Actions
- Interchangeable Scenarios
- Campaign Mode Rules
- Campaign Setup
- Scenarios
- Starter Decks
- Daredevil's Sense Deck
- Frequently Asked Questions
- Campaign Log
Components
- 276 cards, consisting of 89 player cards, 16 villain cards, and 171 encounter cards.
- Cards from the Fear No Evil expansion are identified by the Fear No Evil set symbol.
- Two pre-built player decks premiere two new heroes: Daredevil and Echo. See the Starter Decks section for their decklists.
Featured Keywords
- Keyword new to this expansion. ** Keyword updated starting with this expansion.
Discount X (trait) *
When a player plays a card with discount X, its resource cost is reduced by X if that player's identity has the specified trait. If more than one trait is specified and the player's identity has at least one of the specified traits, the cost is reduced by X.
Hinder X
When a card with hinder X enters play, place X additional threat on that card.
Patrol
While a minion with patrol is engaged with a player, that player cannot use cards they control to thwart the main scheme.
Permanent
A card with permanent cannot be defeated, leave play, or have any part of its text box blanked, except by card abilities in the same set (hero set, scenario set, or modular set).
Piercing
An attack with piercing discards any tough status cards from the target of the attack before dealing damage.
Prerequisite (form or trait) *
In order for a player to play a card with prerequisite (form) or prerequisite (trait), their identity must be in the specified form (i.e. Hero or Alter-Ego form) or have the specified trait.
Ranged
An attack with ranged ignores the retaliate keyword.
Setup
A card with setup begins the game in play.
Stalwart
A character with stalwart cannot be stunned or confused.
Starting *
A card with starting may be added to its owner's starting hand during setup. Each deck cannot include more than one card with starting. Before drawing their starting hand during player setup, each player with a starting card in their deck may search their deck for that card and add it as the first card of their starting hand. That card does count against their hand size and can be discarded for the mulligan.
Steady
A character with steady can have one additional stunned status card and one additional confused status card. That character is not stunned unless they have two stunned status cards, and is not confused unless they have two confused status cards. After that character's attack, scheme, or thwart is canceled by a status card effect, remove all status cards of the corresponding type from that character.
Team-Up
The team-up keyword names two characters. To include a card with team-up in a player's deck, their chosen identity must match one of the named characters. Additionally, a card with team-up cannot be played unless both of the named characters (identity or ally) are in play.
Teamwork (trait)
After a minion with teamwork enters play and engages a player, if there is at least one other minion that shares the specified trait in play, the minion that just entered play activates against the player it is engaged with.
Example: Kate is engaged with Ivan Banionis when Johnny reveals and engages a Tracksuit Bro, who has Teamwork (tracksuit). Because Ivan Banionis also has the tracksuit trait, the Tracksuit Bro activates against Johnny.
Temporary
A card with temporary must be discarded from play at the end of the round.
Victory X
When a card with victory X is defeated, place it in the victory display instead of its owner's discard pile.
Villainous **
When a character with villainous uses a basic power, give it a facedown boost card from the top of the encounter deck. When resolving that basic power, turn the boost card faceup, resolve any boost ability on that card, and apply its boost icons to the character's stats for this use. Discard the boost card after the basic power resolves.
Vulnerable **
When a character with vulnerable becomes stunned or confused, that character is immediately discarded. That character is not considered defeated. If the character would be simultaneously defeated by damage and become stunned or confused, the first player chooses whether that character is considered defeated or not.
Featured Terms
- Term new to this expansion. ** Term updated starting with this expansion.
"Exactly Defeat" *
When a card ability requires a character to "exactly defeat" an enemy, that enemy must be defeated by an attack that dealt no excess damage.
When a card ability requires a character to "exactly defeat" a side scheme, that side scheme must be defeated by a thwart that did not attempt to remove more threat than was necessary to defeat the scheme. For example, a thwart that can remove two threat from a scheme can exactly defeat a scheme with two threat on it, but not a scheme with one threat on it.
"Find" **
When an effect instructs a player to find a card, they search each area where the card could be found (play area, set-aside area, player deck, discard pile, encounter deck, etc.). They do not search the victory display, cards that have been removed from the game, facedown encounter cards currently dealt to players, or facedown boost cards. Do not search game areas unnecessarily if it is known where the card can be found.
"Tuck"
When a player is instructed to tuck a card under another card, they place the tucked card faceup under the other card. The tucked card is not in play. When a card leaves play, any cards tucked under it are discarded.
Victory Display
The victory display is an out-of-play game area shared by all players. Cards in the victory display follow the standard rules for out-of-play cards.
Alternate Encounter Card Back
This product contains a variation on the standard encounter card back. This card back allows players to differentiate these cards from other cards of the same type as the rules for these cards prevent them from entering a deck, a discard pile, or a player's hand.
Amplify Icon (Updated)
The amplify icon increases the number of boost icons on boost cards. When a character resolves a boost card while using a basic power, add one additional boost icon to that card for each amplify icon in play.
Player Side Schemes
Player side schemes are a type of player card. During a player's turn, they can play a player side scheme from their hand by paying its resource cost, placing it next to the main scheme, and putting threat on it equal to its starting threat value. While in play, player side schemes function the same as encounter side schemes, except that they are player cards.
Player side schemes are subject to the player side scheme limit, which restricts the players to having at most one player side scheme in play if one or two players started the game, or at most two player side schemes if three or four players started the game. If this limit is exceeded, the first player chooses and discards player side schemes from play to their owners' discard piles until they no longer exceed the limit.
Attacks Against Allies
Some effects cause a villain or minion to attack an ally directly. When this occurs, any undefended damage from that attack is placed on the ally that was attacked.
Any boost abilities or triggered abilities that resolve during an attack against an ally that refer to "you" refer to the player who controls the attacked ally. Player card abilities that trigger when the attacking enemy "attacks you" do not trigger.
Players may defend these attacks as normal by declaring a hero or an ally as the defender. If the attack has overkill and defeats an ally (whether that ally was the attacked ally or a defending ally), any excess damage from that attack is dealt to the identity of the player who controlled the defeated ally.
Forced Actions
Some cards have a "Forced Action" triggered ability. A player may perform a forced action at any time during the player phase they could normally perform an action, but the player phase cannot end until all possible forced actions among all players have been performed. If a card with a forced action ability leaves play, or the cost cannot otherwise be paid (such as if the cost includes exhausting an exhausted card), then the action cannot be resolved and the players can end the player phase as normal.
Interchangeable Scenarios
Unlike other Marvel Champions expansions, five of this expansion's scenarios combine one of five interchangeable main schemes with one of the five interchangeable villains with the underling trait. The setup instructions for each scenario instruct the players to choose an underling villain to play against.
Underling Villain Setup and Play Tips
The following sections provide setup instructions and play tips for each underling villain.
Bullseye
To set up Bullseye, use Bullseye (I) and (II). (Use Bullseye (II) and (III) instead for expert mode.)
Each of Bullseye's boost cards gets an additional boost icon, which makes him particularly dangerous if he gains extra boost cards by Raise the Stakes or various "Boost" abilities on treachery cards. Many of Bullseye's encounter cards target either your allies or your persona supports and can remove them from the game. Note that if this happens during a campaign, those allies and supports are gone for the rest of the campaign! With Bullseye (II), Bullseye's permanent Adamantium-Laced Spine attachment prevents all but 3 damage from each attack, meaning he is more susceptible to small attacks. If you manage to flip the attachment, make the most of this opportunity with big attacks.
Electro
To set up Electro, use Electro (I) and (II). (Use Electro (II) and (III) instead for expert mode.)
Electro places charge counters on her permanent Electric Charge attachment, and she spends those counters to give herself additional boost cards. She replenishes these charges when she schemes and through various encounter card effects. Conversely, players can remove these counters by spending resources. Energy resources are double-edged swords as they are more effective at removing charges, but also make players more susceptible to her treacheries.
Hammerhead
To set up Hammerhead, use Hammerhead (I) and (II). (Use Hammerhead (II) and (III) instead for expert mode.)
Hammerhead is all about stunning his enemies. His "Forced Response" stuns any character that he damages. The "Head First!" treachery and Maggia Underboss minions hit even harder when your hero is stunned. Use tough status cards, your hero's DEF value, and expendable allies to keep your hero from being stunned.
Purple Man
To set up Purple Man, use Purple Man (I) and (II). (Use Purple Man (II) and (III) instead for expert mode.)
Purple Man's stats may be low, but that's because he makes others do his dirty work. Each of his cards gains a "Boost" ability that deals that card as a facedown encounter card after the activation. Each card has a star icon in the boost field to remind you of this. Purple Man's encounter set includes several Influenced minions—mind-controlled citizens who punish you if you defeat them. Purple Man gives these minions guard (and villainous and patrol at higher stages). However, since they all have the vulnerable keyword, they can be safely discarded if stunned or confused.
Typhoid Mary
To set up Typhoid Mary, reveal the Establish Trust side scheme (113A) and the Disturbed Psyche environment (112). Resolve the "Setup" ability on Disturbed Psyche to put the Typhoid Mary (A)/Bloody Mary (A) card into play on a random side. (Use Typhoid Mary (B)/Bloody Mary (B) instead for Expert mode).
The villain flips at the end of each villain phase, switching between her Typhoid Mary form and her Bloody Mary form. This means that her attack and thwart will alternate being her higher stat—so plan accordingly. The players do not win this scenario in the usual way (defeating all the villain stages), but instead by getting three tokens on the Disturbed Psyche environment. The players gain tokens either by removing all the threat from Establish Trust or by reducing the villain's hit points to 0. Establish Trust adds threat tokens to Disturbed Psyche, while the villain's "Forced Interrupt" adds damage tokens. In campaign play, if Disturbed Psyche has more threat than damage when the players win, they gain access to a Typhoid Mary/Bloody Mary ally for the rest of the campaign.
Campaign Mode Rules
Each of the scenarios in this expansion can be played individually as a standalone adventure, or together with the other scenarios as part of one overarching campaign. Campaign mode combines five of the six scenarios in the Fear No Evil expansion into one epic experience, where the outcome of each game impacts the next scenario.
Unlike other Marvel Champions campaigns, the order of these scenarios is not fixed. Instead, the players choose which scenario to play next after each game.
To begin a campaign, the players start by choosing their heroes. Each player must use their chosen identity for the entire campaign, but they are free to change aspects and alter the contents of their deck between scenarios, following the deck customization rules in the Marvel Champions Rules Reference.
Campaign Log
The campaign log found on page 28 of this rulebook tracks the progress of the entire campaign. At the end of each scenario, the players record their results by entering the required information in the campaign log.
A printable copy of the campaign log can be found on our support page at www.FantasyFlightGames.com/Marvel-Champions.
Scenario Progression
Before choosing each scenario—including the first—two of the scenarios that haven't been resolved yet are chosen at random. These scenarios progress (this is explained in detail in campaign setup) as the villain continues with their plot while the heroes are occupied elsewhere. If a scenario progresses too much, the players automatically fail that scenario and receive a penalty for the rest of the campaign. Losing a scenario does not automatically cause it to fail and it may be able to be attempted again. Conversely, winning a scenario earns the players a benefit for the rest of the campaign.
Once all five interchangeable main schemes are either Completed or Failed, the players take on Kingpin in a final showdown!
Before playing each scenario in campaign mode, follow the instructions in the Campaign Setup section on page 9. When the game ends, if the players won, follow that scenario's victory instructions in the order they are listed. If the players lost, follow that scenario's defeat instructions instead.
Campaign Environments
Each interchangeable main scheme has a corresponding environment card. These cards are double-sided, with a Completed side and a Failed side. The Completed side indicates what benefits the players gain by playing and winning that scenario. The Failed side indicates what penalties the players suffer if that scenario has failed. Players may look at both sides of each of these cards when choosing which scenario to play.
Once a scenario is completed or failed, the players begin each subsequent game with that scenario's environment in play on its appropriate side.
Underling Villain Play Order
As mentioned earlier, each scenario uses one of the five interchangeable villains. Each of these villains has the underling trait. For the players' first playthrough, below is a recommended order to play against the villains. This order pits the heroes against increasingly complex villains as the campaign advances.
- Hammerhead
- Bullseye
- Electro
- Purple Man or Typhoid Mary
On subsequent campaign playthroughs, players should randomly select the underling villain for each game.
Campaign Setup
Before beginning setup for each game, perform the following steps:
- Gather the five campaign environments (205–209). Check the campaign log and remove each card matching a Completed or Failed scenario.
- Shuffle the remaining campaign environments and draw two at random. If there is only one remaining, draw it.
- In the Campaign Log, progress each scenario matching a drawn environment by marking the first unmarked box to the right of that scenario. If there was only one environment drawn, mark two boxes instead. If a scenario has three Xs to its right, it has Failed.
- The players as a group choose any scenario to play that has not been Completed or Failed. If each scenario is either Completed or Failed, the players must choose the Kingpin scenario and skip to step 6.
- Determine the villain via the following criteria and record the name of the chosen villain next to the scenario in the campaign log: a. If there is already a villain listed for the chosen scenario, that villain must be chosen. b. If it is the players' first time through the campaign, they may choose the first villain in the list on page 8 that is not recorded in the campaign log. c. Otherwise, choose an underling villain at random that is not already recorded in the campaign log.
- Gather your chosen main scheme, your chosen villain, and their corresponding encounter sets.
- Proceed with scenario setup until player setup.
- Each player searches their deck for each card whose title is recorded in the "Allies/Supports Removed from the Campaign" section of the campaign log and removes those cards from the game. Any player whose deck is below the minimum deck size must add cards to their deck until they satisfy normal deck customization rules.
- Proceed with player setup.
- Expert Campaign Only: Set each player's hit points to their remaining hit point value recorded in the campaign log for the previous scenario.
- Expert Campaign Only: Each player may deal themself one facedown encounter card to heal damage from their identity equal to its REC.
- Place the environment for each Completed scenario into play Completed side faceup and the environment for each Failed scenario into play Failed side faceup. Resolve the "Setup" abilities on each of these cards.
Map of Scenarios
The map on page 10 shows the location of each scenario in the campaign:
- A: Protection Racket, p. 13
- B: The Raft Breakout, p. 15
- C: Art Museum Heist, p. 17
- D: The Getaway, p. 19
- E: Stop the Presses!, p. 21
Expert Campaign
For players who want an even more challenging campaign experience, the Fear No Evil expansion comes with everything you need to play an expert campaign.
Some Setup and Victory instructions are preceded by "Expert Campaign Only." Ignore these instructions unless you are playing an expert campaign.
Persistent Damage
While playing the Fear No Evil campaign at the expert level, each player must record their remaining hit points in the campaign log after each game. This determines each player's starting hit points for the next scenario.
If a player's remaining hit points is greater than their base hit points, record their base hit points in the campaign log instead.
Elimination and Victory
In an expert campaign, if a player is defeated during a scenario that their teammates go on to win, the defeated player does not participate in the Victory steps of that scenario.
However, during the Setup instructions of the next scenario, the defeated player can rejoin their teammates for the next scenario by following the Campaign Setup instructions for healing their identity.
Scenarios
Protection Racket
Main Scheme Deck: Protection Racket (x5)
Encounter Deck: Protection Racket, Disasters, Tracksuit Mafia, Standard, and chosen villain's encounter sets. (The Standard set can be found in the Marvel Champions core set.)
The Disasters and Tracksuit Mafia sets can be removed from this scenario and/or added to other scenarios when using the scenario customization rules.
Separate Main Schemes
In this scenario, each player has their own main scheme, representing a local business that needs protection from the villain and their goons. When setting up the game in standard mode, players can look at the "1B" side of the main schemes when making their choice of which one to start with.
Each main scheme is in the play area of the player who chose it. When a player plays an event or reveals a treachery that refers to "the main scheme," that card only applies to the main scheme in that player's play area. Cards in a player's play area (identities, allies, upgrades, minions, etc.) that refer to "the main scheme" refer only to the main scheme in the same play area.
Cards that are not in any player's play area (the villain, side schemes, and environments) that refer to "the main scheme" apply to all main schemes. For example, a crisis icon on a side scheme prevents threat from being removed from any main scheme, and an acceleration icon adds 1 additional threat to each main scheme during step 1 of each villain phase.
Cards and effects that refer to "a scheme," including basic thwarts, can affect any main scheme in play.
When an acceleration token would be placed on the main scheme, such as when the encounter deck is reset, place that acceleration token near the villain. Each acceleration token adds 1 additional threat to each main scheme during step 1 of each villain phase.
Campaign Instructions (Protection Racket)
Setup:
- Place 1 threat (2 threat in expert mode) on each main scheme for each check mark in the campaign log beside "Protection Racket."
Victory:
- If Disturbed Psyche (112) is in play and has at least 2 threat on it, check the "Trust Established?" box in the campaign log.
- If the Typhoid Mary/Bloody Mary ally (210) is in the victory display, check the "Mary Defeated?" box in the campaign log.
- Record the title of each unique ally and support that was removed from the game in the campaign log.
- Check the "Completed" box in the campaign log for Protection Racket.
- Go to "Campaign Setup" on page 9.
Defeat:
- Expert Campaign Only: Progress "Protection Racket" in the campaign log.
- Go to "Campaign Setup" on page 9.
The Raft Breakout
Main Scheme Deck: The Raft Breakout
Encounter Deck: The Raft Breakout, The Owl, Tombstone, Standard, and chosen villain's encounter sets. (The Standard set can be found in the Marvel Champions core set.)
The Owl and Tombstone sets can be removed from this scenario and/or added to other scenarios when using the scenario customization rules.
Master Key
The villain has acquired a key, represented by the Master Key attachment, that can open any prison cell in the Raft. When the villain schemes against a player, if any of the villain's boost cards is a minion, resolve any boost effects as normal and then deal each such minion to that player as a facedown encounter card instead of discarding it.
Campaign Instructions (The Raft Breakout)
Setup:
- If there is at least one check mark beside "The Raft Breakout" in the campaign log, give each Prisoner minion in play a tough status card. If there are two check marks, give each of those minions a facedown boost card as well.
Victory:
- If Disturbed Psyche (112) is in play and has at least 2 threat on it, check the "Trust Established?" box in the campaign log.
- If the Typhoid Mary/Bloody Mary ally (210) is in the victory display, check the "Mary Defeated?" box in the campaign log.
- Record the title of each unique ally and support that was removed from the game in the campaign log.
- Check the "Completed" box in the campaign log for The Raft Breakout.
- Go to "Campaign Setup" on page 9.
Defeat:
- Expert Campaign Only: Progress "The Raft Breakout" in the campaign log.
- Go to "Campaign Setup" on page 9.
Art Museum Heist
Main Scheme Deck: Art Museum Heist
Encounter Deck: Art Museum Heist, Cops, The Owl, Standard, and the chosen villain's encounter sets. (The Standard set can be found in the Marvel Champions core set.)
The Cops and The Owl sets can be removed from this scenario and/or added to other scenarios when using the scenario customization rules.
Art Pieces
This scenario includes four art pieces, each represented by an Art attachment. One of these art pieces, chosen at random by stage 1A of the main scheme, begins in play attached to the villain. Leaving these attachments on the villain can quicken the completion of the main scheme, both because these art pieces increase the attached character's SCH or THW value and because the main scheme gets an additional 1 threat added to it during step 1 of each villain phase for each Art attachment on the villain.
The villain can steal an art piece back each time an identity with one attached takes an attack undefended. This can be either a villain attack or a minion attack, but only one art piece is stolen after each undefended attack.
A player can take an art piece away from the villain by triggering the Hero Action on the art piece, which attaches the art piece to their hero. Three of the four pieces give a status card to a character when they first attach to that character, while the fourth grants the attached character the stalwart keyword, removing any stunned or confused status cards from that character.
Campaign Instructions (Art Museum Heist)
Setup:
- Place 1 threat (2 threat instead in expert mode) on the main scheme for each check mark in the campaign log beside "Art Museum Heist".
Victory:
- If Disturbed Psyche (112) is in play and has at least 2 threat on it, check the "Trust Established?" box in the campaign log.
- If the Typhoid Mary/Bloody Mary ally (210) is in the victory display, check the "Mary Defeated?" box in the campaign log.
- Record the title of each unique ally and support that was removed from the game in the campaign log.
- Check the "Completed" box in the campaign log for Art Museum Heist.
- Go to "Campaign Setup" on page 9.
Defeat:
- Expert Campaign Only: Progress "Art Museum Heist" in the campaign log.
- Go to "Campaign Setup" on page 9.
The Getaway
Main Scheme Deck: The Getaway
Encounter Deck: The Getaway, Cops, Drive, Standard, and chosen villain's encounter sets. (The Standard set can be found in the Marvel Champions core set.)
The Cops and Drive sets can be removed from this scenario and/or added to other scenarios when using the scenario customization rules.
Speed Counters
Speed counters placed on the main scheme represent the speed of the ongoing chase. The faster the villain flees, the harder it is to keep up with them and the greater the chance of the chase ending in a catastrophic accident. A speed counter gets added to the main scheme at the end of each round unless you are able to keep it clear of threat. There is no limit to the number of speed counters on the main scheme, and encounter cards in the deck get more punishing the more counters there are.
Out Front/Alongside
This double-sided attachment on the villain indicates whether the heroes have kept up with the villain and are Alongside them, or if they're getting away and Out Front. This attachment starts the game on the Out Front side.
While the villain is Out Front, any damage you would deal to them instead removes that amount of threat from the main scheme. (If the villain has a tough status card, they keep that card because the damage is not actually dealt to them. Similarly, if the villain has a Vehicle attachment from the Drive modular set, no damage is placed on that card.)
If there is no threat on the main scheme, Out Front flips to Alongside. This triggers the "When Revealed" effect on Alongside, dealing damage to both the villain and the heroes as they collide at high speed. While you are Alongside, the attachment has no further effect. The attachment flips back to Out Front at the end of each round in which there is threat on the main scheme.
Campaign Instructions (The Getaway)
Setup:
- If there is at least one check mark beside "The Getaway" in the campaign log, find Jackknifed Tanker Truck and reveal it. If there are two check marks, place an additional 1 threat (2 threat instead in Expert mode) on Jackknifed Tanker Truck.
Victory:
- If Disturbed Psyche (112) is in play and has at least 2 threat on it, check the "Trust Established?" box in the campaign log.
- If the Typhoid Mary/Bloody Mary ally (210) is in the victory display, check the "Mary Defeated?" box in the campaign log.
- Record the title of each unique ally and support that was removed from the game in the campaign log.
- Check the "Completed" box in the campaign log for The Getaway.
- Go to "Campaign Setup" on page 9.
Defeat:
- Expert Campaign Only: Progress "The Getaway" in the campaign log.
- Go to "Campaign Setup" on page 9.
Stop the Presses!
Main Scheme Deck: Stop the Presses!
Encounter Deck: Stop the Presses!, Tombstone, Tracksuit Mafia, Standard, and chosen villain's encounter sets. (The Standard set can be found in the Marvel Champions core set.)
The Tombstone and Tracksuit Mafia sets can be removed from this scenario and/or added to other scenarios when using the scenario customization rules.
Daily Bugle Support Cards
In this scenario, each player starts the game with a random Daily Bugle support under their control. Each of these supports has the "Uses (3 stamina counters)" keyword. As usual, it enters play with 3 stamina counters on it and, if all of those counters are removed, the support is discarded. In this scenario, the main scheme indicates that if a Daily Bugle support leaves play, the players lose the game. Thus, it is imperative that the players protect their Daily Bugle supports from leaving play.
The Daily Bugle supports can lose stamina counters in several ways. First, each of their abilities spends a stamina counter when used. Second, the main scheme removes 1 of their stamina counters after an undefended enemy attack unless the players place threat on the main scheme. And finally, some encounter cards can remove stamina counters.
Fortunately, the players have the ability on the Daily Bugle environment to restock stamina counters should their Daily Bugle support get low.
Campaign Instructions (Stop the Presses!)
Setup:
- Remove 1 stamina counter from each Daily Bugle Support for each check mark in the campaign log beside "Stop the Presses!"
Victory:
- If Disturbed Psyche (112) is in play and has at least 2 threat on it, check the "Trust Established?" box in the campaign log.
- If the Typhoid Mary/Bloody Mary ally (210) is in the victory display, check the "Mary Defeated?" box in the campaign log.
- Record the title of each unique ally and support that was removed from the game in the campaign log.
- Check the "Completed" box in the campaign log for Stop the Presses!.
- Go to "Campaign Setup" on page 9.
Defeat:
- Expert Campaign Only: Progress "Stop the Presses!" in the campaign log.
- Go to "Campaign Setup" on page 9.
Kingpin
Villain Deck: Kingpin (A1)
Remove Kingpin (A1) and add Kingpin (B1) for expert mode.
Main Scheme Deck: The King's Gambit, Endgame
Encounter Deck: Kingpin, Tombstone, and Tracksuit Mafia encounter sets. (Important: This scenario does not use the Standard encounter set, but still uses the Expert encounter set in Expert Mode.)
The Tombstone and Tracksuit Mafia sets can be removed from this scenario and/or added to other scenarios when using the scenario customization rules.
Double-Sided Villain
Kingpin is represented by two double-sided villain cards: one for standard mode (A1/A2) and one for expert mode (B1/B2). Kingpin begins the game on his "1" side, which represents him operating from behind the scenes and pulling the strings of the heroes and their nemeses. On his "1" side, Kingpin is untouchable by the players; he cannot be stunned or confused, cannot take damage, and cannot have upgrades attached to him. Whenever he would attack, he schemes instead.
In order to confront Kingpin directly, the heroes must first convince the public that they are not to blame for the wave of crime and violence gripping the city. To do this, they must build public support by bringing bad guys to justice. Each time a minion is defeated, a support counter is placed on the Public Support environment.
If there are enough support counters there, the heroes can take on Kingpin directly. At the start of the villain phase, Public Support flips Kingpin to his "2" side, advances the main scheme, and flips itself to its High side. Once this happens, Kingpin can be attacked directly, though the main scheme gives each minion the guard keyword.
Nemesis Sets
This scenario utilizes the heroes' nemesis sets in a different way. During setup, each player is instructed to reveal their set-aside nemesis minion. If any player's nemesis minion shares a title with a character in play (such as Echo's nemesis minion, Kingpin), that nemesis minion is removed from the game and that player instead finds an Underling minion in the encounter deck and reveals it.
Several encounter cards in this scenario instruct a player to bring a card from their set-aside nemesis set into the game. Once a card has entered the game this way, it is treated as part of the encounter deck.
Campaign Instructions (Kingpin)
Setup:
- If the number of Completed environments in play is at least:
- 3, give each minion in play a tough status card.
- 4, find and reveal the James Wesley attachment.
Defeat:
- Standard Mode Only: Replay the scenario.
- Expert Campaign Only: If there is at least one environment on its Completed side, choose and flip one to its Failed side and replay the scenario. Otherwise, the players lose the campaign.
Victory:
- The players take down Kingpin and win the campaign!
Starter Decks
These preconstructed decks and character introductions are intended for the player who wants to play the game immediately without customizing their own deck.
Echo / Protection
Echo's photographic reflexes allow her to perfectly recreate any physical movement she sees. Any time a player plays an aspect or basic event, Echo can tuck it under her identity card. She can then discard one of the six copies of her event, Photographic Reflexes, to play a tucked event with its cost reduced by two. Maya Lopez's alter-ego ability and Study the Tape events both help ensure you'll always have an event to "echo." Muscle Memory lets you return a tucked card to hand if you have no Photographic Reflexes to play it with, and Improvisation gives you even more benefits for playing events.
The protection half of Echo's deck is chock-full of events for her to echo. Boost Echo's DEF with Ronin and Innate Reflexes, the latter of which can start in your opening hand thanks to its "starting" keyword. The Best Offense... temporarily boosts your DEF even higher and lets you use it in place of your THW and ATK. Army of One lets Echo ready to get even more value from her boosted stats, and In Harm's Way can do some serious damage and threat removal. Just be careful playing your Daredevil ally as he will reduce the effectiveness of many of your aspect cards.
- Echo cards: Daredevil, Photographic Reflexes (x6), Study the Tape (x2), The Rez, American Sign Language, Choreography, Echo's Katana, Improvisation, Muscle Memory
- Protection cards: Innate Reflexes, Army of One (x3), Get Their Attention (x3), In Harm's Way (x3), Powerful Punch (x3), The Best Offense... (x3), Ronin, Stand Alone (x3)
- Basic cards: See No Evil, Hear No Evil; Superpower Training; Energy; Genius; Strength
- Nemesis set: Kingpin, Master Manipulator, Kingpin's Henchman (x2), Pawn of the Kingpin
- Obligation: Raised by the Kingpin
Daredevil / Justice
Daredevil's superhuman senses are key to his power. (See Daredevil's Sense Deck below.) Not only do these upgrades provide powerful abilities to Daredevil when he interacts with the card to which the upgrades are attached, they also power up his events. Even though you can look through the Sense deck at any time, just focus on the top card. Any extra resources that you don't plan to use for the cards in your hand can be used to play out Sense upgrades. And if you decide you need a specific sense, both Deposition and The Man Without Fear let you find just the upgrade you need.
Daredevil's power may be in his senses, but Matt Murdock's is in his friends. Foggy Nelson helps deal with threat on turns you are in alter-ego form, while Sister Maggie helps nurse you back to health and Karen Page gets important cards back into your deck. Nelson & Murdock confuses the villain after Matt or Foggy defeats a side scheme. Note that all of Daredevil's Thwart events can be played while in alter-ego form.
Daredevil's aspect cards come with several more upgrades that attach to enemies or schemes to power up his events even further. Know Your Enemy and Stick help you defeat side schemes exactly so you can stun the villain with Stealth Training.
- Sense cards: Acute Tactility, Enhanced Olfaction, Heightened Hearing, Radar Sense, Superior Taste
- Daredevil cards: Elektra, Cross Examination (x2), Deposition (x2), Living Lie Detector (x2), Raising Hell, Focus the Senses, Foggy Nelson, Karen Page, Nelson and Murdock, Sister Maggie, Daredevil's Billy Club, The Man Without Fear
- Justice cards: Blindspot, Cloak, Dagger, Ghost Rider, Know Your Enemy (x3), De-escalation, Chance Encounter (x3), Legal Trouble (x3), Move in Shadow (x3), Stealth Training (x3)
- Basic cards: Stick, Contingency Planning (x3), Dance with the Devil
- Nemesis set: Bullseye, Deadliest Man Alive, Stolen Sai, Eye on the Target (x2)
- Obligation: Sensory Overload
Daredevil's Sense Deck
Daredevil's superhuman senses are represented by his Sense deck. To create the sense deck, shuffle all five of Daredevil's Sense cards together. Place it faceup next to your identity and you can look through it at any time, but you cannot change the order. The ability on Daredevil's hero card allows you to play the top card of the Sense deck as if it were in your hand by paying its cost. When a Sense upgrade leaves play, the forced interrupt on both sides of Daredevil's identity card causes that upgrade to be placed on the bottom of the Sense deck.
Frequently Asked Questions
Daredevil
Q. Can players other than Daredevil trigger the abilities on Sense upgrades?
A. No, only the player who controls an upgrade can trigger its abilities.
Echo
Q. When can I use the ability on Photographic Reflexes (40) to play an event tucked under Echo?
A. While Photographic Reflexes is in your hand, it can be used any time that you would be able to play the tucked event if the tucked event had been in your hand. For example, if the tucked event has an "Action" ability, you can use Photographic Reflexes any time you could take an action during the player phase. If the event is a "Response" ability, you can use Photographic Reflexes to play that event any time its ability would trigger.
Q. What happens to the tucked event after I use Photographic Reflexes (40) to play it?
A. That event is placed in its owner's discard pile.
Typhoid Mary
Q. When Bloody Mary (B)/Typhoid Mary (B) (111) flips, does her "When Revealed" ability or toughness keyword resolve?
A. Yes, the ability or keyword on her new faceup side resolves.
The Getaway
Q. Can the "Forced Interrupt" on Out Front (129A) remove threat from the main scheme if there is a crisis icon in play or a minion with the patrol keyword engaged with me?
A. Yes. Because the "Forced Interrupt" on Out Front is an encounter card effect, it ignores crisis icons and the patrol keyword.
Protection Racket
Q. When Change of Venue (141) swaps a main scheme for a new one, what happens to cards attached to the previous main scheme?
A. All cards attached to the previous main scheme are discarded.
The Raft Breakout
Q. When Baron Zemo (145) leaves play, what happens to allies with threat on them?
A. They return to being allies under their owner's control, but the threat tokens stay. If Baron Zemo enters play again, those allies become minions again (in addition to any ally that Baron Zemo places a threat on).
Kingpin
Q. Does Black Cat (169) retain the villainous keyword while she is an ally?
A. Yes. The rules for villainous have been revised to function for allies (and heroes) who have it.
Discount X (trait)
Q. If a card with discount has multiple traits listed and my identity has each of those traits, does the cost reduction apply multiple times?
A. No, the cost reduction is applied only once if your identity has any number of matching traits.
Campaign Log
The campaign log is a printable form that tracks the progress of the campaign. It has these fields:
- Player Information: each player's identity and remaining hit points (Player #1 through Player #4).
- Scenario table: for each of Protection Racket, The Getaway, Art Museum Heist, The Raft Breakout, and Stop the Presses!, a Villain entry, check boxes for Completed, and boxes numbered 1 and 2, followed by three Xs for Failed.
- List of Villains: Bullseye, Electro, Hammerhead, Purple Man, Typhoid Mary.
- Trust Established? and Mary Defeated? check boxes.
- Allies and Persona Supports Removed from the Campaign: a list where the title of each unique ally and support removed from the game is recorded.