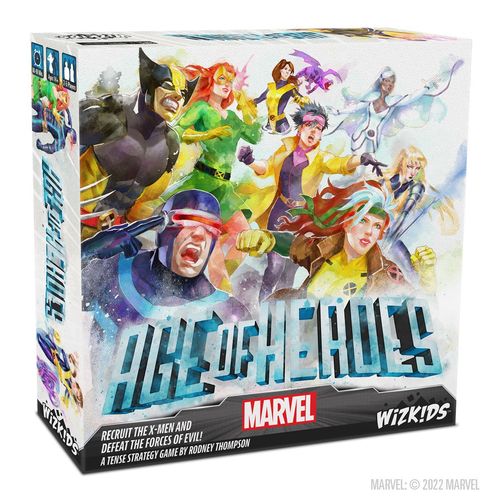
Marvel: Age of Heroes
Marvel: Age of Heroes Rulebook
Table of Contents
Table of Contents
Objective
Your goal in Age of Heroes is to score the most Victory Points. You earn Victory Points mainly by doing damage to Villains. But in order to do that you will need to take actions that build up resources and improve your mutant abilities. You can also earn victory points through special card and character abilities.
At the end of the game, the player with the most Victory Points is the winner!
Components
- 1 Game board
- 1 Round marker
- 1 Magneto Influence marker
- 4 Horseman Effect markers
- 8 Mission tiles (3 "Children of the Atom / Fatal Attractions", 5 "Fall of the Mutants")
- 34 Villain tiles (16 "Children of the Atom", 10 "Fatal Attractions", 8 "Fall of the Mutants")
- 6 double-sided "+100" / "+200" Score tokens
- 30 double-sided Resource tokens (10 red "Physical", 10 yellow "Mental", 10 blue "Willpower")
- 86 Institute cards (34 Core Deck, 26 "Children of the Atom / Fall of the Mutants", 26 "Fatal Attractions")
- 12 Parameter cards (two sets of each: 1 "Children of the Atom", 3 "Fatal Attractions", 2 "Fall of the Mutants")
- 10 double-sided Victory Point tokens
- 15 Villain markers
- 2 double-sided Extraction Zone tiles
- 6 double-sided Player boards (front and back)
- 36 Hero pawns (3 Cyclops, 3 Jean Grey, 4 Storm, 2 Forge, 4 Wolverine, 2 Jubilee, 1 Lockheed, 5 Kitty Pryde, 3 Gambit, 3 Rogue, 6 Magik)
- 5 Score markers (1 per player)
- 15 Resource markers (3 cubes per player color)
- 75 Player markers (15 discs per player color)
- 60 Evolution cards (5 Cyclops, 5 Jean Grey, 6 Storm, 4 Forge, 6 Wolverine, 4 Jubilee, 4 Lockheed, 6 Kitty Pryde, 5 Gambit, 5 Rogue, 10 Magik)
- 20 Student pawns
Institute Setup
- Place the Game board in the middle of the play area.
- Place the "1-3" Extraction Zone tile on the Extraction Zone. Keep the other Extraction Zone tiles near the Game board.
- Place the Round marker on space "1" of the Score track.
- Place Score tokens, Resource tokens, Victory Point tokens, and Student pawns to the left of the Game board to form the general supply.
- Choose one of the three missions to play: Children of the Atom (recommended for your first game), Fatal Attractions, or Fall of the Mutants. Follow the setup for your chosen mission. Complete the mission's setup before proceeding to step 6.
- Deal 4 cards from the Institute deck to the Xavier Protocols card slots along the top of the Game board.
Children of the Atom Setup (Recommended for First Game)
A straightforward Mission taking place within a simulation. Players battle a variety of foes, training a generation of heroes for future conflicts.
a. Place the "Children of the Atom" Parameter card faceup below the Game board.
b. Shuffle the "Core Deck" and "Children of the Atom/Fall of the Mutants" Institute cards together to form the Institute deck and place it above and to the left of the Game board. Leave space next to it for a discard pile.
c. Attach 1 random "Minor Enemy" Villain tile to each of the Mission tiles A and B and place them below the Game board.
d. Randomly select 1 "Final Test" Villain. Place it facedown beside Mission tile C below the Game board.
e. Shuffle the "Challenging Enemy" Villain tiles and place them facedown below the Game board.
Return unused Minor Enemy and Final Test Villain tiles to the box.
Fatal Attractions Setup
Magneto and his Acolytes attempt to lure mutants to their cause. Players must thwart the Master of Magnetism and renew hope among Xavier's Students and affiliated teams.
a. Place the 3 "Fatal Attractions" Parameter cards faceup below the Game board so that they are all visible. Add the Villain tokens to the token pool.
b. Place the Magneto Influence marker at the Headmaster's Office Location.
c. Shuffle the "Core Deck" and "Fatal Attractions" Institute cards together to form the Institute deck and place it above and to the left of the Game board. Leave space next to it for a discard pile.
d. Attach 1 random "Acolyte" Villain tile to each of the Mission tiles A and B and place them below the Game board.
e. Randomly select 1 "Magneto" Villain tile. Place it facedown beside Mission tile C below the Game board.
f. Shuffle the "Lieutenant" Villain tiles and place them facedown below the Game board.
Return unused Acolyte and Magneto Villain tiles to the box.
Fall of the Mutants Setup
Apocalypse has selected four impressionable mutants to be his new Horsemen. Players must free the mutants from Apocalypse's control then defeat their master.
a. Place the 2 "Fall of the Mutants" Parameter cards faceup below the Game board so that they are both visible.
b. Shuffle the "Core Deck" and "Children of the Atom/Fall of the Mutants" Institute cards together to form the Institute deck and place it above and to the left of the Game board. Leave space next to it for a discard pile.
c. Attach 1 random "Horseman" Villain tile to each of the Horseman Mission tiles and place them below the Game board.
d. Reveal cards from the Institute deck until you have revealed 2 Ally cards (with the Ally symbol) and 2 Team-Up cards (with the Team-Up symbol). Place the first Ally card revealed faceup on the "Death" Villain tile and the second faceup on the "War" Villain tile. Place the first Team-Up card revealed faceup on the "Pestilence" Villain tile and the second faceup on the "Famine" Villain tile. Shuffle all other revealed cards back into the Institute deck.
e. Randomly place 1 Horseman Effect marker on each Institute card on the Horseman Villain tiles so that the marker covers the card's effects as much as possible.
f. Attach 1 random "The Master" Villain to "The Master" Mission tile and place them below the Game board.
Return unused Villain tiles to the box.
Player Setup
Each player takes the following steps to set up their personal play area.
-
Choose a player color. Take all the resource markers (cubes), Player markers (discs), and score markers (pentagons) of that color into your personal supply.
-
Choose a Player board based on which heroes you want to play. The blue side is recommended for your first time playing the game. The gold side is for experienced players. All players must agree to use the same side of their Player boards.
» The gold side gives each player a unique ability. You can find it in the box labelled "Advanced."
-
Take the Evolution cards for each of your heroes:
- If you agreed to use the blue side of your Player boards, take only the Evolution cards that have the word RECOMMENDED on them.
- If you agreed to play with the gold side of your Player boards, select a number of Evolution cards equal to the number shown in the black rectangle below "Evolution" on your Player board.
Return any Evolution cards you do not take or select to the box. Place the ones you did select faceup near your Player board. They are not active until played.
-
Draw 3 cards from the Institute deck into your hand. Keep your hand of cards private.
-
Take Hero pawns and place them on your Player board, as indicated based on the number of players.
- In a 4-player or 5-player game, place Hero pawns on the blue Hero spaces (3 total Hero pawns).
- In a 3-player game, also place Hero pawns on the Hero spaces marked "3" (4 total Hero pawns).
- In a 2-player game, place Hero pawns on all Hero spaces (6 total Hero pawns).
Return all unused Hero pawns to the box; they will not be needed.
-
Place your Score marker on the "0" space of the Score track.
-
Insert your resource markers (cubes) in the highlighted spaces on the Physical, Mental, and Willpower resource tracks on your Player board. This indicates their starting value.
-
Randomly determine the starting turn order. Place a Player marker on the top space of the right column of the Turn Order track. Then going clockwise, all other players place their Player markers below the previous one.
Overview
Age of Heroes is played over a series of rounds, with each round divided into two phases: the Institute phase and the Mission phase.
During the Institute phase, players take turns assigning 1 pawn to an Institute action space or placing 1 Hero pawn on the X-Jet. This will allow them to build up their personal resources, enabling the Hero pawns they have placed on the X-Jet to complete their objectives during the Mission phase.
During the Mission phase, players will take turns assigning their Heroes from the X-Jet to Mission action spaces. This will allow them to damage Villains and earn Victory Points.
Note: The Parameter cards for your chosen Mission include extra rules when playing that particular Mission. Take time to familiarize yourself with them before starting the game. The Parameter cards also indicate when the game ends.
Icon Overview
Institute cards: Each Institute card is one of three types, shown by the matching icon in the upper left corner of the card: Ally card, Team-Up card, Event card.
Resources: A number before a resource icon indicates an amount of resources to spend (if displayed above a Convert icon) or gain (otherwise). Your resources are tracked using the Resource markers on your Player board. The resource types are Willpower, Mental, Physical, and Any Resource.
Damage: Damage icons come in gray, purple, green, and orange, plus an Any Damage icon.
Other icons: Draw 1, 2, 3, or 4 cards; Convert (shown as an "OR" arrow); Villain token; Victory Points; Play a card; Student pawn; Evolution Card; Place an Institute card in the Xavier Protocols; Turn order.
Institute Phase
Taking Turns
In the order shown from top to bottom on the Turn Order track, each player takes a turn.
On your turn, choose one of the following 3 options:
- Assign 1 pawn (Hero or Student) to an empty Institute action space and perform the effects of that space.
- Place 1 Hero pawn on the X-Jet.
- Pass. Passing means you will take no more turns in the Institute phase this round.
Play continues in this way until all players have passed.
Institute Action Spaces
An Institute action space is either:
- A basic action space (an action space printed on the Game board) in one of the 6 Institute locations: Headmaster's Office, Medical Bay, Cerebro, Danger Room, Research Lab, or Dormitories.
- An action space on an Ally card in one of the Institute locations.
Institute Locations
Headmaster's Office
There are between two and four action spaces in the Headmaster's Office, depending on the number of players. The top two spaces are available for all player counts and allow a player to resolve two effects.
First, place a card (if you have one) from your hand into an empty Xavier Protocols card slot. If there are no empty slots available, choose 1 card from the Xavier Protocols and discard it to the Institute card discard pile and then place your card in the now empty slot.
Second, draw Institute cards into your hand. The number of cards you draw is noted on the action space (2 or 3). There is no maximum hand size.
You may draw faceup cards from the Xavier Protocols (including the one you placed), from the top of the Institute deck, or a combination of the two. Do not replace faceup cards drawn from the Xavier Protocols.
When playing with 4 players, there is a third action space available in the Headmaster's Office. When playing with 5 players there is a fourth available. Each of these action spaces allows you to gain either 1 Willpower (blue), 2 Mental (yellow), or 3 Physical (red) resources.
Medical Bay
There are two action spaces in the Medical Bay. Each one allows a player to resolve two effects.
First, play an Event card from your hand (see "Playing Event Cards").
Second, choose your place in the turn order for the next round (see "Turn Order").
Cerebro
There are two action spaces in Cerebro.
The left action space allows you to play an Ally card to any empty Ally card space (see "Playing Ally and Team-Up Cards").
The right action space allows you to play one of your Evolution cards to your Player board (see "Playing Evolution Cards").
Danger Room
There is one action space in the Danger Room. When you place a pawn there, gain 4 Physical resources.
Example of Gaining Resources: You assign your Jubilee pawn to the Danger Room. Gain 4 Physical resources, moving your Physical Resource marker from 2 to 6.
Research Lab
There is one action space in the Research Lab. When you place a pawn there, gain 3 Mental resources.
Dormitories
There is one action space in the Dormitories. When you place a pawn there, gain 2 Willpower resources.
X-Jet
When placing a Hero pawn on the X-Jet, place your pawn on the topmost empty X-Jet space. The first player to place a pawn on the X-Jet may play a Team-Up card (see "Playing Ally and Team-Up Cards").
Note: While the X-Jet location has pawn spaces on it, these do not count as action spaces, and placing a Hero pawn on an X-Jet space does not count as assigning that Hero. All pawn spaces on the X-Jet are considered to be in the same location.
Any Hero pawns on the X-Jet at the end of the Institute phase will be assigned to a Mission action space during the Mission phase.
Passing
Instead of assigning a pawn or placing a Hero in the X-Jet on your turn, you may pass. If your turn begins and you have no pawns on your Player board, you must pass.
When you pass, choose your place in the turn order for the next round (see "Turn Order").
Once you have passed, you remain passed for the rest of the round. The other players continue taking their turns. You cannot assign any more pawns, even if an effect causes you to gain additional pawns. Once all players have passed, move on to the Mission Phase.
Example of Passing: You decide to take no more actions and pass. You must now pick your turn order for the next round. White already occupies the first space, so you have a choice to go second, third, fourth, or remain last. You choose to go fourth and place a Player marker on the fourth space.
Institute and Evolution Cards
During the game you will have opportunities to play Institute cards and Evolution cards.
Each Institute card is one of three types, shown by the matching icon in the upper left corner of the card: Ally card, Team-Up card, Event card.
Evolution cards are signified by the Evolution card icon.
Note: Some card effects may override the normal rules of the game, for example, by allowing you to assign a Hero pawn to a Mission tile during the Institute Phase.
There is no maximum hand size of cards.
Anatomy of Cards: an Institute card shows its Type icon, Card Type, Card Name, and Team Affiliation, along with an Action Space (with its resource cost to activate and effect), and a Card ID Number, Special Rules, and Deck Name. A hero card additionally shows Special Rules, Card Name, Special Restriction, Ability Text, Hero Name, whether it is Recommended for First Game, and a Card ID Number.
Playing Ally and Team-Up Cards
When you play an Ally card, perform the following steps in order:
- Choose an Ally card from your hand to play.
- Choose an empty Ally card space to play the card onto. The card space must show the Ally card icon.
- Place a Player marker in the circular Recruiter space above the Ally card space.
You have Recruited that Ally card.
When you play a Team-up card, perform the following steps in order:
- Choose a Team-Up card from your hand to play.
- Choose an empty Team-Up card space to play the card onto. The card space must show the Team-Up card icon.
- Place a Player marker in the circular Recruiter space above the Team-Up card space.
You have Recruited that Team-Up card.
When a player who is not the Recruiter of an Ally or Team-Up card assigns a pawn to that card, the Recruiter gains the Recruitment bonus marked on the Game board to the right of the Recruiter's Player marker.
Example of Recruiting an Ally: You assign Wolverine to Cerebro and play the Ally card "Iceman" in the left card space of the Danger Room. Place a Player marker in the Recruiter space above the Ally card to show that you Recruited the Iceman Ally card.
Example of Recruitment Bonus: An opponent places Cyclops on the Iceman action space and gains 6 Physical resources. Because you recruited Iceman, you gain 2 Physical resources.
When any text refers to an Ally or Team-Up that "you Recruited", it means cards for which you are the Recruiter.
When an Ally or Team-Up card effect says "When assigning", it will usually modify the effect of the action.
When an Ally or Team-Up card effect says "After assigning", the effect will take place after the action space is fully resolved.
Multiple Recruiters? Normally, each Ally or Team-Up card in play will only have one Recruiter. If more than one Player marker is on the Recruiter space (as may be the case if someone plays the "Found Family" Event card), both players are considered to be that card's Recruiter.
Playing Event Cards
Resolve the effects as described on the card, then place the card in the Institute card discard pile.
Playing Evolution Cards
Choose one of your remaining Evolution cards and place it into the leftmost empty Evolution card slot on your Player board.
If that slot has any resource symbols on it, you must first spend those resources.
Evolution cards provide ongoing benefits for the rest of the game once they are played.
An Evolution card may never trigger itself, but gaining the benefit of an Evolution card might trigger the benefit of other Evolution cards.
Evolution cards do not count as Institute cards under any circumstances and cannot be discarded.
Example of Playing Evolution Card: You assign Wolverine to Cerebro and play your Jubilee Evolution card "Fireworks". The first two Evolution slots on your Player board have already had an Evolution card played to them, so you place Fireworks in the third slot, paying the cost of 2 Physical resources and 1 Willpower resource.
Mission Phase
During the Mission phase, each Hero pawn on the X-Jet is assigned to a Mission action space. This assignment takes place in sequential order, from top to bottom, as indicated on the X-Jet. The player that owns the Hero pawn decides which Mission action space that Hero pawn is assigned to.
Mission Action Spaces
A Mission action space is either:
- An action space on a Team-Up card in a Team-Up card space.
- A basic action space printed on the Game board in the Extraction Zone.
- An action space on an Ally card in the Extraction Zone.
- An action space on a Mission tile that is attached to a Villain tile.
Mission Phase Locations
Team-Up Cards
All Team-Up cards in Team-Up card spaces are considered to be in the same location.
Extraction Zone
The Extraction Zone location consists of one basic action space that can fit any number of Hero pawns, and any Ally cards placed in the Extraction Zone. The basic action space allows you to activate the effect of the Extraction Zone tile. The effect of the Extraction Zone tile depends on the current round.
- Round 1-3: Gain 1 of any Resource, or spend 1 Mental resource to draw 2 Institute cards.
- Round 4-6: Spend 2 Physical resources to play an Evolution card, or spend 1 Willpower resource to gain 2 Student pawns from the general supply.
- Round 7-8: Gain 2 of any Resource, or play an Evolution card, or play an Ally card.
- Round 9+: Gain 4 of any Resource, or gain 5 Victory Points.
Mission Tiles
Each Mission tile and Villain tile pair is considered to be a separate location. All of the action spaces on a single Mission tile are considered to be in the same location.
Mission Tile Action Spaces
The Mission and Villain tiles combine to create action spaces that allow a Villain to be damaged by spending the appropriate resources.
Since Mission tiles and Villain tiles are randomly paired, some action spaces won't be matched with a Damage icon on the Villain tile. You may only assign a Hero to an action space that is matched with a Damage icon.
Example of Matched and Unmatched Spaces: The first, second, third, and seventh action spaces are matched. The fourth, fifth, sixth, and eighth action spaces are unmatched.
Dealing Damage
When you assign a Hero pawn to a matched action space on a Mission tile, perform the following steps in order:
- Spend the resources shown to the left of the action space.
- Place a Player marker over the Damage icon to the right of the action space.
- Gain the Victory Points shown next to the Damage icon.
Example of Dealing Damage: You assign your Wolverine pawn to the second action space and spend the required 7 Physical resources and 7 Willpower resources. Place a Player marker over the Damage icon. Gain 8 Victory Points.
Dealing Damage With Cards
Some card effects allow you to deal damage to a Villain. When you assign a pawn to a card that allows you to deal damage, perform the following steps in order:
- Select a Damage icon on a Villain tile of the same type as the Damage icon shown on the card. The matching action space on the Mission tile must be empty and there must not already be a Player marker on the chosen Damage icon.
- Spend the resources shown on the card.
- Place a Player marker over the selected Damage icon.
- Gain the Victory Points shown next to the selected Damage icon.
Example of Dealing Damage with a Team-Up card: You assign a Jubilee pawn to the action space on Karma as it allows you to place a Player marker on any available purple Damage space. Spend the required 8 Physical resources and 7 Willpower resources. Place a Player marker on the Damage space shown below. Gain 15 Victory Points.
One Player Marker per Damage Icon: Once a Player marker has been placed on a Damage icon, players may not assign a Hero pawn to the matching action space or use a card effect to place another Player marker over that Damage icon.
Defeating a Villain
When all of the Damage icons on a Villain tile are covered by Player markers, it is Defeated. When Defeated, resolve any special effects listed on the tile. Resolve these special effects in the current turn order (the order used during the Institute Phase this round). Each player resolves all of their special effects before moving on to the next player.
Discard any Student pawns from the Defeated Villain tile to the general supply.
In current turn order, any players who have Heroes on the Mission tile attached to the Defeated Villain tile reassign them to an unoccupied Extraction Zone action space, performing the action of that space. Each player reassigns 1 Hero at a time from the Mission tile before moving on to the next player, repeating the process until all Heroes have been reassigned.
Return the Player markers from the Defeated Villain tile to their respective owners.
Some effects may instruct you to replace the Defeated Villain tile with another, more difficult Villain tile. In this case, detach the Defeated Villain tile from the Mission tile and remove the Defeated Villain tile from play. Attach the new Villain tile to the detached Mission tile.
If you are not instructed to replace the Defeated Villain tile, simply remove from play both the Defeated Villain tile and the Mission tile attached to it.
Note: It is possible to Defeat a Villain in the Institute Phase (with the use of certain cards). In either case, follow the instructions shown above.
Example of Defeating a Villain: When Avalanche is Defeated, his special effect allows each player to draw 1 Institute card for each of their Player markers on his Villain tile. You, the pink player, have two markers here, so you draw 2 cards. Your opponents each have one marker here, so they each draw 1 card. The Student pawn in the topmost action space is discarded to the general supply.
You have a Wolverine pawn in the third space and decide to reassign it to the Extraction Zone basic action space, choosing to spend 1 Mental resource to draw two Institute cards. Each player takes back their Player markers into their personal supplies. Finally, as instructed on the Avalanche Villain tile, Avalanche is replaced with a random Challenging Enemy.
End of Round
When all players have assigned their Heroes from the X-Jet and resolved their actions, the round ends. Perform the following steps:
- Perform any End of Round instructions on Ally or Team-Up cards, then any End of Round instructions on Parameter cards.
- Each player takes back all of their Hero pawns and places them on their Player board.
- Remove any assigned Student pawns and place them back in the general supply.
- Each player takes back their Player marker from the right column of the Turn Order track.
- Each player moves their Player marker from the left column of the Turn Order track to the corresponding space in the right column.
- Move the Round marker one space forward on the Score track.
- If necessary, flip or replace the Extraction Zone tile so the side matching the new round number is faceup.
- If there are fewer than 4 cards in the Xavier Protocols, deal cards from the top of the Institute deck faceup to empty spaces in this area until there are 4 faceup cards there. If there are 8 cards in the Xavier Protocols, discard all cards in the Xavier Protocols to the Institute card discard pile and deal 4 new cards from the top of the Institute deck faceup to empty spaces in this area.
Winning the Game
End of Game
When a Parameter card or Mission tile tells you the game ends, it ends immediately.
This means, for example, you would not continue the Defeating a Villain steps, such as returning your pawns to the Extraction Zone.
After the game ends, add up all of your Victory Points. The player with the most points is the winner!
In Case of Ties
The winner is the player with the most Willpower, then Mental, then Physical resources. If it is still a tie, the tied players share the victory.
Additional Rules
Actions and Resolving Effects
To assign a pawn to an action space, even through a card effect, you must be able to pay all the costs of the action. Additionally, you must perform as much of the action as you are able.
All action space and card effects must be resolved from top to bottom and from left to right.
Some effects will cause you to Reassign. This is the same as assigning, but you do so from a space on the board instead of your player board. It may leave a space available to be chosen again.
If an effect triggers for multiple players at the same time, (such as end of round effects) they are resolved in turn order.
Conversion
Actions that have the conversion symbol on them require you to spend the resources or tokens above or to the left of the symbol before gaining the resources, tokens, or effects below or to the right of it.
Spending resources means reducing the value of that track on your Player board by the amount indicated. If a cost calls for tokens, you must return them to the general supply.
You must have the resources or tokens available to pay for the conversion or you may not assign a pawn to the action that requires that conversion.
Example of Converting: You want to place your Storm pawn on the Cannonball action space. To place a pawn here, pay the indicated cost shown above the conversion symbol (spend 1 Villain token, placing it back in the general supply). After placing Storm and paying the cost, gain 4 Physical resources and then play an Event card from your hand.
Tokens
Some effects place tokens from the general supply onto action spaces.
When a player assigns a pawn to an action space with one or more tokens on it, they take all the tokens on that action space and resolve their effects before resolving the effects of the action space.
Resource Tokens
Resource tokens each have a "3" side (worth 3 resources) and a side without a number (worth 1 resource). Place the tokens with the appropriate side faceup when placing them on an action space.
When you take a Resource token, gain either 1 or 3 resources (as appropriate) of the type shown and discard the Resource token to the general supply.
Victory Point Tokens
Victory Point tokens each have a "3" side (worth 3 Victory Points) and a side without a number (worth 1 Victory Point). Place the tokens with the appropriate side faceup when placing them on an action space.
When you take a Victory Point token, gain either 1 or 3 Victory Points (as appropriate) and discard the Victory Point token to the general supply.
Villain Tokens
When you take a Villain token, place it in your personal supply. You may spend Villain tokens to pay for various effects.
Unlimited Tokens
Note: Tokens and player discs are not limited. If you run out, use an acceptable substitute.
Resource Limits
You may never have more than 10 or less than 0 of a resource.
Any Resource
When an effect causes you to gain or spend an Any Resource, choose which of your three resources to gain or spend. If you would gain or spend more than one Any Resource with a single action, you can divide the amount gained or spent between multiple different resources.
Drawing Cards
If an action space has the card draw icon on it, draw the indicated number of Institute cards.
For each card you draw, you may choose to take a card either from the top of the Institute deck or from the Xavier Protocols.
If the Institute deck is empty and you need to draw a card, shuffle the Institute card discard pile facedown to form a new Institute deck.
Turn Order
If you pass or activate an action space with the Turn Order symbol, you may choose your turn order for the next round.
Choosing Your Turn Order
To choose your turn order for the next round, place a Player marker on an empty space in the left column of the Turn Order Track.
In a five player game, use all five spaces. In a four player game, use only the topmost 4 spaces, and so on, depending on the number of players.
Note: You may not have more than one Player marker on a space in the left column of the Turn Order track. If you already have one there, instead, you may move that Player marker to another empty space.
Example of Choosing Turn Order: You assign Cyclops to the Rictor Ally card, giving you 3 Willpower and allowing you to place a Player marker on an empty space on the Turn Order Track. You decide to place your marker on the topmost empty space, indicating you will go first in the next round.
Student Pawns
When you gain a Student pawn, take it from the general supply and place it in an empty Student space on your Player board.
If you have no empty Student spaces on your Player board, you may not take a Student pawn.
A Student is a temporary pawn you may assign to an action. The Student pawn counts as your pawn during the action's resolution, however it does not gain any benefits from end of round effects or Evolution card effects that specify a particular Hero.
After resolving the action, the Student pawn counts as an opponent's pawn for all players, including you.
Student pawns are assigned during the Institute phase on your turn instead of assigning a Hero pawn, but may never be placed in an X-Jet space.
Score Tokens
Scores beyond 100 are counted using a combination of the Score track and one or more Score tokens.
When your Score marker moves beyond the "99" space on the Score track, place it on the "0" space and either take a Score token and place it on your Player board with the "+100" side faceup or flip over a Score token on your Player board to its "+200" side. Then, continue marking any remaining Victory Points by moving your Score marker on the Score track.
Quick Reference Summary
Age of Heroes is played over a series of rounds, with each round divided into two phases: the Institute phase and the Mission phase.
Institute Phase
In the order shown from top to bottom on the Turn Order track, each player takes a turn. On your turn, choose one of the following 3 options:
- Assign 1 pawn (Hero or Student) to an Institute action space and perform the effects of that space.
- Place 1 Hero pawn on the X-Jet.
- Pass. Place a Player Marker on the Turn Order track. Passing means you will take no more turns in the Institute phase this round.
Play continues in this way until all players have passed.
Mission Phase
During the Mission phase, each Hero pawn on the X-Jet is assigned to a Mission action space. This assignment takes place in sequential order, from top to bottom, as indicated on the X-Jet. The player that owns the Hero pawn decides which Mission action space that Hero pawn is assigned to. This will allow them to damage Villains and earn Victory Points.
End of Round
- Perform any End of Round instructions on Ally or Team-Up cards, then on the Parameter cards.
- Each player takes back all of their Hero pawns and places them on their Player board.
- Return all Student pawns from action spaces to the supply.
- Each player takes back their Player marker from the right column of the Turn Order track.
- Each player moves their Player marker from the left column of the Turn Order track to the corresponding space in the right column.
- Move the Round marker one space forward on the Score track.
- If necessary, flip or replace the Extraction Zone tile so that the side matching the new round number is faceup.
- If there are fewer than 4 cards in the Xavier Protocols, deal cards from the top of the Institute deck faceup to empty spaces in this area until there are 4 faceup cards there.
- If there are 8 cards in the Xavier Protocols, discard all cards in the Xavier Protocols to the Institute card discard pile and deal 4 new cards from the top of the Institute deck faceup to empty spaces in this area.
Note: The Parameter cards for your chosen Mission include extra rules when playing that particular Mission.