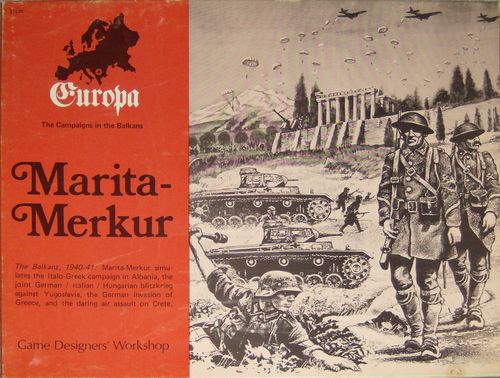
Marita-Merkur: The Campaign in the Balkans, 1940-41
Marita-Merkur: The Campaign in the Balkans, 1940-41 Rulebook
Table of Contents
Table of Contents
- Introduction
- Notes on This Game
- Errata
- Rule 1 - Introduction
- Rule 2 - Game Components
- Rule 3 - Sequence of Play
- Rule 4 - Zones of Control
- Rule 5 - Movement
- Rule 6 - Transport Lines
- Rule 7 - Stacking of Ground Units
- Rule 8 - Ground Combat
- Rule 9 - Regimental Equivalents
- Rule 10 - Effects of Armor and Anti-Tank
- Rule 11 - Unsupported Units
- Rule 12 - Supply
- Rule 13 - Overruns
- Rule 14 - Unit Specialization
- Rule 15 - Heavy Equipment
- Rule 16 - Unit Breakdown
- Rule 17 - Air Phase
- Rule 18 - Air Bases
- Rule 19 - Air Unit Movement
- Rule 20 - Air Zones of Control
- Rule 21 - Air Missions
- Rule 22 - Air Combat
- Rule 23 - Anti-Aircraft Fire
- Rule 24 - Aircraft Repair
- Rule 25 - Special Air Rules
- Rule 26 - Airborne Operations
- Rule 27 - Naval Transport
- Rule 28 - Weather
- Rule 29 - Fortifications
- Rule 30 - Borders
- Rule 31 - Special Rules
- Rule 32 - Reinforcements
- Rule 33 - Initial Deployment
- Rule 34 - Victory Conditions
- Rule 35 - Scenarios
- Expanded Sequence of Play
Introduction
The publication of Marita-Merkur marks the appearance of the sixth game of the Europa series, a series of complete division-level games on World War II in Europe. The titles previously published in the series are "Drang Nach Osten!" (Europa I), "Unentschieden" (Europa II), Narvik (Europa IV), "Their Finest Hour" (Europa V), and Case White (Europa VI). Overall, Europa aims to recreate World War II at the division level, using consistent unit forces and compatible maps, while each individual Europa game treats a specific campaign or battle in more detail. If necessary for reasons of historical accuracy or playability, individual games are presented at levels lower than the division, at different scales, or with specialized non-standard rules. In this way each game offers the greatest possible utility to the player interested only in the situation covered by the title, while providing continuous Europa material for devotees of the series.
Marita-Merkur continues in this direction by providing a game that uses special non-standard rules (covering the complex politics and foreign relations of the Balkans) with standard components.
Notes on This Game
The concept of the Europa Series is that of a living, growing idea and, like any living thing, it is subject to change. Although the Workshop has always categorically rejected the concept of planned obsolescence, change for the improvement of the system or for the sake of quality is both healthy and necessary. Accordingly, Marita-Merkur presents several new or different rules modifications.
Effects of Armor and Anti-Tank - These rules, which form the very basis of the Europa ground combat system, have been presented here in what we believe is the final version. At first glance, the armor/anti-tank rules seem rather extensive for a game dealing with the Balkans. It must however be kept in mind that about half of the German panzer divisions were assigned to this region. Although none of the basic concepts has changed, restrictions* have been placed on the use of neutral units with armor, originally introduced in "Their Finest Hour" and continued in "Case White". In addition, the concept of AECA and AECD, familiar to players of Drang Nach Osten! and Unentschieden, has been refined and reintroduced.
Zones of Control - This rule has been modified from the previous games in that only units the size of a division or larger have them.
Stacking - A change has been made, limiting stacking somewhat in mountain hexes.
Additional Counters - The following counters are for use with the Europa series:
Yugoslavia: All naval units (9 counters)
Greece: All naval units (16 counters). The following ground units:
- 7-6 Infantry XX 2
- 5-6 Infantry XX 6
- 5-6 Infantry XX 7
- 6-8 Motorized XX 19
- 2-8* Mountain X 1
- 2-8* Mountain X 3
- 7-8 Mountain XX 1
- 6-4-8* Armored X 1
Italy:
- 4-6 Infantry XX 21
- 3-4-6 Infantry XX 50
- 1-6 Static X '21 Aprile' (21 April)
- 2-6 Artillery III 35
- 2-6 Artillery III 36
Errata
The following map errata have been noted:
- Zagreb is a dot city.
- The unnamed dot city on map 14, hex 1410, is Szeged.
- The hexside 0117 (map 15A) / 5016 (map 14) is not a mountain hexside.
The name of the island in hex 0101, map 15A, is Imroz and not Imsoz.
Rule 1 - Introduction
Marita-Merkur is a historical re-creation of this campaign. It is a two-player game, one player controlling the various Axis forces (Italian, German and Hungarian) and the other the Allied forces (Greek, British, Commonwealth and Yugoslav) that took part in the campaign. The game has a dual nature. Initially the Italians try to defeat Greece with the Axis forces at their disposal, trying to regain prestige for the Italian armed forces. If this fails, the Germans then intervene and quickly subdue the region, and their troops will soon be far too few in Romania. The Allied player tries to thwart both of these objectives. Both sides maneuver their units and fight combats, trying to achieve their objectives.
Rule 2 - Game Components
The following components are provided in Marita-Merkur:
- This rule booklet.
- One and a half maps (Europa 14 and 16A) covering Greece, Yugoslavia and the immediate region at a scale of 16 miles per hex (measured side to side). These maps are overlaid with a hexagonal grid used to regularize the placement and movement of counters. Each hex is numbered to assist in the initial placement of units and to facilitate play by mail.
- Two and a half sheets of counters (Europa sheets 20, 21 and 22) for a total of 600 counters. Various information essential to the game is printed on the counters; the counter formats are detailed on the unit identification chart.
- A set of game aids including:
- A. Two combat results tables.
- B. A terrain effects chart.
- C. A unit identification chart.
- D. A game turn/victory conditions chart.
- E. An Italian order of battle.
- F. A German/Hungarian order of battle.
- G. A Greek/British order of battle.
- H. A Yugoslav order of battle.
- I. A unit deployment chart.
- J. A die, used to resolve combat.
- K. The additional information included in the game deals with the Europa Series in a broader context and is not used in the Marita-Merkur game.
Rule 3 - Sequence of Play
Marita-Merkur is played in turns, called game turns. Each game turn consists of an Axis player turn followed by an Allied player turn. Each player turn is composed of five identical phases:
- Supply Determination Phase. Both players determine which of their units are supplied and which are not.
- Movement Phase. The phasing player (the Axis player in his turn and the Allied player in his) may move all or some of his units in accordance with the provisions of Rule 5 concerning movement.
- Air Phase. The players deploy air units and conduct air combat in accordance with the air rules.
- Ground Combat Phase. The phasing player resolves all attacks he decides to make according to the combat rules.
- Exploitation Phase. The phasing player may move (again) all or some of his units that are listed as combat motorized on the unit identification chart.
No activity conducted outside this sequence is permitted. Thrust operations are explained in detail in the rules that follow.
Rule 4 - Zones of Control
Units exert control over the surrounding terrain through their firepower and manpower. The zone of control (ZOC) represents this control, and its effects will be mentioned constantly throughout the rules. A unit's ZOC extends into the six hexes surrounding the hex the unit occupies. A unit that is prohibited from entering a specific type of terrain or from crossing a certain type of hexside has no ZOC in that hex or across that hexside. Each full-strength unit of division size has a zone of control; other units, including reduced divisions, have none.
Rule 5 - Movement
Ground units are moved during the movement and exploitation phases of the player's turn. Movement is calculated in terms of movement points (MP). A unit's movement factor is the number of movement points that unit may spend in a single phase.
During the applicable phase, the phasing player may move all or some of his units up to the limit of their movement factors, depending on terrain and zones of control. During the exploitation phase, only units listed as combat motorized units on the identification chart may move. The cost varies with the type of terrain entered or the hexside crossed. Units move voluntarily, spending MP as they trace their path through the hex grid. A unit may move in any direction or combination of directions. (A unit may always move one hex, except into or across prohibited terrain, even if the unit begins the phase with insufficient MP to do so.) Ground combat may not take place during movement.
A. Zones of Control and Movement
Zones of Control (ZOC) affect movement by forcing units to pay a higher number of movement points than they would normally to leave the zone.
The table below gives the cost for various units to leave an enemy zone of control, in addition to the normal terrain costs.
ZOC movement cost
| Cost | |
|---|---|
| To leave an enemy ZOC: German combat motorized units | 1 |
| To leave an enemy ZOC: other units | 2 |
| To go directly from one enemy ZOC to another: German combat motorized units | 2 |
| To go directly from one enemy ZOC to another: all other units | 3 |
B. Effects of Terrain on Movement
The terrain effects chart gives the movement points associated with the various terrain types. The number in the movement effects column indicates the number of movement points that must be used to enter a hex of that type. A number preceded by a "+" sign indicates the number of additional movement points that must be spent to enter a specific type of hex. The prohibition notation indicates that those hex types or hexsides may not be entered or crossed by ground units; as a group, these terrain types are known as prohibited terrain.
Rule 6 - Transport Lines
There are two types of transport lines on the map: primary and secondary lines. Primary lines represent, for the most part, high-capacity railways; secondary lines represent roads of limited capacity, ferries, etc.
Transport lines increase units' ability to move. Units move by tracing a path through hexes linked by transport lines and, in every case, may use the transport line rate only when moving from a hex containing a line directly to another hex containing that line, the line itself passing through the hexside shared by the two hexes.
Units cannot benefit from a transport line if they are not in a hex containing the line. They move using regular ground movement when they move from a line hex to a hex not connected by a transport line. Each primary line printed on the map is considered to have a secondary line parallel to it, although only the primary line is printed in the hex. Metropolises are considered to have primary and secondary lines for movement.
1. Primary Transport Lines
A unit on a primary line moves at an accelerated rate and ignores terrain costs. To move at this rate, the unit must first entrain by spending one additional movement point; more simply, any unit beginning its turn in a primary line hex does not have to spend the additional MP to entrain, unless it leaves the line and entrains later.
Primary lines may be used only during the movement phase, never during the exploitation phase. A unit may neither enter nor leave an enemy ZOC when using a primary line.
An entrained unit has its movement rate increased when it uses a primary line; this increase depends on the movement factor of the entrained unit as specified in the following table:
| Unit MP | Hexes per MP |
|---|---|
| 9-10 | 5 |
| 7-8 | 6 |
| 6 | 7 |
| Less than 6 | 10 |
The Axis player may use primary lines in Albania, Bulgaria, Germany (Austria), Hungary, Italy, Romania and Slovakia. The Allied player may use primary lines in Greece; he may use those of Yugoslavia when that country enters the war. Units may use enemy primary lines only if (1) the line has previously been traversed by friendly units; and (2) the line connects, without being interrupted by cuts, enemy units or enemy zones of control, to a friendly primary line.
2. Secondary Transport Lines
Units moving along secondary lines treat their movement as if they were crossing clear terrain: the actual terrain cost for the hex entered and/or the hexside crossed is ignored. Movement along secondary lines, like movement in clear terrain, is subject to other limitations such as weather, enemy ZOCs, etc.
A unit does not pay any additional cost to use a secondary transport line. A unit may use a secondary line anywhere, unlike the use of primary lines. (When using secondary lines, units may enter and leave ZOCs.) Secondary lines may be used in both the movement phase and the exploitation phase.
Note that hexes containing primary lines are considered to have valid secondary lines, in cases where a player is prohibited from using a primary line in a hex. He may use that line as a secondary line, in accordance with the preceding rules.
3. Transport Line Cuts
Any unit may cut a transport line by spending three additional MP in that hex to do so. Air units may also cut transport lines, as detailed in the air unit rules.
Cuts are indicated by placing a cut counter in the hex where the line was cut. When the primary and secondary lines are both cut in a hex, place a double cut counter to mark the hex. Cutting a primary line in a hex does not automatically cut the assumed secondary line in the hex.
That secondary line must be cut separately, otherwise units may use it unhindered. To simplify, the primary line in a hex must be cut before the secondary line can be. Units may not use primary line movement into or out of a hex where the line is cut; likewise, units may not use secondary line movement in a hex where the secondary line is cut. Line cuts are repaired by engineers (see Rule 14).
Rule 7 - Stacking of Ground Units
Players may place more than one ground unit in a hex; this practice is known as stacking.
A. Definitions
For the purposes of this rule, the following definitions apply.
- Divisions: Units bearing a division size symbol.
- Non-divisional units: All units smaller than divisions; specifically, brigades, regiments and battalions.
- Artillery units: All units with the field artillery, motorized artillery or siege artillery symbol. Note that these units also meet the criteria of non-divisional units and may be included in a stack under either of these two categories. Anti-aircraft and anti-tank units are not considered artillery for stacking.
- Cadres and Divisionsgruppen: All units bearing the cadre or divisiongruppe symbol. These units may be considered divisions or non-divisional units at the choice of the owning player.
B. Stacking Limits
- Normal stacking. In a single hex, a player may stack up to three divisions plus three non-divisional units plus two artillery units.
- Stacking in mountains. In a mountain hex, a player may stack up to two divisions plus two non-divisional units plus one artillery unit. This does not limit the number of units that may attack into a mountain hex.
C. Effects
No unit may end a phase in violation of the stacking limits. If, as a result of combat, a unit is forced to retreat in violation of stacking, then it must retreat further hexes until it complies with the stacking limit. If it cannot do so, the unit is eliminated.
Rule 8 - Ground Combat
During the combat phase, the phasing player may attack enemy units that are in hexes adjacent to his units. However, no unit may attack into or across prohibited terrain. Attacks are voluntary; not all units adjacent to enemy units are obliged to attack, and not all adjacent enemy units must be attacked.
A. Procedure
- Total the attack (combat) factors of all units adjacent to the enemy hex and attacking it. Modify the attacker's total according to terrain, supply and support (see Rule 11 - Unsupported Units).
- Total the defense (combat) factors of all units in the attacked hex, modifying this total according to terrain, supply and support.
- Express the factor totals as a ratio - attacker's factors : defender's factors. Convert this ratio to the simple odds ratio corresponding to one on the Combat Results Table (CRT), rounding down in favor of the defender. For example, 34 factors attacking 9 factors defending would be 34:9, which rounds to 3:1.
- Roll a die and modify the result for any terrain or armor/anti-tank effects (see Rule 10). Cross-index the adjusted die roll with the odds column of the attack and apply the results.
B. General Restrictions on Combat
- No unit may attack or be attacked more than once per phase.
- Units defending in a hex must be attacked as if they were a single unit, with their defense factors combined.
- Each attack must be directed against units occupying a single hex; that is, two (or more) enemy-occupied hexes may not be attacked at once.
- Units of an attacking stack may attack into different hexes, but each attacked hex must be conducted as a separate combat.
- A single unit may not divide its attack factor to attack more than one hex.
- The attacker determines the order in which combats are resolved.
C. Combat Results
The following results appear on the ground combat results table:
- AE - Attacker Eliminated. All attacking ground units are eliminated. Units with a Cadre or DG side revert to their reduced strength; other units are removed from the game. Remaining attacking cadres and DGs must retreat. If the cadres or DGs cannot retreat except into enemy ZOCs, they are eliminated instead.
- AH - Attacker Half eliminated. At least half of the total attack factors are eliminated. All surviving attacking units must retreat.
- AR - Attacker Retreat. All attacking units must retreat.
- NE - No Effect. The attack was inconclusive. Neither side suffers losses or retreats.
- HX - Half Exchange. The side with the fewer combat factors, or, if both sides are tied, the defender, is eliminated. Any Cadres or DGs appearing at this stage must retreat. The opposing side must then eliminate units whose factors are at least equal to half of the total factors of the enemy units eliminated.
- EX - Exchange. This is executed as an HX except that the stronger player must eliminate factors equal to the total value of the enemy units eliminated.
- DR - Defender Retreat. All defending units must retreat.
- DH - Defender Half eliminated. At least half of the total of the defending units is eliminated. All surviving defending units must retreat.
- DE - Defender Eliminated. All defending units are eliminated. Flipped units with cadre or DG (Divisiongruppen) strength retreat.
D. Losses
All combat losses are calculated at the printed strength ("face") of the units involved. Terrain, supply and support modify unit strengths for the resolution of combats, but these factors never affect the assessment of combat losses.
E. Cadres and Divisionsgruppen
Various units have a reduced-strength cadre or divisiongruppe (DG) printed on the back of the counter. When the full-strength unit is eliminated because of combat, it is flipped to show its cadre or DG side instead of being completely removed from the game.
(For example, in an exchange) units flipped to cadre or DG are counted as having their full printed factor eliminated, not full factor minus the cadre or DG side. Units with cadres or DGs have a limited ability to retreat into enemy ZOCs. Normally, no unit may retreat into an enemy ZOC. A unit with a cadre or DG side may retreat into an enemy ZOC but must immediately flip to its cadre strength. Units that already have cadre or DG strength have no special ability under this rule.
F. Movement After Combat
- Retreats. Retreats are mandatory in certain combat results. When a unit is called on to retreat, it must be moved by the owning player one hex from the position it occupied during its combat. Units must retreat according to the following priorities: 1) to a hex not in an enemy ZOC and not violating the stacking limit, 2) to a hex not in an enemy ZOC but violating the stacking limit, and 3) to a hex in an enemy ZOC (regardless of stacking). When a unit must retreat in violation of stacking, it must continue to retreat until it reaches a hex where it does not violate stacking. Units that fail to do so are eliminated. Units that retreat into an enemy ZOC are eliminated; those that are at full strength with DG or cadre sides are flipped to reduced strength. For the purposes of retreat, friendly units do not negate enemy ZOCs in the hexes they occupy. Units forced to retreat into enemy-occupied hexes or across prohibited-terrain hexsides are completely eliminated, even if they have a Cadre or DG side.
- Advances. Advance after combat is voluntary. If an attacked hex is completely empty of defending units because of eliminations or retreats, the attacking units may occupy it. The decision to do so must be made and executed before the resolution of any other attack. All or some (within the stacking limit) of the attacking units may advance into the vacated hex. The defender may never advance after combat.
G. Optional Combat Results Table
There is an optional ground combat results table integrated into the standard CRT. This table may be used for any attack, at the attacker's choice, but only in the odds columns appearing on the chart. Before combat resolution begins, the attacker must specifically state that he is attacking on the optional table. If he does not, the attack is assumed to be made on the standard CRT.
H. Effects of Terrain on Combat
The terrain in the hex occupied by the defender, or the type of hexside across which an attack is made, may affect the resolution of combat. The terrain effects on combat chart gives a summary of these effects, but they are explained in detail below. References to AEC and ATEC refer to the special armor effects capabilities explained in Rule 10.
- Reference City: No effect on combat.
- Dot City: No AEC.
- Partial city hex (metropolis): No AEC. Units (other than engineers and artillery) attacking into a partial city hex have their attack factor halved.
- Full city hex (metropolis): No AEC. Units (other than engineers and artillery) attacking a city in a full hex have their attack factor halved. Modify the combat resolution die roll by -1.
- Woods: If the defender is in a woods hex, modify the combat resolution die roll by 1. (Sign not printed in the French source; presumably -1, as for the other defensive terrain.)
- Rough: If the defender is in rough terrain, modify the combat resolution die roll by -1.
- Wooded rough: If the defender is in a wooded rough hex, modify the die roll by -2.
- Mountain: No AEC. Units other than mountain units have their attack factors halved. Mountain units attack normally.
- Swamp: No AEC. If the defender is in a swamp hex, modify the die roll by -2. In addition, all artillery, anti-aircraft, anti-tank and combat motorized units are halved when attacking into that hex. Note that motorized artillery is halved only once; it is not halved once for being artillery and once for being motorized.
- River: All units other than artillery attacking across a river hexside are halved.
- Fortifications: No AEC. All units other than artillery, anti-aircraft and engineers are halved when attacking across a fortification hexside, printed either on the map or on a counter.
All terrain effects on combat are cumulative. Example: a unit attacking across a river into a full-hex city will be halved twice in strength (i.e., quartered), may not use AEC, and will have a die roll modification of -1.
Rule 9 - Regimental Equivalents
Regimental equivalents are a measure of the size of ground units. Regimental equivalents are used in the rules in areas such as calculating the effects of armor in combat (Rule 10), allocating the naval transport capabilities of the belligerents (Rule 27) and regulating the transport capabilities of aircraft (Rule 21), to mention just three important areas.
Each battalion equals one-half regimental equivalent. Each regiment, brigade or headquarters unit equals one regimental equivalent. Each division equals three regimental equivalents.
Example: if the Allied player has stacked two Greek infantry divisions, a British armored brigade, a Greek artillery regiment and two British anti-aircraft battalions, he will have a total of nine regimental equivalents in the hex.
Rule 10 - Effects of Armor and Anti-Tank
Various units in Marita-Merkur have armor and/or anti-tank effects that affect the resolution of combat. The specific capability of each unit type is detailed on the unit identification chart; players are advised to consult this chart while reading this rule.
A. Categories
- AECA: Armor Effects Capability in the Attack. AECA expresses a unit's ability to use armor effects when attacking.
- AECD: Armor Effects Capability in Defense. AECD expresses a unit's ability to use armor effects in defense.
- ATEC: Anti-Tank Effects Capability. ATEC expresses a unit's ability to defend against attacks using AECA.
B. Values
Armor and anti-tank effects are calculated on a proportional basis, using regimental equivalents (RE). To calculate this proportion, a player must know the value of each of his RE. There are four possible values, defined below, that a unit may have in a given category.
- Full. When a unit is listed as having full capability in a category, each RE of the unit is counted as a full RE for calculating the proportion. For example, a German panzer division attacking (3 RE) is counted as three RE of AECA.
- Half. When a unit is listed as half-capable in a category, each RE of the unit is counted as a half RE for calculating the proportion. For example, an Italian light armored division (3 RE) is counted as 1 1/2 RE of AECA; the remaining 1 1/2 RE are counted as having no AECA.
- Neutral. Some units are listed as neutral in a category. The RE of such a unit are not counted at all when determining the proportion. For example, the RE of a German motorized division are not counted when determining the proportion for AECD.
- None. All units not having one of the above values are assigned the value "none". This means the unit has no capability in the given category, although, unlike neutral, all the unit's RE count when calculating proportions. For example, a Greek infantry division (3 RE) has zero RE of AECA.
C. Proportions
To calculate the proportion in a given category, the owning player totals the number of RE he has participating in the combat. This number is then divided by the number of RE that have a capability in the category. The resulting number is then expressed as a fraction. For example, if two infantry divisions (6 RE) and one panzer division (3 RE) attack, then three RE out of a total of nine have AECA, a fraction of 3/9 or 1/3. Once the proportion is obtained, round the fraction to correspond to one of the fractions listed (below).
- AECA. When one quarter (1/4) of the attacking units have AECA, modify the combat resolution die roll by +1. When one half (1/2) of the attacking units have AECA, modify the die roll by +2. When all (1/1) of the attacking units have AECA, modify the die roll by +3.
- AECD. When one quarter of the defending units have AECD, modify the die roll by -1. When one half of the defending units have AECD, modify the die roll by -2. No additional benefit is received if all the defending units have AECD. AECD is not used when half or more of the attacking units have AECA; in that case, only ATEC is used.
- ATEC. ATEC is used only in defense, and only if half or more of the attacking units have AECA. When one quarter of the defending units have ATEC, modify the die roll by -1. When one half of the defending units have ATEC, modify the die roll by -2. When all the defending units have ATEC, modify the die roll by -4.
Example 1: One armored division, two infantry divisions and three artillery regiments attack. The artillery regiments are neutral as regards armor and are therefore not counted. That leaves nine RE for the proportion, of which three are AECA. The fraction is 1/3, which rounds to 1/4. The attacker therefore adds one to the die roll.
Example 2: An Italian light armored division and a motorcycle regiment defend against an attack. The motorcycle regiment is neutral as regards AECD and is therefore not counted. The light armored division is half AECD; half of its RE count as AECD and the other half as non-AECD. The proportion is 1/2, and two is subtracted from the die roll. (The French source says "un est soustrait", one is subtracted, which contradicts the 1/2 = -2 table above; transcribed as printed.)
Example 3: Three infantry divisions attack an anti-tank battalion. The anti-tank battalion is full ATEC. However, the attacker is not at 1/2 AECA or more; the die roll is therefore not modified.
D. Cumulative Effects
When both AECA and AECD, or both AECA and ATEC, are used in the same combat, the die roll modifications are cumulative. For example, if the attacker has full AECA (+3) and the defender full ATEC (-4), the net die roll modification is -1.
E. Half Capability
Units listed as half-capable in a category may be considered neutral instead of half-capable, at the choice of the owning player. For example, if an armored division and a light armored division attack, the owning player may choose to consider the light armored division neutral as regards AECA. The attack will therefore be made at full AECA. If the other option were chosen, there would be 4 1/2 RE out of 6 RE with AECA, a fraction of 3/4, which is then rounded to 1/2.
To determine whether or not ATEC may be used, the defending player may consider all attacking units that have the option of being either half AECA or neutral to be in whichever mode he chooses. However, this has no effect on the actual mode used by the attacker. For example, a light armored division attacks an anti-tank battalion. The attacking player decides to consider his unit neutral with respect to AECA; there is therefore no die roll modification for AECA. The defender decides to consider the light armored division as half AECA when determining whether he can use ATEC; he can therefore do so. The net die roll modification is -4.
F. Neutral Restriction
In any combat, for any category, the owning player may not have more than twice as many RE of neutral units as RE of capable units. Neutral RE in excess of this figure are counted as having no capability in that category. Example: An armored division, two motorized divisions and three artillery regiments attack. Of a total of 12 RE in the attack, three are AECA and the other nine are neutral as regards AECA. However, only six of them may be considered neutral; the other three are considered as having no capability. Thus the AECA proportion is 3/6 or 1/2.
G. Terrain
The terrain effects on combat chart indicates that several terrain types have no AEC. This means that AECA may not be used by units attacking into the hex, and AECD may not be used by units defending in that hex. ATEC is not affected. If half or more of the attacking units are capable of using AECA, ATEC may be used. In this case there is no modification for AECA, but the die roll is modified for ATEC. For example, an armored regiment attacking an anti-tank battalion occupying a full-hex city will result in a die roll modification of -4 because of ATEC.
Rule 11 - Unsupported Units
All units possess an intrinsic combat value which is represented by the printed combat factors. However, under certain circumstances, some units are unable to use this value to full effect because of an inadequate supply of support weapons. In the game, such units are said to be unsupported.
Most units represent combined-arms combat teams and are considered supported. These units are:
- All divisions, including cadres and DGs.
- All artillery units.
- All non-divisional units bearing a dot in the upper left corner of the counter.
All other units are considered unsupported. Unsupported units have their combat factors halved (retaining fractions) as long as they are unsupported.
Units become supported if they are stacked with:
- A full-strength division.
- An artillery unit.
Any full-strength division or artillery unit supports all units stacked with it. Cadres and DGs are a special case: although they are always considered supported themselves, they do not support other units stacked with them.
Rule 12 - Supply
For ground units to operate at full effectiveness, they must be supplied.
A. Supply Determination
The supply status of each ground combat unit on the board is determined at the start of each player turn. Units not supplied at that time remain unsupplied throughout the player's turn. It may be convenient to mark unsupplied units with a blank counter.
B. Supply Lines
A unit is supplied if it can trace a supply line to a supply source. A unit may trace a ground supply line of a maximum length of seven hexes between the unit and a supply source or a transport line leading to a supply source. A supply line may not be traced into an enemy-occupied hex, nor into a hex in an enemy ZOC, unless that hex is occupied by a friendly ground combat unit. Thus a friendly unit negates the effects of enemy zones of control in the hex it occupies for the purpose of tracing supply. In addition, if a supply line is traced along a transport line, it may not be traced into a hex where the transport line has not been traced.
C. Supply Sources
Units of a specific country have their own supply sources. They may not use the supply sources of another country, even if both countries are on the same side.
- Italian sources: Any port hex under Italian control or any primary transport line on the west edge of the map in Italy.
- German sources: Any transport line hex on the north edge of the map. German units on islands may use as a source any Axis-controlled port on the island if the port is not in an Allied naval interdiction zone (see Rule 31). In addition to the listed sources, any primary transport line on the east edge of the map is a German supply source.
- Hungarian sources: Any partial or full city hex in Hungary.
- Yugoslav sources: Any of the following cities: Beograd, Sarajevo, Skoplje, Ljubljana, or Zagreb. Two of the following cities of choice: Beograd, Sarajevo, Skoplje, Ljubljana, Zagreb. Note that a Yugoslav unit able to trace supply to only one of these cities is unsupplied. (The two sentences are printed as such in the French source, which appears garbled; transcribed as printed.)
- Greek sources: Athens or Thessaloniki. Greek units on Greek islands are always supplied.
- British/Commonwealth sources: Any port hex under Allied control.
The definition of ports is treated in detail in Rule 27. A player controls a port if one of his units occupies the hex or was the last to occupy the hex. At the start of the game, all ports of a country are controlled by the player whose units are allowed to deploy in that country.
D. Effects
Units that are not supplied have their combat and movement factors halved, retaining all fractions. Air units and the Hungarian river flotilla are not affected by supply.
Rule 13 - Overruns
Overruns occur during the movement and exploitation phases and are not considered combats, although they result in the elimination of enemy units. The phasing player may carry out an overrun by moving enough combat factors into a single hex adjacent to an enemy unit (or stack of units) to obtain an odds ratio of at least 10:1. All terrain, supply and support considerations must be taken into account.
When the 10:1 ratio is reached, the defender loses his zone of control for the purposes of the overrun. The attacking forces may then, by spending additional movement points beyond the normal cost to enter the hex, eliminate the enemy units and enter the hex. All units performing the overrun need not advance, but all units must pay the cost, including the cost of entering the hex. Units that overrun may then continue to move, if they have movement points left to do so. Units that do not have enough movement points to pay the full cost of the overrun may not participate in an overrun, even if they have not moved at all during the phase.
If a ratio of 12:1 is reached, then fewer MP are spent. Enemy units with no defense factor (such as the Albanian 1-0-6 CCNN regiment) may be overrun at 12:1 by any unit having an attack factor.
MP cost for an overrun
| Attacker | 10:1 | 12:1 |
|---|---|---|
| Combat/motorized units | 1 | 1 |
| All other units | 3 | 2 |
Although overruns take place during movement and are considered part of movement, the moving player may not exceed the stacking limits in the hex from which the overrun is to be executed.
Rule 14 - Unit Specialization
The following units have special characteristics and capabilities.
A. Engineers
There are three types of engineer units in the game. Each type has its own symbol, as shown on the unit identification chart.
1. Construction Engineers. Construction engineers have the ability to build airfields and forts, and to repair transport lines.
Construction engineers may build airfields in any clear or rough terrain hex, but only one airfield may be built in a single hex. There are two types of airfields, temporary and permanent, as described in Rule 18.
A construction engineer unit may build a permanent airfield by ending its movement phase in the hex where the field is to be built. Place a permanent airfield counter face down in the hex with the engineer unit. If the unit still occupies the hex at the end of the next friendly movement phase, the airfield counter is flipped face up and is fully operational. The engineer unit must be supplied throughout the construction period. After building the airfield, the engineer may leave the hex; the airfield remains.
A temporary airfield may be built in the same way, except that the field requires less time to build. Such an airfield requires 4 MP for a non-motorized unit and 8 MP for a motorized unit for its construction, in addition to normal movement costs. When this additional cost has been paid, place the airfield counter in the hex. Unlike a permanent airfield, a temporary airfield remains on the board only as long as an engineer unit remains in the hex with it. The engineer unit must be of a type capable of building the field, but it need not be the same unit that did so. A temporary airfield may not be converted into a permanent one. But a permanent airfield may be built in the same hex as a temporary one by a different engineer unit; once completed, the temporary field is removed.
A fort may be built in the same way as a permanent airfield, except that, of course, a fort counter is placed in the hex instead of a permanent airfield.
A cut transport line may be repaired by a construction engineer by spending 4 MP for a non-motorized engineer or 8 MP for a motorized unit. Once this additional movement point cost is paid, the cut counter or double cut counter in the hex is removed.
During bad weather turns, all the above operations require double the normal time or MP costs indicated to be carried out. The player may use the normal construction time if he has two engineers, both of which meet all the prerequisites, to carry out the operation. Additional engineers do not speed up construction further.
2. Combat Engineers. Combat engineers have all the capabilities listed for construction engineers and also have special capabilities of their own.
The combat factor of combat engineers is not halved because of terrain when they attack into partial-hex cities, full-hex cities, or across fortification hexsides. In addition, combat engineers are always considered supported when they attack or defend in such terrain, but they cannot support other units stacked with them.
When 1/5 or more of the regimental equivalents of the units attacking into a city hex or across a fortification hexside are combat engineers, the combat resolution die roll is modified by +1. However, at least half of the losses suffered by the attacker must be taken from the attacking engineers, if possible.
3. Assault Engineers. Assault engineers include the German "Sturm-pioniere" and Italian "Guastatori" units. Assault engineers do not have the capabilities of construction engineers; they function only in a combat capacity.
Assault engineers attacking or defending in a partial city hex, a full city hex, or across a fortification hexside are considered supported (but they do not support other units); in addition, their combat factors are doubled. Assault engineers are counted as combat engineers when calculating the regimental equivalent proportion described in the combat engineers section.
B. Artillery
Artillery is defined as any unit with the motorized artillery, field artillery or mountain artillery symbol. These units are not halved when attacking into a partial or full city hex, or across a river or fortification hexside. Artillery is halved when attacking into a swamp hex.
C. Yugoslav Border Regiments
All Yugoslav border regiments (not reserve) are considered supported as long as they do not move. Once moved, these units are supported only according to Rule 11 - Unsupported Units. Border regiments do not support any other units stacked with them.
D. Hungarian River Flotilla
The Duna flotilla may move only along the Danube (the river that runs through Budapest) from the Slovak border to the confluence with the Tisza river (hex 1912). The flotilla may move a maximum of thirty hexes per turn, each hex entered following the course of the river. To follow the river, each hex entered must be adjacent to the river, and each hexside along the course must be a hexside of one of the hexes entered. The flotilla may move freely through enemy units, but may not stack with them. At the end of movement, the flotilla is left in a hex adjacent to the river.
The Allied player may not attack across a river hexside if the flotilla is adjacent to that hexside. The flotilla has no other effect on combat.
E. LSSAH Brigade
The Leibstandarte-SS 'Adolf Hitler' (supported 6-10 brigade) is in fact a division. For all the rules of the game, treat it as such.
Rule 15 - Heavy Equipment
Various units have heavy equipment (artillery pieces, vehicles, etc.) - these units are subject to certain restrictions with regard to naval and air transport, as indicated in Rules 21 and 27. The unit types that have heavy equipment are indicated on the unit identification chart. In addition, all supported units, except cadres and DGs, are considered to have heavy equipment. Thus all division-size units have heavy equipment, even if the type symbol is not indicated on the unit identification chart.
Rule 16 - Unit Breakdown
The various division-size units in the game have the ability to break down into component units, which may engage in independent operations. In general, a player has the option of breaking down a division in two ways, as indicated in paragraph B below.
A. Procedure
A unit may be broken down into its components only at the start of a friendly movement or exploitation phase, before any movement of the phase. Replace the unit with the correct breakdown counters. There is no movement point cost to do so.
A division may be reassembled only at the end of a friendly movement or exploitation phase. All the component units of the division must be stacked in the same hex; remove the components and place the division in the hex. There is no movement point cost to reassemble a division. Stacking limits are enforced at the end of all division reassemblies.
B. Unit Breakdown Chart
The possibilities for breaking down divisions are shown on the unit breakdown chart (UBC). This chart details, by nationality, unit type and unit strength, all the permitted breakdowns. If the three above elements for a division cannot be found on the chart, then that division cannot break down. For example, no Italian division can break down.
In most cases, a division may break down into: 1) supported elements; or 2) a headquarters and unsupported elements.
- Headquarters. The headquarters unit has only a movement factor printed on the counter; it has no combat strength. The headquarters supports all units stacked with it. A headquarters is considered to be of regimental-equivalent size. The unit has heavy equipment.
- Battalions. In some cases, the UBC provides for battalion-size elements. These battalions always appear unsupported; they have no supported side. For example, a German infantry division breaks down into two regiments and three battalions. The regiments are supported, but the battalions are not.
- Greeks. Greek divisions do not have the ability to break down into supported elements.
C. The Counters
- Breakdown of German divisions. Although all German divisions have the ability to break down, they were used intact for most operations. To reflect this doctrinal restriction, only a limited number of breakdown counters are provided for the German divisions. The Axis player may not break down divisions beyond the breakdown counters provided. These components are designated by a letter; they may be used to break down any German division of the appropriate unit type, by matching the components with the UBC. For example, the Axis player breaks down the German 46th Infantry Division (8-6) using headquarters unit B, one 3-6 regiment B, and two 2-6 regiments B. Lettered components are not interchangeable; a division may be reassembled only from components bearing the same designation letter.
- Numbered breakdowns. For certain divisions, the stylized breakdowns indicated above have been replaced by the numerical designation of the actual element. This was done for the division types whose components often operate independently.
- German 9th Panzer Division. For the German 9th Panzer Division, breakdown counters were included in the counter mix as Europa counters. For Marita-Merkur, the Axis player may use these counters to break down any German 10-10 panzer division.
Rule 17 - Air Phase
All air activity takes place during the air phase. In this phase, activity is carried out according to the following sequence.
- Movement segment.
- A. Movement of the phasing player's aircraft.
- B. Movement of the enemy player's interceptors.
- Air combat.
- A. Preparation.
- B. Combat resolution.
- C. Defense and attack of targets.
- Return segment.
- A. Phasing player's return of aircraft.
- B. Enemy player's return of interceptors.
Rule 18 - Air Bases
Air units take off and land at air bases. There are two categories of air bases: cities and airfields. Both have air capacities based on their specific type. The capacity of an air base is the number of air units that may take off from the base in each air phase. There is no limit to the number of air units that may land at an air base. The capacity of an air base also affects the number of air units that may be repaired (see Rule 24).
Cities are printed on the map; airfields are provided as counters. They have varying capacities, as shown in the following table:
Air base capacities
| Base type | Capacity |
|---|---|
| Full or partial hex city | 6 |
| Dot city | 3 |
| Reference city | 1 |
| Permanent airfield (counter) | 3 |
| Temporary airfield (counter) | 3 |
Note that the two types of airfield counters have the same capacity. However, temporary airfields must be maintained by engineers in accordance with Rule 14. For air units to take off from a temporary field, it must either 1) be built on a transport line leading, without a cut, to a friendly supply source, or 2) have a transport air unit (type T) based on the field. This transport air unit counts against the airfield's capacity, since the unit must perform an airfield supply mission (Rule 22) for each friendly phase in which other aircraft take off from the field.
Air bases have no ground defense factor. Enemy ground units may enter an air base hex if there are no friendly ground units in the hex; all air units at the base are then destroyed unless they escape. An escape die roll is made separately for each air unit, up to the capacity of the base; the unit escapes on a roll of 1, 2 or 3. Air units that escape must immediately fly to a friendly air base within range of their movement factor. If a ground unit enters a hex containing an airfield (not a city), it may destroy the field by spending one MP.
Enemy air bases captured by friendly units may be used by friendly air units. An enemy air base is captured when a friendly ground unit enters the base hex.
Rule 19 - Air Unit Movement
Each air unit has a movement factor printed in the lower right corner of the counter, expressing its movement capacity in movement points. This factor is calculated on the basis of the aircraft's operational radius. Air units move by spending movement points as they enter hexes on the map.
An air unit's movement factor indicates the maximum number of MP the unit may spend during the movement segment of the air phase. Movement points may not be transferred between units, nor accumulated from one air phase to another.
When an air unit moves, it spends one MP for each hex entered. Terrain has no effect on the movement of air units.
Air units move in waves. A wave is one, two or three air units that take off from the same air base and head for the same destination. The movement capacity of the wave is equal to that of the unit with the fewest MP in the wave. A wave (up to three air units) may be formed with units taking off from different air bases: all the aircraft forming the wave must fly to a common hex; each must spend one additional MP to form the wave; then the wave continues to fly to its destination. In this case, the movement capacity of the wave is equal to that of the unit with the fewest MP remaining.
Example: Suppose three air units, each with a movement factor of 10, fly to a common hex, two of the units spending 3 MP and the third 5 MP to get there. Each unit then spends one MP to form the wave. Thus the wave has a remaining movement capacity of 4 MP.
During the return segment of the air phase, all aircraft that have performed their mission must return to an air base. The air units of a phasing player return to any friendly base within the unit's movement factor. The interceptors of an enemy player return to any friendly air base within half of the unit's movement factor. Units of the same wave need not return to a single air base.
Rule 20 - Air Zones of Control
Each fighter group that is on an airfield and does not perform an air mission has an air zone of control (AZOC). An AZOC covers every hex within half the movement factor of the fighter group exerting it (drop fractions). A fighter group is defined as any air unit bearing the designation F as its type code.
When a wave of enemy air units enters a hex in an AZOC, the wave is subject to a patrol attack. The fighter unit compares its air attack factor with the lowest air defense factor of the enemy wave. If the fighter's factor is equal to or less than the enemy's, a die roll of 6 aborts (see Rule 22) one air unit of the enemy wave. The specific unit aborted is determined by the owning player. If the fighter's factor is greater, a roll of 5 or 6 aborts one air unit of the wave. If the fighter's factor is at least twice as high, a roll of 4, 5 or 6 will abort an enemy air unit.
The fighter group performing the patrol attack is not subject to loss or abort results. Patrol attacks are not missions, nor are they combats in the sense of actions during the air combat segment. Thus a fighter group may perform a patrol attack and then perform a normal mission during a turn. A single fighter group may perform only one patrol attack in an air phase.
A wave is subject to only one patrol attack in each hex it enters; it is subject to one patrol attack for each hex of an AZOC it enters. Note that the fact that a patrol attack has been made in a specific hex does not prevent other patrol attacks from being made in that same hex against different waves by different fighter units.
Rule 21 - Air Missions
Air units may perform several missions, depending on the type of aircraft, the availability of targets and the preferences of the player who owns them. Each mission is separate; in general, an air unit may perform only one mission per phase. Fighter air units may perform one mission per air phase: one mission during the friendly phase and one interception mission during the enemy phase. Non-fighter aircraft may initiate missions only during their friendly air phase.
All the air missions used in this game are presented below.
A. Interception
Fighter air units (type F) may perform interceptions. An interceptor may fly to any hex within half of the fighter's movement capacity (drop fractions) containing enemy air units. The purpose of the interception mission is to initiate air combat in the hex. Interception is performed during the enemy air phase; interceptors return to any friendly air base within half the unit's movement capacity during the return segment of the same phase.
B. Escort
Fighter air units may escort other air units on missions. They may fly to the target hex as an escort wave or as part of a wave performing another mission. The purpose of an escort is to protect the other air units on the mission. When organized in pure fighter waves, escorts form the screen in air combat. Escorts may not initiate air combat in a hex; only interceptors may do so. During the return segment, escorts may return to any air base within their movement capacity.
C. Transfer
All types of air units may perform transfers. They may fly to any air base within three times their movement allowance, and land in the return segment. Optionally, any air unit other than fighters may be transferred to a base within its printed movement capacity and then perform a second mission during the same air phase. Fighters may never perform a second mission during a phase.
D. Transport
All transport air units (type T) may perform transport missions. Transport aircraft carry ground units; however, no ground unit having heavy equipment (Rule 15) may be transported by air. A division, since it is supported and therefore automatically has heavy equipment, cannot be transported; however, the breakdown elements of the division may be transported by air, if the elements themselves do not have heavy equipment.
Units to be transported must begin the air phase on an air base. A division may break down during the air phase in order to transport its elements by air. The remaining elements of the division may not, however, violate the stacking limits.
An air transport unit may carry its cargo to any friendly air base within twice its movement capacity, and land during the return segment. Optionally, a transport may fly to an air base within its printed movement capacity, land, and then proceed to another air base within its movement capacity. The cargo may be carried on either or both legs of the flight. The unit lands during the return segment of the second leg.
There are three types of transport missions.
-
Regular transport. An air transport unit may carry one regimental equivalent of air-transportable units. If the transport is destroyed in air combat or by anti-aircraft fire, the ground unit carried is also destroyed. If the air unit is aborted, the ground unit must return to an air base with the transport.
-
Temporary airfield supply. A transport stationed at a temporary airfield (Rule 18) must perform this mission in each friendly air phase to a friendly air base other than another temporary airfield. The unit returns to its temporary airfield; ground units may not be carried by a unit performing this mission. If this mission is not fulfilled, the airfield's capacity is reduced to zero; no air unit may take off from the field in subsequent air phases. The mission may also be satisfied if a transport lands on the airfield during the return segment; the transport may perform no other mission during the phase.
-
Air assault. Parachute units, as indicated on the unit identification chart, may be carried to a target hex and dropped, without having to land the transports in the hex. Units may not be dropped into swamps, woods, wooded rough, mountains, full sea hexes or into full-hex or partial-hex cities. They may be dropped onto enemy units or into enemy zones of control.
Paradropped units are disorganized on a die roll of 1 or less. Dropping onto enemy units, into enemy ZOCs or onto rough terrain hexes modifies this die roll by -1. For the effects of disorganization, see Rule 26. The disorganization roll may be modified only once; that is, the above effects are not cumulative.
Two transports are needed to carry one regimental equivalent of paradropped units. If one of the transports is killed or aborted, the unit may still jump into the target hex. If both transports are aborted, the unit returns to base with the transports; if both are killed, or if one is killed and the other aborted, the jumping unit is eliminated.
A transport may tow a glider transport unit (type GT). The towing transport and the glider may together carry one regimental equivalent. When parachute units use a glider as part of their drop, the disorganization die roll is modified by +1. Enemy units, enemy ZOCs and rough terrain modify the roll as described above. A glider may be used only once for an air assault transport mission and is removed from the game after use.
E. Bombardment
Air units with bombardment factors may perform these missions. Air units surviving in a hex after all air combats and anti-aircraft fire have been carried out may then perform their missions. Each air unit may attack only one target and may attack that target only once in that phase. A target may be attacked any number of times by different air units. In Marita-Merkur, only the tactical bombardment factor of air units is used, and most bombardment missions are resolved on the precision bombardment table. All air units, except glider transports (type GT), may perform the following bombardment missions.
-
Air bases. Any air unit with a tactical bombardment factor, or any fighter unit, may attack aircraft on an air base. The aircraft of a wave may attack either individually or as a combined total. All fighter units bombarding air bases add 1 to their printed tactical bombardment factor; thus a fighter with a tactical bombardment factor of 0 may attack as a 1. Each attack must be directed against one air unit at the base, consulting the precision bombardment table for a result. A hit (H) on an operational air unit makes it inoperative (see Rule 24). A hit on an inoperative unit destroys the unit. Thus an operational air unit may be destroyed in a single air phase if it receives two hits.
-
Ground units. Any air unit having a tactical bombardment factor may attack enemy ground units. These units may be bombarded only if they are also to be attacked by friendly ground units in the combat phase. Air units performing this mission remain in the target hex until the combat phase. Anti-aircraft fire and execution of the mission take place during that phase, and the air units return to base at the end of the phase. The aircraft's tactical bombardment factors are added to the total ground attack strength; terrain does not affect tactical bombardment factors. The total number of factors applied must not exceed the total printed strength of the attacking ground units; excess factors are ignored.
-
Harassment. All aircraft with a tactical bombardment factor may perform air harassment. For each increment of four factors delivered into a hex, each enemy ground unit leaving that hex during the next enemy movement and exploitation phases must spend one additional movement point.
-
Transport lines. Any air unit with a tactical bombardment factor of 2 or more may attack transport lines. Each air unit must attack individually on the precision bombardment table. A hit breaks the line; place a cut marker in the hex. Note that cutting a primary transport line in a hex does not cut the secondary line associated with it. The secondary line must be bombarded separately; place a double cut marker in the hex when it is cut. For more information on cutting transport lines, see Rule 6.
Rule 22 - Air Combat
Opposing waves in the same hex undergo air combat. Waves may be divided by the owning player at the start of the air combat segment, but air units may not later recombine into waves.
The following definitions apply to air combat. A pure fighter wave is a wave containing only fighter-type air units. A mixed wave is a wave that contains at least one non-fighter-type unit. For example, a wave of three bombers is a mixed wave. An interceptor wave is a pure fighter wave performing the interception mission.
Air combat occurs in a target hex that the phasing player is attempting to attack, or in a search hex. It occurs only if the enemy player sends interceptors to contest the hex. The enemy player will have only interceptors present, while the phasing player may have both pure fighter waves and mixed waves.
Air combat takes place in three steps in each contested hex. All air combat in a single hex is resolved before any air combat in any other contested hex is initiated. The three steps are preparation, combat resolution, and defense and attack of the target.
1. Preparation
The phasing player separates his waves into networks of pure fighter waves (the screen) and mixed waves (the mission force). The enemy player must engage at least one interceptor wave against each wave of the screen. Uncommitted interceptor waves may be sent against the mission force, but only if the intercepting player has an odds ratio of at least 1:2 against the screen. The odds ratio is determined by comparing the total air attack factors of the interceptors to the total air defense factors of the screen. If it is impossible to obtain an odds ratio of at least 1:2, all the interceptors must fight the screen.
2. Combat Resolution
Air combat in a hex has a two-stage resolution. First, the interceptors and the screen resolve combat. Then, all surviving interceptors, plus those allocated against the mission force in the preparation step, attack the mission force.
The combat between the interceptors and the screen proceeds as a series of successive simple combats between opposing waves. The owning player determines the order in which his waves will enter combat; once determined, the player may no longer change the order of his waves. The first interceptor wave undergoes combat with the first wave of the screen, then it undergoes combat with the second wave of the screen, and so on until it has fought all the waves of the screen. The player repeats this procedure with each successive interceptor wave until each wave has undergone combat with each enemy wave.
At this point, the surviving interceptor waves, together with all waves allocated in the preparation step, attack the mission force. Both players determine the order of waves and carry out the combat in exactly the same manner as described above.
For each wave-to-wave combat, the phasing player totals the air attack factors of his wave and sets up a ratio between this number and the air defense factors of the enemy wave. This ratio is then simplified to correspond to one on the air combat results table, always rounding down in favor of the wave receiving fire. A die is rolled, and the result is cross-indexed with the table to obtain a result. Before the result is applied, the opposing wave fires, using the same procedure. All results of both waves are then applied.
The air combat results are no effect, aborted (A) and killed (K). Each result affects only one unit of the wave; thus a result of AAK means that two units are aborted and one unit is killed. Results are read from left to right if a wave does not contain enough units to satisfy all the results. In the preceding example, if the affected wave had only two units, they would both be aborted and none would be killed. An aborted air unit is immediately sent back to a friendly air base within its movement factor, or half its movement factor if it is an interceptor, and becomes inoperative (see Rule 24). A killed unit is eliminated and removed from the game. The owning player determines which air units of a wave are aborted and killed.
Any wave may decline combat before a specific combat between that wave and an enemy wave is resolved. A wave that does so must abandon its mission and immediately return to an air base. If a fighter wave of the screen declines combat, the opposing wave may be immediately engaged against the mission force, without any further combat against the screen. Aircraft performing double-range air transport missions or interception missions may not decline combat.
3. Defense and Attack of Targets
The waves of the mission force that survive air combat designate their targets in the hex. Waves may not be formed or divided at this stage; they remain in their post-combat state. The target units may carry out anti-aircraft fire, and all surviving aircraft may then carry out their missions.
Rule 23 - Anti-Aircraft Fire
Air units carrying out bombardment missions or dropping ground units must first undergo anti-aircraft fire. Once all air combats are resolved in the hex, units that have anti-aircraft factors and are in the target hex may fire at the surviving air units. Anti-aircraft fire may be directed at an individual air unit or against all the air units of a wave, at the choice of the firing player. Units with anti-aircraft factors may fire individually or in combination with other units. During a phase, any number of anti-aircraft attacks may be made in a hex, but each firing unit may do so only once, and each air unit may be fired on only once. Odds are calculated and results are implemented as in air combat, using the anti-aircraft factors as air attack factors. Anti-aircraft attacks are resolved on the anti-aircraft fire table.
In general, all anti-aircraft factors in a hex may fire at the air units above the hex. However, if air units attack the Hungarian river flotilla, then only the flotilla may fire at those units. The flotilla may fire anti-aircraft only if it is attacked by air units.
Units and cities have anti-aircraft factors as shown in the following table.
Anti-aircraft capabilities
| Units | Factors |
|---|---|
| Anti-aircraft units | 2 per attack factor* |
| All divisions | 1 |
| All Cadres and DGs | 0 |
| River flotilla | 3 |
| All other units | 0 |
| Cities | Factors |
|---|---|
| Full hex city | 6 |
| Partial hex city | 3 |
| Dot city | 1 |
| Port (only for reference cities) | 1 |
* Anti-aircraft units having an attack factor of 0 have an anti-aircraft factor of 1.
Rule 24 - Aircraft Repair
Aircraft become inoperative in two ways. An air unit that receives an abort result in air combat or from anti-aircraft fire must immediately return to an air base; the unit is inoperative. An air unit that is hit by bombardment of an air base is inoperative. An inoperative air unit is designated by flipping the counter at the air base. It must remain at the base until it is repaired.
At the start of each player turn, the phasing player may attempt to repair his inoperative air units. Each air base, other than a temporary airfield, has a repair capacity equal to its capacity. A temporary airfield has a repair capacity of 1. The air base's repair capacity is the number of repair die rolls that may be made to attempt to repair the aircraft at the base. Each time a 1 or a 2 is rolled on the repair die, one air unit may return to operational status.
Unused aircraft repair capacity may not be accumulated for subsequent turns, nor transferred to other bases.
Example: The Allied player has two inoperative air units in the city of Thessaloniki. The city has an air capacity of three; it therefore has a repair capacity of three. The Allied player rolls the die three times and succeeds once in getting a 1 or a 2. As a result, only one of the two inoperative air units at the base becomes operational.
Rule 25 - Special Air Rules
A. Gliders
In addition to the rules for gliders given in the air assault mission, several general rules apply. Gliders do not count against an air base's capacity. Gliders do not count against the three-unit limit for waves. Gliders have an air defense factor of 1. In combat, the glider's factor is subtracted from the defensive factor of the towing unit; the glider cannot be attacked separately. Gliders may be transferred between air bases towed by a transport unit performing a regular transfer mission. Neither unit may carry ground units during the transfer.
B. Fighters on Bombardment Missions
Any type F air unit performing a bombardment mission has its attack and defense factors reduced by 2 (but never below 1) for the duration of the phase. The fighter's bomb load may be dropped at any time before the attack on the target, at the owning player's choice; if this is done, the unit returns to its full fighter strength but cannot complete the bombardment mission. Treat the unit as a fighter performing an escort mission in this case.
C. Fighter-Bombers
Type FB air units are fighter-bombers. In an air game, they may be treated as type F or type B units, at the owning player's discretion. However, if they performed a bombardment mission in the friendly air phase, they may not perform an interception mission in the enemy air phase immediately following.
D. Extended Range
Aircraft may perform bombardment missions at a distance greater than their movement by carrying a reduced bomb load. Before a unit's movement, it may be designated as flying at extended range. The unit may fly up to twice its movement capacity, but its bombardment factors are reduced to one third of their printed value (retaining fractions). Fighters performing an extended-range bombardment mission may not drop their bomb loads.
E. Increased Bomb Load
Type B air units may carry out bombardment missions with a doubled bombardment factor if the attack is made at less than one third of the unit's movement capacity (round fractions down).
Do not use this rule. (Later testing showed that it has a greater effect on the game than it should.)
F. Dive Bomber Effectiveness
When type D units attack individually or form a wave composed solely of dive bombers, add 1 to the die roll result when consulting the dive bombing table.
G. Night Operations
Air operations take place normally by day in the game. However, night operations are powerful. All air units with the prefix N preceding their unit name may perform only night operations*, and at full effectiveness. Other air units may perform night operations only if they include at least one air unit with the prefix N; these units have their bombardment factor halved. Air units performing day operations may not interact with those performing night operations. For example, a night bombardment movement cannot be intercepted by (day) fighters.
When an air unit other than a unit with an N prefix performs a night mission, it must roll a die when it lands at the end of its mission; on a roll of 5 or 6, the unit is inoperative.
Rule 26 - Airborne Operations
The air assault transport mission of Rule 21 details how parachute and air-landing units are transported and dropped onto a target hex. Units that perform airborne operations are called jump units, to distinguish them from units that do not perform airborne operations.
A. Effects of Disorganization
Units that are disorganized upon landing may not attack in subsequent combat phases. (If one or all of these units are disorganized, the combat resolution die roll is modified by -1.)
B. Surprise
Because of the surprise effect of an airborne operation, any unit that jumps is considered supported during the entire player turn of its jump.
C. Combat Operations
Non-disorganized jump units adjacent to enemy units may attack normally during the combat phase. Units landing directly in an enemy-occupied hex must attack without regard to disorganization. They attack during the air phase, immediately after the jumping units land. Adjacent friendly units (jumping or not) may not join in this attack. Defending units benefit from the terrain in the hex they occupy. Combat proceeds as a normal combat, with one exception: ignore all NE results. If an NE result is obtained, reroll the die until a different result is obtained. Units that retreat are subject to the effects of any enemy ZOC they enter, including that of a unit occupying the hex from which they retreated. Attacks made during the air phase may use friendly air support.
D. Capture of an Air Base
Jump units landing on an air base capture that base if the hex is cleared of all enemy units. A captured air base may be used during the return phase; that is, regular air transport missions may land there.
Rule 27 - Naval Transport
Both players have a limited naval transport capacity that allows ground units to be moved across sea hexes.
A. Ports
Any city in a coastal hex is a port. Ports are differentiated into two types.
-
Major port. A major port has the capacity to load/unload heavy equipment. A total of six regimental equivalents may embark or disembark at a major port per player turn. The following ports are major ports:
- Greece: Athens, Volos, Thessaloniki, Corfu and Khania.
- Yugoslavia: Kotor and Split.
- Albania: Durres and Vlore.
- Italy: all ports.
A destroyed major port cannot load or unload heavy equipment until it is repaired. Bombardments have no other effect.
-
Minor ports. Heavy equipment may not be loaded or unloaded at a minor port. A total of three regimental equivalents may embark or disembark at a minor port in each player turn. In addition, when an island has no identified port (i.e., city), each hex of that island may be treated as a minor port.
-
Alexandria. Alexandria is a major port controlled by the Allied player; it is located on the south edge of the map. British and Commonwealth reinforcements appear at Alexandria, and Allied units may use naval transport to enter or leave this port. Units transported from Alexandria must enter by the south edge of the map; units transported to Alexandria exit by the south edge.
B. Procedure
Naval transport of ground units takes place during the friendly movement phase. A ground unit may move to the port, embark, be transported, disembark, and then continue to move, but within the same movement phase, units may not remain "at sea" but must embark and disembark in the same phase. Embarking and disembarking together require the expenditure of a total of two movement points. Units leaving a single port and transported to the destination port may move as a group; otherwise, each unit is transported separately. National transports have unlimited range on the Marita-Merkur maps, but the path the transported unit follows to enter the port must be traced for the purposes of the bombardment method. (This paragraph is garbled in the French source; transcribed as closely as possible.)
C. National Capacities
- Greece. Up to three regimental equivalents of Greek units may be transported during an Allied player turn. Each RE of naval transport has two anti-aircraft factors.
- Britain. The British have no permanent naval transport capacity in the region because of the Royal Navy's distant commitment in the Mediterranean. Each turn, British naval transport capacity is equal to the number of British/Commonwealth reinforcements received that turn. Each RE of naval transport has an anti-aircraft factor of 4.
- Italy. The Italian army's transport capacity is 15 regimental equivalents per turn. Each RE of transport has four anti-aircraft factors.
- Other countries. Germany's naval transport capacity is described in the special rules (91 [sic]). The other countries on the map have no naval transport capacity.
D. Losses
If a full division loses one or two regimental equivalents during transport, the unit is flipped to its cadre strength. If three regimental equivalents of a division are lost in transit, the unit is completely eliminated. Smaller units sunk in transit are eliminated.
The Italian and Greek naval transport capacities are carried out by die rolls. (Sentence as printed in the French source.) For each regimental equivalent lost in transit, the respective naval transport capacity is permanently reduced by one.
Example: A regiment of the Greek 5th Infantry Division is transported from Crete to Athens. Subsequently, the Italian air force manages to destroy one transport point; only two regimental equivalents per turn may use Greek naval transports.
British naval transport capacity is never reduced by losses, because the Royal Navy has the ability to transfer to this theater the naval units used in other Mediterranean operations.
E. British Evacuation
As an emergency measure, the Allied player has the option of declaring any game turn to be an evacuation turn. He must declare it at the start of his player turn. He receives 10 regimental equivalents (each with an anti-aircraft factor of 6) for that turn and that turn only. Any Allied unit may use this transport. All units using evacuation transport must abandon their heavy equipment. Consequently, divisions flip to their cadre side; supported brigades flip to their unsupported sides. Artillery-type units composed of heavy equipment are considered heavy units; they may have their personnel evacuated; this unit counter is removed from the game but does not count as an eliminated unit when calculating victory points.
When a British evacuation is carried out, all Air Force air units must leave the map for the rest of the game. It suffices to remove them from the map during the last phase of the evacuation turn. Non-operational air units must leave during the turn in which they are repaired. The Allied player may carry out any number of evacuation turns. However, to reflect the diversion of the Royal Navy from its other operations in the Mediterranean, a victory point penalty is imposed on the Allied player for the second evacuation turn and each subsequent turn.
F. Restrictions
-
Operational. The operations or potential operations of opposing navies impose certain limitations on naval transport units. Italian naval transport is limited to ports under friendly control in Italy, Yugoslavia, Albania and on the west coast of mainland Greece up to and including Patras. Allied naval transport may be used in all friendly ports not included above, and at Alexandria.
-
Political. The game is a simulation at the operational level of a combined campaign. Consequently, the various political and strategic decisions are beyond the players' control. These considerations impose certain restrictions on the use of Allied naval transport.
The Greek government did not approach the war with the fatalistic outlook that affected the governments of Western Europe during the campaigns of 1940. On the contrary, the Greeks believed they could defeat the Italian invasion; moreover, they accepted that Britain would provide sufficient aid to stop the Germans if they intervened. Consequently, Greek naval transports may be used only to transport Greek units on the mainland until the Allied player declares the British evacuation turn. Once an evacuation has been declared, Greek transport may be used to carry Allied units to any authorized port.
The Greeks accept British aid only on the condition that it be sent to mainland Greece to take part in the fight. Consequently, British Commonwealth reinforcements must be sent to mainland Greece, with the following exception. For each regimental equivalent of Greek units transported from an island to the mainland, the Allied player may send one regimental equivalent of British or Commonwealth units to the same island in order to maintain the garrison of that island.
Declaring a British evacuation turn is an admission that the mainland can no longer be defended against the Axis invasion. As such, the political restrictions on Allied naval transport are lifted. However, evacuation cancels the war efforts of the Greek government. Consequently, one regimental equivalent of naval transport may be allocated to carry the Greek government off the map and into exile. In addition, all Greek units on the mainland surrender (are removed from the map) at the end of the turn in which the first British evacuation was declared. Greek units on the islands remain in play.
Rule 28 - Weather
The general weather conditions of the region affect the course of the game. The weather for a turn is determined at the start of each game turn, before any other action. The Allied player rolls a die and cross-indexes the result with the appropriate turn on the weather chart to obtain a result. The resulting weather is in effect throughout the turn and affects the entire map.
There are four possible results:
- Clear: use the clear weather section of the terrain effects chart.
- Poor: use the bad weather section of the chart.
- Poor (Snow): Treat as bad weather except that there is snow in the mountains. The terrain effects chart notes that snow in mountain hexes makes them prohibited terrain. Note that combat/motorized and artillery units have no ZOC extending into mountain hexes that have become prohibited terrain. Because of the unique nature of this situation, it is possible that units may be unable to move if they are surrounded by mountain hexes when the weather turns to snow; players are aware that this is not an optimal strategy.
- No change: the weather existing during the previous turn continues in the turn in which the result was obtained.
Rule 29 - Fortifications
Fortifications appear either during initial deployment, like the Metaxas line, or during play through construction. Regardless of this, all fortifications have the same effects.
The effects of fortifications are defined in terms of hexsides. Fortifications have a negative effect on units that attack across a fortified hexside, as indicated on the terrain effects chart.
Fortification hexsides have no effect on the owning player; his units may in fact attack across a fortification hexside, ignoring all effects of fortifications on that hexside.
Fortifications are not permanent. When an enemy unit enters a hex containing a fortification counter during its normal movement or advance after combat, the fortification counter is immediately removed from the game.
Fortifications built during the game do not have the same effects as other fortifications. A fort has the following combat effect: No AEC; -1 to the die roll.
Rule 30 - Borders
A. Romania and Bulgaria
While both countries allow the Germans to operate from their territory, neither takes part in the campaign with its own forces. The Allies were careful not to provoke active participation from these countries. In addition, both kept significant contingents on their borders. In light of these factors, Allied player units may not cross Romania or Bulgaria.
B. Germany and Italy
The formations guarding these national borders with Yugoslavia are not included in the game. The effect of these units is as follows: Yugoslav ground units may not enter Germany or Italy.
C. Hungary
Like the other German allies in the Balkans, Hungary took an active part in the campaign. Thus Hungarian units have been included and there are no restrictions against Allies entering Hungary. Hungary had more concerns than just this campaign; for that reason, two Hungarian divisions must be placed on order-keeping status. These two units may neither attack nor leave Hungary.
D. Greece
With decades of animosity between Greece and Bulgaria, the Greek government is concerned about the possibility of Bulgaria joining Italy in the invasion of Greece. (For Marita-Merkur this means that all Greek units on the mainland east of the Axios river (the river running from the Yugoslav border to the hexside adjacent to Thessaloniki) may not move west of that river until:
- Every hex of the Metaxas Line is occupied by an Allied unit; and
- There are at least thirteen regimental equivalents of infantry, artillery and/or engineers in the Metaxas line.
(The French source reads "Ligne des Axes Métriques" in item 1; evidently the Metaxas Line.)
E. Albania
One Italian division must remain in Albania, north of Tirana, to guard the border between Albania and Yugoslavia. It must remain there until Yugoslavia becomes a participant in the war, after which the division may ignore this restriction. The division need not be adjacent to the border.
F. Zara
Two Italian units are initially deployed at Zara. These units constitute the garrison of the city, and may not leave Zara until Yugoslavia has entered the war.
G. Border and Zones of Control
- Yugoslavia. ZOCs do not extend beyond the Yugoslav border, in either direction, until the country is invaded. When it is invaded, Axis ZOCs extend into Yugoslavia immediately. Yugoslav ZOCs extend into Axis nations only after completion of the special German invasion turn (that is, at the start of the Axis player's normal turn).
- Romania and Bulgaria. Since German units are allowed to operate in Romania and Bulgaria, these units exert a ZOC in and from these two nations. However, Allied units do not exert ZOCs in these two countries.
- Greece. The Greek army, aware of the possibility of an Italian invasion, maintains a careful and active watch on its border with Albania. Consequently, Greek ZOCs extend into Albania from the start of the game.
Rule 31 - Special Rules
A. Greek Mountain Capability
Greek units attacking into a mountain hex have their combat resolution die roll modified by +2. This is in addition to all other modifications. Note that non-mountain Greek units attacking into a mountain hex are halved, as indicated on the Terrain Effects Chart. Greek units have no special capability for moving or defending in mountains.
B. Gulf of Corinth
A secondary transport line crosses the Gulf of Corinth at hexes 0418 and 0519. Units of either player may cross the Gulf using this line; there is no additional movement cost to do so. Units may not attack across the Gulf of Corinth, including across the crossing point of the secondary line.
C. Corfu
The Italians made preparations for the amphibious invasion of the island of Corfu. Consequently, the Axis player may use hexside 4521/4522 as a "return" hexside (sic), for both movement and combat, as long as the Italian Marine battalion (III/SM) is adjacent to the hexside.
D. Yugoslav Coup d'Etat
Balkan politics are, to say the least, complex. Without going into detail, the political factions of Yugoslavia had long been preoccupied with and dissatisfied by the constant expansion of Axis influence and control in Europe. Believing that the Axis cause had begun to weaken (as signified by the constant failure of Italy in Greece and Albania) and encouraged by British promises of aid, these factions overthrew the Yugoslav government, which had adopted pro-Axis policies.
In the game, the Allied player begins to seek a coup in Yugoslavia on the game turn when the following two conditions occur: 1) the Allied player's victory point total is at least twice that of the Axis; and 2) the Allied player has a total of at least 30 victory points. Until that happens, the Allied player makes a test for a coup each month until the coup occurs or German intervention is triggered. The coup will not take place if Germany has become an active participant in the Balkans.
The Allied player checks for the coup immediately after the calculation of victory points each turn. A die is rolled twice, adding the numbers. Modify this sum by +3 if there are at least three regimental equivalents of British/Commonwealth units in mainland Greece and if the Allied victory point total is at least twice that of the Axis. If this final sum is 11+, a coup has taken place.
After the coup, the Allied player may freely use the Yugoslav units in Yugoslavia. However, Yugoslavia is neutral: no unit may leave Yugoslavia or attack across the border. Allied units may not enter Yugoslavia. These restrictions are lifted when the Axis invades Yugoslavia.
The Allied player checks for the possibility of a Yugoslav coup each turn until the coup occurs or until German intervention occurs. Note that the coup is checked after German intervention is triggered but before it occurs.
E. German Units
The Italian plan for the invasion of Greece was kept secret from the Germans, because they feared that Hitler would sanction action in this region of Europe. Consequently, the invasion took the Germans by surprise, a very unwelcome surprise when the Greeks launched their counterattack. The fierce Greek resistance raised the question of a British armed presence in the Balkans, a threat the Germans could not tolerate. At the time of the first planning, units were sent to Albania to help the Italians (Case "Violet Mountain"). (Sentence garbled in the French source; transcribed as closely as possible.) Hitler is convinced that the deterioration of the situation in the Balkans is such that intervention is the only acceptable solution. Marita-Merkur reflects these factors in the following rules.
1. Assistance. Throughout this rulebook, reference is made to German intervention. The units arriving under the provisions of this paragraph do not constitute an intervention. At the end of a turn, after the calculation of victory points, if the Allied victory point total is greater than the Italian player's total but is not double it, a die is rolled to determine German assistance. On a roll of 4, 5 or 6, German assistance is sent; roll the die again and consult the following table. The Axis player chooses any unit described on the table up to the limit of the counters. If a counter type is no longer available, reroll the die until an available type is obtained.
German assistance table
| Die roll | Unit received |
|---|---|
| 1-3 | One Mountain XX |
| 4 | One Light Infantry XX |
| 5 | One Infantry XX |
| 6 | One Infantry XX and one Artillery III |
These units appear two turns later in the same way as Italian reinforcements. The number of these units may be reduced if German intervention is triggered subsequently; however, units already in Italy or Albania remain in play. In this case, ignore their appearance in the German order of battle.
2. Intervention. If the Allied victory points are at least twice those of the Axis at the end of a game turn, roll a die to see whether German intervention is triggered. Roll a die, adding the following modifications, if necessary:
- +1 if there are three or more regimental equivalents of British or Commonwealth units in mainland Greece.
- +2 if a coup has taken place in Yugoslavia.
The above modifications are cumulative. In an intervention test, the die roll is made immediately after the Yugoslav coup die roll. Thus a Yugoslav coup will affect the calculation of German intervention during the game. If the modified die roll is greater than or equal to 8, German intervention is triggered.
Although the intervention has been triggered, the actual intervention does not occur until the German units are deployed. This happens on the next weather turn with clear weather after the intervention is triggered.
The allocation of forces for the intervention depends on the political situation in Yugoslavia. If a coup has occurred in Yugoslavia, the units appearing on the intervention order of battle appear.
If the coup has not occurred, only the German 12th Army, the German air units and the German reinforcements (except those deploying on the northern edge of the map) are received. In addition, if the Yugoslav coup has not occurred, Axis units may not violate the Yugoslav border.
Use the following single-die-roll system to determine German assistance/intervention: At the end of each game turn in which the Allied victory point total exceeds the Axis total, roll a die.
- On a roll of 4, 5 or 6, the Germans send help to Albania, according to the rules.
- On a roll of 7 or more, German intervention is triggered.
Modify the die roll by +1 if the Allied victory point total is at least twice that of the Axis, by +1 if there are three or more RE of British/Commonwealth troops in mainland Greece, and by +2 if the Yugoslav coup has occurred.
Units provided by German assistance may use Italian supply sources, as well as German sources.
If the Yugoslav coup does not take place, then Yugoslavia must comply with the agreements made with Germany: German units may use the railway lines in Yugoslavia when tracing supply. German forces have no other privileges in Yugoslavia: German units may not enter Yugoslavia or trace their supply through Yugoslavia, except by rail.
German air units may not fly over any hex of Yugoslavia.
F. German Invasion
On the turn of German intervention, the German units receive a special invasion turn immediately before the Axis player's turn. This special invasion turn consists of one player turn, excluding the exploitation phase. Only German units may operate during the special turn; other Axis units may not. Yugoslav air units, unprepared for this invasion, may not make patrol attacks or interception missions during the air phase of this special turn. At the end of this special invasion turn, the Axis player's normal turn begins.
German units supplied during the special invasion turn are automatically supplied during the Axis player's following turn.
G. Yugoslav Defection
Several nationalities in Yugoslavia, in particular the Croats, did not much appreciate Serbian domination of the government. When the Germans invaded the country, segments of these nationalities refused to fight for Yugoslavia: the Yugoslav army was therefore hard hit by mass desertions and defections. During the movement phase of this special invasion turn, each infantry, cavalry, light cavalry or border unit is checked for defection the first time a German unit moves next to it (or begins the battle). Roll a die; the unit is removed from the game on a result of 5 or 6. If the unit is in Beograd, it is removed on a roll of 6 only.
H. Yugoslav Collapse
When the Yugoslav supply sources are (simultaneously) controlled by the Axis, the Yugoslav army ceases operations. Remove all Yugoslav units at the end of the first player turn in which this occurs.
I. Greek Collapse
Although the Greek army had proved unshakable during the Italian invasion, its morale quickly collapsed in the face of the rapid German invasion. During the supply determination phase following German intervention, each Greek unit on the mainland that is unable to trace supply to a supply source surrenders. Remove the unit from the map.
Check for Greek collapse only during the Axis supply determination phases.
J. Banat, Backa and Baranja
These three areas of Yugoslavia are mentioned in the following rule and in the initial deployment of Yugoslavia.
The BANAT consists of the area north of the Romanian border, hexes 1510 to 2310, bounded by the first perimeter. (As printed.)
The BACKA consists of the area adjacent to the Hungarian border, bounded by the first rivers encountered, containing Subotica and Novi Sad.
The BARANJA corresponds to hexes 1515 and 1516.
K. Limited Hungarian Objectives
The Hungarians take part in this invasion for one reason only: to occupy the territory they wish to annex. Hungarian units may move only into hexes of Hungary, the Baranja, and the Backa region.
L. British Naval Interdiction
The Allied player may use the Royal Navy to interdict German naval transport (see below). The interdiction may be either limited, forbidding German naval transport up to four hexes from Crete, or extended, forbidding all partial and full sea hexes from the east edge of the map up to hex column 12; that is, all hexes whose last two digits are twelve or less. For each German unit transported into the interdiction zone, a die is rolled, consulting the Interdiction Results Table. The results are:
- -: No effect. The transported unit proceeds to its destination port.
- A: Abort. The transported unit must return to its port of embarkation.
- S: Sunk. The transported unit is eliminated.
At the start of each game turn, the Allied player announces whether he is using naval interdiction or not, and, if so, whether it is limited or extended. Before the Allied player decides whether to use naval interdiction, the Axis player must announce whether he will send units to Crete that turn. If he does not announce it, he may not do so. This reflects the British military intelligence capability, since aerial reconnaissance would reveal the appearance of transport aircraft, the gathering of ships and the concentration of troops in the ports. The Allied player may use this information in his decisions regarding naval interdiction. Extended interdiction may not be used during a British evacuation turn.
During the air phase of the Axis player's turn, Axis air units performing the ship bombardment mission may attack the naval interdiction. The units must fly to any hex in the interdiction zone. Before the mission is carried out, each wave must undergo an anti-aircraft attack. The strength of the anti-aircraft attack is six anti-aircraft factors for a limited interdiction and three anti-aircraft factors for an extended interdiction. All air units that survive anti-aircraft fire may carry out their mission. Total the tactical bombardment factors of the air units; for this calculation, all dive bombers have their tactical bombardment factor tripled. Roll a die and consult the air-naval table. The results award victory points to the Axis player for sinking and crippling Allied warships.
M. German Naval Transport
German naval transport takes place during the Axis air phase. Any German unit may use this transport, but all units transported must be of regimental size or smaller. Ground units may break down during the air phase in order to be transported by sea; the remaining elements may not violate stacking at the end of the phase.
German naval transport may land units in enemy-controlled or enemy-occupied ports. If a unit is landed in an enemy-occupied port, combat is resolved immediately, in the same way as for an airborne operation (Rule 26). When German units storm an island held only by Greek units, and the Greek government is in exile (Rule 27), each Greek unit must undergo a surrender test. The unit will surrender on a roll of three or less; otherwise it will resist.
There are two types of German naval transport.
- Motor boats. The Axis player has three regimental equivalents of motor boat naval transport available in the Black Sea (outside the combat zone to the east). During any Axis player turn, he may have these transports transferred to any Axis-controlled port in the extended British interdiction zone defined above. On subsequent turns, he may use these boats to transport units. Motor boats may not carry heavy equipment, nor enter a naval interdiction zone. Note that this latter restriction may prevent them from leaving the Black Sea.
- Captured ships. When Athens is captured by the Axis player, he rolls a die to determine the quantity of captured ships. The number obtained equals the number of regimental equivalents that the captured shipping is able to transport. One third (round fractions up) is able to carry heavy equipment.
N. Rhodes
Rhodes is an island under Italian control, off the map to the east. For the purposes of the game, it is an imaginary hex immediately east of hex 2301. There is a major airfield on Rhodes, and Axis air units may be based there.
The Axis player may send a landing force from Rhodes to attempt to capture the Scarpanto airfield (hex 2503) on any Axis player turn following the first British evacuation turn. Roll a die for the effects of naval interdiction (fictional), if any. The landing force captures the island if it is unoccupied by Allied units; it cannot capture the island if Allied units are there. Once captured, Axis air units may be based at the island's main airfield. Note that there is no counter to represent the landing force. Within the following limits, the Italian player simply announces that he is attempting the landing. The landing force does not count against Italian naval transport, and Italian transport is not reduced if the force is aborted or sunk. This attempt may be made only once; if it is aborted or sunk, it may not be repeated.
O. Off-Map Air Base
A German off-map air base with a capacity of 12 air units exists one hex north of hex 0117, map 14. Use this air base by paying 1 MP to enter or leave the map through hex 0117.
Rule 32 - Reinforcements
Reinforcements appear at specific times, as indicated on the various order of battle charts. Reinforcements are placed on the map during the owning player's movement phase; they may move fully and engage in combat on the turn of their appearance.
A. Italy
Regular Italian reinforcements appear in any city in Italy with one exception. The 2nd Mountain Division (4-8) appears at Tirana on turn 2 of November II 40.
The Italian Second Army appears on the turn of German intervention. These units may deploy in any hex of Italy adjacent to the Yugoslav border.
B. Other Axis Countries
The appearance of German and Hungarian reinforcements is specified in the respective orders of battle of those nations.
C. Britain/Commonwealth
British and Commonwealth ground unit reinforcements appear at Alexandria and must enter play by naval transport (Rule 27).
British air units also appear at Alexandria. They may fly to Athens or any friendly air base south of Athens during the friendly air phase. They may perform no other mission on the turn of their arrival.
D. Greece
Greek reinforcements appear at the locations indicated in the order of battle. If the indicated hex is occupied by an enemy unit, the reinforcement cannot enter play.
The Greek order of battle also provides for the improvement of the strength and size of various units during the game. The Allied player always has the option of either upgrading the unit or taking a replacement point.
The upgrade takes place at the end of a friendly movement phase. To upgrade a unit, it must be supplied and must not be in an enemy ZOC. If more than one unit is to be upgraded (for example, three regiments that become a division), then all these units must be stacked together. When the Order of Battle Table calls for a specific unit to be upgraded, the designated unit must be upgraded; no other unit may be upgraded in its place. If the designated unit is no longer in play, then a replacement point must be taken instead.
Replacement points are used to return eliminated Greek units to play. A replacement point replaces one attack (combat) factor. For example, three replacement points are needed to bring a 3-6 Greek unit back into play.
Rule 33 - Initial Deployment
Place the two maps so that map 14 is directly north of map 15A. Make sure there is an overlap of one row of hexes. Map 15A should overlap map 14.
After the deployment of the Greek army, the Axis player places the Italian units on the map in accordance with the Italian Order of Battle. Units need not be placed according to a specific designation; the counters used must agree with the Order of Battle as regards the size, type, and combat/movement factors of the units.
While the Axis player sets up the Italians, the Allied player may place the Yugoslav army in accordance with the Yugoslav Order of Battle. Again, the unit designations may be ignored. The Yugoslav units are divided into armies; units are placed with every other unit of their army. (As printed.)
The units of the German Second Army, the Hungarian and the Italian Second Army (all units shown on the back of the Italian Initial Order of Battle) are not deployed at the start of the game. They are placed when (and if) German intervention occurs, at the start of that game turn. Their respective Orders of Battle detail the various deployment areas for these units.
Rule 34 - Victory Conditions
At the end of the game, the players' performance is evaluated to determine the winner of the game and his level of victory. Victory is measured by means of victory points (VP), which are awarded to players for the accomplishment of various objectives. VP are awarded either turn by turn or upon the occurrence of a specific event, as indicated in the players' victory point tables.
The victory conditions of Marita-Merkur reflect the dichotomous nature of the Balkan campaigns. German intervention has a profound impact on the game; thus the award of VP and the determination of victory are different depending on whether or not the Germans intervene.
A. Definitions
- Italo-Greek War. This refers to the part of the game that takes place before German intervention; it refers to the entire game if intervention does not occur.
- German Intervention. This is the part of the game that takes place after the Germans intervene. The German intervention turn designates the game turn in which German units, except those that enter play because of German assistance (Rule 31), enter play because of German assistance (Rule 31).
- Elimination of ground units. VP are awarded for the elimination of entire enemy units or the elimination of enemy combat (attack) factors. VP awarded for the elimination of a unit are awarded only when the counter is removed from the game; that is, the unit's cadre, if it has one, must be eliminated as well. VP awarded for the elimination of factors are awarded only for factors actually lost. For example, if a German 7-6 division has been reduced to its 3-6 DG strength, then four combat factors have been lost for VP calculation.
- Control of territory. VP for territory are awarded at the end of each turn, based on the situation on the map at the time of calculation. A player controls a hex if: a) it is occupied by a friendly unit; b) it is in the uncontested zone of control of a friendly unit; or c) it was last occupied by, or is in the ZOC of, a friendly unit. (The French source garbles this definition; the items are rendered as printed.) Corfu is under Axis control only if an Axis unit is on the island and there is no Allied unit on the island.
B. Italo-Greek War
During the Italo-Greek war, VP are awarded for the capture of territory and the elimination of units. VP must be tallied at the end of each turn, because the current position is used to determine the possibility of a coup d'etat in Yugoslavia and/or German intervention. Both players must record their VP in three separate columns: one for enemy units eliminated during the turn, one for victory points concerning enemy territory controlled during that turn, and the last for the player's cumulative totals. A player's cumulative total is the sum of the VP for enemy units eliminated and enemy territory controlled. The cumulative totals are used for the coup d'etat and German intervention trigger rolls.
- Length of the game. If German intervention does not occur, the Italo-Greek war continues until the end of the Jun II 1941 turn. The game may end earlier if a player achieves a decisive victory.
- Axis decisive victory. If, at the end of a game turn, there is a supplied Axis unit in Athens or Thessaloniki, the game ends immediately with an Axis decisive victory.
- Allied decisive victory. If, at the end of a game turn, there is a supplied Allied unit in each reference city in Albania and there is no supplied Axis unit on the Greek mainland, the game ends immediately with an Allied decisive victory.
- Levels of victory. At the end of the game, if a decisive victory has not been achieved, victory is determined by victory points. The player with the most VP is the winner. If he has more than twice as many VP as his opponent, he wins a substantial victory. Otherwise, he wins a marginal victory. If both players have the same number of points, the game is a draw.
C. German Intervention
If a German intervention takes place, the Italo-Greek war victory conditions are not used. VP are not awarded for control of territory on or after the German intervention turn, nor for the following items. In addition, the players' VP totals for control of territory are halved. For example, if the Allied player had 160 VP for control of territory in Albania, he would then have 80 VP after German intervention.
-
Withdrawal. The Axis player must conclude the campaign quickly, because the majority of the participating German formations will soon be needed for Operation Barbarossa, the invasion of the Soviet Union. This situation is reflected in the VP awarded to the Axis player for a rapid conquest of the Balkans. VP are awarded when the Axis player declares a withdrawal of German units.
The Axis player may declare a withdrawal at the end of any turn, regardless of the general situation on the map. A withdrawal involves the removal of most of the German units in play, leaving only a small force for mopping-up operations. This mopping-up force is measured in the number of regimental equivalents of German units that the Axis player is allowed to leave in play; all German units in excess of this number are removed from the map. To spare the Axis player unnecessary bother, withdrawn units are simply removed from the map. A unit cannot be withdrawn if it is not supplied or if it is in an enemy zone of control; such units must be counted as part of the mopping-up force and their RE must be counted in the force. A withdrawal cannot be declared if the number of RE that cannot withdraw exceeds the permitted size of the mopping-up force.
The Axis is allowed to declare a full or partial withdrawal, the difference being the size of the mopping-up force. For calculating the mopping-up force, combat/motorized units count for double their actual RE value.
- Full withdrawal: The mopping-up force is limited to 20 RE. In addition, the following German air units must be withdrawn: one type B, two type D, and three type F. No German air unit may be withdrawn subsequently.
- First partial withdrawal: The mopping-up force is limited to 40 RE. No air units are withdrawn. The Axis player may, on a later turn, declare a second partial withdrawal.
- Second partial withdrawal: The mopping-up force is reduced to a maximum of 20 RE. The air units listed above for a full withdrawal must be withdrawn. No further withdrawal may be declared after the second partial withdrawal.
Victory points are awarded for the withdrawal on the turn in which it is declared. Note that if the two partial withdrawals add up to a full withdrawal, the Axis player gets more VP for a full withdrawal.
Rule 35 - Scenarios
A. The Italo-Greek War
This scenario begins on the November I 1940 turn. Use the same initial deployments as for the campaign game. The game ends on the turn immediately preceding the German intervention turn; if the Germans do not intervene, the game ends at the end of the June II 1941 turn. Apart from this limit, all rules are in effect. The players calculate victory using the Italo-Greek War section of Rule 34.
B. Marita-Merkur
This scenario begins on the April I 1941 turn, the historical turn of the German invasion. The weather for this turn is clear. The Yugoslav coup has occurred. The Germans intervene during this turn.
1. Rules. The scenario begins with the special German attack turn. It continues until the end of the game, as indicated in Rule 34. At the end of the scenario, victory is calculated according to the German intervention section of the victory rule. All rules of the game are in effect.
2. Deployment.
a. Yugoslavia. Deploy as described on the Yugoslav Order of Battle.
b. Intervention forces. Deploy the Germans, the Hungarians, and the Italian Second Army as described on their respective orders of battle.
c. Italy. The Italian Air Force is placed as shown on the Italian Order of Battle. The following Italian ground units are placed in Albania:
- 3 x 3-6 Infantry XX
- 10 x 3-4-6 Infantry XX
- 2 x 4-6 Infantry XX
- 1 x 4-8 Mountain XX
- 1 x 1-8 Mountain Cadre
- 1 x 1-8* Mountain II
- 2 x 1-8 Cavalry III
- 3 x 0-1-6 Construction III
- 3 x 2-6 Artillery III
At least one full-strength division must be deployed in Albania north of Tirana. At least one division must be placed in each of the following hexes: 4221, 4220, 4120, 4119, 4018 and 4017. The remaining forces may deploy anywhere on or north of this line.
d. British and Commonwealth.
Map 14:
- 4612: 8-6 Infantry XX
- 4513: 2-6* Infantry X; 2-3-8 Artillery [X]
- 4413: 1-8 Artillery II (mot)
- 4414: 3-2-8 Armor X; 1-10 Antitank II (mot)
- 4913: 1 x Hurri-1 4F4 0/8; 1 x Mxd 2FB3 2-1/10
Map 15:
- 0911: 1 x Blen-1 3NB3 1-2/20; 1-10 Anti-aircraft II (mot)
- 2113: 2-6 Infantry X
e. Greece. Place the Metaxas Line and the airfields as shown on the Greek Order of Battle. Place the units as follows:
Map 14:
- 4209: 1-6 Infantry III; 1-6 Artillery III
- 4309: 4-5-6 Infantry XX
- 4308: 1-6 Infantry III
- 4307: 3-4-6 Infantry XX
- 4306: 2-6 Infantry III; 1-2-6 Artillery III
- 4405: 4-6 Infantry XX
- 4505: 1-6 Infantry III; 0-1-4 Construction [X]
- 4513: 2-6 Infantry III; 4-6 Infantry XX
- 4522: 1-2-6* Infantry III
- 4509: 3-8 Motorized XX
- 4413: 1-6 Infantry Cadre
- 4414: 3-8 Cavalry XX
- 4913: 1-8 Anti-aircraft II; 1-8 Anti-aircraft II; 1 x Mxd 3F3; 1 x Mxd 2B2
- 5018: 0-1-6 Engineer II
Map 15A:
- 0304: 0-1-6 Infantry II
- 0421: 1-4 Static [II]
- 0508: 0-4 Static [II]
- 0701: 0-1-6 Infantry [II]
- 1002: 0-1-6 Infantry [II]
- 1401: 0-1-6 Infantry [II]
- 1610: 0-4 Static [II]
- 1616: 0-4 Static [II]
The following Greek units are in Albania:
- 2 x 4-6 Infantry XX
- 2 x 5-6 Infantry XX
- 3 x 2-6 Infantry Cadre
- 1 x 2-6 Infantry X
- 2 x 1-6 Artillery III
- 2 x 2-1-8 Cavalry III
- 1 x 2-7 Mountain III
- 1 x 1-8 Mountain Artillery III
The Greek units in Albania must deploy in hexes 4321, 4320, 4219, 4118 and 4117. At least one unit must occupy each hex.
3. Order of deployment. The Italian units in Albania are placed first. All Allied units are then deployed. Finally, the remaining Axis units are set up.
4. Victory points. The Allied player begins the game with 160 VP for control of enemy territory and 30 VP for the elimination of Italian units. The Axis player begins the game with 30 VP for control of enemy territory. Note that the values for control of territory will be halved when calculating the winner, in accordance with Rule 34.
Expanded Sequence of Play
A detailed breakdown of the activities that may occur during a turn is presented below. The activities under each main heading are numbered and occur in the order shown; those marked with an asterisk (*) may occur simultaneously. The numbers in parentheses refer to the appropriate rule sections.
At the start of each game turn
- Weather determination (28)
- British evacuation decision (27.E)
- British interdiction decision (31.L)
- German intervention deployment (31.E.2)
Player turn
Aircraft repair phase (24)
Supply of all units (12)
Greek collapse (31.I)
Movement phase
- Entry of reinforcements (32)
- Unit breakdown (16.A)
-
- Movement (5)
-
- Overruns (13)
-
- Construction of airfields, forts and line repair (14.A)
-
- Naval transport (27)
- Reassembly of units (16.A)
- Upgrade of Greek units (32.D)
Air phase
- Return of air units from bombardment expedition (21.E.6)
- Return of air units from defensive air support (21.E.7)
- The phasing player repairs ports (21.E.8)
-
- Phasing player moves air units (19)
-
- Resolve patrol attacks (20)
- Movement of enemy interceptors (21.A)
- Use of German naval transport (31.M)
- Air combat preparation (22.A)
- Air combat resolution (22.B)
-
- Defense and attack of targets (22.C)
-
- Parachute jumps (21.D.3 and 25.A)
-
- Resolution of parachute attacks (26)
-
- Resolve special naval assaults (31.M)
- Return of phasing air units (19)
- Return of enemy interceptors (19)
Combat phase (per individual combat)
- Combat resolution (8)
- Perform retreats (8.F.1)
- Perform advances (8.F.2)
Exploitation phase
- Breakdown of combat/motorized (C/M) units (16.A)
-
- Movement of C/M units (5)
-
- Overruns (13)
-
- Construction by C/M engineers (14.A)
- Reassembly of separated C/M units (16.A)
At the end of each player turn
Yugoslav collapse (31.H)
At the end of each game turn
- Victory points (34)
- Yugoslav coup d'etat (31.D)
- German assistance/intervention (31.E)
- German withdrawal (34.C.1)