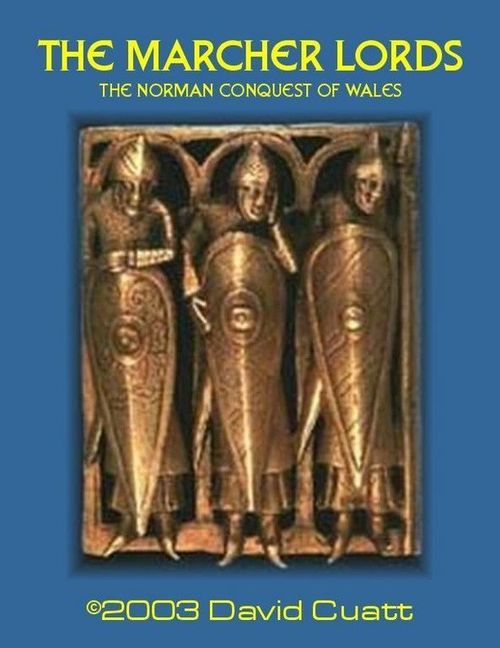
The Marcher Lords: The Norman Conquest of Wales
The Marcher Lords: The Norman Conquest of Wales Rulebook
Table of Contents
Table of Contents
- 1.0 Introduction
- 2.0 Game Components
- 3.0 Sequence of Play
- 4.0 Levy of New Units
- 5.0 Random Events
- 6.0 Movement / Supply
- 7.0 Combat
- 8.0 Activation
- 9.0 Strategic Movement
- 10.0 Leaders
- 11.0 Scenarios
- 12.0 Optional Rules
- 13.0 Designer's Notes
- Tables
1.0 Introduction
The Legacy of Hastings
In many ways, the famous Battle of Hastings in 1066 was only the beginning of a very long series of battles for the Normans, who had many challenges waiting for them in the British Isles. To secure the Welsh border, William the Conqueror (the newly crowned King of England) established the loyal Norman nobility in heavily garrisoned counties along the frontier. What followed were decades of war and diplomacy as these "Marcher Lords" sought to expand their domains by subjugating the stubbornly independent Welsh.
The Marcher Lords is a simulation of the Norman conquest of Wales in the 11th century. Players take command of Norman earls or their Welsh enemies, and then make the decisions that determine the course of the war. To succeed, the Normans must fortify their conquests by building castles and then withstand Welsh counter-attacks, Viking raids and other assorted threats.
Footnote 1 (translator's note): A Marcher Lord is the English equivalent of a Margrave (in the Holy Roman Empire). In this context the word "march" means a border zone or frontier, and it shares the same origin as the verb "to march", both ultimately derived from the Proto-Indo-European mereg-, "border" or "boundary". Margrave is the Spanish name given to the Germanic title Markgraf (from Mark, frontier, march, and Graf, count), equivalent to marqués. The wife of a margrave is called a margravine, or Markgräfin in German. A margrave originally served as the military governor of a Carolingian march (for example the Spanish March, a border province in the Middle Ages). Margraves held jurisdiction over a march (Mark, in German), which was called a margraviate or marquisate. As border provinces gained importance they became larger than the interior ones, and the margraves gained power over the other rulers of the realm. The most accurate Spanish translation of "The Marcher Lords" would be "Los Lores Marqueses" or something similar, but I have preferred to leave it untranslated. (Translator's note.)
2.0 Game Components
A game of The Marcher Lords consists of the following:
- 1 Game Map, 25.50 x 43.20 cm
- 4 sheets of die-cut counters
- 1 rulebook, and the Cards and Tables provided separately
- 2 ten-sided dice (one black and one white)
2.1 The Rulebook
The rulebook contains all the rules needed for play. Information on several optional rules and the scenarios is included toward the end of the rulebook.
2.2 The Game Map
The game map represents Wales in the 11th century. Thick red lines divide the map into Welsh kingdoms and Norman counties. Coloured flags indicate areas that have their own unique movement restrictions (see 6.0, 11.1.2 and 11.2.2). Dashed white lines subdivide these large kingdoms and counties into zones. Zones are used in determining movement, unit placement and so on.
All units in the game, including leaders and castles, must be placed clearly in only one zone.
2.3 The Counters
The counters represent all the military units, leaders and castles used in the game. Information on combat values, movement and so on is detailed on the Unit Legend. Units are colour-coded as follows:
- Welsh: Red
- Norman: Blue
- Castles: Brown
- Vikings: Purple
- Irish: Green
2.4 Reading the Dice
When a single die is rolled (as in Combat Resolution), a result of "0" is always counted as a "10". When both dice are rolled together (as in Random Events), one die is counted as tens and the other as units; when the dice are rolled together in this way, the "0" is counted as "0". Therefore a result of "0" (for tens) and "7" (for units) would be read as "7", whereas a result of "7" and "0", respectively, would be read as "70".
3.0 Sequence of Play
Turns are divided into six phases which must be completed in order by the player whose turn it is (or the side whose turn it is in the case of multiplayer games). The number of turns and the order of play are indicated in the scenario notes. The sequence of play is summarised below:
3.1 Levy Phase
The player whose turn it is takes new units from his reinforcement pool and places them face down in the appropriate zones (see 4.0). The levy phase is skipped on the first turn of both scenarios.
3.2 Random Events Phase
The player whose turn it is rolls two D10 and consults the Random Events Table (Welsh or Norman). The results are applied immediately (see 5.0).
3.3 Movement Phase
The player whose turn it is may move all activated units up to their full movement allowance (see 6.0). The Normans must check supply when invading (see 6.2).
3.4 Combat Phase
For each battle, combat is resolved following this sequence:
3.4.1 Conduct Sieges
The attacking side determines whether a siege succeeds, if one applies (see 7.1).
3.4.2 Combat Resolution
The players resolve combat in a series of rounds. Each round consists of the following exchanges:
- Missile: All eligible archer units fire simultaneously. Casualties are applied immediately (see 7.2).
- Melee: All eligible knights, infantry and Vikings attack at the same time, applying casualties afterwards (see 7.2).
- Retreat: The attacker or the defender may retreat. The side that does not retreat may carry out pursuit with cavalry (see 7.3).
Combat rounds continue until one side retreats or is eliminated.
3.5 Activation Phase
The player whose turn it is now activates any new units placed during the Levy Phase (see 8.0).
3.6 Strategic Movement Phase
The player whose turn it is may carry out a strategic movement, moving units from any zone to another friendly zone (see 9.0).
After the side whose turn it is completes the six phases, the opposing side then completes the six phases, and together this constitutes one complete game turn. The Game Turn Marker is advanced, and any Random Event markers are removed from the track as appropriate.
4.0 Levy of New Units
During the Levy Phase, the player whose turn it is may recruit one unit in each mobilised zone. Newly recruited units are drawn at random from a reinforcement pool (face down or from an opaque cup) and placed in the recruitment zone. Neutral zones (those with no troops or under Viking control) can never recruit new units. The initial reinforcement pools include all Norman and Welsh military units not used in setup.
Note: The levy phase is skipped on the first turn of both scenarios.
4.1 Norman Levy
All zones controlled by the Normans are mobilised, unless stated otherwise. For a newly conquered zone, the first levy is always a castle. For controlled zones that have a castle, draw a unit at random from the Norman reinforcement pool. Only the Normans build castles, and no more than one castle per zone.
Note: Castles, once built, are permanent structures that remain for the rest of the game, except under the effects of certain Random Events results (see 5.0). They may change hands or, by chance, be left empty, but they remain on the map to be used by the first force that returns to the area (including the Vikings).
4.2 Welsh Levy
To reflect the lack of cooperation between the Welsh kingdoms, the levy is carried out only under strict conditions for mobilisation. Unless stated otherwise in the scenario notes, a Welsh kingdom is not considered mobilised until Norman units are present in any zone bordering that kingdom. Therefore, even a failed Norman attack can still cause mobilisation. Once mobilised, a Welsh kingdom remains mobilised until it is completely conquered, and each zone controlled by the Welsh in that kingdom draws a unit at random in a similar way to the Normans.
Example: Norman forces from Hereford invade a zone in southern Gwent. The attack goes badly and the Normans end up retreating back to Hereford. However, since the Normans have been present in a neighbouring zone, Morgannwg would now be mobilised and would begin recruiting new units in the next Welsh Levy Phase. Note that Gwent was already mobilised before the attack because of the Norman presence at Hereford.
Exception: The Welsh cannot recruit in a county zone even if they control it, but they prevent the Normans from doing so.
5.0 Random Events
The player whose turn it is rolls two D10 and consults the appropriate Random Events Table (Welsh or Norman). Only one attempt is made by each player whose turn it is during a turn, even if there are multiple commanders (although teams may rotate the commander who rolls the dice each turn). Most results of the Table take effect immediately or during the following Combat Phase, as indicated on the Table. Some results have effect for the rest of the game turn, unless a contradictory result (for example a change of weather) occurs during the other side's turn. Note that if a random event leaves a zone unoccupied, the zone becomes neutral.
6.0 Movement / Supply
During the movement phase, the player whose turn it is may move his activated units (see 8.0). All units except castles have a movement allowance, representing the number of zones through which the unit may move during a single movement phase. A unit moves from one zone into the neighbouring zone, spending one point of its movement allowance for each new zone entered. Movement is always voluntary, and a unit may decide to move less than its full movement allowance, or not to move at all.
A unit must end its movement the moment it enters a non-friendly or neutral zone.
There are no stacking limits for a zone. (Any number of units may occupy a single zone at any time.)
Normally no sea movement is permitted except between Mon and the nearest zone of Gwynedd (see 12.2).
Only one Norman earl may be in a zone at a given time, and an earl may not enter the county of another earl (as indicated by the corresponding flag colour on the map and on the leader counters).
6.1 Garrison
At least one military unit must always be present in a zone at the end of the player's turn as a garrison to keep control of a zone. Castles, Norman earls and Welsh kings do not count as garrisons.
6.2 Supply Checks
Maintaining the supply of an invading army is never easy, and the primitive, rugged terrain of Wales made it even harder for the Normans. Before any Norman force may advance into a non-friendly or neutral zone, supply must first be checked. Units invading simultaneously from two or more zones are combined for a single supply check. Checks are made by rolling a single D10. A result of "2" or higher means the check succeeds.
This die roll is modified as follows:
- -1 for each counter that exceeds the number of 3 (do not count leaders) in the zone.
- -1 for each zone between the zone being invaded and the invader's "home" county zone (count the zone being moved into, but not the "home" county).
- +1 for Fair Weather in effect (from Random Events).
- -1 for Bad Weather in effect (from Random Events).
- +1 for a Norman earl who is present.
A successful check allows the invading forces to move forward as planned, but a failed check means that the advancing units must stop immediately for this turn. Normans are exempt from the supply check only when trying to recover a county zone.
As the Welsh generally fight on their own ground, they are exempt from supply checks. However, if they attack a county zone, then they must make a similar supply check; Welsh forces ignore the "home" county distance modifier.
Example: In a typical first-turn Norman attack, the Earl of Hereford decides to invade a zone of neighbouring Gwent, taking with him 2 Norman knights and 2 Norman infantry units. There is no atypical weather currently in effect, so the total modifiers for the die roll are as follows: -1 for the distance of one zone from a "home" county, another -1 for having a counter that exceeds the limit of 3 counters (not counting the earl's counter), and finally, a +1 because the earl is present. This gives a total modifier of -1.
The Norman player rolls a 7 on the die, which is modified to a 6 (still successful), so he may continue with his attack.
7.0 Combat
If a zone is empty, the first player who moves into it conquers it automatically. When rival forces occupy the same zone, combat occurs and is resolved following the steps in the combat sequence (see 7.2).
7.1 Sieges
Opposing armies in this game are both capable of conducting castle sieges. The Normans employ the full range of techniques and equipment available to the feudal armies of the period, whereas the Welsh rely on the simple (but nonetheless effective) system of surrounding the fortification and starving the defenders.
Whenever an invading army faces the defence of a castle, the siege is an option for the attacker. The procedure for conducting a siege is to subtract the number of defending units from the number of attacking units (the result may be a negative number). Use the result of this subtraction to modify a D10 roll. A result of 5 or higher is successful, indicating that the castle's defensive modifier is ignored in the subsequent battle. If the siege attempt fails, the attacking forces are forced to retire one of their units (at the attacker's choice), and the castle's modifier remains for the resolution of the subsequent combat.
Note: The Normans always receive an additional +1 modifier when besieging enemy fortifications, owing to their superior tactics. Irish auxiliary troops may besiege, but the Viking raiders and Welsh insurgents (both as results of Random Events) may not.
Example: A stack of Welsh units moving from Morgannwg attacks a zone of Gwent and decides to besiege the castle that the Normans have built there. The Welsh forces consist of 3 archer units and 3 infantry units, while the defenders have 1 knight and 2 infantry units. The attackers have a +3 modifier for numerical superiority. The Welsh player rolls a "4", which is modified to a "7", so the siege succeeds. (Therefore the castle's +1 defensive modifier is ignored for the duration of the battle that follows.)
7.2 Combat Resolution
Combat is resolved following the combat sequence as described in the sequence of play (see 3.4). Both players first fire their archer units, applying results immediately, and then the remaining units carry out their melee battles. One side or the other may then decide to retreat; if not, another round is fought.
Each player rolls the die simultaneously, one D10 per unit. Units score hits if they roll a result equal to or greater than their combat strength. Die results are modified by castles or leaders present in the battle zone, as well as by some Random Events. Modifiers apply to every unit of the affected side and are cumulative.
Each hit means that an enemy unit is eliminated (the defender decides which units are eliminated among those that were hit). Archers, knights and infantry that are eliminated are returned to the reinforcement pool after combat. Teulu eliminated (Welsh warrior units on horseback), earls and kings are removed from the game.
After each combat round has been fully completed, one or other side may retreat to a neighbouring friendly zone (the attacker chooses first). All units of a side must retreat as a group. Combatants may not retreat if there is no neighbouring friendly zone. The winner of the combat controls the disputed zone, and if there is any castle, it becomes his. If all units of both sides are eliminated or retreat, the zone becomes a neutral zone.
Note: Units may not retreat to or from Mon, nor to the nearest zone of Gwynedd.
Example: The Norman player has moved a stack of units consisting of an earl, two Norman knights, one Norman infantry unit and one Norman archer to invade a zone of Gwynedd controlled by the Welsh. The defending Welsh player has 2 archers and 2 infantry there. There is no castle in the zone.
Both sides have archers, so both take part in the missile fire. The Norman player rolls a "4" for his archer unit, which is too low even with the +1 modifier of the earl, so it fails. The Welsh player rolls a "3" and an "8" for his two archer units, so he scores a hit (with the 8). The Norman player must remove one unit, and chooses his archer (returning the archer counter, face down, to his reinforcement pool).
For melee, the Norman player rolls the die for his two knights, getting results of "3" and "5". Thanks to the +1 modifier of the earl, both rolls score a hit. He now rolls for his infantry and gets a "6", also a hit. The Welsh player rolls the die for his two infantry units and gets a "3" and a "7"; the "7" scores a hit. The Norman player must now take another casualty, and this time he chooses his infantry. The Welsh player must lose three units, so he eliminates the 2 infantry units and an archer.
This completes one full combat round.
7.3 Cavalry Pursuit
Medieval cavalry achieved its most destructive form when the opportunity arose to pursue fleeing enemies and attack them from behind. Cavalry pursuit occurs in the game only when a combat round ends in a retreat. If the victorious side has cavalry (knights or teulu, as appropriate) and the retreating side has at least one foot unit (infantry or archers), then cavalry pursuit takes place.
The attacking cavalry receives one additional die roll for each of them, and any hit scored is applied to enemy foot units (never to cavalry or to leaders that are retreating). In this circumstance, the defenders do not get a die roll as in normal combat. The attacking cavalry gains the usual +1 modifier if they have an earl/king present, but they do not benefit from possession of a castle. Regardless of the result of the cavalry pursuit, the cavalry units do not actually move to another zone as the retreating units do.
Example: Immediately after the previous combat round, the Welsh player decides to retreat to a neighbouring friendly zone, leaving the Normans in control of the zone. However, since the Normans have cavalry units (knights) present, those two units pursue the retreating Welsh archer unit and, with the +1 modifier from the earl, finish off the archers successfully.
If the Norman player still controls this zone in the next turn, he may begin the levy of new units here (the first will be a castle).
8.0 Activation
Units placed during the preceding Levy Phase are now turned over to their active side to show that they are now active and therefore eligible for use (including strategic movement).
9.0 Strategic Movement
Units in any zone may now make a free movement, subject to normal movement and garrison requirements (see 6.0 and 6.1). Only units of a zone are eligible even when playing with multiple leaders (use a die roll or rotation to decide if the commanders cannot agree).
No combat or movement into non-friendly/neutral zones is permitted during this phase.
10.0 Leaders
The use of leaders and the rules governing their use are specified in the scenario notes. A player who eliminates an enemy leader gains victory points (see 11.1.7 and 11.2.6); leaders cannot be replaced. The scenario notes describe any limitations on where leaders may or may not move (as indicated by the corresponding flag colours on the map; see 11.1.2 and 11.2.2).
Earls and kings have no military strength of their own, so if they are alone in a combat zone, they have no combat die roll and are therefore very vulnerable. They cannot be used as a garrison or to control a zone. However, they grant the +1 modifier to the die rolls of all friendly military units in the same zone with them (this bonus is cumulative with that of castles, etc.). Leaders must always be selected last as casualties.
11.0 Scenarios
11.1 Scenario One: The Norman Conquerors
This scenario represents the first incursions made by the Normans into Wales in the years immediately following William's triumph at Hastings. The original Marcher Lords were leaders of great quality (see 11.1.8) who faced the disunited opposition of the Welsh. The land of Wales had been a patchwork of small kingdoms since the death of the great unifier Gruffydd ap Llywelyn in 1063, and the kings were often too busy with squabbles among themselves to mount a consistent defence against their new enemies.
11.1.1 Length of Game
This scenario lasts 10 turns.
11.1.2 Number of Players
This scenario is played normally with two players, one controlling the Norman forces and the other the Welsh. However, it may also be played as a team game with separate commanders (or earls) for each of the Norman counties. Generally, a Norman player will control all units that originate from any of his own counties (as indicated by the corresponding flag colours on the map) or from zones he has conquered. However, units that are moved into another Norman player's zone remain under the control of the other player until these units are moved back again. Earl counters may never move or retreat into a zone controlled by another earl, even in a two-player game.
11.1.3 Sequence
The Normans always go first in every turn. Both sides place simultaneously.
11.1.4 Norman Placement
Each Norman county zone begins with a knight, two infantry and a castle; the earls may occupy either of the two zones of their county "home" (at the player's choice). These are the only zones initially controlled by the Normans. The three Norman earls are used in the standard scenario.
11.1.5 Borderland Placement
The territory called Borderland is neutral at the start of this scenario, and no forces of either side begin here. Anyone may invade here once the game has begun.
11.1.6 Welsh Placement
All zones not mentioned in the two previous sections are controlled by the Welsh. All Welsh zones have an infantry unit as a garrison. Additional units are explained below.
The names in parentheses are the Welsh leaders of this period, provided as historical reference.
Welsh teulu units (mounted warriors) must remain in their starting kingdom, even if doing so means their elimination (but see 12.1).
- Morgannwg (Cadwgan): 1 teulu
- Gwent (Caradog): 1 teulu
- Gwynedd (Bleddyn): 1 teulu, 1 Welsh archer unit
- Powys (Rhiwallon): 1 teulu, 1 Welsh archer unit
- Deheubarth (Maredudd): 1 teulu
11.1.7 Victory Conditions
Victory points are gained as follows:
- +1 for each teulu eliminated
- -2 for each Norman leader eliminated
- +1 for each castle under Norman control in a zone originally Welsh or in the Borderland zones
- -2 for any county zone under Welsh control
Add all these points at the end of turn 10:
- Fewer than 8 points = Welsh Victory
- 8-9 points = Draw
- 10-12 points = Minor Norman Victory
- 13+ points = Major Norman Victory
11.1.8 Historical Notes on the Norman Earls
Hugh of Avranches, Earl of Chester: Hugh had two nicknames which, combined, aptly summed up his character: "Hugh the Fat" and "Hugh the Wolf". While on the one hand he was a gluttonous, wasteful and licentious eater, he was also a fierce fighter and a cunning leader.
Roger de Montgomery, Earl of Shrewsbury: A veteran of one of the Norman border lordships, Roger was a principal adviser to King William. He was a capable administrator who left a lasting impression on the geography of the region.
William Fitz Osbern, Earl of Hereford: One of the most powerful and respected Norman leaders in all of England, William was famous for his valour and honesty. Besides his actions in Wales, he was a key figure in York, Sussex and the Isle of Wight, all contested places during the Norman Conquest.
11.2 Scenario Two: The Welsh Resurgence
Toward the end of the 11th century, the situation in Wales had changed considerably. Norman command was in decline, while the Welsh had finally found effective leadership in the form not of one, but of two Kings: Rhys ap Tewdwr of Deheubarth, and Gruffydd ap Cynan of Gwynedd. In this hypothetical scenario, the two influential Welsh kings inspire a general rebellion against the Normans and threaten to drive them from Welsh soil.
11.2.1 Length of Game
This scenario lasts 10 turns.
11.2.2 Number of Players
As with Scenario One, this scenario may be played with one leader per side, or with two commanders representing the two Welsh kings and their territories. Gruffydd's territory covers all of Mon, Gwynedd and Powys, and Rhys all the other Welsh territories, including Borderland. The two kings may move freely throughout their own territories (as indicated by the corresponding flag colour on the map). They are not bound by kingdoms in the standard sense, but they may not enter the territories of another kingdom or the zones of any county.
11.2.3 Sequence
The Welsh always go first in every turn. Both sides place simultaneously.
11.2.4 Norman Placement
The Normans initially control the six county zones, plus the eight Welsh zones directly bordering them to the west (including Borderland). Place in each zone one infantry unit and one castle. In this scenario, no Norman earl is used.
11.2.5 Welsh Placement
All zones not controlled by the Normans are controlled by the Welsh, and each has one infantry unit as a garrison. One King counter (representing Rhys) is placed in any zone of Gwynedd, and the second King counter (representing Gruffydd) is placed in any zone of Deheubarth. Both kings are accompanied by one Welsh archer counter and one Welsh teulu (do not use the other three teulu counters in this scenario). The teulu are not tied to a kingdom as they were in Scenario One, but they still may not enter the counties.
11.2.6 Victory Conditions
Victory points are gained as follows:
- +1 for each of the eight Norman-controlled border zones that the Welsh manage to recover and hold
- +2 for each county zone controlled by the Welsh
- -2 for each Welsh King eliminated
Add all these points at the end of turn 10:
- 0-3 points = Norman Victory
- 4-5 points = Draw
- 6+ points = Welsh Victory
11.2.7 Special Note on Levies
In this scenario, levies are carried out by the Welsh on even-numbered turns. All Welsh kingdoms begin mobilised except Dyfed. If the Welsh run out of counters (which is likely), distribute them as evenly as possible between the two kings. The Normans recruit on every turn (except turn 1), but only their county zones are active for levies during odd-numbered turns.
12.0 Optional Rules
Players who wish to add a little more historical flavour (and perhaps more balance to the game) may decide to use any or all of the following optional rules.
12.1 Blood Ties
(Scenario One only.) The monarchs of Gwynedd and Powys (Bleddyn and Rhiwallon) were brothers. These brothers jointly supported the rebellions led in England by the Saxon Eadric the Wild during the late 1060s, and were therefore able to cooperate in opposition to the Normans. For this reason, in the game these two teulu are permitted to enter each other's kingdoms and move/fight together as desired.
12.2 Sea Invasion
The Menai Strait separating the island of Mon (today, Anglesey) from the Welsh mainland poses a unique obstacle in the game. Acquiring boats and sailing unknown waters would have been especially difficult for the Normans with their heavy armour and horses, but moving an army across a body of water carries the risk of loss and/or delay for one side or the other. Unless the Fair Weather or Bad Weather Random Event is in effect, any stack of units that intends to cross the strait must first pass a weather check by rolling a D10 and obtaining a result of 5 or higher; if this check fails, they may not move this turn. Note that this is in addition to the supply check for the Normans if they move into a non-friendly zone.
12.3 The Archers of Gwent
Gwent had the reputation of having the best archers in Wales. To represent this in the game, any Welsh or Norman archer unit that comes from the levies of either zone of Gwent receives a +1 modifier to its combat die roll (cumulative with any other modifier).
13.0 Designer's Notes
In creating this game, my main objective was to maintain playability and enjoyment, not to produce an exact simulation of historical events. Nevertheless, I have included historical elements wherever possible, and some of them are explained in a little more depth in these notes.
First and foremost, there are the castles. Wales is a land famous for its castles, many of them enormous and imposing buildings such as Cardiff Castle. While many of these were indeed built by the Anglo-Normans, most have their origin much later than this period (particularly during the reign of Edward I). In the early days of the Norman invasion, the great majority of the literally hundreds of castles that were built were of simple motte-and-bailey design. Made of earth and timber rather than stone, these early castles could be built in a matter of days rather than years, but they were still effective fortresses as the Normans moved further into hostile territory. These castles were a key element in the Norman success, and this explains why they are such an important component of this game.
The Teulu (literally "family") were the heart of the forces of any Welsh prince. These well-armed warriors on horseback served as the bodyguard and personal army of their leader. A typical teulu numbered approximately 120 men. The rest of the Welsh forces were the militia, who could be called away from their farms and other occupations only when necessary. As an interesting point, both the teulu and the Norman knights who opposed them may have used javelins as their preferred weapons during this period.
The Norman conquerors exploited the rivalries between the Welsh kingdoms. These rivalries also helped them to recruit Welsh to serve as auxiliary troops as the Normans extended their reach.
The time scale of this game is one turn, each turn representing several weeks or months. A battle over control of a zone in the game is in reality a campaign that could consist of multiple pitched battles and/or sieges.
Finally, in case anyone has difficulty with all these Welsh names, be assured it could be much worse! This is the real name of a Welsh village on the island of Mon (today Anglesey):
"The church of St Mary in the hollow of the white hazel near a rapid whirlpool and near the church of St Tysilio by the red cave"
Translator's note on motte-and-bailey: Motte-and-bailey was a type of castle built in Britain and France in the 11th and 12th centuries, especially in England after the Norman Conquest (1066). The motte is a raised mound of earth, like a small hill, generally artificial, topped by a wooden or stone structure. The earth for the mound was taken from a ditch dug around the motte or around the whole castle. The outer surface of the mound might be covered with clay or reinforced with timber supports.
Tables
These are the companion tables supplied with the game (Random Events Tables and reference cards). Dice results are as read in section 2.4.
Welsh Random Events Table
| Result (2 D10) | Event |
|---|---|
| 0-4 | Fair Weather. No weather check is needed to allow sea invasions under the optional rules of the game (see 12.2). Also, a +1 modifier applies to supply checks made while this condition lasts (see 6.2). Place the Fair Weather marker on the Game Turn Record Track (replacing any Bad Weather marker). |
| 5-9 | Civil War. Welsh leaders were not immune to internal conflict and attempted coups, diverting their attention from the Normans. During one turn, all units in any mobilised Welsh kingdom chosen by the Norman player are frozen and may not move or attack. Affected units may defend normally. |
| 10-14 | Bad Weather. No sea invasion is possible this turn (see 12.2). Also, a -1 modifier applies to supply checks (see 6.2) while this situation lasts. Place the Bad Weather marker on the Game Turn Record Track (replacing any Fair Weather marker). |
| 15-19 | Welsh Insurgents. Welsh agents stir up anti-Norman fervour. In any zone occupied by the Normans that is not a county zone, the Welsh player places two randomly drawn Welsh units face up. These units may not take part in any siege and may not retreat for the duration of the game. These newly placed units must fight immediately. |
| 20-24 | Assassination. The Welsh player may attempt to kill any opposing leader (earl) using an assassin. Roll a D10. A result of 1, 2 or 3 is successful, and means that the "targeted" leader is eliminated (this counts for the victory conditions). Any other result has no effect. |
Norman Random Events Table
| Result (2 D10) | Event |
|---|---|
| 0-4 | Peasant Rebellion. Outraged Welsh peasants rebel against their Norman occupiers. The Welsh player chooses any Norman-controlled zone that is not a county zone and eliminates one Norman military unit there (but not a leader). |
| 5-9 | Viking Raid. The Norman player may immediately send two Viking units (if available) to attack any coastal enemy zone. If the Viking attackers eliminate all defenders, the zone becomes neutral. Surviving Vikings remain in the zone and defend normally. (Viking raiders never retreat!) A Viking raid does not mobilise any neighbouring Welsh kingdom. The combat for a Viking raid must be resolved immediately; it does not wait for the combat phase. |
| 10-14 | Rebellion of Eadric the Wild. (This result applies only in Scenario One; in another scenario, it has no effect.) A great rebellion of patriots in the centre of England causes King William to redeploy troops from the counties. All units that are face down in county zones are removed and returned to the reinforcement pool. |
| 15-19 | Abundance of Provisions. For this turn only, the Norman player automatically passes all supply checks. |
| 20-24 | Royal Council. (This result applies only in Scenario One; in another scenario, it has no effect.) King William summons one of his earls to a meeting. The Norman player rolls a D10 for each earl, and the one who rolls the lowest result must attend the meeting. Remove that earl's counter from the game board for one turn, and place it again on the following turn in one of his "home" county zones. |
Reference Cards
Sequence of Play
- 3.1 Levy Phase
- 3.2 Random Events Phase
- 3.3 Movement Phase
- 3.4 Combat Phase
- 3.4.1 Conduct Sieges
- 3.4.2 Combat Resolution: Missile Fire, Melee, Retreat
- 3.5 Activation Phase
- 3.6 Strategic Movement Phase
Supply Checks
Roll a D10; a result of 2 or higher is successful.
Modifiers:
- -1 for each counter that exceeds the number of 3 in the zone (do not count leaders).
- -1 for each zone between the zone being invaded and the invader's "home" county zone (count the zone moved into, but not the "home" county).
- +1 for Fair Weather in effect (from Random Events).
- -1 for Bad Weather in effect (from Random Events).
- +1 for a Norman earl who is present.
Sieges
Subtract the number of defending units from the number of attacking units (the result may be a negative number). Use the result of this subtraction to modify a D10 roll.
A result of 5 or higher is successful: the castle's defensive modifier is ignored in the subsequent battle.
With 4 or less, the attacking forces are forced to retire one of their units (at the attacker's choice), and the castle's modifier remains for the resolution of the subsequent combat.