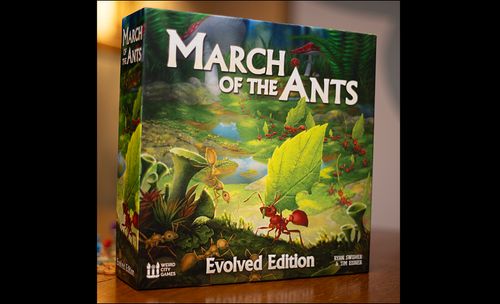
March of the Ants: Evolved Edition
March of the Ants: Evolved Edition Rulebook
Table of Contents
Table of Contents
Game Overview
March of the Ants is played over several rounds that represent the passing seasons. Each round has four phases: the Worker Phase, in which the majority of actions are taken; the Soldier Phase, when battles in the Great Tunnel and contested hexes are resolved; and the Queen Phase, where resources are collected, ants must be fed, and the Queen's Choice is made. Finally, during the Slumber Phase players score colony points (Colony Point icon).
At the end of the game, the player with the most points is the winner. Players score points by controlling the hexes that border The Great Tunnel, harvesting them from special collection sites, evolving full ant bodies, winning battles, and meeting the conditions on Colony Goal cards.
Game Variants
2 or 5 Player Game - Games with these player counts have a few special setup and gameplay rules. See "2 Player Game" and "5 Player Game" below for details.
Beyond the Meadow Hexes - Hexes 21-25 have special rules on them. To use them in a 2-4 player game, select 2 at random and shuffle them in with the standard hexes during step 3 of setup. See "Beyond the Meadow" below for more details.
Solo Game - The rules for the solo game are explained in "Solo/Co-op Variant" below.
Long Game - This game lasts 5 rounds instead of the usual 4. See "Long Game Variant" below for rules and setup changes.
Game Components
- 5 Nest Mats
- 1 Great Tunnel
- 8 Starting Hexes (1-8)
- 17 Standard Hexes (9-20)
- 66 Ant Cards
- 180 Wooden Ants (36 in each player color)
- 5 Score Markers
- 30 Food Tokens
- 1 Round & Score Track
- 6 Centipede Tokens & 1 Size Marker
- 8 Wormhole Tokens
- 12 Rest Tiles
- 6 Reward Tiles
- 1 Round Marker
- 1 Active Player Marker
- 5 Beyond the Meadow Hexes (21-25)
Game Setup
- Place The Great Tunnel in the center of the table.
- Place the Score/Round Track on one side of the play area on the 4-round side. Place the Round Marker on Round I and the Centipede Strength marker on 0. See the Long Game Variant section for the 5-round long game rules.
- Shuffle the standard hex tiles (blue border). Place them face down in a stack next to The Great Tunnel. For your first game, don't use Beyond the Meadow hexes (21-25).
- Randomly select two starting hexes (gold border) per player, shuffle and place them face down on top of the standard hex pile. Return any unused starting hex tiles to the game box.
- Place food, centipede, and wormhole tokens next to the play area.
- Shuffle the Rest tiles and place them in a facedown stack near the score track. Reveal one per player and place them faceup under the score track.
- Randomly select 2 of each type of Great Tunnel Rewards tiles. Place the III+ tiles facedown to form the bottom of a stack and place the I-II tiles on top. Return the unused tiles to the game box.
- Reveal the top Great Tunnel Reward tile and place it in the center of the Great Tunnel faceup.
Each Player:
- Take all ant tokens of your color and 1 Nest Mat.
- Place 5 of your ant tokens in your Larvae Chamber as larvae, and 2 in The Great Tunnel as ants. Place the rest on the side of your Nest Mat as eggs.
- Place your score marker on the start square of the score track.
- Place 2 food tokens into your Food Stores.
- Shuffle the cards and deal 2 cards to each player. Place the deck next to the play area.
Finally:
- Randomly select the starting player and give them the Active Player Marker. The player to the right of the starting player places 1 additional larva in their Larvae Chamber.
The Meadow
The Meadow is made up of The Great Tunnel and the hex tiles. The Meadow expands during the game as players Explore and place new hex tiles.
The Great Tunnel - The Great Tunnel is the center of the Meadow and place of origin of all of the ant colonies. The Great Tunnel does not count as a hex, but players may always place larvae into The Great Tunnel. The Great Tunnel can be contested, and a battle will take place there at the start of the Soldier phase if ants from two or more nests are present.
Anatomy of a Hex
Each hex has the following features: a Feature Illustration (e.g. a Wormhole), Standard Collection Sites, a Control Site, a Number and Name, and a Feature Icon (e.g. a Wormhole icon) next to its number.
Icon Key
- Collection Site - Collect resources during Queen Phase.
- Control Site - The collection site that indicates control of the hex.
- Food
- Colony Point
- Single Larva
- Ant Card
- Double Larvae
- Tunnel Marker
- Wormhole - Place a wormhole token on the hex.
- Centipede - Place a centipede token on the hex. Advance Centipede Army Size marker by one.
Hex Features
Some hexes have a feature icon next to the name, such as a centipede or wormhole that have special rules when placed.
Centipedes: Advance the Centipede Army Size marker by one and place a Centipede token on the hex.
Centipedes are threats to the ants. Ants may move into hexes with centipedes and inhabit collection sites as normal, but will have to battle the centipedes during the Soldier phase.
Wormholes: Place a wormhole token on the hex. It now contains a wormhole. If the token is moved or removed, the wormhole no longer exists in that hex.
Ants may move from a hex that contains a wormhole to any other hex that has a wormhole with a single step.
Inhabiting Collection Sites - When you move an ant into a hex, it immediately inhabits any empty collection site of your choice. If no collection sites are empty, place the ant in the outskirts of that hex.
Inhabiting Hexes - To inhabit a hex, you must have at least one ant in a collection site in that hex. When you move larvae, they may move them to any hex you inhabit.
Outskirts - The outskirts are anywhere in the hex that is not a collection site. Ants in the outskirts may contest hexes, do not inhabit the hex, and do not collect resources.
Vacated Collection Sites - Ants in the outskirts will automatically move to inhabit collection sites that become empty as soon as the current action is resolved.
Players take turns moving all of their available ants to inhabit vacant sites in player order. After a battle, begin with the winner of the battle instead.
Shared Hex - A hex is shared when two or more players' ants inhabit that hex. Ant battles will not take place in that hex unless it is contested.
Contested Hexes - If there are any ants in the outskirts of a hex where multiple players have ants, the hex is contested. Starting on Round 2, ant battles will take place in contested hexes during the Soldier Phase. The Great Tunnel is always contested, and battles will take place there at the start of the Soldier Phase if 2 or more player's ants are present.
Connected Hex - Two hexes are considered connected if they are adjacent and they share a connected tunnel. Wormholes do not connect hexes.
Worker Phase
During the Worker Phase, players take turns in clockwise order, starting with the player with the Active Player marker.
Each turn, the player with the Active Player marker takes one action: Explore, Forage, March, Play a card, or Rest. When a player takes an action other than Rest, each other player may take the associated Reaction. Reactions have no cost, and are taken in clockwise order from the left of the Active Player.
After the action and reactions are resolved, the Active Player marker is passed to the left, and the next turn begins. Play continues until all faceup Rest Tiles have been taken.
The Explore, Forage and March actions all cost one food to perform. Playing a card does not cost food. Instead, it costs larva and/or ants. Resting has no cost.
Explore Early, Explore Often! The Starting Hexes do not have any centipede icons on them and all have a food collection site to ensure your ants get off to a healthy start!
Explore
Cost: 1 Food
Action: Draw 1 hex and place it connected by at least one tunnel to a location where you have an ant. Move any number of your ants from any connected hexes into the explored hex. (You must move at least 1 ant.)
If there are any hex features place the corresponding token on the hex.
Draw the hex first, then choose where to place it. Ants can move to the explored hex from collection sites, the outskirts, or from the Great Tunnel.
Reaction: Each other player may move 1 larva from their Larvae Chamber to any hex they inhabit or the Great Tunnel.
If you have no larvae in your Larvae Chamber you may not perform this Reaction.
Hex Placement Rules
Anytime you place a hex in the Meadow, whether through Exploration or from a card effect or other ability:
- You must connect at least one of its tunnels.
- You may place it so that some of its tunnels are blocked, and it may block the tunnels of other hexes.
Explore Diagram (example): Blue chooses to take the Explore action. They pay 1 Food and draw the top hex (Dry Seep). They choose to place it with tunnels connected to Water's Edge and The Great Tunnel. Blue must move at least 1 ant from a connected hex into the newly Explored hex. They choose to move 1 ant from Water's Edge and 1 from the Great Tunnel. Those ants immediately inhabit the collection sites in Dry Seep. Blue chose to block the tunnel connection with Fungal Reach to protect Dry Seep from the red ants. Red takes the Reaction to Blue's Explore action and places a larva from their Larvae Chamber into Fungal Reach, where it immediately inhabits a collection site.
Forage
Cost: 1 Food
Action: Draw 3 cards, then discard any 1 card from your hand.
Reaction: Each other player may gain 1 larva.
To gain a larva, move an Egg from your supply to your Larvae Chamber. If you have no Eggs in your supply, you may not gain larvae.
If at any time you would draw a card, and there are none left in the deck, shuffle the discard pile to make a new deck. Then draw from the new deck.
Location vs. Hex
Each tile in the Meadow is a location, which includes The Great Tunnel and all the hexes. When a card or rule refers to hexes specifically, it does not include the Great Tunnel.
March
Cost: 1 Food
Action: Move up to six steps with your larvae and/or ants.
Reaction: Each other player may move an ant 1 step. (Larvae cannot be moved with the March reaction.)
Step: Steps allow players to move ants around in the Meadow, and to move larvae into the Meadow, where they become ants. One step allows you to move:
- 1 ant from any location to any connected location.
- 1 ant from a location with a wormhole to any other location with a wormhole.
- 1 larva from your Larvae Chamber to any location that you inhabit.
March Action Diagram (example): Red wants to move larvae into Water's Edge but cannot move them directly since they don't inhabit any collection sites there. Red pays 1 food to March and may take up to 6 steps. Red moves 3 larvae into Soil, using 3 steps. (They become ants upon entering the Meadow.) They use another step to move an ant from Soil into the available collection site in Water's Edge. Red now inhabits Water's Edge, and uses 1 step to move a larva into the other available collection site in that hex. They choose to forego their final step. There are no available sites in Soil, so the red ant remains in the outskirts. Soil is now a contested hex, since there are two types of ants, and more ants than collection sites. If it is still contested during the Soldier Phase, a battle will occur.
Reaction example: Black takes the Reaction to Red's March action and moves one ant one step from Soil into Dry Seep. A red ant in the outskirts of Soil immediately inhabits the vacated collection site, but Soil is still contested. Blue takes the Reaction and moves into Dry Seep outskirts, making it contested. The red ants in Water's Edge cannot move into the vacated food collection site since they already inhabit sites. Red would need to use a step to change which collection sites their ants inhabit.
Play a Card
Cost: shown on card
Action: Play one card from your hand.
Reaction: Each other player may discard a card from their hand to draw a card.
Playing a card does not cost food. To play a card, pay an amount of your larvae and/or ants equal to the cost of the card by removing them from your Larvae Chamber and/or from the Meadow and returning them to the side of your nest mat.
- Pay with any combination of larva from your Larvae Chamber and/or ants from the Meadow.
- Pay only with ants from the Meadow.
- Pay only with larvae from your Larva Chamber.
There are three types of cards in March of the Ants:
Event - Events are one time effects that represent the actions of ants or natural forces. After an Event card is resolved, it is placed face up in the discard pile.
Colony Goal - Colony Goals set unique objectives for players to achieve. They also give a small effect when played to help the player meet that objective. Each Slumber, colony points are awarded based on how well the objective is met. Play Colony Goals face-up on the right side of your nest mat.
You may have a maximum of two Colony Goal cards in play. If you wish to play another Colony Goal, you must first discard one that you have in play.
Anatomy of a Card: Cards show a Card Cost, Card Name, Scientific Name (does not affect gameplay), Ferocity (if played for Ferocity during battle, add the number of white dots to Battle Strength), Card Type, Evolution Body Segment Symbol, Card Text (describes effects and abilities), and Flavor Text (does not affect gameplay).
Colony Goal Details: Colony Goal cards show a Goal Reminder Icon, Goal Reward Levels (each Slumber, gain points equal to level of completion; for example 4 hexes connected by a single tunnel = 2 points), a When Played Effect, and Goal Text.
Evolution - Evolutions are played onto the ant body on your nest mat, granting a permanent upgrade to your nest. Each evolution offers a unique bonus to your ants.
When a new evolution is played, it must be placed on top of all other evolutions in that body segment. Only the topmost evolution in each body segment grants its unique effect, but all Evolutions will add to their segment bonus.
Segment Bonuses - Each body segment (Head, Thorax, and Abdomen) grants a bonus based on the number of evolution cards you have in play in that body segment.
- Head: In battle, gain +1 Ferocity for each head evolution you have.
- Thorax: At the start of the Worker Phase, you may place 1 larva into the Great Tunnel for each thorax evolution you have.
- Abdomen: Your food feeds 1 additional ant per abdomen evolution you have.
Fully Evolved Ant Body - Gain 3 Colony Points for each ant body you complete. A complete body has a head, a thorax, and an abdomen. You may complete and score multiple ant bodies, but each card may only be scored in one ant body.
Evolution Diagram (example): Red has 2 head evolutions in play, so they gain the head segment bonus twice. Red will add 2 Ferocity in each battle they fight. Red gains the ability from the Tawny Crazy Head but not from the head evolution played below it. Red has one thorax evolution in play. They gain the ability from the Scouting Thorax, and the thorax segment bonus: at the beginning of the Worker Phase, they may place one larva into the Great Tunnel. Red does not have an abdomen evolution in play. They do not gain an abdomen segment bonus. If Red plays an abdomen evolution, they will evolve a complete ant and gain three colony points.
Rest
When a player takes the Rest action, they choose one available Rest tile and immediately gain the rewards shown. After Resting, that player must Rest on each subsequent turn, taking another Rest tile when they do.
When the last Rest tile is taken, the Worker Phase ends immediately. The player who rested passes the Active Player marker to the player on their left, who will be the Active Player in the remaining phases this round, and take the first action in the next Worker Phase.
Players may not choose to Rest as their first action of a round, unless they have no food and no cards in hand.
Rest Tile Icons - Rest tile rewards include:
- You may place 1 larva into the Meadow.
- You may take 1 step with an ant.
- You may take up to 2 steps with ant(s).
- Gain 1 larva.
- Gain 2 larvae.
- 2 of your ants do not need to be fed this round. They are considered fed.
- Draw 1 card.
- You may gain 1 larva. Place it in the Great Tunnel. You may not choose to keep it in your Larvae Chamber.
- You may lose 1 ant to gain 1 Colony Point.
- You may lose 1 ant to gain 1 food.
Ant, Larva, or Egg?
The wooden ant tokens represent different stages of the life cycle of ants, depending on where they are. When they are in the Meadow (Great Tunnel or hexes) they are ants. When they are in your Larvae Chamber, they are larvae. All other tokens are kept to the side of the Nest Mat, and are Eggs.
Gain Larvae - Take an egg from your supply and place it in your Larvae Chamber.
Place Larvae - Take a larva from your chamber and place it into the Meadow, where it immediately becomes an ant.
Soldier Phase
Start of Soldier Phase: Resolve relevant head evolution bonuses in clockwise order beginning with the Active Player.
- Resolve the Great Tunnel battle.
- Resolve Hex battles in ascending order of hex number. No hex battles occur in Round I.
Battle Rules
Battle takes place in each contested hex between all players who have ants in that hex. A hex is contested when there are two or more players present in the hex and there are ants in the outskirts.
In each contested hex, the defender is the player who inhabits the control site. The other players are invaders.
Stages of Battle
-
Army Size - Each player states the number of ants they have in the hex.
-
Ferocity - Starting to the left of the defender and moving clockwise, each player who is battling may play 1 card from their hand, face down. After all players have played a card, or declined to, reveal the cards. Each player's Ferocity is equal to their card's Ferocity value (number of white pips), +1 for each head evolution on their nest mat. If two non-defending players are tied, resolve ties starting with the player to the left of the defender and continuing clockwise.
-
Outcome - Add Ferocity to Army Size to determine Battle Strength. The player with the greatest Battle Strength is the winner. The defender wins ties.
-
Casualties - The winner loses ants equal to half the combined army size of all losers (rounded down). Each losing player loses ants equal to the winner's army size.
Lone Survivor - If all of the winner's ants would be lost, their last ant is not lost.
Players choose which of their ants to lose. The number of casualties is determined before either side loses ants.
-
Spoils - Starting with the greatest Battle Strength and proceeding clockwise, players may move any or all of their ants in that hex to any empty collection sites.
Each type of battle grants different spoils:
- Hex Battles with only ants: 1 Colony Point.
- Hex Battles with centipedes: 1 Colony Point + 1 Food.
- The Great Tunnel: Players gain rewards in order of their Battle Strengths.
Stages of Battle Diagram (example): Water's Edge is contested because there are two players present and there are ants in the outskirts. Blue is the defender because one of their ants inhabits the control site in it.
- Army Size - Red has 4 ants. Blue has 3 ants.
- Ferocity - Red plays a card with a Ferocity of 2. They also have one head evolution giving them +1 Ferocity for a total of 3. Blue plays a card with a Ferocity of 3. They have no head evolutions.
- Outcome - Blue's Battle Strength is 6 (3 ants + 0 head evolutions + 3 Ferocity). Red's Battle Strength is 7 (4 ants + 1 head evolution + 2 Ferocity). Red wins with a total of 7 Battle Strength.
- Casualties - Red loses 1 ant (half of Blue's Army Size of 3, rounded down). Blue loses 4 ants (Red's total Army Size). Blue only has 3 ants and loses them all. (Ferocity does not affect casualties.)
- Spoils - Red gains 1 Colony Point and moves their ant from the outskirts into the control site. Red gains an additional Colony Point from their Trapjaw Head, since they played a card for Ferocity.
Great Tunnel Battle Rules
The Great Tunnel is the ancestral home of the ants, and each round they will compete for rewards. The three players with the highest Battle Strength will gain rewards shown on the Reward tile for that round.
Battle in the Great Tunnel follows standard battle rules with these exceptions:
- The Great Tunnel is considered contested if ants from two or more nests are present.
- There is no defender and no invaders.
- Ferocity cards are chosen in player order, starting with the Active Player if there is no defender. Ties are resolved starting with the Active Player and continuing clockwise.
- Players gain the rewards shown on the tile in order of their Battle Strengths. Players gain rewards even if all of their ants were lost as casualties.
If only 2 players battle in the Great Tunnel, only the top two rewards are claimed. If only 1 player has ants in the Great Tunnel, no battle occurs and they gain the top reward.
Centipede Battle Rules
Hexes with a centipede and any ants are contested. The centipede will battle all ants in the hex. The centipede is always an invader. Centipede Battle follows the standard battle rules with these additions:
- A centipede's starting Army Size is shown on the Centipede Army Size track.
- After players play Ferocity cards, (starting with the Active Player if there is no defender), draw a card and add its Ferocity to the centipede's Army Size. Unpredictable Foe: If the card drawn for the Centipede has a Ferocity of 1, add 1 to its Army Size and draw again.
- Each player who equals or exceeds the centipede's Army Size wins, and gains spoils. If any player wins, the centipede loses, and is returned to the supply.
- If the centipede won, it deals casualties equal to its total Army Size to each ant opponent. If the centipede lost, it deals half of that amount to each ant opponent, rounded down. If any ant player wins, the centipede deals half-casualties to all opponents, not just the player who won.
- Ants do not deal casualties to each other.
After the centipede battle, if the hex is still contested, the ants will battle.
Centipede Battle Diagram (example):
- Any hex containing a centipede is considered contested.
- The centipede starting Army Size is 2.
- Red chooses to play a card to add its Ferocity of 2 to the 4 ants present in the hex, for a total of 6 Battle Strength (Red has no head evolutions).
- The centipede draws the top card of the deck, adding the Ferocity of 3, for a total Army Size of 5.
- The ants win, and the centipede is destroyed. Red loses ants equal to half the centipede's Army Size of 5, rounded down, for a result of 2. Red gains 1 food and 1 Colony Point, and the centipede token is returned to the supply.
Queen Phase
During this phase, all players Harvest, Feed Ants, and make their Queen's Choice.
Start of Queen Phase: Resolve relevant abdomen evolution bonuses in clockwise order beginning with the active player.
Harvest
Each player collects resources from all collection sites their ants inhabit. For each food or larva collected, take 1 token of that resource type, and place it in the corresponding spot on your nest mat. For each card collected, draw 1 card from the deck. For each Colony Point collected, advance your score marker 1 space on the score track. Collection sites grant 1 resource unless indicated otherwise with a number in or next to the icon.
To help correctly collect your harvest, we recommend counting each type of resource separately and placing all resources above your nest mat before moving them to their final locations.
Feed Ants
All ants in the Meadow need to be fed to survive. Larvae do not need to be fed. Each food feeds 4 ants.
Players may choose not to feed any number of their ants, but they will lose any ants they do not feed.
In Autumn (the final round), if a player has any unfed ants, they are ineligible to win Endgame Awards.
Feeding Diagram:
- 1 food = 1 to 4 ants
- 2 food = 5 to 8 ants
- 3 food = 9 to 12 ants
Pay 1 food for every 4 ants
Abdomen Feeding Bonus
Each food feeds 1 additional ant for each abdomen evolution in your ant body.
A player with one abdomen evolution would be able to feed 5 ants with 1 food, up to 10 ants with 2 food, and so on.
Queen's Choice
The Queen's Choice is made after all ants have been fed. Each player decides if their queen will produce food or larvae to prepare the colony for the next round.
Each player gains either 2 food or 5 larvae.
There is no Queen's Choice in the final round.
If needed, the Queen's Choice is resolved in clockwise order beginning with the active player.
Slumber Phase
During Slumber, players score points, and refresh the board for the next round.
Score Inner Meadow Hexes
Each player gains one colony point for each Inner Meadow hex they control. All hexes that are adjacent to the Great Tunnel are part of the Inner Meadow. Although hexes must be adjacent to the Great Tunnel, they do not need to be connected to gain colony points.
Score Colony Goals
Each player can gain 1, 2, or 3 colony points for meeting the conditions of any Colony Goal cards they have in play. The number of points they gain is based on the number of times they meet the condition, as shown on the card.
Prepare for the Next Round
Advance the Round Marker one space. If it is the final round, end game points are awarded, and the game ends. If not, complete the following steps to prepare for the next round:
- Players discard all Rest Tiles. Reveal one new Rest tile per player and place them below the Round Track.
- Discard the current Reward tile. Reveal the topmost Reward tile and place it faceup in the Great Tunnel.
- Then the next Worker Phase begins. The Active Player takes the first action.
Queen Phase and Slumber Phase Diagram (example):
- Harvest: Red collects 2 food, 3 larvae, 1 card, and 1 Colony Point. Blue collects 1 food, 2 larva, and 1 Colony Point. Black collects 2 food and 6 larvae.
- Feed Ants: Red's 6 ants will need to eat 2 food. Blue's 4 ants will need to eat 1 food. Black has a total of 9 ants, which normally would require 3 food. However, Black has an abdomen evolution in play, so each food they use will feed one additional ant. Black's ants only need to eat 2 food.
- Queen's Choice: Each player chooses to gain 2 food or 5 larvae.
- Inner Meadow Points: Red controls Dry Seep and Soil and gains 2 Colony Points. Red controls Bark, but it is not adjacent to the Great Tunnel so they gain no points for it. Black controls Tall Sand and Water's Edge and gains 2 colony points. Blue controls Loamy Tunnels and gains 1 colony point.
- Colony Goal Points: Red gains 1 colony point for meeting the easiest condition of Extensive Tunnel by inhabiting 3 hexes connected by a single tunnel (Soil, Bark and Dry Seep).
Game End and Victory
Each nest is vying for ecological dominance and must choose different evolutionary paths and strategies. The nest with the most colony points will live on, passing their genetic code down through the centuries, fostering countless generations of ants to come. The success of each nest is judged by the amount of colony points gathered.
After Slumber in the final round, end game colony points are awarded, colony points are totaled, and the winner is declared.
End of Game Awards
Players who successfully fed all of their ants in Autumn compare resources for Endgame Awards:
- Largest Brood - Two colony points for the player with the most larvae.
- Greatest Stores - Two colony points for the player with the most food.
- Untold Potential - Two colony points for the player with the most cards in hand.
If two or more players tie for any of the end game rewards, each tied player gains one colony point.
The player with the most colony points wins!
In case of a tie, the player with the most ants in the Meadow wins.
Gameplay Variants
Long Game Variant
A long game of March of the Ants is played over five rounds rather than four. It follows all the standard rules of the game with these adjustments. During set up, flip the Score Track to the 5 Round side and add 3 III+ Great Tunnel Rewards tiles to the stack.
In rounds III, IV, and V each food feeds only 3 ants (plus 1 for each Abdomen).
Beyond the Meadow
The Beyond the Meadow hexes (#21-25) introduce special hexes that have unique effects and abilities. Each hex tile has the effect written on it. The player who explores or places a Beyond the Meadow hex tile resolves any effect that it has. For your first game, it is recommended to remove all Beyond the Meadow hexes from the game. You may choose to include some, all or none of the Beyond the Meadow hexes in a game. We recommend you add 2-3 randomly selected Beyond the Meadow hexes per game. In a five player game, or a long game, include all five Beyond the Meadow hexes.
2 Player Game
For a two player game of March of the Ants, follow these additional rules:
Set Up
- Beginning with the Starting Player, each player takes two of the unused starting hexes at random. Each player chooses one hex and places it connected to the Great Tunnel. Return the unchosen hex to the game box.
- Each player starts with 3 ants in the placed hex, 2 ants in the Great Tunnel and 4 larvae in their Larvae Chamber, and 2 food in their Food Stores, and 2 cards.
- Reveal 3 Rest tiles. (Reveal 3 at the start of each round.)
- Place 1 ant from an unused color into the Great Tunnel as the Old Guard.
Great Tunnel Battle
The Old Guard represents the last remnants of the ancient colony that lived in the Great Tunnel. Their ant cannot be moved or interacted with in any way.
In the Great Tunnel battle, the Old Guard has base Army Size equal to the Round number. After players choose to play cards for Ferocity, the Old Guard will discard the top card of the deck and add the Ferocity value to its Army Size.
The Old Guard deals no casualties.
The Old Guard will claim spoils from the Great Tunnel based on their Battle Strength. They gain no resources, but will block players from gaining better rewards if their Battle Strength is higher.
5 Player Game
For a five player game of March of the Ants, follow these rules:
Set Up
Include all 8 starting hex tiles and all Beyond the Meadow hexes.
Reveal 5 Rest tiles.
The 2 players to the right of the start player, start with 1 additional larva in their Larvae Chamber.
Reaction
In a five player game, the player to the right of the Active Player does not take a reaction.
Card effects that target all players affect all players.
Solo/Co-op Variant
Rise of the Centipedes
Rise of the Centipedes creates a solitaire or cooperative game where the ants battle an invading Centipede Horde. The centipedes are overrunning the Meadow, and the ants must defend The Great Tunnel.
Rise of the Centipedes is played with the standard March of the Ants rules, with these changes and additions. The Centipede Mat is a quick reference guide to these rules.
Setup
Remove the cards marked with a centipede icon from the deck. Shuffle them and place them next to the Centipede mat to create the Centipede Deck. Shuffle the remaining cards and set them next to the play area as the player deck.
The Centipede Horde's Army Strength starts at 1 and increases by 1 each round.
Centipede Actions
The centipedes' actions are determined by revealing cards from the centipede deck. During the Worker Phase after each player's turn, a card is revealed from the Centipede deck and placed onto the Centipede Mat. Depending on which card type the centipedes reveal, they take the following action:
Invade - Evolution Card: Add a centipede to the Meadow. Place the centipede in the highest numbered hex that does not already contain a centipede. If all the regular hexes are full the centipede is placed directly into The Great Tunnel.
Advance - Event Card: The centipede on the lowest numbered hex moves a number of steps equal to the card. With each step, the centipede moves into the next available hex with a lower number. If there are no hexes with lower numbers, the centipede enters The Great Tunnel.
Whenever a centipede enters The Great Tunnel, the Centipede Horde gains 1 colony point.
Rampage - Colony Goal: A Centipede Battle happens in each hex that is inhabited by ants where there is a centipede token. If no battle occurs as a result of Rampage, the Centipedes gain 1 point for each Centipede token in the Great Tunnel.
Explore - If the centipede reveals an Event card and there are no Centipedes to move, then it will explore a hex. Reveal and place a hex anywhere in the Meadow. Place a centipede token on that hex. If that hex contains a centipede icon, reveal and resolve another centipede card.
Bonus March Action
Defend the Colony: After taking a March action, a player may initiate a centipede battle in one hex.
Defend the Great Tunnel
At the start of each Soldier Phase, if there are any ants in the Great Tunnel, they will battle one of the Centipedes there.
If you win the battle in the Great Tunnel, remove 1 Centipede token, and gain the top spoils. If multiple players win, gain spoils in order of highest Battle Strength. If the players lose, they do not gain any spoils.
Centipedes that enter The Great Tunnel will gain points for the horde each Slumber. There is no limit to the number of centipedes in The Great Tunnel. Centipedes in The Great Tunnel cannot be battled.
Game End
At the end of the game, if the Centipede Horde's colony point total is greater than any player's colony point score, the Centipede Horde wins and all players lose.
Centipedes Gain Points By
The Centipede Horde gains 1 point during Slumber for each centipede in the Meadow. (In hexes and The Great Tunnel.) With 3 and 4 players the Centipede Horde doubles these points each round.
The Centipede Horde gains 1 point each time the Centipede Wins a Battle.
The Centipede Horde gains 1 point each time a Centipede enters the Great Tunnel.
Keep track of the centipede Horde's score on the Score Track by using an unused Player Marker
No End of Game Points
Players do not score end game points for having the most food, larvae or cards in hand.
Solo Game Additional Rules
Begin the game with one randomly selected starting hex containing three ants, five larvae in your Larvae Chamber, and 4 cards in hand.
At the start of the game reveal 4 Rest tiles. Each round choose 1 of them when you rest.
After the solo player Rests, the Centipede reveals one Centipede card and the Worker Phase ends.
Quick Reference
The Meadow - Consists of The Great Tunnel and the hex tiles. Hexes must always have at least 1 connected tunnel.
Location - Each hex and the Great Tunnel are locations.
The Great Tunnel - You may always place larva into The Great Tunnel. It is contested if ants from 2 or more different nests are present. The Great Tunnel is not a hex.
Place Larvae - Move larvae from your Larvae Chamber to a location you inhabit. If you do not have any larvae in your Chamber, they cannot be placed.
Inhabit - A hex is inhabited by each player who has at least one ant in a collection site in that hex. The Great Tunnel is always inhabited by all players.
Control - If your ant inhabits the control site you control the hex. You win ties in battle and gain 1 point in Slumber if the hex is adjacent to The Great Tunnel.
Outskirts - If all collection sites in a hex are inhabited, any ant that enters that hex is placed in the outskirts.
Contested Hexes - If two or more players have ants in the same hex and there are ants in the outskirts, it is contested. A hex battle will take place during Soldier Phase.
Shared Hex - A hex that 2 or more players inhabit.
Losing Ants - Whenever you are instructed to lose ants, as a result of a card effect or battle casualties, you choose which ants to lose.
Vacated Collection Sites - If a hex has vacant collection sites, ants in the outskirts of that hex will immediately try to inhabit the site(s).
Wormholes - A location with a wormhole token has a wormhole. Ants may move from any hex with a wormhole to any other hex with a wormhole with one step. Ants may not explore through wormholes.
Centipedes - Hexes with centipedes and ants are always contested. A hex can only have one centipede token on it at a time. Centipedes may not enter The Great Tunnel.
Active Player - The player with the Active Player Marker.
Player Order - Clockwise, starting with the Active Player unless specified otherwise.
Play Priority - Unless specified, resolve questions of priority in player order.
Hand Size - There is no hand size limit. The number of cards each player has is public knowledge.
Icon Guide
Hex Icons
- Control Site
- Collection Site
- Food
- Colony Point
- Single Larva
- Ant Card
- Double Larvae
- Tunnel
- Wormhole
- Centipede
Action Icons
- Explore: Draw a hex and connect it to a hex where you have an ant. Move ants from connected hexes to the explored hex. Reaction: Place a larva in the meadow.
- Forage: Draw 3 cards, then discard a card from your hand. Reaction: Gain 1 larva.
- March: Move ants and/or larvae up to 6 steps. Reaction: Move an ant 1 step.
- Play a Card: Play a card, paying its cost in ants or larvae. Reaction: Discard 1 card to draw 1 card.
- Rest: Take one Rest card and gain its reward. You may only Rest in future turns. You cannot Rest on your 1st turn each round. No reaction.
Segment Bonuses
- For each Head, gain +1 Ferocity.
- For each Thorax, place 1 larva into the Great Tunnel at the start of Worker Phase.
- Each food feeds 1 additional ant per Abdomen.