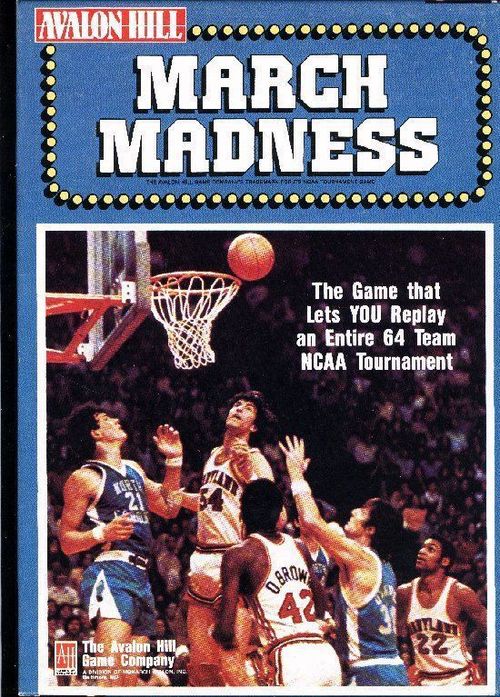
March Madness
March Madness Rulebook
Table of Contents
Table of Contents
- 1. Introduction
- 2. Components
- 3. Prepare to Play
- 4. Game Play
- 5. Solitaire Play
- 6. Base Score
- 7. Next Year
- 8. Alternate Victory Conditions
- 9. Alternate Play
- Advanced Game
- 10. Introduction
- 11. Prepare to Play
- 12. Game Play
- 13. Overtime
- 14. Strategy Card Tips
- 15. Solitaire Play
- 16. Rating Your Own Teams
- 1989 Tournament Field (Seeds)
1. Introduction
MARCH MADNESS is a fast-playing game of tournament basketball at the collegiate level for one to four players with the emphasis on quick progression through a tournament field as opposed to the play of individual basketball games. Each player has 16 teams to "coach" to the final slot and victory, a position only one can reach. An entire 64 team tournament can be resolved in 90 minutes with results similar to those in real life with top-rated teams favored, but not guaranteed, to advance to the finals. The teams provided duplicate the 1989 season, but provisions have been made to allow you to replicate any tournament field.
2. Components
The game consists of the following equipment:
- one 16"x22" gameboard
- one sheet of 112 die-cut playing pieces
- two sheets of self-adhesive team labels
- one rulebook
- six six-sided dice (one each in colors: white, yellow, blue, black, green, red)
- one 8x11 Scoring Charts card
- two 8x11 Strategy Displays
- 60 Strategy Cards
- 60 Team Cards containing 120 great teams of the past
The last four items are used only in the Advanced Game and should be put aside until playing that version.
3. Prepare to Play
3.1 SETUP: Punch out the die-cut playing pieces. Place the 40 half-inch pieces face down in a cup suitable for random drawings in the Event Board section of the gameboard. Place each of the 64 numbered Team pieces on the gameboard bracket corresponding to its rank and color. The twelve non-numbered Team pieces are spares and are put aside.
3.2 TEAM SELECTION: All players roll dice to determine a High Roller who may select a color (either red, blue, yellow, or green) as his group of 16 teams. All teams with that color under their Seed Number belong to him. All other players in clockwise order around the table then make their selections.
3.3 EVENT SELECTION: Each player randomly draws five markers from the Event Board, privately examines them, and then places them face down near his colored oval. During a tournament each player may use his Event markers for any of his 16 teams.
4. Game Play
4.1 GAME SELECTION: The High Roller selects any game in the Preliminaries involving one of his teams to resolve. After its resolution, the next player in clockwise order around the table selects a game in the Preliminary Round to resolve containing one of his teams. This is repeated until the Preliminaries are finished. All winning teams immediately advance to the next round. Game selection continues in clockwise order until each round is finished before the next round begins.
4.2 SCORING: A team's score in each game consists of two separate scores for each half. A half's score consists of:
- the total of a six dice roll, plus
- any Seeding Bonus, plus
- any Events played.
After recording the halftime score, both players decide what Events (if any) they will play in the second half, roll the dice, and total the scores.
4.21 SEEDING BONUS: The better ranked team in each of the first four rounds always receives a bonus equal to the positive black number at the end of that bracket in each half.
EXAMPLE: Georgetown, seeded #1, playing Robert Morris, team seeded 16th, in the Preliminaries adds eight points to its score in each half. Assuming Georgetown wins, it will play a team seeded 8th or 9th in the Second Round, and add four points to its score in each half.
4.22 EVENTS BONUS: A player may play up to three of his Events markers per half to aid his team. He plays them face down at center board so that his opponent does not know their value. The order of play is as follows:
- First Half: Worse-seeded team commits Events first
- Second Half: Trailing team commits Events first
- Tied Score: Worse-rated team commits Events first
The leading (or better-seeded) team may commit his Event markers after seeing how many Events his opponent has played. After both teams play their Events, the trailing (or worse-seeded) team rolls his six dice and then flips his committed Event markers to determine his score for the half. The leading (or better-seeded) team then does likewise.
(Sample Event markers shown: "Foul +1" and "Layup +2".)
4.3 EVENT RESTRICTIONS: All played Event markers are returned to the Event cup prior to the next drawing.
4.31 DOUBLE/TRIPLE: The "2x" and "3x" Events double or triple the die roll for that half corresponding to the color of the marker (for example "2x RG" and "3x LF" on the sample markers). A player may count only one "2x" or "3x" Event per half. If he plays more than one such marker per half, he may choose which will actually double or triple its respective die roll after seeing the dice roll, but the other Event is worthless. Solitaire teams (teams belonging to no real player; 5.) always use the most effective bonus event when this occurs.
4.32 MAXIMUM: A player may not start the second half of any game with more than five Events in reserve. A player with more than five Event markers at the start of a game must play or discard the excess during that half.
4.33 NEW EVENTS: After every game, the losing player draws one new Event marker. The winning player draws two new Event markers if he won by 1-9 points. He may draw three if he won by 10-19 points, four if he won by 20-29 points, and five if he won by 30 or more points.
4.4 OVERTIME: Should any game end in a tie, each player rolls one die of his choice and may play up to one Event to determine a winner. No Seeding bonus applies. If still tied, another Overtime period is played with another die roll and another possible Event play per player until the tie is broken.
EXAMPLE: Robert Morris (Blue Seed-16) is playing Georgetown (Yellow Seed 1) in the Western Preliminaries. The Blue player plays one of his Events face down. Yellow declines to match it, relying on his Seed Bonus to carry the game. Blue rolls his dice:
red 6, blue 5, green 4, yellow 3, white 6, black 6
Blue flips his Event marker and reveals a "3 x C" marker which triples his black "6". Robert Morris' halftime score is 42.
Yellow rolls the dice:
red 6, blue 5, green 4, yellow 3, white 2, black 1
To this total of 21 he adds his Seed Bonus of eight for a halftime score of 29. Mighty Georgetown trails lowly Robert Morris 42-29 at the half. Sensing an upset, Georgetown plays the maximum three allowable Events markers for the second half. Robert Morris matches it with three of his own. Georgetown, trailing, rolls first:
red 4, blue 5, green 3, yellow 6, white 4, black 3
He flips his Event markers to reveal: "+2", "+2", and "2 x Bench" (white). This total of 33 plus his Seed Bonus of eight gives him 41 for the half and 70 for the game.
Robert Morris rolls next:
red 6, blue 5, green 4, yellow 3, white 2, black 3
He flips his Event markers to reveal: "+2", "+2", and "+1" for a total of 28 for the half and 70 for the game. Overtime!
Robert Morris as the lower-seeded team commits first, using his last Event marker. Georgetown, no longer able to rely on his big Seed Bonus, commits his best remaining Event. Robert Morris rolls a "2" and regrettably reveals that his last Event marker was an Air Ball. Georgetown rolls a "6" and reveals a "2 x RG" Event marker for an Overtime score of 12. Georgetown wins 82-72 and draws three new Event markers for the ten point win. Robert Morris is eliminated and Blue draws another Event marker.
4.5 TWO TEAMS WITH THE SAME COACH: Sooner or later a coach will find he has two teams which have a game against one another. When this occurs, he chooses one of the teams to retain, and gives the other to another player currently having the fewest remaining teams. Transfer of the team is permanent.
4.6 FINAL FOUR: Once play reaches the Final Four, the Seed Bonus is no longer applicable, but the better rated team (if any) receives a one point bonus per game (not per half). The worse-seeded team must still commit his Events first (4.22) at the start of play. If seeded equally, the team with fewer Events must commit his first at the start of play. If equally seeded with the same number of events, a die roll is used to determine who must commit his Events first at the start of play.
5. Solitaire Play
When there are fewer than four players in the game, there will be teams which do not belong to any real player. All teams not controlled by a real player are governed by the following Solitaire rules.
5.1 GAME SELECTION: A Solitaire faction will always select as the next game to be resolved its best rated remaining team yet to play in the current round. If that faction has no remaining teams, it must select the game containing the best rated team yet to play in the current round.
5.2 ORDER OF PLAY: Regardless of seeding or score, Solitaire factions always declare their Event plays and make their dice rolls second when opposing a real player. A Solitaire faction must match the number of Events played by its opponent one for one as long as it has sufficient Events. A Solitaire faction's Event play is always drawn at random.
5.3 EXCESS PLAY: If not already required to match his opponent's Event declarations (5.2), a Solitaire faction with more than five Events must play one Event in the first half and any others in excess of five in the second half.
5.4 OVERTIME: A Solitaire team in Overtime will always play an Event if it has one.
5.5 TRAILING/LEADING: A Solitaire team trailing a worse-seeded team at half time must play at least one Event if it can. A Solitaire team leading a better-seeded team of another player at halftime must play an Event if it can.
5.6 LAST REMAINING TEAM: A Solitaire faction with only one remaining team will play half (fractions rounded down; minimum of one) of its remaining Events in each half unless it has a halftime lead of 10 or more in a non-Championship game.
5.7 SOLITAIRE BONUS: Solitaire factions always draw one extra Event marker per game to compensate them for the random selection of their Event plays.
5.8 OPPOSING HIMSELF: A Solitaire faction playing against another team of its own color/side, will play an Event marker only for the better Seeded team. All Event-play requirements for the worse-rated team are ignored.
6. Base Score
To arrive at a more representative final score, add 25 points to each team.
7. Next Year
MARCH MADNESS is never outdated. You can always play the current year's tournament by duplicating the field as reported in your local newspaper; the Seeding process automatically ranks each team according to its relative strength. Self-adhesive labels for most NCAA Division I schools are supplied herein. Merely peel them off and attach them to the proper Seed Team marker and you're ready to begin. The Seeds for the 1989 tournament field are on the back page. Note that the Regional brackets change from year to year so that the same regions do not always meet in the Semi-Finals. When reproducing a current year's tournament field, ignore the printed Regional labels and organize each bracket according to that year's tournament format. New team markers and labels can be ordered direct from TAHGC by following the order information noted in Section 2.
8. Alternate Victory Conditions
Award players points each time one of their teams wins a game according to the following schedule:
- 1 point for a win in the Preliminaries
- 2 points for a win in the Second Round
- 3 points for a win in the Regionals
- 4 points for a win in the Quarter Finals
- 5 points for a win in the Semi-Finals
- 6 points for a win in the Championship game.
9. Alternate Play
After each completed round, all players put their Events markers back in the cup and draw five new Events to start the next round.
Advanced Game
10. Introduction
The Advanced version of MARCH MADNESS is a longer game featuring individual player ratings. Each Participant has several teams to "coach" to the championship. A single "game" between experienced Participants can be resolved in 30 minutes, allowing a Conference Tournament to be played in an evening or an entire NCAA Tournament in a week. Results will be similar to those in real life, with top-rated teams favored but never assured of winning. Most of the Final Four teams of the 60's, 70's, and 80's plus some great old-timer teams are included so you can pair off teams and star players of different eras. Most equipment used in the Basic Game is also used in the Advanced Game. The sample scoresheet on the back of the Scoring Charts may be photocopied for use in recording game statistics.
11. Prepare to Play
11.1 SETUP: Carefully tear apart the perforated team cards. Select the teams you wish to include in your tournament and place their die-cut playing pieces on one of the four Regional brackets of the Basic Game playing board. Ignore the Seed Numbers on the team pieces or use the self-adhesive labels if you wish to match the teams with their Seeds. Pair the teams up in accordance with their Power Rating (found in the lower right corner of each card); matching the highest rated team against the lowest, next highest against the next lowest, etc. Shuffle the 60 Strategy cards and place them face-down between the players.
11.2 TEAM SELECTION: Each Participant rolls the dice to determine a high roller who will have first choice of the available teams. That Participant will be followed in clockwise order by the others until each has selected a team. The process is then reversed with the Participant who selected last entitled to select the next team and so on, counter-clockwise back to the high roller who will select the last team chosen in this round. This process continues until all teams are selected. A "solitaire" or "phantom" Participant will always select the highest rated team available that is not scheduled to play his own team in the opening round. Once all teams are owned, play begins with two Participants playing their first-round game. If there are more Participants, they should act as scorekeepers when their teams are not involved unless they happen to have another copy of the game and can thus resolve two games at once.
Although the game is designed for play between four Participants with "Solitaire" or "Phantom" rules used in place of any missing Participants, you can agree to play with fewer (or more) Participants by ignoring the four-color coding of the Team markers and recording who controls each team.
Sample "Team" card (Seattle Chieftains): Center Elgin Baylor (AA); LF Don Ogorek; RF Jerry Frizzell; LG Charley Brown; RG Jim Harney (individual letter ratings not reliably legible in the scan); Bench Grade, Defensive Grade and Coach John Costellani (2) also listed; Power Rating 82. The card labels mark the school/team name and the Power Rating.
12. Game Play
12.1 READING TEAM CARDS: The Team cards contain the individual ratings for the Final Four teams of the past three decades. The Team name and year are given at the top of each card. The team's starters at each of the five positions (Center, Left Forward, Right Forward, Left Guard, Right Guard) are listed next with their Offensive Rating to the right (ranging from "AA" for offensive superstars to "F" for poor scorers). The Offensive Rating is a measure of the player's scoring average for that team. The sixth rating, "Bench Grade", is a combined rating of all the team's non-starters. The next rating is a letter grade for Team Defense which varies from "A" (best) to "C" (worst) and determines the scoring chart used by the opposing team. The next rating is for Coaching (ratings run from "4" through "1"; "4" being the best). Finally, in the lower right corner of each card opposite the team nickname is its Power Rating which is used to determine seeding and as a quick reference to a team's overall ability (the higher the better).
12.2 PREPARE TO PLAY: Prior to each game, both Participants draw seven Strategy cards. The Team with the lower Power Rating takes the Underdog Strategy Display and gives the Favorite Strategy Display to his opponent. If they have equal Power Ratings, they roll to determine the Favorite. Each Participant places his Team card in the designated box of his Strategy Display. The game is then ready to begin.
12.3 THE CLOCK: Each Participant places a marker in the "20" box of the Clock on his Strategy Display. Each time he finishes his turn he moves his marker down one box to the next-lower-numbered box of the Clock on his Display. (The Clock shows the time remaining and, by the hand of the clock, the number of dice rolled that turn.)
12.4 SEQUENCE OF PLAY: Each game consists of two halves wherein each Participant will alternate turns playing, drawing, or withdrawing his Strategy cards, or revealing his opponent's played Strategy cards to affect the play of either his own or his opponent's team. The Underdog takes his turn first unless he leads at the start of the second half.
In each Player Turn, the Participant rolls the number of dice listed on the hand of the Clock for the current time remaining (i.e., five dice for 18-20 minutes, four dice for 15-17 minutes, three dice for 11-14 minutes, two dice for 6-10 minutes, and one die for 1-5 minutes). The white die must always be among those rolled. If the dice roll total exceeds the time remaining (the number in the marked box), AND the Position indicated by the white die roll has not yet been resolved, the Participant MUST use his turn to resolve the scoring for BOTH sides at the Position corresponding to that on the white die roll. He may not take any other action until that Position is resolved. If he wishes to use a free Move he must wait until after that Position's score has been resolved. Each Participant rolls the die for his own Player.
If the indicated Position's scoring has already been resolved for the period, the Participant must pick another Position to resolve OR do any of the following instead:
- Play a Strategy card in his Coaching Box or one of the unresolved Positions of his Strategy Display.
- Reveal an opponent's played face-down Strategy card without resolving it.
- Withdraw one of his own played Strategy cards from his Display back to his hand.
- Discard one of the Strategy cards in his hand and draw a replacement.
- Attempt to draw a new Strategy card by rolling a "5" or "6" with one die.
A Participant who has rolled less than or equal to the time remaining on the Clock must perform one of the five above options. A Participant may never resolve scoring for more than one Position per turn, nor for any Position if the Clock dice roll was less than or equal to the remaining time.
Play alternates between each Participant until all six Positions on the Strategy Display have been resolved or the time on the clock expires. If any Positions remain unresolved once time expires, they are resolved immediately without further use of turns.
12.4.1 DISCARDS: Whenever a Participant discards for a free replacement he does so face-up so his opponent can see the card he has removed.
12.5 PLAY OF STRATEGY CARDS: There are three types of Strategy cards: Offense, Defense, and Coaching. Each is distinguished by color or illustration. Most Offense cards are blue, and most Defense cards are red. Coaching cards are black. If a card could possibly affect all Positions, its illustration is black. If it can affect only its own Position, the illustration is red or blue. It is the owner's responsibility to reveal any face-down, played Offense or Defense card with a black illustration at another Position which can affect a Scoring dice roll BEFORE the dice roll. If he does not, the face-down card has no effect on that scoring dice roll.
12.5.1 COACHING CARDS: Coaching cards are played face-up in the gray Coaching Box of the Strategy Display. They affect the scoring of all Positions not previously resolved. Only one Coaching card can be in play per Team at a time. To change a played Coaching card, that Participant must use one turn to remove the current Coaching card and another turn to play the new Coaching card (unless he uses a Free Move; see 12.7). The effect of Coaching cards is cumulative. For example, if the SLOW TEMPO card (-1 drm) was played by one team and the RUN & GUN card (+2 drm) was played by the other team, the net result would be a +1 column shift on the Scoring Table for all Positions of both teams resolved while both of those cards are in play.
(Sample Coaching card: FULL COURT PRESS. All scoring die rolls of "3" or "4" for both sides are rerolled once unless voided by GOOD BALL HANDLING. Defensive Foul.)
12.5.2 OFFENSE CARDS: The blue Offense cards are played face-down on the Position of the Player whose score they will influence. Each Position may contain up to two cards at a time. Cards with a colored dot by the illustration matching the color of a particular Position(s) can be played only on Positions with a matching color on the Strategy Display. Those cards with no colored dots can be played on any Position (including the Bench).
(Sample Offense card: FAST BREAK. Gain points equal to a die roll. Voided by opposing CONTROLLING THE BOARDS at any Position.)
12.5.3 DEFENSE CARDS: The red Defense cards are played face-down on the Position of their own Strategy Display whose counterpart on the other team they will influence. For example, to hinder the opposing Center's score, play a Defense card on your own Center Position. Each Position may be affected by a maximum of one Defense card at a time on each Display (although the Position may also contain an effective Offense card). If two Defense cards are in play on the same Position when that Position is resolved, the opposing Participant may select which of the two will be in effect prior to the Scoring dice roll. Defense cards with a colored dot can be played only on Positions of the same color.
(Sample Defense card: BLOCKED SHOT. -2 drm. Defensive Foul. Goaltending: +1 drm to opposing Player's score instead of -2.)
12.5.4 MISTAKES: A Strategy card illegally played on a Position has no effect. The Participant may use one of his moves to withdraw it to his hand or leave it in its current Position with no effect other than counting as one of the two cards allowed in play at that Position.
12.6 SCORING: The Basic Game's Seeding Bonus does not apply. Both teams resolve their score simultaneously, one Position at a time, whenever a Participant or the Time Clock dice roll selects a Position to resolve. Each Participant must reveal all of his Strategy cards already played at that Position. If either Participant has a black-illustration card in play at another Position which will affect the selected Position, he may reveal it. Each Participant then rolls a die. The die roll is cross-indexed with the Offensive Rating of the Player at that Position on the appropriate Scoring Chart, as determined by the Defensive Rating of the opposing team. All Offense and Defense cards currently played at that Position ONLY are then discarded without replacement. Black-illustration cards that affected the score from another Position or the Coaching Box remain in play.
EXAMPLE: Indiana State (1979) is playing Michigan State (1979). The Left Forward Position is being resolved. No Strategy cards are in play. Indiana State rolls a "4" for Larry Bird which when cross-indexed with Bird's "AA" rating and Michigan State's "A" Defense yields a halftime score of 16 points for Bird. Michigan State rolls a "5" for Greg Kelser which when cross-indexed with Kelser's "B" rating and Indiana State's "B" Defense yields a halftime score of 12 for Kelser.
12.6.1 EFFECT OF STRATEGY CARDS: Scoring for a Position is modified by Offense cards played on that Position, by Defense cards played on the same Position of the opposing team's Display, by certain black-illustration cards which affect all Positions, or by Coaching cards played in the Coaching Box which affect all Positions resolved while the card is in play. The effect of a card may modify a die roll, void the beneficial effects of an opposing card, change the offensive rating of a player, or add points directly to the result obtained. Details of the specific effect of each card are summarized on the card, and a more detailed explanation for each card is provided in section 14. Those cards modifying a Scoring die roll always refer to "+" or "-" "drm" (Die Roll Modifier). All Strategy card modifications are cumulative. Results that modify die rolls to greater than "7" or less than "0" are treated as "7" and "0" respectively. Once the net score is determined, it is recorded on the Team's score sheet. This score is the number of points that Player scored in the period although it can be increased or reduced by fouls incurred simultaneously by/against the other Player at the same Position. Played Strategy cards are discarded without replacement after their Position has been resolved. The resolved Position is marked with a blank marker to signify that it is no longer in play during that period. Played Coaching cards remain in play to affect later Position resolutions until withdrawn. At the end of each period, any Coaching card currently in play is returned to the Coach's hand.
12.6.2 VOIDS: A Strategy card "voided" by another Strategy card loses its advantages only for the team on which it was played. Any disadvantage of the voided card, such as possible fouls to its own team still apply.
12.7 MOVES: In addition to his normal turn, each Participant may make a number of free "Moves" during his own turn equal to his Coaching rating per half. At the start of each half, place a marker in the box of the Coaching Moves Track of each Strategy Display equal to that Coach's rating. Move this marker down the Coaching Track one space each time the Participant uses one of his free Moves. A Participant may use only one free Move per turn but he may decide to use it even after seeing the results of his regular move for that turn. In a given turn, a Participant cannot take a free Move prior to resolving that turn's scoring resolution.
12.8 TIMEOUTS: Once per half, each Participant may call a Timeout (regardless of whether or not it is his turn) to force a reroll of all dice involved in any scoring resolution of any Position just resolved. Timeouts can be used not only to change the score, but also to change the result of a Foul incurred or not incurred by the preceding die roll. A Timeout can be called immediately after an opposing Timeout to force yet another reroll of the same scoring resolution even if there is no time remaining or Positions left to be resolved. However, once a subsequent move is made, a score cannot be changed.
12.9 FOUL TROUBLE: Many Strategy cards can result in a Player getting into foul trouble if the scoring resolution die roll is the same as that depicted in the Foul section of an applicable Strategy card. The card will always list whether the foul is offensive or defensive. A defensive foul is on a Participant's own Player as a result of his own Defense or Coaching card, or his opponent's Offense card. An offensive foul is on a Participant's Player due to his own Offense card or his opponent's Defense card. Die roll modifiers have no effect on fouls; only the number actually rolled on a Participant's own scoring die as applied to his Strategy card determines whether he or his opponent picks up a foul. A Player in foul trouble immediately has his Offensive rating reduced by one letter grade, thus affecting his scoring for that die roll and the rest of the game unless the Foul is removed by play of an appropriate Strategy card. To have no effect on the player's score during the period the foul was incurred, the foul would have to be immediately negated by an appropriate Strategy card already in play or an immediate reroll caused by a Timeout.
(Sample Offense card: SECOND SHOTS. +2 drm. Opposing FAST BREAK is doubled. Voided by opposing BOXING OUT at any Position. Offensive Foul: if the owner of this card rolls a "1", his Player at this Position receives a foul. Defensive Foul: if the owner of this card rolls a "6", his opponent's Player at this Position receives a foul.)
EXAMPLE: Back to our Michigan State-Indiana State game. The LF Position is being resolved again. Indiana State has a SECOND SHOTS Offense card played at the LF Position. Michigan State has a TAKING A CHARGE Defense played at the LF Position and a ZONE DEFENSE in the Coaching Box. Indiana State's Larry Bird rolls a "2", which is subject to a +2 drm for its SECOND SHOTS card and a -1 drm for the Michigan State ZONE DEFENSE for a total drm of +1 and a net die roll of "3". A "3" on the "A" Defense Table for an "AA" scorer results in Bird scoring 13 points. However, Michigan State's LF Greg Kelser has rolled a "4", resulting in an Offensive Foul on Bird due to the Michigan State TAKING A CHARGE Defense card. Consequently, Bird is in foul trouble and his rating drops a letter grade to "A", resulting in his scoring only 10 points for the period. Had Indiana State already been in a ZONE DEFENSE as well, they could have elected to remove Bird's foul instantly and retain his 13 points. Kelser's "4" on the "B" row of the "B" Defense Table nets him 11 points for the half.
12.9.1 FOULING OUT: Whenever a Player gets into foul trouble, place a Foul marker ("Foul +1" from the Basic Game) on his Position in the Strategy Display. If a Position accumulates two Foul markers, that Player has fouled out and is replaced by the Bench rating. Place a Bench marker ("3 x Bench" from the Basic Game) on that Position in the Strategy Display. That Position assumes the lesser of the current rating of the Bench or the disqualified player's original rating minus one letter grade, and the opposing Player at that Position gains a +1 drm. Put a marker on the Position with the new scoring rating written on it. This rating is not affected by fouls to the Bench Position, but can be reduced normally like any other Position with more fouls. When a player fouls out, the Bench rating for his Team's scoring is reduced by one letter grade. The Bench Position never fouls out. Its rating is reduced one letter grade for each foul marker it receives until the minimum rating of F is reached. If the Bench's rating is already "F", the Position opposing the Bench marker qualifies for an immediate Rating upgrade of one letter for the remainder of the game in addition to the +1 drm.
12.9.2 MULTIPLE FOULS: It is possible for a player to incur two fouls and foul out on a single die roll. For example, a die roll of "1" while playing both FULL COURT PRESS and ALTERED SHOT cards will result in two fouls on the defending player. If this happens to a player who already has a foul, the third foul generates no additional foul trouble for his replacement but does affect any CLUTCH FREE THROWS in play at the opposing Position. Otherwise, 12.9.1 applies. It is also possible for both players to gain fouls on the same dice roll due to the combined effects of different Strategy cards.
12.10 END OF GAME: All Strategy cards are returned to the deck after every game for a reshuffle. Each new game starts with a fresh deal of seven cards. Otherwise the deck is shuffled only after a Technical or if the entire deck has been used.
12.11 END OF HALF: Participants start the second half or Overtime periods with only those cards remaining in their hand from the previous half (including any played Coaching card in the Coaching Box).
12.12 OPPOSING YOURSELF: Eventually, a Participant will have two teams scheduled to play each other. When this occurs, it may be resolved in any of three ways. Prior to starting the tournament, the Participants should agree on the method to be used:
- A. SOLITAIRE: The Participant selects one of his teams to play and uses the Solitaire rules (15) to govern play of the other. The Participant controls the winner in the next round.
- B. ELIMINATION: The Participant selects one of his teams to retain and advances it to the next round. The other team is eliminated.
- C. SUBSTITUTION: The Participant selects one of his teams to retain and gives the other to the Participant with the fewest teams left in the tournament. Possession of the "gift" team can be either permanent or temporary as previously decided by the Participants.
Regardless of the method used, the owner must decide which team he will keep before being dealt the Strategy cards for his next game.
13. Overtime
If the score is tied after two halves or any Overtime period, a five-minute Overtime period is played. Play follows the normal procedure for a half with the following exceptions:
- The Clock is set at five minutes to start the Overtime period.
- Each Participant has half (fractions rounded up) of his normal number of Free Moves in each Overtime plus one Timeout.
- Team Defense ratings are not used. All scoring is resolved on the Overtime Scoring Table.
14. Strategy Card Tips
The following section may clarify the use of some cards as well as provide a few tips on how best to play them.
14.1 Coaching Cards (16)
Coaching cards affect all Positions resolved while the card is in play and unlike Offense/Defense cards are always played face-up. Unless stated otherwise on the card, once played they remain in play until withdrawn into the hand or the period ends. Defensive fouls incurred apply to the Position being resolved at the time. Because they can be used repeatedly, it rarely pays to hold two of the same Coaching cards.
14.1.1 TEMPO CARDS (4): The UPTEMPO GAME and RUN & GUN cards are best used when trailing or if you have the better scorers at the remaining Positions to be resolved. Similarly, the SLOW TEMPO and FOUR CORNER STALL are best used when leading or if your opponent has the better scorers at the remaining Positions. It usually doesn't pay to keep both of the "+" or "-" "tempo" cards, a discard for a replacement being more advantageous.
14.1.2 ZONE DEFENSE (2): The ZONE DEFENSE is among the most useful cards, but has many drawbacks and should seldom be employed before the Guard Positions have been resolved. A Coach with a Zone Defense should frequently use his turns to reveal his opponent's played Strategy cards, looking for BACK DOOR, ALLEY OOP, POST UP, and PICK & ROLL cards he can void or to search for THREE POINTER cards to avoid. Regardless of their presence or absence, a Participant may want to play a ZONE DEFENSE to protect a dominant scorer from foul trouble. A ZONE DEFENSE can void only one foul per period. A coach need not use its foul-removal ability if he prefers to save it for later use. However, once the last scoring Position has been resolved, the ZONE DEFENSE may no longer negate a foul if not already in play. Removing a foul restores the points that Player lost when he incurred the foul only if the ZONE DEFENSE was already in play when the foul occurred.
14.1.3 TIGHT MAN-TO-MAN (2): The only weakness of this defense is its tendency towards foul trouble. It is best used in combination with a good Bench or the KEY SIXTH MAN card to lessen the effects of any resulting foul trouble.
14.1.4 BOX & ONE (2): This defense is excellent against a top scorer with Offense cards already played on his Position or against the last Position to be resolved in a Period. Once the Position it is played against is resolved, it cannot be played again in the same period although it remains in play until withdrawn. The +1 drm to other Positions is applicable only while the Coaching card is in play.
14.1.5 HALFCOURT TRAP (1): An excellent defense against a team without GOOD BALL HANDLING or when played in combination with a KEY STEAL card. If the opponent plays GOOD BALL HANDLING, the "RG" Position should be resolved as soon as possible to remove it. It can also be voided by an opposing GREAT PASS at the resolved Position.
14.1.6 FULL COURT PRESS (2): This is a desperation defense used by a trailing team that needs to gamble to make up points in a hurry. The reroll function is limited to the action before any Timeout is called. A "3" or "4" rolled after a Timeout is not rerolled again for the FULL COURT PRESS.
14.1.7 TECHNICAL FOUL (2): Coaches inspire their team by animated gestures and "working the officials" as well as by making moves. After receiving a Technical they have to be more subdued or risk having a less competent assistant take over. The two points can be added to any Position, even one already resolved. The TECHNICAL FOUL card must be discarded without replacement immediately after use, but can only be played in an empty Coaching Box. For that reason, and also to ensure that the opponent loses as many Moves as possible, it is best played early. A TECHNICAL FOUL also causes the discard and draw piles to be reshuffled, enabling the possible re-entry of an already discarded card.
(Sample card: TECHNICAL FOUL. Add 2 points to score of any Position and reshuffle the deck. Opposing Coach loses 1 from Coaching Rating for rest of game. Discard after use.)
14.1.8 INJURY (1): This card can cut both ways and is therefore best used by an underdog or a team with a good Bench. If played, a die roll is immediately made to determine which team it affects. If the die is even, it will affect the Favorite; if odd, it will affect the Underdog. Another die roll is then made to determine the Position affected. Any Position can be affected, including those that have already been resolved. An injured Player's already recorded points are not reduced. An injured Player is removed for the rest of the game and replaced in the same manner as a Player who has fouled out. Injuries do not carry over from game to game so an injured Player whose team wins may return for the next game of the tournament.
14.2 Offense Cards (22)
Offense cards are used primarily to increase the score of the Player at the Position on which they are played, but some of them can influence more than one Position and/or get opposing Players in foul trouble (or less frequently, saddle one of their own Players with an offensive foul).
14.2.1 SUPER EFFORT (2): A card with no drawbacks although it can be nullified by a BOX & ONE. It is best played on an "A" shooter.
14.2.2 HOT SHOOTER (1): Nullified only by a BOX & ONE, it is best played on a poor shooter since the score isn't dependent on the quality of the player rating. A Timeout requires a reroll of the extra die roll along with that of the basic scoring dice roll at that Position.
14.2.3 ZONE VOIDS (4): The ALLEY OOP, PICK & ROLL, BACK DOOR, and POSTING UP are voided by a ZONE DEFENSE and may be worth withdrawing when it is played. Consequently, they usually shouldn't be played prematurely lest they be revealed by the opponent in time to play his ZONE DEFENSE. If your opponent has a ZONE DEFENSE you may want to discard these for a redraw unless you can use them to draw out his ZONE DEFENSE to setup THREE POINTERS for your Guards. The POSTING UP card is especially valuable to play against a high scoring guard to get him into foul trouble.
(Sample card: BACK DOOR. +1 drm. Voided by opposing ZONE DEFENSE.)
14.2.4 WORKING IT INSIDE (1): The main value of this card is not its +1 drm, but rather the opportunity to draw a foul against an opponent's high-scoring big man.
14.2.5 KEY SIXTH MAN (1): An invaluable card to safeguard any high scorer from foul trouble. It can even be used to nullify a second foul which would foul out that Player if played before the opponent takes another turn. Therefore, it might be worthwhile for a Participant to take a free Move after fouling out an opposing Player to prevent play of the card. Removing a foul does not restore points lost due to that foul unless the card was already in Position at the time of the foul. The card cannot be played at the start of a period to restore a Player who fouled out at the end of the preceding period.
14.2.6 CLUTCH FREE THROWS (2): If played on a Position whose opponent subsequently draws a foul during scoring resolution, that Player gains four points even if the foul is removed by a KEY 6TH MAN or ZONE DEFENSE. The bonus does not apply if the foul is voided by a reroll. Best played in conjunction with another card likely to draw a foul such as WORKING IT INSIDE or TAKING A CHARGE.
14.2.7 OFFENSIVE SPECIALIST (1): The value of this card is directly proportional to the quality of the Team's Bench rating. In general, play it on any Position whose rating is at least two less than the Bench's unless he happens to be guarded by a great scorer. Otherwise discard and draw a replacement. The opposing Player at the substituted Position always qualifies for an upgrade of one letter.
14.2.8 THREE POINTER (3): The perfect answer to a ZONE DEFENSE. The question is never IF to play it, but WHEN. Most effective on a "B" scorer.
14.2.9 FAST BREAK (2): Best used on a poor scorer. Either withdraw it if opponent is CONTROLLING THE BOARDS or resolve the offending Position to remove the CONTROLLING THE BOARDS card. Worth saving for the second half unless you discover an opposing SECOND SHOTS cards to exploit. If "doubled" by an opposing SECOND SHOTS at the same Position, roll two dice instead of one.
14.2.10 SECOND SHOTS (2): A potent Offense card, it can be burned by opposing FAST BREAKS at any Position or nullified by BOXING OUT. Revealing opposing cards is a must to enable you to withdraw it or decide which Positions to resolve first.
14.2.11 GREAT PASS (2): Forget the +1 drm. The real value of this card is the protection it affords you from an opposing DOUBLE TEAM or HALFCOURT TRAP. Save it to counter those plays.
14.2.12 GOOD BALL HANDLING (1): The only Offense card that does not add points on its own. It is used strictly as a counter to Defense cards. It is often a good idea to reveal opposing "RG" plays looking for "Key Steal" before playing it.
14.3 Defense Cards (22)
Defense cards are used primarily to decrease the score of the opposing player at the Position on which they are played. Some can influence more than one Position and/or get opponents in foul trouble, although most Defense cards are more likely to result in defensive fouls against the player on which they are played. Consequently, Participants must constantly weigh whether their benefits outweigh the risks to the player on which they are played.
14.3.1 DUAL NEGATIVE DRM (2): The DOGGING OPPONENT and DEFENSIVE INTENSITY cards penalize the scoring of both Players at the Position. This can be useful if you are guarding a good scorer with a poor one or protecting a lead. Otherwise, it is usually not worth the associated foul risk to your own Player.
14.3.2 TAKING A CHARGE (2): This is the best way to permanently nullify an opposing scorer, albeit a risky one which can backfire. It is best played early unless you prefer to wait for your opponent to burn his Timeouts first or you are hoping to find an opposing FAST BREAK or POST UP to increase your odds of a favorable foul outcome.
14.3.3 ALTERED SHOT (3): The opposing Player suffers a -1 drm with little downside risk.
14.3.4 BLOCKED SHOT (3): The payoff increases but so does the foul risk. In addition, if your Player rolls a "6", he is called for goaltending and loses the -2 drm to the opponent who gains a +1 drm instead.
14.3.5 PRESSURE DEFENSE (2): This is best used against an opposing top scorer if you can afford a foul.
14.3.6 CONTROLLING THE BOARDS (2): This voids opposing FAST BREAK at any Position while the card is in play. It also reduces an opposing SECOND SHOTS drm at any Position from +2 to +1.
14.3.7 BOXING OUT (2): This voids opposing SECOND SHOTS cards at any Position while it is in play. Like the previous card, it often pays to spend some moves revealing what your opponent is up to before you play it.
14.3.8 KEY STEAL (2): This card not only subtracts one from the die roll of your opponent, but also adds one to the die roll of your own Player, albeit at high foul risk. Normally one should play "+ drm" cards on his best shooters, but the voiding effect of this card on GOOD BALL HANDLING suggests it be played often on the "RG" Position to nullify that card if there is any doubt about who has it.
14.3.9 FORCING TURNOVERS (2): It always pays to reveal the opponent's "RG" plays when you have this card because if he has played GOOD BALL HANDLING, playing this card will incur a foul risk for no gain.
14.3.10 DOUBLE TEAM (2): The best defense against a great scorer, but it usually should not be used against a "C" or worse-rated shooter because his teammate stands to gain more than the shooter loses. The teammate gain, which occurs only when the Double Team Position is resolved, can be added to any already-resolved score at that Position or simply noted and added to its score when resolved later. Always withdraw it immediately if you reveal a GREAT PASS at the same Position.
15. Solitaire Play
Solitaire play is handled as in a two-Participant game except that all cards are played face-up on the Strategy Display. The following changes also apply:
15.1 PREPARATION: To compensate for the random play of a Solitaire opponent, the Solitaire team may draw additional cards equal to its Coaching rating prior to each half. A Solitaire team with a "4" Coaching rating thus starts with 11 Strategy cards.
15.2 SCORING RESOLUTION: The Solitaire team will always pick a Position to resolve if the Clock dice roll permits it. Continue to roll the white die until it selects a Position that has not yet been resolved. [Note: For more challenging solitaire play, always select a Position to be resolved that is in the Solitaire team's best interests.] Otherwise, it always plays a card randomly from its hand unless it has none left (in which case it will roll instead in an attempt to draw a new card).
15.3 STRATEGY CARDS: When playing a Solitaire team, all Strategy cards are played face-up. The Solitaire team's cards are drawn randomly. If they can be played on more than one Position, they are always played on the opposing team's best scorer yet to be resolved if Defensive, or on their own best scorer yet to be resolved if Offensive. [Exception: The OFFENSIVE SPECIALIST card is played on the Solitaire team's worst scorer yet to be resolved, and only if the Solitaire team's Bench rating is better than that of both Players at that Position. Otherwise, it is discarded.] If a Coaching card is drawn, it automatically replaces any previously-played Coaching card which is discarded and replaced at the bottom of the Solitaire hand by a newly drawn card. If a played Strategy card exceeds the limit of effective plays at a Position, it is moved to the next best Position where the card can be legally played. If none exists, it is discarded and a replacement is drawn for the Solitaire Team's hand and placed at the bottom of his hand. [Exception: If one of the Solitaire team's cards in play is voided by an opposing card in play, the Solitaire team will replace its card with the newly drawn card if played at that Position. The voided card may be discarded and replaced at the bottom of the Solitaire hand as part of the same move.]
15.4 MOVES/TIMEOUTS: The Solitaire team gets Timeouts equal to its Coaching Rating. They are used to reroll any Scoring dice roll in which the opponent's dice roll is three or more greater than its own, or in which one of its Players gets into foul trouble. It may not call two Timeouts for the same Position resolution. It also calls a Timeout automatically at the end of a game if it will otherwise lose. [EXCEPTIONS: A Solitaire Team won't call Timeout if it has already won the game, or if the offending dice roll resulted in a foul on a better-rated opposing Player.]
15.5 END OF PERIOD: Should the Solitaire team have a Coaching card in play at the end of a half or Overtime, it is shuffled back into the Solitaire hand.
16. Rating Your Own Teams
16.1 INFORMATION: MARCH MADNESS allows players to rate their own favorite college teams to play against each other or those provided in the game. All that is required to rate a team is a copy of a team's season's statistics, the team's comparative rating in any popular team Power Rating system (such as the Saragin Rating printed weekly in USA TODAY), and the charts below.
16.2 PLAYER RATINGS: Individual offensive ratings are assigned to each starting player, and an aggregate Bench rating is assigned to all non-starters collectively. If you are unsure which players started, use the player with the most minutes played at each position, or the most field goal attempts if other stats aren't available. For starters, apply the player's scoring average to the Position Rating Table. For the Bench, add the scoring average of all starters and subtract the total from the team's average score.
Position Rating Table
| Letter Rating | Average Points Per Game |
|---|---|
| AA | 27+ |
| A | 22.5-26.9 |
| B | 17.0-22.4 |
| C | 13.0-16.9 |
| D | 9.0-12.9 |
| E | 6.5-8.9 |
| F | 0-6.4 |
16.21 POSITION RATING ADJUSTMENT: For teams which are in the bottom 25% of a comparative Power Rating system, a downgrading of one letter grade for all positions should be made. Thus a Forward who averaged 24 points a game for a low rated team would be given a B rating rather than an A rating.
16.3 TEAM DEFENSE RATING: All teams start with a basic Defense rating of B. For certain teams, upward adjustment to an A rating or downward adjustment to C is made, as follows:
- Teams which outscored their opponents by an average of 15 or more points per game, AND which held their opponents to an average of 74 or less points, are rated "A".
- Teams which held their opponents to an average of 64 or fewer points, AND won over 75% of their games played, are rated "A".
- Teams which allowed their opponents to score an average of 74 or more points, AND did not outscore them by 15 or more points per game, are rated "C".
- Teams which were outscored on average by their opponents are rated "C".
16.31 DEFENSE RATING ADJUSTMENT: When teams have widely divergent schedule strengths, any team which is in the lower half of a comparative Power Rating system should be downgraded by one letter on defense.
16.4 COACHING RATING: The Coaching rating is naturally the most subjective, covering as it does, not only a coach's performance and skill, given the talent with which he is working, but the team's "heart", its ability to win in tournament play, and its cohesion. As a starting point, a coach with a good Career win-loss record and several years with a program should be a "3", while a new, but successful, coach or an old pro in the twilight of his career would probably be a "2". Most coaches will fall into one of those two categories. The "4" rating is reserved for the upper echelon, and is earned only by coaches who have demonstrated a consistent ability to put together a Top 20 nationally rated team over the years regardless of year-to-year talent. Few coaches should be given a "1" rating which is intended for those with consistently weak programs.
16.5 POWER RATING: The Team Power Rating is the last rating to be determined, and is simply a mathematical sum of the previous ratings using the point values on the following chart.
Team Power Rating Table
| Position | Points |
|---|---|
| AA | 31 |
| A | 25 |
| B | 19 |
| C | 15 |
| D | 11 |
| E | 7 |
| F | 5 |
| Team Defense | Points |
|---|---|
| A | 12 |
| B | 0 |
| C | -12 |
| Coaching | Points |
|---|---|
| 4 | 4 |
| 3 | 2 |
| 2 | 0 |
| 1 | -2 |
16.6 INTANGIBLES: No rating system is perfect, and this is particularly true in college basketball where comparable statistics are often hard to come by and strength of schedule and playing styles can make an enormous difference. The above standards are just guidelines . . . if you feel a team deserves better or worse treatment . . . do so. Handicapping is part of the fun.
1989 Tournament Field (Seeds)
Seed: team, listed by Region.
Midwest: 1 Illinois; 2 Syracuse; 3 Missouri; 4 Louisville; 5 Arkansas; 6 Georgia Tech; 7 Florida; 8 Pittsburgh; 9 Ball State; 10 Colorado State; 11 Texas; 12 Loyola Marymount; 13 Ark.-Little Rock; 14 Creighton; 15 Bucknell; 16 McNeese State.
Southeast: 1 Oklahoma; 2 North Carolina; 3 Michigan; 4 Florida State; 5 Virginia; 6 Alabama; 7 UCLA; 8 La Salle; 9 Louisiana Tech.; 10 Iowa State; 11 South Alabama; 12 Providence; 13 Mid. Tenn. St.; 14 Xavier; 15 Southern U.; 16 E. Tennessee St.
East: 1 Georgetown; 2 Duke; 3 Stanford; 4 Iowa; 5 N. Carolina St.; 6 Kansas State; 7 West Virginia; 8 Vanderbilt; 9 Notre Dame; 10 Tennessee; 11 Minnesota; 12 South Carolina; 13 Rutgers; 14 Siena; 15 S. Carolina St.; 16 Princeton.
West: 1 Arizona; 2 Indiana; 3 Seton Hall; 4 UNLV; 5 Memphis State; 6 Oregon State; 7 Texas-El Paso; 8 St. Mary's, Calif.; 9 Clemson; 10 LSU; 11 Evansville; 12 De Paul; 13 Idaho; 14 SW Missouri St.; 15 George Mason; 16 Robert Morris.