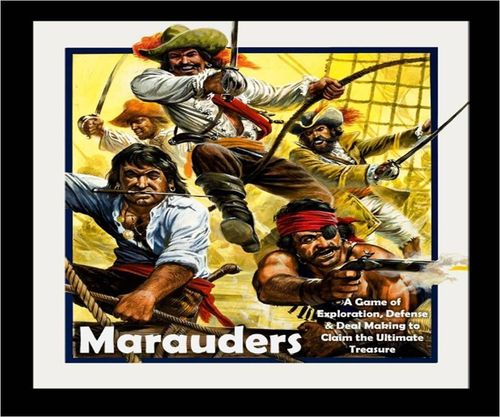
Marauders
Marauders Rulebook
Table of Contents
Table of Contents
- Game Setup
- Game Overview
- How the Clue Cards Narrow Down the Location of the Artifact
- Winning the Game
- Game Play
- A Player's Turn
- Rolling the Dice (to Collect Jewel and Resource Cards from Chests)
- Using Scouts, Key Cards & Guards to Open Additional Treasure Chests
- Using Jewel Cards (& Chests) to Unlock the Clues and Find the Artifact
- Resource Cards
- Trading Key, Resource and Jewel Cards
- Shortcut For Unlocking Clues: Form Pacts With Other Players!
- Form An Alliance Against Another Player
- Last But Not Least: Build A Stash To Unlock & Recover the Artifact
- Some Parting Words of Advice
Game Setup
- Assemble the 8 pieces that make up the outer (shoreline) portion of the Island. The pieces can be assembled in any order.
- Randomly lay out the 16 large Terrain Tiles that make up the inner portion of the Island. The order and orientation of the Tiles can be completely random, making the game different every time you play. If this is your first time playing, use a setup similar to the one shown in the guide, with similar Terrain Tiles grouped next to each other in the four corners of the Island. Also note that rivers are navigable during the game; the more rivers that are connected the easier the game will be.
- Randomly lay out the 16 Treasure Chests face down. No one should know what is on the other sides of the Chests. There are 3 Silver Chests, 3 Gold Chests, 3 Emerald Chests, 3 Ruby Chests and 3 Diamond Chests, each with 1 of 3 color Keys: Red, Yellow or Blue. A final "Wild" Chest contains all the Jewels and Keys.
- Shuffle the Key Cards and place them in a pile face down near the game area. The deck contains equal numbers of Red, Blue and Yellow Keys (8 each) and 4 Brown (Wooden) Keys.
- Shuffle the Resource Cards and place them in a pile face down near the game area.
- Separate the Jewel Cards into 6 separate piles (1 Terrain Card, 10 Silver Cards, 10 Gold Cards, 10 Emerald Cards, 10 Ruby Cards, 10 Diamond Cards) and place the piles face up in the order shown near the game area. These 6 piles are called "The Vault".
- Place the 3 Dice in the game area.
- Each Player selects a Player color (red, blue, yellow or green), takes the corresponding playing pieces (2 Scouts, 4 Guards, 6 Markers, 2 Marauders Cards), and selects one of the four corners of the Island as his or her home port (youngest player selects a home port first, followed by next oldest, and so on).
- Each Player receives 3 random Key Cards and 2 random Resource Cards (drawn from the tops of the shuffled piles). Players do not show each other their Cards.
- Finally, select 6 of the 12 Clue Cards and place the Cards face down next to the Cards in the Vault. Separate the 12 Clue Cards into 5 sets as shown in the guide. The guide's set diagram lists the Clue Card faces as follows: Set 1: Mountain, Forest, Grassland, Desert. Set 2: Pond, Lake. Set 3: Bear, Turtle. Set 4: Boulder, Cave. Set 5: Marauder, Marauder.
Turn each set face down and randomly select 1 Card from each of the first four sets, and BOTH Cards from the 5th set, for a total of 6 Cards. No one should know any of the values on any of the selected or the unselected Cards. Shuffle the 6 selected Cards and place them face down in the game area directly above each Card in the Vault as shown. Remove the 6 unselected Cards from the game area (making sure no one sees them).
You are ready to play!
The guide's setup diagram (the layout of the Island, Vault and card piles) is an image and is not reproduced here.
The 6 Clue Cards in the Vault are: Terrain Clue, Silver Clue, Gold Clue, Emerald Clue, Ruby Clue, Diamond Clue.
Game Overview
You and your team of explorers have just arrived on the shore of a distant Island. Your team consists of you (the Captain), 2 Scouts and 4 Guards. The Island is made up of mountains, grasslands, forests, deserts, rivers, lakes, ponds and more. The Island is also full of valuable treasure: silver, gold, emeralds, rubies, and diamonds, locked inside 16 treasure chests. But you are searching for something else: an ancient artifact, rumored to be buried somewhere on the Island, and worth more than all the other treasure combined.
The artifact is buried under one of the 32 small, red "x"s spread throughout the Island. Your task is to unlock a series of 6 Clues which, taken together, narrow down the possible locations until only 1 remains. To unlock the Clues, you will send your Scouts and Guards into the Island to gather resources, open treasure chests, and collect the jewels inside. The jewels, when collected in the right combinations, unlock the Clues that reveal the location of the artifact.
However, it won't be quite that easy. Other explorers are also on the Island, and they intend to find the artifact before you do. Because there are limited resources on the Island, it will soon become apparent that to win, you will need help from other players. What will your strategy be? Should you steal what you need, and possibly make enemies? Should you trade, and create allies? Perhaps you can bluff an opponent into giving you what you need? If all else fails, you might even need to stab a trusted friend in the back...
As each Player comes closer to finding the artifact, a frenzied race will ensue, and you'll be surprised at what you're willing to do to win. The first Player to find and recover the artifact wins the game!
How the Clue Cards Narrow Down the Location of the Artifact
During game set up, you randomly selected 6 Clue Cards from 5 sets of Clues. Each set of clues narrows down the possible locations of the Artifact:
- The first set determines the Terrain that holds the Artifact: mountain, grassland, forest or desert.
- The second set determines the type of water near where the Artifact is buried: a lake or a pond.
- The third set determines the shape of the lake or pond near where the Artifact is buried: a bear or turtle (notice that both lakes and ponds have these shapes on the game board).
- The fourth set determines whether the Artifact is buried under a boulder or in a cave.
- The fifth set (Marauders Clues) are dead ends. They mean nothing, except that you have wasted your time going after them.
Note that the Artifact will always be buried under a boulder or in a cave. You need to determine which one, along with the other nearby landscape features. Also note that only 4 of the 6 clues are actually required to solve the game. If you are lucky, you may not have to waste any time going after the dead end clues!
Example solution (remember that the clues may appear in any order during the game, as they are randomly shuffled before being placed in the game area. The order below is for simplicity): If the clue set was (example Clue Cards shown in the guide), then the Artifact is buried in the forest, near a lake shaped like a turtle, under a boulder, and the correct location on the Island is (example location shown in the guide).
The example Clue Cards and example Island location in the guide are images and are not reproduced here.
Winning the Game
The game is won by the first Player to:
- Unlock all 4 required Clues. (Players may not "guess" where the Artifact is! Each Player must find and unlock all 4 necessary Clues.)
- Move a Scout onto the correct "x", and simultaneously display the 8 Cards needed to unlock and recover the Artifact. The 8 cards are: 1 of each key (Red, Yellow, Blue) and 1 of each Jewel (Silver, Gold, Emerald, Ruby, Diamond). A Player may not occupy the correct "x" until the Player has collected these 8 Cards! (The Cards are accumulated in each Player's stash during the game.)
The guide's win illustration (a "has won!" callout over an example board) is an image and is not reproduced here.
Game Play
All Players arrive on the Island simultaneously and open and guard up to 3 initial Treasure Chests!
- Each Player picks up the 4 Treasure Chests nearest to his or her home port and privately looks underneath to see the color Key associated with each Chest.
- If the Player has a Key Card (each player begins the game with 3 random Key Cards) that matches the color Key on the underside of a Chest, the Player discards that Key Card, places the Chest back on the Island face up, and places a Guard on top of the Chest. (Each Key Card opens only 1 Chest.)
- Each Player tries to open as many of the 4 Chests as possible.
- Players may trade Key Cards with each other.
(The guide shows each Player looking at the 4 Treasure Chests nearest to that Player's home port and opening as many as 3 of them.)
After Players have opened and guarded their initial Treasure Chests, the game begins. Each Player takes consecutive "turns" until a Player has recovered the artifact and won the game! To determine who goes first, each Player rolls one of the dice with jewels on it: highest value is the Marauder (skull and crossbones) symbol, followed by Diamond, Ruby, Emerald, Gold and Silver. After the first Player has taken a turn, play continues clockwise to the each Player's left.
A Player's Turn
A Player's turn has 3 parts:
- Player rolls Dice (and ALL Players collect Jewel or Resource Cards from the corresponding Chests; see Rolling the Dice below).
- Player moves a Scout 3 spaces OR selects a new Key Card (from the Key Card pile).
- Player uses, trades or Stashes any Cards desired (Key, Jewel, Resource or Marauders Cards).
Parts 2 and 3 of a Player's turn may be combined (example: a Player can use Cards first, then move a Scout, or move a Scout 1 space, use a Card, and move the Scout the other 2 spaces). Players may split the 3 moves between their 2 Scouts. A Player may also play as many Cards as desired and in any order desired. Cards not played on a particular turn remain with the Player to be used on subsequent turns.
Rolling the Dice (to Collect Jewel and Resource Cards from Chests)
Each Player begins his or her turn by rolling all 3 Dice. The Dice allow Players to collect Jewel and Resource Cards, depending on which Treasure Chests each Player is guarding. All Players are subject to the outcome of a particular roll of the Dice, regardless of whose turn it is. You collect Cards even when it is not your turn!
There are 10 of each type of Jewel Card in the game. If the Vault runs out of a particular type of Jewel Card during the game, no one collects that Jewel until the Vault is replenished (by Players trading Jewels in at the Vault for Clue or other Cards). If there are some Jewels but not enough for everyone, the Player guarding the "Wild" Chest collects first (if Jewels are earned by that Player), then everyone else.
(Only 4 different types of rolls are possible; you will memorize this table after a few turns.)
Two different jewels and a key (example roll: a Diamond, a Yellow Key and an Emerald). Find the 2 matching Treasure Chests (if they are open). The Player who is guarding the Diamond Chest receives two corresponding Jewel Cards (Diamond) from the Vault. The Player who is guarding the Emerald Chest receives two corresponding Jewel Cards (Emerald) from the Vault.
Two of the same jewel and a key (example roll: a Ruby, a Blue Key and a Ruby). Find the 1 matching Treasure Chest (if open): the Player who is guarding this Chest receives three corresponding Jewel Cards (Ruby) from the Vault. Also find the "Wild" Chest (if open): the Player who is guarding this Chest receives three corresponding Jewel Cards from the Vault. ALL Players receive one Resource Card (regardless of who is guarding Chests). The Player whose turn it is draws a Card first from the top of the pile, followed by the Player to the left and so on.
One jewel, marauder, key (example roll: a Gold, a Marauder and a Red Key). The Player who is guarding the 1 matching Treasure Chest receives two corresponding Jewel Cards (Gold) from the Vault.
Double marauders (example roll: a Marauder, a Blue Key and a Marauder). EARTHQUAKE! The 2 jewel Dice are rerolled. The 2 corresponding Chests, if open, are closed (Guards are removed and Chests are turned face down) AND All Players who possess any corresponding Jewel Cards lose those Cards back to the Vault.
(The guide's roll table shows example dice faces and Chest icons for each of these four rolls; the dice faces are illustrated only.)
Using Scouts, Key Cards & Guards to Open Additional Treasure Chests
(To collect more Jewel and Resource Cards when Dice are rolled.)
Moving Scouts: Players use their Scouts to explore the Island and reach unopened Treasure Chests. In general, Players move Scouts 3 spaces per turn (some Resource Cards allow more spaces). Scouts enter the Island through any of the 8 ports (black squares) around the perimeter of the Island. Each small gray square on the Island is a space moved. Early in the game, Players will primarily want to move their Scouts toward unopened Treasure Chests. When a Player's Scout reaches any one of the four keyholes surrounding an unopened Treasure Chest, the Player picks the Chest up and looks underneath to see the type of jewel contained in the Chest and the color Key (red, yellow, or blue) required to open it. Scouts may not move diagonally, but may cross rivers and bodies of water. Scouts may return to any port during the game and "sail" to another port (sailing counts as 1 space moved). If a Player has opened a Treasure Chest, his or her Scout may enter one keyhole and exit another keyhole on the same Chest (allows Players to move around the Island faster). A Player does not need to use all 3 moves on a given turn, but forfeits any unused moves.
Opening & Guarding Treasure Chests: If a Player's Scout has reached an unopened Treasure Chest, the Player picks the Chest up and looks to see what color Key Card opens the Chest. If the Player has the matching color Key Card and wants to open the Chest, the Player discards the Key Card, replaces the Chest on the Island face up, and places one of his or her Guards on top. If the Player cannot or does not want to open the Chest, it is replaced on the Island face down, and is available for other Players to open.
Notes: a Brown, or Wooden, key is a master key and opens any Chest on the Island. The "Wild" Treasure Chest requires all 3 keys to open (a red, blue AND yellow key) or 1 Wooden key. Each Player has 4 Guards. If a Player is already guarding 4 chests but wants to Guard another Chest, the Player must choose one of his or her current Chests to close (remove the Guard, turn Chest face down) and place the newly freed Guard on the newly opened Chest (the Chest that was closed is now available for other Players to reopen).
Key Card pile: On a Player's turn, rather than moving a Scout 3 spaces, the Player may instead select a new Key Card (this is the most common way to collect Key Cards). If the Key Card pile runs out during the game, the discard pile is shuffled and reused.
The Scout, Key Card and Guard actions are summarized in the guide as a sequence: move a Scout onto a keyhole surrounding an unopened Chest, look under the Chest to see the color Key needed to open it; discard the matching color Key Card; place the Chest back on the Island face up; place a Guard on top of the Chest.
Using Jewel Cards (& Chests) to Unlock the Clues and Find the Artifact
Ultimately, your goal is to unlock the 4 Clues that narrow down which "x" on the Island contains the Artifact (there are 6 Clues in all, 2 are dead ends). Each Clue requires a different combination of jewels or guarded Treasure Chests to be opened:
- Terrain Clue: To unlock this Clue, open & guard 3 Treasure Chests on the same Terrain at the same time.
- Silver, Gold, Emerald, Ruby and Diamond Clues: Each of these 5 Clues is unlocked with 3 of the corresponding Jewel Cards. For example, it takes 3 Silver Cards to unlock the Silver Clue.
When a Player has collected the 3 appropriate Jewel Cards, he or she deposits the Cards back into the Vault and looks at the Clue Card. When a player unlocks a Clue, he or she picks the Clue Card up, being sure no one else can see it, looks at the Clue, then replaces the Clue Card face down. The Player places one of his or her Markers near the Clue to indicate it has been unlocked by that Player. Players may look at any of their previously unlocked clues at any time during the game. (The 6 Clue Cards always remain face down, even if all Players have unlocked a particular Clue. 4 of the Clues show where the artifact is buried; the other 2 Clues are dead ends.)
Example: Both Yellow and Blue have unlocked this Clue (Yellow has opened 3 Chests in the mountains; Blue has opened 3 Chests in the grasslands). The beginner setup makes it especially easy for each Player to unlock this Clue, since all Terrain areas are grouped together.
Resource Cards
Resource Cards help Players move through the Island, increase production of Treasure Chests, steal Chests and Jewels from other Players, and even unlock Clues! Except as noted, Resource Cards are discarded after use. If the Resource Card pile runs out during the game, the discard pile is shuffled and reused.
- Horse (x5): Move Scout(s) 10 additional spaces on your turn.
- Canoe (x6): Move a Scout between any 2 canoe ports that are connected by a river. Canoe ports are the 14 black outlined squares on the board.
- Sword (x4): Steal all of any particular jewel of your choice from an opponent of your choice.
- Mine Cart (x3): Place under one of your guarded Chests. Collect an additional jewel when Dice are rolled (instead of collecting 2 jewels, collect 3). A Player may "reassign" a Mine Cart to any guarded Chest during the game, but watch out for cannons!
- Cannon (x6): Removes a Guard (and mine cart if in play) from any Chest of your choice (return Guard to Player, put mine cart in discard pile, turn Chest face down). Chest can be reopened by a player with the correct key!
- Fortress (x3): Place under one of your guarded Chests. Protects against the first cannon from another Player (first cannon removes the fortress, but the Guard, and mine cart if in play, remain on the board). Also protects against earthquakes (earthquakes have no effect on a Chest protected by a fortress). Fortresses may not be repositioned!
- Poison (x1): Give this Card to a Player of your choice; that Player loses a turn.
- Spyglass (x3): Unlock any Clue of your choice (and place one of your Markers near the Clue after you have looked at it).
Trading Key, Resource and Jewel Cards
Players may trade Cards with the Vault or other Players on their turns. Trading is usually necessary, since it is difficult for any single Player to independently collect the various Cards needed to win the game.
Trading with the Vault:
- A Player may trade any 3 of the same Card for any other Card (example: 3 Rubies for 1 Gold, 3 Yellow Keys for a Resource Card, etc.).
- A Player may trade any 5 Cards for any other Card (example: 2 Emeralds, 1 Blue Key, and 2 Resource Cards for 1 Diamond, etc.).
- (If trading for a Key or Resource Card, the new Card is drawn at random from the top of the pile.)
Trading with other Players:
- Any trade is legal as long as both parties agree to the trade and at least one Card is traded by both Players (may not give Cards away).
Shortcut For Unlocking Clues: Form Pacts With Other Players!
At certain points in the game, particularly near the end, Players will find it necessary to directly trade unlocked Clues with each other. For example, if Player 1 has unlocked the Emerald Clue but not the Ruby Clue, and Player 2 has unlocked the Ruby Clue but not the Emerald Clue, Player 1 may offer to trade the Emerald Clue in exchange for the Ruby Clue. However, Clues are valuable, and the Players must use the Marauders Cards to execute the trade, which puts both Players at risk for being stabbed in the back!
On a Player's turn, after outlining the proposed trade with another Player, the two Players each select one of their Marauders cards (the Handshake or the Marauder symbol) and place the selected Cards face down on the table (the Players may not show each other what Card they have selected, but they can try to convince each other they have been honorable). The two Cards are then turned face up. If:
- Both Cards are a Handshake: The trade takes place as outlined (each Player looks at the Clue he or she did not have and places one of his or her markers near the Clue).
- One Card is a handshake and the other is a Marauder: The Player who played the Marauder has backstabbed the Player with the Handshake! The Marauder Player receives the clue in the trade, while the Handshake Player does not!
- Both Cards are Marauders: Both Players have backstabbed each other! The trade does not take place (and be assured, each of you will remember what just happened, which will influence future trades).
Players may trade unlocked Clues for other Cards (for example, toward the end of the game, a Player may be willing to trade a Clue for a couple of Key or Jewel Cards to complete his or her Stash). However, any time a trade involves a Clue Card, the Marauders Cards must be used to execute the trade!
Form An Alliance Against Another Player
The Marauders Cards have a second, more malicious, use: 2 Players may form an alliance against a 3rd Player! Because this type of alliance is particularly nasty, each Player may participate in this type of alliance only once during the game, so use it wisely. On a Player's turn, he or she proposes an alliance WITH a 2nd Player AGAINST a 3rd Player. If the 2nd Player agrees to participate, the 1st and 2nd Players each select one of their Marauders Cards and place them face down on the table (both Players are now ineligible to participate in any future alliances). The Cards are then turned face up. If:
- Both Cards are a Handshake: the alliance is honored and the 3rd Player loses all his or her Cards back to the Vault and discard piles! (Cards in the Player's Stash are safe.)
- One Card is a handshake and the other is a Marauder: the alliance is dishonored, and the Player who played the Handshake loses all his or her Cards (except Cards in his or her Stash) TO THE PLAYER WHO PLAYED THE MARAUDER CARD! The Player who the alliance was against is unaffected.
- Both Cards are Marauders: the alliance is dishonored, and both Players lose all their cards back to the Vault and discard piles (cards in each Player's stashes are safe). The Player who the alliance was against is unaffected.
Last But Not Least: Build A Stash To Unlock & Recover the Artifact
After a Player has unlocked all the Clues and discovered the location of the Artifact, the Player must move one of his or her Scouts onto the correct "x" to win the game. However, before a Player can move a Scout onto the correct "x", the Player must possess the 8 Cards required to recover the artifact: 3 Key Cards (1 Yellow, 1 Red, 1 Blue... Brown may not be used!) and 5 Jewel Cards (1 Silver, 1 Gold, 1 Emerald, 1 Ruby, 1 Diamond). Players build this reserve during the game by "stashing" Cards in a safe place, usually under the corner of the game board nearest to the Player. Stashed Cards are protected from earthquakes, swords and Marauders Cards. A Player's Stash may be concealed from other Players. A Player may only stash Cards on his or her turn and must inform the other Players that a Card is being put in his or her Stash. Once a Card is stashed, it remains there and MAY NOT BE USED UNTIL THE VERY END OF THE GAME, and only for the purpose of unlocking and recovering the Artifact.
Some Parting Words of Advice
There's nothing worse than jumping into a game, only to find out halfway through that you have no chance of winning. This game was designed specifically so that does not happen. You always have a chance to win! Focus on unlocking Clues other Players don't have...that's how you gain the ultimate leverage in this game. It's entirely possible to go from having 1 Clue on one turn, to having all 6 Clues within a few more turns. Become expert at using Pacts and Alliances! Finally: be careful what you say and how you react during the game. You'll be surprised how easy it is to unintentionally give information away.
The guide's closing line pointing to the publisher's website for strategy hints, video tutorial and updated rules is omitted here as marketing text. The guide's 1st Edition text is transcribed as printed.