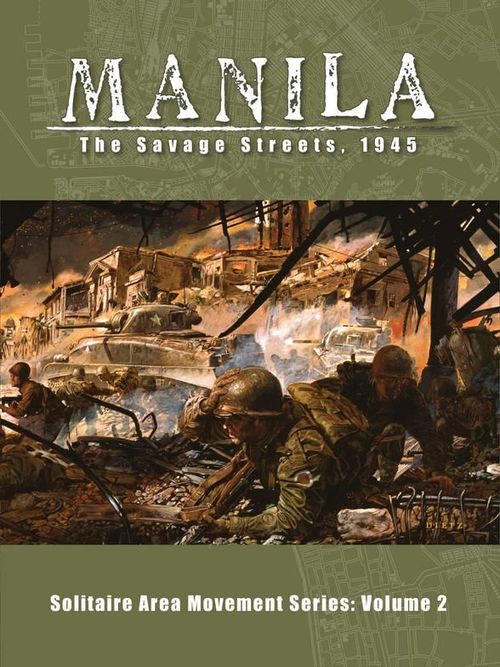
Manila: The Savage Streets, 1945
Manila: The Savage Streets, 1945 Rulebook
Table of Contents
Table of Contents
- 1.0 Introduction
- 2.0 Components
- 3.0 The Map
- 4.0 Playing Pieces
- 5.0 Prepare for Play
- 6.0 Sequence of Play
- 7.0 Stacking and Control
- 8.0 Movement
- 9.0 Combat
- 10.0 Victory Conditions
- 11.0 Optional Rules
- 12.0 Photo Gallery
- 13.0 Example of Play
- 14.0 History and Suggested Reading
- 15.0 Game Strategy
- 16.0 Index and Glossary
- Japanese Opening Setup Checklist
1.0 Introduction
In reading these rules, if any capitalized term or abbreviation confuses you, refer to the index and glossary at the end of this rulebook. The numerical references found therein and throughout these rules should be ignored during the first reading and used only later to refer to related sections for greater clarity.
2.0 Components
MANILA: THE SAVAGE STREETS, 1945 includes the following components:
- One 17" by 22" mounted map
- One sheet of 5/8" die-cut counters
- One Player Aid Card
- This rule booklet
- Seven six-sided dice (3 red and 4 green)
2.1 Dice
Throughout the rules "1d6" signifies the roll of a single die, while "2d6" signifies the sum of two dice rolled together, "3d6" signifies the sum of three dice rolled together, and "4d6" signifies the sum of four dice rolled together.
3.0 The Map
The map depicts the city of Manila where combat took place between February 6 and March 4, 1945. The scale is approximately 1 inch = slightly more than 1,000 yards.
3.1 Map Areas
The map is divided into 37 numbered locations hereafter called Areas. Two Areas are Adjacent to each other if they share a common boundary thus enabling units to move directly from one to another (see 8.3 for movement restrictions).
3.1.1 Identifiers. Each Area on the map contains an Identifier divided into two halves. The top half contains a number for identification purposes (from 1 to 37). Areas initially under American control have identifiers color-coded green. Areas initially under Japanese control have identifiers color-coded red. The geometric shape of the Identifier (circle, square, or pentagon) is used for initial placement of Japanese units (5.4).
3.1.2 Area Terrain Type. The bottom half of each Identifier in Areas initially under Japanese control contains that Area's Terrain Effects Modifier (TEM): Clear (+2); Urban (+3); or Fort (+4). The TEM is used when resolving attacks against Japanese units in that Area (9.5.3B).
3.1.3 Area Boundaries. Areas are separated by solid black lines.
3.2 Turn Track
The Turn Track printed on the map is used to note the game's current Turn. At the end of each Turn, advance the Turn marker one space to the next sequential Turn on the Turn Track.
3.3 Morale Track
The Morale Track is used to record the state of American Morale.
3.4 Record Track
The Record Track is used to keep track of any Supply Points not allocated by the American player during the Supply Phase. These "banked" Supply Points may be allocated in any future Supply Phase. It is also used to keep track of the number of Areas under American control for purposes of determining Operational Victory (10.2).
3.5 Available Support Units Box
The Available Support Units Box holds Air, Artillery, and Engineer markers the American player purchased during the Supply Phase.
3.6 Used Support Units Box
The Used Support Units Box holds Air, Artillery, and Engineer markers the American player used during the Combat Phase.
3.7 Out of Action Box
The Out of Action Box holds American units that were selected for loss during the Combat Phase (6.4). They are eligible to return to play through the expenditure of Supply Points.
4.0 Playing Pieces
Included with the game are die-cut playing pieces, called units, representing the various military formations that fought in the campaign, as well as markers that assist in game play.
4.1 Unit Coloring
American units are green with black text. American Infantry and Leader units are color-coded by regiment. Japanese units are color-coded (4.4).
4.2 American Unit Types
There are three basic types of American units: Armor, Infantry, and Leader. During play American units will have either their colored (Fresh) or white (Spent) side facing up.
4.2.1 Armor: Armor units may be distinguished from Infantry units by their vehicle illustration. An Armor unit is required for an American attack to earn the Combined Arms Bonus (9.5.2D).
4.2.2 Infantry: An Infantry unit is required for an American attack to earn the Combined Arms Bonus (9.5.2D).
4.2.3 Leader: A Leader unit (named HQ) has no intrinsic Attack Factor and may not serve as the Lead Attacking Unit in an attack (9.5.2A). This is indicated by an asterisk (*) in place of an Attack Factor. A Leader unit may only add to the Attack Value (9.5.2B) of units under its command. Units of the same command are indicated by a matching color code. Leader units stack for free (7.1).
4.3 American Unit Information
American units have information printed on them to identify the unit and indicate its strength as well as its movement capability. The setup Area is also included on each unit.
4.3.1 Strength Factors. On its Fresh side each American unit has two values below its unit ID or Leader name. The first is the unit's Attack Factor and the second is the unit's Movement Factor. There are no values on an American unit's Spent side since a Spent unit may not move or attack.
4.3.2 Parent Organization. Each unit has a Parent Formation. This serves to identify the unit for historical purposes and assumes greater importance if using Optional Rule 11.3.
4.3.3 Unit Size. American Infantry units are battalion sized and armored units are mostly company sized.
4.4 Japanese Unit Information
Each Japanese unit is associated with one Area Terrain Type (3.1.2). There are 16 Clear, 32 Urban, and 16 Fort units. Only the Terrain Type is visible on the front (Unrevealed) side. Note: There are extra Japanese units of each terrain type. The inclusion of extra units is intentional and meant to increase player uncertainty. See 5.4.
On the back (Revealed) side is the unit's Defense Factor and Defense Strategy (9.4). The Defense Strategy effect is applied only once, when the unit is first Revealed. Once Revealed, a Japanese unit remains Revealed and only its Defense Factor is used until it is eliminated. Japanese units may not move.
4.5 Markers
Markers represent support units and non-combat units used to record various types of game information.
4.5.1 Turn
This marker is used to track the game's current Turn.
Design Note: The Symbol on the marker is that of the American XIV Corps which oversaw the battle for Manila.
4.5.2 Morale
This marker is used to track the current American Morale level. It has a "Strong" and a "Shaken" side.
4.5.3 Supply
These markers are used to record American Supply Points not yet expended.
4.5.4 Artillery
Artillery Support markers may be purchased with Supply Points during the Supply Phase.
4.5.5 Engineer Support
Engineer Support markers may be purchased with Supply Points during the Supply Phase.
4.5.6 Air Support
Not used in the standard game. See Optional Rule 11.6. Purchased during the Supply Phase with Supply Points if using the Optional Rule.
4.5.7 Control
The player places American Control markers as Japanese units are eliminated to indicate Areas now under American control.
The "Control x1" and "Control x10" markers track the number of Areas currently under American control (5.2).
5.0 Prepare for Play
5.1 Game Length
The game is nine turns long and covers the battle of Manila from February 6 to March 4, 1945.
5.2 Marker Placement
Place the Turn marker in the "1" (February 6-8) space on the Turn Track.
Place the Morale marker in the "19" space of the Morale Track with its "Strong" side facing up. If American Morale is reduced to 9 or less flip the marker to its "Shaken" side. Note: Treat Morale greater than 19 as 19, and less than 0 as 0.
Place the Supply x1 and Supply x10 markers in the "0" space on the Record Track. Place the American Control x1 marker in the "3" space on the Record Track and the American Control x10 marker in the "0" space on the Record Track. Note: The Americans begin the game already controlling three Areas (see 7.2).
Place all of the Artillery and Engineer Support markers in the Used Support Units Box printed on the map (3.6).
5.3 American Unit Setup
All American units begin play Fresh side face up.
5.3.1 American Setup.
The following American units are placed on the map at the start of play:
- Area 1 (Caloocan) – 37th Infantry Division
- Area 2 (Grace Park Airfield) – 1st Cavalry Division
- Area 30 (San Rafael) – 11th Airborne Division
5.3.2 American Reinforcements. American units marked with "T2" and "T6" instead of an Area setup number are reinforcements that appear during the game. T2 signifies Turn 2 and T6 signifies Turn 6. See rule 6.1.1 for placement of reinforcements.
5.4 Japanese Unit Setup
Sort the Japanese units into the three terrain types they may occupy. Shuffle the counters of each terrain type and then randomly place one counter, Unrevealed side up, in each Area whose Identifier corresponds to its terrain type: circle for Clear, square for Urban, and pentagon for Fort. After setup is complete, excess Japanese unit counters should be set aside without being examined.
Design Note: The game includes extra Japanese units of each terrain type to prevent the player from being able to determine the exact Japanese Defense Strategy in an Area based on already Revealed Japanese units.
6.0 Sequence of Play
Each Turn represents three full days of combat and comprises five Phases. The sequence of play is conducted in the following order: Dawn Phase, Random Event Phase, Supply Phase, Combat Phase, and End Phase.
6.1 Dawn Phase
6.1.1 Reinforcement. The player receives reinforcements twice during the game. On Turn 2 the six units of the 11th Airborne Division that become available are placed in any combination of Area 30 and/or (if American Controlled) Areas 27 and/or 28. If placed in Areas 27 or 28, normal stacking rules (7.1) apply. On Turn 6 the 754/A Armor unit is placed in Area 1 and the 754/B is placed in Area 2.
6.1.2 Permanent Withdrawal. There is one permanent withdrawal during the game. On Turn 6, remove the three units of the 44th Tank Battalion from play whether they are in a map Area, on the Turn track, or in the Out of Action Box. For each of the three units that are in the Out of Action Box at the moment of removal reduce American Morale by -1.
6.1.3 Leader Mortality. If a Leader unit was placed into the Out of Action Box during the previous turn, a 1d6 roll is made during the Dawn Phase to determine their fate. On a "1" or "2" the Leader is considered Killed in Action (KIA). Remove the Leader unit from play for the rest of the game. On a "3" or "4" the Leader is considered lightly wounded and that Leader unit may return to play during the Dawn Phase of the next Turn. To indicate this, move the Leader unit from the Out of Action Box to the Turn Track for the following Turn. On a "5" or "6" the Leader unit returns to play immediately. A Leader unit that is returned to play is placed Fresh side up in any Area that is American Controlled and contains at least one other unit from the same division, or the unit's original setup Area (5.3.1).
6.2 Random Event Phase
During the Random Event Phase, the player makes a 3d6 roll and consults the Random Event Chart on the Player Aid Card. Place that event marker in the corresponding space printed on the map as a reminder. The Kembu and Shimbu markers are double sided.
6.2.1 No Result. Treat any "Pause" result on Turn 1 and Turn 9 as "no result." If the same American division is paused for a second consecutive Turn, treat that result as "no result" as well. Finally, treat "Iwabuchi Breakout" as "no result" if there are no American-Controlled Urban or Fort Areas.
6.2.2 Kembu/Shimbu Group Breakout. For each of the three units belonging to the 44th Tank Battalion that is in the Out of Action Box and unavailable to be withdrawn reduce American Morale by -1. Units withdrawn as a result of a Random Event return as a Reinforcement (6.1.1) the following Turn and may be placed in Area 1 and/or Area 2.
6.3 Supply Phase
At the beginning of each Supply Phase, the American player rolls 4d6 for Supply Points and may then spend Supply Points to gain certain game benefits. Note: Treat any result less than "12" as a "12" on Turn 1.
Supply Points are marked on the Record Track with the game's two Supply markers. Supply Points may be expended to purchase Support markers, return units in the Out of Action Box to play, and/or to increase American Morale. Costs are listed on the Player Aid Card. A unit in the Out of Action Box that returns to play must be placed in an American-Controlled Area containing at least one other American unit of that same division or the division's original setup Area (5.3.1).
6.3.1 Unspent Supply. Supply Points may accumulate from Turn to Turn. These "banked" Supply Points may be used in any future Supply Phase.
6.4 Combat Phase
6.4.1 Bloody Streets. At the start of the Combat Phase, the player rolls 1d6 for each Contested (7.3) Urban and Fort Area.
| Roll | Effect |
|---|---|
| 1-3 | No effect |
| 4 | Place any one American Unit in the Out of Action Box |
| 5 | Reduce Morale -1 |
| 6 | Flip the unit(s) to their Spent side AND reduce Morale -1 |
+1 die roll modifier if the Japanese unit is an Elite unit. Treat results greater than "6" as "6".
6.4.2 American Action Rounds. The Combat Phase is made up of individual Action Rounds. During each Action Round, the American player may activate Areas on the map containing Fresh units to move (8.0) and/or attack (9.0).
6.4.3 Becoming Spent. After being activated and upon completion of its action a unit is flipped to its Spent side. Exception: Overrun (9.5.5). The Combat Phase ends when all American units are Spent or the player declines to activate additional Areas. Determine if the player has won an Automatic Victory (10.1).
6.5 End Phase
If the player has not won an Automatic Victory, flip all Spent American units back to their Fresh side. Reduce American Morale by -1. Remove any event marker placed on the Random Event Chart during the Random Event Phase (6.2). Advance the Turn marker to the next space on the Turn Track. Any Support markers still present in the Available Support Units Box remain there and continue to be available.
6.5.1 End of Game. If the player has not won an Automatic Victory by the end of Turn 9 (March 2-4), a final victory check (10.2) is made.
7.0 Stacking and Control
7.1 Stacking
A maximum of six American Infantry and Armor units may occupy a single Area. Exception: any number of American units may occupy Area 1, Area 2, and Area 30. Leader units do not count against stacking limits. American Support markers (Air, Artillery, and Engineers) do not count against stacking limits.
A maximum of one Japanese unit may be stacked in an Area at any given time.
American units may not move into, attack into, or end a retreat in an Area already stacked to the maximum. They may, however, retreat through a fully stacked Area (9.5.7). Note: Japanese units never move (8.1.2).
Although most Areas are large enough to display all of the American units therein, stacking all of a player's Fresh and Spent units in separate piles may be done to conserve space.
7.2 Control
Each Area is always Controlled by either the American player or the Japanese side. An Area containing a Japanese unit is always Japanese Controlled. An Area lacking a Japanese unit and containing an American Control marker is always American Controlled. Control changes when an American unit occupies a Vacant (7.4) Area that was previously Controlled by the Japanese side.
7.3 Contested
An Area is considered Contested if it contains units of both sides. Contesting an Area that is Controlled by the Japanese side does not alter control of that Area. Exiting a Contested Area: see 8.3.2.
7.4 Vacant
An Area is Vacant if it contains no Japanese units, regardless of the presence of American units. Note: A Vacant Area is always American Controlled.
8.0 Movement
8.1 Mechanics of Movement
During an Action Round, the American player may select a single Area for activation. This is called the Active Area. An Area must contain at least one Fresh American unit in order to activate. The player may activate any number of Fresh units in the activated Area.
Units move one at a time. A unit may move from an Area to an Adjacent Area, the number of Areas entered during movement being limited by the printed Movement Factor (MF) on the moving unit. After movement and/or combat is completed, a unit is flipped to its Spent side.
If the Active Area contains a Japanese unit at the moment of activation, or if American units enter an Area with a Japanese unit, the American player may attack (9.0) that Japanese unit with their activated units.
8.1.1 Area Activation. All of the Fresh units in an Area may move and/or attack if the American player has chosen that Area to be the Active Area. Units in the activated Area may move and/or attack until there are no units left to perform an action.
8.1.2 Japanese Units. Japanese units never move. An Unrevealed Japanese unit is Revealed (9.4) after movement of American units into the Area is complete.
8.2 Movement Costs
Only Fresh units may move. Movement requires the expenditure of Movement Factors (MF). A unit may continue either to move into Adjacent Areas until it lacks enough MF to enter another Area or it enters an Area occupied by a Japanese unit, where it must stop. Movement into an Area incurs one of the following MF costs (units must expend the highest applicable cost):
| Cost | Effect |
|---|---|
| 1 MF | Enter a Vacant Area |
| 2 MF | Enter a Vacant Area Adjacent to any Japanese unit |
| 3 MF | Enter an Area containing a Revealed Japanese unit |
| 4 MF | Enter an Area containing an Unrevealed Japanese unit |
| ALL MF | Attack within a Contested Area |
If the Active Area is Contested at the moment of activation, American units may exit the Area at normal MF costs, subject to Contested Area exit restrictions (8.3.2).
8.2.1 Multiple Area Destinations. Units starting in an Active Area may move and/or attack into different Areas. Attacks made into different Areas do not have to be designated in advance. The American player may wait for the results of a move/attack before announcing a later move/attack into another Area by other units starting in the Active Area.
Once an Area is attacked, additional units may not move into that Area during the same activation. Units that begin movement in the same Area do not have to end their movement in the same Area. Nor do all units moving have to move simultaneously.
8.3 Movement Restrictions
The following three situations restrict movement:
8.3.1 Overstacking. Units may not move into a fully stacked Area (7.1). Note: American units that must retreat (9.5.7) may retreat through fully stacked Areas.
8.3.2 Exiting a Contested Area. American units exiting a Contested Area must first move to a Vacant Area before again entering an Area containing a Japanese unit.
8.3.3 Water Boundaries. American units may not move from Area 11 (San Nicholas) or Area 12 (Tondo) to Area 37 (Intramuros) nor may they move from Area 37 to Area 11 or Area 12.
9.0 Combat
Only units in the Area chosen to be the Active Area may attack. An attack incurs no additional MF cost beyond that for entering a Japanese-occupied Area. If the Active Area was already Contested at the moment of activation, the units within that Contested Area may either exit the Area, attack, or some combination of the two.
An attack is resolved only after all units have entered the attacked Area. Other units starting in the Active Area not involved in the attack may move, but no additional units may enter the Area being attacked once combat is resolved.
9.1 Mandatory Attacks
American units must make a Mandatory Attack whenever they enter a Japanese-occupied Area that was not Contested at the moment the Active Area was selected. If a Mandatory Attack results in a Repulse (9.5.5), all participating units must retreat (9.5.7).
9.2 Optional Attacks
Unless required to conduct a Mandatory Attack, the American player may attack with all, some, or none of the units that entered the Area. If they choose to attack, at least one unit must attack.
9.3 Contested Area
If the Active Area is already Contested at the moment of activation, all, some, or none of the American units starting in that Area may attack. If the American player loses the attack, the attacking units do not retreat and must remain within the Active Area. Note: If American units enter a Contested Area containing other American units, they may not join with those units to make a single combined attack.
9.4 Reveal Japanese Unit
If the Japanese unit in the Area entered is Unrevealed, flip it to its Revealed side. Japanese units are Revealed after all movement into the Area is complete but prior to Combat Resolution. The Japanese unit's Defense Strategy is applied during the Combat Resolution that follows. A Defense Strategy is applied only once, when the Japanese unit is first Revealed. See the Player Aid Card.
9.5 Combat Resolution
Attacks are resolved by comparing the Attack Value of the attacking American unit(s) plus a 2d6 roll (the Attack Total or AT) against the Defense Value of the defending Japanese unit plus a 2d6 roll (the Defense Total or DT). Combat is resolved in the following order:
A. American player designates the Lead Attacking Unit
B. American player places Artillery, Engineer, and Air Support markers into the Area (9.5.4)
C. Tabulate the final Attack Value (AV) and Defense Value (DV)
D. Roll dice (9.5.1) and compute results (9.5.5)
E. American Support markers are removed from the Area and placed in the Used Support Units Box printed on the map (9.5.9)
Note: Two markers and a chart on the map have been supplied for players who wish to keep track of their AV and DV before rolling dice. Their use is optional.
9.5.1 Dice. When resolving combat roll two dice (2d6) for each side. Exception: Elite Japanese units roll three dice (3d6) and drop the lowest die roll (9.4).
9.5.2 Attack Value (AV). The AV is equal to the sum of:
A. The Attack Factor of any one attacking American unit of the player's choice (the Lead Attacking Unit),
B. +1 Each additional unit participating in the attack,*
C. +1 Each Artillery; and +2 each Engineer Support marker placed in the Area,
D. +1 Combined Arms Bonus if an attack by at least one Infantry and at least one Armor unit is supported by at least one Artillery or Engineer Support Marker,
E. +1 If American Morale is 10 or higher (Strong Morale).
F. -1 If making a Mandatory Attack during a Turn in which Civilians and Refugees is the Random Event.
* A Leader unit does not add +1 if there are no units under its command (see 4.2.3) participating in the attack.
9.5.3 Defense Value (DV). The DV is equal to the sum of:
A. The Defense Factor of the Revealed Japanese unit,
B. +? For the Area TEM: +2 Clear; +3 Urban; +4 Fort,
C. +1 If American Morale is 9 or less (Shaken Morale),
D. -1d6 If an American Air Support marker was placed in the Area (Optional Rule 11.6). The final Japanese DV may never be reduced below zero, even if the Air Support die roll was high enough to have done so.
9.5.4 Support Limits. The number of Support markers allocated to any one Combat Resolution may not exceed the number of attacking American units. If using Optional Rule 11.6 a maximum of one Air Support marker may be placed in an Area during Combat Resolution.
9.5.5 Computing Results. The result of the attack depends on the difference between the Attack Total (AT) and the Defense Total (DT).
Repulse: If the AT < DT, the American attack has been repulsed and there is no effect on the Japanese unit. The Lead Attacking Unit is removed from the Area and is placed in the Out of Action Box. All of the remaining attacking units are flipped to their Spent side. Retreat is required in cases of a failed Mandatory Attack (9.1). Retreats must follow retreat procedure (9.5.7). Reduce American Morale by -1.
Stalemate: If the AT = DT, the American attack has suffered a Stalemate. There is no effect on the Japanese unit. All of the attacking units are flipped to their Spent side.
Success: If the AT > DT, the American attack has achieved a Success. The Japanese unit is eliminated and removed from the map. All of the attacking units are flipped to their Spent side. Place an American Control marker into the Area. Advance the "American Control" markers on the Record Track as needed.
Overrun: If the attack is a Success and the difference between the AT and DT is greater than the Defense Factor of the Revealed Japanese unit, an Overrun has been achieved. The Japanese unit is eliminated and removed from the map. Place an American Control marker into the Area. Advance the "American Control" markers on the Record Track as needed. All attacking units remain Fresh and may be activated again in a future Action Round. An Overrun also cancels the effect of the Fanatic Japanese Defense Strategy.
9.5.6 Ambush Area Change
If the combat result is a Success or Overrun, but the Lead Attacking Unit is eliminated due to the Japanese Ambush Defense Strategy (9.4), and the Lead Attacking Unit was the only American unit, remove both the American unit and the Japanese unit and place an American Control marker into the Area. Advance the "American Control" markers on the Record Track as needed.
9.5.7 American Retreat Procedure. Attacking units may only retreat into the Area from which they entered the attacked Area. Units must retreat one at a time to determine if the Area becomes fully stacked. If it does, subsequent units must continue their retreat to another Area that is not fully stacked. Note: American units that retreat as a result of a Japanese Barrage (9.4) or the Iwabuchi Orders Breakout Random Event (6.2) follow this procedure also.
9.5.8 Captured Area Morale Bonus. Increase American Morale by +1 each time an American Control marker is placed in an Area with an American flag: Fort William McKinley (Area 22), Rizal Stadium (Area 31), Provisor Island Power Plant (Area 34), and Intramuros (Area 37).
9.5.9 Support Marker Removal. Support markers used in Combat Resolution should be removed from the Area they were placed in and relocated to the Used Support Units Box printed on the map. They are unavailable until purchased in a future Supply Phase.
10.0 Victory Conditions
10.1 Automatic Victory
The American player wins an Automatic Victory if at the end of any Combat Phase every Area on the map is American controlled. If American Morale is "0" at the end of any Combat Phase, the game ends in an Automatic Victory for the Japanese side. If every Area on the map is American controlled at the end of the Combat Phase and at the same time Morale is "0" the American player still wins an Automatic Victory.
10.2 Operational Victory
If Automatic Victory has not been achieved by the start of the End Phase of Turn 9, the game's final turn, the American player wins an Operational Victory if they control Intramuros (Area 37) and the "American Control" markers on the Record Track total 34 or greater. If they fail to do so, the Japanese side is the victor and the player has lost the game.
Design Note: This is the roughly historical result.
11.0 Optional Rules
These rules may be incorporated for greater historical realism and play balance.
11.1 Rubble
American units attacking Urban and Fort Areas may not receive the Combined Arms Bonus (9.5.2D) unless an Engineer Support marker is present in the attacked Area. In addition, Fort Areas may not be Overrun.
Design Note: This rule will make a Fanatic Defense in a Fort Area impossible to cancel.
11.2 Nichols Airfield
The 11th Airborne Division may not attack any other Area on the map until Area 28 is either Contested by American units or is American Controlled. Reduce American Morale by -1 if Area 28 is not American Controlled by the end of the Combat Phase of Turn 3.
Design Note: Nichols Airfield was heavily defended and the 11th Airborne Division could not simply ignore it.
11.3 Parent Formation
The American Attack Value receives a -1 modifier for each different division beyond the first participating in an attack. Note: Each division has its own unique icon.
11.4 Historical Artillery Support Restrictions
A maximum of one Artillery Support marker may be placed in any single Area during any one Combat Resolution. Beginning Turn 4 (February 15-17) this restriction is lifted and rule 9.5.4 applies.
Design Note: Historically, General MacArthur wished to preserve the city of Manila from wholesale destruction and for this reason forbade the use of artillery except on registered targets. The extremely tenacious Japanese defense led to the restriction being lifted.
11.5 Early Lead Unit Declaration
As an additional challenge during Combat Resolution the player must select their Lead Attacking Unit before an Unrevealed Japanese unit in the Area is flipped to its Revealed side (9.4).
11.6 Air Support
Air Support markers may not be purchased during the Supply Phase so long as American Morale is Strong. This restriction is lifted for the rest of the game during the first Dawn phase that American Morale is Shaken, even if American Morale returns to being Strong. Air Support markers may then be purchased with Supply Points during the Supply Phase. Air Support markers may not be placed in Urban or Fort Areas that were Contested at the beginning of the Action Round.
Design Note: General MacArthur refused to allow close air support, including the use of napalm, despite on-going requests by his subordinates. This "what if" allows his mind to be changed.
12.0 Photo Gallery
- Engaging Japanese forces near the Filipino legislature building.
- The ruin that was Manila.
- Using an M2 flamethrower on a Japanese position.
- Exiting assault boats after crossing the Pasig River.
- Firing on Japanese positions inside Intramuros.
- Filipino survivors after the capture of Intramuros.
13.0 Example of Play
Optional Rules are not used in this example of play.
13.1 Dawn Phase
It is the Turn 2 Dawn Phase. The Morale marker is in the "17" box on the Morale Track. The Turn Track printed on the map indicates that a Reinforcement is available this Turn. The six units of the 11th Airborne Division with "T2" printed on the counter are now available and may be placed on the map according to the rule for reinforcements (6.1.1.) The American player (hereafter "the player") decides to place the units into Area 30.
13.2 Random Event Phase
The player rolls 3d6 and the result is a "6". The player consults the Random Events Chart on the Player Aid Card for the result and sees "Pause 1st Cavalry." The "Paused" marker for the 1st Cavalry Division is placed in the appropriate event box printed on the map. In the upcoming Combat Phase 1st Cavalry Division units may move, but may not attack.
13.3 Supply Phase
The Record Track printed on the map has the "Supply x1" marker in the "2" box, indicating there are two Supply Points saved from Turn 1. The player rolls 4d6 and the result is an "11". Combined with the 2 points marked on the Record Track the American side now has 13 points available. The Supply markers on the map's Record Track are now adjusted, placing the "Supply x1" marker in the "3" box and the "Supply x10" marker in the "1" box. The player may now purchase support markers for the upcoming Combat Phase, or spend to increase morale, or return units from the Out of Action Box to play. They select three Engineer markers at a cost of 6 Supply Points (2 points each), and seven Artillery Support markers at a cost of 7 Supply Points (1 point each). Both the "Supply x1" and "Supply x10" markers are moved to the "0" box on the Record Track.
After activating Area 9 (Maypajo), American units move to Area 10 (Cocomo Island) and attack.
13.4 Combat Phase
The player chooses Area 9 (Maypajo) to be the Active Area. The 637/A Armored unit, the 1/145 Infantry unit of the 145th Infantry Regiment, and Leader Whitcomb, move to Area 10 (Cocomo Island) at a cost of 4 Movement Points due to the presence of an Unrevealed Japanese unit (8.2) and conduct a Mandatory Attack (9.1). With movement finished play proceeds to Combat Resolution. The Japanese unit is flipped to its Revealed side which indicates a Fanatic Defense Strategy (9.4) with a Defense Factor of 9.
The player allocates two Artillery Support markers and one Engineer Support marker to the Area and decides the 637/A will be the Lead Attacking Unit. The final American Attack Value (AV) is "6" (the Attack Factor of the Lead Attacking Unit) +2 (two additional attacking units) +2 (Artillery Support) +2 (Engineer Support) +1 (Combined Arms Bonus) +1 (American Morale is Strong) = 14. The Japanese Defense Value is 9 (the Defense Factor of the Revealed Unit) +3 (Urban Terrain) = 12. The player rolls 2d6 and rolls a "7" which is added to the American Attack Value to yield a final Attack Total of 21. The player rolls 2d6 and rolls a "6" which is added to the Japanese Defense Value to yield a final Defense Total of 18.
The result is a Success (9.5.5), and normally the Japanese unit would be eliminated, but the Fanatic Defense changes the combat result from a Success to a Stalemate. The American units are flipped to their Spent side and the Japanese unit remains in the Area, Revealed side facing up. Note: The Defense Strategy of a Japanese unit is applied only when it is initially flipped to its Revealed side. If the American player attacks Area 10 again on Turn 3, or any Turn thereafter, Fanatic Defense will not be in effect.
The first American attack on Cocomo Island leaves the Area Contested by both sides and still under Japanese control.
13.5 End Phase
After moving and attacking with all of the American units they wished to activate during the Turn the player decides to proceed to the End Phase. The player did not win an Automatic Victory during the Combat Phase, so they flip all Spent American units back to their Fresh side, remove the "Paused" marker in the event box printed on the map, and advance the Turn marker to the next space on the Turn Track. Play proceeds to Turn 3.
14.0 History and Suggested Reading
Manila, "the Pearl of the Orient," had been occupied by the Japanese Empire in January 1942. With a population of 800,000, the city was one of the largest in Southeast Asia. In late 1941, Manila was declared an open city by the retreating Americans to spare it from destruction. Now, three years later, American General Douglas MacArthur had returned to the Philippines, intent on liberating the city. Before the war he had lived in the Manila Hotel (Area 37).
MacArthur (seated) was eager to reenter Manila in triumph.
"Regarding Manila as indefensible, General [Tomoyuki] Yamashita had originally ordered the commander of Shimbu Group, General Yokoyama Shizuo, to destroy all bridges and other vital installations and evacuate the city as soon as strong American forces made their appearance. However, Rear Adm. Iwabuchi Sanji, the naval commander for the Manila area, vowed to resist the Americans and countermanded the order. Determined to support the admiral as best he could, Yokoyama contributed three Army battalions to Iwabachi's 16,000-man Manila Naval Defense Force and prepared for battle. The sailors knew little about infantry tactics or street fighting, but they were well armed and entrenched throughout the capital. Iwabuchi resolved to fight to the last man.
On 4 February 1945, General MacArthur announced the imminent recapture of the capital while his staff planned a victory parade.
But the battle for Manila had barely begun. Almost at once, the 1st Cavalry Division in the north and the 11th Airborne Division in the south reported stiffening Japanese resistance to further advances into the city. As one airborne company commander remarked in mock seriousness, "Tell Halsey to stop looking for the Jap Fleet; it's dying on Nichols Field." All thoughts of a parade had to be put aside.
Following the initial American breakthrough on the fourth, fighting raged throughout the city for almost a month. The battle quickly came down to a series of bitter street-to-street and house-to-house struggles. In an attempt to protect the city and its civilians, MacArthur placed stringent restrictions on U.S. artillery and air support. But massive devastation to the urban area could not be avoided. In the north, General Griswold continued to push elements of the XIV Corps south from Santo Tomas University toward the Pasig River. Late on the afternoon of 4 February he ordered the 2d Squadron, 5th Cavalry, to seize Quezon Bridge, the only crossing over the Pasig that the Japanese had not destroyed. As the squadron approached the bridge, enemy heavy machine guns opened up from a formidable roadblock thrown up across Quezon Boulevard. The Japanese had pounded steel stakes into the pavement, sown the area with mines, and lined up old truck bodies across the road. Unable to advance farther, the cavalry withdrew after nightfall. As the Americans pulled back, the Japanese blew up the bridge.
American forces rooting out Japanese Snipers in Manila's rubble.
The next day, 5 February, went more smoothly. Once the 37th Division began to move into Manila, Griswold divided the northern section of the city into two sectors, with the 37th responsible for the western half and the 1st Cavalry responsible for the eastern part. By the afternoon of the 8th, 37th Division units had cleared most Japanese from their sector, although the damage done to the residential districts was extensive. The Japanese added to the destruction by demolishing buildings and military installations as they withdrew. But the division's costliest fighting occurred on Provisor Island, a small industrial center on the Pasig River. The Japanese garrison, probably less than a battalion, held off elements of the division until 11 February.
The 1st Cavalry Division had an easier time, encountering little opposition in the suburbs east of Manila. Although the 7th and 8th Cavalry fought pitched battles near two water supply installations north of the city, by 10 February the cavalry had extended its control south of the river. That night, the XIV Corps established for the first time separate bridgeheads on both banks of the Pasig River.
The final attack on the outer Japanese defenses came from the 11th Airborne Division, under the XIV Corps control since 10 February. The division had been halted at Nichols Field on the fourth and since then had been battling firmly entrenched Japanese naval troops, backed up by heavy fire from concealed artillery. Only on 11 February did the airfield finally fall to the paratroopers, but the acquisition allowed the 11th Airborne Division to complete the American encirclement of Manila on the night of the twelfth."
Quoted from "Luzon" by Dale Andradé.
Troops of the 11th Airborne Division make contact with the 37th Infantry Division during the capture of Manila.
Surviving Japanese forces were gradually compressed into Manila's inner city and the ancient citadel called Intramuros. Aided by massive artillery support the penultimate American assault began on February 23. After three days of no-quarter fighting, the end was in sight for the Japanese defenders. Iwabuchi and his officers committed ritual suicide (seppuku) as the sun rose on February 26.
The battle would finally end in the first days of March with the capture of the nearby Agricultural Building and Legislative Building. The month-long battle for Manila was the most savage urban fighting of the entire Pacific War. The Americans would suffer just over 1,000 dead and more than 5,000 wounded during the battle, while virtually all of the more than 16,000 Japanese defenders were killed. When the fighting was over the combination of Japanese demolition work and American artillery had left the city, including MacArthur's home in the Manila Hotel, in almost total ruin. The "Pearl of the Orient" was no more. Between 100,000 and 240,000 Filipino civilians, caught between the American and Japanese forces, perished. Manila, the "Stalingrad of the Pacific," was a true city of the damned.
Suggested Reading
- Andradé, Dale. 1996. Luzon: The US Army Campaigns of World War II. Washington, DC: Army Center of Military History.
- Del Gallego, John A. 2020. The Liberation of Manila: 28 Days of Carnage, February–March 1945. Jefferson, NC: McFarland.
- Connaughton, Richard, et al. 2002. Battle for Manila. New York: Presidio Press.
- McEnery, Kevin T. 1993. "The XIV Corps Battle for Manila, February 1945." Thesis, US Army Command and General Staff College.
- Miranda, Miguel. 2019. Battle of Manila: Nadir of Japanese Barbarism, 2 February–3 March, 1945. South Yorkshire, UK: Pen and Sword.
- Scott, James M. 2019. Rampage: MacArthur, Yamashita, and the Battle of Manila. New York: W. W. Norton.
15.0 Game Strategy
15.1 Dealing with Random Events
Random Events are meant to slow American progress and to give the player a sense of the challenges American commanders faced dealing with logistical and military variables both inside and outside the city of Manila during the battle. The results are designed in the form of a bell curve. The most common results will be civilians and refugees whose liberation hampers American combat effectiveness and orders "from above" requiring a portion of the attacking American force to halt for a Turn. The most extreme results—an offensive or breakout by the Japanese forces inside or outside Manila—have the capacity to slow progress in some Areas to a near standstill.
15.2 Spending Supply Points
As the American player you have well-trained and well-balanced forces at your command. The supplies arriving each day can vary. Managing what supplies you receive is a game-within-a-game and must be done with care or you will find yourself without the support you need at crucial moments. You can spend all of your Supply Points in a given Supply Phase, trusting you will roll well during the next Supply Phase, or you can keep a few points saved to offset a potentially poor roll the following Turn. Artillery Support is the cheapest to purchase but the least powerful; conversely a boost to Morale is the most expensive to purchase but can be a game-changer by preventing American Morale from becoming Shaken.
15.3 Japanese Defense Strategies and Combat
Japanese Defense Strategies represent actions by Japanese units inside the city of Manila that could frustrate American progress. The Sniper Defense Strategy is perhaps the least powerful, placing a Leader unit either temporarily or permanently out of action. Next in power is the Ambush, which can steadily chip away at American unit strength. More powerful is the Barrage. If there are little or no American units in the Out of Action Box, it is probably worth placing a unit out of action to keep the advance moving. But if there has already been a number of units lost, it is probably better to forgo additionally losses and retreat to fight another day. Similar to the Barrage the Fanatic Defense Strategy represents the on-going stubbornness of the Japanese defenders in Manila and the enormous resources the Americans had to spend to ferret them out. The most likely result of a Fanatic Defense is changing what would have been a Success in combat into a Stalemate, with the Area merely Contested and the player forced to attack the Area a second time. Last and perhaps most powerful is the Elite Defense. These Areas possess the capacity to repulse an American attack unless it is very well supported. If incorporating any of the Optional Rules such as Rubble, capturing a Contested Urban or Fort Area can become a drawn-out endeavor—or never happen at all.
16.0 Index and Glossary
1d6 (die roll): A roll of a single six-sided die.
2d6 (dice roll): A roll of two six-sided dice added together to form one combined result. Used during the Combat Phase.
3d6 (dice roll): A roll of three six-sided dice added together to form one combined result. Used during the Random Event Phase and Japanese Elite Defense.
4d6 (dice roll): A roll of four six-sided dice added together to form one combined result. Used during the Supply Phase.
Active Area: The Area the player has chosen to activate to conduct unit Movement and/or Combat Resolution.
Action Rounds: 6.4.2.
Adjacent: Areas that share a common boundary are adjacent.
Air: An American Support marker; 4.5.6. Optional Rule: 11.6.
Area: Any of the 37 spaces on the map, used to regulate movement and combat; 3.1.
Area Boundaries: 3.1.3.
Armor: Any unit with a vehicle illustration; 4.2.1.
Artillery: An American Support marker; 4.5.4.
Attack Factor: The first (leftmost) number printed at the bottom of each Fresh American unit (4.3.1).
Attack Total: The sum of the Attack Value and a 2d6 roll.
Attack Value (AV): 9.5.2.
Available Support Units Box: 3.5.
Combat Phase: A portion of each Turn when the player may activate Areas for unit movement and/or combat; 6.4.
Combat Resolution: 9.5.
Combined Arms Bonus: 9.5.2D.
Contested: An Area containing both American and Japanese units; 7.3.
Controlled: The last side to be the sole occupant of an Area controls that Area; 7.2.
Dawn Phase: 6.1.
Defense Factor: The number printed at the bottom of each Revealed Japanese unit (4.4).
Defense Strategy: 9.4.
Defense Total: The sum of the Defense Value and a 2d6 roll.
Defense Value (DV): 9.5.3.
End Phase: 6.5.
Engineer: An American Support marker; 4.5.5.
Fresh: The colored (front) side of an American unit; 4.2 (see also 4.3).
Identifier: 3.1.1.
Infantry: 4.2.2.
Lead Attacking Unit: 9.5.2A.
Leader: A unit whose Attack Value is an asterisk (*); 4.2.3.
Mandatory Attacks: 9.1.
Markers: 4.5.
Morale: 4.5.2 (see also 9.5.2E, 9.5.3C, 9.5.5.).
Movement: 8.0
Movement Factor (MF): The second (rightmost) number printed at the bottom of each Fresh American unit (4.3.1). It is the number of movement points a unit may expend while activated during an Action Round.
Optional Rules: 11.0.
Out of Action Box: 3.7 (see also 6.3, 9.5.5).
Overrun: 9.5.5.
Parent Formation: 4.3.2; 11.3.
Random Event Chart: 6.2, 6.5.
Random Event Phase: 6.2.
Repulse: 9.5.5.
Revealed: 4.4, 9.4.
Spent: The reverse (white) side of an American unit.
Stalemate: 9.5.5.
Success: 9.5.5.
Supply Phase: 6.3.
Terrain Type: There are three Terrain Types on the map: Clear (circle Identifier), Urban (square Identifier), and Fort (pentagon Identifier); 3.1.2, 5.4.
Turn: A Turn is comprised of the five phases that make up the sequence of play (see 6.0).
Turn Track: 3.2.
Unrevealed: 4.4.
Used Support Units Box: 3.6.
Vacant: An Area that contains no Japanese units; 7.4.
Victory Conditions: 10.0 (Automatic: 10.1; Operational: 10.2).
Japanese Opening Setup Checklist
Permission is granted to copy this unit checklist for personal use.
| Terrain Type | Defense Value | Defense Strategy |
|---|---|---|
| Clear | 3 | Sniper |
| Clear | 3 | Ambush |
| Clear | 3 | Barrage |
| Clear | 3 | Fanatic |
| Clear | 4 | Sniper |
| Clear | 4 | Ambush |
| Clear | 4 | Barrage |
| Clear | 4 | Fanatic |
| Clear | 5 | Sniper |
| Clear | 5 | Ambush |
| Clear | 5 | Barrage |
| Clear | 5 | Fanatic |
| Clear | 6 | Sniper |
| Clear | 6 | Ambush |
| Clear | 6 | Barrage |
| Clear | 6 | Fanatic |
| Urban | 5 | Sniper |
| Urban | 5 | Ambush |
| Urban | 5 | Barrage |
| Urban | 5 | Fanatic |
| Urban | 5 | Elite |
| Urban | 6 | Sniper |
| Urban | 6 | Ambush |
| Urban | 6 | Barrage |
| Urban | 6 | Fanatic |
| Urban | 6 | Elite |
| Urban | 7 | Sniper |
| Urban | 7 | Ambush |
| Urban | 7 | Barrage |
| Urban | 7 | Fanatic |
| Urban | 7 | Elite |
| Urban | 7 | Sniper |
| Urban | 7 | Ambush |
| Urban | 7 |