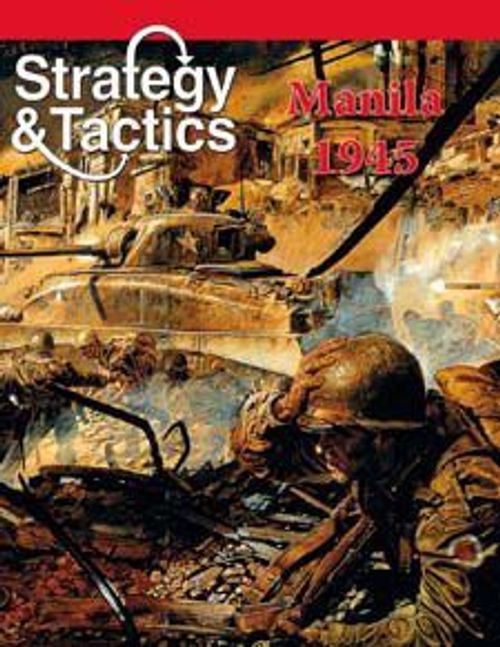
Manila '45: Stalingrad of the Pacific
Manila '45: Stalingrad of the Pacific Rulebook
Table of Contents
Table of Contents
Unit Counter Errata
The Japanese 450th Rocket artillery unit should be marked as being "indirect fire capable."
1.0 Introduction
1.1 Manila '45: Stalingrad of the Pacific (M'45), is a two-player wargame of low to intermediate complexity that simulates the American liberation of the capital of the Philippines in World War II, which took place from 3 February to 4 March 1945. To control complexity and present an overall-force-commander's-view of the battle, the game uses a tactically scaled map and units of maneuver coupled with an operationally scaled game turn length. The American player is generally on the offensive, trying to clear the entire Japanese defending force from the city prior to the end of the game.
1.2 Game Scales
Each game turn of M'45 equals three days. Each hexagon on the map represents 0.3 miles (0.5 km) from side to opposite side. The units of maneuver in the game are companies, batteries and battalions, representing anywhere from 100 to 1,000 men and their equipment.
2.0 Components
2.1 The components to a complete game of M'45 include these rules, a 34x22" mapsheet, and one sheet of 176 die-cut unit-counters. Players will need to provide themselves with a regular (six-sided) die to use in resolving combat and other probabilistic events throughout the game.
2.2 The Game Map illustrates the militarily significant terrain found in and around Manila in 1945 when viewed at this scale. A hexagonal ("hex") grid is printed over the map to regulate the placement and movement of units across it, much as in chess and checkers. A unit is considered to be in only one hex at any one time.
Each hex contains natural or manmade terrain or water features that can affect the movement of units and combat between units. The various terrain and water features on the map have had their exact real-world configurations altered slightly in order to make them coincide with the hex-grid, but the relationships among the terrains and water bodies from hex to hex are accurate to the degree necessary to present players with the same space/time dilemmas faced by their historic counterparts in the real war.
Also note every hex on the map has a unique four-digit identification number printed within it. They're provided to help find exact locations more quickly and to allow for the recording of unit positions if a match has to be taken down before it can be completed. For example, the heavy structure known as "Fort McKinley" is in hex 1812, while the heavy structure known as the "Psychopathic Hospital" is in 2119.
2.3 Seating
The Japanese player should sit along the map's west edge, facing east, with the US player sitting and facing opposite him on the east.
2.4 Counters
There are 146 unit-counters in the game, most of which represent combat formations. Others are provided as informational markers and memory aids. There are also 30 additional variant counters included for use in other, previously published, games.
After reading these rules at least once, carefully punch out the counters. Trimming off the "dog ears" from their corners with a fingernail clipper will facilitate easier handling and stacking during play and also enhances their appearance.
2.5 Sample Combat Unit
Each combat unit-counter displays several pieces of information: nationality and organizational affiliation by color scheme (and therefore also the "side" it's on), specific historic identification, unit-type and size, special combat characteristics, fire factor, range allowance and, on Japanese units, mobility category (again, by color scheme).
2.6 Nationality, Sides & US Organizational Affiliations
Each unit's nationality, and therefore the side for which it fights, is shown by its color scheme. On the US side, the organizational affiliation of each unit is also shown by color scheme. On the Japanese side, the mobility category of each unit, mobile or static, is shown by color scheme.
US Side
- 1st Cavalry Division Units: black on yellow
- 11th Airborne Division Units: black on green
- 37th Infantry Division Units: black on orange
- XIV Corps Units: black on blue
Japanese Side
- Mobile Units: black on scarlet
- Static Units: white on scarlet
2.7 Historical Identifications
All units are given their specific identifications by numbers and/or abbreviations of their historic designations or names to the right of their unit-type boxes. The abbreviations are as follows.
- CF: Central Force
- EF: Eastern Force
- HQ: Headquarters
- HQS: Headquarters Sector
- Ind: Independent
- IS: Isthmus Sector
- K: Kempetai
- KS: Kusunoki Sector
- NF: Northern Force
- NP: Northern Port
- NS: Nichols Sector
- P: Provisional
- SF: Southern Force
- SP: Southern Port
- SS: Sakura Sector
- T: Toshio
- TS: Tachibani Sector
- 82C: 82nd Chemical Mortar Battalion
Note. Japanese static artillery units, since they were ad hoc formations, are identified by their barrel size in millimeters.
2.8 Unit Organizational Sizes are shown by the following symbols: II, battalion; I, company, or battery for artillery. US air support units represent numbers of individual aircraft sorties sufficient to affect ground battles at this scale.
2.9 Mobility Category
Unlike most wargames, the movement allowances of the various units aren't printed on the counters themselves. All US units, along with all mobile Japanese units, have movement allowances of 16 (see section 8.0). All Japanese static units are just that: immobile in their placement hexes once they've been put on the map during set up (see 3.2).
2.10 Unit Types
Every combat unit in the game is identified on the basis of its predominant type of weapon. Those types have significant effects in combat (see sections 9.0, 10.0 and 11.0). Units are also divided into two general target categories, armored and unarmored. For details concerning the importance of that distinction, see 10.14.
2.11 Special Combat Characteristics
Certain units have special combat characteristics, which are shown as follows.
- + = Indirect Fire Capable (see section 11.0)
- Circled Fire Factor = Close Assault Capable (see 10.17)
- — = Anti-Armor Capable (see 10.14)
2.12 Other units are provided as markers and memory aids. Details of their uses are given in the sections and particular rules noted below.
- Game Turn Marker (see 5.2)
- Bridge Demolished Marker (see 10.19)
- Rubble Marker (see 10.20)
- US Combat Air Support Marker (see 10.23)
3.0 Set Up
3.1 Prepare to Play
Players should first decide who will command which side. Place the Game Turn Marker in the "3-5 Feb" box of the Turn Record Track printed on the mapsheet. Temporarily place off to the side, but within easy reach, all the other counters shown above in 2.12.
3.2 Japanese Set Up
The Japanese players sets up first. To facilitate that process, the US player should turn away from the mapsheet until his opponent announces he's completed the Japanese set up. All Japanese units given in the counter-mix begin play on the map.
The Japanese player may deploy his units almost anywhere he desires across the entire map; however, he must take into account the stacking rules when doing so (see 6.3), and he should also note the "fog of war" rule (6.5) and the US sudden death victory condition (see 4.3). Further, he may not deploy any of his units in any map-edge hexes or any hexes immediately adjacent to any map-edge hexes. For example, no Japanese unit may set up in 3401 or 3402, nor in 1613 or 1712, nor in 3532 of 3531, etc. (Japanese units may potentially move into such hexes once play has begun; they just may not start set up in them.)
3.3 US Preparation for Play
No US units begin play on the map. While the Japanese player is completing that side's set up, the US player should sort his own side's units into four separate piles: one for each of his three divisions, 1st Cavalry, 11th Airborne and 37th Infantry, and another for his XIV Corps support units (see 2.6).
3.4 US Map Entry
When the Japanese player has announced he's finished his set up, the US player should enter all his units into play using the following sequence. All three divisions should be entered prior to the entry of the first XIV Corps unit. No particular entry order is necessary among the three divisions, but no US unit, corps or division, may be left unentered at the end of the first US player turn. Also note the entry of one US division must be completed before that of the next is begun. Japanese defensive fires may be executed normally starting with the entry of the very first US unit (see section 9.0).
The units of the 11th Airborne Division enter through one, some, or all of the south map-edge hexes between 3401 1900, inclusive. The units of the other two divisions, along with those of XIV Corps, are entered through one, some, or all of the north map-edge hexes between 2532 and 4233, inclusive.
Every US formation should be entered one unit at a time. Each entering unit pays the normal terrain cost to enter its first hex (and thereafter). If the same hex is used to enter more than one unit, each unit after the first still only pays the normal terrain cost for entry.
Design Note. The entire battlefield here isn't quite 10 miles long by five miles wide. Given that game turns each represent three days, the movement factor of 16 is conservative, and is more representative of mission orientation rather than true mobility. Hence, we can omit the 'enter in column' rules common in many games covering this kind of entry scheme. Also see 3.5 below.
3.5 XIV Corps Always Last & North
Due to the fact XIV Corps units must wait until all the three of the divisions have deployed, the movement allowance of all XIV units is halved to eight during Game Turn 1. Also note there is never an option of entering any XIV units along the map's south edge.
4.0 How To Win
4.1 The US player is generally on the offensive all across the map, attempting to duplicate or improve his historic counterpart's performance in the actual campaign. Historically, all Japanese resistance was wiped out by the end of Game Turn 10 (4 March).
4.2 Normal Victory Determination
Examine the map at the end of Game Turn 10. If at that time there's one or more Japanese units still in play anywhere on the map, the Japanese player is declared to have won the game. If there are no Japanese units left on the map at that time, the US player is declared to have won the game. Of course, if all Japanese units are wiped out prior to the end of the last game turn, play stops and the US player is declared the victor. No draws are possible.
4.3 US Sudden Death Victory
If, at any time prior to the very start of Game Turn 3 (9-11 Feb), there are no Japanese units in one or more hexes that are both north of the Pasig and west of the San Juan Rivers, play stops and the US player is declared the winner. To clarify, that map section includes: 2623, 2923, 3522, 4123, 4131, 2830, 3526, etc.
Design Note. The Japanese commander in Manila began the battle with the belief he could defend the entire city. Accordingly, during the fight's first few days he attempted to do just that. Thus the regular victory condition wouldn't hold up without the provision of 4.3.
5.0 Sequence of Play
5.1 Each game turn of M'45 is divided into two player turns of sequenced steps called "phases." Every action taken by a player must be carried out in the appropriate phase as described below. Once a player has finished a particular phase he may not go back to perform some forgotten action or redo a poorly executed one unless his opponent graciously permits it.
5.2 The Turn Sequence Outline is given below. Note the US Player Turn is the first player turn during each game turn. At the end of each game turn, move the Game Turn Marker forward one box on the Turn Record Track printed on the mapsheet.
I. US Player Turn
- A. US Replacement & Reinforcement Phase
- B. US Movement & Japanese Defensive Fire Phase
- C. US Offensive Fire Phase
II. Japanese Player Turn
- A. Japanese Movement & US Defensive Fire Phase
- B. Japanese Offensive Fire Phase
5.3 Sequence Peculiarities
Note there is never a Japanese Replacement & Reinforcement Phase (see section 7.0). Also note Japanese defensive fire takes place during what is otherwise the US Movement Phase, and US defensive fire takes place during what it otherwise the Japanese Movement Phase.
5.4 Game Turn 1 & 2 Peculiarities
During Game Turn 1, the movement factor of all XIV Corps units is eight rather than the normal 16 (see 3.4 & 3.5). During Game Turns 1 and 2, the US player may not use any of his field artillery units (see 2.10) to make offensive fires, neither direct nor indirect, into any urban or heavy structures hexes anywhere on the map, nor may he make any flamethrower and gasoline attacks (see 10.22). Also during Game Turns 1 and 2, neither player may make any bridge or heavy structure demolition attacks (see 10.19 - 10.21).
Design Note. During the early phase of the battle, MacArthur hoped to be able to take Manila 'on the fly by,' without causing great damage to its infrastructure or casualties among its civilian population; hence the US restrictions above. He became disabused of that notion, and rescinded those tactical restrictions, at the start of Game Turn 3. Similarly, during that same early phase of the battle, the Japanese commander remained convinced he could hold the city, and so was not interested in ordering bridge or structure demolitions when they could've done him the most good.
5.5 Ending Play
Play may end during Game Turns 1 or 2 due to the US player achieving a sudden death victory; see 4.3. Barring that, play continues until the end of Game Turn 10, or sooner, when the winner is reckoned according to rule 4.2. Play may also end at any time due to the capitulation of either player, should one of them become convinced his situation has become hopeless.
6.0 Stacking & Fog of War
6.1 Stacking is the word used to describe the piling of more than one friendly unit into a single hex at the same time. The general rule is each side may stack only up to two units per hex. Each unit in the game is considered one unit for stacking purposes, no matter what its particular fire strength or organizational size.
6.2 US Stacking
The US player may never stack together, even just temporarily, the units of his different divisions (see 2.6). Within the overall two-high stacking limit, though, XIV Corps units may stack with each other or with units of one, some, or all of the divisions. Thus a US stack could contain two units from any single division, or one divisional unit and one XIV Corps unit, or two XIV Corps units.
6.3 Japanese Stacking
The Japanese player may generally stack any two friendly units together in the same hex; however, no Japanese stack may ever contain more than one static unit (see 2.6). Thus a Japanese stack could contain one mobile and one static unit, or two mobile units, but never two static units.
6.4 Stacking Counts for both sides during every game turn. Thus units may not move into an illegal stacking situation even momentarily. Further, units must always be moved individually, one at a time, never as a stack. If a stack is ever found to be overstacked, correct the situation in such a way as to satisfy the offended player, either by elimination of the overstacked unit(s), or by simply allowing the offended player to move them to the nearest legal hex (and the offended player always choose).
6.5 Fog of War
In general, the Japanese player may never look beneath the top unit of any US stack, nor may he look through the US dead pile. He may see both units in a US stack whenever he declares offensive fire into a hex containing two US units. US units are always deployed on the map face-up.
When the Japanese player sets up (see 3.2), he should initially place all his units on the map with their reverse (battle flag) sides upward. Note that both mobility classes of Japanese units have identical battle flag sides. Whenever a Japanese unit fires for the first time, or is fired on for the first time, either offensively or defensively, it is flipped over so its front side (the side with numbers printed on it) thereafter permanently shows upward. If a still-inverted Japanese unit is fired on by the US player, either offensively or defensively, it is also permanently flipped over at that time. Once a given Japanese unit is flipped over to show its front side, there is no way for it to regain 'hidden' status during that match.
The US player may always examine the bottom unit in a Japanese stack. Note, though, that doesn't give him the right to flip over Japanese units (alone in a hex, or the top or bottom unit of a stack) that still have their battle flag sides showing upward.
Design Note. The US command kept the sky above the city full of aerial reconnaissance planes, and there was also an active Filipino guerrilla intelligence network making regular reports.
7.0 US Replacements & Reinforcements
7.1 US Reinforcements are units that enter play for the first time after Game Turn 2. The only US reinforcements are the six combat air support units that become available at the very start of Game Turn 3. Those aircraft are not used like regular ground units; see 10.23 for the rules governing their use. Note there are no Japanese reinforcements during the entire game.
7.2 US Replacements
Starting with his player turn of Game Turn 2, and at that same time during each of his subsequent player turns, the US player may replace (reclaim from the dead pile) one eliminated unit from each of his divisions along with one eliminated XIV Corps unit.
That capacity may not be accumulated from turn to turn, nor may it be in any way traded or shifted among the divisions or corps. That is, if a given division, or the XIV Corps, has no unit in the dead pile at the start of a US player turn, that organization's replacement capacity is simply forfeit for that turn; it isn't carried over to later turns, nor can it be in any way transferred or loaned to any other division (or corps) that might have more than one unit in its dead pile. Thus, on any given turn after the first, the US player may replace (put back into play on the map) a maximum of four of his side's eliminated units: one from each of his three divisions and one from XIV Corps. Note there are no Japanese replacements available during the game.
7.3 US Replacement Entry
To enter a given organization's replacement unit, the US player should place it atop any other unit of its division or corps that is at that moment not directly adjacent to one or more Japanese units. If no such situation exists for an organization that would otherwise be receiving a replacement, that replacement unit is forfeit; put it back into the dead pile. (It could be chosen again on a later turn.) No arriving replacement unit may otherwise have its reentry onto the map delayed to a later phase or later game turn.
7.4 Replacement Units immediately have all their normal movement and combat capabilities available for use during their player turn of reentry onto the map.
7.5 US Combat Support Aircraft Units (six of them) become available as reinforcements for that side at the start of Game Turn 3. They are the only reinforcements in the game. For details on their use, see 10.23.
8.0 Movement
8.1 Each non-static ground unit moves individually from hex to adjacent hex, expending movement points (MP) from the universal movement allowance of 16 for each hex entered. MP may not be saved from one phase or turn to the next, nor may they in any way be given or loaned from one unit to another. Each unit's movement is completed before the movement of the next is begun. Once you've moved a unit, you may not redo its movement that phase or turn unless your opponent graciously permits it.
Both players only move their own side's units during their own movement phases; no friendly movement takes place during the opposition's player turns. A player need not move all his units in each of his movement phases. He may choose to move none, some, or all of them, within strictures given below, in each of his movement phases. Further, a moving unit need not expend all its MP before stopping, and no moving unit may ever exceed its MP during a single move.
Also note that, unlike during their initial entry during Game Turn 1, the US player is afterward no longer required to complete the movement of one of his organizations prior to beginning the movement of the units of another. He may thereafter intermix their movement, within the limits of the stacking rules (see section 6.0), as he sees fit.
8.2 No ground unit may move into a hex in a friendly movement phase unless it has sufficient MP available to pay all the involved costs.
8.3 Japanese Static Units, once placed on the map (see 3.2), are never moved from their hexes-of-placement except to be put into the dead pile.
8.4 No Stack Movement
Units are always moved one at a time, never as stacks. The stacking restrictions given in section 6.0 must be observed by all ground units at all times during all phases of both player turns in every game turn.
8.5 In-Hex Terrain Costs
Each clear terrain hex entered (including airfields) costs one movement point (MP) to enter. Each urban hex costs two MP to enter. Each heavy structure hex costs three MP to enter.
8.6 Hexside Movement Costs
Certain types of terrain and water obstacles are drawn along hexsides rather than inside hexes: major rivers, minor rivers, the Intramuros District wall, bridges, and the 100 meter contour line. There is an additional movement cost incurred when moving across such hexsides, which is added to costs for the terrain types within the hex being entered. For example, to cross a wall hexside while moving into a heavy structure hex would cost three MP for the heavy structure hex and an addition (+1) MP to cross the wall hexside, for a total of four MP expended to make that one-hex move.
8.7 Bridges
With one exception (see 8.8), movement across major river hexsides is prohibited except over a bridge, either those printed on the map or an engineer-established pontoon bridge. Unbridged minor river hexsides may be crossed by paying one extra MP. Bridged minor river hexsides may be crossed without any extra movement cost having to be paid.
8.8 The 672nd Amphibious Tractor Battalion & River Crossings
One of the units among those of XIV Corps is the 672nd Amphibious Tractor Battalion. That unit may facilitate one other unit's river crossing, minor or major, during each US movement phase, in the following manner. The 672nd must begin the phase already in a hex bordering either kind of river hexside, and the unit that will have its river-crossing facilitated must already be stacked with it in that same hex at the start of that phase. That stacked unit may move across the river hexside as if it were bridged, and it's subject to normal defensive fire rules in the hex being crossed into (see section 9.0).
The unit that had its crossing facilitated by the 672nd may continue movement normally after crossing the river, and the amphibious tractors may also move that same phase. (The 672nd never pays any kind of river crossing cost.) No more than one unit crossing one river hexside may be facilitated by the 672nd per US Movement Phase.
8.9 Engineer-Built Pontoon Bridges
Three of the units among those of the XIV Corps are bridging engineers: the 117th, 532nd and 556th Engineer Battalions. Those units may each facilitate any number of other units' river crossings, minor or major, during each US Movement Phase, in the following manner. A bridging engineer unit must begin the phase already in a hex bordering either kind of river hexside. That done, a pontoon bridge has been established across that hexside.
If an engineer unit is in a hex bordered by more than one river hexside, the US player should orient the bridge icon in its unit-type box to face toward the hexside being bridged. No single engineer unit may establish more than one pontoon bridge across any one river hexside, minor or major, at any one time.
All that accomplished, potentially any number of US units may move across the selected river hexside as if it were bridged, and they may be subject to normal defensive fire rules in the hex being crossed into (see section 9.0).
A given pontoon bridge is considered to remain in place as long as the engineer that built it remains in place in its hex. If the engineer unit is eliminated in combat, or is simply moved off to another location, the bridge at its former location is considered destroyed.
A bridging engineer unit that facilitates the river crossing of one or more US units may not itself move during that same phase. Further, bridging engineers do pay minor river crossing costs. A bridging engineer that starts a US Movement Phase next to an unbridged major river hexside may move itself to the other bank, but it may not then facilitate the crossing of any other US units that phase.
8.10 The 672nd Amphibious Tractor Battalion & Coastal Movement
One of the units among those of the XIV Corps is the 672nd Amphibious Tractor Battalion. That unit may, either alone or while transporting with it any one other US ground unit, move 'out to sea' and then immediately reenter the map via another coastal hex, during each US movement phase.
To conduct such coastal movement, the 672nd must begin the phase already in a coastal hex that's not immediately adjacent to any Japanese unit(s). Further, if another unit is to be transported by the 672nd, that unit must already be stacked with it at the start of that phase. The 672nd and its potential passenger unit are then simply moved out to sea, and then are immediately returned to the map via another coastal hex that's not then immediately adjacent to any Japanese unit(s).
A unit transported by the 672nd may continue movement normally after landing; however, the amphibious tractors must remain in place in the landing hex throughout the rest of that movement phase. No more than one coastal move may be made by the 672nd per US Movement Phase. Note, though, within the strictures above, such moves don't involve the expenditure of MP. A transported unit that moves after landing begins expending MP as it moves out of the tractor unit's coastal hex and would also, from that hex on, be subject to normal Japanese defensive fires; see section 9.0.
8.11 The 100 Meter Contour Line
A 100 Meter Contour Line hexside costs a moving unit an additional (+1) MP to cross, and that remains true no matter in which direction the hexside crossing takes place.
8.12 Rubble
A hex containing a Rubble Marker costs an extra (+1) MP to enter, above the normal terrain cost for entering that type of hex.
8.13 Prohibited Hexes
All-sea hexes and hexsides are prohibited to all units except as described above in 8.10 (though fire may be traced into and through them).
8.14 Enemy Occupied Hexes may never be entered by your ground units. US Combat Air Support units may be placed in Japanese occupied hexes to conduct attacks; see 10.23.
9.0 Defensive Fire
Design Note. If this is your first reading of these rules, you may want to skip this section for now; go on and read the rest of the rules; then come back to this section. We put the defensive fire rules section here because this is where it falls as you go through a game turn, all of which will make sense to you once you've gotten a game turn's play under your belt.
9.1 Defensive fire is conducted by each player during his opponent's movement phases. The opportunity to conduct defensive fire is triggered anew each time a moving enemy unit enters a hex immediately adjacent to one or more of your defensive-fire-capable units.
9.2 Procedures & Strictures
Follow the normal offensive fire procedures (see section 10.0), but with the following changes.
The non-moving player may declare "defensive fire" each time a moving enemy unit enters a hex immediately adjacent to one or more friendly defensive-fire-capable (DFC) units. When that declaration is made, the moving player must pause his unit's movement to allow the defensive fire to be resolved against it. Any friendly DFC unit or stack may potentially conduct defensive fire any number of times per enemy movement phase. Each such unit or stack may do so each time a new opportunity, in the form of another moving enemy unit coming adjacent, presents itself.
Defensive fire may be declared only against moving enemy units, and the fire is resolved within the hex the moving enemy unit is entering. If there is a non-moving enemy unit in the hex receiving defensive fire, that non-moving unit is in no way affected by the defensive fire's outcome.
A moving unit is subject to new enemy defensive fire each time it enters a hex immediately adjacent to one or more DFC enemy units, even if it's the same enemy unit(s) conducting the defensive fire each time. For example, if, for some strange reason, you decided to move one of your units into all six hexes immediately around some enemy unit, you would be subject to new defensive fire each time your unit entered the next hex.
When a moving unit enters a hex in which it will be subject to defensive fire, all the DFC enemy units available to make that fire must combine their fire into one effort. That's true if the DFC eligible enemy units are stacked together in just one hex or if they're located in several hexes.
9.3 Ineligible Units
Japanese static units, along with US field artillery and combat air support units, never conduct defensive fire. Further, Japanese static units and US combat air support units will never have defensive fires directed against them. (Moving US field artillery units could be attacked by Japanese defensive fires; see the second die roll modifier described below in 9.5.) Note that DFC units stacked with defensive-fire-ineligible units aren't thereby made ineligible to make defensive fires.
9.4 No Ranged or Indirect Defensive Fire
In addition to the limits given above in 9.2 and 9.3, no units (no matter if DFC or not), may conduct defensive fire from hexes that aren't immediately adjacent to the moving enemy unit about to receive the fire. In other words, you can't 'call in' more distant units to aid you in your defensive fires.
9.5 Die Roll Modifiers Unique to Defensive Fire
First, all defensive fires automatically receive a minus-one (-1) die roll modifier (DRM) bonus. Second, if the target moving unit is field artillery (see 2.10), the defensive fire made against it receives a further minus-two (-2) bonus DRM. Third, if the target moving unit is being fired on as it enters a hex already containing a unit friendly to it, that defensive fire suffers a +1 DRM. Note that all the plaintext DRM listed in 10.12 are also potentially applicable for defensive fire. Note, too, that all the DRM listed here and in 10.12 are cumulative in their effects.
9.6 No Rubble, Close Assault or Advance After Combat
No defensive fire ever results in the placement of a rubble marker (see 10.20), no matter the outcome otherwise. Likewise, no defensive fires may ever be resolved as close assaults, and no defensive fire ever results in an advance after combat (see 10.17).
10.0 Offensive Fire
10.1 During your offensive fire phases, your units may fire at enemy units that are within range. Combat is executed by totaling the fire strengths of all firing units, finding that strength within the appropriate column-heading on the Combat Results Table (CRT) printed on the mapsheet, then rolling a die and applying all applicable DRM to get a final result.
Each unit may potentially fire in one or two ways in every game turn: one offensive fire during each friendly offensive fire phase, and any number of defensive fires during each enemy movement phase. A firing unit is considered the "attacker," and a unit or stack being fired on is considered the "defender," regardless of the overall strategic posture of a side or if a given combat is offensive or defensive fire.
10.2 Strictures
Each unit may fire no more than once per friendly offensive fire phase, but no unit is ever forced to fire offensively or defensively. You may choose to fire with some, none, or all of you units during each of your offensive fire phases throughout the game. The attacker need not declare all his fires at the beginning of his offensive fire phase; he announces and executes them one at a time in any order he desires. The resolution of one offensive fire must be completed before that of the next is begun.
If you need a memory aid to help you recall if a given unit has already fired during an offensive fire phase, maintain a common facing among all your units and rotate each one 180 degrees when it fires.
With one exception, a targeted hex must contain at least one enemy unit in order to direct fire into that hex. Exception: see the rubble and bridge demolition rules below (10.19, 10.20 & 10.21). No offensive fire may ever have as its target more than a single enemy occupied hex. If two enemy units, rather that just one, are located in a hex attacked with offensive fire, both those units share the same combat result (that's not true for defensive fires; see 9.2).
10.3 Firing Procedures
First designate the firing units and their target hex.
Total the number of attacking fire factors, which gives the attacking fire strength.
Go to the column on the CRT corresponding to that fire strength. The attacking player rolls a die and then applies all applicable die roll modifiers. Cross index the final, modified, die roll result beneath the previously chosen fire strength column. That gives the combat result, which is applied immediately. Note the defender's fire strength in no way affects this procedure. Units in this game have no "defense factor."
10.4 Multi-Unit Fires
In general, units may fire by themselves or in groups, as long as the single target hex is within the range of all firing units. If attacking in groups, then use the combined total fire strength. US divisional units that fire in groups must belong to the same division. US XIV Corps units may fire in groups of their own or with groups of firing divisional units.
10.5 A given hex may not be attacked more than once in a single offensive fire phase.
10.6 Range
Each unit has a printed range factor (see 2.5), which is expressed as a number of hexes. Units may fire only at enemy occupied hexes within their ranges. Count the target hex but not the firing unit's hex when determining range. For example, a unit in hex 2202 that was firing at hex 2206 would be firing at a range of four hexes. A unit may fire out to, but not beyond, its range.
10.7 Line of Fire (LOF) & Blocking Terrain
A unit may always fire into a hex immediately adjacent to it (a range of one). If the range is more than one hex, however, first trace a line of fire (LOF) to the target. LOF are visualized straight lines running from the center of a firing unit's hex to the center of a targeted unit's hex. If such an LOF runs through any "blocking terrain," the firing unit may not fire at the blocked target. Terrain in a firing or target hex never blocks LOF. That is, a unit can always fire out of or into a hex; LOF is blocked for purposes of firing through hexes.
If firing at an odd angle across the hex grid, use a straight edge, running it from the center-dot of the firing hex to the center-dot of the targeted hex to determine if an LOF is blocked.
10.8 In-Hex Blocking Terrain
The following in-hex terrain types block LOF as described above: urban and heavy structures, both of which remain blocking terrain if a rubble marker is present. Units and markers (other than rubble) never block LOF.
10.9 Intramuros District Wall Hexsides may be fired through, but LOF stops in the hex immediately on the other side of the wall hexside, no matter from which side, and at what range(s), the fire is being delivered. Hexes 3821, 3822, 3921 and 3922 are considered inside the wall; all other hexes are outside.
10.10 100 Meter Contour Line Hexsides may be fired through at any ranges and in any directions. The terrain in and beyond the plateau areas described by the contour lines are universally and uniformly higher than the areas below them. As an example, hexes 1805, 1812, 2120, 1723, 1633, etc., are all behind/beyond a 100 meter contour line. A firing unit located in, say, 2224 and firing at a unit in 1924, would thereby suffer the plus-one (+1) DRM listed fourth in rule 10.12. below.
10.11 Die Roll Modifiers (DRM)
The attacker modifies his fire die rolls by certain conditions, most of which are cumulative; use all that apply. Note that the final DRM is added to the outcome of the die roll; it isn't added to the strength of the firing unit. For example, a unit with a fire strength of eight receives a DRM of plus-two (+2). It still fires on the "≤9" column on the CRT. If the die roll is a two, that fire's final, modified, die roll result is four. Final DRM may be positive, negative or zero. Positive DRM work in favor of the defender; negative DRM work in favor of the attacker.
10.12 Cumulative DRM For Offensive & Defensive Fires
In the list below, those DRM shown entirely in italics are used only for offensive fires; those in plaintext are applied in both offensive and defensive fires.
- +1 if firing at a target in an urban hex (+2 if rubble).
- +2 if firing at a target in a heavy structures hex (+3 if rubble).
- -1 if a firing unit is within a 100 meter contour line hex or area and is firing at a unit below it.
- +1 if a firing is below a 100 meter contour line hex and is firing at a unit in or beyond such a hex.
- +1 if firing, including close assaults, from the outside of a wall hexside to its inside.
- +2 if targeted unit is armored, unless one or more firing units have anti-armor capability.
- +1 if making a close assault offensive fire through any kind of bridge hexside or when making a close assault across offensive fire across a major river hexside with the assistance of the 672nd Amphibious Tractor Battalion.
- +2 if making a close assault offensive fire across an unbridged minor river hexside.
- +1 if a US aircraft units are making an offensive fire into a hex within two hexes of a Japanese anti-aircraft unit.
- -1 if half or more of the strength factors in an offensive fire come from CAC units located in hex(es) immediately adjacent to the targeted hex.
- -2 for US "Flamethrower & Gasoline" close assault offensive fires.
10.13 Range DRM
The following DRM aren't cumulative, only one or the other may apply. Also note these range DRM will never be applied to defensive fires, since that kind of fire is always conducted only into hexes immediately adjacent to the firing units. If different units are firing at different ranges in the same offensive fire, the longest of those ranges applies to all the firing units in that combat.
- +1 if firing at a target two, three or four hexes away.
- or
- +2 if firing at a target five or more hexes away.
10.14 Anti-Armor-Capable Units
If a target hex contains one or two types of armored units (see 2.10), the attacker must add a plus-two (+2) DRM, unless one or more attacking units have anti-armor capability (see 2.11). If one or more involved firing units have anti-armor capability, don't add this DRM, but still apply all other applicable modifiers normally.
10.15 Stack Defense
If there are two defending units in a hex receiving offensive fire, that stack is attacked as if it were one combined unit. If some DRM would apply to one of the units in the targeted hex, but not to the other, all those DRM are still figured in during the calculation to get the final DRM.
10.16 Combat Results
There are two combat results: Elimination ("E") and No Effect ("-"). Eliminated units are simply put into the dead pile. Units receiving a no effect result aren't affected in any way.
10.17 Close Assault & Advance After Combat
The participation of one or more "close assault capable" (CAC) units (those with boxed fire factors; see 2.11) in a hex immediately adjacent to an enemy unit or stack receiving offensive fire allows those CAC units to advance after combat into the defender's vacated hex. Close assault is entirely at the player's option. Resolve offensive fire normally, except if the combat result is "E," those CAC units involved in that close assault may enter the vacated hex. That's called "advance after combat." Advance after combat is never mandatory, but it must be decided on prior to beginning the resolution of the next combat. Also note such advances don't in any way use up normal movement phase movement allowances. Advance after combat doesn't trigger enemy defensive fire.
10.18 Rivers & Bridges
Close assault and advance after combat may not take place across major rivers unless across a printed bridge or engineer-established pontoon bridge, or via the assistance of the 672nd Amphibious Tractor Battalion (see 8.7, 8.8 & 8.9), all of which still incur a DRM. Close assaults across unbridged minor river hexsides or bridges also incurs a DRM (see 10.12).
10.19 Bridge Demolition Attacks are a special kind of offensive fire that either player may choose to conduct against the bridges printed on the mapsheet starting with Game Turn 3. If the result is "E," place a bridge demolished marker over that bridge on the map. Bridge demolition attacks are conducted just as regular offensive fires, except only the DRM below are ever applied to such efforts.
- -2 for each friendly involved combat-engineer unit.
- +1 if one or more involved attacking units are in hexes that aren't immediately adjacent to the bridge.
- +1 if enemy units are in one of the hexes at either end(s) the end of the bridge, or
- +2 if enemy units are in both bridge-end hexes.
10.20 Rubble Creation & Effects
Whenever an offensive fire into an urban or heavy structures hex gets an "E" result, the attacking player should immediately roll the die again. If that unmodified die roll is a six, place a rubble marker in the just-vacated hex. No DRM are ever applied to rubble rolls, nor does a rubble marker serve to prevent an advance after combat. A rubble marker once placed remains in its hex for the remainder of the game. Rubble works to increase the defensive value of urban and heavy structure hexes (see 10.12). No hex may ever receive more than one rubble marker, no matter how much and what kinds of combat take place in it over the course of a game.
10.21 Structure Demolition Attacks are a special kind of offensive fire that, starting on Game Turn 3, both players may choose to conduct against urban or heavy structures hexes then empty of all units. If the result is "E," place a rubble marker in the target hex. Structure demolition attacks are conducted just as regular offensive fires, except only the cumulative DRM below are ever applied to such efforts.
- -2 for each friendly involved combat-engineer unit.
- +1 if all of the involved attacking units aren't in hexes immediately adjacent to the targeted hex.
- +1 if the attacked hex is a heavy structure hex.
10.22 US Flamethrower & Gasoline Attacks (FGA) are a special kind of offensive fire that may be conducted by the US player into urban or heavy structure hexes starting on Game Turn 3. Such attacks gain a minus-two (-2) DRM. To be eligible to gain that DRM, at least two involved US units must be CAC, and they must be located in hexes immediately adjacent to the targeted hex. Further, those two hexes must be directly opposite each other. For example, if conducting an FGA into 3228, and one participating US CAC unit was in 3227, another would have to be in 3229. Other US units, both CAC and non-CAC, may participate in any FGA, as long as there are at least two CAC involved from hexes directly opposite each other. The presence of a rubble marker in a hex doesn't prohibit an FGA into that hex, though the rubble DRM would also still be applied.
Design Note. In the historic battle, the US infantry devised tactics that, first, made use of flamethrowers to drive the Japanese defenders inside. After that, they would bring up drums of gasoline, pour that liquid into holes in the roof or walls, and then ignite it. Working with the gasoline was clumsy, however; hence the requirement for CAC units to be positioned in such a way as to have set up a rough perimeter around the hex to be burned.
10.23 US Combat Support Aircraft Units (six of them) become available as reinforcements for that side at the start of Game Turn 3. Each such unit, alone or with other air or ground units, may be used in one US offensive fire per game turn. They are indestructible, have infinite range across the map, and should be placed atop the enemy hex they're attacking. There is no limit on the number of such units that may be used in any one offensive fire attack, but note the Japanese anti-aircraft DRM in 10.12. Clarification: The "3" on the aircraft units is their game turn of arrival into play; the "10" is their fire factor.
11.0 Indirect Fire
11.1 Units carrying the indirect-fire-capable (IFC) symbol ("+") may conduct indirect fire, which allows them to fire ignoring normal LOF restrictions concerning blocking terrain.
11.2. Indirect fire is conducted in the same manner as normal offensive fire, but such units' LOF aren't affected by blocking terrain of any kinds. Indirect fire may be combined with direct fire in the same offensive fire combat.
Indirect-fire-capable US units may conduct such fire anywhere on the map within their range. Japanese IFC units may conduct indirect fire only if a friendly unit can trace a normal LOF to the target hex (that's called "spotting"). The spotting unit's LOF may be of any length up to and including its own range allowance. The spotting unit doesn't have to fire at the spotted hex; it may fire at the same or another hex, or it might simply not fire at all.
11.3 Indirect Fire may not be used for defensive fire.
Mapsheet Errata
On the CRT, a less-than-or-equal-to symbol (≤) should appear to the left of the "9" heading atop the leftmost results column. Also on the CRT, a greater-than-or-equal-to symbol (≥) should appear to the left of the "50" heading atop the rightmost results column.
In the "Non-cumulative Range DRM for Offensive Fire" summary that is below and to the right of the CRT, the "+2" line should read: "If firing at a target five or more hexes away."