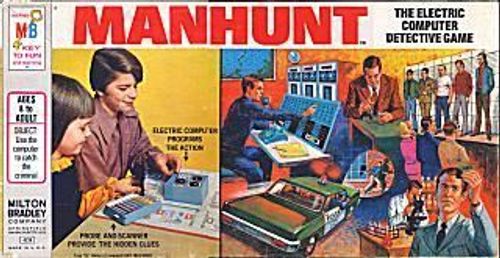
Manhunt
Manhunt Rulebook
Table of Contents
Table of Contents
Equipment
-
Gameboard: Take the gameboard out of the bottom of the box and open it up flat. The 8 numbered pictures represent places visited by the Detectives (players) as they collect clues which help them to solve the crime. The gray spaces are the roadways. The 4 badge spaces around the Center Picture are the starting spaces and represent Headquarters.
-
Computer: The Computer is powered by one "D" cell battery. To insert it, turn the Computer face down. Unsnap and open the hinged battery cover. Insert the battery with the PLUS (+) end against the motor and snap the cover back into place. Place the Computer in the center of the board over the "MANHUNT" Picture.
The Computer has three dials. All of the pointers revolve each time the lever is turned "ON." When the lever is turned "OFF" they stop. When a player is moving his car around the board, he reads the Orange "NUMBERED" dial. When he reaches a destination (colored numbered space on the board) he reads the Yellow "ON LINE — OFF LINE" dial. When two players stop on the same space, the Red "BROADCAST — RECEIVE" dial is read.
-
Scanner Cards: Before playing your first game, break apart the 16 Scanner Cards (black cards with holes). Then pop out (and throw away) all of the small discs from the holes in each card.
These cards are also printed on the white side. Find Card #1 marked "Sample." Notice that on this side are three names and numbers "MARIA NET R1, UNA CORN M4, CAREFUL CARRIE S5." These identify the Suspect for Robbery (R1), Murder (M4), or Swindle (S5) when this card is used.
Slide this card, BLACK side up, into the Clue Scanner until only the white tab shows.
-
Clue Scanner and Probe: These are kept on the table beside the Gameboard and moved around from one player to another, as they are needed.
Take the Probe and insert its Plunger into the 4 holes A B C D in the Scene 1 row, as shown on the box cover. Notice that holes "B C D" show the Red Dot (•) in the Probe, and hole "A" shows nothing. This signifies that the hole in the punch card for that row is at "A."
THE OBJECT OF THE GAME is to be the first player to identify the "Culprit."
Playing Rules
For 2, 3, and 4 single players or 4 and 6 players as partners
-
At the beginning of a game, players agree which one of the types of Crime they are going to solve, Robbery, Murder or Swindle, and use only the Read Out diagram and Suspects in the section of the book matching that Crime.
-
The 16 Scanner Cards are shuffled and held Black side up. One is drawn and slid into the Clue Scanner until only the white Tab is showing. Players must not see the white side of the card, as it reveals the solution of the crime.
-
Each player is given a Read Out book, Detectives Handbook and a blank Clue Sheet, which he carefully places in his Handbook. (Both partners use the same Handbook and Clue Sheet.) Each player or partnership needs a pen or pencil.
-
All players in turn use the Computer by moving its lever to "ON" and "OFF," reading the orange NUMBERED Dial. The player who dials the highest number, chooses a colored car and places it on any one of the Badge spaces. The other players in turn to his left, do the same. (Partners start both of their cars from the same Badge space.)
-
All players MUST first visit "Scene of Crime 1," moving there by spins of the Computer reading the NUMBERED Dial. They must stop on either "Red 1" space by exact count.
-
When a Player stops on that space, he spins again, now reading the Yellow dial. If the pointer stops on "OFF LINE," he waits on that space until he successfully spins "ON LINE" in a following turn.
-
When the Computer stops at "ON LINE," the Player uses the Clue Scanner and Probe. He turns the Probe toward him as shown on the cover of the game box. He SECRETLY pushes the Plunger into ALL FOUR HOLES — "A-B-C-D" in the Scene 1 (red) row on the Clue Scanner. He should push the Probe down until it hits the Scanner surface in EACH hole. In this way his Opponents will not find out which hole is punched in the Scanner Card. There is one (only one) punched hole in each row.
-
Each time, after using the Probe and Clue Scanner, the player marks the results in the correct row on the Clue Sheet in his Handbook.
Further Investigation
After visiting Scene of Crime 2, the players search for more Clues. They may collect them three ways: (1) by visiting the other numbered locations on the board, (2) by landing on the same space as an Opponent, (3) by returning to (Headquarters) any Badge space and calling an Opponent back there for a conference. Players usually use a combination of all three.
-
Visiting Locations: A Player's car may go from "Scene of Crime 2" to the other Pictures in any order. That is, it may go to WITNESS (3 or 4) or STAKE OUT (7 or 8) or one of the Crime Labs (5 or 6). He must land on its colored number space by exact count, spin the Computer for "ON LINE," etc., the same as he did for Scenes 1 and 2.
-
Landing on the Same Space: When a Player lands, by exact count, on the space occupied by an Opponent there is a possible exchange of information. The Player spins the Computer again and uses the Red "BROADCAST-RECEIVE" dial to accomplish this.
(a) If the pointer stops on "RECEIVE," the Player can ask to see what the Opponent has written in his Handbook under any number from 3 to 8.
(b) The Opponent must open (turn back) only the flap on the cover of his Handbook opposite the number requested. For example, using the Printed Copy in the Handbook under Flap 5 is [X][O][O][O].
(c) The Opponent must show this so that only the Player involved will see it. The Player then copies this information in HIS Handbook and therefore doesn't have to visit that location on the Board.
(d) When the pointer on the Computer stops on "BROADCAST," instead of "RECEIVE," the Opponent may ask the Player for information by number instead. Either Way, Rules (b) (c) and (d) must be followed.
Note: In any one turn information may be asked from only one number, whether or not a clue is revealed.
Knowing that he may "BROADCAST" instead of "RECEIVE" information, a Player should think "Is it to my advantage?" before moving his car to a space occupied by an Opponent.
-
Calling an Opponent's Car Back to Headquarters: When a Player lands on any of the 4 Badge spaces by exact count, he may, if he wishes, call any Opponent to that same "Badge" space for a conference. For example, calling the "Green Car back to Headquarters" means that the "Green Car MUST be placed on that Badge space immediately. The Player who called the car back then spins the Computer again using the "BROADCAST-RECEIVE" dial and Rules A, B, C, and D as in "Landing on the Same Space" are followed. Both cars move from the Badge Space in their next turns.
Eliminating Suspects
-
Each time a Player uses the Probe and Clue Scanner or adds information from Opponents, he should write in the Clues on his Clue Sheet from the Read Out diagram as soon as practical.
-
During the time his Opponents are taking their turns, the Player should check the Suspects and eliminate those whose records show they DO NOT HAVE matching clues. This is done by crossing out the circled numbers that match the "R, M or S" numbers under the Suspects' pictures.
-
Once a Suspect's number is eliminated, the Player doesn't have to check that number when new clues are found.
-
When a player has eliminated all but one circled number, that number should identify that Suspect as the "Culprit."
-
After double-checking the Clues he has written in his Handbook with the "record" of that Suspect, a Player removes his Clue Sheet and secretly writes on the back of it, the name and number of the one he thinks is guilty.
-
After announcing that he thinks he has solved the crime, he turns the Clue Scanner face down, and SECRETLY pulls out the Scanner Card by the tab just far enough to read the Culprit's name for that game.
-
If the name DOES NOT match the name he has written on his Clue Sheet, he slides the Scanner Card back into the Clue Scanner again and he is OUT OF THE GAME. He MUST NOT reveal the correct name to the Opponents nor tell whom he incorrectly thought was the Culprit. This would spoil the game for the other players.
-
The first player to correctly identify the "Culprit" WINS THE GAME.