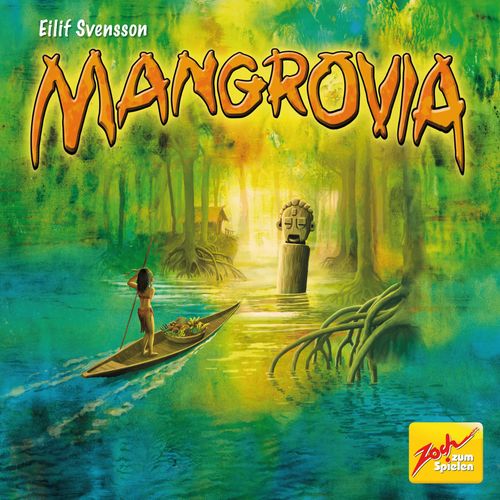
Mangrovia
Mangrovia Rulebook
Table of Contents
Table of Contents
Materials
- 1 gameboard
- 85 game cards:
- 32 landscape cards: 8 x water, sand, mangroves and reed
- 53 valuables: 9 x value 2, 8 x value 3, 7 x value 4 and 5, 6 x value 6 and 7, 10 starting cards
- 1 boat
- 2 birds of paradise
- 1 starting player talisman
- 40 amulets: 5 amulets worth 1, 35 amulets worth from 2 to 6
- 1 amulet bag
- 50 huts in 5 colors
- 10 pillars in 5 colors (5 chief's pillars and amulet pillars)
- 10 bowls in 5 colors
- 8 pole tiles with values from 2 to 9
For the game variant (see Game Variant below):
- 16 stone area tiles
Introduction
In order to earn chief's points, you collect amulets and build huts:
- on the eight divine paths
- in the stone area
- in the pole area.
There are four vertical and four horizontal divine paths. Each path begins next to or below a God's statue and consists of all landscape spaces of one column or row.
Amulets also give you chief's points at the end of the game. Besides this, amulets are required to build huts at certain locations.
Amulets in the bag: 10 x value 2, 9 x value 3, 7 x value 4, 5 x value 5, 4 x value 6.
If you earn more chief's points than any of the other players, you win and become the new chief.
Gameboard and Set-up
The gameboard shows four types of landscape: mangroves, sand, reed, water.
Oracle rock: That's where the birds of paradise move. You can build huts on the landscape spaces. Amulet spaces are landscape spaces encircled in red. Chief's track: Chief's pillars start on space 0. Amulet track: The starting space for the amulet pillars is next to the 0. This is where you stack the amulets with the value 1. This is where you stack the pole tiles. The archipelago holds the ritual sites for the bowls. Boat space: This is where the ride around the archipelago starts.
In the five-player game, each player gets 8 huts and 1 bowl. In the four-player game, each player gets 9 huts and 1 bowl. In the two- or three-player game, each player gets 10 huts and 2 bowls.
In the three-player game, you place a hut of an unused color on each of the 3 landscape spaces with a gray hut symbol. In the two-player game, you place such a hut on each space with a gray hut symbol (3) as well as on each space with a white hut symbol (7).
In the two-player game, put the tile with the value 2 below the neutral hut in the pole area. Consequently, now tile value 3 is lying on top of the pile. In addition, you block the last ritual site (landings 6/7) with a neutral bowl. Those landings are ignored completely during the entire game.
1. Huts, bowls, and chief's pillars
You place your chief's pillar on space 0 of the chief's track and get huts and bowls in your color (see the player-count text-box above). The remaining huts, bowls and chief's pillars are not needed.
2. Game cards and starting player talisman
Determine a starting player. He puts the talisman in front of him. Distribute the starting cards: The starting player gets the two cards with the number 1 and takes them into his hand. His left neighbor gets the cards with the number 2. The other players get, in turn and in clockwise order, the cards with the numbers 3, 4 and 5. Return any unused starting cards to the box.
Shuffle the remaining valuables and put them as a face-down draw pile next to the gameboard. Reveal four of them and lay them out next to one another.
Shuffle the landscape cards. Each player gets 2 of them and takes them into his hand. Put the remaining landscape cards as a face-down draw pile next to the gameboard. Reveal three landscape cards and lay them out next to one another.
3. Boat and birds of paradise
Place the boat on the marked boat space above the archipelago.
Put one bird of paradise on the (dark green) mangrove space and the other bird of paradise on the (blue) water space of the oracle rock.
4. Amulets and amulet pillars
Stack the 5 amulets with the value 1 face up on the repository space below the amulet track. Put all the other amulets into the amulet bag at the beginning of the game; have this bag accessible next to the gameboard.
Each player places the amulet pillar of his color in the left column next to space 0 of the amulet track. The remaining amulet pillars are not needed.
5. Pole tiles
Sort the pole tiles by number values, in ascending order from the 2 on top to the 9 at the bottom, and put them as a face-up pile on the small island space next to the pole area. (Exception: two-player game, see the text-box above.)
Course of the Game
Each game round consists of 3 phases, which you execute always in the same order:
- Placing bowls – choosing actions
- Moving the boat – carrying out actions
- Preparing the next game round.
Phase 1: Placing bowls - choosing actions
The starting player begins. The other players follow in clockwise order. On your turn, you place your own bowl on any unoccupied ritual site of the archipelago. The symbols on the twelve landings show you what action(s) a player is allowed to carry out when the boat reaches that bowl.
The twelve landings around the archipelago show the following actions:
- Landing 1: First draw 2 face-up cards and then 1 face-down card.
- Landing 2: Collect amulets.
- Landing 3: Draw 1 face-up card.
- Landing 4: First draw 1 face-up card and then 1 face-down card.
- Landing 5: First draw 1 face-up card and then 2 face-down cards.
- Landing 6: Collect amulets or draw 1 face-down card.
- Landing 7: Draw either 2 face-up cards or 2 face-down cards.
- Landing 8: Collect amulets or build 1 hut.
- Landing 9: Build 1 hut or build 1 double hut.
- Landing 10: Build 2 huts on different spaces.
- Landing 11: Build 1 hut and then draw 1 face-down card.
- Landing 12: Place the birds of paradise on the oracle rock on two spaces of your choice and become the starting player for the next game round.
In the two- and three-player game, each player, in turn, then also places his second bowl on a free ritual site. In this case, the starting player may not place his first bowl on the first ritual site of the archipelago (landings 1/12). However, he may place his second bowl there, provided this site is still unoccupied.
Phase 2: Moving the boat – carrying out actions
The boat heads to the landings 1 to 12, one after another, around the archipelago. If there is a bowl on the associated ritual site, the boat stops. The owner of this bowl carries out the action indicated on the landing. You may never change the indicated order of actions. However, you may forego (parts of) actions if you wish. If there is no bowl at the ritual site, you move the boat ahead immediately.
Example 1: Since there is no bowl on the ritual site at landing 1, the boat moves on to landing 2. The yellow player has placed a bowl there; therefore, he may now collect amulets. This is how you move the boat from one bowl to the next.
Example 2: The landing that the boat has reached (3) allows the player to draw a face-up card. The orange player does this since his bowl is on the applicable ritual site. This bowl also allows him to carry out the action of the landing on the opposite side (10) – not immediately, but only when the boat has reached that space.
How to Carry Out the Actions
How to build huts
A hut may be built only on an unoccupied landscape space. The landscape of this space must be marked by one of the two birds of paradise on the oracle rock.
Example 3: Right now, you can build only on water spaces and sand spaces.
How to place birds of paradise
Put the birds of paradise on two different landscape spaces of the oracle rock. You may also leave one or both birds where they are.
How to draw cards
Cards are drawn only from the draw piles and the face-up cards displayed next to them - never from other players! You may not change the specified order in which the cards must be drawn face down or face up. For each single card, you can choose freely whether you draw a valuable or a landscape card. When drawing two face-down cards, you may look at the first one before you draw the next one. Face-up cards in both displays (valuables and landscapes) that were drawn are not replaced immediately but only in phase 3!
How to collect amulets
With your amulet pillar on the amulet track, you mark the number of huts you have on the red-encircled amulet spaces. The more huts you have built on amulet spaces, the more amulets you are allowed to collect. Lay down the amulets you have collected face-down in front of you.
- If you have two or more huts on amulet spaces, you draw the corresponding number of amulets from the bag – but no more than 5. Then you throw one of your choice back into the bag.
- If you have exactly one hut on amulet spaces, you draw one amulet from the bag and keep it.
- If you don't have a hut on any amulet space, you may not draw any amulet from the bag. Instead, you take an amulet with the value 1 from the gameboard, if there are any left.
Example 4: Orange has already built 3 huts on amulet spaces. He draws 3 amulets from the bag, has a look at them and keeps 2 of them.
Building one hut
To build one hut, you have to (from your card hand):
- ... pay the exact amount of valuables or amulets that is indicated on the space in question.
If you are not able to pay the exact amount, you may not build a hut on the applicable space. You may not pay a higher amount. If the space indicates valuables as the means of currency, you may not pay with amulets (and vice versa).
- ... give up a landscape card that corresponds to the landscape of the respective space.
If you have built a hut on a space that shows chief's points, you immediately move your chief's pillar on the chief's track the applicable number of spaces forward.
Example 5: On this space, building a hut costs 7 valuables and one "sand" landscape card. Orange is able to pay the exact amount and therefore is allowed to build. Because there is 1 chief's point on the space, Orange may move his chief's pillar 1 step forward on the chief's track.
Example 6: On this space, building a hut costs exactly amulets worth 5 and one "water" landscape card. The red player has amulets worth 6, but he can't pay the exact amount at the moment. Therefore, he may not build here right now.
If you have built a hut in the pole area, you place the topmost pole tile from the pile underneath this hut and immediately move your chief's pillar ahead on the chief's track the number of spaces that corresponds to the value of the pole tile.
Please note: The center square of both the stone area and the pole area are not considered building spaces. That means you may not build huts on these squares.
Building two huts
If you build two huts (which is allowed only from landing #10), you erect two huts, one after another, on two different spaces. You have to pay the exact amount for each of them individually. All rules apply as previously described (see "Building one hut").
Example 7: With two landscape cards and 14 valuables, Red builds two huts: one on the reed space value 8 and another one on the water space value 6. Because there are 3 chief's point on the reed space, Red may move his chief's pillar 3 steps forward on the chief's track immediately. Even though Red has 14 valuables in total, he would not have been able to build huts on two "7" spaces using the same cards as above. He has not 2 x 7 valuables.
Building double huts
If you build a double hut (which is allowed only from landing #9), you pay twice the amount of valuables or amulets plus two corresponding landscape cards. If you have built a double hut on a space that shows chief's points, you immediately move your chief's pillar double the number of steps forward.
Example 8: On this space, building a double hut costs 20 valuables and 2 "water" landscape cards. Purple is able to pay the exact amount and therefore is allowed to build. Because there are 4 chief's point on the space, Purple may move his chief's pillar 8 steps (2 x 4) forward on the chief's track.
Please note: Double huts may not be built in the following areas:
- In the entire stone area
- In the entire pole area
- On all 10 amulet spaces
Already-built huts cannot be "upgraded" to a double hut.
Double-landscape spaces
There are two double-landscape spaces on the gameboard, each of them consisting of two landscapes. If you build a hut on such a space, the landscape card you pay with has to correspond to one of the landscapes (of the space in question). This type of landscape must be occupied by one of the birds on the oracle rock.
If you build a double hut on a double-landscape space, you may choose to pay with landscape cards of one or both landscapes (of the space in question).
However, here too, you are not allowed to pay with landscape cards of a type that is not occupied by a bird on the oracle rock.
Example 9: Orange builds a hut on this space and moves his chief's pillar 4 steps forward on the chief's track immediately.
After building a hut
Once valuables and landscape cards have been used, they are collected on separate discard piles. Sort out the starting cards and put them back into the game box. When a draw pile has been depleted, shuffle the corresponding discard pile and use it as the new draw pile.
Put the amulets aside that you have used for building huts. Only if the bag is empty you put all the amulets that you have put aside (so far) back into the bag.
Phase 3: Preparing the next game round
- The player who has occupied the first ritual site of the archipelago (between landings 1 and 12) with his bowl in this round takes the talisman and thus becomes the starting player of the next game round.
IMPORTANT: If the first ritual site of the archipelago is unoccupied, the starting player (of the round that just ended) passes the talisman to the neighbor on his right, who then becomes the starting player of the next round. He has to move the birds of paradise to the two unoccupied landscape spaces of the oracle rock.
Example 10: Since no player has occupied the first ritual site the birds of paradise have to be moved from water and sand to mangroves and reed.
- Take your bowls back from the ritual sites and put the boat back on the starting boat space.
- Refill the display of valuables to 4 cards, using cards from the draw pile.
- Refill the display of landscape cards to 3 cards, using cards from the draw pile.
Final Scoring
When one player has built his last hut, the current game round is still completed. Now players score additional chief's points.
The 8 divine paths
Players check who has built the most huts on each of the four vertical and four horizontal divine paths. Double huts count as two huts. The numbers in front of the statues indicate how many chief's points the players get for having built the most and second most huts on the respective path. In case of a tie (same number of huts), the player whose hut is closer to the statue of this path wins.
In the two- and three-player game, huts of neutral color are included in the count (also to resolve a tie). That means: If you are behind the (fictional) "neutral" player in terms of the number of huts on a path, you'll also be ranked behind him in the scoring.
Example 11: On the vertical divine path on the very left (A), Yellow, Purple and Red each have two huts. However, the hut furthest up (near the God's statue of this path) is a red one. Red wins this path and scores 12 chief's points for it. Consequently, Yellow takes second place on this path – and thus earns 6 chief's points: His upmost hut is closer to the God's statue than Purple's huts.
On the vertical divine path to the right of the above-mentioned path (B), Orange has the most huts. This first place gives him 10 points. Yellow's hut is positioned further up than Purple's hut, giving Yellow second place and 5 points.
The stone area
Calculate your chief's points in the stone area as follows: Multiply the number of your huts in the stone area by the total number of all huts in the stone area.
Example 12: There are 7 huts overall in the stone area. Purple has 3 of them. He scores 7 x 3 = 21 chief's points. Yellow and Red have two huts each; so each of them scores 7 x 2 = 14 chief's points.
The pole area
If you have built the most huts in the pole area, you score 12 chief's points. The player with the second most huts in this area scores 6 chief's points. In case of a tie (same number of huts), the winner of the tie is the player who has built his first hut in the pole area earlier than the other players involved in the tie. This is easy to find out by checking the pole tiles under the huts: Huts on pole tiles with a lower value were built earlier than those on higher-value pole tiles.
In the two-player game, the neutral hut is included in the count (also to resolve a tie). That means: If you are behind the (fictional) neutral player in terms of the number of huts in the pole area, you'll also be ranked behind him in the scoring.
Example 13: Orange has built the most huts (3) in the pole area; for this, he scores 12 chief's points. Both Red and Purple have the second most huts (2 each). The pole tile with the lower value (4) of these two players is lying under one of Purple's huts. Therefore, Purple scores 6 points as the player in second place in the pole area.
Remaining amulets
For each amulet a player owns, he scores chief's points equal to the amulet value.
Example 14: 6 + 4 + 2 = 12
Overview of Final Scoring
- The 8 divine paths. Most huts: higher number of chief's points. Second most huts: lower number of chief's points. Tie-breaker: huts closer to the statue.
- Stone area. Number of your huts x number of all huts = number of chief's points.
- Pole area. Most huts: 12 chief's points. Second most huts: 6 chief's points. Tie-breaker: hut built earlier.
- Remaining amulets. Total value = number of chief's points.
Ending and Winning the Game
After all players have moved their chief's pillars to mark their chief's points on the chief's track, it becomes clear to whom the Gods are particularly inclined: The player who has earned the most chief's points becomes the winner and thus the future tribe leader.
In case of a tie, the player (among the tied players) who has the highest total value of amulets at the end of the game wins.
There can be more than one winner.
Game Variant
The Stone Area Tiles
All rules of the basic game apply. Additionally, eight stone area tiles come into play. Distribute eight of them face-up randomly onto the eight spaces of the stone area. The remaining eight stone area tiles are put back into the box.
In the two- and three-player game, there are only seven stone area tiles placed, since no tile is positioned on the space with the hut of a "neutral" color.
Special rules for the course of the game: If you build a hut on a space of the stone area, you receive the stone area tile lying there.
- You keep any tile that shows a God's statue for the rest of the game. If you are involved in a tie on a divine path for which you own the tile with the corresponding God's statue, the tie is resolved in your favor. Different from the basic game, the distance from his huts to the God's statue of this path doesn't play a role for the owner of this tile.
Example 15: Purple wins the tie with Red and Yellow on the divine path (A) since he has the God's tile of this path.
You may use tiles with other motifs anytime during your own turn, as follows (discard them after use):
- This tile counts as a valuable with the value 3.
- This tile counts as an amulet with the value 2.
- "Landscape wild card." If you give up this tile, you may build a hut on any landscape space – no matter where the birds of paradise are sitting.
Other possible variants
If you want, you can also deliberately use just the (eight) stone area tiles showing God's statues. Or, the other way around, it is also possible to deliberately take these tiles out of the game and use the eight "godless" tiles instead.
The author would like to thank Lin Heidi Isaksen, Tommy Reitan, Bente Tangen Reitan, Remo Rehder, Per Johan Lysberg and Nils Håkon Nordberg. Also thanks to Kristian A. Østby, Åsmund Svensson, Ronny Eftevåg, Christian Vennerød, Knut Strømfors and other game testers.