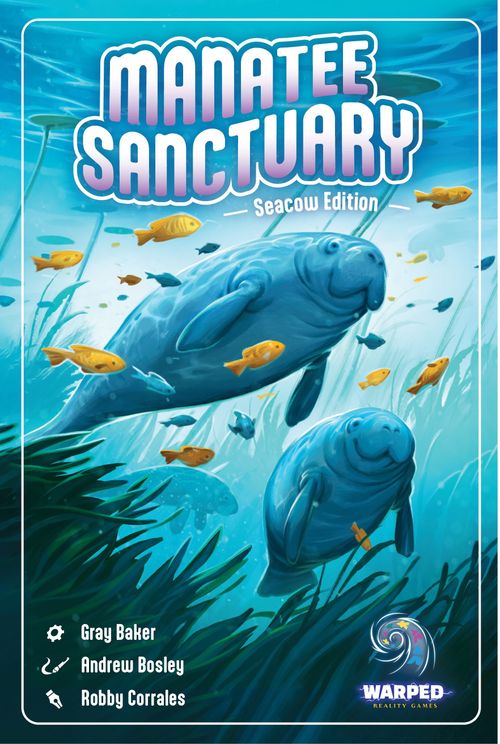
Manatee Sanctuary
Manatee Sanctuary Rulebook
Table of Contents
Table of Contents
Components
- 1 Game Board
- 6 Player Boards
- 6 Starting Tiles
- 90 Sanctuary cards
- 130 Manatees + 1 Manatee Bag
- 1 Round Tracker
- 6 Score Markers
- 12 Food Markers
- 6 50/100 Point Tokens
- 6 Completed Flower Markers
- 10 Round Bonus Cards
- 1 Solo Token
Player Set-up
- All players choose a color and take a set of components of that color (Score Marker, Completed Flower Marker, two Food Markers, and 50/100 Point token). Additionally, players take a Starting Tile and a Player Board. Be sure not to place on Solo Mode side!
- Place the Game Board in the center of the table and place each player's Score Marker on the 10 space. Place the Round Marker on the 1 space of the board with the arrows pointing to the left. Finally, place the 50/100 point tokens for each player on the marked place on the board.
- Put all Manatees into the bag and place it next to the board within reach of all players.
- Shuffle the deck of Sanctuary cards and place it near the Game Board.
- On their Player Boards, each player places their Completed Flower Marker on the 0 space of the Completed Flower track. Then place one Food Marker on the 0 spot of the top Food Track, and the second Food Marker on the 0 spot of the lower 10's Food Track.
- Place all unused components back in the box and put it aside.
Sequence of Play
Gameplay takes place over 3 rounds each consisting of 4 Phases: Draft, Expand & Actions, Feed, and Score.
After 3 rounds the game goes to End Game Scoring and the player with the most points wins the game!
Phase 1 - Draft
Deal 5 Sanctuary cards face down to each player. Players will simultaneously look at their cards and must choose how to split their 5 cards into 2 individual face down stacks. These can be stacks of 1 and 4 cards or 2 and 3 cards. Which cards are placed into each stack is entirely up to the player.
Once all players are ready, players will pass both stacks to the player to their left on Rounds 1 and 3, or right on Round 2. Once all players receive 2 stacks of cards, they must choose 1 stack of cards to keep and 1 stack to return. Do not mix cards in the stacks.
To show which stack they are keeping players place their chosen stack on the bottom side of their Player Board labeled "stack to keep." Conversely place the stack they are returning above their Player Board labeled "stack to return."
After all players have made their choice they return the top stack to the player from whom they received it.
Each player ends the Draft Phase with a hand of 2 combined stacks of Sanctuary cards ranging from a total of 2 to 8 cards.
Sanctuary Cards
Sanctuary cards are split into two halves, top and bottom.
The top half can be played for its Rescue Manatees and Harvest actions. The bottom half is used to Expand where players increase habitat space and Food production.
Players must choose which half to use but may NEVER use both halves. Players may use their cards in any order they choose and must do so ONE AT A TIME.
Card Strength
All Sanctuary cards have a number of dots (1-3) in the center. These dots determine the "strength" of the card. For new players we recommend keeping both stacks of cards to be as equal as possible in dot count, when splitting your stacks.
Reminder: Manatee Sanctuary comes in two versions, Seacow and Mermaid. The icon to the left of the strength dots denotes which version the card belongs to. Game version has no impact on gameplay and is only used when combining the games to play 7-12 players (see Sanctuary Scramble).
Phase 2 - Expand & Actions
In this phase players will simultaneously use their Sanctuary cards to Expand their Habitat, Rescue Manatees, and Harvest food.
Tip: Players may place their cards faceup in front of them during this phase in order to make it easier to look at all parts of each of their cards.
Expand (Bottom)
Using a Sanctuary card for its bottom action is how players can expand their sanctuary to house more Manatees as well as increase Food production.
To expand their sanctuary players MUST tuck the top half of the card UNDERNEATH a Starting Tile or a Sanctuary card already played. Cards may be played in any orientation but MUST establish one or more Completed Flowers when added. Additionally, any walls CANNOT leave a Flower icon incomplete.
Completed Flowers
A Completed Flower happens when two halves of a matching flower symbol line up from expanding a sanctuary.
When a player completes a flower they immediately move up the Completed Flower track 1 space and gain 1 Food for each flower they just completed.
Example: Purple player wants to add their last card to their Sanctuary. Since it only has one open end, they must be careful where they place it. With this Sanctuary, Green player has 2 possible locations for the card. The purple flower on the right is open, however the card cannot be placed as it would leave the red flower icon incomplete.
Housing Manatees
The bottom half of Sanctuary cards will have a number in the middle (and corners) that determines the amount of Habitat space a card has available. Each Manatee requires a certain amount of Habitat space(s) to be housed within a Sanctuary.
If a player draws a Manatee and cannot house it because they are out of Habitat space, they must return the Manatee back to the bag and lose 2 points for each Manatee returned.
Some Sanctuary cards will NOT show a number on the bottom half but instead will show an end game scoring condition. These cards are added to sanctuaries like any other card but CANNOT house Manatees. In the FINAL round of scoring (round 3) players will score these bonuses along with normal round scoring.
Important: Players may re-arrange their housed Manatees whenever and however they want. All Manatees still follow normal housing rules and cannot be left outside of a Sanctuary.
Actions
To play a card for its action(s) place it next to the Player Board and take all of the actions listed on that card. Cards are played on top of each other creating a discard pile for each individual player.
Once a player has carried out all actions from a played card they will leave that card in the play area beside their board. If they wish to play another card simply place the new card on top of the card(s) in their play zone. This way a player can easily reference cards they have already played throughout the previous round(s).
Rescue Manatees
For each Manatee icon shown on a played card that player MUST draw a Manatee from the bag and place all drawn Manatees onto the card played.
A Manatee icon of a specific color (Pink or Yellow) means the player must search the bag for a Manatee of that specific color. A white Manatee with a "?" mark means the player draws a random Manatee from the bag.
After drawing the Manatee(s) from the played card (and any bonuses from Yellow Manatees) the player must then move all new Manatees to their Sanctuary.
If a player would ever need to place a Manatee from their card into their Sanctuary and cannot house it they must return the Manatee back to the bag and lose 2 points for each Manatee returned. Players may choose which Manatees to return from new incoming Manatees if they do not have enough Habitat space. However, players may not return Manatees that are already established in their Sanctuary from previously played cards/rounds.
Manatee Icons
-
Gray Manatee - Gray Manatees make up the majority of the bag. These are standard Manatees with no special requirements. Each Gray Manatee requires 1 Habitat space and 1 Food during each Feeding Phase.
-
Pink Manatees - Pink Manatees are always hungry! These Manatees take up 1 Habitat space and require 2 Food during each Feeding Phase. Pink Manatees score double points during each scoring phase.
-
Yellow Manatees - Yellow manatees are playful! These Manatees take up 2 Habitat spaces and require 1 Food during each Feeding Phase. Due to their playful nature, Yellow Manatees attract additional Manatees. Whenever a player uses a card to Rescue Manatees, they MUST draw one additional Manatee at random per Yellow Manatee within their sanctuary.
Tip: Some Sanctuary cards are marked with an icon. This is a reminder for players to draw any additional Manatees if they have any Yellow Manatee(s) within their sanctuary.
-
Random Manatee - Draw a random Manatee from the bag.
Example: Purple plays two Sanctuary cards to Rescue Manatees. With the first card they must draw a Yellow Manatee from the bag and house it within their sanctuary. With the second card they must draw two Manatees at random from the bag. Additionally Purple must draw a bonus Manatee because of their Yellow Manatee already in their sanctuary, they randomly draw a Pink Manatee.
Harvest
A happy Manatee is a well-fed Manatee! Players will use the Harvest action to gain Food to Feed their Manatees.
Each Harvest icon will earn the player Food equal to the number of Completed Flowers within their Sanctuary. A single card may have more than one Harvest icon so these will supply larger amounts of Food. A player may either count the flowers in their sanctuary or reference their Completed Flowers track on their Player Board to know how much Food to gain per Harvest icon.
Players will keep track of their Food Supply by moving the appropriate tokens on their Player Board.
Example: Purple has 4 Manatees within their Sanctuary, 1 Yellow, 1 Pink, and 2 Grays. This will cost them 5 Food during the Feeding Phase. Currently, they do not have enough Food. Purple has two Sanctuary cards and decides to use the first card to expand their habitat, making 2 Completed Flowers and gaining 2 Food immediately. With the second card, Purple must draw a Manatee at random and must Harvest twice. Additionally, they must draw a random Manatee for their housed Yellow Manatee. With 4 Completed Flowers and 2 Harvest icons, Purple gains 8 Food, giving them a total of 12 Food. More than enough to feed all their Manatees!
Phase 3 - Feed
Once all players have used or played their Sanctuary cards, they must now Feed all Manatees within their habitat. Gray and Yellow Manatees require 1 Food each whereas Pink Manatees require 2 Food each. This phase can be done simultaneously by all players.
If a player does not have enough Food for all their Manatees they must return Manatees to the bag until they have enough Food for those left. For each Manatee returned, that player loses 2 points. Players may choose which Manatees to return.
Example: Purple player has 6 Manatees to Feed - 1 Yellow, 1 Pink, and 4 Grays. Purple needs 7 Food total to feed them all. With 12 Food in their supply, Purple subtracts the required 7 Food from their supply moving their token to "5". With all Manatees fed Purple now moves to Round Scoring.
Phase 4 - Score
Once all players have fed their Manatees they will score their housed Manatees. This can be done simultaneously by all players.
Scoring changes depending on the round as shown on the Score Track:
- In Round 1 each Gray and Yellow Manatee is worth 3 points and Pinks are worth 6.
- In Round 2 each Gray and Yellow Manatee is worth 2 points and Pinks are worth 4.
- In Round 3 each Gray and Yellow Manatee is worth 1 point and Pinks are worth 2.
Example: Purple player has 6 Manatees in Round 1. Gray and Yellow Manatees are worth 3 points apiece for a total of 15 points. The Pink Manatee is worth 6 points. Purple player scores 21 points for round 1!
After Scoring for Rounds 1 and 2 begin a new round by starting with Phase 1 Draft. Additionally, move the Round Token down to the next round number and flip it over changing the direction of the draft.
At the end of the 3rd round score all Manatees as normal and then move on to Final Scoring.
End Game Scoring
Players now calculate any End Game scoring bonuses they have from cards within their sanctuary.
End of Game Scoring Icons
- 1 point per any two Manatees
- 2 points per Pink Manatee
- 3 points per Yellow Manatee
The player with the most points is the winner!
If there is a tie the player with the most Manatees in their sanctuary wins. If there is still a tie the player with the LEAST left over Food wins, and if there is still a tie the tied players share the victory!
Optional Module: Round Bonuses
Round Bonus cards can be added at the beginning of a game for added complexity and bonus points.
Some of these cards are divided into sections, 2 faces on the front side, and one face on the backside. Each one of these faces will add a bonus objective to a particular round of the game. Each card shows the round which the bonus takes effect and the bonus points players can earn if they achieve the round objective.
Setup
Follow the normal setup and shuffle the Round Bonus cards and draw 3 cards at random. Tuck one card underneath the board next to each round number. Orient each card so that the round bonus showing matches the round number next to it.
Some Round Bonus cards can be applied to any of the 3 rounds.
Gameplay
Gameplay continues as normal. During the Score Phase of each round, however, players may score additional points if they have completed the round bonus objective. All players may complete the same objective and there is no penalty if the objective is not met.
Objectives must be completed during the round when it is active. Objectives cannot be scored retroactively.
Example: The current Round Bonus is 3 points per housed Yellow Manatee. Both Purple and Green players have completed the Round Bonus objective. Since Purple has 2 Yellow Manatees within their Sanctuary they earn 6 bonus points. While Green only has 1 Yellow Manatee so they earn 3 points.
Round Bonus Objectives
- 3 points per Yellow Manatee housed within your sanctuary.
- 2 points per Pink Manatee housed within your sanctuary.
- 1 point per any Manatee housed within your sanctuary.
- 3 points per red Completed Flower.
- 3 points per green Completed Flower.
- 3 points per purple Completed Flower.
- 5/10/15 points if you have 3 or fewer food at the end of the round.
- Have a sanctuary in the shape of the drawing shown on the card, in any orientation. The required shape can be within a larger shape of a sanctuary. The shape can be made with previously placed cards or with new ones. There are no extra points given for making two or more of the required shape.
Solo Mode
Setup
Setup the game as normal. Use the opposite side of the Player Board labeled "Solo Mode." Pull the Solo token from the box and set it on the marked spot on your Player Board. Bonus Round cards can be used in Solo games.
Gameplay
At the beginning of each Draft phase draw 2 Sanctuary cards and choose 1 card to pick and 1 to discard.
Keeping the "stronger" card (more dots) will move the Solo Token up the Track, choosing a "weaker" card (less dots) moves the token down the track. If the cards have the same amount of dots, use either card and do not move the token.
Repeat this process until you have 5 Sanctuary cards in hand, then move to Phase 2 of the round.
Example: Purple player draws 2 Sanctuary cards at the start of the round. Purple chooses the 3 dot card and discards the 1 dot card. With the difference between the cards being 2, Purple moves the Solo token up two spaces to the -4.
Gameplay continues as normal, but during End of Round scoring, remove or add points according to the location of the token on the Solo Point Track, then reset the Solo Token to the middle white spot on the track.
At the end of the game, compare your score to the scoreboard to see how well you did!
Scoreboard
- Fewer than 50 points: Try again
- 50-60: You can do better
- 60-70: Respectable
- 70-80: Good
- 80-90: Great
- 90-100: Wow!
- 100-110: Amazing!
- 110+: Mana-topia
If playing with Round Bonuses add 25 points for each Mana-tier.
Solo Challenges
After playing a few solo games, try your hand at some challenges! When playing challenges, do not use the Round Bonus cards. To win any challenge you must complete the listed objective AND score MORE THAN 70 VP.
- Harvester - Have 40 or more leftover Food at the end of the game.
- Tight Fit - Treat all Sanctuary cards as if they have -1 Habitat Space.
- Color Co-ordinated - Have at least 7 Completed Flower icons of the same color in your Sanctuary.
- Shortage - Have no more than 6 Completed Flower icons in your Sanctuary.
- Power Cap - Once during the game, after the Draft Phase but before moving to Expansions and Actions, discard your strongest (most dots) card from your hand. If multiple cards are tied in strength, choose which card to discard.
- Weak Cut - Each round, after the Draft Phase but before moving to Expansions and Actions, discard your weakest (least dots) card from your hand. If multiple cards are tied in strength, choose which card to discard.
- Architect - Create the required shape shown on the challenge card in your Sanctuary by the end of the game.
- Manatee Savior - Have at least 24 Manatees (of any color) at the end of the game. If you ever must return a Manatee to the bag for lack of Habitat Space or Food, lose the game.
Manatee Facts
- The average adult manatee is about 10 feet long and weighs between 800 and 1,200 lbs. For reference, a standard fridge weighs around 300 lbs!
- Manatees can sink by farting! The sea cows can "hold" gas which makes them lighter, helping them to float. The manatees can "let it go" releasing gas to sink lower.
- Sea cows are built to eat! Manatees eat on average 10 to 15 percent of their body weight daily in vegetation and aquatic plants!
- Manatees can hold their breath for up to 20 minutes! They are able to exchange about 90% of the oxygen in their lungs with each breath. In comparison humans only replace 10%.
Sanctuary Scramble
Important: To play Sanctuary Scramble both the Seacow and Mermaid versions of Manatee Sanctuary are required.
Setup
Combine both decks of Sanctuary Cards and shuffle thoroughly. Choose either of the Score Boards to use and leave the other in its box. Use both Manatee Bags, leaving one at opposite ends of the game table for easy reach.
If using the optional round bonuses only use 1 edition's set of bonuses and leave the other in the box.
Gameplay
Gameplay is the same as a standard game. If one bag runs out of Manatees resupply from the other bag and continue.
Clean Up
Sort the Sanctuary Cards based on the edition symbol seen in the left center. Next, divide the Manatees by returning 80 Gray, 30 Pink, and 20 Yellow to each bag. Make sure each game gets its set of 6 player colored pieces back.
Phases Reference
Phase 1 - Draft
Deal 5 cards to all players. Players simultaneously split their cards into two stacks. Depending on the round players will pass their two stacks to the player on the left or right of them. After all players receive the 2 stacks, they will choose 1 to keep, placing it on the bottom side of their player board and one to return placing it above their player board. Once all players have made this decision pass back the stack above your player board to the player who gave it.
Phase 2 - Expand & Actions
Players will simultaneously use their Sanctuary cards for top or bottom actions, but never both. Players expanding will tuck the cards creating Completed Flowers and enlarging their Sanctuary or players will place the card beside their player board carrying out all the top actions of the card.
Phase 3 - Feed
All Manatees require a certain amount of Food. If players do not have enough Food they must remove Manatees from their Sanctuary until they can feed all remaining Manatees. Players can choose which Manatee(s) to return and lose 2 victory points for each Manatee returned to the bag.
Phase 4 - Score
All Manatees in a player's Sanctuary score points at the end of the round. If the game is in the 3rd round players also perform End Game scoring. If playing with the Round bonus model score during the round that corresponds to the model.