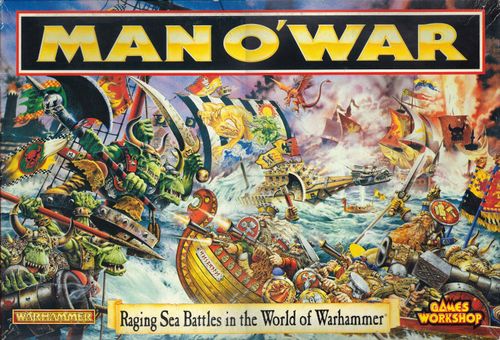
Man O' War
Man O' War Rulebook
Table of Contents
Table of Contents
Glossary
Before we go into the rules proper, you might want to take a quick glance through the glossary and the components list. Many of the terms listed here may seem a bit obscure at first, but are explained more fully later in the rules. Don't worry about this for now, all will become clear!
- Aft — The rear end of a ship (also referred to as the Stern).
- Fore — The front end of a ship (also referred to as the Prow).
- Fore Battery — A volley of cannon-fire or other weaponry from the front of a ship.
- Aft Battery — A volley of cannon-fire or other weaponry from the rear of a ship.
- Broadside — A volley of cannon-fire or other weaponry from the side of a ship.
- Starboard — The right hand side of a ship.
- Port — The left hand side of a ship.
- Lateen — A type of sail that is triangular in shape. Mainly used by Imperial vessels.
- Admiral — The overall commander of the fleet.
- Yard — Yard arm — a huge cross piece on the mast, from which the sails hang.
- Wind Abeam — The ship has the wind coming in from the general direction of Port or Starboard.
- Wind Astern — The ship has the wind coming in from the rear.
- Grapeshot — Small bore lead shot loaded into the great cannons of a ship and fired at point blank range into the ranks of enemy sailors attempting to board the vessel.
Components
This section lists the components in Man O' War one by one, explaining how they are used. Many things mentioned here won't seem that clear at first, but don't worry as all will be explained later. This section also has detailed instructions on how to assemble your plastic ship models and attach their sails.
Counters
There are a great number of card counters in Man O' War: crew counters, wound counters, flagship counters, treasure counters, wizard markers, Admiral markers, wizard level counters, damage counters, blaze counters, wizard college counters, wreck markers, debris markers, and so on.
In most cases, these counters are used to indicate the status of something, such as which location has been damaged, or how experienced a particular character is. The exact use of each individual type of counter is explained in the relevant section of the rules.
Notice that not all the counters of the same type are the same size. For instance, there are two different sizes of abandoned counters. This is so that you can place the smaller ones on the table next to the ship in question, whilst the bigger ones can be placed on the ship's template to remind you the ship is abandoned.
Some of the counters you will find in the box:
- Admiral Counter — shows the Admiral is aboard.
- Damage Counter — shows damaged areas of the ship.
- Wardancer Counter — indicates a Wardancer Troupe is aboard.
- Wound Counter — used to keep track of monsters' wounds.
- Crew Level Counter — shows crew's level, for example Cutthroats.
- Crew Counter — indicates the number of crew companies aboard.
- Captured Counter — marks a ship that has been captured.
- Blaze Counter — shows an area of the ship is on fire.
Ship Templates
The ship templates are one of the most important elements of the game. They show how each ship is divided up into different areas, and have details of how tough the ship is, how fast it can move and what weapons it has.
There are enough full colour card templates included for the plastic ships you get in the box. The Fleets section of the rulebook has ship templates for other races' fleets, that you may copy and cut out as your model collection grows.
Other Components
Man O' War also contains wreck and debris markers to indicate where ships have sunk. These are placed on the table where ships go down and form a hazard to other ships.
The three range rulers in the box are used to determine how far a ship may fire its weapons and whether it may hit its chosen target. The two smaller rulers are the standard ones that are used for almost all the ships, while the larger blue one is a special range ruler that only the Elf ships use.
Other components include two turning templates — used to work out how a ship turns — and a template that is used when firing the Dwarf Nautilus submarine's torpedoes.
Terrain Pieces
Although Man O' War is best played around three dimensional modelled terrain features, we have included a full set of card terrain features so that you can get started straight away.
These include islands, sand bars, headlands, rocks, shoreforts, whirlpools and icebergs. Note that the two headland pieces can also be put together to form a large island.
Plastic Ships
Finally, there are the plastic ships: twelve wargalleys, six for each side. You can either use the sails we have provided exactly as they are, or use our suggestions as a starting point for painting your own designs.
The Warhammer World
Before you play Man O' War, it's a good idea to read through the rules. At this stage there is no need to learn them by heart; once you've glanced through the rulebook you'll have a good idea where the relevant rules sections are, and you can simply refer to them when the need arises. The best way to learn the game is by playing it!
Choosing Your Fleet
Before you are ready to play Man O' War, each player will need to choose a fleet. Most races in the Warhammer World have their own fleets, each with an individual character and special rules appropriate to that race. Rules for how to choose your fleet, and a list of the different fleets available are given in the Fleets section of this book.
Each player must then choose a Wizard. Full details on how to choose a Wizard are given in the Wizards and Magic section of this book, but for your first few games we suggest you use the procedure below.
Sort out all the college colour counters and place them face down on the table. Each player takes one counter at random - this is the college to which his wizard belongs. Take one of the Wizard cards and place your college colour counter on it.
Take a Master Wizard counter and place it on the other box on your Wizard card to show your Wizard's level. Then place your Wizard card next to your command ship's template to show the Wizard is on this ship.
Finally, shuffle the magic deck and deal a hand of four cards to each player. You should keep this hand of cards secret, and not let your opponent see them.
Your First Game
For your first few games we suggest you play a sea battle between an Imperial fleet and a Pirate fleet. You can choose who commands which fleet by mutual agreement, or by rolling a dice, in which case whoever gets the highest die roll has first choice.
Don't worry about choosing ships from the Fleets section for the moment, just take six of the plastic Wargalleys each.
The ship templates in the Man O' War box are coded green for the Pirate ships, and red for the Imperial ships. Each ship template corresponds to a particular ship in the example fleets. You will notice that there is a picture of a sail in the top left hand corner of each template, and that this exactly matches one of the sets of cut-out ship sails.
When you come to use the blank templates from the Fleets section to design your own fleets, we suggest you paint or draw a copy of the sail or pennant designs you use in the same way, so that you can tell which template belongs to which ship.
Ship Templates & Fleet Lists
Templates for all the different races' ships are included in the Fleets section for you to photocopy and use. You will need one template of the correct type for every ship in your fleet. The Fleets section also has a fleet list for each race, which contains additional information about that race's ships and a summary of any special rules that apply. You should keep a copy of it at hand for reference while you play.
Crewing Your Ships
Place a number of crew counters equal to the ship's crew strength on each ship template. The crew strength is in the top right corner of the ship template. Each crew counter represents a company of the ship's crew.
Each player now takes an Admiral counter and places it on the template for his command ship. The full rules for admirals can be found at the start of the Fleets section. For your first few games, just place the Admiral counter on one of your squadron flagships.
Squadrons
A squadron represents a unit of vessels under the command of one senior leader and responding to his orders. Ships are placed on the table and move and fight together as a squadron.
The leader's ship is called the squadron's flagship and all the ships of the squadron must be set up within six inches of it before the game begins.
Divide your fleet into squadrons of three ships. Nominate one ship from each squadron to be the flagship and put a flagship counter next to its template.
If a flagship is sunk or so badly damaged that it cannot continue, the remaining ships must now keep within six inches of the new squadron flagship.
If, during the course of the game, a ship ever ends the game turn more than six inches from its flagship, it becomes a straggler and is subject to all the rules concerning stragglers until it rejoins its squadron.
Setting Up
The Battlescape
Before the opposing fleets clash you will need to prepare the floor or tabletop area for battle. You will need a clear, flat space of at least four foot by four foot. A large kitchen table is ideal but the floor will do just as well in a pinch. Obviously the larger the battle you wish to fight the larger the playing area should be.
Not all battles take place on the open sea. In fact many sea battles in the Old World take place near the coast so now is the time to place terrain such as stretches of coast, sand banks or islands.
Divide the playing area up into roughly two foot by two foot sections. Roll a dice for each section to determine how many terrain features there are in it:
| Roll | Number of Terrain Features Present |
|---|---|
| 1-2 | None |
| 3-4 | One terrain feature |
| 5 | Two terrain features |
| 6 | Three terrain features |
To remind you how many terrain features are present place a dice in each section turned so the number on the uppermost face shows the number of terrain features.
Each player then rolls a dice, and the person with the highest roll chooses a piece of terrain from the box and places it in the section of his choice. The second player now places a piece of terrain in whatever area he chooses. Players now take turns to place terrain features until each section has its full quota.
Deploying the Fleets
Decide which side of the table is North, and roll a dice. If the result is 2, 4 or 6 the wind is blowing North. If the result is 1, 3 or 5 the wind is blowing South. Place the Wind Compass where it is clearly visible and place the arrow to indicate which direction the wind is blowing.
Both players now roll a dice, and the person with the highest score can choose whether to set his fleet up on the East side or the West side of the table. His opponent must set up on the opposite side. Starting with whoever won choice of entrance side each player takes turns to place a squadron of ships on the playing area. This continues until all the ships are deployed.
When you are setting up your fleets, your ships must be placed within nine inches of your edge of the table. Also, you may not set up closer than nine inches to the North or South edges of the table.
Place your fleet's ship templates somewhere nearby where you can see them easily. You may find it useful to set up all the templates of a squadron in line together with the flagships at the front.
Formation and Stragglers
Players are allowed to split up squadrons deliberately, leaving behind ships that are so damaged that they are slowing down the rest of the squadron for instance.
Stragglers are moved during the End Phase of the turn and are unable to fire, ram or initiate boarding actions until they rejoin their squadrons.
Sequence of Play
In a sea battle lots of things happen at once: ships move and turn, fire their weapons, and sink. To represent all this furious activity, play is divided into turns. After both players have deployed, play proceeds in turns until either all the ships on one side are sunk or have left the play area, or until one player surrenders.
Alternatively, if you have only a limited amount of time available you can play to a time limit. Players can agree how long they are going to play for. At the end of this time they should finish their last turn and then count battle honours (see the End Phase section). The person with the highest total is the winner.
Each turn is divided into phases. During each phase different aspects of the game are dealt with. The basic turn sequence in Man O' War consists of four phases, each of which takes place after the other until the turn is complete.
Man O' War Turn Sequence
1: Initiative Phase During this phase players roll to determine whether the wind changes and to see who has gained the initiative this turn.
2: Magic Phase The player with the initiative casts whatever spells he is capable of and then the second player does likewise.
3: Battle Phase Starting with the player with the initiative, the two players take it in turns to move, fire and take boarding actions with one squadron at a time.
4: End Phase Both players do any record keeping needed, such as checking whether fires that have broken out have spread and move any stragglers.
The rules for all of these things can be found in the relevant sections below.
Initiative Phase
The initiative represents the ability to manoeuvre to gain the best position; one side gains a temporary advantage over the other by thinking and dispatching orders more quickly than the Admiral of the other. For full details on magic, see the Magic Phase section.
During the Initiative Phase both players roll a dice. The player with the highest number is the player with the initiative for the turn. If both sides roll the same number the wind changes and both players must roll again.
Changing the Wind
The wind changes clockwise one position if the double rolled is even, counterclockwise if the double rolled is odd. For example if the wind is blowing North and both players roll 4's then the wind is changed so that it blows East. It is quite possible for the wind to change many times if both players continue to roll doubles.
Magic Phase
Magic is a powerful and fickle force capable of wrecking ships, summoning monsters and turning the course of battle. Its presence is represented by a deck of magic cards which detail the spells a wizard may cast.
The player with the initiative may cast a spell, and if it works, his opponent may attempt to dispel it. Then the second player may attempt to cast a spell and the first player can try and dispel it. Once a player has attempted to cast a spell the card is discarded, whether or not the spell was successful.
Battle Phase
In the Battle Phase each player has the chance to move and fight with all his ships. Starting with the player who has the initiative, both players take turns moving and firing with their squadrons. The player with the initiative chooses one squadron and performs all its actions ship by ship. Then the second player chooses one of his squadrons and does the same. They continue taking turns in this way until all squadrons have done their actions for this Battle Phase. No squadron may move or shoot more than once in a Battle Phase.
Players can't save some of a squadron's actions till later in the phase. You cannot partially move a squadron, let the second player move his ships and then return to it, for instance. Once a player has declared his squadron's actions completed it may perform no more actions during this phase.
During this phase a player cannot pass when it is his turn to play. If he wishes he can pick a squadron and say it is performing no actions this phase but that is all.
The Rule of One
During a Man O' War game a dice roll of 1 represents very bad luck. When you are shooting, a 1 always misses. When you are making a saving roll, 1 always fails. When you cast or dispel a spell a roll of 1 is always a failure.
Even if you have modifiers on your dice roll (because of magic or Man O' War cards, for instance) a roll of 1 is always a failure.
End Phase
During the End Phase, both players do any record keeping that is required, such as picking up survivors, checking whether fires have spread, and moving stragglers. See the End Phase section below for full details.
The Magic Phase
The Known World is rich in magic. Streams of power arc and crackle across the surface of the globe from the Chaos Wastes at the poles, yet they are invisible to all but the most powerful sorcerers. These rare individuals have the power to bend these powerful forces to their will, and are eagerly sought after by clever Admirals.
Casting Magic
During the Magic Phase the player with the initiative may play a Magic Card he has in his hand and attempt to cast the spell. If it works, his opponent may attempt to dispel it. Then the second player may attempt to cast a spell and the first player can try to dispel it.
Once a player has tried to cast a spell, the Magic Card is placed in the discard pile, whether or not the attempt to cast the spell was successful.
The same is true for dispels; if you use a Magic Card to dispel your opponent's spell, you must discard your Magic Card afterwards, whether the dispel attempt succeeded or not.
How Long Do Spells Last?
Unless otherwise stated on the Magic Card, a spell only lasts for a single turn.
Example Magic Card: Storm (Celestial College)
Casting Number: 5+
Force over the bows of the ship, the Wizard calls upon his powers to bend the elements and bring down a storm on his foes. Lightning flashes and thunder rolls as stormclouds gather over the battlescape. As the wind rises a violent storm breaks. The torrents of rain reduce visibility to 3".
Cast on: The whole seascape.
Spell's effects: All firing is reduced to 3" range. Ramming and boarding is impossible until the storm abates at the end of the turn. All blazes on all ships are put out.
Dispels: Grey Magic.
Spells of Different Colleges
Each Warfleet has a cabal of Wizards, enabling spells of any colour to be cast throughout the battle. The dominant Wizard in the cabal is the only one you need worry about, and he is the Wizard represented by your wizard card. Any reference made in the rules to 'your Wizard' are talking about the dominant Wizard.
If your dominant Wizard is lost during the battle, you may assume that the rest of the cabal is also destroyed. This of course means that if the dominant Wizard is lost you will be without magic for the rest of the game.
For game purposes, the college of the dominant Wizard is also considered to be the cabal's dominant college or colour. If your Wizard fails to cast a spell of his own college he may re-roll the dice and try again. This can be done once per turn. Likewise, when he is using a Magic Card of his own college colour to dispel an incoming spell and fails, he may re-roll the dice and attempt to dispel it a second time. He can do this once per turn too.
Magic Cards
Each Magic Card represents one spell and has a header showing the colour of the magical college the spell belongs to. The card describes the effect the spell has, and its duration. Most spell effects last only one turn and affect only one ship.
Each card has a casting number, and the Wizard must roll this number or higher to cast the spell. Spells which affect enemy ships can be cast on any enemy ship on the table. Exceptions are mentioned on the cards. It is important to note that you may not move enemy ships off the table with spells that allow you to move them.
Magic Cards have another important function. Every spell may be dispelled by spells of their opposing colour. This colour is shown as a bar along the bottom of the card. To dispel an incoming spell you must roll the casting number or greater on your own spell card. Spells may only dispel incoming spells of their opposing colour.
Once you have attempted a dispel the Magic Card is discarded whether the attempt was successful or not. Note that you do not have to attempt a dispel if you want to keep the card for later.
Movement
In the Old World there are various ways of propelling a ship, each with its own advantages. Sails move a ship quickly if the wind is with it, but slow it enormously if the wind is against it. Oars are less speedy than sails but enable a ship to move without worrying about the wind direction.
Some ships possess sails and oars giving them the best of both worlds. A ship with two methods of propulsion must state which method it is using at the start of its move.
Being able to move quickly is important to your ships. The distances given on the template are the maximum number of inches a vessel can move in a turn — you don't have to move this far if you don't want to.
Sustaining damage will affect a ship's speed. If you look at a ship template you will see that if a broadside destroys one of the ship's sails then its movement speed under sail will be reduced. How a ship's movement is affected by damage is given on the ship template. For example if a Corsair has one sail location destroyed its speed is reduced by 3 inches to 6 inches. If a Wargalley loses its sail it can no longer move under sail at all.
Normally, all ships may move up to their maximum movement distance during this section of the phase. There are exceptions to this, most notably when a ship under sail turns into the wind and becomes subject to special rules dealt with below.
Basic Movement
Ships usually travel in the direction they are facing. When you want to turn a ship, use the special turning template included in this box. You use it by placing the current position side of the template alongside the ship parallel to the direction in which it is heading.
Move the ship to the new position facing marked on the template. Essentially this template turns the ship up to 45 degrees and moves it two inches forward. When you turn you do not have to move the ship all the way round to face in the new direction (i.e. a full 45°) but you do have to move it two inches forward.
Each time a ship turns it uses up two inches of its movement. So, for instance, if your ship has a move rate of 6", you may make a single turn and move forward 4". Alternatively, you could make 2 turns and move forward 2", or any other combination of moves and turns that total 6".
Note that if it has less than 1" of movement left your ship cannot make a turn. So, if your ship has a move of 6", and it has already moved 5" this turn, it may not make a turn until its next Battle Phase.
The turning template shows the tightest turn which can be made. In fact, so long as a turning ship moves forwards 2" as it turns, it does not have to turn through the full angle.
Movement Under Sail
The wind can affect movement of ships under sail in several ways. Some ships can move faster with the wind astern (coming from behind) and all sailing ships are slowed when sailing against the wind.
First of all check to see which direction the wind is blowing in relation to the ship's direction.
Sailing Against the Wind
The Wind Compass shows the direction the wind is blowing. If it is pointing North the wind is blowing from the South side of the table towards the North.
A ship may be sailing against the wind if its bows are facing towards the table edge from which the wind is blowing. The wind may be astern if the stern of the ship is pointing towards that table edge.
Nine times out of ten it will be perfectly obvious whether you are sailing against the wind or not, but sometimes it is not so clear. If you or your opponent think you may be sailing against the wind, there is an easy way to check.
Place the turning template alongside your ship, parallel to the direction in which it is heading. Measure a straight line directly to the edge of the table from the bow of your ship. If the line passes through the turning template you are not sailing into the wind. If it's still not absolutely clear you should give your opponent the benefit of the doubt.
To check whether the wind is astern place the template so that it is alongside the ship but facing the stern. The procedure for checking is the same.
Movement in the Wind
Once the direction of the wind is found, the ship is considered to be at that angle to the wind for the whole of its turn. For instance, if your ship starts its move with the wind behind it, any turns made so that the wind is blowing astern will not affect the ship's movement rate until next turn.
The only exception to this rule is that all ships under sail which turn to face into the wind must finish moving immediately. Place the ship at the new position point on the turning template. They may fire their guns or board any ship they are in contact with but their movement for this Battle Phase ends at once.
Any ship under sail that starts its movement against the wind may only make a single turn during this phase so that it is no longer facing into the wind.
Because of their better rigging and greater sail capacity some ships move faster with the wind behind them (wind astern). The wind fills their sails driving them speedily forward. These ships have a separate movement rate for this situation.
Ships With Oars
Ships propelled by oars are not affected by the wind direction.
Ships using oars can opt to turn using the normal system described above, or they can choose to use their oars instead to turn on the spot. By expending half of their total movement they can turn 90° on the spot. By expending all of their movement they can turn 180° on the spot.
Oared ships can order their rowers to battlespeed. The men strain to move the ship straight ahead as fast as possible. By doing so they enable the ship to move faster but only in a straight line. When moving at battlespeed a ship can make no turns.
For example, Wargalleys may move 4" under oars and still turn as they move. Alternatively they can move straight ahead 6". This is very handy if you want to ram or are moving straight into the wind.
Of course, if an oared ship has its oars destroyed, or if it is moving under sail, it is subject to all the rules for movement under sail.
Aground
Any ship that starts the Battle Phase aground may attempt to move off. Roll a dice, and if you roll 4 or more your ship may move away normally. If you roll 3 or less the ship is stuck fast and stays where it is. It takes no more damage, and you can try to move off the dangerous terrain again in the next turn.
Collisions
In the heat of battle, it is quite common for ships to get in each other's way and hit each other. This is called a collision. This happens when one player makes a miscalculation and finds he hasn't got enough room to turn without making contact with another ship. If this happens the ship stops when it contacts the other ship and its movement ends. Indeed, as a general rule, any time a ship touches another ship its movement ends for that Battle Phase.
On occasions, two or more ships may come into contact deliberately. There are two circumstances under which this can happen:
The first is when one ship rams another. This is a deliberate attack and what happens is dealt with in the Combat and Damage section.
The second is when one ship moves into another to instigate a boarding action. This is dealt with in the Boarding Actions section.
Ramming
Ships with oars and rams have a special attack. By ordering their oarsmen to exert themselves to the full they can ram, driving their great iron-prowed ships into the unprotected sides of their foes.
In order to ram a ship has to move at least 3" in a straight line towards its target.
The ship needs to start its ramming move at least 3" away from its target in order to build up speed. Damage from ramming is inflicted immediately. The ship may then fire its cannons and initiate boarding actions normally. For details on what happens after you ram see the Combat and Damage section.
Obstructions
Ships don't always sail on an open sea: sand banks, rocks and even other ships can prove hazardous to a moving vessel.
Any ship passing over any part of a sandbank, rocks, a coastal section or other terrain runs aground, and its movement ends at that point. Roll a dice and consult this table:
| Roll | Damage taken by the ship |
|---|---|
| 1-2 | 3 points of below the waterline damage. |
| 3-4 | 2 points of below the waterline damage. |
| 5-6 | 1 point of below the waterline damage. |
Any ship forced onto such terrain during the Magic Phase must also check for damage as above.
Pushing Clear
Any ship that starts the Battle Phase with its bows in contact with another ship in such a way that it cannot move can push clear. Using long poles and tackle it may move along the side of the other ship until its path is clear and then can move on normally.
Pushing clear costs half the ship's movement. If a ship encounters another obstacle after pushing clear its movement ends as usual.
The edge of the table is a special kind of obstruction. Any ship that sails off the edge of the table is assumed to be leaving the battle and may not return to the table. Do not do this unless you mean to.
Combat and Damage
The first sign that two opposing fleets have met is usually a plume of cannon smoke and the terrible whistling of cannonballs as they sail through the air towards their targets. The crack of shot as it leaves the smoking barrels echoes through the air as the enemy ships desperately try to line up their guns and retaliate!
Most ships have some form of ranged weapon, usually cannons. Depending on where and how they are mounted these fire either forward, to the side or backwards. Note that even if your ship isn't armed with cannons, then the following rules still generally apply - just replace the word cannon with whatever weapon your ship uses.
The first step when firing at the enemy is, as one would expect, to choose your target. Cannons have a maximum range of nine inches; if the distance between your ship and its target is greater than nine inches then the cannons are out of range and your shot is wasted. You are not allowed to measure the range in advance - you must select a target, then measure the range. To see whether the target is within range place the firing template against the side of your ship which is firing. If the enemy ship is wholly or partially under the template then it is within range of your cannons.
Unless stated otherwise, all weapons are fixed, and cannot be turned to point in different directions. Thus forward facing cannons always fire directly ahead of the ship, sideways facing cannons always fire directly to the side, and rearward firing cannons always fire directly backwards.
The Range Template
To use the range template, place it touching the side or end of the ship you are firing from. The template faces directly away from the firing ship, either forwards, backwards, or to one side. The centre mark at the base of the template should touch the centre of the side or end of the ship you are firing from, and line up with the exact centre of the ship.
The range template is divided into three 3 inch sections. Any ship falling under the section nearest to you is at close range. Any falling under the middle section is at medium range, and any falling under the section furthest away is at long range.
Ships with broadside cannons can fire from either side, or from both sides simultaneously if they have targets available. If the broadside cannon battery is lost, the cannons on both sides of the ship have been destroyed, and the ship can fire no more broadsides at all.
Your fleet list has a diagram for each type of ship that shows how many guns it has and in which directions they fire.
Line of Sight
Sometimes a ship is prevented from properly sighting its intended target by intervening obstacles such as another ship or a wreck. Terrain also blocks line of sight. A firing ship hits the first obstacle that falls under its range template, whether this is an enemy ship or not. It is not possible to fire past an obstacle to an enemy vessel further away. Of course, you can always choose not to shoot, which is a good idea if one of your own ships has accidentally sailed in front of the enemy vessel.
Assuming that the enemy is within range and your line of sight is not obstructed then you can open fire.
Opening Fire
Most ships in Man O' War are armed with cannons. Each cannon in a location represents a vast battery of weapons, not just a single gun. The ship template shows you how many weapons your ship has and in which direction they are facing. For example a Wargalley can fire one battery of cannons forward. Larger ships have several batteries of cannon. If you have guns firing in more than one direction, then all of them may fire each turn as long as they have targets within range.
If you have a target available you are ready to fire. You can open fire with all the cannons you have that are facing in a target's direction. They shoot at the nearest target under the range template.
Each cannon may only fire once in each Battle Phase. Ships with cannons firing broadside would seem to be exceptions because their guns fire once on each side. This is not the case, as each cannon represents a pair of batteries firing in opposite directions.
Now it's time to let fly! Look at the template of the enemy ship you're aiming at, and then roll one dice for every cannon you can bring to bear.
A roll of 1 always misses. The number you roll indicates which location you have hit on your foe's ship. If there is no location with that number on the ship's template then you have missed.
For example, on a Wargalley you must roll a 4, 5 or a 6 to hit a location. A roll of 4 hits the mast, a roll of 5 hits the oar deck, and a roll of 6 hits the Forecastle. Any other score is a miss.
Aiming High or Low
Some ships are so large that they are divided up into two areas: high and low. This means that when you fire cannons at these ships you must decide whether you are aiming high or low. Aiming high means that you look at the numbered sections on the top of the template; aiming low means you look at the numbered sections on the bottom.
If you look at the template for a large ship like a Bretonnian Corsair you will see that it is possible to hit the ship in the mid-section aiming either high or low. This is because there is some overlap when the guns are fired.
Notice that you cannot split cannons firing in the same direction so that some aim high and some aim low.
For example: you are the Imperial player sailing along in your Wolfship, the Sigmar. You can bring three guns to bear on a Bretonnian Corsair. You open fire, aiming high, and roll a 1, a 5 and a 3. Looking at the Corsair's template shows that the 1 has missed, the 5 has hit his aft mast and the 3 has hit the main deck. Well done!
(An Imperial Wolfship, with three forward-facing cannons and a single broadside battery to port and starboard, gives it a 3 dice forward cannon attack aimed either high or low, plus a single dice attack to both port and starboard, each of which again are aimed either high or low.)
Saving Throw
Once cannons have fired, the ship being shot at can try and save itself from having been hit. To recast this, the player whose ship has been shot can make a saving throw for each location hit. The number he needs to roll to save each location on a dice is given on the ship template. If he succeeds in rolling this number or above then the location takes no damage. If he fails then a damage marker is placed on that section of the template to indicate that the area has been destroyed. If it is hit again the ship could be in big trouble.
It is very important to remember that each ship in a fleet has its own template which is used to record how much damage it has taken.
Range Modifiers
With most weapons, saving throws are modified by the range from which you shoot. With cannons, for instance, if you are firing from close range then the defender subtracts one from his saving throw. If you are firing from long range then he adds one. This means that it is much harder to avoid taking damage at close range than it is at long range.
For example, at medium range the Pirate Wargalley mentioned above needs to roll a 5 or a 6 to save its oar deck. At close range it would require a 6. At long range any number from 4 to 6 would do.
Cannons are the 'standard' ship-mounted weapon in Man O' War, and are the weapons to which other races' armaments are compared. Some races have special weapons which may function somewhat differently. The rules for these are covered in the Fleets section of the rulebook.
Effects of Damage
If a location is hit and fails its saving throw, the area is usually destroyed. Place a damage marker in that location of the ship template. On larger ships some locations can take two or more points of damage. These are shown in the Fleets section with the relevant ships.
If a location is destroyed there are often side effects. Hitting a ship's oar deck stops it from moving further this turn under oar or ramming. Destroying a ship's sails can reduce its speed. The exact effects are explained on the ship template. Some locations do not contain cannons, sails, oars, or anything else vital to the running of the ship and only ever take structural damage. This represents general damage to the hull but has little effect on play unless a critical hit is scored in that area.
If a location containing a weapon is hit, the weapon is destroyed, and may not be used for the rest of the game. If an area containing cannons that can fire broadside is destroyed, the ship loses its ability to fire on both sides with those guns. This is because the gun decks are large open areas and the damage has blasted right through the ship and destroyed all the cannons in that location.
A location can sometimes absorb more than one hit before it is destroyed, and this is shown on the ship's template. If this is the case the effects of each hit will be shown on the template. For example, it takes two hits to destroy the forward gun deck on the Imperial Wolfship. Each hit destroys one cannon battery. Once such a location has taken all its hits it is destroyed. Each time such a location is hit and fails its saving throw place a damage marker until it has taken enough hits to destroy it. Only then will that location start taking critical hits.
Critical Hits
Each time a destroyed area is hit again and fails its saving throw then a critical hit occurs. These can be incredibly nasty! Roll a dice, consult the Critical Hit Table, and apply the results.
Some areas, most notably sails, don't take critical hits once they are destroyed. This indicates that it is not possible to sink a ship by hitting it there repeatedly. Putting more holes in a ship's sails won't send it to the bottom for instance. Such areas are always indicated on the ship template.
If a critical hit indicates that a fire has broken out in that location replace the damage marker with a blaze marker to indicate that the area is on fire. Fires aboard ship are very dangerous mainly because they can spread, causing even more havoc. This happens during the End Phase, so see the rules below.
If the critical hit indicates that a crew counter has been lost then remove one from that ship's template. If a ship's crew strength is ever reduced to zero then the ship is abandoned. Place an abandoned marker on its template. The ship may no longer move, fire or board. Any ship boarding it captures it automatically.
If the Critical Hit Table indicates that you should look up another entry on the Captain's Chart then do so and apply the results. Some of these results say that the ship cannot move or that it cannot fire. One result says that it can neither move nor fire. Place a 'no movement' and/or a 'no firing' counter on the ship's template, as appropriate. If the ship has already performed actions this turn these results have no effect. If a ship that is part of a squadron has already moved then the player can make it a straggler and move the rest of the squadron.
If the Critical Hit Table indicates that the target has taken one or more below the waterline hits then the player places the appropriate number of damage markers on the below the waterline location of the ship's template. Then he should pray. It is important to note that the ship does not get its below the waterline saving throw for damage taken in this way.
Captain's Chart
| Roll | Result |
|---|---|
| 1 | The Captain's maps and charts are burnt to a crisp. The ship may not move this turn if it hasn't already done so as the Captain has to replot its course. Place a 'no movement' counter next to the ship. Remove the counter at the end of the turn. |
| 2 | The Captain's treasure chest is split open, spraying the deck with gold. The ship may not fire this turn as the crew are too busy picking up the fallen booty. Place a 'no firing' counter next to the ship. Remove the counter at the end of the turn. |
| 3 | The Captain is caught by a stray shot and killed outright. The ship may do nothing but defend itself until the end of the turn, when a new Captain is elected. Place a 'no movement' counter and a 'no firing' counter next to the ship. Remove the counters at the end of the turn. |
| 4 | The Captain is washed overboard by a freak wave. Roll a dice: 1-2 Ship must make a 2" left turn to pick him up. 3-4 Ship must make a 2" right turn to pick him up. 5-6 Ship must move straight ahead 2" to pick him up. |
| 5 | The Captain's secret rum stash is hit. The decks are awash with alcohol. Roll a dice for each crew counter: on a 6 they are drunk and fall overboard. Remove any drunk crew counters from the ship. |
| 6 | Mutiny! Roll a dice for each crew counter: on a 5 or 6 they take to the boats and abandon ship. Remove the mutineers from the ship. |
Sinking
A ship only sinks because it has suffered more below the waterline hits than it can take. The exact number of hits needed to do this is shown on its template. Once a ship's below the waterline area is destroyed it sinks. It never takes critical hits there.
Usually the only ways a ship can take hits below the waterline are as a result of a critical hit, a ram or sailing into some particularly nasty obstruction like rocks. If the Critical Hit Table indicates that the ship takes damage here place the number of damage markers indicated on the ship template.
If the number of damage markers equals or exceeds what it takes to sink the ship it goes down to the ocean's dark depths. Place a 'sunk' counter on the ship's template to indicate the ship is at the bottom of the briny.
Wreckage Markers
On the turn a ship sinks remove the ship model from the table and place a wreckage marker where it was. Any character counter that was on the ship (for example, an Admiral or a Wizard) may cling to the wreckage and debris as long as there is some there. This allows for a friendly ship to rescue him before he goes down! Rescuing characters is covered in more detail in the End Phase section.
A wreckage marker obstructs movement and line of sight as if it were a ship — see the rules on collisions in the Movement section.
During the End Phase of the turn remove the wreckage marker and replace it with a debris marker. Debris does not obstruct line of sight or movement. At the end of the next turn, the debris counter is removed.
Effects of Ramming
Once a ship has moved into contact with its target the opposing player must make a saving throw against a below the waterline hit. If he fails the target ship takes a number of below the waterline hits.
The amount of damage varies, depending on the size and effectiveness of the ramming ship — look at your fleet list for details. This damage will usually put most ships well on the way to sinking. Place the damage markers on the below the waterline location. The ramming player may now board the ship if he wants and has a crew counter available.
Blaze Spreading Table
During the End Phase, roll on this table for each blaze marker.
| Roll | Result |
|---|---|
| 1 | Blaze goes out. Remove the blaze marker. |
| 2 | Blaze doesn't spread. Roll again next End Phase. |
| 3 | Blaze doesn't spread. Roll again next End Phase. |
| 4 | Blaze spreads forward (prow-ward). Place another blaze marker. |
| 5 | Blaze spreads upward. Place another blaze marker. |
| 6 | Blaze spreads backwards (stern-ward). Place another blaze marker. |
If there is a fire in a location that can take two hits, and only one is ablaze, then any result that says the fire spreads means that the second part of the area is now on fire too. Place another blaze marker on that location.
When a fire spreads upward there will sometimes be a choice of two locations to which it can spread. Roll a dice. If the result is 1, 2 or 3 the blaze spreads to the left hand location. On a roll of 4, 5 or 6 the fire spreads to the right.
If a blaze spreads to an area that has already been damaged, it does not cause a critical hit: the area is simply set on fire.
If a fire goes out remove the blaze marker and replace it with a damage marker. If the fire spreads prow-ward or stern-ward then place a blaze marker in the location to the left or right of the blazing location as appropriate (prow-ward is usually to the left on a template). If the fire spreads upward place a blaze marker in the location above the blazing location.
If a fire cannot spread because there is no area above or to the right or left, or because that area is already alight, then nothing happens. The fire continues to burn in the original location.
Blazing locations are treated exactly as destroyed locations. If a sailing ship's sails are ablaze then its movement will be reduced. If a shot hits a blazing location then critical hits occur as normal. There is no saving throw against fires spreading to a new location.
Boarding Actions
Once a ship has made contact with its enemy it may, if it has any crew left, launch a boarding action. Frenzied, maniacal swordsmen swarm aboard the enemy craft seeking to over-run any opposition. Equally blood-mad opponents attempt to stop them. Gunners will fill their cannons with grapeshot to discourage the attackers.
The most important factors in boarding actions are the number of men involved and the number of cannons that the defender can bring to bear. Cannons can be used to repel enemies boarding from that direction, but not to repel boarding from the stern for example.
Both sides roll a dice and add the number of crew counters on their ship. The defender adds the number of remaining cannons he has pointing in the direction of the attacker. The player with the highest score wins. The Rule of One applies as normal.
If the attacker wins, he can press on with his attack or break off if he likes. If the defender wins he can continue the fight or cut grapples. If he opts to cut grapples then the boarding action ends. If he opts to continue then he is now the attacker, trying to board his opponent's ship. He can no longer add the number of cannons he has to the number of his crew. His opponent does, since he is now repelling boarders. The fight can thus see-saw back and forth for some time.
If the attackers' and defenders' totals are the same then both sides lose a crew counter and the defender chooses whether to continue or cut grapples.
A ship which has no crew counters left has lost the boarding action. Place an abandoned marker on the ship's template and an abandoned counter beside the ship. Any boarding action launched against an abandoned ship will succeed automatically. An abandoned ship does not move, and will constitute an obstruction to line of sight.
If the winning player wants to take the ship as a prize he moves as many crew counters as he wishes from the capturing ship to the enemy ship. The prize is his!
Note that if your ship is in contact with two or more enemy vessels, you may only initiate a boarding action against one of them per turn.
For Example
An Imperial Wolfship moves in to attack a Pirate Wargalley. The Imperial player moves his ship until the bows of his ship are touching the pirate vessel, a head on ram. Having finished his move, he fires his cannon at the Pirate ship, hitting the mast.
The Pirate rolls a dice for his saving throw, subtracting one from his dice roll as it is close range. He fails his saving throw, and the mast is destroyed.
Next the Imperial player works out the damage for the ram. The Pirate player rolls his below the waterline saving roll, needing a 5 or 6. He rolls a 6 so the ram fails.
However, the Imperial player then decides to board the Pirate Wargalley. He rolls a dice and adds 2 (1 for each crew counter onboard the galley). The Pirate defends, rolling a dice and adding three (one for each crew member aboard the Pirate Wargalley, and one for his forward cannon, which may fire grapeshot). The Imperial player rolls a 4+2=6. The Pirate player rolls 4+3=7. The Pirate player wins and the Imperial player loses a crew counter.
The initiative now passes to the Pirate player, who decides to counterboard. He rolls a dice and adds 2, one for each crew. The Imperial player rolls a dice and adds 2, one for his remaining crew and one for his forward cannon; and the Imperial player rolls 3+2=5. The Pirate wins! The Imperial player loses his final crew counter and the Pirate captures the ship.
Captured Ships
If a ship has been captured as a result of a boarding action then it is considered a prize ship. Place a captured marker on the ship's template and a captured counter next to the ship.
Because your crew are unfamiliar with how the enemy ship works, they cannot sail it or use its weapons, so prize ships cannot move or fire. The crew left aboard the prize ship may repel boarders, but they cannot use the captured ship's cannons to fight off attackers.
If you don't wish to keep a captured ship afloat, you may order your men to scuttle it. This happens during the End Phase, giving the ship's original owner a chance to recapture it if he hasn't moved all his squadrons yet.
If you have recaptured a ship of your own nationality then you may recrew the captured ship. Place crew companies from the ship that re-captured it onto the recaptured ship's template, reclaim the ship template from your opponent, and give thanks to the gods of battle.
For this turn the recaptured ship is a straggler, and moves during the End Phase. It can rejoin its original squadron if any of these ships are still afloat, and then it will be able to move and fire normally.
Crewing Limits
A ship cannot carry more crew companies than its original crew strength indicates. So if you captured a Wargalley (which only has 2 crew companies) or recaptured it with a Greatship (which has 5!), you still could not place more than two crew companies on the Wargalley's template.
The End Phase
Once both players have moved and fired with all their ships the Battle Phase is over and it is time for the End Phase. Any record keeping that must be done is taken care of now.
Pick Up Survivors
If you have any ships in contact with debris or wreckage that has characters clinging to it (see the Fleets section), you may move the character counter onto the ship's template to show they have climbed aboard.
Remove Debris
Remove any debris markers that are on the table. Any characters that are clinging to the debris are lost and are also removed.
Any wreckage markers on the table are now changed to debris markers, ready to be taken off in the End Phase next turn.
See If Any Fires Spread
If an area of a ship is ablaze then there is a chance that the fire may spread. Roll once for each area on fire on the ship, and consult the Blaze Spreading Table (see the Combat and Damage section).
Move Stragglers
Stragglers are ships that started the turn more than 6" from their squadron's flagship. They may not move or fire in the Battle Phase although they may defend themselves as usual if boarded. In the End Phase they may move normally but may not fire cannons or board other ships.
Now is the time to move your stragglers. Ships that have taken a 'no movement' critical hit on the Captain's Chart may not move either.
Scuttle Ships
If you want to scuttle a captured ship now is the time to do it. Scuttling a ship means that the crew plant explosive charges or knock holes in the bilges and then leave the ship to sink.
If the ship from which they came is still in contact with the prize, increase the crew strength by one. The lads are now back aboard their original vessel.
If the ship from which they came is no longer in contact, the lads take to the boats and lose the game.
Place a wreckage marker where the ship was. It will become debris during the End Phase of the next turn. The ship is now sunk.
If you want to scuttle any of your own ships, feel free. The ship sinks with all hands!
Remove Counters
Now is the time to remove any no movement and no firing counters that your ship may have picked up as a result of critical hits.
Wizards and Magic Cards
If your Wizard is still alive in the End Phase, you may discard any Magic Cards you do not want and then replenish your hand, bringing it back up to full strength. You must discard any spells you do not want before drawing any more, and may not discard any you draw now until the End Phase next turn.
A Wizard who is clinging to the wreckage (see the Wizards and Magic section) may not discard or pick up any Magic Cards in the End Phase.
Any spells played during this turn which have a duration of one turn are removed. When all the Magic Cards have been used, shuffle the discard deck and start again.
The turn is now over and play proceeds to the next turn. If all of one side's ships are sunk or captured then the game ends. The player who still has ships afloat and uncaptured is the winner.
Using Battle Honours
If you wish to play to a time limit, victory can be decided by counting up the number of battle honours you have gained during the game. This is calculated in the End Phase of the last turn.
Total the number of below the waterline hits for all the enemy ships you have sunk or captured. Any enemy ships scuttled, or abandoned at the end of the game, count as ships sunk. This is the number of battle honours you have.
The player with the highest total of battle honours is the winner.
Capturing or killing Admirals and Wizards also counts towards the battle honours. See the Admirals and Wizards and Magic sections for details on how many battle honours such characters are worth.
Admiral Koenig adjusted the range of the telescope. The Bretonnian Fleet jumped into view, strung out in long lines across the treacherous waters of Marienburg Sound. He made out the giant shape of the Grande Roi, where the Galleon towered over its flock of Corsairs. Even the hardened old Imperial seadog admitted it was a sight to stir the heart; with its flags fluttering many-coloured in the wind and the beautifully cast brasswork surrounding its high aftcastle glittering in the sun. It was going to be a pity to sink it, he thought. The Bretonnians built fine ships.
The grace of their flagship made the hard lines of the Altdorf seem almost brutal by contrast. Compared to the Bretonnian it was but a floating gun platform, functional and basic. The Greatship lacked the speed and beauty of the other ship but on the other hand it did possess firepower in abundance. Koenig did not doubt that the stout hearted Imperial soldiers clustered on the foredecks would prove more than a match for the spoiled Bretonnian noblemen on the Grande Roi. They were professionals, hardened soldiers, veterans of many a campaign. Fighting was their trade, not their amusement.
The Imperial Wolfships that surrounded the Altdorf, like hunting hounds at the heel of their master, were inspiring in their way. They were long and sleek and low in their water. Their great iron-beaked rams bit the waves. Koenig knew that the rams turned the entire ship into a weapon. When driven forward by the steel muscled arms of their oarsmen the Wolfships became spears aimed at the very heart of an enemy ship. And if that weren't enough, their great batteries of forward facing guns would certainly finish their foes. Koenig felt certain that no Bretonnian Corsair would prove a match for them.
Behind the Wolfships waited the smaller Wargalleys, arranged in hunting pack formations to catch any stray Bretonnians that should escape his net of steel. Koenig placed great store in the small ramships, respecting their strength, manoeuvrability and firepower, not to mention the renowned courage of the Wargalley crews. He knew that the Wargalley squadrons would do their duty, their prime targets the smaller Bretonnian vessels. He also knew that the gallant Wargalley captains would not hesitate to attack a vessel many times the size of their ships, for their strength lay in fighting as a squadron, not as single warships.
From his position on the Aftcastle of the Grande Roi, Admiral Le Fevre of the Bretonnian Fleet regarded his assembled ships with pride. Sails and banners emblazoned with the heraldic devices and crests of the Bretonnian nobility stretched before him in a wash of bold colours. His Corsair and Buccaneer squadrons were ready to fight, and the battle lines drawn up according to plan. The vast Galleons Invincible, Indomitable and Redoubt held the centre of the Bretonnian fleet, each rivalling the Grande Roi for size, firepower and elegant beauty.
On the maindeck of the Grande Roi, feverish preparations were underway, making ready for the battle to come. Some washed down the decks, damping the timbers to lessen the chance of fire. Others sharpened their swords and adjusted their armour in readiness for fierce boarding actions - an inevitable part of any large scale sea battle. The gunners wheeled powder kegs and shot below, to feed the appetites of the rows upon rows of heavy cannons. Signal flags fluttered from the main mast, and the Bretonnian warships glided into their allotted positions with a grace that belied their ferocity in battle.
Today was a day long planned for, and Le Fevre firmly believed that the evening would see the sun set on the fleeing remnants of the Imperial Warfleet. Careful manoeuvring had placed the Bretonnian ships with the wind in their sails, and his Wizards scryed no change in the wind for the rest of the day. Yet Le Fevre knew that to underestimate the assembled Imperial warfleet that lay before him would be stupidity of the highest order. He had repeated again and again to his often reckless barons that although sailing into the heart of the tight Imperial formations would doubtless lead to an honourable and heroic death, it would not win the battle. This was a battle to be fought with cold precision, all elements of the fleet acting their pre-determined part. For Le Fevre knew the fearsome reputation of Admiral Koenig, and knew that the Imperial Admiral would ruthlessly exploit any opportunity presented to him by reckless or foolhardy Bretonnians. Le Fevre knew that Koenig regarded them as little more than spoiled, foppish noblemen, whose only interests lay in carousing and drinking at the King's court in Couronne. He also knew that this was not so, and that today's battle was an unrepeatable chance to teach the disrespectful Imperial dullards a lesson in sailing and warfare that they would never forget.
Fleet Lists
In the pages that follow you will find the Fleet Lists of many nations and races of the Known World. Each list describes the type of ships that are available to that fleet and the points cost of buying them. It also contains any special rules that may apply to the fleet concerning such things as weapons and methods of propulsion. This is important since each fleet has its own advantages and disadvantages.
In each Fleet List you will also find templates for that race's ships. These may be photocopied, mounted on thin card, and cut out. You will need one template for each ship in your fleet.
Points Costs
When choosing a fleet, you will see that each type of vessel has a points cost. The bigger ships cost more points than the smaller ones. In a typical battle, both players will have the same number of points to spend on their fleets. Thus, from game to game, you may vary your fleet within known limits, alter your strategy and tactics, yet still retain a balanced game.
The fleets you have been playing with so far have a total points value of 400 points for each player: six Wargalleys at 150 points per squadron of three, and one Wizard at 100 points.
In a normal game of Man O' War, each player has 1000 points available to buy his fleet with. You should choose the national fleet you want to play and look at its Fleet List, which will tell you how many points it costs to purchase each sort of ship. Certain types of ship must be bought in squadrons, so you will have to buy three of a kind at once. As you select your ships deduct the number of points from your total. Keep choosing until all your points are gone.
The Fleet Lists contain certain limits on the number and type of ships you can buy. Sometimes you will have to settle for less than a particular ship type; sometimes there will be a maximum number allowed to purchase.
These constraints are to simulate the unique composition of each nation's naval forces. You must select all your ships from the same Fleet List. You cannot have Elven ships in an Orc fleet, for instance.
You can also use your points to buy a Wizard (see the Magic section) and to customise your ships by buying Man O' War Cards.
For Example
You have chosen an Empire Fleet. According to the Empire Fleet List, the fleet must contain one Greatship to be the Admiral's Flagship. It must also include one squadron of Wargalleys and one squadron of Wolfships. Since you must have these, it's time to spend some points. A Greatship costs 150 points, a squadron of Wolfships costs 300 points and a squadron of Wargalleys costs 150 points.
You think it's a good idea to have a Wizard, and choose a Master Wizard at 100 points. This leaves you with 300 points so you purchase another squadron of Wolfships. You could have purchased two more squadrons of Wargalleys. Alternatively you could have had two more Greatships or one more Greatship and a squadron of Wargalleys.
Since each ship has its own strengths and weaknesses you should give very careful consideration to the exact make-up of your force. A balanced fleet is essential to victory.
Wargalleys are small and fast and good at ram actions against weakened enemies. Their ram is a powerful attack if they can make it. However, they are not so good in a long range firefight and would be hard put to win a boarding action against an undamaged Corsair.
It is essential for the Empire Player to have a Greatship or a squadron of Wolfships to provide firepower to soften up the Wargalleys' targets.
In the later stages of the game, when there are many damaged or crippled enemy ships, Wargalleys can really come into their own picking on stragglers and the weak. Until then they should be held back unless an ideal opportunity to ram presents itself.
Once you know the strengths and weaknesses of the various ships you'll be in a good position to pick the best combination of forces for your fleet.
If players wish to play with larger or smaller fleets then they should agree on a different points value before the game. We find 1000 points a good size for an enjoyable evening's play but it's perfectly possible to do battle with squadrons of 2000 or even 5000 points if you have the time and the ships available.
Admirals
An Admiral is in overall command of a fleet. His Man O' War is the flagship for the whole force, and it is to him that all the other commanders turn to receive their orders.
The Admiral costs no points and comes automatically with your fleet. He goes on the Man O' War of your choice since it would be beneath his dignity to travel on any lesser ship. Once you have chosen his ship place the Admiral's counter on that ship's template. The Admiral's ship is automatically dealt one Man O' War Card before the game begins. This costs no points.
Boarding Actions
The ship carrying the Admiral gets +1 added to its dice roll during a boarding action, as his presence heartens the men and inspires them to greater effort.
If the ship loses the boarding action and all the crew are killed, the Admiral is also killed.
Clinging to the Wreckage
If the ship carrying the Admiral sinks, he will cling on to the wreckage. Place his counter on the wreck or debris marker. During the End Phase players may attempt to rescue him.
To effect a rescue a player's ship must be touching the wreck or debris marker. If both players have ships touching the wreck or debris marker the Admiral swims to the ship of his own fleet.
If the Admiral is picked up by the enemy he is captured. This represents a considerable humiliation for the owning player and will give his foe extra battle honours at the end of the game.
If the Admiral is picked up by his own player's ship, place his counter on the appropriate ship template. He can now be used again as normal.
Battle Honours
An Admiral is worth 5 Battle Honours.
Wizards and Magic
In the Old World the raw energy of magic exists as a palpable, elemental force. Its unfettered power can trigger awesome catastrophies on an unimaginable scale that completely overshadow natural disasters. Wizards are that rare breed that can turn this awesome power towards their own ends.
The Elves were the first race to master the capricious forces of magic. They discovered the magical flux of power which permeates the world and learned how to bend it to their will.
In the distant past the Elves taught some of their knowledge to men so that they could fight back against the incursions of Chaos which threatened to overrun the Old World. Men were poor pupils in comparison to the Elves, lacking the lifespans necessary to learn all of the intricacies and disciplines of magery.
To aid them the Elves taught men how the Winds of Magic blow throughout the world, gusts of raw energy which blow out through the collapsed warp gate hanging over the North Pole.
The Elves told their pupils how the winds of raw magic are polarized by contact with the material world into eight 'colours' of magic. By studying a single magical colour for much of their lives men could master and manipulate it with a fraction of the skill of the Elven lords.
The Colleges of Magic
Each college specialises in a particular colour of magic, its adepts learning to draw power from their own magical colour and manipulate it with form and purpose.
Ordinary men can't perceive the flux of energy or see its startling colours. Wizards, however, can feel the flow of power and see the colours of magic as they swirl and billow across the world. They see the roiling polychromatic clouds which twist across the sky forming fantastic shapes and giddy patterns, and feel the thundering energies that writhe through the earth.
The eight Colours of Magic are Bright, Jade, Amethyst, Gold, Amber, Celestial, Light and Grey. Each colour has its own peculiar properties which affect the kind of magic it can be used for and the personality of the Wizard who studies it.
In addition, there is the High Magic of the Elves, which uses all eight colours combined, and Dark Magic, which manipulates the raw, seething energy of magic before it is polarized. Dark Magic is a wild and dangerous form of wizardry pursued only by the most twisted and power hungry Sorcerers.
Bright — Bright Magic is closely associated with heat and flames and is drawn into whirling vortices of power over flames or fiery phenomena such as volcanoes. Bright Wizards can manipulate fire and create flames with ease, making them very effective battle wizards with many destructive long range spells to destroy the enemy with fireballs, flamestorms and the like. Bright Wizards have fiery tempers and a warlike disposition, they are constantly active and animated by a purpose or idea. Traditionally, Bright Wizards dress in red or orange robes and bear the sign of a stylised key, symbolising the knowledge of Bright Magic as the way of unbarring the unknown.
Jade — Jade Magic is intimately tied to nature and its power waxes and wanes with the seasons, making Jade Wizards tired and reluctant to use magic during winter but vibrant and full of energy during the spring and summer. Some Jade Wizards worshipped the darker side of nature's power — disease and decay. Few believe such practices still occur but many people still regard Jade Wizards with not a little suspicion and fear. Jade Wizards wear green or turquoise robes and often bear a sickle as a symbol of the harvesting of nature's energy.
Amethyst — Amethyst Magic is perhaps the strangest and most indefinable of all of the eight colours. Amethyst Wizards are forbidding figures, hooded and cowled in deep magenta vestments and frequently wearing skull masked helms. They bear great scythes, supposedly as a symbol of mortality, and huge, leather bound books which are symbolic of Fate. They never speak, instead communicating when they must by projected thought. Popular superstition states that the words of an Amethyst Wizard are the last thing a mortal ever hears.
Gold — Gold Magic is a particularly heavy and dense form of energy which quickly sinks to the ground and seeps into the earth. There it is attracted to the heavier, more precious metals — most obviously gold itself. It is said that this goes some way to explaining the almost magical effect that gold has on most of the intelligent races, inciting greed, murder and insanity. Gold Wizards use a stylised eagle's head motif representing the soaring aspiration which motivates their College.
Amber — Amber Magic is most easily manipulated to affect plants and wild animals, being wild and undisciplined by its very nature. Amber Wizards are big, burly individuals with wild hair and unkempt beards. They dress in furs and animal skins adorned with bones and feathers. The Amber College is most frequently associated with the symbol of an arrow, representing the Wizards' place as huntsmen of knowledge.
Celestial — Celestial Wizards spend much of their time stargazing and recording the astral conjunctions to foretell the future, and it is commonly accepted that their predictions are absolutely accurate. In battle Celestial Wizards command the power of the heavens so they are able to call down great sheets of lightning and savage winds against their foes, in addition to casting portents and divinations to aid their own forces. They dress in deep blue robes adorned with stars and crescent moons. The College of Celestial Magic is commonly represented by the symbol of the comet as the herald of celestial knowledge.
Light — Light Magic is notoriously difficult to control and channel, so the rituals used by Light Wizards are particularly complex and difficult to master. The symbol of the Light College is an arrow jutting up from the wheel of magic, symbolising intellectual endeavour raising the individual above the majority.
Grey — Like Celestial Wizards, Grey Wizards are potent weather-mages much sought after by Admirals who want to ensure their journeys remain safe from storms. Grey Wizards invariably carry a great, gnarled staff and cultivate a wild, slightly wolfish appearance by wearing wild animal skins. The symbol of the Grey College is a downward pointing arrow: a stylised rendition of the Sword of Judgement, symbolising the college's legendary good judgement.
College Relationships
Although the eight Colleges of Magic are described in isolation, their relative positions on the colour wheel are very important when Wizards fight.
Each College of Magic is superior to that which lies directly clockwise of its own position; equally, each college is inferior to its immediate neighbour in an anticlockwise direction.
These relationships allow a Wizard of each college to dispel incoming attacks of certain colours, as explained in the Magic Phase section.
Notice that although we talk about Wizards being of opposing colours, they do not lie opposite to each other on the colour wheel: they in fact lie next to each other, with the stronger colour on the left.
Choosing Your Wizard
Before you start playing, you will need to decide what sort of Wizard you are going to include in your fleet. Of course, you don't have to take a Wizard, but being unable to cast or dispel spells will put you at a considerable disadvantage.
There are three Mastery Levels of Wizard to choose from, and each costs a number of points which must be taken from the 1000 points you have to buy your fleet with (see the Fleets section).
Each Wizard starts the game with a certain number of Magic Cards. Magic Cards are discarded after they have been used, and can be replenished in the End Phase, but your Wizard may never hold more than his original quota.
The death or capture of an enemy Wizard is worth a number of battle honours, according to his Mastery Level. The more powerful a Wizard is, the more battle honours he is worth!
| Mastery Level | Points Cost | Magic Cards | Battle Honours |
|---|---|---|---|
| Wizard Champion | 50 | 2 | 1 |
| Master Wizard | 100 | 4 | 2 |
| Wizard Lord* | 150 | 6 | 3 |
Note: The Wizard Lord can add +1 to his dice roll when casting or dispelling any spell.
This means that you can purchase a less competent Wizard cheaply and have a hand of two Magic Cards, or you can buy a truly mighty Wizard Lord for more points and get a larger hand of six cards. Note that you can only ever have one Wizard in your fleet.
A Wizard Champion is only allowed to hold two Magic Cards at any time. This represents the fact that they are less competent than the usual fleet Wizards.
A Master Wizard starts the game with four Magic Cards and is the standard level for sea-faring Wizards.
A Wizard Lord is the most powerful Wizard of all, and holds a comparatively massive hand of six Magic Cards. In addition, when casting or dispelling any spell a Wizard Lord can add one to his dice roll.
What Colour Is Your Wizard?
When you have chosen what sort of Wizard you want, you will have to find out which College of Magic he comes from.
Place the college colour counters (there should be eight in all, one for each college) face down in front of you. Each player takes one counter at random to see what colour his Wizard is. If you drew a gold counter, for example, your Wizard would be a Gold Wizard.
Of course, if both players agree you may choose your Wizard rather than select him randomly.
Put your college counter and level counter on your Wizard's card to act as a reminder during the game.
Boarding Actions
A Wizard has no effect on boarding action dice rolls. However, when the last crew counter is removed during a boarding action, the Wizard is also assumed to be killed and his counter is removed as well.
Clinging to the Wreckage
If the ship carrying the Wizard sinks, he will cling on to the wreckage. Place his counter on the debris marker. During the End Phase players may attempt to rescue him.
While the Wizard is adrift, clinging to the wreckage, he may not cast any spells. As soon as the Wizard goes overboard, discard all of your Magic Cards.
To effect a rescue a player's ship must be touching the wreck or debris marker. If both players have ships touching the wreck or debris marker the Wizard will swim to the ship of his own fleet.
Battle Honours
If the Wizard is picked up by the enemy he is captured. This represents a considerable humiliation for the owning player and will give his foe extra Battle Honours at the end of the game.
If he is picked up by his own player's ship, place the Wizard's counter on the appropriate ship template. He can now be used again as normal. Replenish your hand of Magic Cards in the End Phase as usual.
Scenarios
Once you've played a few games of Man O' War, you may want to try some of the scenarios given in this section. Scenarios add an extra level of excitement to your games, because they give you objectives to fight towards, quite apart from the ultimate goal of destroying your opponent's fleet.
Scenarios sometimes change the rules of the game a little to provide a storyline for your battles. Each scenario that follows places you in a new situation with different dilemmas and tactical problems. Some present the players with objectives other than the simple destruction of their foe's fleet and provide more battle honours for achieving those objectives.
Some scenarios present new rules, and once you've played a few of these you might want to have a go at making up your own scenarios and special rules. You may want to combine some of the ones below. Providing both players agree on these before play begins this is perfectly acceptable.
Except where the scenarios' special rules state differently, both sides should begin play with 1000 point fleets. Players should select ships, wizards and Man O' War cards up to that limit. If both players agree, these scenarios can be played using different points limits.
1: After the Storm
Just before this battle began both fleets were caught up in a great storm. Howling winds and mountainous seas scattered the ships. Once the tempest had passed both sides frantically tried to re-assemble their fleets. More by luck than judgement they have ended up in the same area and must hastily form up for battle.
This scenario is played exactly as the basic game with one exception. Your opponent sets up your fleet and you set up his. You must follow all the normal set up rules, so place a squadron at a time within nine inches of the table edge. You can set up ships facing in any direction. You cannot place them within 2" of terrain or the table edge. Ships in squadrons must be within six inches of their flagship. Within these limits you can set them up how you like. Battle Honours are earned as usual.
A particularly nasty variation on this theme is to combine this scenario with the setting up rules from Treacherous Waters. Only use this variant if both players agree.
2: Treacherous Waters
One fleet has finally brought the other to battle in the estuary of the mighty River Reik. This is a dangerous area full of treacherous shoals and rocks. Captains will have to be more careful than usual while sailing here.
This scenario is exactly as the basic game except for the fact that all the quadrants of the table must have the maximum amount of terrain on them. In fact you may place all the terrain in the box if both players agree. Play proceeds as normal.
3: In the Jaws of a Trap
One fleet has managed to isolate and ambush a sizeable section of the other. The smaller fleet is doomed unless it can fight its way off the table and out of the jaws of the trap.
Roll a dice. The player with the lowest score has been trapped. His fleet may only be half the points cost of his opponent's. He sets up on the east or west side of the table and can exit from the table only on the opposite side.
The other player must split his fleet into two equal halves. One half sets up within nine inches of the north edge of the table and the other sets up within nine inches of the south edge of the table.
Play now proceeds as normal.
The trapped player gains battle honours as usual for enemy ships sunk or captured. Additionally, every ship he gets off the opposite edge of the table he gets Battle Honours for. The game ends when he surrenders or has no more ships on the table.
The ambushing player gets Battle Honours for sinking or capturing enemy ships as usual.
4: Buried Gold
One admiral has acquired a map containing the location of buried treasure. Spies have informed the admiral of the enemy fleet of this and he has put to sea in hot pursuit. Unfortunately the map was not very accurate. The island must be scoured for treasure since it would be bad form to return empty-handed.
During set up, when terrain is placed, choose one island to be the treasure island. This terrain piece is put in the centre of the table. Terrain set up and play can now proceed normally.
A ship which ends its movement within one inch of the central island can anchor and send landing parties ashore. Take as many crew companies as you like from the ship's template and place them on the island. These are your landing parties. You should place the landing parties in separate piles and put them near the ship they came from. This will let you know which ship they return to. If that ship sails off in the next movement phase they take to the boats and go off with it. If the ship is attacked while at anchor they will return to defend it.
In the End Phase they may search for the treasure. For each landing party roll a dice and consult the following table:
| Roll | Result |
|---|---|
| 1 | The landing party is consumed by fearsome monsters. |
| 2-5 | No treasure to be found, try again next turn. |
| 6 | They have found the treasure! |
Once the treasure has been located no more searches can be made. During the movement phase of the next turn the landing party can return to the ship and it can sail away. Place the treasure chest on its template. If the ship is captured in a boarding action its captor seizes the chest and places it on his ship's template.
If both sides manage to place landing parties on the island, then in the End Phase a massive battle ensues. Both players roll a dice and add the total number of landing parties on their side. Highest total is the winner. The loser loses one crew company. If it's a draw both sides lose one crew company. If crew companies from more than one ship are involved then the losing player gets to pick from which ship they come. There is no retreat from this battle; it carries on until one side has been slaughtered. Their red-handed foes get to search the island in the End Phase of the next turn if they are not attacked again.
Both sides receive Battle Honours for enemies sunk and captured. The player who manages to get the ship with the treasure chest off the table gains a further five Battle Honours.
5: The Treasure Fleet
The treasure fleet is returning home, groaning under the weight of gold in its hold. Enemy spies have found out the fleet's course and a strong force has been dispatched to intercept it. The treasure fleet must fight its way through or its admiral will face disgrace or worse on his return home.
Roll a dice. The player with the highest score is the treasure fleet. He takes three treasure chest counters and places them on the templates of three of his ships, one on each ship. Now both sides place ships and terrain as usual.
When a treasure ship is captured during a boarding action the winning player can transfer a treasure chest to his own ship's template.
Battle Honours are awarded as usual. In addition, for each ship with a treasure chest counter he manages to get off the opposite side of the table, the treasure fleet player receives 3 Battle Honours. For each ship carrying a treasure chest he manages to get off his own table edge the intercepting player gets 3 Battle Honours.
6: Storm the Shoreforts
The sixth scenario includes a new piece of scenery - the Shorefort. The seascape represents bordering territorial waters between two nations at war. The waters are guarded by Shoreforts, and the fleets of the nations are determined to destroy their opponent's Shorefort as quickly as possible.
Set up the terrain as usual. Choose table edge as usual.
Choose your fleets as usual, except that each player gets a Shorefort, at no points cost, which he places as a squadron when the fleets are deployed. The Shorefort is treated exactly like an extra squadron in your fleet, subject to the rules below.
Victory conditions: The first player to reduce his opponent's Shorefort to rubble is the winner, and gains 15 Battle Honours. There are no other Battle Honours gained in any other way in this scenario - i.e. you get no Battle Honours for sinking or capturing enemy ships. Note that if you are buying a Shorefort for your fleet under normal circumstances, it is only worth 5 Battle Honours. The extra 10 in this case is due to the fact that they are the only Battle Honours in the scenario.
Shorefort Templates: The Shorefort template is just like that of a ship - a sideview split into areas. Each area houses a cannon battery. It has no high or low areas.
Moving: A Shorefort cannot move. It is a vast construction built on a rocky outcrop, towering out of the sea, and somewhat immobile by its very nature.
Firing at a Shorefort: When firing at a Shorefort, you do not aim high or low, simply fire at the Shorefort. Roll the correct number of dice, depending on the number of weapons which your ships have. Any that score a 1, 2 or 3 miss, any other score is a hit. The Shorefort must then make the saving throws for the hits it has taken.
Saving Rolls: The Shorefort is very tough. It cannot be sunk, and is immune to rams or below the waterline hits. In fact, anyone trying to ram the Shorefort runs aground. To reflect its four foot thick walls of granite construction (stronger than the sturdiest ironclad), all locations on a Shorefort have a saving roll of 3+. Normal save modifiers apply.
Taking Damage: If a Shorefort takes damage, it loses a gun battery. Each location has a damage box in it. Each damage box represents a gun battery. When the damage box in a location is destroyed, then the Shorefort may no longer fire that gun, and subsequent successful hits in that area which fail their saving roll will cause 1 point of structural damage and kill 1 crew counter, crushed by falling masonry.
Destroying a Shorefort: A Shorefort is destroyed when it has lost all its gun batteries.
Firing from a Shorefort: The cannons on the Shorefort have 360° arcs of fire, which represents the fact that they can be swiveled in their mountings to be brought to bear on moving targets. All the cannons in the Shorefort are fired at the same target in every turn, using the standard cannon firing template. The Shorefort has 3 batteries of guns, giving it a 3 dice cannon attack in any one direction, once per turn.
Capturing a Shorefort: To capture a Shorefort, move your ship so that it is touching the Shorefort template. Roll a dice. On a 1 or 2 you have miscalculated your manoeuvre and run aground. Whether or not you have run aground, you may conduct a boarding action as normal. The Shorefort fires its guns in defence. The Shorefort also adds +1 to its dice rolls as the defenders are protected by huge stone walls.
Shoreforts in Other Games: The following information allows you to write your own scenarios featuring Shoreforts.
One or both sides can buy Shoreforts at 100 points each. Deploy them as squadrons in your fleet, but they can be placed anywhere within a section on your side of the table.
- Weapons: 3 cannon batteries; 360 degree arc of fire.
- Battle Honours: 5.
- Crew: 3.
- Points cost: 100.
You may have no more Shoreforts in your fleet than you have Ships of the Line squadrons.
Campaigns
Campaigns give more structure to your games of Man O' War. Your ships will earn battle honours, gain experience, and become more powerful in future battles. A campaign can create a string of epic battles at sea, from the shores of the Southlands to the estuary of the Reik.
Setting Up a Campaign
A Campaign is a linked series of battles between two fleets. Each player starts off with a fleet straight from the Fleet Lists, and as scenarios are played, they will accumulate Battle Honours. Not only do these give an indication of who wins each battle, they can be spent on improving your ships throughout the campaign.
The first thing you must do is decide the number of points both players will have to purchase their fleets: 1000 points is a good amount to begin with. Having done this you buy your ships as described in the Fleets section.
It is perfectly permissible, if both players agree, to increase the points values of your fleet during the course of the campaign. This will allow you to incorporate any new models you have acquired into your force. The points totals of both fleets should be equal, however.
Now you must decide on how many scenarios the campaign is going to run for; we recommend that you have four or five ready to start the campaign. It's up to you and your opponent how many battles to fight.
Deciding on a Scenario
Before you fight you'll need to decide which scenario you're playing. We run our campaigns using the scenarios from the rulebook. Roll a dice. If the result is 1, 2 or 3 then play a normal battle, otherwise roll on the table below.
| Roll | Scenario |
|---|---|
| 1 | After the Storm |
| 2 | Treacherous Waters |
| 3 | In the Jaws of a Trap |
| 4 | Buried Gold |
| 5 | The Treasure Fleet |
| 6 | Storm the Shoreforts |
If both players agree then you may substitute scenarios of your own design for any of those on this table. You may even want to write a set of fixed scenarios for a specific campaign, which are played in a set order and which tell a heroic saga of battle.
If a scenario calls for you to use less than the normal number of points you don't have to do this exactly. It may prove impossible for one player to choose exactly 500 points' worth of vessels from his fleet. Don't worry — try to get as near to the total points required as possible. The game will be better if you are a little over the points value required rather than a little under.
For Example
The players have rolled up scenario 3, In the Jaws of a Trap. For the campaign the first player, with an Imperial fleet, has chosen to have a Master Wizard, a Greatship, two squadrons of Wolfships and one squadron of Wargalleys, which comes to a total of 1000 points. He is the player springing the trap.
The scenario calls for him to divide his force into two equal halves. He can choose to have the Wargalleys (points value 150) start on the North Edge with a squadron of Wolfships (points value 300). This leaves the Greatship, with the Master Wizard aboard (points value 150+100) and the other squadron of Wolfships (points value 300) coming on from the South. This means that the Imperial Player has 450 points coming on one table edge and 550 points coming on the other. Given his fleet this is about as close to dividing it into two equal halves as he can get.
The second opponent, choosing a Bretonnian fleet, takes a Galleon, two squadrons of Corsairs, two squadrons of Buccaneers and a Master Wizard. The scenario calls for him to use only half his fleet. He could choose to field his Galleon (150 points), his Master Wizard (100 points) and a squadron of Corsairs (300 points). This would give about as close to half his fleet as he can manage.
Having picked a scenario you then proceed to the game, following any special rules that may apply to the scenario. The battle is fought exactly as normal.
In the Aftermath of the Battle
Once the battle is over both players should total up their Battle Honours as usual. These can be allocated to any surviving ship your fleet possesses in whatever way you want within the limits mentioned below.
Once a ship has acquired enough Battle Honours, the crew will improve, progressing from being mere inexperienced crewmen to hardened sailors or beyond.
- Once the crew has acquired 4 Battle Honours its crew will become experienced sailors. They are a level one crew.
- Once they have acquired 12 Battle Honours they will become grizzled veterans. They are now a level two crew.
- Once they've acquired 24 Battle Honours they are stalwart seadogs. This makes them a level three crew.
- Once they've earned 40 Battle Honours they are fearless cutthroats. They are a level four crew.
- On a total of 60 Battle Honours they are elite. They have achieved the dizzying heights of a level five crew.
| Battle Honours | Crew Title | Crew Level |
|---|---|---|
| 4 | Sailors | 1 |
| 12 | Veterans | 2 |
| 24 | Seadogs | 3 |
| 40 | Cutthroats | 4 |
| 60 | Elite | 5 |
Once you've allocated Battle Honours you should check to see whether a ship has acquired a new level. In any event you should note the number of earned Battle Honours on the campaign record sheet.
After any battle you can only allocate enough Battle Honours to a ship to take it to the next level of experience. This means that you can give a maximum of four Battle Honours to an inexperienced crew or a crew that has just reached the first level of experience.
You should note all the details on the campaign record. In this way you will be able to keep track of the progress of your ships. During battles, place a crew level counter next to the template of any ships which have gained enough experience to be promoted.
For Example
After a particularly hard fought battle the Imperial Player finds himself with 21 Battle Honours. He has six surviving ships, all with starting crews. He can give 4 Battle Honours each to five of the ships making them all sailors. He can assign the last to the sixth ship which will make it slightly easier for it to progress next time. If only five ships on the Imperial side had survived then the last Battle Honour would have been lost.
The Benefits of Experience
Once a crew has achieved a new level of ability it gains many benefits.
Superior Commander. The captain may be experienced enough to act independently even if separated from his squadron flagship by more than six inches at the start of a turn. At the start of his squadron's Battle Phase you can make a navigation check. Roll a dice adding the ship's crew level. If the result is greater than 7 then the ship is not a straggler and may move and fight normally that phase.
Master Gunners. Because of their experience your crew may make an Inspired Gunnery check. When you come to fire roll a dice and add the ship's crew level. If the result is greater than 7 then the ship may fire twice this phase.
Battle Hardened Crew. Because of their greater morale and proven fighting ability an experienced crew gets to add their crew level to their die roll during any boarding actions they take part in.
However, if you use a company from an experienced crew as a prize crew on a captured ship it does not gain any bonus. The lads are obviously demoralised by the unfamiliarity of their surroundings and separation from their trusty shipmates. They'll be fine once they return to their original ship though.
For Example
The Sigmar, an Imperial Wolfship, has acquired 12 Battle Honours, making it a level two ship with a crew of veterans. It is approaching the l'Honneur, a Bretonnian Corsair with an inexperienced crew who have not yet achieved level one.
Once the Sigmar makes contact with the l'Honneur its movement ends. The Imperial Player fires all three of the Sigmar's forward guns.
First he checks to see if his gunners feel inspired. He rolls a dice, adding his level. He gets a 5 on the dice. 5+2 is 7 so the check is a success. He fires the guns twice, raking the Bretonnian with 6 dice of cannon fire.
Having knocked out all the Corsair's guns with this mighty salvo the Sigmar's crew decide it's time to get to grips with the dazed Bretonnians. The boarding action begins. The Sigmar has three crew counters and the l'Honneur only has two. With a mighty shout the Imperial soldiers storm aboard rolling a 3 on their dice. To this they add their 3 boarding parties and the crew's level of 2. This makes their total 8.
The Bretonnians, unable to load their cannon with grapeshot because they have no undamaged guns, roll a 5. To this they add their 2 crew for a total of 7. Despite heroic Bretonnian resistance the Empire's finest soldiers cut their way to victory. The Bretonnian loses a crew counter. Imperial victory looks almost assured.
Continuity
One of the greatest benefits of the campaign is continuity. The player is using the same ships and fleet and watching them grow in power and experience.
During a Campaign, you should keep note of the colour of your fleet's wizard. It will remain the same from game to game. If the wizard is lost during a battle his College will replace him with a wizard of the same mastery level before the next battle.
You should also note which Man O' War cards a ship has assigned to it. These will be the same from game to game unless the ship is sunk.
Sunken Ships
Any ships sunk, captured or scuttled during the course of the campaign are lost, and all their battle honours and levels of experience go too. This can be a real tragedy when you've watched a ship develop from a fresh crew to Cutthroat heroes.
If a ship is lost your fleet will commission a new one before the next battle. The sunken ship will be replaced with one of the same type. If the sunken ship had any Man O' War cards, draw the same number of new ones and assign them to that ship. If the original ship had any Engineers or Wardancers or other special troops aboard then the new ship will have them too.
This ship will have a fresh crew and no Battle Honours although it may earn them in the same way as any other ship. The ship will be assigned to the same squadron as the ship it replaces. In this way you will always start each battle with the same number of squadrons and ships as you began the campaign with, although they will probably be of different levels of experience.
Winning the Campaign
After the first battle you should roll on the scenario table to find out what your next battle will be. Place the appropriate counters telling you the level of your crew on the templates of any ships which have gained a new level of experience.
After the next battle, tally up your battle honours and award them as before. Repeat this process until you have fought the agreed number of battles.
After the last battle each player should add up the total Battle Honours acquired by all his surviving ships over the duration of the entire campaign.
The winner of the campaign is the person whose surviving ships have the most Battle Honours.
Lily Livered Cowards
Any player who sails his fleet directly off the table without firing a shot, with no intention of fighting the enemy or achieving the scenario objective, is obviously a lily livered coward.
His opponent is immediately awarded the value of the coward's entire fleet in Battle Honours since his lads are heartened by facing a fleet whose admiral is such a yellow bellied dog.
Any fleet which does this twice in a campaign has its admiral executed and automatically loses the campaign. This rule is meant to stop one player from winning a campaign purely by refusing to engage. It is not meant to discourage sensible tactics, such as retreating a badly damaged squadron to preserve it as a fighting force, for example.