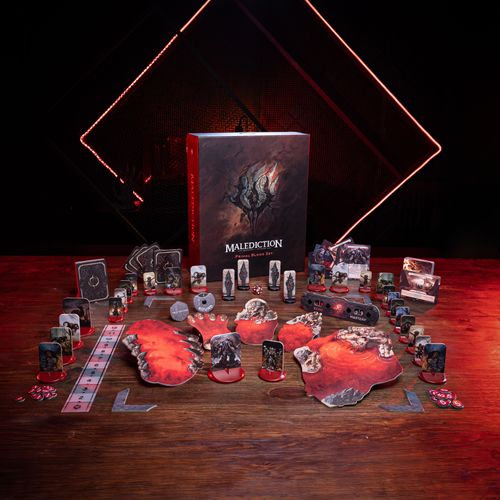
Malediction
Malediction Rulebook
Table of Contents
Table of Contents
Game Overview
Malediction is a unique blend of miniature games, using highly detailed models to represent your units, and card games, offering many options for customizing your deck to fit your playstyle.
In this dark fantasy setting, you'll take the role of a Seeker, a wielder of powerful relics and commander of their faction, leading a warband into the accursed grounds of the Malediction. There, you will face your opponents in battle to claim dormant relics from the husks of their former wielders. Games are played on a tabletop battlefield using models, cards, dice, and rulers. Players take turns ordering their units to combat their enemies and gain mastery over that region of the Malediction. With different combinations of cards in each deck, several relics to be claimed, and various terrain configurations, no two games will ever be the same!
Card Types
Cards come in different types and subtypes, which identify their special characteristics and dictate basic rules and interactions, such as when they can be played.
Unit Card Anatomy
Units are represented by a model and a corresponding unit card. They are a fundamental aspect of your warband used to move around the battlefield, attack, and claim relics!
- Card Name: Identifies a specific card.
- Cost and Rank: Cards have a cost in echo to be played, represented by the number on the diamond. The color of the diamond indicates a card's rank, referenced by some game effects. Ranks are, from lowest to highest: Basic, Elite, Unique, Legendary.
- Stats: Specific to unit cards. This represents how capable a unit is at interactions on the battlefield.
- Factions: The sigils indicate which factions this card is aligned with. This will be used when building your deck.
- Card Type & Subtype: All unit cards have subtypes. These subtypes might be referenced in abilities and effects.
- Abilities and Effects: A detailed description of a card's abilities and effects.
- Flavor Text: Some cards have flavor text that enhances the lore of Malediction.
Seekers: Each warband must always have one Seeker. These are powerful units that are not shuffled into your deck, and their card is instead placed on the Seeker zone, close to your deck. Each Seeker also has a Legacy card associated with them, also placed in the Seeker zone.
Legacy Cards
Players always have one Legacy card each, and their Legacy card is associated with a specific Seeker. They bring powerful abilities that will help dictate your warband's playstyle. A Legacy card's abilities are always available to its owner, regardless of the Seeker being on the battlefield or not.
Legacy Card Anatomy
- Card Name: Identifies a specific card.
- Card Type & Seeker: All Legacy cards are associated with a specific Seeker.
- Starting Echo: How much echo you start the game with.
- Abilities and Effects: A detailed description of a card's abilities and effects. Legacies don't have to be deployed or played; their abilities and effects are always available for you and your entire warband, regardless of whether your Seeker is on the battlefield or not.
Spell Cards
Spells create unique effects that can vastly alter the course of a battle, often overriding the core rules of the game.
Spell Card Anatomy
- Card Name: Identifies a specific card.
- Cost and Rank: Cards have a cost in echo to be played, represented by the number on the diamond. The color of the diamond indicates a card's rank, referenced by some game effects.
- Factions: The sigils indicate which factions this card is aligned with. This will be used when building your deck.
- Card Type & Subtype: There are 2 spell subtypes, channel and swift. Each subtype of spell card has its own specific timing to be used.
- Effects: A detailed description of a spell's effects.
- Flavor Text: Some cards have flavor text that enhances the lore of Malediction.
Attachment Cards
Attachment cards can be equipped by units to modify or enhance their capabilities. A unit with attachments equipped gains all abilities and effects from those attachments.
Attachment Card Anatomy
- Cost and Rank: Most cards have a cost in echo to be played, represented by the number on the diamond. The color of the diamond indicates a card's rank, referenced by some game effects. Relic cards have neither cost nor rank.
- Card Name: Identifies a specific card.
- Card Type & Subtype: There are 2 attachment subtypes, Items and Relics. Units may have one of each attachment subtype equipped to them.
- Abilities and Effects: A detailed description of a card's abilities and effects that will be granted to the unit equipping this attachment.
- Flavor Text: Some cards have flavor text that enhances the lore of Malediction.
Relics: Relics are a special type of attachment that also act as game objectives. They are not included in player decks, but have their own deck instead, made of 15 Relic cards.
Terrain Cards
Each player brings a terrain set to the game, and each set has a matching terrain card.
Terrain Card Anatomy
- Card Name: Identifies a specific card.
- Card Type: Identifies this card as a terrain card.
- Effects: Terrain effects apply to all corresponding terrain pieces.
Playing the Game
After setting up the battlefield, players will play through a series of rounds, each consisting of 4 phases.
- Refresh Phase: Players gain echo, refresh their units for the upcoming round, draw cards, and resolve an initiative bid.
- Deploy Phase: Players deploy units and items onto the battlefield.
- Action Phase: Players alternate taking turns activating their units.
- End Phase: Players try to claim relics from nearby husks and check for victory.
After finishing the end phase, if no player has won the game, a new game round begins, starting with the refresh phase.
Battlefield Setup
A battlefield in Malediction is set up by both players, giving everyone an opportunity to tailor the lay of the land to their strategy. To prepare the battlefield, follow the steps below, in order:
- Define the Battlefield: Malediction is usually played on a 30" by 30" flat surface.
- Place Terrain: Players roll a die to decide who starts placing terrain. Terrain pieces can be placed anywhere fully within the battlefield, outside of the four deployment zones, and at least 3" apart from other terrain pieces. Starting with the player who won the die roll, players alternate placing terrain pieces. Players must place terrain from their sets from large to small until each player has placed 4 terrain pieces. If both players agree that a terrain piece will not fit into the battlefield, the terrain placement step ends without adding any further terrain pieces.
- Place Husks: Starting with the player who went second in placing terrain, players alternate placing husks until all 4 husks have been placed. You can place a husk anywhere outside of the four deployment zones and outside any obstacles. Husks must have a minimum distance of 10" between each other.
- Create Relic Display: Shuffle the 15-card relic deck and place it facedown near the battlefield, draw the top four cards, and place them faceup in a line next to the deck.
- Set Echo, Mastery, and Round: Set your echo to the number indicated on your Legacy card and set the mastery to "0." Set the round tracker to "1".
- Draw Starting Hand: Shuffle your deck and draw 7 cards. If you dislike your starting hand, you may reshuffle your deck and draw a new hand with one fewer card for each time you repeat this process. You may repeat this process up to 5 times and must start the game with at least 1 card in your hand.
- Setup Bid: Players must now bid to choose either their deployment zone or if they want the initiative token for the 1st round. The winner of the bid chooses first. When a player chooses their deployment zone, their opponent's deployment zone must be the diagonal opposite. During the setup bid, if there is a tie, players must roll a die to decide the winner.
Bidding: Whenever the game allows (or requires) players to bid, they may (or must) place one card from their hand, facedown, onto the battlefield. Once all players who want to (or must) bid have done so, players will reveal their chosen cards. The player who bids the card with the highest cost is the winner of the bid. Any cards used to bid are banished.
Setup Diagram
Both players' play areas mirror each other across the battlefield. Each player's area includes, near their corner of the battlefield: their Terrain set, their Legacy card, their Seeker zone, their deck, their discard pile, and their banish pile. The Relic Display, holding the four faceup relic cards drawn from the shared relic deck, sits centrally between both players.
Game Round
Once the battlefield setup has been completed and both players know their deployment zones and who has initiative, the first round of the game begins.
Each game round is comprised of 4 phases, explained below:
Refresh Phase
Refresh Phase in Round 1: In the first round of the game, the refresh phase is skipped.
The refresh phase marks the start of a new round. Players gain resources, refresh their units, and bid for initiative, following the steps below in order:
- Refreshing Units: Each player refreshes their exhausted units by rotating their card upright.
- Advance the Round Tracker: Advance the round tracker by one to indicate that you are entering a new round of the game.
- Gather Resources: Each player gathers resources by following these steps.
- 3.1: Draw 2 cards from your deck. If a player has to draw cards, but there are no cards to be drawn from their deck, that player loses the game.
- 3.2: Gain echo equal to 2x the round (the number shown on the round tracker).
Gained echo is cumulative, so add it to any unspent echo from previous rounds. This means that a game escalates to allow for powerful plays as a match builds up to its conclusion. Manage your resources wisely to maintain the upper hand or turn the tables in your favor in the late game!
The round tracker counts up to only 5, so there is a maximum limit to how much echo can be gained during the refresh phase. From round 5 onward, players gain 10 echo.
- Initiative Bid: The player without initiative can make a bid. If they choose not to, then initiative remains with its current player, and the game proceeds to the deploy phase. But if they choose to make a bid, they declare that they are bidding for initiative and place a card from their hand facedown in front of them. The current initiative player can contest this by bidding their own facedown card, or simply forfeit initiative without spending a card. The highest bidder wins the initiative and takes the initiative token (if only one player bids, then they are the highest bidder). If there is a tie, the player without initiative wins the bid. Once the initiative bid has been concluded, the deploy phase begins.
Gaining Echo Example: Round 3 has started, and it is the refresh phase. Player A gains 6 echo (twice the number of the current round: 2x3). Since they had 15 unspent echo from previous rounds, their new echo amount is 21.
Deploy Phase
In the deploy phase, the initiative player chooses to either deploy first or defer to their opponent, who deploys first. Then, the first player deploys all units and items they want to bring to the battlefield for that turn. Then, the other player does the same. Each unit can equip only one item, placed under that unit's card.
To play a unit card, the active player places the card from their hand or Seeker zone faceup in front of them and pays for it by reducing their echo dial equal to its cost. Then, they stage the unit's deployment by placing the physical model on the battlefield.
To play an item card, the active player places the card faceup under the unit card that is equipping it and pays the echo cost. Items being deployed must be equipped to a unit that is either being deployed or unengaged and already on the battlefield. Equipped units, even those being deployed, immediately gain the item's abilities and effects.
As long as the player has sufficient echo, there is no limit to the number of units and items they can deploy in a single round.
When the first player finishes deploying for this round, they inform the other player that it's their turn to deploy their units. After both players have finished deploying, they proceed to the action phase.
Seekers and the Seeker Zone: Unlike other units, Seekers are not shuffled into the player's deck, nor are they added to the player's hands. Seekers begin the game in the Seeker zone and can be played from that zone just as a unit card is usually played from the hand. If a Seeker ever leaves the battlefield for any reason, they return to their owner's Seeker zone (and can even be played again).
Standard Deployment: To bring a unit into play via standard deployment, they are placed fully within a player's deployment zone, a 6" quarter circle measured from a corner of the battlefield. A player's deployment zone is in the opposite corner from their opponent's deployment zone.
Reinforcement Deployment: As the game progresses and more of your units are spread across the battlefield, you have the option to deploy units as reinforcements. To deploy a reinforcement, place your unit on the battlefield nearby (within 1") any unengaged unit you own. Since units enter the battlefield all at once during deployment, starting in Round 2, only units already on the battlefield from a previous round can call reinforcements. You aren't required to make all deployments, either standard or reinforcement; units can be deployed in a standard way or as reinforcements during the same deployment phase.
Swapping Attachments: Lastly, during the deploy phase, any two unengaged allies you own, nearby each other (within 1"), may freely swap any attachments among themselves as part of staging. Each attachment may only be swapped once per deploy phase. Units must always respect their attachment limits (1 item and 1 relic).
Staging: The deploying player is able to stage their units where they want to place them. This allows for some flexibility in planning as the player can freely move the deploying units around to ensure they have optimal placement. When a player has finished staging, they declare that they are now deploying, and their incoming units and items all enter the battlefield at once. This means, for example, that a unit being deployed cannot call reinforcements during that same deploy phase.
Deploy Example: It is the deploy phase. Player A has 18 echo and wants to deploy a Tarok Beast. The Tarok Beast costs 2 echo as shown on its card. They must play the card by spending the echo equal to the unit's cost, going down to 16 echo. Then, they must place the unit fully within their deployment zone. Player A places their Tarok Beast fully within their deployment zone and places their card close to the battlefield.
Player A also wants to deploy a Bloodfrenzy Berserker. The Bloodfrenzy Berserker costs 7 echo as shown on its card. They now spend another 7 echo (the cost of the Berserker), going from 16 down to 9 echo. Once again, they must place the unit fully within their deployment zone. Player A places their Bloodfrenzy Berserker fully within their deployment zone and places their card close to the battlefield next to their other deployed unit cards.
Lastly, player A wants to equip their Bloodfrenzy Berserker with the Winged Sandals. The Winged Sandals costs 3 echo as shown on its card. They must spend another 3 echo, going from 9 down to 6. They now must equip the item on a unit that is either being deployed or unengaged. Since the Berserker is a valid target, player A places the Sandals underneath the Berserker. Now, without any other units or attachments to play, player A finishes staging, meaning their incoming units and items all enter the battlefield at once.
Reinforcement Deploy Example: Next round, player A wants to deploy their Boneclaw Raider as a reinforcement deploy. The Boneclaw Raider costs 6 echo to be played. In this example, the Boneclaw Raider may not be deployed nearby (within 1") the Bloodfrenzy Berserker since that unit is engaged. But they may deploy their Raider near the Tarok Beast. Player A then spends echo equal to the cost of the unit (in this case, 6) and places the Boneclaw Raider nearby (within 1") their Tarok Beast, since it was unengaged. The Raider is even able to be engaged with the Spellbound Bahig'udjin, denying their opponent the chance to reinforcement deploy nearby that unit.
Action Phase
Unlike the deploy phase, the action phase is resolved in an alternating fashion, with each player, in turn, activating one of their units until there are no units left to activate. The initiative player chooses to either activate first or defer to their opponent, who must then activate first.
Activation
Units can be in one of two states, as shown by their card's orientation: REFRESHED (upright) or EXHAUSTED (sideways). Units enter play refreshed. Refreshed units can be activated, but exhausted units cannot.
Activation refers to playing a turn by using one of your refreshed units on the battlefield. To activate a unit, declare that you are starting its turn and exhaust its card. It gains two ACTION POINTS (AP), which you can spend to perform various actions during its activation.
A unit may repeat actions as long as it can afford the action's AP cost. After a unit starts performing an action, it cannot spend AP to perform a new action until it has fully resolved its current one (meaning it cannot attack while moving and vice versa). Additionally, a unit cannot spend AP to perform an action while an ability or effect is being resolved.
You may also play one channel spell during each of your unit's activations, which does not cost action points. When you are finished activating a unit, declare that you are passing the turn. That unit loses any unspent AP. Exhausted units become refreshed again during the next round's refresh phase.
Character Stats: Many actions in Malediction will take into account a unit's stats when being performed.
- Accuracy: The ability to hit during combat. Add the Accuracy value to the result of a die when making attacks to determine the total attack value. If the result equals or exceeds the target's defense, the attack HITS; otherwise, the attack GRAZES.
- Power: The unit's damage output. If the attack hits, the defender suffers full damage (the bigger number to the left of the slash); if the attack grazes, the defender suffers partial damage (the smaller number to the right of the slash).
- Range: The distance in inches that the unit can make a ranged attack. If the stat is "0", the unit may only perform attacks on nearby enemies (within 1"), but other game effects could increase this number.
- Speed: The distance in inches the unit can move in a single move action.
- Defense: The unit's defense threshold. The attack hits if the total attack value equals or exceeds its target's Defense and grazes otherwise.
- Max Health: How much damage a unit can resist before being defeated. Use the damage tokens to track damage dealt to a unit or its current health (referred to simply as health). When the unit's health reaches 0, that unit is defeated.
Null Stats: Some units have a stat of null "–". If a dash is used instead of a number, then that unit cannot use that stat at all. For example, a unit whose move stat is "–" indicates a stationary unit that cannot move; a unit whose ranged stat is "–" indicates a unit incapable of doing any ranged attacks (regardless of any augmenting methods like unit abilities, items, or spells). If an effect is dependent on a null stat, treat it as "0" regardless of any abilities.
Standard Actions
A unit can spend AP to perform standard actions. There are four standard actions: Move, Attack, Charge, and Shift.
Move (1AP)
A move action costs 1AP. Move your unit up to the distance of its Speed stat. You can measure from any point on the edge of a unit's base, placing that same point at the end of the desired trajectory. You are not required to move the full distance and may stop short.
Units are not restricted to moving only in straight lines, so you can move the unit in increments to maneuver around obstacles (terrain or other units) and even curve your ruler.
Also, a unit cannot move through spaces narrower than its base. If there is not enough space for the width of its base to fit between objects on the battlefield, then the unit cannot move that way and must find another way to maneuver around. The direction a model is facing is not relevant to the game, so you can pivot it to face whichever direction you prefer.
Units cannot overlap or move through:
- Any model on the battlefield (ally or enemy).
- Husks.
- Any section of terrain higher than the base of a unit (meaning anything that's not the "flat part" of the terrain—the ground).
Attack (1AP)
An attack action costs 1AP. To make an attack, roll a die and add the unit's Accuracy to the result to get the total attack value. Compare this value against the target enemy's Defense to see how much damage that attack will inflict.
If the attack value equals or exceeds the Defense stat, then the defender suffers a hit and is dealt full damage, represented by the bigger number to the left of the slash on the attacker's Power. If the attack value does not equal or exceed the Defense, then the defender suffers a graze and is dealt only partial damage, represented by the smaller number to the right of the slash on the attacker's Power.
Criticals: When a natural "20" is rolled in an attack (meaning an unmodified roll of "20"), a critical hit is scored, regardless of the target's Defense! Add up both numbers in the unit's Power stat (for hit and graze) before adding any Power from abilities, then deal the total amount of damage to the defender.
When a natural "1" is rolled (meaning an unmodified roll of "1"), you score a critical graze, regardless of the target's Defense! Simply deal 1 damage to the defender, without adding any Power from abilities.
An attack may be either melee or ranged.
Melee Attack: All units can make melee attacks. Nearby enemy units (within 1") and line of effect (LoE) are considered engaged in melee combat. So, a unit can perform a melee attack against any engaged enemy unit.
Ranged Attack: Units with a Range stat greater than zero can attack targets from that distance in inches. These attacks use the same basic formula to hit and deal damage as a melee attack, but a ranged attack can be performed only if the intended target is valid, meaning that it is within range and line of sight (LoS).
Line of Sight & Line of Effect
Line of Sight: To check for line of sight (LoS), trace a line from the center of the originating unit's base to any point on the target's base. If the line crosses another unit, a husk, or a tall obstacle (vertical terrain that is taller than 1"), then LoS is blocked.
Line of Effect: To check for line of effect (LoE), trace a line from an effect's point of origin or the center of the originating unit's base to any point of the target's base. If the line crosses a tall obstacle (terrain that is taller than 1"), then LoE is blocked.
Attack Example: The Tarok Beast has activated and wishes to attack the Spellbound Bahig'udjin. They are already engaged, so the Tarok Beast simply spends 1 AP to perform a melee attack. Roll a die and add the Tarok Beast's Accuracy to the result. In this scenario, a 13 was rolled, and the Tarok Beast's Accuracy is 2, meaning the total attack value was 15. Next, compare the total attack value to the defender's Defense value. Since the Tarok Beast's total attack value was 15, it was higher than the Bahig'udjin's defense of 10, and a hit was scored. The Tarok Beast's Power is 3/1, meaning it deals 3 damage on a hit and 1 damage on a graze. Since a hit was scored, the Bahig'udjin suffers 3 damage.
Charge (2AP)
A charge action costs 2AP. It allows a unit to move twice its Speed to engage with an enemy, and then perform a melee attack against it. To perform a charge, a unit must first choose a target that is not engaged with it, and the charging unit must have LoS to any point of the target's base. The charging unit can slightly adjust its movement along the way to avoid obstacles as long as the unit's base does not leave the traced LoS trajectory. If the charging unit's base is unable to reach the target without leaving the traced LoS, then the unit cannot make a charge against that enemy. A charge provokes retaliation from engaged enemies.
Charge Example 1: Sigrith wants to charge either the Soulwhisperer or the Deadeye Archer. She has LoS to both enemies, but her base cannot fit through the gap between the Truestone Defender and the Duskwood Prowler, meaning she would need to make a turn and break LoS to reach the Soulwhisperer. However, Sigrith can reach the Deadeye Archer by maneuvering around the Prowler without leaving the LoS trajectory she traced to it.
- Trace LoS from Sigrith's center to any point on the Deadeye Archer's base.
- Maneuver her unit around the Prowler, making sure that Sigrith's base is still inside the traced LoS trajectory.
- Upon engaging her target, resolve the attack portion of the charge.
Charge Example 2: The Cabra Mauler has several possible charge trajectories to the Akhenzan Shieldmage based on the LoS it can trace. It wants to possibly push the Shieldmage into the Noxious Fleshgardens with its Knockback ability. To do so, the Mauler needs to get to its final position engaged and without having its base leave the LoS trajectory. It's important to note that while the Mauler can make it to the side of the Shieldmage, it cannot be positioned out of the traced LoS trajectory for the charge, even if it still finishes engaged to the destination point.
Shift (2AP)
A shift action costs 2AP. It allows a unit to make a single move a distance up to its Speed, in a straight line, without provoking retaliation. The unit can move in a straight line to wherever it can trace LoS to, as long as the line doesn't go over an obstacle (tall or short). Unlike a regular move, while shifting, a unit can squeeze through spaces narrower than its base as long as it ends its movement in a space that the unit's base can fit.
Terrain effects will only apply to a shifting unit if the line traced for the shift crosses through the terrain.
Shift Example: The Spellbound Bahig'udjin wants to move to be nearby its warband's Seeker, Polinore. Moving the Bahig'udjin would provoke a retaliation from the Cabra Mauler that it is engaged with, but the Bahig'udjin has a clear LoS to where it wants to move, and that line does not cross any obstacles. Since the Bahig'udjin has enough Speed to get to where it wants to go with a single move, instead of performing a move, it spends 2 AP and shifts to be nearby Polinore, without provoking retaliation.
Retaliation
Retaliation is a melee attack that is performed as a reaction to certain situations. It does not cost AP, and it occurs in response to another action, taking place before the declared action that provoked the retaliation, and always against the unit that provoked it. Retaliation cannot trigger other retaliations. A unit may choose to perform a retaliation each time they are provoked, regardless of whether they are refreshed or exhausted, and even regardless of whether they have already performed a retaliation during this activation.
These instances provoke retaliation from each engaged enemy:
- An engaged unit performs a move.
- An engaged unit performs a charge.
- An engaged unit performs a ranged attack.
- Specific game effects and abilities.
Retaliation Example: The Cabra Mauler wants to move to be nearby a husk. Since it is engaged in combat with a Virtahn Battlecaster, the move from the Mauler will trigger a retaliation. A retaliation always takes place and resolves before the provoking action, meaning that the Mauler will suffer an attack even before it starts moving. If the Mauler is defeated, it does not even perform its move.
Extra Actions: Sometimes an effect will allow a unit to perform extra actions. These actions do not cost AP nor do they interfere with a unit's normal activation in any way, and they may be performed even if the unit is already exhausted.
Abilities
Abilities are a unit's special characteristics that often overrule core concepts of the game. They are written in reference to the unit itself, meaning that if an ability requires any type of measurement or LoE, it will be traced from the edge of the base of the unit that is using the ability, unless specified otherwise. Some abilities are always in effect or require a certain condition to be used, while others can only be performed by spending a unit's AP.
Reading an Ability: All abilities have a name and an effect. Some abilities might have a number after their name, but before the effect. This number is an indicator of any variable value on the effect, called a modifier. For example, "Regeneration 2" has "Regeneration" as the ability name, and "2" as the modifier.
Some abilities are actions. They will have an indicated AP cost in parentheses after their name. A unit can only perform these action abilities when they would be able to perform actions and spend the indicated AP. For example, a unit may have "Onslaught (2AP)," meaning that unit must spend 2AP to perform the Onslaught action.
Non-Unit Abilities: Despite not being units, terrain and Legacy cards also have abilities. These abilities are always available and take place whenever their conditions are met.
Replacing Abilities: Sometimes a unit might have the same ability twice (such as by gaining it again through equipping an attachment). In this case, only the ability with the highest modifier takes effect. If a unit has the same ability twice and that ability has no modifiers, the unit only has one instance of that ability.
Ability Stacking: A unit's stats may be altered by one or more abilities that can either add to or subtract from its stats. Whenever a unit's stats would be altered by multiple abilities with the same name, only apply the ability of that name with the highest modifier.
Same Name Ability Stacking Example: Vorendal has the ability Regeneration 2. He also has equipped the Ring of Vitality, which gives him Regeneration 3. Since the effect from the Ring has the highest modifier, it takes precedence.
Spells
During the action phase, players can play spells from their hands by paying the card's cost. Place spells in their owner's discard pile after resolving their effects.
It is important to note that whenever a spell requires measuring from a point of origin (be it a model or a single point on the battlefield), LoE must be traced from the origin to any possible subjects of the spell's effect for it to be affected. If LoE is interrupted between the point of origin to the subject, then the subject was not affected by the spell. If no measuring is required on a spell, that spell does not need to trace LoE.
There are two spell subtypes: channels and swifts.
Channels: During the activation of an ally they own, players may play a single channel spell from their hand.
Channel spells:
- Cannot be played during the activation of a unit you don't own.
- Can be played at any point of a unit's activation, as long as no action or effect is being resolved.
- Are limited to a maximum of one per activation.
Extra Channels: Some abilities and effects might allow a player to play a channel spell, disregarding the restrictions of when you could normally play a channel spell. In this case, the spell does not count toward the limit of one channel per activation.
Channel Spell Example: If a channel spell is played through the Chaotic Impulse ability, the player may still play a channel spell from their hand. Also, if this spell gains Quicken, it is played as a swift spell, therefore, the player may still play a channel spell from their hand during this activation.
Swift: Swift spells can be played at any time during the action phase, even during an opponent's turn, though some swifts have specific restrictions or timing when they can be played.
Swift Spell Example: Sigrith is declared as the target of an attack made by a Duskwood Prowler. After seeing the result of the attack but before suffering damage, Sigrith's owner can play Shield of Andravos to prevent the damage from that attack entirely.
The Herald of Salvation is positioned to claim a relic farther than where Polinore would be able to reach with his two moves. By playing Telekinesis, Polinore is able to move over the tall obstacle, denying the claim to the relic.
Resolving Spells
When a spell's cost is paid and the spell is played, resolve it in the following sequence:
- Read and resolve the first sentence of the spell (up to the first full stop). Resolve the spell's effect on all valid targets and ignore the spell's effect on all targets that are not valid.
- Perform the first step for the next sentence. Repeat this step until all sentences from the card have been completed.
- The spell is resolved and placed on the discard pile.
If the point of origin of a spell stops being a valid reference for a spell's LoE to be traced, that spell cannot draw valid targets.
Invalid Targets Example: Player A has hidden their Sestinar, the Silent inside the Deathshroud Mire, as to not suffer ranged attacks. Player B attempts to use Amblis Transposition on their Spellbound Devourer and Sestinar in an attempt to remove it from the terrain. However, since Sestinar has the Spell Immunity ability, it may ignore the effect of that spell. Since Sestinar's owner decided to ignore that spell, it is now not a valid target for Amblis Transposition. As such, it cannot be forced to exchange positions with the Devourer.
Defeating Units
Throughout the game, units suffer damage from various sources, such as attacks, terrain, and spells. Damage is tracked by placing damage tokens on the matching unit's card.
When a unit has damage equal to (or exceeding) its Max Health, it becomes defeated: remove the model from the battlefield, and place its unit card and any equipped items in its owner's discard pile.
Defeated Seekers do not go to the discard pile, but instead return to their Seeker zone.
Defeated units with equipped relics become husks (see Losing Relics below).
When a unit is defeated, the opponent gains mastery equal to the defeated unit's cost plus the cost of any equipped attachments. If by any chance an item is destroyed without the unit equipping it being defeated, place the item on its owner's discard pile, and their opponent gains mastery equal to the item's cost.
Losing Relics: When a unit equipped with a relic is defeated, remove that model from the battlefield and place a husk onto the battlefield, centered on the defeated unit's previous position. Return that relic card to the bottom of the relic deck, and the unit's owner loses 10 mastery. The newly placed husk can now be claimed by units as usual, granting a relic and mastery.
Losing Relics Example: As the Spellbound Devourer attacks and defeats a Twinblades Skirmisher that has a relic equipped, the owner of the Skirmisher loses 10 mastery, places the equipped relic card at the bottom of the relic deck, and places a husk centered where the Skirmisher was after removing its model from the battlefield. During the end phase, the Devourer may claim a relic from this husk if other conditions for claiming the relic are valid.
End Phase
The end phase is when players claim relics from husks and then check if victory conditions have been met.
When the end phase begins, the player with initiative chooses which player will have one of their units claim a relic first. Then, players will alternate having units claim relics until all relics that could be claimed have been claimed.
Husks and Relics: Husks represent the carcasses of former relic wielders. By tapping into a husk's core, one can manifest a relic in whichever form best fulfills their objective.
Relic Deck and Display: The relic display shows you which relics you can choose from at that moment, and as relics get chosen, new ones get added to the display.
Claiming Relics: A unit may claim a relic if all three of these conditions are true:
- The unit is nearby a husk (within 1").
- The unit is not engaged.
- There are no enemies nearby the husk (within 1").
To claim a relic, choose one relic card from among the faceup cards in the relic display or draw the top card of the relic deck. Then, if the card was chosen from the display, immediately draw another relic card and add it to the display.
After choosing a relic, attach the relic card to the unit by placing it under that unit's card, and remove that husk from the battlefield.
When a unit claims a relic, its owner gains 10 mastery.
Claiming Relics Example: At the end phase, both Sigrith and Vorendal are each unengaged and nearby a husk (within 1") that has no enemies nearby it (within 1"). Since both players are in a position for their units to claim relics, the player with initiative chooses which player will have one of their units claim a relic first.
Winning the Game
After claiming relics, players will see how much mastery each one has. If any player has 40 or more mastery, the game ends, and the player with the most mastery wins. If there is a tie, a new round begins.
If no player has won the game, a new round begins.
Alternatively, whenever a player must draw one or more cards from their deck, but has no cards in their deck to draw from, that player loses the game.
Additional Rules
Terrain
Terrain creates an immersive battlefield. In addition to customizing their deck, players also bring one terrain set to the battlefield that abides by the rules in its corresponding card. Each terrain piece in a set comes in one of three sizes: large, medium, or small.
Terrain Effects: Units (both ally and enemy) on terrain are subject to the terrain's abilities, described on its corresponding terrain card. A unit is on a terrain if any part of its base is inside the flat areas of a terrain piece. Each individual terrain piece from a single set follows the same rules.
Entering Terrain Example: A Twinblades Skirmisher moves into the Astarian Pathways terrain piece. Now, that unit is on the terrain, gaining the benefit from its boosting ability to increase its Speed by 2 on its next move.
Obstacles: Obstacles are any object that occupies space on the battlefield, causing it to block movement and possibly disrupt LoS and LoE. A unit's size is always in reference to its base. When measuring, any parts of the model that extend beyond the unit's base and a model's height do not influence its movement or how that unit interacts with obstacles.
An obstacle is any section of terrain higher than the base of a unit (meaning anything that's not the "flat part" of the terrain—the ground). All units and husks are also obstacles. Units cannot move through obstacles.
Short and Tall Obstacles: Any terrain segment below 1" in height is a short obstacle. Short obstacles do not block LoS or LoE.
Any terrain segment that is 1" in height or above is a tall obstacle. Tall obstacles block LoS and LoE.
Anywhere outside the battlefield is a tall obstacle.
Terrain and Obstacle Example: If you are playing using 3D terrain, overhanging sections (such as an archway) are not obstacles and are ignored for LoS, LoE, and movement. These sections respect the rules for the sections underneath them.
Using 2D Terrain: If you are playing using 2D terrain, the guide side will show what parts of the terrain are short obstacles and what parts are tall obstacles. Sections shaded in translucent yellow represent short obstacles. Sections shaded in red bars represent tall obstacles.
Premeasuring
Players can freely premeasure distances for effects or actions at any moment of the game for any reason.
Rolling Back Decisions
Malediction is a game with a lot of moving parts, and you might realize that you had wanted to resolve things in a slightly different order. To that regard, your choices and effects only take place after you decide what you want to do, meaning you can fumble around with your pieces or your cards as you figure out your plans, as long as your opponent has not reacted to your decisions, no dice were rolled, nor cards were drawn.
Stat Alteration
Units may have their stats altered by abilities and effects (such as spells). When altering a unit's stats:
- If a unit's stat is altered by 2 abilities with the same name, only the ability with the highest modifier is applied.
- Null stats can never be altered.
- If the same stat is altered by one or more positive effects and negative effects, first add the positive values, then subtract the negative values.
Contradictory Effects
Occasionally, card effects might provide contradictory outcomes in regards to the rulebook. In these cases, the cards override the rulebook.
Card Overriding Rulebook Example: Usually, units can only be played during the deploy phase, and reinforcements cannot be deployed nearby engaged allies. The effect of Answer the Call, however, allows a unit to be deployed during the action phase and also to reinforce an engaged ally.
Additionally, a few game effects might provide contradictory outcomes, with one ability enabling some sort of effect while another ability disables the exact same effect. When this occurs, disabling effects override enabling effects.
Contradictory Effects Example: An Armored Revenant has Counterattack as one of its unit abilities. However, when attacking a unit equipped with the Boots of Celerity, the disabling effect of the Boots negates the enabling effect granted by Counterattack. Thus, the unit involved in combat with the Revenant does not provoke retaliation.
Concurrent Triggers
If triggered abilities or effects occur at the same time, their owner can choose the order they are resolved. If they are controlled by different players, the player with initiative chooses which player resolves all their effects first instead. Effects that are not controlled by any player, such as one that comes from terrain, are always resolved last.
Concurrent Triggers Example: Player A, who has a Fleshripper within 3" of both Player B's Valcarist Priest and Herald of Salvation, plays Cataclysmic Blast, defeating both the Fleshripper and the Herald and triggering both Death Throes and Martyr's Blessing respectively. Since each of these units is owned by different players, the player with initiative chooses the order to resolve the abilities, either resolving Death Throes before and defeating the Priest before it gets healed, or resolving Martyr's Blessing first, saving the Priest from being defeated.
Positioning and Forced Movement
Forced Movement: Some game effects can force a unit to move to a new position. Units being forced to move do not trigger retaliation as a result of this movement, even if they began their move engaged. Forced movement still takes obstacles into account.
Pushing and Pulling: Push and pull effects are traced by a straight line passing through the center of both units' bases: the point of origin and its subject. If during a push or pull, the subject's base makes contact with any obstacle, the move immediately stops.
Placing and Swapping: Whenever an ability or effect orders a model to be placed on the battlefield, use the model's centermost point as the reference for where to place it. Whenever an ability or effect orders models to be swapped, they are each placed in the position of the other. If a model must be placed on a specific point of the battlefield but cannot (because there is no room for the model's base), its owner places it in the nearest possible point of the battlefield.
Resolution Sequence Charts
Here are a series of charts to help better understand the resolution sequences within the game.
Each chart has a list of steps that must be followed in order. During the action phase, players may play swift spells and use effects and abilities they own to interrupt a step as it is declared, but before it is resolved.
If a spell, ability, or effect happens in response to or in between any of these steps, that effect must now be fully resolved before returning to the next step of the resolution sequence.
If any step of a sequence required for it to advance cannot be resolved, skip to the final step of the sequence (thus ending it).
Round Order
Refresh Phase
1.1. Both players simultaneously draw 2 cards, refresh their units, and gain echo.
1.2. The player without initiative chooses to bid (or not) for initiative and places (or not) a card facedown.
1.3. The player with initiative chooses to bid (or not) for initiative and places (or not) a card facedown. Then, both players compare the echo value of their cards.
Deploy Phase
2.1. The player with initiative chooses which player deploys their units and attachments first.
2.2. The player who will deploy first begins their staging: they play all unit and attachment cards they wish to deploy, then may swap attachments between units.
2.3. The other player now begins their staging: they play all unit and attachment cards they wish to deploy, then may swap attachments between units.
Action Phase
3.1. Swift spells may now be played by any player.
3.2. The player with initiative chooses which player will activate their first unit.
3.3. The player who will activate first chooses a refreshed unit to activate and exhausts that unit.
- 3.3.1. That player may now play a channel spell.
- 3.3.2. The activated unit may perform its actions. A channel spell may be played by the unit's owner between the first and second action if no other channel spell was played during this activation.
- 3.3.3. That player may now play a channel spell if no other channel spell was played during this activation.
- 3.3.4. The activation is ended.
3.4. The other player chooses a refreshed unit to activate and exhausts that unit. That player now resolves steps 3.3.1 to 3.3.4.
3.5. When there are no more units available to activate, the action phase is ended, and spells may no longer be played this round.
End Phase
4.1. The player with initiative chooses which player has their unit claim the first relic.
4.2. That player chooses a unit, and it claims a relic from the display and equips it.
4.3. That player gains mastery. The husk is removed from the battlefield, and a new relic is drawn and placed on the display (unless the relic was drawn from the relic deck, then no new relic is placed on the display).
4.4. The other player now performs steps 4.2 and 4.3.
4.5. Once there are no more possible relics to be claimed, both players check if the game has been won or if a new round begins.
Note: Some abilities might be used or triggered before or after any of the steps above.
Activating and Action
- Declare a unit to activate and exhaust it.
- The unit activates and gains 2AP.
- The unit's owner may play a channel spell.
- The unit may spend AP to perform an action.
- The unit's owner may play a channel spell if no other channel spell was played during this activation.
- Repeat steps 4 and 5 if able.
- Declare the end of the activation.
Note 1: Swift spells can be played before or after any of the steps above. Note 2: Some abilities might be used or triggered before or after any of the steps above.
Move
- Declare a move.
- Check for any retaliation being provoked.
- Enemies perform retaliation (if any).
- Measure distance and move the model.
- Declare the end of the move.
Note 1: Swift spells can be played before or after any of the steps above. Note 2: Some abilities might be used or triggered before or after any of the steps above.
Attack
- Declare an attack and its target.
- Declare if it is ranged or melee.
- Check if the defender is a valid target.
- 3A. If the attack is ranged, check for LoS and Range distance.
- 3B. If the attack is melee, check for being engaged and LoE.
- If the attack is ranged, check for any retaliation being provoked.
- Enemies perform retaliation (if any).
- Roll the attack die.
- Add accuracy and determine the total attack value.
- Compare the total attack value with the defense and check if it is a hit or graze (or critical hit/graze).
- Deal damage.
- Check if the defender was defeated.
- Place defeated units in its owner's discard pile.
- Declare the end of the attack.
Note 1: Swift spells can be played before or after any of the steps above. Note 2: Some abilities might be used or triggered before or after any of the steps above.
Charge
- Declare a charge and its target.
- Check for any retaliation being provoked.
- Enemies perform retaliation (if any).
- Check for LoS and the Speed distance.
- Measure distance and move the model to become engaged.
- Perform all the steps from the attack chart.
- Declare the end of the charge.
Note 1: Swift spells can be played before or after any of the steps above, including the steps from the attack chart. Note 2: Some abilities might be used or triggered before or after any of the steps above, including the steps from the attack chart.
Shift
- Declare a shift.
- Draw LoS to the model's final destination.
- Measure distance and move the model.
- Declare the end of the shift.
Note 1: Swift spells can be played before or after any of the steps above. Note 2: Some abilities might be used or triggered before or after any of the steps above.
Retaliate
- Declare if the unit will retaliate or not.
- Check if the defender is still engaged and is in LoE.
- Roll the attack die.
- Add accuracy and determine the total attack value.
- Compare the total attack value with the defense and check if it is a hit or graze (or critical hit/graze).
- Deal damage.
- Check if the defender was defeated.
- Place defeated units in its owner's discard pile.
- Declare the end of the attack.
Note 1: Swift spells can be played before or after any of the steps above. Note 2: Some abilities might be used or triggered before or after any of the steps above.
Playing and Resolving Spells
- Declare the spell and spend echo.
- Declare targets for the first sentence of the spell.
- Resolve the first sentence of the spell.
- Declare targets for the next sentence of the spell.
- Resolve the next sentence of the spell.
- Repeat steps 4 and 5 until all sentences of the spell have been read.
- Declare the end of the spell.
- Place the spell on its owner's discard pile.
Note 1: Swift spells can be played before or after any of the steps above. Note 2: Some abilities might be used or triggered before or after any of the steps above.
Game Modes
The rules explained so far are the standard used to play Malediction, but there are other game modes that change how the game is played. Here is a summary of the standard game and the alternative modes.
Standard Game
The standard game of Malediction: 2 players, a 2.5' x 2.5' (30" x 30") battlefield, minimum 10" between husks, 1 large/1 medium/2 small terrain pieces per player, and 40 mastery points to win. No special rules.
Demo Game
A good option for teaching new players: 2 players, a 2' x 2' (24" x 24") battlefield, minimum 10" between husks, 1 medium/1 small terrain piece per player, and 25 mastery points to win.
Special rules: both players start with 10 echo and their Seeker already deployed; neither player uses their Legacy card; only 2 husks are placed on the battlefield; and only 2 relics are shown on the display.
Allegiance (Team Battle)
A 2v2 mode: 4 players, a 2.5' x 2.5' (30" x 30") battlefield, minimum 10" between husks, 1 large/1 medium/2 small terrain pieces per team, and 50 mastery points to win.
Special rules:
- Teammates' units count as allies; opposing units count as enemies. Abilities referencing "an ally you own" apply only to your own warband.
- Teammates may communicate and bluff openly at the table but may not show each other their hands.
- Each team pools its terrain pieces and places them following the usual rules.
- On an initiative bid, both teammates must agree to bid; add both players' bid card costs together when comparing bids. Initiative belongs to the team, not an individual.
- The team that wins the setup bid chooses between gaining initiative or picking its side of the battlefield.
- When picking a side, each teammate must choose a different deployment zone on the same side; a player cannot standard-deploy inside their teammate's zone.
- Ties within a team are broken by a die roll.
- Teams alternate activating one unit at a time; a player cannot activate a second unit until every other player has activated one. A player with no units left to activate is replaced by their teammate.
Nemesis (Team Battle)
A 2v1 mode with two teams, the two-player Union and the one-player Nemesis: 3 players, a 2.5' x 2.5' (30" x 30") battlefield, minimum 10" between husks, 1 large/1 medium/2 small terrain pieces per team, and 50 mastery points to win.
Special rules:
- Each deploy phase, the Nemesis may play one basic or elite unit for free (without spending echo).
- Each refresh phase, the Nemesis draws 3 cards instead of 2.
- Each action phase, the first time the Nemesis would activate a unit but has none refreshed, the Nemesis instead refreshes a number of units equal to the current round number, then activates one as usual.
- Teammates' units count as allies; opposing units count as enemies, as in Allegiance.
- Players may communicate and bluff openly but not show hands to teammates.
- The Union pools its terrain; place it following the usual rules.
- On an initiative bid, both Union players must agree to bid, and their card costs are added together; the Nemesis' bid card cost is doubled for comparison. Initiative belongs to the team.
- The team winning the setup bid chooses initiative or its side of the battlefield; Union teammates take separate zones on the same side, while the Nemesis may use both zones on its side.
- Ties within the Union are broken by a die roll.
- Teams alternate activating one unit at a time, with the same one-activation-per-player-before-repeating rule as Allegiance.
Alternative Battlefield Sizes
Any of the modes above can be played on a smaller or larger battlefield:
- Strife (Small Battlefield): 2' x 2' (24" x 24") battlefield, minimum 8" between husks, 1 medium/1 small terrain piece per player or team.
- Maelstrom (Large Battlefield): 3' x 3' (36" x 36") battlefield, minimum 12" between husks, 1 large/1 medium/3 small terrain pieces per player or team.
Building Your Warband
Deck
A warband consists of a chosen Seeker, its matching Legacy card, a terrain card, and a deck of 30-50 cards made up of units, spells, and non-relic attachments.
Start by choosing a Seeker; each Seeker is paired with a specific Legacy card. Then choose a terrain card and its matching terrain set — any terrain card may be added to a warband.
Most cards belong to one or more factions, and a Seeker's factions determine which cards can join the deck: a card can only be included if the chosen Seeker bears all of the faction sigils shown on that card. A card with no faction sigil is unaligned and can go in any deck. For example, a deck built around the Seeker Auric Evenhand, who bears the sigils of the Order of the Shattered Throne and Primal Blood, can include cards from either faction, or cards that belong to both.
A card's rank — shown by the color of the diamond in its top-left corner — also limits how many copies of it a deck may contain: up to 3 copies of a Basic card, 2 of an Elite card, or 1 of a Unique card; a Legendary-ranked card is a player's own Seeker.
Deck Creation Tip: Aim for a deck of around 30 cards with at least 14 units — a smaller deck makes it more likely you'll draw into a useful card that fits your strategy.
Side Deck
The side deck lets a player swap cards with their main deck between matches for extra versatility. It holds 7 cards (units, spells, and non-relic attachments) kept apart from the main deck.
After seeing an opponent's Seeker, but before game setup, players may freely swap cards between their deck and side deck. A deck must stay between 30 and 50 cards, and the side deck may never exceed 7 cards.
Common Game Terms
- Absorb: When a unit absorbs damage, it redirects that damage to itself.
- Action Points (AP): The resource a unit spends to perform actions.
- Activation: A unit's turn.
- Ally: Any unit from your warband, or from a teammate's warband.
- Ally you own: An ally that belongs to your own warband.
- Attack: An action that deals damage.
- Banish pile: A player's collection of faceup banished cards, in no particular order, viewable by any player at any time.
- Banished: Cards placed in their owner's banish pile.
- Battlefield: The surface with defined boundaries where the game takes place. Deployed units and items are placed on it; anywhere outside it is a tall obstacle.
- Bidding: One or more players choose a card to bid and place it facedown; once everyone required or willing to bid has done so, cards are revealed and the highest-cost card wins. All bid cards are then banished.
- Cancel: An effect that stops another spell or ability without applying its own effects.
- Charge: An action that lets a unit move and then attack.
Quick Reference
Round Structure
- Refresh Phase: draw cards, gain echo, refresh units, bid for initiative.
- Deploy Phase: Player A deploys, then Player B deploys.
- Action Phase: players alternate activations.
- End Phase: claim relics, check for victory.
Basic Actions
- Move (1AP): move up to Speed. Provokes retaliation.
- Attack (1AP): melee or ranged. Die + Accuracy compared against Defense.
- Charge (2AP): must have LoS. Move up to 2x Speed, then melee attack. Provokes retaliation.
- Shift (2AP): must have LoS. Move up to Speed. Does not provoke retaliation.
Stat Reference
- Accuracy: added to the die to determine total attack value.
- Power: damage dealt on a hit or a graze.
- Range: how far a unit can make a ranged attack.
- Speed: how far a unit can move.
- Defense: the value an attack must meet to score a hit.
- Max Health: how much damage a unit can suffer before being defeated.
Attack Results
- Natural 20: Critical hit. Damage equals the sum of both Power values (hit + graze).
- Attack ≥ Defense: Hit. Damage equals the hit value of Power.
- Attack < Defense: Graze. Damage equals the graze value of Power.
- Natural 1: Critical graze. Damage is always 1, without adding Power from abilities.
Echo Gained per Round
| Round | Echo Gained |
|---|---|
| 2 | +4 |
| 3 | +6 |
| 4 | +8 |
| 5+ | +10 |