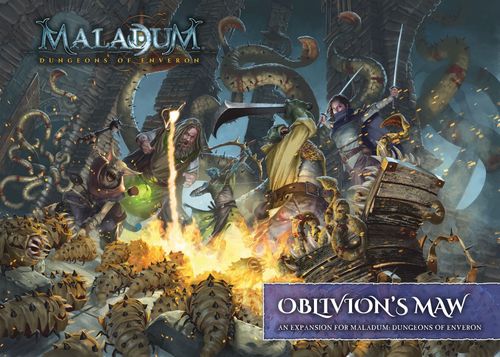
Maladum: Dungeons of Enveron – Oblivion's Maw
Maladum: Dungeons of Enveron – Oblivion's Maw Rulebook
Table of Contents
Table of Contents
- Summary
- Components
- The Corrupter
- The Corrupter in Play
- Cursed Dice
- Terrain Rules
- Terrain Features
- Campaign: Oblivion's Maw
- Mission OM-A: In the Mouth of Madness
- Mission OM-B: The Deep and Dark Forest
- Mission OM-C: The Arcane Pillars
- Mission OM-D: The Desecrated Cemetery
- Mission OM-E: Beneath Tull
- Mission OM-F: Nightmare Creatures
- Icon Reference
Summary
This narrative expansion for Maladum introduces a new faction of tentacled monstrosities from another world to put your temple to the test. All of the new game elements can be experienced in a new narrative campaign or integrated into your other games.
- The Campaign of the Jaws of Oblivion continues the story established in the Dungeons of Enveron. The Malagaunt is dissatisfied with its hordes of undead and begins to experiment with dimensional borders to achieve greater power.
- From the other side emerges the Corrupter, a giant magical beast that feeds on Maladum. Its strength grows as the campaign progresses: at first you will fight its twisted tentacles one at a time, but if a breach opens wide enough, you will have to face one of its terrible jaws!
- Six new Wandering Beasts represent the consequences of the energy of another world that seeps through dimensional breaches.
- The Event card deck is expanded with new Wandering Beast, Environment, Dungeon and Veteran cards to add variety to your missions.
- The New Terrain forms an ancient sanctuary where you will find arcane Talismans to summon (or banish!) the Corrupter.
- If you have the Beer and Adventure expansion, the new content in this set expands the offer of Side Missions, Hidden Locations and new creative opportunities.
Components
The Corrupter
- 1 Maw
- 7 Tentacles
The tentacles are designed to work as independent miniatures, but they can also join the Corrupter's Maw when it manifests in later missions. The tentacles simply slot into the numbered spaces around its body.
Wandering Beasts
- 6 Wandering Beast miniatures: Cursed Vestiges, Cursed Chest and Cursed Portal.
- 4 Character boards: The Corrupter, Cursed Portal, Cursed Vestiges and Cursed Chest.
Cards and Tokens
- 1 Reference card
- 1 Campaign Record card (The Corrupter)
- 15 Event cards: the Wandering Beast, Environment, Dungeon and Veteran cards must be shuffled into the supply of their type so they can be added to your missions as normal. The Corrupter cards are new and are used to integrate the Corrupter into your missions.
- 1 Side Mission card, used with the Beer and Adventure expansion
- 1 Hidden Location card, used with the Beer and Adventure expansion
- 51 Team tokens. The tokens bearing the icons shown on the separate sheet are for use with the Beer and Adventure expansion. If you do not want to use them, add the new common tokens to the Team token bag and keep the rest with the other tokens of the same rarity.
Markers and Dice
- 4 Destruction markers
- 4 Lock markers
- 1 Tentacle die
- 1 Maw die
- 6 Dimensional Portals
Terrain
- 4 Sanctuary Walls
- 2 Walls with Door
- 2 Walls with Secret Door
- 4 Railings
- 8 Braces
- 2 Entrances
- 2 Half-Wall Doors
- 2 Quarter Walls
- 2 Half Walls
- 2 Sanctuary Gates
- 2 Ladders
- 24 Plastic clips
- 2 Bridges
- 6 Walkways
- 2 Runic Columns
- 1 Chest
- 4 Support Posts
The Corrupter
The Corrupter is a being of energy from another world, summoned to this dimension by dark forces. Its spirit is bound on the other side, but if several talismans are brought together, it will manifest on the material plane.
Within a nightmare realm lies the Corrupter, a cursed creature that is perpetually on the brink of death, yet can never find release. What passes for thought in its fractured mind is unknown; it is only known that it hates all living creatures and devours them in the mistaken belief that this can halt its own eternal decay.
The talismans bind the creature within its own realm, but they can be used by a powerful Maladaar to summon and control it. The talismans can create a portal between both worlds, allowing the Corrupter to force its way into Enveron. The creature cannot manifest fully, and most of its body will remain trapped in its own realm. Nevertheless, this partial manifestation will allow the Corrupter to bring other mystical creatures to Enveron, which will aid it and are, in essence, autonomous extensions of itself. The Corrupter must be destroyed tentacle by tentacle before it can be sent back to its own realm.
Using the Corrupter
The Corrupter is used in the campaign "Oblivion's Maw" in this rulebook, but it can also be integrated into any other Maladum campaign as a new challenge. When you decide to use the Corrupter:
- Put into play the Corrupter's Campaign Record card and Reference card. The Corrupter rules apply to all games of your campaign until it is defeated or banished.
- Set aside the four exclusive Talisman tokens. They come into play through Event cards and mission rules. The Adversary Commander takes them to summon the Corrupter, keeping them from game to game. These powerful magical objects can also banish the Corrupter from this plane.
- At the start of each game, if the Corrupter's Event cards are not numbered in the mission, they must be added to the deck. Before adding any Commander, Novice or Veteran card, remove 5 random cards from the deck and replace them with the 5 Corrupter Event cards. Then shuffle them together with the Commander, Novice and Veteran cards to complete the starting deck.
It takes time to locate the Talismans and for the Corrupter to manifest, so it cannot be used in standalone games. However, note that its individual tentacles also have the Wandering Beast icon on their card. These, along with the other creatures in this set, can be used in any game that uses Wandering Beasts, drawing them from the card supply as usual. When the Corrupter is in use, Eldritch Tentacle cards cannot be selected as Wandering Beast cards.
Manifestation Record
Found in the Corrupter's Campaign Journal, this record represents the weakening of the boundaries between dimensions and how close the Corrupter is to arriving.
The Campaign Journal, the Event cards and the mission rules will tell you when to mark spaces on this record.
If the Manifestation Record is at level 3 or higher at the start of any mission, place a green peg on the Threat track at the start of the Disaster phase. When the peg is replaced, if the Corrupter is not already in play, it will manifest immediately, regardless of the number of Talismans or any other rule.
Tentacle Record
Also found in the Campaign Journal, this record is used to register the number of Tentacles defeated in each game, potentially reducing the Corrupter's strength when it manifests. Mark a space each time you defeat a Tentacle. This record is cleared at the end of each game.
Manifestation
The Corrupter fills a 3x3 area of the board and is in contact with the 12 adjacent spaces, following the rules for Large Bases.
Unless a rule states otherwise, the Corrupter enters the game at the centre of the play area. Any wall or terrain that would be covered by the Corrupter is absorbed by the portal through which it arrives and removed from the game. All miniatures are also removed from the game: they are permanently dead and cannot be revived.
Translator's note: the source reads "todas las miniaturas" ("all miniatures") in this sentence. It is reproduced as printed; the context suggests it refers to the miniatures in the area the Corrupter covers.
Discard any Eldritch Tentacle card in play. Tentacle miniatures in play are removed and added to the body of the Corrupter. Keep adding Tentacles to the Corrupter's body until the number of unmarked spaces on the Tentacle Record is reached.
If you use the Crafting rules of Beer and Adventure, draw one of the Corrupter's relic resource tokens (either 6 or 7) and a Severed Tentacle token (if available) from the supply, and add them to the Corrupter's board. They will be available when the Corrupter is defeated.
The Corrupter isolates the surrounding area in a pocket dimension. Replace all Regroup Points with Portals (or Dimensional Portals if you use the Forbidden Creed expansion). These Portals must be passed through to return to your Regroup Area, following the normal rules. Characters who do not spend a Magic token when passing through them roll a die:
- 1-2: The character is defeated and will not play any other game. Adventurers are declared dead.
- 3-6: The character is placed adjacent to an Entry Point.
If the Corrupter is defeated, restore the Regroup Points.
The Summoner
It is the Adversary Commander that is taking possession of the Talismans and attempts to summon the Corrupter. While there are Talismans in play, it does not follow its normal rules.
If it is engaged at the start of its turn, the Commander follows its normal rules. Otherwise:
- If one or more Talismans are in play and are not in the possession of the Commander:
- It will make a Ranged Attack against the nearest target following its normal rules, if possible.
- It will use any remaining actions to move toward the nearest Talisman (prioritising Talismans not in the possession of other characters, if possible).
- If the target Talisman is loose or within terrain, it will perform a Search to recover it.
- If the target Talisman is held by another character, it will attack that character (using its strongest attack according to the normal NPC rules) until the Talisman is dropped.
- If all Talismans in play are in the possession of the Commander:
- It will make a Ranged Attack against the nearest target following its normal rules, if possible.
- It will use its remaining actions to leave the play area through the nearest Entry Point.
If the Commander leaves the game with one or more Talismans, set them aside next to its character board. Until it has gathered enough to summon the Corrupter, these objects remain out of play and are not considered part of its inventory.
Once the Commander has set aside three or more Talismans, in the next game it will enter play carrying them.
Summoning
If the Adversary Commander has three or more Talismans, it will attempt to summon the Corrupter. If it does not succeed, it will use its actions to move toward the centre of the play area. It must spend two consecutive actions in the same turn to summon the Corrupter. All Magic pegs of the Commander are discarded.
At the end of the Commander's turn, the Corrupter will manifest adjacent to it. The Commander returns to its normal rules for the rest of the game.
Any Talisman held by the Commander is placed on the Corrupter's character board. They will be dropped when it is defeated.
If the Corrupter is summoned, the Adversaries will not consider it an enemy nor select it as a target, although the Corrupter can still attack them.
Banishment
The Adversary Commander is not the only one who can try to manipulate the Corrupter. An Adventurer carrying three or more Talismans can "banish" the Corrupter and prevent it from manifesting.
To do so, neither the Corrupter nor any of its Tentacles may be in play, and the Adventurer must be as close as possible to the centre of the play area without other characters within short range. The Adventurer must spend two consecutive actions in the same turn to perform the ritual, and must choose a number of Magic tokens to spend. For each token spent, roll a combat die. Each hit erases the leftmost space on the Manifestation Record. Each botch (skull) corrupts the Adventurer (if the Corruption rules of the Forbidden Creed expansion are being used) or, otherwise, causes one point of damage.
If all spaces on the Manifestation Record are erased, the Corrupter is banished. When this happens, one random Talisman held by the Adventurer is destroyed and returned to the supply. The others may be kept.
If at the end of a mission there are still marked spaces on the record, all erased spaces are filled in again and the banishment ritual must be attempted again in a different mission.
Translator's note: the Talisman images on the printed page (four exclusive tokens: a fiery orb, a purple crystal, a teal rune stone and a green crystal) are not reproduced here.
The Corrupter in Play
Activating the Corrupter
The Corrupter activates in the NPC Phase. Its character board has two sets of statistics: Tentacles (one set per Tentacle) and Maw.
Translator's note: the numerical values of these statistics are printed as icons on the character board artwork and are not transcribed as text here.
When activated, it first performs one action for each connected Tentacle, using the Tentacles statistics. It then performs two actions using the Maw statistics. Consider all characters to be enemies unless otherwise stated.
Additional Rules
- If the Corrupter is Fatigued, it will use Tentacle actions to remove Fatigue counters if possible. The Corrupter is only Stunned if it has more Fatigue counters than its total of accumulated actions. For example, if three Tentacles remain it would have five actions, and would need six Fatigue counters to Stun it. If it recovers Tentacles (and therefore actions) while Stunned, it will remain Stunned until it is activated.
- It cannot move and will only perform attack actions against targets within its reach. If the Corrupter cannot reach any enemy, it does not perform any action. Instead, it draws and resolves an Event card.
- The Corrupter does not always attack the nearest target. Its attack actions must be distributed as evenly as possible among all the targets it can reach, starting with the nearest.
- The Corrupter rolls two special dice for its attacks in addition to any combat dice: see the Cursed Dice below.
- If the Corrupter makes an opportunity attack, it uses the Maw statistics.
- If a defending enemy is Stunned or defeated after an attack by the Maw while in contact, it is swallowed whole and dies permanently.
- The Corrupter will not attack, nor be attacked by, characters with the Mythic rule. However, individual Tentacles are not subject to this rule.
- The Corrupter will not attack any character that has two or more Talismans. Individual Tentacles are not subject to this rule.
Attacking the Corrupter
The Corrupter does not have a board with Health pegs, nor Health icons on its character board. Instead, its Health is determined by its seven Tentacles. These must be eliminated one at a time before the Maw can be attacked and defeated.
When attacking the Beast, if it has any Tentacle remaining, you must use its Tentacle armour value of 1. If it suffers any damage, remove a Tentacle from its body. Only one Tentacle can be eliminated per attack.
Only once all Tentacles have been removed can you attack the Maw using its armour value of 2. A single point of damage will defeat it.
Cursed Dice
The creatures of this expansion have unpredictable abilities represented by two new dice: the Tentacle die and the Maw die.
They are rolled when attacking, in addition to any combat dice, whenever you see the Tentacle icon or the Maw icon next to an attack statistic. The effects listed below apply to that attack.
Tentacle Die
The results are as follows:
- Crushing: Apply the Crushing rule to this attack.
- Poison: Apply the Poison rule to this attack.
- Sharp: Apply the Sharp rule to this attack.
- Looter: Apply the Looter rule to this attack. Any item obtained after a critical hit is permanently lost.
- Strangle: After resolving the attack, if the defender is still in play, it moves into contact with the attacker. If it is already in contact, it becomes Fatigued (in addition to any Fatigue caused by the attack). The defender may spend a Skill (reaction) peg to avoid these effects.
- Hurl: After resolving the attack, if the defender is still in play, scatter it using this same die and knock it down.
Note that the Tentacle die is also rolled for any Retaliation attacks made when a character with the Tentacle icon is being attacked.
Maw Die
The results are as follows:
- Impact: This result adds one hit to the attack.
- Critical Hit: This result adds two hits to the attack, and turns it into a critical hit for any applicable rule.
- Regenerate Tentacle: After resolving the attack, add a Tentacle to the Corrupter if possible. If the Corrupter is not in play, this character takes another action.
- Summon: After resolving the attack, shuffle all cards not used in this game that bear the Mythic icon. Then draw one at random and resolve it immediately. Instead of randomly determining its arrival point, the character is placed at the Entry Point nearest to this character (or the Summoning Point, if the Forbidden Creed rules are being used).
- Raise the Threat: After resolving the attack, increase the Threat by 1.
- Dark Energy Burst: After resolving the attack, if the Corruption rules of the Forbidden Creed expansion are being used, Corrupt the defender. Otherwise, the defender suffers one point of damage.
Terrain Rules
This expansion includes some new terrain elements to build the sanctuary where the Corrupter will manifest, but they can also be used in other games.
Note: The walls, doors and entrances in this set are identical to their counterparts in the base set for game purposes, so when building maps it does not matter exactly which wall panel you use, as long as it is of the same type.
Higher Levels
Higher levels will help keep your Adventurers out of the Tentacles' Reach. Do not forget that the Reach rule applies in three dimensions. Likewise, you can still attack enemies on a different level, although you will need a ranged weapon, or something like a pike, to do so.
Map Keys
- Hidden Door (question-mark symbol)
- Support Post (blue line)
- Sanctuary Door (green dotted line)
- Railing (blue dashed line)
- Runic Column
- Ladder
- Walkway
- Bridge
Optional / decorative parts:
- Brace
- Foliage
Terrain Features
Hidden Doors
These wall panels include a door that can only be opened in a certain way, as specified in the mission rules. In your own games you may create your own rule, such as pulling a lever, holding a certain object, or spending Magic pegs to pass through it.
When closed, a Hidden Door is considered a solid wall for all effects.
Unless stated otherwise, Adversaries treat Hidden Doors as normal doors and can move freely through them, with the exception that they leave them in the same state: if the door was closed, it will remain closed after the Adversary passes through it.
Runic Columns
Runic Columns have corresponding rune tokens. These ancient artefacts function as keys or protections, and their specific rules depend on the mission being played.
Unless stated otherwise, while a Runic Column has a rune token on top of it, Adventurers can Interact with the Column, spending a Skill peg and a Magic peg, to take the rune.
In addition, these Columns channel magical energy. Adventurers can Interact with a Runic Column to roll a combat die. They gain Magic pegs equal to the number of hits obtained with the roll. If the result of the roll is a botch, they become Fatigued.
Note: When assembling your Columns, make sure to place the top plate differently on each Column, so that a different symbol is visible on each one.
Chest
The Chest is Searchable. It will normally contain specific objects detailed in the mission instructions, and can generally only be opened in a specific way. Otherwise, it has no rules of its own, but it can block movement and provide cover.
Necrotic Fluids
If you use the rules of the Beer and Adventure expansion, you will find a new Crafting resource in this set.
The chemical brew created by the Malagaunt can be used to imbue its capacity to manipulate vital forces into objects. This adds a new option to the list of Interactions with the Crucible of Resurrection:
- Spend a Magic peg. If successful, take a Necrotic Fluids token.
Campaign: Oblivion's Maw
In the Oblivion's Maw campaign, the Malagaunt is attempting to summon the Corrupter and bring it to its cause. Its experiments with energies have weakened the dimensional limits and awakened the beast, and now it is seeking magical Talismans that will allow it to control the Corrupter at its inevitable arrival.
You are following its trail, and if you can recover the Talismans before it does, you will be able to banish the Corrupter from this plane before it arrives!
Similar to the Dungeons of Enveron, this campaign presents a series of linked games with a continuous narrative, but it is not necessary to play them all at once. The Malagaunt may be seeking these Talismans over a longer period, and the Oblivion's Maw missions can be played one by one, integrating into other campaigns as you decide. Just remember that once the Oblivion's Maw campaign has begun, the Corrupter's rules remain active in every game until it is banished or defeated, whether or not that game is part of the Oblivion's Maw campaign.
You will not necessarily play all six missions. If the Adversary Commander succeeds, it may attempt to summon the Corrupter early. Likewise, at any time when your Adventurers have three or more Talismans, you may attempt to banish the Corrupter and complete the campaign, no matter which mission you are playing.
Note: The story built around this campaign features the Malagaunt from the Initial Campaign of the Dungeons of Enveron. However, the campaign itself is not specific to the Revenant Adversaries. If you have another group of Adversaries from a different Maladum set, the campaign can use that faction instead, by changing the Malagaunt for its Commander, and the cards bearing the Revenant faction icon (shown in the printed note) for the cards of that faction.
This Isn't Your First Rodeo
The Oblivion's Maw campaign is designed to be played with an experienced group. Although it is not impossible, a low-level group will generally lack the Skills and equipment to finish off the Corrupter without losing a life in the process.
We recommend playing the Oblivion's Maw campaign after completing the Dungeons of Enveron campaign, using the same group and without resetting the token bag. If you have not yet completed the Dungeons of Enveron campaign, you can use the content of this expansion while shuffling the new Event cards into this deck.
Commanding the Adversaries
Maladum's Adversaries are designed to be controlled for cooperative games or as a solo experience. However, some groups choose to have one player control the Adversaries directly, ignoring the AI rules and essentially acting as the Game Master (GM) of a roleplaying game.
If you have a GM or a spare player, the Oblivion's Maw campaign is ideal for this mode of play. As the Adversary Commander has its own objective in these missions, giving control to a player will offer less predictability in how the Commander pursues its objective. This gives the Adversaries more substance and creates more of a challenge for the Adventurers.
Campaign Journal
As with the Dungeons of Enveron campaign, the Oblivion's Maw includes a Campaign Journal card, which keeps track of your Achievements and Rewards, as well as the current state of the Corrupter from one game to another.
Talismans
While playing this campaign, Talismans cannot be discarded or sold.
Mission OM-A: In the Mouth of Madness
Hyberia is a cold and hard place, of cold and hard people, and your guide is in no hurry to abandon you as soon as you catch sight of the ruined castle. It is here that the Malagaunt you are pursuing has settled, claiming everything around it. The locals are frightened and keep their distance, but they would be terrified if they came within reach of the Malagaunt's plans. It is no longer content to stitch together corpses; it seeks talismans with which to invoke an eldritch horde to conquer the realms of Enveron.
The castle lies in ruins, but you can find an entrance to its depths. It is as damp and dark as one would expect, but as you descend it takes on an unnatural aspect. The heat is oppressive, the air is suffocating, and even in the darkness of the depths of the earth there has been an explosion of flora, an excess of green life where none should survive. The Malagaunt's experiments have weakened the borders between worlds, forbidden magic that creates life from nothing. Perhaps the sweat running down your back is only from the heat, or perhaps it is from fear, because you are right to be afraid...
Primary Objective
You have tracked your Adversaries to this place and must recover the Talisman before they do, to prevent the arrival of the Corrupter.
When you enter the resting place of its totem, the Corrupter senses your presence at the start of the game and marks a space on the Manifestation Record.
Then draw one of the reserved Talismans at random and add it to the chest marked in yellow on the map.
At the end of the game, if the Adversary Commander was not defeated, it will automatically take any Talisman the Adventurers have not recovered.
If the Adversary Commander was defeated, any Talisman not recovered is assumed to be taken by opportunistic looters who take advantage of your distraction. They will most likely be sold or traded, and may reappear in the future. Add any Talisman not recovered to the token bag.
Secondary Objective
The imminent arrival of the Corrupter has awakened magical energy in certain artefacts on this plane. If you manage to find one, you can channel this energy from another world.
During setup step 5, add Objective 16 to the token bag.
If an Adventurer recovers this Objective, mark the Reward "Planar Channeler" on the Corrupter's Reference card.
If it is not recovered by the end of the mission, it must remain in play or be returned to the bag, to be discovered in future missions.
Special Rules
Vanguard
After determining the location of the Talisman, the Adversary Commander has sent its minions to clear the area, so that the Commander can recover its prize without interruption.
The Threat track begins on side B, and the Adversary Commander must be placed on Entry Point 4 when the Threat reaches Dismay.
At any time during the game, if the Commander has an Adventurer in Line of Sight, or it is attacked in any way, it will call for reinforcements (by turning the Threat track to side A).
Runic Columns
In this mission, the runes from the Runic Columns cannot be taken. During setup step 6, include both runes when filling the terrain pieces.
Adventurers carrying a rune can Interact with a Column to replace the rune on its top.
Hidden Doors
The Hidden Doors in this mission will open when the Adventurers Interact with both Levers in the same round.
The Levers begin the game inactive, and can only be interacted with once both runes are in their Columns.
Once both Levers have been operated, open the Hidden Door and place the Destroyed marker on it. It cannot be closed again.
Consequences
You may choose which mission to play next. Choose any of the following that you have not yet played:
- If you wish to explore the wilderness, play Mission OM-B (see page 14 of the printed book).
- If you wish to go underground, play Mission OM-C (see page 16 of the printed book).
- If you dare to venture into the cemetery, play Mission OM-D (see page 18 of the printed book).
Mission OM-A Setup
Translator's note: the board layout is a map image on the printed page. The key items, Entry Points, and setup tables are transcribed below; the exact placement of the terrain and objects is shown on the printed map.
Key Objects
- Objective 16 (heart icon)
- Random Talisman (? marker)
Event Cards
- 5 cards with the screaming-face icon
- 5 cards with the green swirl icon
- 5 cards with the scroll-and-target icon
- 3 cards with the brick wall icon
- 1 card with the bull icon (Wandering Beast)
- 1 card with the ring icon
- Based on difficulty: Novice (green chevron) / Veteran (red chevron)
Threat Track
- Side B (or pegs)
Entry Points
- Six Entry Points are numbered 1 to 6 around the edges of the board.
Search Assignment
- Set aside: 3 brown tokens with a yellow corner.
- Then, as printed: 3 tokens with a yellow corner and 1 token with a blue corner, shown beside the sack-with-arrow icon.
- Table rows, as printed (terrain picture, then the sack-with-arrow icon and the number shown):
- Wooden crate: sack-with-arrow ×2.
- Parchment panel: sack-with-arrow ×3.
- Carved stone panel: brown token ×1, and sack-with-arrow ×3.
- Table with objects: brown token ×1, and sack-with-arrow ×1.
Mission OM-B: The Deep and Dark Forest
Leaving the ruins of the castle far behind, you descend beneath the earth in search of the next talisman, finding a tunnel that climbs up to the ruins of a great house. There is no catharsis in reaching open air, as the house is shrouded in the gloom of a dark forest. The house was once an impressive mansion, but it has been devastated both by time and by the creepers that grow on every side. You all agree that there is a talisman here, but the Malagaunt is also close. You must find the talisman before it becomes your enemy.
Primary Objective
You must recover the Talisman before your Adversary does, to prevent the arrival of the Corrupter.
At the start of the game (after resolving the Ready and Waiting rule), mark a space on the Manifestation Record.
Then draw one of the reserved Talismans at random and place it in the Chest.
The Talisman is located in a secret compartment in the Chest, which can only be accessed by interacting with it while you hold two Objective tokens found in the apparently closed rooms; see Hidden Doors.
The Adversary Commander can access the compartment without needing to hold Objectives.
At the end of the game, if the Adversary Commander was not defeated, it will automatically take any Talisman not recovered by the Adventurers.
If the Adversary Commander was defeated, add any Talismans not recovered to the token bag.
Secondary Objective
You aim to learn everything possible about the dimension of the Corrupter.
During this mission, when a Mythic character is defeated it drops a Reminder marker. Adventurers can interact with these markers to set them aside. At the end of the game, note the number of markers set aside under the reward "Vision of Another World" on the Corrupter's Reference card.
Also, if Objective 16 has not yet been found, it may be located in this area. If it is recovered, mark the reward "Planar Channeler" on the Reference card.
Special Rules
Vanguard
The Threat track begins on side B, and the Adversary Commander must be placed on the Entry Point furthest from any Adventurer when the Threat reaches Dismay.
At any time during the game, if the Commander has Line of Sight with an Adventurer, or it is attacked in any way, it will call for reinforcements, turning the Threat track to side A.
Ready and Waiting
The Adversary Commander is now aware of your attempts to thwart it. At the start of the game, add X Veteran cards to the Event deck and increase the Threat by X, where X is the number of spaces marked on the Manifestation Record.
Hidden Doors
At the start of the game, shuffle Objectives 1 to 6 and place them face down in the rooms marked in blue. Only two of them will be accessible during the game.
When an Adventurer recovers a rune from a Runic Column, roll the Magic Die. The rune opens the room that contains the corresponding Objective. If you roll the same number when the second rune is recovered, roll the die again. Write these numbers under "Rune Keys" on the Corrupter's Reference card.
An Adventurer carrying a rune can Interact with any wall marked in red to turn the Objective token in that room. If the number matches the number rolled for that rune, replace the red wall with a wall with a Hidden Door. Any character carrying the corresponding rune can open and close the Hidden Door as if it were a normal door.
Recovered Objectives are discarded at the end of the game.
Consequences
If the Manifestation Record is at four or more, your next mission is Mission OM-F (see page 21 of the printed book).
If the Adventurers possess two or more Talismans and you have not yet played Mission OM-E, the Adversary Commander will come after them: play Mission OM-E (see page 19 of the printed book).
Otherwise, you may choose the next mission. Choose any of the following that you have not yet played:
- If you wish to go underground, play Mission OM-C (see page 16 of the printed book).
- If you dare to venture into the cemetery, play Mission OM-D (see page 18 of the printed book).
Mission OM-B Setup
Translator's note: as in Mission OM-A, the board layout is a map image on the printed page. The key items, Entry Points and setup tables are transcribed below.
Key Objects
- Objectives 1 to 6 (placed face down as described under Hidden Doors)
- Random Talisman (? marker)
Event Cards
- 4 cards with the screaming-face icon
- 5 cards with the green swirl icon
- 4 cards with the scroll-and-target icon
- 5 cards with the bull icon (Wandering Beast)
- 2 cards with the ring icon
- Based on difficulty: Novice (green chevron) / Veteran (red chevron)
Threat Track
- Side B (or pegs)
Entry Points
- Six Entry Points are numbered 1 to 6 around the edges of the board.
Search Assignment
- Set aside: 2 brown tokens with a yellow corner.
- Then, as printed: 4 tokens with a yellow corner, shown beside the sack-with-arrow icon.
- Table rows, as printed (terrain picture, then the sack-with-arrow icon and the number shown):
- Wooden crate: sack-with-arrow ×2.
- Parchment panel: sack-with-arrow ×3.
- Carved stone panel: brown token ×1, and sack-with-arrow ×3.
Mission OM-C: The Arcane Pillars
After consulting the most clairvoyant members of your group, you decide to follow a descending route. The Maladaar are certain that a talisman is hidden in the bowels of the earth, and even those least gifted in magic can perceive a strange atmosphere in this place. As you delve deeper, you can feel the boundaries between realities growing extremely thin. It is a dangerous situation, but perhaps you can use it to your own advantage... Magic feeds on magic, and you may be able to close the dimensional breach...
Primary Objective
You must recover the Talisman before your Adversary does, to prevent the arrival of the Corrupter.
At the start of the game (after resolving the Ready and Waiting rule), mark a space on the Manifestation Record.
During setup step 6, draw one of the set-aside Talismans at random and include it when filling the terrain pieces.
Without knowing the location of the Talisman, the Adversary Commander will Search each terrain piece, starting with the nearest, until it finds it. Mark each terrain piece searched with a counter.
At the end of the game, if the Adversary Commander was not defeated, it will automatically take any Talisman the Adventurers have not recovered.
If the Adversary Commander was defeated, add any Talismans not recovered to the token bag.
Secondary Objective
The boundaries between dimensions are particularly weak in this area, and you believe you may manipulate them to repair the breaches, reducing the power of the Corrupter on this plane.
The Adventurers can Interact with the Runic Columns to do this (runes are not used in this mission). The first attempt requires one action and a Magic peg; the second requires two consecutive actions and two Magic pegs, and so on. All actions must be performed in the same turn. There is no limit, provided you have the necessary actions!
For each successful attempt, cross out the rightmost space on the Tentacle Record. Crossed-out spaces reduce the maximum number of Tentacles that may be in play at the same time for the rest of the campaign, regardless of whether they are separate from or attached to the Corrupter's body.
Also, if Objective 16 has not yet been found, it may be located in this area. If it is recovered, mark the reward "Planar Channeler" on the Corrupter's Reference card.
Special Rules
Vanguard
The Threat track begins on side B, and the Adversary Commander must be placed on a random Entry Point when the Threat reaches Dismay.
At any time during the game, if the Commander has Line of Sight to an Adventurer, or it is attacked in any way, it will call for reinforcements, turning the Threat track to side A.
Ready and Waiting
The Adversary Commander is now aware of your attempts to thwart it. At the start of the game, add X Veteran cards to the Event deck and increase the Threat by X, where X is the number of spaces marked on the Manifestation Record.
Darkness
The entire play area follows the Darkness rules in this mission.
Weakened Borders
Due to the weak dimensional walls, each time a character suffers Mental Overload in this mission, mark a space on the Manifestation Record.
Also, whenever an Event card bearing the green swirl icon or the bull icon is discarded, shuffle it back into the deck instead of discarding it.
Consequences
If the Manifestation Record is at four or more, your next mission is Mission OM-F (see page 21 of the printed book).
If the Adventurers possess two or more Talismans and you have not yet played Mission OM-E, the Adversary Commander will come after them: play Mission OM-E (see page 19 of the printed book).
Otherwise, you may choose the next mission. Choose any of the following that you have not yet played:
- If you wish to explore the wilderness, play Mission OM-B (see page 14 of the printed book).
- If you dare to venture into the cemetery, play Mission OM-D (see page 18 of the printed book).
Mission OM-C Setup
Translator's note: as in the other missions, the board layout is a map image on the printed page. The key items, Entry Points and setup tables are transcribed below.
Key Objects
- Random Talisman (? marker)
Event Cards
- 5 cards with the screaming-face icon
- 5 cards with the green swirl icon
- 2 cards with the scroll-and-target icon
- 6 cards with the brick wall icon
- 1 card with the bull icon (Wandering Beast)
- 1 card with the ring icon
- Based on difficulty: Novice (green chevron) / Veteran (red chevron)
Threat Track
- Side B (or pegs)
Entry Points
- Six Entry Points are numbered 1 to 6 around the edges of the board.
Search Assignment
- Set aside: 2 brown tokens with a yellow corner, and 1 brown token with a blue corner.
- Then, as printed: 2 tokens with a yellow corner, shown beside the sack-with-arrow icon.
- Table rows, as printed (terrain picture, then the sack-with-arrow icon and the number shown):
- Wooden crate: sack-with-arrow ×2.
- Parchment panel: sack-with-arrow ×3.
- Carved stone panel: brown token ×1, and sack-with-arrow ×3.
- Table with objects: brown token ×1, and sack-with-arrow ×1.
Mission OM-D: The Desecrated Cemetery
Following a rumour of another talisman, you make your way to an ancient cemetery, long abandoned and forgotten. To your dismay, you discover that you are not the first to arrive. The ancestral crypts lie uncovered, the tombs have been desecrated, and the servants of the Malagaunt have opened the graves. With a chill, you realise that the Malagaunt may channel more power here and create more Revenants to carry out its orders. A sense of terror takes hold of your group, and you decide to find the talisman as soon as possible and escape.
Primary Objective
You must recover the Talisman before your Adversary does, to prevent the arrival of the Corrupter.
At the start of the game (after resolving the Ready and Waiting rule), mark a space on the Manifestation Record.
Then draw one of the set-aside Talismans at random and place it in the Chest marked in yellow. The Talisman can be taken by interacting with the Chest and spending a Skill peg.
At the end of the game, if the Adversary Commander was not defeated, it will automatically take any Talisman the Adventurers have not recovered.
If the Adversary Commander was defeated, add any Talismans not recovered to the token bag.
Secondary Objective
It seems you are in the Adversary's territory, and you can resort to the ancient magic of the Runic Columns to restrict the power of the Commander.
While carrying a rune, there is a new option when Interacting with the Crucible of Resurrection:
- Return the rune to its Column and spend a Magic peg. If successful, mark a space under the reward "Diminished Power" on the Corrupter's Reference card, if possible.
Also, if Objective 16 has not yet been found, it may be located in this area. If it is recovered, mark the reward "Planar Channeler" on the Corrupter's Reference card.
Special Rules
Vanguard
The Threat track begins on side B, and the Adversary Commander must be placed on Entry Point 3 when the Threat reaches Dismay.
Translator's note: the printed text of this mission says "Desaliento" for this threat level; it is rendered as "Dismay" to match the other missions.
At any time during the game, if the Commander has Line of Sight to an Adventurer, or it is attacked in any way, it will call for reinforcements, turning the Threat track to side A.
Ready and Waiting
The Adversary Commander is now aware of your attempts to thwart it. At the start of the game, add X Veteran cards to the Event deck and increase the Terror by X, where X is the number of spaces marked on the Manifestation Record.
Translator's note: the printed text says "Terror" here, where Missions OM-B and OM-C say "Threat". It is reproduced as printed.
Hidden Door
In this mission, any character carrying a rune can pass through the Hidden Door as if it were an opening. However, doing so returns the rune they carry to its Column.
As usual, Adversaries may pass without carrying a rune.
Consequences
If the Manifestation Record is at four or more, your next mission is Mission OM-F (see page 21 of the printed book).
If the Adventurers possess two or more Talismans and you have not yet played Mission OM-E, the Adversary Commander will come after them: play Mission OM-E (see page 19 of the printed book).
Otherwise, you may choose the next mission. Choose any of the following that you have not yet played:
- If you wish to explore the wilderness, play Mission OM-B (see page 14 of the printed book).
- If you wish to go underground, play Mission OM-C (see page 16 of the printed book).
Mission OM-D Setup
Translator's note: as in the other missions, the board layout is a map image on the printed page. The key items, Entry Points and setup tables are transcribed below.
Key Objects
- Random Talisman (? marker)
Event Cards
- 7 cards with the screaming-face icon
- 5 cards with the green swirl icon
- 3 cards with the scroll-and-target icon
- 4 cards with the brick wall icon
- 1 card with the bull icon (Wandering Beast)
- Based on difficulty: Novice (green chevron) / Veteran (red chevron)
Threat Track
- Side B (or pegs)
Entry Points
- Six Entry Points are numbered 1 to 6 around the edges of the board.
Search Assignment
- Set aside: 3 brown tokens with a yellow corner.
- Then, as printed: 2 tokens with a yellow corner and 1 token with a blue corner, shown beside the sack-with-arrow icon.
- Table rows, as printed (terrain picture, then the sack-with-arrow icon and the number shown):
- Wooden crate: sack-with-arrow ×2.
- Parchment panel: sack-with-arrow ×3.
- Carved stone panel: brown token ×1, and sack-with-arrow ×3.
- Table with objects: brown token ×1, and sack-with-arrow ×1.
Mission OM-E: Beneath Tull
With the talismans in your possession, you hoped to have frustrated the Malagaunt's plans to summon the Corrupter. You do not feel safe in the open country, so you retreat to Tull, a small port town on the River Onan and the only safe crossing from Hyberia to the Free Lands of the east. You begin to argue over your plans when the most powerful of you is seized by an intense vision of the Malagaunt, furious but also desperate, stalking you with the intent of tearing the talismans from your dead hands. The vision shows that the Malagaunt is beneath your feet, in the tunnels and sewers below Tull. There is no escape. You must confront it...
Primary Objective
You are being attacked by the Adversary Commander, and you must prevent it from taking the Talismans you have recovered.
The Adversary Commander enters play from Entry Point 3 when the Threat reaches Distress.
The Adversaries are attacking from beneath your own house, so there is nowhere to retreat in this mission and the Adventurers cannot return to their Regroup Area. The game only ends if the Commander is defeated or separated from its forces (see Secondary Objective).
Secondary Objective
You can force the Commander to flee, and prevent further underground incursions into your city, by protecting the area and cutting off the flow of malacitas (a term of the printed text, kept as it is).
Adventurers can Interact with any Entry Point and spend X Magic pegs to place X Reminder markers next to it.
If an Adversary arrives from a marked Entry Point, remove one Reminder marker from it instead.
If during any Evaluation Phase all six Entry Points have at least one Reminder marker, the Commander flees and the game ends.
Burial Points work as usual.
Also, if Objective 16 has not yet been recovered, it may be located in this area. If it is recovered, mark the reward "Planar Channeler" on the Corrupter's Reference card.
Special Rules
Desperation
The Adversary Commander is determined to recover the Talismans. At the start of the game, add X Veteran cards to the Event deck and increase the Threat by X, where X is the number of spaces marked on the Manifestation Record.
Defend the Town!
You are in your own Base Camp, and there is no place to hide your valuables. If the Talismans are in the Storage area of your Base Camp board, the Commander can still access them by searching your Regroup Point.
However, if you need supplies, you also have easy access! Adventurers can Interact with your Regroup Point to exchange any item between their inventory and the Storage area. Adventurers can also Interact with the Regroup Point to buy or sell any item, as if it were the Market Phase.
You may also ask the townsfolk to help you repel the invaders. At the start of the game, draw three Inhabitant boards at random. Each one receives an additional Health peg and a random item from the token bag.
These NPCs begin the game in your Regroup Area and are controlled by the players as if they were Adventurers, though using the NPC faces of their boards. Remember that NPCs are removed when they are defeated and cannot be revived.
Consequences
If the Manifestation Record is at four or more, your next mission is Mission OM-F (see page 21 of the printed book).
Otherwise, you may choose the next mission. Choose any of the following that you have not yet played:
- If you wish to explore the wilderness, play Mission OM-B (see page 14 of the printed book).
- If you wish to go underground, play Mission OM-C (see page 16 of the printed book).
- If you dare to venture into the cemetery, play Mission OM-D (see page 18 of the printed book).
Mission OM-E Setup
Translator's note: as in the other missions, the board layout is a map image on the printed page. The setup tables are transcribed below.
Event Cards
- 5 cards with the screaming-face icon
- 5 cards with the green swirl icon
- 6 cards with the scroll-and-target icon
- 2 cards with the brick wall icon
- 2 cards with the bull icon (Wandering Beast)
- Based on difficulty: Novice (green chevron) / Veteran (red chevron)
Threat Track
- Side A (5 pegs)
Entry Points
- Six Entry Points are numbered 1 to 6 around the edges of the board.
Search Assignment
- Set aside: 2 brown tokens with a yellow corner.
- Then, as printed: 4 tokens with a yellow corner, shown beside the sack-with-arrow icon.
- Table rows, as printed (terrain picture, then the sack-with-arrow icon and the number shown):
- Wooden crate: sack-with-arrow ×2.
- Parchment panel: sack-with-arrow ×3.
- Carved stone panel: brown token ×1, and sack-with-arrow ×3.
Mission OM-F: Nightmare Creatures
The Malagaunt's efforts have weakened the dimensional walls, and the manifestation of the Corrupter is imminent. With all the talismans it has managed to gather, the Malagaunt wastes no time and hurries to take refuge in its deepest crypt, a hidden lair where it prepares its most potent spells. The crypt is adorned with vegetation, and half-finished experiments slink away from the torchlight to hide in the darkness. The smell turns your stomach, and what you see in this laboratory hardens your heart even more, heightening your natural fear and revulsion towards necromancy and its practitioners. The Malagaunt is so concentrated on its preparations that it does not notice, nor does it care, that you have slipped stealthily into its sanctuary. It is now ready to summon the Corrupter, and you must stop it.
Primary Objective
The Adversary Commander has begun the summoning process, and you must stop it, either by banishing the Corrupter before it manifests or by defeating it once it arrives.
Even if the Commander has not yet accumulated three or more Talismans, the dimensional walls are so weakened that the Corrupter will manifest in any case. The Adversary Commander is considered to be carrying three Talismans for the purposes of determining its actions.
Secondary Objective
In a place so revered and secure, there are surely objects of value.
During setup step 6, add a random rare object from the supply to each Tomb.
Do not forget that the Talismans have powers beyond simply summoning the Corrupter. Recovering them after dealing with the Corrupter will be worth it.
The runes found on the Runic Columns in this mission can be sold in the Market Phase for 10 each (printed with a currency icon).
Also, if Objective 16 has not yet been found, it may be located in this area. If it is recovered, mark the reward "Planar Channeler" on the Corrupter's Reference card.
Special Rules
Summoner's Arrival
If the Commander has three or more Talismans, the Threat track starts at 0, and the Commander will arrive at Entry Point 3 when the Threat reaches Distress.
If not, increase the Threat by 8, and add X Veteran cards to the Event deck, where X is the number of Talismans your Adventurers have. The Commander enters play from a random Entry Point in the first round.
Hidden Doors
There are two Hidden Doors on the map, marked in red and yellow. Each one opens by pulling the lever marked with the corresponding colour.
Consequences
Regardless of the result, this is the final mission in the Oblivion's Maw campaign, but it may not be the end of the Corrupter...
If you failed to banish or defeat the Corrupter, mark a space on the Manifestation Record. The Corrupter's rules remain in play for all your future games until it is defeated or banished.
If you succeed, you may continue your adventures safe from its mythic tentacles, but it is not the only thing lurking out there. Do not forget that you can integrate all the content of this expansion into your other campaigns too!
Mission OM-F Setup
Translator's note: as in the other missions, the board layout is a map image on the printed page. The key items, Entry Points and setup tables are transcribed below.
Key Objects
- 2 brown tokens with blue corners
Event Cards
- 5 cards with the screaming-face icon
- 5 cards with the green swirl icon
- 3 cards with the scroll-and-target icon
- 5 cards with the brick wall icon
- 2 cards with the bull icon (Wandering Beast)
- Based on difficulty: Novice (green chevron) / Veteran (red chevron)
Threat Track
- Side A, 0 of 8 pegs (see Summoner's Arrival)
Entry Points
- Six Entry Points are numbered 1 to 6 around the edges of the board.
Search Assignment
- Set aside: 2 brown tokens with a yellow corner.
- Then, as printed: 5 tokens with a yellow corner, shown beside the sack-with-arrow icon.
- Table rows, as printed (terrain picture, then the sack-with-arrow icon and the number shown):
- Wooden crate: sack-with-arrow ×2.
- Parchment panel: sack-with-arrow ×3.
- Carved stone panel: brown token ×1, and sack-with-arrow ×3.
- Pair of brown tokens with blue corners (bottom row, as printed): ×1.
Icon Reference
Translator's note: icons are described in words where they appear in the glossary text; the printed page shows the icon artwork.
- Pacify: Reduces the Threat by the amount shown when this item is used.
- Malacitic Conductor: This character cannot contain the magical energy of its body. At the start of each of this character's turns, add a peg to the Threat track. If on an item, the rule applies while it is carried.
- Rope: This character may spend an action to place this item in contact with it. While the item is in position, any character may Climb up or down from that location at a cost of one action per level (height of a wall) climbed.
- If it is placed in contact with an empty space, characters can jump over it from their position, adding 2 to their safe distance.
- Maw Die: Roll the Maw die in addition to any combat die when attacking. See page 8 of the printed book.
- Tentacle Die: Roll the Tentacle die in addition to any combat die when attacking. See page 8 of the printed book.
- Lasting Effect: Effects granted by this item last until the end of the round. Turn the token 180° as a Reminder. If the token is discarded after use, place it on your character board and discard it at the end of the round.
- The user may spend X Magic pegs (maximum 2) to add X Reminder markers to the item. In each Evaluation Phase, instead of discarding or turning the item, remove one Reminder marker.
- Immovable: This character cannot Move or be moved unless a rule explicitly says otherwise.
- Indestructible: This item ignores any rule that would break it. If you need to determine at random an item to be broken, you must choose another if possible.
Item Notes
- Abyssal Trophy: The user may reroll attacks and effects against Mythic characters. In addition, the user inspires terror in Mythic creatures, even if they are normally immune.
- Eldritch Talisman B: When this character is Protected, treat its Protection value as one more when it is attacked. This has no effect if the character is not Protected.
- Eldritch Talisman D: This character may add 1 to the roll to maintain a summoned character (when the Forbidden Creed expansion is used).
- Liberator of Souls: When Channeled, this item applies the Piercing rule, but only against Revenants.
- Prism of Protection: This item may be Channeled when the user suffers an attack from a character it is not engaged with. That attack, and any other ranged or Reach attack, has no effect until the end of the round. The attacks are still made.
- Uncanny Oculus: Once per game, during its turn, the user may invoke the Mythic power. Turn this token 180° and place Reminder markers equal to the user's Range on it. While they are there, the user may use its actions to perform actions with any Revenant or Mythic character within short range of up to the user's Range. Remove one Reminder marker in each Evaluation Phase.