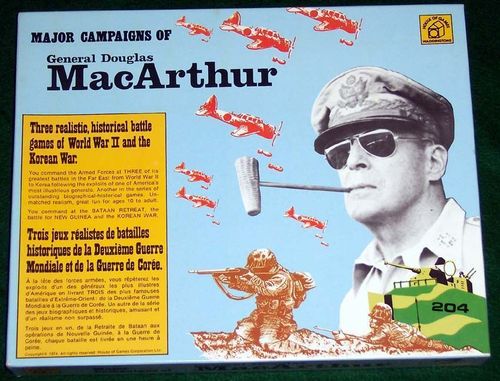
Major Campaigns of General Douglas MacArthur
Major Campaigns of General Douglas MacArthur Rulebook
Table of Contents
Table of Contents
Equipment
- Folding board
- 16 Large and 40 Small American, United Nations, or Allied Unit Markers (Blue).
- 16 Large and 40 Small Japanese or North Korean Unit Markers (Red).
- 24 Movement Cards. 5 White & 5 Red Dice.
- Sheet of Troop Allocation Grids (for use in Bataan Retreat).
Positioning of Units
Units are placed in the towns (circles at the road intersections), and up to a maximum of 10 Units can be stacked in one town. The Units can be either Large or Small or a mixture of the two, but must all belong to the same side. (If it is discovered that after a player's turn is completed he has more than 10 Units in a town, he must remove enough to reduce the Units to 10. These are out of the game, the same as if they had been lost in battle.)
(Note: The significance of the Large and Small Units varies with the campaigns and will be explained for each campaign.)
The Movement Deck
The cards are divided between the two players (in accordance with the rules of the specific campaign). Each player shuffles his cards and places them face down before him. The Blue player turns the top card of his pack face up next to the pack. The number showing is the number of Movement Points he can use for his first turn. After the Blue player has completed his turn, the Red player turns his top card. He totals this number and the number in front of the Blue player and can use that many Movement Points for his first turn. The Blue player now turns a new card on top of his previous one. The total of this card and the one in front of the Red player gives him the Movement Points for his second turn. And so on.
(For example, the Blue player turns over a 6 as his first card. He has that many Movement Points for his first turn. The Red player turns over a 9. He has 15 Movement Points for his first turn. The Blue player now turns over a 2 and has 11 Movement Points for his second turn. And so on.)
When a player turns up all of the cards in his pack before the game is over, he turns over the face cards, without shuffling, and uses them again.
Using Movement Points
To move 1 Unit, either Large or Small, from a town to the next town takes a set number of Movement Points, depending on the type of road used:
- Solid Road: 1 Movement Point
- Dashed Road: 2 Movement Points
- Dotted Road: 3 Movement Points
A player can use his Movement Points for moving a few Units long distances, or many Units short distances, or any combination he wishes. He is not compelled to use all of his Movement Points if he doesn't wish to.
A maximum of 5 Units can use any one road segment during a turn.
(As an example of using Movement Points, in Illustration 1 a player has 2 Large Units and 1 Small Unit in the town marked A. He has 1 Large Unit and 3 Small Units in town B. He desires to move all of these Units to town C. He can move the 4 Units from B to C for a total of 4 Movement Points. He can move 1 of the Units from A, through B, and to C for a total of 2 Movement Points. He has now moved 5 Units along the road segment from B to C and cannot use it for further Units. To move the remaining 2 Units through town D would take 10 Movement Points, 5 each. To move them through B and E would take only 8 points, 4 each. To move all of the Units into town C would take a minimum of 14 Movement Points: 4 + 2 + 8.)
Battles
When a player moves 1 or more Units towards a town that is occupied by the opponent, he must stop outside of the town (but uses Movement Points as if he had reached the town) and fight for it. The result of the battle is determined by each player throwing a number of dice, depending on the Units they have entered in the battle. If the attacking player has Units on two or more roads approaching the town, they are considered as a single attack force in figuring the number of dice he throws.
For each Large Unit, a player throws 1 die. For each 2 Small Units, a player throws 1 die. A single Small Unit does not add to a player's dice total. (Note: The New Guinea campaign is an exception and one die is thrown for each Unit whether Large or Small.) The maximum number of dice that a player can throw is 5, and additional Units do not increase his battle capacity. (One player holds the 5 white dice throughout the game, the other the 5 red dice.)
If the defending player has only 1 Small Unit in the attacked town, he does not throw any dice. The attacker, however, still throws to try and destroy the Unit. (See "Casualties.")
If the player whose turn it is attacks two or more towns, he chooses the order in which the battles are to be resolved. He must, however, complete all of his moves before the first battle is started.
Casualties
A player throwing 1 die inflicts 1 Casualty on the opponent if he throws a 6. A player throwing 2 or more dice inflicts 1 Casualty on the opponent for each double (2 of the same number) he throws. For 3 of the same number he inflicts 2 Casualties, for 4 of the same number 3 Casualties, and for 5 of the same number 4 Casualties.
For each Casualty suffered, a player must remove 1 Small Unit that was involved in the battle. If a player does not have enough Small Units, he instead removes 1 Large Unit for each 2 Casualties. If a player suffers a single Casualty and does not have a Small Unit available, he must give up a Large Unit, and does not receive "change."
(Note: In the New Guinea campaign one Unit, either Large or Small, is removed for each Casualty.)
Retreating
After all of the Casualties, if any, have been removed, the dice totals thrown by the two players are compared. The player with the lower total is forced to retreat (even if he inflicted more Casualties than the player with the higher total). In case of a tie, either player may choose to retreat voluntarily; if neither player will retreat the battle is refought, each player first adjusting his number of dice to reflect Casualties, if any, that he suffered.
If one player's Units in a battle are completely eliminated, the opponent does not have to retreat even if his dice total is smaller. (For example, a player attacks a town in which the opponent has 1 Large Unit with 2 Large Units of his own. The attacker throws 2-2 for a total of 4, while the defender throws 5-5. Each player suffers only 1 Casualty, but each must give up a Large Unit. Since the defender has no remaining Units, the attacker enters the town even though his dice total was lower. If, instead, the attacker had thrown 2-3, he would have been forced to retreat.)
If the attacking player is forced to retreat (or chooses to after a tie) he moves his stack of Units, or each stack if he attacks along two or more roads, back along the road to the adjacent town.
If the defending player is forced to retreat (or chooses to after a tie) he picks a road (regardless of type) that is completely clear of enemy Units and moves his Units, up to a maximum of 5, to an adjacent town. If more than one road is clear of enemy Units, he can if he wishes split his Units and retreat to different towns.
If the retreating defender moves his Units into a town that is still under attack (in the situation where more than one town was originally attacked) the Units join those already in the town, but are not considered in determining how many dice the defender throws. They also cannot be used for covering Casualties.
If a defender is forced to retreat and all roads are blocked, either by enemy Units on the road or by enemy Units in the adjacent town along the road, the Units must all surrender and are removed from the game.
(As an example, in Illustration 2 a player has moved two stacks of Units, X and Y, to attack town A. The attacking player throws 5 dice; the defending player throws 3 dice. After all of the Casualties, if any, have been removed, the dice totals are compared. If the defender's total is higher, he remains in town A, stack X retreats to town B, and stack Y retreats to town C. If, however, the attacker's total is higher, the defender must retreat to town D, using the only road that is completely clear of enemy Units, and the attacker moves stacks X and Y into town A. If the defender had had more than 5 Units in town A he could only retreat with 5, the remainder having to surrender. And if the attacker had had Units in town D, all of the defender's Units would be forced to surrender.)
Optional Retreating Rule for Advanced Players
A defending player who is forced to retreat may, if he is surrounded (or if he wishes to for strategic reasons), retreat along a road towards a town that is occupied by enemy Units. He fights a battle for this town in the usual manner, except that the enemy adds 2 dice to the number determined by his Units in the town, and if the player throws a lower total his Units (having no place to retreat) are eliminated.
The retreating player may not try to fight past enemy Units on a road.
(In the example of Illustration 2, if town D were occupied by the attacker the retreating defender could move towards town D, E, or F. He could not move towards stack X or stack Y. If he chose town F, the enemy would throw 2 dice, since the single Small Unit doesn't give him additional dice, in his battle for the town. If the retreating defender throws a lower total, his Units are trapped and eliminated. If the enemy throws a lower total, his Units retreat to an adjacent town.)
Landings from the Sea
A player brings Units onto shore by first placing them in a triangular landing area (with an arrow pointing to a coastal town). The number in the landing area is the maximum number of Units it can handle in one turn. It takes one Movement Point for each Unit, Large or Small, placed in a landing area.
If the connected town is not occupied by the enemy, the Units move into the town without further expenditure of Movement Points. If the connected town is occupied by the enemy, the Units must fight a battle for their town, but also do not use further Movement Points. The battle is fought in the usual manner, except that if the landing player throws the lower total, all of his Units attempting to land are eliminated.
Units cannot move along roads on the same turn on which they are landed. Units already on land, however, can be moved to assist in a battle being fought by Units attempting to land.
Special Rules for Korean War
Starting Forces. The United Nations player (Blue) starts with 1 Large (Armored) Unit and 18 Small (Infantry) Units. These are placed in the seven towns inside the "Pusan Perimeter" in any distribution the player wishes (except, of course, that no more than 10 Units can be placed in any one town).
The North Korean player (Red) starts with 2 Large (Armored) Units and 18 Small (Infantry) Units. After the United Nations placement is completed, the North Korean places 4 Units in each of the five towns adjacent to the "Pusan Perimeter" (his only choice being which city or cities of the five get the 2 Armored Units).
Reserves. The United Nations player starts with 4 Infantry Units in reserve. He also has potential reserves of 1 Armored Unit and 3 more Infantry Units. At the end of each turn he throws 1 die. If he throws a 6 he places the Armored Unit in his reserves. If he throws a 5 or 4 he places an Infantry Unit in his reserves. Units from the reserves are landed from the sea on any turn and at any one of the four landing areas.
The North Korean player has no reserves.
Supplies. North Korean Units involved in a battle must be supplied by being able to trace a path back to the north (one of the five roads with arrows) that is completely free of United Nations Units. If such a supply route is not open, the North Korean throws 1 die less than he otherwise would be entitled to.
The United Nations player has no supply requirements.
Duration of Game. The "Game Ends" card is separated from the rest of the Movement Deck and then the cards are dealt out: 15 to the United Nations player and 8 to the North Korean player. The United Nations player places the "Game Ends" card at the bottom of his face down pack and when it is turned the game is over, giving each player 15 turns. (Note: the North Korean player will have to turn over his cards. See "The Movement Deck.")
Objective. Either player wins if, at the time the "Game Ends" card is reached, that player has Units in both Seoul and Pusan. If neither player has Units in both cities, the game is a draw.
Special Rules for New Guinea
Starting Forces. The Allied player (Blue) starts with 6 Small (Infantry) Units: placed 1 in Uberi, 2 in Port Moresby, and 3 in the town adjacent to Port Moresby (below and to the right).
The Japanese player (Red) starts with 6 Small (Infantry) Units: placed 1 in Buna, 2 in Kokoda, and 3 in Ioribawa.
Reserves. The Allied player starts with reserves of 1 Small (Infantry) Unit and 2 Large (Airborne Infantry) Units. At the end of each turn he throws 1 die. If he throws a 6 he adds an Airborne Infantry Unit to his reserves. If he throws a 5, 4, or 3 he adds an Infantry Unit to his reserves. There is no limit to the number of reserves available.
Any Units from the Allied reserves can be landed from the sea at any turn. They can be landed at Port Moresby in the usual manner, or they can be landed at either of the two landing areas in Zone II by taking a chance on an additional "storm hazard." One die is thrown and if a 1 or 2 shows, the Unit attempting the landing is destroyed. Allied reserves may never be landed at the three landing areas in Zone I. Airborne Infantry reserve Units have the additional option of being dropped at an air strip (town with picture of a plane). Only one Unit can be dropped at any one air strip on a turn. In order to be used, an air strip must be occupied by Allied Units, or must be unoccupied and have no Japanese Units in any adjacent town. Once an Airborne Infantry Unit has been dropped, it has the same power as an ordinary Infantry Unit.
The Japanese player starts with reserves of one Small (Infantry) Unit. At the end of each turn he throws 1 die. If he throws a 5 or 6 he adds an Infantry Unit to his reserves. There is no limit to the number of reserves available. Units from the Japanese reserves can be landed from the sea at any turn. They can be landed at either of the three landing areas in Zone I in the usual manner, or they can be landed at either of the two landing areas in Zone II by risking the "storm hazard" as described above. Japanese reserves may never be landed at Port Moresby.
Battles and Casualties. As noted in the general rules, in this campaign both the Allied and the Japanese player throw 1 die for each Unit, Large or Small, that they have entered in the battle. And each Casualty results in the loss of one Unit, either Large or Small.
Duration of Game. The "Game Ends" card is separated from the rest of the Movement Deck and then the cards are dealt out: 10 to the Allied player and 13 to the Japanese player. When the Allied player turns over his cards he places the "Game Ends" card at the bottom of his pack, giving each player a maximum of 20 turns.
Objective. The Allied player wins if, at the end of any turn by the Japanese player, there are Allied Units in Gona and Buna. The Japanese player wins if he succeeds in preventing this until the "Game Ends" card is reached.
Special Rules for Bataan Retreat
Starting Forces. The Allied player (Blue) starts with 16 Large (American) Units and 40 Small (Filipino) Units. A minimum of 3 American Units and 6 Filipino Units must be assigned to Zone I. These are placed, at the player's discretion, in one, two, or three of the towns with landing areas (Aparri and the two adjacent towns to the right). In a similar manner, at least 3 American Units and 6 Filipino Units are assigned to coastal defense in Zone II, and in Zone III. 1 American Unit is placed in Mariveles (on the enlarged Bataan insert) and two Filipino Units are placed as desired on Bataan. (Note: Olongapo and Layac are not considered on Bataan.) The remainder of the Allied troops are placed as desired.
The Japanese player (Red) starts with 16 Large (Experienced) Units and 40 Small (Inexperienced) Units. Before the Allied player makes his disposition, the Japanese player uses a Troop Allocation Grid to secretly allocate his Units (Experienced and Inexperienced) to the five Zones in any manner he wishes. He cannot, however, allocate any Units to Bataan. After the Allied player has made his disposition, the Japanese player shows his Troop Allocation Sheet and places his Units off shore in the designated Zones. As the game progresses, they are landed from sea in the usual manner.
The Allied player has no reserves. The Japanese player does not receive reserves until late in the game and they will be covered below.
Japanese Air Control. If the Japanese player succeeds in placing Units in the three towns with airfields (adjacent to Aparri in Zone I, to Vigan in Zone II, and to Legaspi in Zone III) he throws 1 more die than he otherwise would be entitled to, but not more than 5, in all battles fought. This advantage continues as long as the three towns are occupied. However, it does not apply to battles fought on Bataan.
Manila as an Open City. If the Japanese attack Allied Units in Manila, the Allied Units must retreat without putting up a fight. The Allies are not permitted to attack the Japanese in Manila.
Bataan. Units move from Olongapo and Layac (which appear on both the main map and the enlarged insert) into Bataan. Once Units move into Bataan they may not be moved back to Olongapo or Layac.
If the Allied player has Units in Olongapo or Layac or both, he can use up to his full total of Movement Points on the main map and, if he wishes, can use up to the full total again for moving Units into Bataan and/or for changing positions on Bataan. If the Allied player does not occupy Olongapo or Layac, he gets only the usual total of Movement Points, which can be used on the main map, on Bataan, or divided between the two.
If the Japanese player occupies both Olongapo and Layac, the Allied player throws 1 less die than he otherwise would be entitled to in all battles fought outside of Bataan (on the main map).
Duration of Game. The "Game Ends" card is separated from the rest of the Movement Deck and then the cards are dealt out: 12 to the Allied player and 11 to the Japanese player. When the Allied player turns over his cards the second time he places the "Game Ends" card at the bottom of his pack, giving each player a maximum of 36 turns.
Japanese Reserves. After the Allied player has turned his cards the second time, the Japanese player at the end of each turn throws 1 die for reserves. If he throws a 6 or a 5 he receives an Experienced Unit, but cannot receive more than 2 Experienced Units. If he throws a 4, 3, or 2 he receives an Inexperienced Unit, but cannot receive more than 5 Inexperienced Units. Reserves can be landed from sea on any turn, in any landing area including the two on Bataan.
Objective. The Japanese player wins if, at the end of any turn by the Allied player, there are Japanese Units in Manila and Mariveles. The Allied player wins if he succeeds in preventing this until the "Game Ends" card is reached.
Historical Commentary
The Fall of the Philippines
In the summer of 1935 President-elect Manuel Quezon of the Philippine Commonwealth persuaded his friend, Gen. Douglas MacArthur, to relinquish his post as Chief of Staff of the U.S. Army and to accept assignment as Military Advisor to the Commonwealth. MacArthur's mission was to build a self-sufficient Philippine defense force by 1946, the date the Islands were to gain their independence. This task was disrupted, halfway to completion, by the Japanese attack at Pearl Harbor. MacArthur, at the age of 61, was recalled to active duty as Commander of U.S. Army Forces in the Far East.
The Japanese began their conquest of the Philippines in December of 1941 by landing forces in three areas on the principal Island of Luzon. In the north the landings took place at Aparri, in the northwest near Vigan, and in the southeast near Legaspi. The American and Filipino forces were able to offer only token resistance and the Japanese were quickly able to seize many important airfields. By the end of the first week of fighting Japanese Army aircraft were solidly based in the Philippines.
As the campaign progressed, the Japanese relied less on finesse, and more on simple weight of numbers to push back the Allied troops. Rather than trying for a defense of Manila, it was declared an open city to save it from destruction. The withdrawing Allied troops began to converge on the mountainous Bataan Peninsula. By early January of 1942 some ten divisions were massed for the defense of Bataan, and for the next three months they exacted a heavy toll for any terrain they had to yield.
MacArthur was evacuated from the Philippines on March 12, with his famous promise that "I shall return." On April 9, the forces on Bataan were compelled to surrender and the island fortress of Corregidor fell after another four weeks. By their dogged resistance, the American and Filipino troops upset the Japanese timetable and, even more important, shattered the myth of Japanese invincibility.
The New Guinea Campaign
The month of July, 1942 was a month of guarded optimism for the Southwest Pacific Area command. After the battles of Coral Sea and Midway, Japanese Naval-Air strength had been smashed and without this essential element further Japanese advances seemed out of the question. Nevertheless, the Japanese were slowly advancing over the Owen Stanley mountain range of New Guinea (previously thought impassable) threatening Port Moresby and Australia. They were also developing airfields further down the Solomon Island Chain, also threatening Australia.
As Gen. MacArthur viewed the situation there could be only one course of action, the initiation of a major counter offensive. The offensive would be a two-pronged operation involving an assault on the advanced Japanese base of Guadalcanal executed by Marine units, and a major drive to clear the Japanese from the Papuan peninsula in New Guinea.
The New Guinea Campaign was classic in its application of the indirect approach. It involved pinning the main Japanese forces on the Kokoda Trail, using Australian troops, while regiments of the American 32nd Infantry Division were airlifted over the mountains to Wanigela and Fasari, threatening to cut all supplies and communication lines with the main Japanese forces. The Japanese, realizing the hopelessly extended position of their troops, beat a hasty retreat to the Buna-Gona area. At this point the campaign centered on reducing this Japanese stronghold, an extremely costly undertaking. If the Japanese had been allowed to maintain this bridgehead, they doubtless would have been able to reinforce it and begin another offensive of their own. In January, 1943, six long months after the campaign began, the fighting ended in complete Japanese defeat. At the same time the fighting on Guadalcanal was ending, and the initiative was now clearly in the Allies' hands.
Korea: Turning the Tide at Inchon
On June 25, 1950 North Korea began an invasion of her southern neighbor. Initially U.S. involvement was limited to covering the withdrawal of American civilians but, after obtaining a United Nations condemnation of the invasion, the U.S. became embroiled in the conflict along with several other nations of the U.N. The initial invasion was unstoppable and hastily committed American forces were easily overrun. Finally by mid-August a line was established known as the Pusan perimeter. The entire North Korean Army was now employed in reducing this perimeter, leaving their rear wide open for an amphibious assault.
MacArthur, with his usual flair for the dramatic, did just that. The landing took place at the port of Inchon, just southwest of Seoul, and was a complete success. Nearly the entire North Korean Army was cut off, and although the number of prisoners was relatively small, the results were entirely favorable. The entire campaign was turned around, and U.N. forces pushed north.
It is at this point the campaign becomes more political than military, and MacArthur was never one for politics. In this case it cost him his job (Truman did not think it wise to invade China) and he soon returned home, concluding what many consider to be the most illustrious military career in our history.