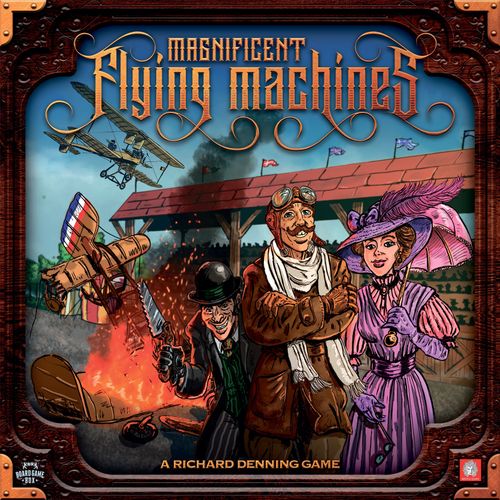
Magnificent Flying Machines
Magnificent Flying Machines Rulebook
Table of Contents
Table of Contents
- 1. Overview
- 2. Contents
- 3. The Racecourse and Flying Machines
- 4. Preparing to Set Up
- 5. Quick Start Setup
- 6. Setup - Standard Rules
- 7. Race Stage Placing Markers
- 8. The Race
- 9. End of the Game
- 10. Glossary
- 11. Final Airfield - Special Actions
- 12. Game Variants
- 13. Pilots
- 14. Equipment Cards
- 15. Special Abilities
- Symbol Reference (back page)
- About the Early Air Races
1. Overview
In Magnificent Flying Machines the winner is the person who ends the game with the most victory points. These can be earned in various ways including being the first to land successfully on a certain terrain tile, landing on the middle airfield, transporting cargo or passengers or performing trick manoeuvres. Simply being the first to cross the finishing line is unlikely to be enough on its own to secure a victory. The winner will be the player who picks a strategy that best matches the abilities of the pilot and features of the flying machine they are using.
2. Contents
- 6 flying machine dashboards (one of each type - monoplane, biplane, seaplane, pusher plane, triplane and helicopter).
- 18 pilot cards.
- 24 special equipment cards.
- 45 spare parts tokens of three types (14 take-off, 17 flying and 14 landing).
- 6 luck tokens.
- 64 trick and boost cards.
- 10 six-sided dice marked with takeoff, flying, landing, and explosion symbols.
- 1 marker of each of the six types of flying machine.
- 6 flying machine bases - each in a different colour.
- 15 terrain tiles - three airfields (starting, middle and final), three mountains, three towns and three water.
- 20 weather tiles.
- 8 weather change cards.
- 44 cargo tokens - 22 special cargo (divided into 5 mountain cargo, 5 water cargo, 6 town cargo and 6 fields cargo) and 22 general cargo divided into two types (11 x 2 pts and 11 x 1 pt).
- 24 passenger tokens.
- 12 damage markers.
- 60 victory point markers of five types (20 x 1pts, 20 x 2pts, 5 x 3pts, 5 x 4pts, 10 x 5 pts).
- 10 race stage placing markers of seven types (1 x 8 pts, 1 x 7 pts, 1 x 5 pts, 1 x 4 pts, 1 x 3 pts, 2 x 2pts and 2 x 1pts).
- 18 dashboard ability markers: 3 x+1, 2x+2, 1x+3 for each of takeoff, flying or landing symbols.
- 24 fuel cubes - 4 in each of the six player colours.
- 36 charge markers.
- 6 player summary cards.
3. The Racecourse and Flying Machines
3.1 The Racecourse
The course is composed of tiles of five different types (airfield, fields, mountains, town, water). A sample terrain tile has the following parts: weather slot, tile number, terrain icon, terrain difficulty, high altitude, middle altitude, low altitude, ground region, resources available, first to land points, passenger numbers and cargo slot.
3.2 The Flying Machine Dashboard
The flying machine dashboard gives basic information about the flying machine. It is also where the pilot card and any special equipment cards are stored and allows players to track available storage space, cargo, spare parts, passengers, fuel consumption and damage taken. A sample flying machine dashboard has: flying machine type, special abilities, ability scores, dashboard ability markers, internal storage slots, external storage slots, pilot space, scoring area, fuel gauge and special equipment slots.
3.3 The Dice
During the game flying machines progress by passing a series of tests. These involve rolling six-sided dice with takeoff, flying, landing and explosion symbols. The die faces are: x2 takeoff, x2 flying, x2 landing, explosion symbol, and a face showing one each of takeoff, flying and landing.
4. Preparing to Set Up
4.1 Spare Parts, Dashboard Ability Markers, Luck Tokens, Damage Markers and Victory Point Markers
Sort the spare parts into three separate piles according to the symbols on them (takeoff, flying or landing). Sort the dashboard ability markers into three further piles according to the symbols on them. Put each pile, together with the luck tokens, damage markers and victory point markers at the side of the playing area.
4.2 Trick and Boost Cards
Shuffle all of these together. Deal out three cards to each player. Place the remainder of the deck face down near the playing area.
5. Quick Start Setup
"First time in the air? Start here!"
To get playing as quickly as possible follow these quick start rules. Once you are familiar with the game skip to Section 6 to use the standard setup rules which offer more variety.
5.1 Building the Racecourse
Locate the deck of terrain tiles. Each tile has a number next to the terrain icon. You will need tiles 1 to 11. Build a course with terrain tiles placed in a straight line in ascending order from left to right. The course should now be as follows: Starting Airfield, Fields, Town, Water, Mountain, Middle Airfield, Fields, Town, Water, Mountain, Final Airfield.
Separate the cargo tokens into general cargo and special cargo, then separate the special cargo further into mountain, town, water and fields cargo. Place the victory point markers, passengers and cargo tokens on the terrain tiles in accordance with the table on page 6. Note that amounts and types of cargo and the numbers of passengers differ depending on the number of players.
| Tile Number | Terrain Type | Victory Points | 3-4 Players: Cargo | 3-4 Players: Passengers | 5-6 Players: Cargo | 5-6 Players: Passengers |
|---|---|---|---|---|---|---|
| 1 | Starting Airfield | None | None | None | None | None |
| 2 | Fields | 1 | 1 Town & 1 Mountain Special Cargo | 1 | 1 Town, 1 Mountain & 1 Water Special Cargo | 1 |
| 3 | Town | 2 | 1 Mountain and 1 Water Special Cargo | 1 | 1 Mountain, 1 Water and 2 Fields Special Cargo | 2 |
| 4 |
(Transcription note: the tile 7 five-to-six player entry is printed in the source as "2 x 2pts & 1 x 2 pt General Cargo"; the same position on tiles 6, 8 and 9 reads 1 pt.)
Locate and shuffle the weather tiles. No tile is placed on the starting airfield. Place one face up weather tile on terrain tile 2 and place one face down weather tile on each of terrain tiles 3 to 11. Shuffle the remaining weather tiles and place in a pile face down near the playing area.
5.2 Set Up of the Flying Machines
Shuffle together the six flying machine dashboards and place one in front of each player with the preset side face up. Add the pilot and equipment cards, dashboard ability markers (if any), together with spare parts and cargo in the appropriate slots as shown on the preset side. A brief explanation of any other attributes or benefits of the equipment and pilot is also included.
Some pieces of equipment have limited charges. Each player now places as many charge markers on each equipment card as needed.
5.3 Choosing First Player
Each player rolls five dice in turn. The player who rolled the highest number of flying symbols is first player. In the case of a draw, the affected players re-roll. Starting with the first player and going clockwise round the table each player chooses a colour and places four fuel cubes in that colour on the four spaces of the fuel gauge on the flying machine dashboard. Each player finds the marker for the flying machine that they are using, affixes a base in the same colour, and places the flying machine model on the starting airfield.
Place the deck of weather change cards face down next to the first player. Give the second player one victory point, the third player two victory points and so on until all players apart from the first player have received victory points.
Setup is almost complete. Skip now to section 7 (Race stage placing markers).
6. Setup - Standard Rules
"Frequent Flyer? Start here!"
The following setup rules allow players to choose the combination of pilot, flying machine and special equipment they will use in the game as well as providing some variety in the layout of the Racecourse. If you wish to start playing quickly please make use of the Quick Start Setup rules in section 5.
6.1 Building the Racecourse
Decide if you want to play a standard or long game. Take the deck of terrain tiles, remove the three airfields and put to one side. Deal out eight of the remaining terrain tiles into two equal piles ensuring that each pile contains one mountain tile, one town tile, one water tile and one field tile. If you are playing the standard game place the four remaining tiles back in the box. If you are playing the long game, shuffle the remaining terrain tiles and add one drawn at random to each pile. Place the two remaining tiles back in the box.
Place the starting airfield terrain tile face up. Deal out one of the two piles of terrain tiles, also face up, in a row to the right of and adjoining the starting airfield tile. Place the middle airfield tile face up, then deal out the remaining terrain tiles, and lastly the final airfield tile.
Advanced option: For a random course which is suitable for experienced players refer to Section 12.1.
6.2 Passengers
Take the passenger tiles. Beginning with the terrain tile next to the starting airfield, place on the passenger space at the bottom of each terrain tile the number of passengers indicated on that terrain tile (which varies depending on the type of terrain and the number of flying machines in the game. The lower number is used for games with three or four flying machines and the higher number for games with five or six flying machines).
6.3 Cargo
Separate the cargo tokens into general cargo and special cargo. Take three of the mountain special cargo tokens and three of the water special cargo tokens. Place these in a pile face down near the racecourse for later use. (They will be needed when players stock their flying machines). Shuffle any unused tokens back in with the other special cargo tokens together to form a single stack.
Place face up on each terrain tile beginning with the tile next to the starting airfield and proceeding along the course as far as the terrain tile that precedes the middle airfield, the number of special cargo tokens indicated on that terrain tile (which varies depending on the type of terrain and the number of flying machines in the game). As you place each special cargo token on a terrain tile check to ensure that the terrain of the tile does not match the terrain of the special cargo. E.G. No mountain cargo on a mountain terrain tile. If it does replace it with another special cargo token.
Return any surplus special cargo tokens to the box.
Shuffle the general cargo tokens together. Place face up on each terrain tile beginning with the middle airfield and proceeding along the course as far as the terrain tile that precedes the final airfield, the number of general cargo tokens indicated on that terrain tile (which varies depending on the type of terrain and the number of flying machines in the game as previously explained). Return any surplus general cargo tokens to the box.
6.4 Weather
"Here is the weather forecast at 06:00 hours"
Shuffle all the weather tiles together and deal one face up onto the weather slot of the terrain tile next to the starting airfield, and one face down onto each of the weather slots of all the remaining terrain tiles other than the starting airfield. The race always begins in good weather, but weather conditions on the remainder of the racecourse may change during the game, so place the surplus weather tiles in a pile face down near the racecourse for later use. (See 8.5 "End of Round" for how weather changes)
6.5 First to Land Victory Point Markers
Each terrain tile (apart from the airfields) has a first to land space. Place a victory point marker with the matching points value on that space for each tile.
6.6 Choosing First Player
Each player rolls five dice in turn. The player who rolls the highest number of flying symbols is first player. In the case of a draw, the affected players re-roll. Place the deck of weather change cards face down next to the first player.
6.7 Choosing a Pilot
"Calling adventurous men and women of courage and honour!"
Shuffle the pilot cards together and deal out six cards face up. The player to the right of the first player chooses a pilot and then replaces it with a card from the top of the deck. Continue round anti-clockwise until each player has chosen a pilot.
6.8 Choosing a Flying Machine
Place the flying machine dashboards face up. The player to the right of first player chooses one of the flying machine dashboards. Continue round anti-clockwise until each player has chosen a flying machine. Each player then chooses a colour (again going anti-clockwise) and places four fuel cubes in that colour on the four spaces of the fuel gauge on the flying machine dashboard.
Each player's pilot card is placed on the pilot space on the flying machine dashboard. The other pilot cards are placed to one side.
Each player finds the marker for the flying machine he has chosen, affixes a base in his chosen colour, and puts the flying machine model on the starting airfield.
6.9 Choosing Special Equipment
"The right tools for the job"
Shuffle together the special equipment cards and deal out six face up in a row near the racecourse and leave the rest as a draw deck nearby.
Starting with the player to the right of the first player and going anti-clockwise round the table each player then takes one of the face up cards and places it into a spare special equipment slot in their flying machine dashboard and replaces it with a card from the top of the draw deck.
When everyone has chosen one piece of special equipment, then starting with the player to the right of the first player and going anti-clockwise around the table each player then takes a further face up card, places it into a spare special equipment slot in their flying machine dashboard and replaces it with a card from the top of the draw deck. If any players still have an empty special equipment slot then this continues for one more round with those players each selecting a final piece of equipment. NB players cannot change equipment already chosen. Add any required charge markers to equipment cards.
Leave the row of six face up special equipment cards and the draw deck available as players will have the opportunity to change special equipment when landing on the middle airfield (see Section 10.1 below).
6.10 Finishing Off the Dashboard Setup
If any of the pilot cards and special equipment cards modify the ability scores of a flying machine the player will use an ability marker to show this on the flying machine dashboard. NB if the player takes the opportunity to change special equipment at the middle airfield (see Section 10.1 below) then the ability scores may need to be adjusted again. See example on page 8.
6.11 Loading Up
For each flying machine give out one passenger together with two takeoff, two flying and two landing spare parts. Shuffle the three water and three mountain special cargo tokens set aside previously and deal one for each flying machine. Return any surplus special cargo tokens to the box. The player chooses as many of these as they wish to provide they have capacity in their flying machines to store them. Each passenger occupies two internal storage slots or a passenger seat if available. Passengers cannot be carried in the external storage slots.
Example: Bob has chosen a triplane which has five takeoff symbols, five flying symbols and four landing symbols. However, his pilot is the nifty flyer giving him two additional flying symbols. He therefore selects a token showing two flying symbols and places this in the space below the flying symbols on the dashboard. He also has a finely tuned engine which gives one additional takeoff symbol. He therefore selects a token showing a single takeoff symbol and places this in the space below the takeoff symbols on the dashboard.
When he reaches the middle airfield, Bob decides to exchange his finely tuned engine for the extra passenger seat. The additional takeoff symbols marker is then removed as he no longer has access to additional dice when attempting a takeoff test.
Cargo can be carried in internal or external storage slots but not in a passenger seat. See section 10.2 - Cargo - and section 10.3 - Passengers - for more details.
Spare parts can be placed in the internal storage slots, the external storage slots or on the relevant pilot, special equipment or boost cards. NB: During the game, spare parts held in external storage slots cannot be used when the flying machine is in the air. However, it is always possible to re-arrange where spare parts, cargo and passengers are stored (without using up an action phase) whenever the flying machine is on the ground.
7. Race Stage Placing Markers
Consult the following table. Locate the relevant race stage placing markers and place these on the middle and final airfield as a stack of markers arranged in ascending order with the highest number on the top of each stack.
| Middle Airfield | Final Airfield | |
|---|---|---|
| 2 Players (4 planes)* | 7,4,3 | 8,5,3 |
| 3 Players | 7,4 | 8,5 |
| 4 Players | 7,4,3 | 8,5,3 |
| 5 Players | 7,4,3,2 | 8,5,3,2 |
| 6 Players | 7,4,3,2,1 | 8,5,3,2,1 |
* For more details on the two player variant see section 12.2
Strap on the goggles and slap on the flying helmet. You are now ready to get airborne!
8. The Race
8.1 Game Play Overview
During the race the flying machines move from terrain tile to terrain tile always heading towards the final airfield. As a flying machine enters a new terrain tile, the weather tile on the next terrain tile down the course is turned face up. Although a flying machine may take off and land on the same terrain tile, once it has exited a particular terrain tile it is not possible for the flying machine to return to it (except by the playing of the Swap the Maps Dirty Tricks card).
Rounds
The game is played in a series of rounds, always beginning with the first player and proceeding clockwise around the table. Play continues until the Game End is reached (see section 9 - End of the Game).
Turns and Phases
During a turn a player has two action phases available. The players choose from the following actions:
- Repair and scavenge
- Take off
- Flying
- Perform trick manoeuvre
- Gain altitude
- Landing
Players can choose to repeat the same action or to do two separate actions.
Trick and Boost Cards
At the start of the game each pilot starts with 3 Trick and Boost Cards (Marco Florentina starts with 4). Each card has text which outlines the effect of playing that card. There is also a symbol at the bottom which is either a spare part symbol or a cad symbol which may be discarded to help you pass a test or in the case of a cad symbol to impede another player taking a test (see 8.2 Taking and Passing Tests). When a card is played you must choose to either use the text on the card or the symbol but never both.
A boost card (which has a light-coloured frame) will aid players. Dirty trick cards (dark-coloured frame) will impede other players.
Players can play dirty trick cards at any time. Boost cards can only be played during a player's turn unless the text on the card says otherwise. There is no limit to how many cards you may play in a turn.
These cards are generally played once and discarded unless the text on the card says otherwise.
NB Dropping off and picking up passengers and cargo does not require a phase. Likewise playing a trick and boost cards does not require a phase.
At the end of the turn, the player draws one additional card from the trick and boost deck regardless of how many they played. Any cards in excess of the hand limit (which is normally three cards), must be discarded. Play then passes to the next player.
"Chocks away!"
8.2 Taking and Passing Tests
Players progress in the game by passing a series of takeoff, flying and landing tests. To determine the difficulty of a particular test, first look at the number of symbols for that test shown on the terrain tile that the flying machine is on. Simply add the number of symbols shown on the terrain tile to the number of symbols on the relevant weather tile.
To take a test, first check to see the total number of relevant symbols shown on the flying machine dashboard (which may be a combination of the Flying Machine's default abilities and ability markers gained due to Pilots or Equipment). This is the number of dice that will be rolled when attempting to obtain a sufficient number of symbols to pass the test. If the player does not roll enough symbols to pass the test they may accept that the test has failed, or use any available special equipment, spare parts, pilot abilities or trick and boost cards to pass the test (whether by enabling re-rolls, modifying the difficulty level, giving extra dice etc).
Each spare part is a single use token providing one symbol. Some trick and boost cards also include a spare part symbol which can be used as if it was a spare part. The card is then discarded. The text of some trick and boost cards may enable a test to be passed. The card is then discarded.
A player may continue to use spare parts, charges and trick and boost cards in any order until a test is passed. In addition it is always possible to pass a Take off or Flying Test (but not a Landing test!) they would otherwise fail by discarding 2 Fuel Cubes.
If the player manages to pass the test it does not matter if some of the dice rolled show an explosion symbol.
If a player wishes to take off in a mountain area, and the weather is fine, there are three takeoff symbols on the mountain terrain tile, and no additional takeoff symbols on the fine weather tile. A total of three takeoff symbols will be required. To take off in a mountain area during a thunder storm a further two takeoff symbols will be required giving a total of five symbols.
Bob has a triplane which is currently in the air over a town terrain tile. He wishes to fly through that tile (a flying test requiring three flying symbols to pass). Bob's dashboard shows that he has five flying symbols. As this is the start of his flying test Bob picks up five dice ready to roll and attempt to obtain three flying symbols. However, Paul plays a card with a cad symbol at the bottom so Bob must put one dice back and only roll four dice. He passes the test and moves his triplane to the next space. He decides to try and fly on through that field tile. He picks up the dice that had been discarded as a result of the cad symbol. However, as the flying test is attempting to pass a second flying test in the same turn Bob must discard a dice. So, Bob now rolls four dice again to fly on.
If a player is unable to obtain a sufficient number of symbols to pass a test then a failure occurs. If the dice rolled include one or more explosion symbols, then a catastrophic failure occurs. The effects of a failure or catastrophic failure vary depending on the test being taken (see the phases table on page 11).
In any given turn, each time a player repeats a test that has already been taken the number of dice available is reduced by one. This is so even if the test is taking place in a separate phase.
Joanne has a pusher plane which is on the ground on a field terrain tile at the start of her turn. She attempts to take off, rolling five dice needing two takeoff symbols. From her dice roll she only has one takeoff symbol, and does not have any available spare parts or trick and boost cards to enable her to pass the test. Her first action phase ends. For her second action phase, she again attempts to pass a takeoff test, but this time may only roll four dice as it is the second takeoff test she has taken that turn.
Cad Symbols
If a player is about to take a test, but another player plays a cad symbol (either by discarding a trick and boost card showing that symbol or using a charge on an equipment or pilot card), then the number of dice to be rolled for that attempt is reduced by one. Only one cad symbol may be applied to any single test. NB: a cad symbol is not a dirty trick card.
8.3 The Actions in Detail
Some actions require a flying machine to pass a take off, flying or landing test. The different actions that can be taken as well as, where relevant, the test required and the consequences of passing, failing and catastrophically failing that test, are set out in the table below.
| Action Chosen | Outcome | Pass | Fail | Catastrophic Failure |
|---|---|---|---|---|
| Take off (requires take off test) | Depends on result of takeoff test | Take off. Move flying machine to lowest altitude band of terrain tile. End of this phase. | Stay on ground. End of this phase. | Stay on ground. Place 1 damage marker on the dashboard fuel gauge. End of this phase. |
| Repair and scavenge | Transfer all damage markers from fuel gauge to score area. Take 1 fuel cube if required. Select 2 to 3 spare parts and/or additional fuel cubes (depending on the resource number of the tile and if the flying machine has space to store these). End of this phase unless on an airfield when can immediately proceed to a takeoff test in the same phase. | N/A | N/A | N/A |
| Fly on (requires flying test) | Depends on result of flying test | Move on to next tile. Discard 1 dice. Can choose (if have dice available and sufficient fuel) to continue this phase by repeating this action and flying on or performing a trick manoeuvre (see below). | Stay on same tile. End of this phase. | Take 1 damage marker and place on dashboard fuel gauge. Forced down. Must take a landing test even if has no action phase remaining in turn. |
Altitude: A player may move a flying machine down by one or two altitude levels to gain one or two flying symbols towards passing a flying test. In addition, a flying machine may ignore weather conditions when taking a flying test at the highest altitude band.
Luck Tokens: If a flying machine makes no progress in the turn - i.e. it has failed to score any victory points, take on cargo or passengers, move on at least one terrain tile towards the final airfield or finish the turn at a higher altitude than it began - then the player receives a Luck Token. This may be used in any subsequent turn to change the result of any failed test to a pass. The luck token is then discarded.
Final Airfield Special Actions: If a flying machine is already on the runway of the final airfield at the start of a turn, the actions in the table above no longer apply. Instead follow the rules in section 11 - Final Airfield Special Actions.
8.4 Fuel and Damage
8.4.1 Fuel
The fuel gauge shows the amount of additional fuel a flying machine has available to travel at a faster rate than one terrain tile per turn. At the end of a player's turn remove fuel cubes dependent on the number of terrain tiles crossed that turn as set out in the following table:
| Terrain Tiles | 0 | 1 | 2 | 3 | 4 |
|---|---|---|---|---|---|
| Fuel Cubes | 0 | 0 | 2 | 3 | 4 |
Two fuel cubes may also be discarded in order pass a takeoff or flying test they would otherwise fail (but not a landing test). Players remove fuel cubes from their fuel gauge from right to left (full to empty).
One fuel is replenished following a successful landing test (but not a bumpy landing or catastrophically failed landing) and also as part of a repair and scavenge action (see Section 8.3 above).
"Mayday, Mayday!"
8.4.2 Damage
If a flying machine is damaged one or two damage markers are placed on the fuel gauge of the flying machine dashboard from right to left (full to empty) to indicate this. Any fuel cubes in the spaces the marker now occupies must be discarded. If there are already two damage markers on the fuel gauge, subsequent markers are placed in the scoring area of the dashboard.
It is possible to perform any action with one damage marker on the fuel gauge (and any number in the scoring area). If a flying machine ever has two damage markers on the fuel gauge then if flying it is immediately forced to land and when on the ground may not take off until at least one of the damage markers has been removed.
8.4.3 Repairing Damage
Damage may be removed in several ways. A player may conduct a repair and scavenge action to remove all damage on the fuel gauge. Some trick and boost cards allow players to repair damage. Some equipment and pilots also allow damage to be repaired.
When damage is repaired, any damage markers are moved from the fuel gauge to the dashboard scoring area. At the end of the game each damage marker on the fuel gauge or in the dashboard scoring area results in a penalty of minus one victory point.
8.5 End of Round
When each player has taken a turn, the first player turns over the top card from the weather change deck. There are 8 cards.
5 of them show the phrase "Change in the Weather" and a terrain symbol (Fields, Town, Water, Mountain and Airfield). Remove any face up tiles on terrain tiles matching these symbols and deal out a replacement.
1 card shows the phrase "Easterly Wind - Move all weather one to the left". Move all the terrain tiles one space to the left, discard any tile that has as a result been pushed off the end of the board and deal out a new one to the empty space at the far right.
1 card shows the phrase "Westerly Wind - Move all weather one to the right" Move all the terrain tiles one space to the right, discard the tile that has as a result been pushed off the end of the board and deal out a new one to the empty space at the far left.
The final card shows the phrase "No Change". Leave the weather tiles as they are.
If a change in the weather is indicated, move face up weather tiles as necessary (either moving tiles to the left or right along the course, or removing weather tiles from a certain terrain type and dealing out replacement weather tiles). The used weather change card is placed in the discard pile. The first player then starts the next round. If the draw deck is exhausted, the first player shuffles the discard pile and places it face down to form a new draw deck.
9. End of the Game
Once a flying machine lands at the final airfield, the players continue to take turns in order. Players on the final airfield may continue to play trick and boost cards in the normal way and may also carry out final airfield actions (see Section 11). In a three or four player game, when the penultimate flying machine has landed, the game will end when the remaining player has taken one more turn. In a five or six player game, when there are only two flying machines remaining on the course the game will end when each of the remaining players has taken one more turn. If any flying machine is unable to land on the final airfield by game end, no points are scored for any cargo or passengers that have not previously been moved to the dashboard scoring area.
All players then add up the total number of victory points they hold deducting points for any damage markers or undelivered special cargo. The player with the highest number of victory points wins. In the event of a tie the player with the least damage wins the game. If still tied players break ties in reverse player order.
10. Glossary
10.1 Landing - Airfield Additional Actions
When landing on the middle airfield or the final airfield (even if the landing is bumpy or a catastrophic failure) the player takes the highest remaining race stage placing marker on the terrain tile and places it in the dashboard scoring area.
When landing on the middle airfield a player may replace one or more equipment cards with any one of the six face up equipment cards by the side of the racecourse. If necessary, take a sufficient number of charge markers and place on the equipment card. Replace equipment cards chosen with cards from the draw deck. Place discarded cards in a discard pile. On subsequent turns, if the player's flying machine is still on the middle airfield they may, without using any phases, elect to replace one or more equipment cards before taking off. When discarding any equipment card the player must check if that card granted modifications to their ability scores and if so discard the relevant ability markers from their dashboard.
10.2 Cargo
10.2.1 Cargo Types
Cargo is available to be shipped to certain locations for which the player will score victory points. Cargo tokens are of two types.
a) Special cargo tokens have icons for the different terrain types. They will be picked up in the first half of the race and must be delivered to a terrain tile of that type in order for the player to score points. If the special cargo is not delivered by the end of the game the player suffers a 1 victory point penalty.
b) General cargo tokens. These will be collected during the second half of the race and must be delivered to the final airfield in order for the player to score victory points.
10.2.2 Collecting Cargo
Whenever a flying machine is on the ground the player may collect cargo (see Collection limit section 10.4) from that terrain tile providing they have available storage slots in either their internal or external storage space. They may even discard spare parts to make room for the cargo. Once a cargo token is taken on board a flying machine players may not discard that cargo.
10.2.3 Delivery of Cargo
Whenever a flying machine is on the ground in a terrain tile that matches the special cargo terrain icon a player may deliver special cargo. Move the cargo from the storage slot to the scoring area. At the end of the game it will score the victory points shown on the token. When the flying machine lands at the final airfield the player removes any general cargo token from storage slots on the flying machine to the scoring area. Each piece of cargo will score the victory points shown on it.
10.3 Passengers
Passengers are eager to experience the new thrill of air travel. They wish to travel to any town or airfield after the terrain tile they are collected from.
10.3.1 Collecting Passengers
Whenever a flying machine is on the ground the player may collect passengers (see Collection limit section 10.4) from that terrain tile providing they have available storage slots. Note that a passenger occupies two internal storage slots unless the flying machine has a passenger seat. They may even discard spare parts (though not cargo) to make room for the passenger. Once a passenger is taken on board a flying machine the player may not discard that passenger, who will remain on the flying machine until the next town or airfield is reached. However, another player may use the dirty trick card, Grumpy Passenger to force a passenger to disembark earlier. Should that occur the player scores no points for that passenger.
10.3.2 Delivery of Passengers
Whenever a flying machine lands at a town or airfield passengers may disembark. Move the passenger token from the storage slots to the dashboard scoring area to reflect this.
10.4 Collection Limit
During a single turn each flying machine may only collect a maximum of 2 passengers and/ or cargo.
11. Final Airfield - Special Actions
If a flying machine is stationery on the final airfield at the start of the player's turn, then the player may choose one of the following actions:
Make good: take a takeoff test (three symbols plus any weather modifier required to pass). If the player manages to pass the test remove up to three damage markers from the flying machine dashboard (this includes damage markers that are held in the dashboard scoring area or on the fuel gauge). These no longer count as minus victory points at the end of the game. If the test is failed then the damage markers remain. If the player catastrophically fails the test then add one additional damage marker to the flying machine. Only one make good action may be conducted on each flying machine in the game.
Give a flying lesson: take a flying test (three symbols plus any weather modifier required to pass). If the player manages to pass the test the lesson is successful and the player immediately scores three victory points. If the player fails the test, no points are scored. If the player catastrophically fails the test then the crowd is annoyed and attacks the flying machine. Add one additional damage marker to the flying machine. Only one flying lesson may be given in each flying machine in the game.
Give a speech: take a landing test (three symbols plus any weather modifier required to pass). If the player manages to pass the test the speech is well received and the player immediately scores three victory points. If the player fails the test, no points are scored. If the player catastrophically fails the test then the crowd is annoyed and attacks the flying machine. Add one additional damage marker to the flying machine. Only one speech may be given by each pilot in the game.
After attempting any of the above three tests mark the relevant ability display on the dashboard with a fuel cube to show it cannot be attempted again.
Sign autographs: no test required. Score one victory point. There is no limit to the number of turns in which this action may be performed.
12. Game Variants
After you have played the game a few times here are some variants you may wish to introduce.
12.1 Racecourse - Fully Random Course
The following variant may be adopted to increase the variety and potential difficulty of game play.
From the deck of terrain tiles, take out the three airfields and put to one side. Shuffle the remaining terrain tiles together. These rules assume you are playing the long game and will use 13 tiles in all.
Place the starting airfield terrain tile face up. Deal out five of the terrain tiles, also face up, in a row to the right of and adjoining the starting airfield, place the middle airfield tile face up, then deal out five more terrain tiles, and lastly the final airfield tile. Place the remaining terrain tiles into the box.
NB - when using a random course it is possible that some of the Special Cargo will be impossible to deliver to the designated terrain type as there will not be any terrain of that type available in the remainder of the course. Players will need to ensure that they do not collect any such cargo or else suffer minus points at the end of the game.
12.2 Two Player Variant
In a two player game the players will each have two flying machines.
The race course is set up as per a four player game.
The remainder of the set up follows the general rules subject to the changes below:
Choosing pilots and flying machines: The players take it in turns to select a pilot starting with the second player. When each player has two pilots the players then take it in turns to select a flying machine, again starting with the second player. Once both players have two pilots and two flying machines they each decide which of their pilots is to fly which flying machine and place the pilot card on the pilot space of the relevant dashboard.
Choosing special equipment also alternates between the players with the second player having first choice. When a piece of equipment is selected the player can choose to place it into an empty special equipment slot on either of the two flying machines. However, once placed in a special equipment slot it cannot then be moved until the flying machine reaches the middle airfield.
Once the flying machines are fully stocked the first player decides which of their two flying machines will be the first flying machine and the second player chooses which of that player's flying machines will be the second flying machine.
During a game round the first player will take a turn with the first flying machine followed by the second player taking a turn with the second flying machine. Next the first player will take a turn with the third flying machine followed by the second player taking a turn with the fourth flying machine.
Each player will as normal have a hand of three trick and boost cards and after taking a turn with a flying machine will draw a single replacement card in the usual manner. NB the pilot Marco Florentina (options open) may not be used in the two player game.
Rounds continue in this manner until the end of the game. When one player has landed their second flying machine on the final airfield, the game will end when the other player has taken one more turn. Each player totals the scores for both flying machines and the player with the highest combined total wins the game.
12.3 Team Play
In a team game the players will each have one flying machine. In a four player game players will play in pairs.
In a six player game players may choose to play in two teams of three or three teams of two.
Members of the same team should not sit next to each other. The game is set up as per a four or six player game.
At the end of the game each team totals the scores for their flying machines and the team with the highest combined total wins the game.
12.4 Less Dirty Game
If you prefer a game with less direct confrontation, then use these rules. Remove the Shotgun and Mounted Rifle from the Equipment Cards, Sir Archibald Smythe from the Pilot deck and the following cards from the Tricks and Boost deck: all Dirty Trick cards, the Immunity cards, An Honourable Pilot, This Means War and Official Scrutiny. Return these cards to the box as they will not be used in this game.
13. Pilots
The following table explains the special attributes of each pilot.
- Amelia Skyfoot - American - The Nifty Flyer: Rolls 2 extra dice for flying tests.
- Adriana Belhinda - Peruvian - Lucky: Once per phase may re-roll up to two dice.
- Captain Matthew Comben - Canadian - The Pioneer: Gains one victory point each time he claims first to land points.
- Condesa Isabella Sanchez - Spanish - Keen and Eager: Rolls 2 extra dice for takeoff and one extra dice for landing tests.
- Elinah Mwangi - Kenyan - The Superb Mechanic: May always repair one damage marker when taking off. Rolls one extra dice for landing tests.
- Hamish McTarn - Scottish - The Opportunist: Gains one extra victory point for each piece of cargo delivered.
- Janu Rajan - Nepalese - The Navigator: Ignores one symbol of each type on every weather tile.
- Jan Van der Vall - Dutch - The Chauffeur: Has an additional passenger seat.
- Jing Li - Chinese - The Courier: Has 1 extra external storage space for cargo only.
- Karishma Khana - Indian - The Tour Guide: Gains 2 additional victory points for every passenger delivered.
- Kauri Parata - New Zealander - The Barnstormer: Gains one extra victory point for each successful manoeuvre.
- - Italian - Options Open: Has a hand limit of 4 trick and boost cards and can draw 2 cards at the end of his turn.
14. Equipment Cards
The following tables explains what each equipment card does.
-
Aerodynamic Tail: Three times during the game enables one extra dice to be rolled during a flying test.
-
Armour Plating: Enables one explosion symbol to be ignored from every failed test.
-
Box of Tricks: Three times during the game may play a cad symbol.
-
Catapult Launcher: Once in the game when performing a takeoff action automatically take off and fly through one terrain tile on to the next terrain tile. End up in the lowest air region.
-
Damage Repair Kit: Once in the game when on the ground discard to gain an extra phase to perform a repair and scavenge action. Remove all damage markers from the flying machine and discard them. These damage markers are not counted as minus victory points at game end.
-
Drop of Courage: Three times during the game may roll an additional dice when attempting a test.
-
Extra Cargo Capacity: Gives one additional internal and one additional external storage space.
-
Finely Tuned Engine: Enables one extra dice to be rolled for takeoff tests.
-
Floats: Enables 2 extra dice to be rolled for takeoff and landing tests on water terrain tiles.
15. Special Abilities
Two flying machines have special rules.
The helicopter special ability is that the terrain difficulty of take off and landing is never higher than a 2.
The seaplane's special ability is that it gains 2 dice for all take off and landing tests on water tiles.
Symbol Reference (back page)
Take off dice, flying dice, landing dice, explosion symbol, additional dice, re-roll dice, damage dice; terrain: fields, mountain, water, town, airfield; weather: snow, cloudy, fog, storms, sunny, windy; pilot, range, equipment, internal storage, external space; remove damage, ignore damage, card, discard card, pass, take off, flying, landing; passenger, cargo, first to land, victory points, weather, trick manoeuvre, spare part, cad.
About the Early Air Races
With the advent of flight by heavier than air aircraft a new era began. Many people could see the potential in this new form of travel and as a result exciting air races were soon all the rage. The first air race was probably in France in 1909 with just 4 aircraft. This was followed by others in Europe, in the USA and around the world. This game is most closely inspired by the 1911 Daily Mail Circuit of Britain. The proprietors of the Daily Mail offered a £10,000 prize to any aviator to complete an approximately 1,000 miles circuit of Britain in the shortest time. The contest was held between 22nd July 1911 and 5th August 1911. 30 aircraft took part with pilots from a number of nations. Four competitors completed the course, the first and winner of the prize was the Frenchman Lieutenant Jean Louis Conneau flying under the name of André Beaumont.