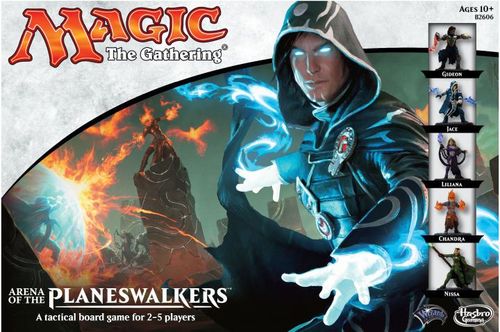
Magic: The Gathering – Arena of the Planeswalkers
Magic: The Gathering – Arena of the Planeswalkers Rulebook
Table of Contents
Table of Contents
- Game Contents
- The First Time You Play
- Get Ready to Play
- Army Cards and Spell Cards Overview
- Playing the Two-Player Game
- 1. Place your Planeswalker in a starting zone.
- 2. Place your Planeswalker army cards in front of you.
- 3. You and your opponent shuffle your own spell card decks and each draws a hand of three cards.
- Action 1: Draw a Spell Card
- Action 2: Choose an Army Card
- Action 3: Move One or More Figures on Your Army Card
- Action 4: Attack with One or More Figures on the Army Card (Optional)
- Action 5: Move the Turn Marker on the Turn Track to the Next Number
- Ending the Game
- Scoring
- Glyphs
- Terms and Clarifications
- Playing the Multiplayer Game
- Using Multiple Game Sets and/or Expansion Sets
- The Battlefields
Game Contents
- 5 Planeswalker figures
- 30 squad figures
- 2 ruins
- 6 cardboard terrain boards
- 2 3-hex sand tiles
- 2 1-hex sand tiles
- 4 glyphs
- 30 damage markers
- 20-sided die
- 10 combat dice
- 15 army cards
- 60 spell cards
- turn marker
The First Time You Play
Remove your game parts from their wrappings. Discard the extra materials. Pop out the cardboard terrain boards, turn marker, and ruin pieces. Assemble the ruins as shown in the diagrams in the guide.
OBJECT: Be the first player to achieve your victory condition.
Get Ready to Play
1. Set Up Your Battlefield
Refer to The Battlefields on pages 17-19 for descriptions of the battlefields and instructions for building them. Select a battlefield to play, based on the number of people playing. Place the turn marker on space 1 of the turn track.
2. Gather Your Figures, Army Cards, and Spell Cards
Each player chooses a Planeswalker. (You can roll the 20-sided die to determine who chooses first.) Each player takes the matching color spell cards, army cards, and figures for that Planeswalker. For example, if you chose Jace, you would take the three blue army cards, the 12 blue spell cards, and the six blue squad figures.
Army Cards and Spell Cards Overview
The game features army cards and spell cards. Before you start to play, you should familiarize yourself with the cards.
Army Cards
There are two kinds of army cards: the Planeswalker army card and the squad army card. Each card carries the following information:
- Card color/mana symbol — The border of the card indicates what color the army card is. Planeswalkers can summon only other non-Planeswalker army cards that have the same mana symbol and/or color.
- Life — The amount of damage it takes to destroy the figure(s).
- Move — The maximum number of spaces the figure(s) can move.
- Range — The maximum number of spaces away that the figure(s) can attack.
- Power — The number of dice you roll to attack.
- Toughness — The number of dice you roll to defend.
- Target point — The green dot shows the area from where you determine line of sight.
- Hit zone — The dark gray area shows what part of the figure can be attacked. Used when checking line of sight.
- Size/height — The size of the hero or squad, and the number of levels high.
- Abilities — The abilities of the army card.
- Cost — The value of the army card.
- PPF cost — Price per figure cost. This value is used with scenarios that include scoring. This cost is only on squad cards.
Spell Cards
Each spell card carries the following information:
- Type — Tells you whether this spell card is a sorcery or an enchantment.
- Spell cost — The value of the spell card.
- Abilities — The special things that the card does.
- Set symbol — Shows what set this card belongs to.
- Card color/mana symbol — The border of the card indicates what color the spell card is. Planeswalkers can cast only spell cards that have the same mana symbol and/or color.
Playing the Two-Player Game
1. Place your Planeswalker in a starting zone.
Each player rolls the 20-sided die. The high roller may choose to go first and place first, or let his or her opponent go first and place first. When placing, you must place your Planeswalker in a starting zone. You cannot place your Planeswalker in a starting zone occupied by your opponent. Both players place their Planeswalkers and then the first turn begins.
2. Place your Planeswalker army cards in front of you.
You and your opponent both place your Planeswalker army cards in front of you face up. Place all non-Planeswalker army cards and figures in your army off to one side face up. This location is called your reserve. Your opponent does the same.
3. You and your opponent shuffle your own spell card decks and each draws a hand of three cards.
The player who takes the first turn will not draw a card that turn. The remaining cards become the draw pile, which is called the library.
On Your Turn
On most turns, you'll perform five actions, in this order:
- Action 1. Draw a spell card
- Action 2. Choose an army card
- Action 3. Move one or more figures on your army card
- Action 4. Attack with one or more figures on your army card (optional)
- Action 5. Move the turn marker on the turn track to the next number
Let's look more closely at these actions.
Action 1: Draw a Spell Card
If your Planeswalker is on the battlefield, draw a spell card from your draw pile. On your turn, you may play up to three spell cards. You cannot play spell cards on another player's turn. You may play spell cards before Action 3 and after Action 4.
There are two main types of cards: sorceries and enchantments.
Sorcery cards: When a sorcery spell card is played, do whatever it says and then place it in your discard pile, which is called your graveyard.
Enchantment — Aura cards: Auras are attached to army cards. Enchant cards are placed face up on the called-out army card. For example, an enchant (unique) squad card is placed on any (unique) squad army card.
Types of enchantment cards:
- Enchant Planeswalker
- Enchant (unique) squad
- Enchant (common) squad
- Enchant (unique) hero
- Enchant (common) hero
Hidden enchant cards are played face down on the called-out army card. Hidden enchant cards can only be played on your army cards. For example, a hidden enchant Planeswalker card is placed on your Planeswalker army card face down. Hidden enchant cards tell you when to flip them over and what happens when you flip them over.
Types of hidden enchant cards:
- Hidden enchant Planeswalker
- Hidden enchant (unique) squad
- Hidden enchant (common) squad
- Hidden enchant (unique) hero
- Hidden enchant (common) hero
If an army card already has a face-down hidden enchant card, place the additional card under the already played card. A hidden enchant card can be countered. For example, Scatter Arc will counter the next enchantment spell played by an opponent even if it is a face-down hidden enchant card. If you forget to trigger a hidden enchant card, it is placed out of play without being triggered. So don't forget.
Note: Enchantments affecting heroes are not included in this set.
More on Using Spell Cards
Spell card hand limit: At the end of your turn, if you hold more than seven spell cards in your hand, discard cards to reduce your hand to seven.
You draw your last card: If you draw your last spell card from your library, do not reshuffle your graveyard to create a new library. When you are supposed to draw a card and your library is empty, you do not draw a card.
Hidden enchant card order: If you have more than one hidden enchant card that would trigger at the same time, they trigger in order with the top-most card going first.
Action 2: Choose an Army Card
Choose any one of your army cards to use on your turn.
You can only use activated abilities from the army card you chose. For example, you can only use Liliana's Snuff Out ability on a turn in which you choose Liliana.
Planeswalker Rules
Before Action 3 of your Planeswalker's turn, your Planeswalker may summon up to two squads and heroes from your reserve to the battlefield. Summoned figures must be placed on empty spaces within 5 clear sight spaces of your Planeswalker. If your Planeswalker is destroyed, you cannot play or draw spell cards. Hidden enchant cards can still be triggered.
Action 3: Move One or More Figures on Your Army Card
Now you can move any or all of the figures on the army card you have chosen. Follow these rules for moving figures.
Check the move number. You can move a figure in any direction up to the move number on its army card. For example, with a move number of 5, the Illusionary Projections can each move 1, 2, 3, 4, or 5 spaces. (Uneven terrain and water may limit their movement, as you'll see.)
Example 1: Basic movement — On this turn, you choose to move each Illusionary Projections its full five spaces toward the enemy figures on the other end of the battlefield.
Order of movement. Move squad figures in any order, one at a time.
Passing and landing on other figures. You can move through a space with a friendly figure on it unless the figure is engaged (see the rules for engaging figures on pages 9-10). You can't move through a space with an opponent's figure on it, or end your move on a space with any other figure.
Moving up. When you move to a higher level, count the side of each higher level as one space, as well as the space you land on (see Example 2). Note that glyphs do not add height to any spaces on which they are placed.
Example 2: Moving up — Count five spaces for your Pummelroot Elemental to move up onto this ledge.
Height limit. A figure cannot move up a number of levels equal to or higher than its height number all at once (see Example 3).
Example 3: Height limit for moving up — Chandra cannot move up to the space marked with an X because it would take five moves to reach the top. Chandra's height number is 4.
Moving down. When you move to a lower level, you don't need to count sides on the way down (see Example 4). But note that there may be a penalty for moving to a much lower level. See Falling, below.
Example 4: Moving down — To move Chandra down from this ledge, you don't need to count the sides of the tiles.
Falling. When a figure moves down to a much lower level, it may take damage. A fall is defined as a move in which a figure moves down onto a level that is equal to or higher than the figure's height. In this case, roll one combat die. If you roll a crossed weapons symbol, the figure takes one damage. (See Using the Life Number, page 12.)
Falling rules do not apply if a figure falls onto a water space. A figure can fall onto a water space from any level. Falling does not stop a figure's movement, but it may cause it to take damage. Example 5 shows a figure falling.
Example 5: Falling — When you move Chandra down from this four-level cliff, you roll one combat die for the fall, because the cliff is equal to or higher than her height of 4. You don't roll a crossed weapons symbol, so Chandra is safe.
Moving onto water. When you move onto a water space from any other space (even from another water space), you must end your move there. Note that figures that take up two spaces (double-space figures) can move past one water space that's between two non-water spaces without stopping; they must stop only if they move onto two water spaces (see Example 6).
Example 6: Moving onto water — When you move Chandra onto a water space, she must stop there.
Moving from water to land. When moving out of water, add one to move out of the water space (see Example 7).
Example 7: Moving from water to land — When moving Chandra from the starting water space to a land space, you count two spaces because the water is considered a level lower than the land space. Chandra then moves four additional spaces for a total move of six.
Moving a double-space figure. Some figures take up two spaces. When moving a double-space figure, decide which side to lead with (for example, the left side or the right side). Then move the figure so that the other side follows the same spaces that the leading side just occupied. Always end a double-space figure's move on two same-level spaces (see Example 8). Since water is considered a lower elevation, a double-space figure cannot end its movement on a water space and a land space.
Example 8: Moving double-space figures — From its starting spaces (top view), the Firecat moves five spaces right side first, with its left side trailing along the same spaces as its right side (middle view). Counting the sides of the ledges, the Firecat ends its move at the top, on two same-level spaces (bottom view).
Flipping a double-space figure. You can flip a double-space figure anytime during its move (see Example 9). To flip a double-space figure, turn the figure around while keeping it on the same two spaces. The flip is free: it does not count as part of your move. The double-space figure does not take any leaving-engagement attacks when flipping since the figure is staying on the same two spaces. (Leaving-engagement attacks are explained on page 10.)
Example 9: Flipping a double-space figure — The Firecat flips to face the other direction.
Keeping the base on the space. When you end a figure's move, be sure its base lies flat and is on that space only (or spaces, in the case of double-space figures). No part of its base may overlap on another space.
Moving in tight quarters. Ruins may limit the movement of some figures. A figure can't move through or onto a space that it can't fit completely onto (see Example 10).
Example 10: Moving into tight quarters — Chandra can't move onto this space because her base cannot fit onto the space.
Becoming engaged. A figure becomes engaged when it moves adjacent to an opponent's figure. An exception is when one figure's base is on a level equal to or higher than the height of the other figure. In this case, they are not adjacent and therefore are not engaged (see Example 11).
If an obstacle such as a ruin is between two figures, both figures' heights must be higher than the obstacle to be engaged. If both figures' heights are lower than the obstacle, or only one figure's height is lower, they are not engaged.
Example 11: Figures are not adjacent — Chandra is not adjacent to the Pummelroot Elemental because the Pummelroot Elemental is on a ledge that is four levels high, and is equal to Chandra's height of 4.
Leaving an engagement. Your figure may move around an opponent's figure that it is engaged with. However, as soon as your figure moves away (onto a space that's not adjacent), the opponent's figure may take a "leaving-engagement attack" at your figure. To do this, the player who controls the opponent's figure rolls one combat die to attack. You do not roll any dice to defend your figure. If a crossed weapons symbol is rolled, your figure takes one damage. Place one damage marker on its army card if it is a Planeswalker or a unique hero (see Using the Life Number, page 12). Place the damage marker on the base of the figure if it is a squad figure or a common hero.
Multiple engagements. Your figure may become engaged with more than one figure at the same time. As you leave each engagement, your opponent's figure may roll one die. For each crossed weapons symbol rolled, your figure takes one damage (see Example 12).
Example 12: Multiple engagements — When you move Chandra away from two opposing Pummelroot Elementals, your opponent may roll one die for each Pummelroot Elemental. Two crossed weapons symbols are rolled, inflicting two damage. You place two damage markers on Chandra's army card.
Action 4: Attack with One or More Figures on the Army Card (Optional)
Now it's time for you to attack with your Planeswalker, hero, or squad.
Who Can Attack?
Any figures on your chosen army card within range and with a clear line of sight (if necessary) can attack. If no figure on your army card meets these two conditions, then no attack is possible.
Before attacking with a figure, check the range and line of sight as follows:
Range. A targeted figure must be within the attacking figure's range. For example, with a range of 5, Chandra can attack any figure within five spaces from Chandra. A figure with a range of 1 can attack a figure only from an adjacent space. A double-space figure can attack from either space it occupies. When checking the range, don't count extra spaces for any difference in levels.
Engaged figures. If one of your figures is engaged with one or more other figures, your figure may attack only those figures. A figure does not need line of sight to attack a figure that it is engaged with or adjacent to.
Attacking around other figures. You may attack figures even if other figures are between your figure and the targeted figure, but you must have a clear line of sight to attack.
Line of sight. To attack a targeted figure, your figure must be able to "see" it from its location. Unlike range, the line of sight is an imaginary straight line between your attacking figure's target point and the targeted figure's hit zone; it has nothing to do with the spaces on the battlefield. If the targeted figure is behind the ruin or a cliff so that your figure can't "see" it, for example, then no attack is possible. The only exception to this rule is if a figure is engaged with or adjacent to another figure. A figure does not need line of sight to attack a figure that it is engaged with or adjacent to.
To determine if there is a clear line of sight, check the target point (the green dot on your figure's army card) and the hit zone (the dark gray area on the targeted figure's army card). Then get behind your figure and look to see if its target point can "see" any part of the targeted figure's hit zone. If so, there is a clear line of sight. If players cannot agree that there is a clear line of sight, they can roll the 20-sided die and let the high roller win the dispute.
Adjusting figures. Players may touch or move only their figures, and may do so only on their turns. For example, a player cannot move his or her figure out of the line of sight on an opponent's turn.
Example 13 shows how to determine if a targeted figure is within an attacker's range and line of sight.
Example 13: Range and line of sight — You want your Elf to attack Chandra. First, count the spaces from your Elf to Chandra. Chandra is five spaces away, so she is just within the Elf's range. Then check for a clear line of sight from your Elf's target point to Chandra's hit zone. A Flamewing Phoenix is in the way, but your Elf can still see part of Chandra's hit zone, so your Elf can attack.
How to Attack
The figures on your chosen army card attack one at a time, in any order. Each figure can attack only once, but each figure can attack the same figure or a different figure. Some figures have abilities that allow them to attack more than once.
Before you attack, consider height advantage, abilities, spell cards, and glyphs (if any), as explained below. (The you-snooze-you-lose rule: If you forget to do this, tough luck. Maybe next time, you'll remember!)
Height advantage: If the base of one figure is higher than the base of the other figure (no matter what their actual size or height), the higher figure has height advantage, and rolls one extra die for either attack or defense. When determining the height advantage, remember that glyphs do not add height to the spaces they are on. Water spaces are lower than land spaces.
Abilities: Check your figure's army card for abilities. Many figures have abilities that help them move, attack, defend, and more.
Spell cards: Sorceries played during Action 2 can modify your attack along with any enchantment cards attached to army cards.
Glyphs: Some glyphs give the attacker or the defender an advantage. See page 13 for more information on glyphs.
To carry out the attack, follow these steps:
- Announce which figure is the attacker and which figure is the defender.
- Check the power number on your attacker's army card, adding any extra dice for height advantage, abilities, spell cards, or glyphs. Then roll that number of attack dice. After you roll, the defender rolls the number of toughness dice on his or her defender's army card, adding any extra dice for height advantage, abilities, spell cards, or glyphs.
- Every crossed weapons symbol the attacker rolls counts as one hit. For every crossed weapons symbol (hit) the attacker rolls, the defender must roll at least one shield to block it. Important: for attack rolls, the attacker counts only crossed weapons symbols. For defense rolls, the defender counts only shields.
- If the attacker rolls the same number of crossed weapons symbols (hits) or less than the defender rolls shields, the attack is unsuccessful. The attacking and defending figures stay where they are, and that attack is over.
- If the attacker rolls more crossed weapons symbols (hits) than the defender rolls shields, the attack is successful. For each unblocked crossed weapons symbol (hit) the attacker rolled, the defender is dealt one damage. For each damage dealt, a damage marker is placed either on the base of the figure or on the army card, depending on whether the figure is common or unique. If the figure is common, then any damage markers go on the base. If the figure is unique, then the damage marker goes on the army card.
Using the Life Number
When a figure has as many damage markers as the life number on its army card or base, it is destroyed. (A figure with only one life is destroyed by only one damage.) The player who controls the destroyed figure places it in his or her figure graveyard. When all figures on an army card have been destroyed, the army card is placed in your army card graveyard.
Examples 14 and 15 show an attack and its outcome.
Example 14: An attack — One of your elves attacks Chandra. You roll three attack dice. Chandra has a height advantage, so she adds one die to her defense number. Your opponent rolls five defense dice.
You roll two crossed weapons symbols.
Your opponent rolls no shields.
Example 15: Outcome of an attack — Chandra is dealt two damage. Place two damage markers on Chandra's army card.
Chandra has four damage from a previous attack. She now has six damage markers, and is destroyed.
Action 5: Move the Turn Marker on the Turn Track to the Next Number
At the end of your turn, move the turn marker on the turn track to the next number. The player to your left takes the next turn.
Ending the Game
The game scenario sets the victory conditions for each game. However, if the game hasn't ended by the time you've played a certain number of turns, the player with the most points wins. See Scoring, below.
Scoring
In cases where scoring is necessary, each player scores points for each figure still on the battlefield. Total the PPF cost (price per figure cost) for all figures remaining to determine a player's score.
Glyphs
Depending on the battlefield you are playing, you may place glyphs on top of battlefield spaces either ability-side up or Planeswalker symbol-side up. Glyphs are stationary unless otherwise stated in a scenario. When one of your figures moves onto a glyph whose Planeswalker symbol is side up, stop there and turn the glyph ability-side up. The abilities on the glyph then take effect immediately. When your figure lands on a glyph whose ability is side up, it must stop. If it's a double-space figure, it must stop when its leading side moves onto it.
Some glyphs grant temporary abilities, while others grant longer-lasting ones. For each glyph your figure moves onto, follow the rules below.
Permanent Glyphs
The glyphs shown below are permanent. The ability of each permanent glyph is in effect for as long as a figure is standing on it.
- Glyph of Power (Power +1): All figures you control get +1 to their power.
- Glyph of Toughness (Toughness +1): All figures you control get +1 to their toughness.
- Glyph of Movement (Move +2): All figures you control get +2 to their move.
Temporary Glyph
The ability of a temporary glyph takes effect only once. When one of your figures moves onto this glyph, follow its rules, then remove it from the game.
- Glyph of Knowledge: Draw a spell card.
Terms and Clarifications
Abilities
Figures have abilities that keep the game exciting, challenging, and unpredictable. Always be aware of the abilities your figures possess; they can make a big difference in your game.
Figures
All creatures and Planeswalkers are figures.
Empty Spaces
Empty spaces are spaces that are empty. For example, spaces that contain ruins, figures, or glyphs are not empty.
Summoning a Double-Space Figure
When summoning a double-space figure, only one hex of the base needs to be within the 5 clear sight spaces.
Twisted Image
Switch power and toughness after all modifiers (such as glyphs, enchantments, and previously played sorceries) have been calculated.
Countering Spells
If a spell is countered, it has no effect and is placed in its owner's graveyard.
Clear Sight Spaces
Nissa's Keen Sight mentions "clear sight." To determine clear sight, use Nissa's target point. If she can see any part of your figures (not just the hit zone) within the 4 spaces, they are affected by Keen Sight. To determine clear sight from a double-space figure, you may count from any of the spaces the figure occupies.
Returning a Squad to Owner's Reserve
Only figures on the battlefield are returned to an owner's reserve. Any figures in the figure graveyard stay there. All attached enchantments are discarded to their owners' graveyards. All damage markers are removed.
Simultaneous Damage
If an ability or a spell card deals simultaneous damage, the player whose turn it is chooses the order. For example, Killing Wave deals three damage to all non-Zombie creatures adjacent to the target Planeswalker. The player whose turn it is chooses the order in which all adjacent creatures are dealt the damage. All damage is targeted damage.
Playing the Multiplayer Game
In the multiplayer game, each player rolls the 20-sided die to determine who goes first (roll again if there is a tie). The high roller goes first and places first. When placing, you must place your Planeswalker in a starting zone. Play passes to the left. All players place their Planeswalkers, and then the first turn begins. You cannot place your Planeswalker in a starting zone that is occupied by an opponent. The player who goes first in a multiplayer game draws a spell card on his or her first turn.
All other rules are the same as for the two-player game.
Team Rules
If you're playing a team game, teammates should sit next to each other on one side of the table, facing their opponents. Each team rolls once to see which team goes first. The high-rolling team goes first and places first. In some scenarios teammates can share starting zones. The player who goes first and places first is always the player sitting farthest to the left. The player who goes first draws a spell card on his or her first turn. Play passes to the left.
Teammates take separate turns and can discuss strategy, offer suggestions, look at teammate's spell cards, and so on.
Friendly figures are both figures you control and figures your teammates control.
Numbered teammates. Teammates are always numbered 1 and 2. If two teammates have hidden enchantments that would trigger at the same time, they are triggered in player number order, starting with 1.
Using Multiple Game Sets and/or Expansion Sets
Combining two or more game sets, or collecting expansion sets (look for in 2016), gives you lots of new options. You can create a supersized battlefield and play with any number of players. You can even boost the point value of your armies to match the bigger battlefield. But along with that extra excitement comes a few special rules:
Building Your Premade Army: Players may know exactly which armies they want, based on the game scenario, the cost values, their favorite figures, or other factors. The scenarios will call out the total army points to build to. All scenarios in this game set have a total build of 500 points per army.
When building an army, you must include one and only one Planeswalker. After you select your Planeswalker, select which army cards you want to include in your army. Each army card in your army must be of a color matching your selected Planeswalker, or be an artifact army card. The total of all army cards, including your Planeswalker card, cannot exceed the total build number for the scenario you are playing.
Unique Army Cards: If you're combining two sets of army cards, make sure that no player has more than one of the same unique army card in their army. (For example, your army can't include two Leyline Phantoms squads.) However, you and an opponent can both have the same unique army cards, such as one Leyline Phantoms squad, in both of your armies.
Common Army Cards: You can include two or more of the same common army card.
Building Your Spell Deck: Once you have selected which Planeswalker you would like to include in your army, you will then need to build your spell deck. Each spell deck must contain 12 cards. The total cost of the 12 cards cannot exceed 200. Each card in your spell deck must be of a color matching your selected Planeswalker.
Marking Your Figures: If you are playing with multiple sets or expansion sets, you may want to use a permanent marker to initial the underside of your figures' bases to remember who owns which figure.
The Battlefields
Choose a battlefield shown on pages 17-19 according to how many players you have.
Battlefield Key
Here are the different pieces you will use to build your battlefields:
- 6 Shandalar sand and water terrain boards
- 2 sand tiles (1 hex)
- 2 sand tiles (3 hex)
- Shandalar ruin A
- Shandalar ruin B
- Turn marker
The Tiles
The hex-shaped tiles come in two sizes. You'll link them and stack them as shown.
To link: Slide the notches into the grooves as shown.
To stack: Fit one tile on top of another as shown.
The Glyphs
In the battlefield diagrams, glyphs are represented by their key letters. When you build a battlefield that includes glyphs, follow the glyph key below to see which ones to use.
Glyphs Key
- Symbol-Side Up
- Ability-Side Up (example shown: Power +1)
Planeswalker symbol-side up: shown as a red hex marked with a question mark.
Ability-side up:
- Glyph of Power — blue hex marked "P"
- Glyph of Toughness — blue hex marked "T"
- Glyph of Movement — blue hex marked "M"
- Glyph of Knowledge — blue hex marked "K"
Battlefield 1: The Duel
For 2 players
In a duel, it's Planeswalker against Planeswalker in single combat. Magic is your best weapon, so summon your creatures, ready your spells, and sharpen your wits to claim victory in this arcane contest.
Goal: Destroy your opponent's Planeswalker.
Setup: Place glyphs ability-side up where shown (M = move, P = power, T = toughness). Each player brings a 500-cost premade army.
One player starts in the yellow starting zone. The other player starts in the orange starting zone.
Victory: The first player to destroy the other player's Planeswalker wins. If the battle reaches the end of turn 30, then the battle is over and the player with the most cost points on the battlefield wins (see Scoring, on page 12).
The turn marker track runs from 1 to 30. Start on 1, then move the marker at the end of each player's turn.
Battlefield 2: The Skirmish
For 4 players — 2 teams of 2 players
In a skirmish, two allied Planeswalkers square off against two enemy Planeswalkers. You and your ally will come together with a unique blend of magical talents to bring to bear against your opponents. Coordinate, and you will conquer.
Goal: Destroy your opponents' Planeswalkers.
Setup: Turn all glyphs Planeswalker symbol-side up, then shuffle them. Randomly place the glyphs Planeswalker symbol-side up where shown. Each player brings a 500-cost premade army.
One team starts in the yellow starting zone. The other team starts in the orange starting zone.
Victory: The first team to destroy the other team's Planeswalkers wins. If the battle reaches the end of turn 60, then the battle is over and the team with the most cost points on the battlefield wins (see Scoring, on page 12).
The turn marker track runs from 1 to 60. Start on 1, then move the marker at the end of each player's turn.
Battlefield 3: The Melee
For 3, 4, or 5 players
In a melee, it's every Planeswalker for him- or herself in a spell-slinging free-for-all. Your alliances will be temporary. Your grudges will be fueled. The only certainty is that, in the end, one Planeswalker will remain.
Goal: To occupy the power glyphs spaces (the purple spaces next to the 3 permanent glyphs) to score victory points when the game ends.
Setup: Place glyphs ability-side up where shown. Each player brings a 500-cost premade army.
Each player can start on any of the orange starting spaces.
Victory: The game ends after the turn shown on the turn track based on the number of players. For three players, the game ends after 36 turns. For four players, the game ends after 48 turns. For five players, the game ends after 60 turns. The player with the most total cost points on the purple spaces wins (see Scoring, on page 12).
The turn marker track runs from 1 to 60, with the end-of-game turn highlighted for each player count: turn 36 for three players, turn 48 for four players, and turn 60 for five players. Start on 1, then move the marker at the end of each player's turn.