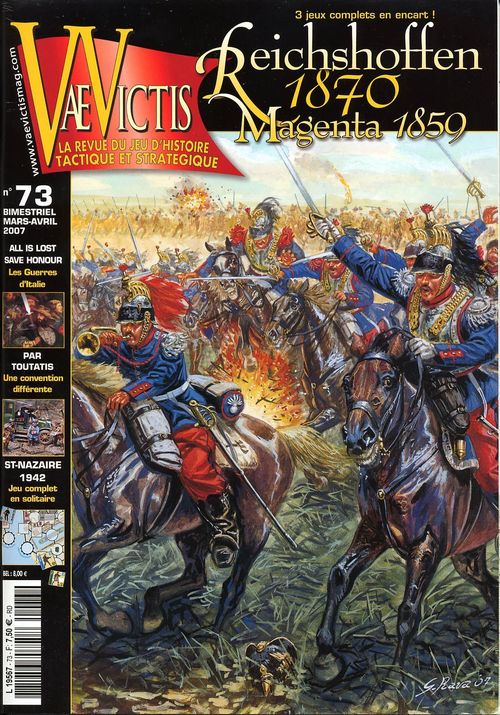
Magenta 1859
Magenta 1859 Rulebook
Table of Contents
Table of Contents
0. Generalities
0.0 Generalities
In Magenta, one player controls the Franco-Sardinian army of Napoleon III and Victor Emmanuel. The other player controls the Austrian army of Emperor Franz Joseph.
0.1 Abbreviations
For simplification, the abbreviation "hex" is used for hexagon in the rules. The game requires the use of a six-sided die (denoted 1d6 or d6).
0.2 Scales of the Game
A game turn represents one hour of real time, the number of turns depends on the scenario. A hexagon on the map is 600 m. Each combat point is equivalent to 500-800 men.
0.3 The Counters
- HQ counters have a combat bonus, a command value and a movement / command distance value in movement points. The back indicates that the leader has been eliminated and a replacement has taken the command.
- The Commander-in-Chief counter has an initiative bonus, an inertia value, and command movement / distance in movement points.
- A combat unit has a unit type (infantry or cavalry), a combat value, a number of step losses (which represents its level of morale / cohesion), and a movement value. The back indicates that the unit is disorganized. The L on some cavalry units indicates heavy cavalry. (heavy = lourde in French.)
- An artillery combat unit has a combat value, a number of step losses, a movement value and a range.
- An activation marker indicates the command value of the leader of the formation.
0.4 Tests with a die
As a general rule, as soon as a test is requested by the game (morale, activation, coordination, inertia, etc.), the player must roll a d6. To pass the test, he must roll a 6 or more by adding or subtracting from the die roll the modifiers indicated by the rules. If the final digit is less than 6, the test failed.
0.5 Morale test
All combat units have a morale value. During a morale test, the player tests as indicated in 0.4 his level of morale / cohesion indicated on the counter, plus any modifiers. If the final digit is less than 6, the unit fails and becomes disorganized or loses a step if it is already disorganized; if the result is greater than or equal to 6, the test is successful, the unit suffers nothing.
The modifiers are:
- +1 if the unit occupies protective terrain.
- +1 if the unit is stacked with its headquarters or the commander-in-chief.
- -1 if an enemy unit is present on the side of the unit, even without attacking.
- -1 per level of loss.
- -1 if not ordered.
- -1 if the unit is demoralized.
- +1 if stacked with a leader or adjacent to the CIC (rallies only).
- -1 if in range of enemy artillery (rallies only).
1. Units of Combat
The infantry and cavalry units are grouped in formations, according to their command, identified by the color on the counter and directed by a HQ. This organization intervenes for the activation rules, the units of the same formation always acting together (see 5).
Following a combat result, units may become disorganized, then the counter is flipped over. Units of two or more steps may also suffer losses; a loss marker "-1" or "-2" is then placed under the unit.
2. Counter Orientation
All units of infantry, cavalry and artillery follow rules of orientation (front of the unit) which influence movement and combat. They have three front hexes and three flank hexes. Unless they are in a town or village, in which case, their front extends over all 6 hexes.
Commanders-in-chief (see 8) and formation leaders (see 9) have no orientation and are always considered head-on.
3. Stacking
The stacking of units in a hex is limited to one cavalry or infantry unit plus one or two artillery units per hex, but it is possible to exceed the stacking limits during movement. The two artillery can be from different formations. A detachment is considered a normal unit.
When retreating, passing through a friendly unit disrupts it, but if it is already disorganized, there is no loss of steps. Leaders are not taken into account for stacking.
4. Sequence of Play
Magenta 1859 is played in a fixed number of turns defined by the scenario, each game turn being comprised of several phases.
A. Verification of Command
Each player checks that the HQs are commanded. Uncontrolled leaders are indicated by an appropriate marker (8.3). The chief commanders present on the map may move before the check if they pass their inertia test. The commanders in chief who come in as reinforcement this turn also move at this moment. This is the only time they can move.
B. Phase of Operations
Players will proceed, step by step, through several segments of operations (within the limit of the number of formation markers of each side). There are activation markers for each formation in the game. All the markers for the formations on the map or entering the map on a turn are put into a cup or bowl. One of the players will draw at random an activation marker of activation from those remaining in the bowl, except the first activation; that is chosen by the side that wins the initiative. When all formations have been pulled and activated, the operations phase is completed.
Determination of initiative for this round. Each player rolls 1d6 and adds the initiative bonus of his commander-in-chief. The player with the highest score wins the initiative (in case of a tie, the French player wins the initiative for Magenta). He will choose a formation that will be immediately activated, its activation marker is set aside. The other activation markers from both sides are put in a bowl and will be randomly drawn successively, except for reinforcement formations that have not yet arrived and remain out of the bowl.
If only one of the commanders-in-chief is on map, his side automatically has the initiative. If none of the commanders-in-chief are present on the map, no one has the initiative and you put all the activation markers into the bowl.
When a formation is activated, the artillery units of this formation can fire, then all the infantry units of this formation can fire, then all the units of this formation can move and finally fight according to the state of command of the formation (8.3 and 9.2), including the its leader. The formation cannot fire or move again in this turn.
C. Rallying Phase
"Uncontrolled" markers are removed from HQ counters. Disorganized units outside enemy ZOCs test their morale to see if they keep this status or not. The turn is then completed and the turn marker is advanced one space.
5. Activation of Formations
Each formation has an activation marker. At the beginning of the operation phase, both sides pull the initiative, the winner selects a marker that he will play right away. The other activation markers are placed in a bowl and will all be drawn, one by one, during this phase of operation.
A HQ and the units it commands are active when the player draws its activation marker during an operation segment. After having possibly tested the initiative of the HQ (see 9.1), units of this formation group can then act. The action of a formation is divided into three stages: shooting, movement, then fighting.
A formation may only be activated once per turn and a unit may move and attack only once per turn, with the possible exception of artillery defensive fire.
6. Zones of Control
All units except for HQs exercise a Zone of Control (ZOC) into its three front hexes.
6.1 Properties of the ZOC
A unit that enters an enemy ZOC stops its movement for the turn, but will not be forced to attack, and it is forbidden to go directly from an enemy ZOC to another enemy ZOC. So a unit in an enemy ZOC encircled by enemy ZOCs will not move. A ZOC is not exerted into terrain where a unit cannot go (e.g. escarpments). Movement out of a ZOC costs half the movement of a non-disrupted unit, rounded up, but at least one hex, or the entire movement allowance of a disorganized and/or uncontrolled unit. The unit is withdrawn from one hex, not into enemy ZOCs (from the same enemy or another). A disorganized cavalry unit cannot enter an enemy control zone.
The presence of a friendly unit in an enemy ZOC cancels the latter with respect to the command and movement restrictions.
Finally, a unit that retreats into a ZOC after a combat result can become disorganized and suffer a loss (see 11.3).
6.2 Flank Hexes
The three rear hexes of an enemy unit do not have a ZOC. They do not prohibit movement and a unit that moves back into one of these hexes due to a combat result does not incur any penalty.
7. Movement
7.1 Generalities
A unit or HQ of an active formation may move all or part of its movement potential, depending on the state of its command (see 8.3 and 9.1). Entry into a hex costs a certain number of movement points (MP) to the unit that is moving. The costs of different terrain hexes are shown on the terrain table provided in the rules.
Movement points are not cumulative from one turn to another. The movement of one unit must be completed before moving another unit of the same body. CICs follow their own rules of movement.
7.2 Movement of the Commanders in Chief
Commanders-in-chief move their movement potential during the command verification phase if they pass an inertia test, but they are not allowed to enter a hex adjacent to an enemy not occupied by a friendly unit. An inertia test is to roll a die and add the leader's inertia value; on a 6 or more the commander can move. If an enemy unit is present within a radius of three hexes around a commander-in-chief during the command verification phase, he will be able to move normally without testing his inertia.
7.3 Change of Orientation
The change of orientation is free and can be done at any time during the movement phase of a unit, but not during any other time, even before a defensive shot. It is allowed within certain limits during advances and retreats before and after fights.
7.4 Arrival of Reinforcements
Some troops on both sides arrive as reinforcements. On the turn of their arrival they can be activated normally as a formation, but are not in command and must test the initiative of their HQ to enter the map. To simulate arrival in a road column, each unit after the first must subtract the cost of the entry hex terrain from its movement, (1/2 for the road or 1 for a clear field) multiplied by the number of units that have already entered.
Example: If four units enter on a road, the first pays 1/2 point, the second 1 point, the third 1.5 points and the fourth 4 points to enter the map.
If the formation does not enter due to failure of the initiative test, it will retest the next turn with a bonus of +1 cumulative for each turn it failed to enter. If units come as reinforcements after part of the formation has already entered, these units come into play on the scheduled turn and move normally when drawing their activation marker. They move towards their HQ to be in command.
8. Commanders in Chief
8.1 Generalities
Each commander-in-chief has a command distance (expressed in cavalry movement points) that represents his ability to control formation HQs. This value is equal to his movement capacity: 8 MP.
8.2 Command
To be commanded, a HQ must be in the command path of its commanding officer. This path is traced from the latter to the HQ, by a hex path of 8 points of maximum movement distance, using cost of cavalry unit movement and it must not pass through enemy ZOC that are not occupied by friendly units. If the commander-in-chief is in a city, 2 movement points can be added, for a total of 10 MPs.
The commander-in-chief can directly command a number of units (no formations) equal to his inertia value. These units must be within the command range of the Commander-in-Chief, without having to be within range of their HQ (if they have one). Each unit will normally be activated with its formation when its marker is pulled and will be considered as normally activated, regardless of the status of the leader of its formation (if it has one).
8.3 Formations Out of Command
A HQ that is not commanded at the start of the game turn receives an "Uncontrolled" marker. When this HQ is activated during the operations phase, the units of its formation will only be able to act effectively if the leader passes an activation test.
Activation test: An uncommanded leader is activated if the player achieves a 6 or more with 1 d6 by adding the command value of the leader. If successful, all units of this formation can act normally. In the event of failure, the HQ will not be able to move, but artillery barrages are allowed to provide defensive support during an enemy activation.
The units of his formation will act as non-commanded units (9.2). If the HQ is in an enemy ZOC, it can still move back one hex if the next hex is not in an enemy ZOC.
8.4 Death of the Commander in Chief
A commander-in-chief is eliminated (for the game at least) when the units with which he is stacked are eliminated entirely by combat, otherwise he follows a unit that retreats. If during enemy movement he becomes adjacent to an enemy without being stacked with a friend, he is placed immediately on the nearest friendly unit. Since a commander-in-chief does not give a combat bonus, there is no point in having him participate in an attack. None of the chief commanders are replaced if they die.
9. Formation HQs
The HQs/leaders represent the different commanders of the formations of each army. They each command several brigades. A HQ is activated according to the activation (see 5) and command (see 8) rules. A leader can only be activated once per turn and moves as a cavalry unit.
9.1 Unit Command
When activated, a HQ can activate all the units of his formation that are commanded at the beginning of activation. To be commanded, a unit must be in the HQ Command Path, following the same principles as Rule 8.2, but with 6 Cavalry Movement Points including the cost of the terrain (+2 MP City bonus applies).
The unit command check is done at the beginning of the activation of the formation, before any movement, which means that if a unit is determined to be not commanded, it is not commanded for the rest during the whole phase, even if the HQ moves to within command range. To order, a leader does not need to be stacked with units of his formation.
9.2 Units out of Command
A non-commanded unit at the time of activation of a formation cannot enter an enemy ZOC. It can still move, but at most half its movement potential rounded down. Any movement must in no way put it beyond the reach of the command of its headquarters; if it is already out of reach it must get closer in hex count if it moves. If it is already in a ZOC, it can either disengage, attack with possible attack co-ordination (see 11.1), or do nothing.
An uncontrolled unit that disengages from an enemy unit's ZOC uses all of its movement potential to move back one hex to a hex not in an enemy ZOC (see 6.1).
9.3 Death of a Commander
A HQ is eliminated when the units with which it is stacked are eliminated entirely by combat or by a post-combat mortality test in which they participated. The test takes place at the end of the fight. The player rolls 2d6. On a 12 without modifiers, the leader is killed.
For HQ, participating in a fight means coordinating an attack or contributing its combat bonus. It is enough that the HQ is present and that the player has declared that it participates. A HQ can also be eliminated following artillery fire on its hex. If the result is "T" or better, it tests its elimination.
An eliminated HQ is immediately turned on its back, indicating the replacement by an aide-de-camp (identified by a replacement bar). The player places the HQ on a unit of its formation. A killed aide de camp is replaced in the same way. In case of retreat of the troops with which it is stacked, a HQ that does not die follows its troops.
9.4 Demoralization of Formations
A formation that suffers a specific loss threshold becomes demoralized at the beginning of the next turn. This threshold is shown in a table provided with each battle. The summary table shows the number of steps that a formation can lose before it becomes demoralized.
The demoralized formation can no longer voluntarily enter a hex adjacent to an enemy unit. If that is impossible, they do not move. In addition, they routinely undergo an additional -1 to all their morale tests. Finally they must move toward their friendly map edge (see special rules of the scenario) at the rate of at least one hex per turn. That is, trying to finish their movement closer to the friendly map edge than they started. Once off of the map, they do not come back into play. An uncommanded leader (and his formation) who has missed his activation test and is therefore not supposed to move, still moves a hex towards the edge of the map.
10. Artillery
Artillery attached directly to a brigade has been generally included in the unit values and is not represented by a counter. Only corps or army artillery is represented by counters. Each artillery unit is equipped with:
- A firepower value that indicates the column of the combat table that will be used to resolve shooting or defensive support and that will be used for combat.
- A movement value to move according to the normal rules.
- A maximum range that is used to know which enemy units can be shot at. This range must respect line of sight.
10.1 Artillery Fire
Artillery units may fire at different times during an operational phase, but only once per activation phase. They can perform a barrage shot during their activation or provide defensive support of any unit in their formation at any other time during the turn.
- Barrage shots: The shooting phase occurs when a formation is activated and before any movement. Any enemy unit within range can be bombarded following the normal combat procedure (see 11.3). But retreats, possibly triggered by some combat results, will not be performed. An artillery unit may change orientation by one hexside before shooting. Artillery firing on a hex containing an artillery unit and another unit, chooses its target before resolving the shot. The result will only apply to the selected unit.
It is not possible to combine the shots of several units of artillery of the same formation into a single attack, but the same target can be bombarded several times in succession. A unit that fires in a barrage fire can move normally immediately afterwards. An artillery unit cannot fire during the assault phase and therefore does not participate in combat at the same time as the infantry or cavalry. It fires only at the beginning of the activation phase, so it will not advance after a fight even if the unit with which it is stacked advances.
- Defensive Support: The firing value of an artillery can be added to a defending formation unit. For that, it is necessary that the artillery is within range of a unit which attacks and that the attacker is in its line of sight. For defensive support, the maximum range is half of the maximum range rounded up. This artillery value is added to the defender and may be shared between attacking attackers as for normal defensive combat (see 11.2). The potential adjacent artillery bonus will then be added to each defensive battle, but an artillery unit can only give one defensive support per activation. An artillery unit that is attacked alone in a hex cannot change direction before firing, since it is only allowed during the movement phase, and it is automatically and immediately eliminated if the enemy survives its defensive fire.
10.2 The Procedure
Range (Diagram 3): The maximum range of artillery is indicated in hex numbers on the unit. Its range extends from its front three hexes. When the shot has half round range rounded down (one hex for the French and the Austrians, two hexes for the Prussians), in order to simulate the effect of cannister or grape shot at close range, a +1 is added to the shooting in attack as well as in defense.
Line of Sight: To reach a target, it must be in line of sight of the artillery. This line of sight is blocked by any enemy unit or any hex obstacle (village, town, wood, higher or equal elevation), excluding edges, located between the artillery and its target.
These elements block the line of sight if they are at the same elevation level or higher. If they are located on a lower level, they block the view if they are adjacent to the target. If an artillery unit is placed on an elevated position with respect to its target, every hex between the artillery and its target must be of strictly lower level and not equal to the height of the artillery.
A shot is always allowed on an adjacent target. If the line of sight passes between two hexes and one is not blocking, the target can be seen.
11. Combat
Combat takes place after the attacker moves. He may attack anyone in his three hexes abreast without being obliged to attack all adjacent enemies, unless he wishes. However all defenders adjacent to the attacker even if they are not attacked will be able to fight defensively unless they are attacked during this activation by another attacker.
At the beginning of the combat phase, the attacker indicates his attacks knowing that only units of the activated formation can fight. The fight always takes place in two stages: the defender acts first to try to repel the attacker. If he succeeds the fight stops, if he fails the attacker performs his assault.
11.1 Combats with Multiple Attackers
When several attackers are adjacent to the same defender, it is possible either to try to coordinate their assault if a HQ is present (see 11.2), or to attack each in turn, the player deciding on the order of his attacks: knowing that each fight will be resolved entirely before the next. If the fight rolls back the defender, subsequent fights will not take place. To coordinate an attack, a HQ must be stacked with one of the attacking units and must pass a coordination check: 6 or more with a die by adding its command value. If successful, the attackers will group their attack values and there will only be one defensive combat. If it fails, each attacker will attack individually.
11.2 Combat Procedure
Defensive Combat: The defender's unit may attack each adjacent enemy unit that will assail it following the normal combat procedure by sharing its combat value. If a defending unit adjacent to the attacker is not itself attacked, it may add its combat value to that of the attacked unit, or even share it between several units attacked. The attacker's ground protection value is always 1. The defender may retreat before the fight instead of fighting (see 11.4). On an enemy flank attacker, the defender's combat value is divided by two, rounded down, with a minimum of 0. If there are several attackers, the defender can share its combat value according to his choice. Any factors applied to an attack on its flank will have a value divided by two rounded down; and that it can attack with a power of 0. A fight with a value of 0 or less, depending on the modifiers, is still resolved on the 0 column.
Example of defensive combat: A defender on clear terrain has a 5 combat value and is attacked by three enemy units, one of which is attacking coordinated (a leader is present and has passed his coordination roll). During his defensive fight, he can either concentrate his 5 points against one of the enemies in front, or attack the first at 3 and/or the second at two, or 2 on the first, 1 on the second and 2 which becomes 1.
If the leader had missed his co-ordination roll, the attacker would have had to choose a first attacking unit with all defensive combat going against it alone.
Assault: If not coordinated, all attacking units individually attack the defender following the normal combat procedure, in an order chosen by the attacker, the results then being applied successively. The presence of the formation leader on one of the attacking units makes it possible to coordinate the attack of several units on the same enemy. The combat values are combined for a single result. The leader must pass a coordination test as explained in 11.1. The attacker is not obliged to group his attacks but can solve them individually according to his choice and decides when he announces all his attacks. The advance of a unit participating in the combat at the choice of the attacker is obligatory if the defender retreats, and it is obligatory for one unit of cavalry that participated in the assault. The advancing attacker may reorient to a hexside. Even if an attacking unit must move backward, the defender cannot occupy his hex, but will be able to reorient himself to one hexside. An artillery unit cannot advance after combat. At the end of a fight, do not forget to check the possible deaths of leaders, if they participated by coordination or a bonus (see 9.3).
Assault example: (Continuation of the Defensive Fighting Example.) After the defensive combat, there are two attackers of 6 and 7 combat value attacking in front. As indicated, a leader is present (with +2 combat bonuses) and has passed his coordination roll. The two attackers add their value 6 + 7 = 13. This value is divided by the terrain which is clear, therefore divided by 1 that is 8 which is the maximum column. A 5 is rolled. The result is automatically D + 1. The defender's counter is turned over and a "-1" marker is placed under it. If the defender had been in a village with 2 protection, the combat power would have been 13 divided by 2, or 6 on the combat table.
11.3 Battle Sequence and Results
Each unit uses its combat value divided by the value of the terrain (always considered equal to 1 in the case of a defensive fight), rounded down. This combat value is used on the combat table with the roll of a die that can be modified by the level of unit losses, the flanking, the leader bonus. All modifiers are added before using the combat table. If there are multiple terrain types in the hex, the defender takes the best, but he also counts hexside bonuses.
The possible results of the fight are: D, T, or D + 1. - = Nothing. The war continues.
- D = Disorganization. The counter is flipped or suffers a step of loss if already flipped. If the maximum level of losses is reached the unit is eliminated from the game. A unit that is not in terrain with a protection above 2 immediately retreats one hex. If that hex is already occupied by a friendly unit, the occupying unit is disorganized. Otherwise no other effect, and the retreating unit moves back one more hex. If the retreat is impossible because of an enemy unit or impassable terrain, the unit takes an additional step of loss and stays in place. If the hex is in an enemy ZOC, the unit must lose one level of loss. Stacked artillery with a friendly unit that must retreat is immediately eliminated.
It is possible to refuse the retreat by passing a morale test. In the event of success the unit, in attack as in defense, will not fall back but will suffer an additional loss. If the morale test fails, the unit moves back as indicated by following the standard rules of retreat, detailed above. The retreats are resolved by the owner of the unit following the following rules: The retreat must take place towards the friendly map edge, indicated in the special rules of the battle, it must avoid enemy ZOCs and friendly units if possible. If all these rules are respected and the retreating unit can choose which hex to retreat into.
-
T = Test for Disorganization. The unit tests its morale with a d6 and possible modifiers (see 0.5). In case of success nothing happens, in case of failure the unit follows the result D. If an artillery unit is stacked with another unit, only the other unit tests morale. The artillery will suffer the results depending on the other unit, that is to say, it will disappear in case of defeat of the defender. In the event of a retreat by an attacker following an unfavorable defensive combat, a stacked artillery remains without damage.
-
D + 1 = The unit automatically takes a loss and suffers in addition the result D as explained above. If an artillery unit is stacked with another unit, it cannot suffer the loss but will be eliminated if the defender retreats.
In case of advances after combat, a stacked HQ is not obliged to follow the unit. He can thus stay to give his attack bonus to other attacks.
11.4 Retreat Before Combat
It is possible to retreat before each fight instead of doing a defensive fight if the unit has a movement potential equal to or greater than that of the attackers. The unit retreats one hex and becomes disorganized, or loses a step if it was already disorganized, if it does not have a higher movement potential than at least one of the attackers. Thus a cavalry unit can retreat from an infantry attack without becoming disorganized, but a cavalry unit in front of a cavalry unit and an infantry unit will be disorganized. The attacker can occupy the hex. The retreat must be done outside the enemy ZOC, even if occupied by a friendly unit, and the unit may reorient itself on a hexside.
11.5 Cavalry Charges
Cavalry units attack or defend only by charging, which is treated an infantry combat as in 11.2, with the possibility of coordination even with the infantry, The defensive combat is called a defensive counter-charge and the assault called a charge. The following changes apply in addition:
- A charge is forbidden against terrain where the cavalry cannot go or cannot cross.
- To charge, the cavalry must not have spent more than half of its movement points (for light cavalry, 3 MP maximum).
- The charging cavalry (not a defensive counter charge) is automatically disorganized at the end of the fight if the fight has not already disorganized it. If it is already disorganized after the fight, it does not suffer any loss. If it charges an enemy cavalry that retreats before combat, it is not disorganized.
- A disorganized cavalry cannot charge offensively, but it can counter charge defensively. In addition, a disorganized cavalry cannot enter an enemy controlled hex (ZOC).
12. Rallying
During the rally phase, all unorganized units may attempt to reorganize themselves. That is, put the unit back on its front, but in no case recover steps of loss. You must not be adjacent to an enemy and must succeed in a moral test possibly modified as for the combat results. There is an additional modifier of -1 if the unit is within range of enemy artillery. Also a -1 for an unit out of command and a +1 if the leader of the formation is adjacent.
In case of failure, the unit remains disorganized but does not lose a step of loss.
13. The Battle of Magenta
The battle starts at 10 am in the morning and continues to 7 pm in the evening, inclusive. So the game has 10 turns of one hour each.
13.1 Initial Placement and Reinforcements
During the initial placement and on the arrival of the reinforcements, the players choose the orientation of their units.
13.2 Victory Conditions
Hold more hexes of Magenta. Each enemy corps demoralized counts as a hex of Magenta.
At the end of the game, both sides add Magenta hexes (there are three) and the enemy corps demoralized. The highest count wins. In case of equality it is a draw.
13.4 Special Rules
Historically MacMahon took a long time to move forward and engage in battle, wanting to keep his divisions online and have his left flank covered by the Sardinian army. To simulate this slowness, during his activation roll, MacMahon will have a penalty of -1 die, if the Fanti Division has not yet entered the map. This penalty will disappear at the moment the first unit of the division Fanti arrives.
The 2nd Division of the Guard officially part of the Imperial Guard is attached for the duration of the battle to the II Corps. It is activated with MacMahon.
Note: the source document has no section 13.3; the numbering above follows the printed rulebook.
13.5 Supply Lines
- Austria Hungary: Units retreat to the east edge.
- French and Sardinia: The W Corps and the Sardinians retreat back to the north and east between hexes 0103 and 1501. The other units retreat to 0117.
13.6 Terrain
The canal and Ticino are only traversable across the bridges. Cultivated terrain hexes cost 2 movement points unless traversed by a road. They do not interfere with the line of sight of the artillery. The fortifications west of Ticino around San Marco are ancient Austrian fortifications and have no influence on the game. Magenta Cemetery in 1912 is treated as a village hex.
Tables
Modifiers for Morale and Rally Tests
- +1 for protection ground 2 or greater
- +1 if stacked with the formation leader or CiC
- -1 per level of loss
- -1 if not in command
- -1 if there is an enemy on the flank
- -1 for heat
- -1 if the formation is demoralized
- +1 if adjacent to the head of the formation or the CiC (rallies only)
- -1 if within range of enemy artillery (rallies only)
Protection Value of the Terrain
- Clear level 1 to 3, cultivated = 1
- Wood, village, clear level 4 and 5 = 2
- City = 3
Note: For defensive battles, the ground protection is always 1.
Combat Column Modifiers
- -1 per level of loss
- -1 if enemy higher than at least one of the attackers
- +1 if enemy lower than at least one of the attackers
- +1 for each column greater than 8
- +x leader bonus (except for artillery fire)
- +1 if the artillery is adjacent to the enemy
- +1 if at least one of the cavalry is heavy cavalry
- +2 for the attacker if at least one flank of the defender is attacked
Modifier to Defense Value
Combat value divided by 2 (lower rounding) against an enemy on the Flank.
Terrain Effects Table
| Type | Effect on Movement | Block Line of Sight? | Combat Col. Shift |
|---|---|---|---|
| Level 1 clear | standard | No | none |
| Level 2 clear | standard | No | none |
| Level 3 clear | standard | No | none |
| Level 4 clear | standard | No | none |
| Change in elevation | +1 MP | No | -1 versus uphill; +1 versus downhill |
| Escarpment | movement & ZOC blocked unless crossed by a road | No | combat prohibited |