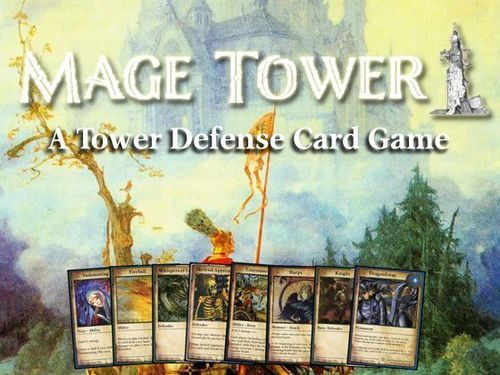
Mage Tower, A Tower Defense Card Game
Mage Tower, A Tower Defense Card Game Rulebook
Table of Contents
Table of Contents
Game Components
Here's what should be kept in each of the four sections of the Mage Tower box:
Section 1
Basic Cards (30): 12 Archers, 12 Elite Archers, 6 Knights.
Prize & Confusion Cards (38): 9 Summoning, 9 Intellect, 9 Gloryseeking, 11 Confusion.
Demonspawn Pile (26): 9 Demonspawn, 12 Monster-Attack Placeholder Cards, 5 Token Cards.
Section 2
Monster Decks (79): 48 Monsters, 31 Co-Op Monsters.
Section 3
Draft Deck (166): 166 Unique Draft Cards.
Section 4
20 Dice, 24 Gems.
2 Player Game Setup
- Give each player 2 Archers, 2 Elite Archers, and 1 Knight.
- Also give each player 8 random cards from the 166 card draft deck so they now have a 13 card deck. However, for your first few games don't use the cards with the advanced icon on the bottom of the card. (The Advanced Card Icon is a small star symbol at the bottom center of the card.)
Advanced players lay out 8 cards at a time and take turns picking the cards they want until each player has 8 cards. They also are able to use "Advanced Icon" cards.
- Give each player a 24 card monster deck with four of each monster (Orc, Hellhound, Ogre, Warlock, Demon, Giant).
Game Setup (Play Area)
Each player places their monster and player deck in front of them to their right. Then place five piles of cards to the side of the play area:
- Three prize card piles of 9 cards each (Summoning, Intellect, & Gloryseeking)
- A pile of the 26 cards with the "Demonspawn Pile" banner (with the 9 "Demonspawn" cards on top).
- A pile of all 11 Confusion cards.
Layout: each player has a "Monster Board" of monster slots in front of them and an "In Play" zone near their player deck. Each player has a Monster Deck, Player Deck, and two discard piles (one for the Player Deck, one for the Monster Deck) to their right. The Special Cards piles (Summoning, Intellect, Gloryseeking, Demonspawn, Confusion) are placed to the side of the play area.
Each player begins the game with 20 life, 0 gold, and a starting hand of 2 cards.
Notes on Game Setup
- The Demonspawn pile is a pile of cards that contains every card that has a yellow triangle in the top left corner that says "Demonspawn Pile."
- Leave the "Demonspawn" cards on top of the pile. You'll only need to use the other cards if a card tells you to or if you play a 3-4 player game and someone gets a Monster-Attack card in their deck (see page 15).
- If any player has a card with a purple triangle in the corner that says "Gamestart Ability", make sure to do what it says in the purple box on the card before the game starts!
- The actual "Demonspawn" cards are only put in play when the "Demon" monster card uses its ability. Demonspawn always go back to the Demonspawn pile when they leave play.
Game Variants
Playing with 3-4 or more players
- Share a single 48 card monster deck.
- When drafting, each player is given 8 hidden cards. They pick one and place it face down, then pass the rest to the next player. This continues until each player has picked 8 cards.
- The alternate game-ending condition happens if the 48 card monster deck is shuffled twice for 3 players, three times for 4-5 players, and four times for 6 players (see page 16 for more info on the game end conditions).
Co-Op Mode (Vs. the orange deck)
- Each player gets 13 random cards from the draft deck that do not have the Boon type and chooses 8 to use with their 5 basic cards as their deck.
- Players have a shared total of 20 life.
- The co-op deck takes a turn, then each player takes a turn.
- On the co-op deck's turn: For a solo player reveal 4+ points of monsters, two players reveal 10+ points, three players 15+, four players 20+. Going over the point value in a turn is okay.
- Attack cards work as normal but the attack part doesn't do anything since the monster deck is not a player, and your allies aren't considered "other players".
- When a card or effect simply says it "destroys" a monster, it deals 5 damage to that monster instead.
- If you make it through the 29 card monster deck and kill every monster, you win.
Solo Mode (Vs. the red monster deck)
- Assemble your deck like in co-op mode.
- Make a monster deck with 6 of each monster.
- Reveal 11-13 points of monsters a turn. If you go over, set that monster aside and put it back on top of the deck when you're done revealing.
- Kill every monster in the deck to win!
Phases of a Turn
Beginning of Turn Phase: Draw two cards, gain one gold.
Monster Phase:
- Any angry monsters damage you equal to their attack value and are discarded.
- Any non-angry monsters become angry.
- Add 10-12 points of new monsters to the monster board, each one in the closest slot after the other monsters.
Casting Phase: Use up to 7 energy to play cards & abilities, attack once with each Defender (closest monster only), buy & play prize cards (do these things in any order).
End of Turn Phase: Discard any Ability cards played. Remaining energy is lost. Damage does not go away at end of turn. No max hand size.
1. Beginning of Turn Phase
Draw two cards (even on your first turn so you will have four cards). Gain 1 gold. If you ever need to draw or reveal cards from your deck while it's empty, shuffle your discard pile and put it face down as your deck. Do the same for the monster deck when it's empty.
2. Monster Phase
a. (Parts a. and b. don't matter for the first turn because you won't have any monsters on your monster board yet. Skip to part c. on the next page.)
If you begin the Monster Phase with monsters on your monster board, any angry monsters attack you equal to their attack value. A monster's value is shown as Attack/Health (e.g. 2/3: 2 is the Monster Attack, 3 is the Monster Health). An angry monster (e.g. a 2/3 Orc) deals its attack in damage (2) to you and is discarded.
b. Non-angry monsters become angry and move closer to fill any empty monster slots. (In the illustrations, angry monsters are shown turned upside down.)
c. Time for new monsters to come out. The monster board has eight slots: Closest Monster Slot, 2nd Closest, 3rd Closest, 4th Closest, 5th Closest, 6th Closest, 7th Closest and 8th Closest Monster Slot.
Take the top card of your monster deck and place it into the closest open monster slot (behind all other monsters). Continue until you've added 10-12 points of new monsters (the point value is the number in the circle in the card's corner). For example, 5+3+3 = 11, or 5+5 = 10. A third monster that would bring the total to 13 is not added.
When a monster would put you over 12 points for the turn, discard it and keep going.
Example (partway through the game): the two angry monsters in the bottom right attack us for 1 and 4 damage respectively (a Hellhound 1/2 and a Demon 4/4), then are discarded. The other three monsters move forward and become angry, then we add two new monsters that happen to add up to 10 points because they are Giants worth 5 points each. We had better kill the three angry monsters before next turn or we'll be taking more damage. (Rules Note: You can have more rows of monsters if these rows fill up.)
3. Casting Phase
Every card has an energy cost in the top right corner. Each casting phase you have 7 energy to spend to play cards. Examples: 3 + 4 = 7 energy (good); 1 + 3 + 2 = 6 energy (good); 5 + 3 = 8 energy (too much energy).
The different types of cards you might play during the Casting Phase:
Ability Cards & Arrow Damage
When you play an Ability card, do what it says on the card. Then, leave it in play until the End of Turn phase when it is discarded.
Many cards deal arrow damage, shown by the "-->" symbol (e.g. "Deal 3 damage -->."). Arrow damage attacks the closest monster. If it kills that monster, the extra damage carries over to the next closest monster until it's all used up.
Arrow Damage Example
Say you play Elite Archer, an Ability card that simply deals 5 damage -->. On a monster board with a Warlock (2/2) closest, another Warlock (2/2) second closest and a Giant (5/5) third closest:
- The Warlock closest has 2 health, so he takes 2 damage, dies and is discarded. We started with 5 damage --> so we have 3 damage --> left.
- The middle Warlock takes 2 damage and is discarded. We only have 1 damage --> left.
- The last 1 damage --> is dealt to the Giant.
Damage is permanent. Only cards and abilities that deal --> damage have their damage carry over to the next monster.
Card Types
Defenders
Defenders, like monsters, have attack and health values, but they fight on your side! (For example, a Knight is a Basic Defender 3/4: attack 3, health 4.)
Defenders stay in play until they die by taking damage equal to or more than their health, then they are discarded.
A defender can attack the closest monster once per turn, any time during your casting phase, even the turn you play them. The monster and defender deal damage to each other equal to their attack values. (Extra damage doesn't carry over to the next monster.) You can choose not to attack with a defender. Defenders only interact with monsters during your casting phase (they can't stop monsters from hurting you in the monster phase.)
Example: a Knight (3/4) fights an Orc (2/3): the Knight deals 3 damage and the Orc dies; the Orc deals 2 damage to the Knight.
Permanents
Permanents are cards that stay in play like Defenders, and often have activated abilities. Once played, they stay in play unless something destroys them.
Example: Element Cannon (cost 2), Permanent: "Pay 2 energy, Sacrifice a defender you control: Destroy the closest monster." Element Cannon lets you pay 2 energy and sacrifice (destroy/discard) a Defender you have in play to destroy the closest monster. Play this ability any time during the casting phase and as much as you want or are able to.
Rules clarifications
- You can only play cards and activated abilities on your turn, during your casting phase.
- Cards only affect your own monsters or in-play zone unless they say otherwise.
- Sacrificing something causes it to be killed/destroyed. "Killed" and "destroyed" are the same thing, they cause it to be discarded.
Prize Cards
Every turn you gain 1 gold. You can use gold to buy prize cards from the prize card piles. There are three prize cards:
- Intellect (3 Gold): Draw a card. Draw another card if you didn't buy Intellect this turn.
- Summoning (4 Gold): Gain 2 energy. Draw a card if you didn't buy Summoning this turn.
- Gloryseeking (4 Gold): Deal 2 damage -->. Draw a card if you didn't buy Gloryseeking this turn.
The gold cost of a prize card is on the type line. Pay that much gold to buy it.
Prize cards have 0 energy cost. When you buy a prize card, it is played immediately and works like any other ability. At the end of the turn it is discarded and thus becomes part of your deck.
Prize cards have an ability that lets you draw a card if you didn't just buy it. You'll benefit from this when you draw the prize card from your deck later!
Monster-Attack Cards
Monster-Attack cards are monster cards that YOU play by paying the energy cost in the top right corner, just like any other card. They go directly onto the opponent's monster board in the closest open slot behind the other monsters, but don't become angry that player's next turn (they take two turns to become angry). They go back to your discard pile when they leave play for any reason. (These cards never count towards the 10-12 points of new monsters that players must add each turn.)
Examples: Harpy (cost 2, 2/2): Comes into play onto each opponent's monster board and doesn't become angry their next turn. At the beginning of this player's turn, Harpy deals 2 damage to the Defender with the lowest remaining health that this player controls. (They choose if tied.) Meat Grinder (cost 0, 3/3): Comes into play onto each opponent's monster board and doesn't become angry their next turn. Orc Chieftain (cost 5, 2/3): Comes into play onto each opponent's monster board and doesn't become angry their next turn. When you play Orc Chieftain, deal 3 damage to the closest monster on your own monster board. Other Orcs and Ogres on this player's monster board get +0/+1.
In 3 or 4 player games, use the placeholder cards from the Demonspawn pile to represent the Monster-Attack card for the third and fourth players, and return them to the Demonspawn pile when they leave play.
Equipment Cards
Equipment cards are attached to one of your Defenders when played and usually provide a benefit to that Defender. They are discarded when the Defender dies. You must have a Defender in play to play an Equipment card. They also have an ability that lets you pay 2 energy and discard them from your hand to draw a card. This is useful when you don't have any Defenders in play. ("You may pay 2 energy and discard this Equipment from your hand to draw a card.")
4. End of Turn Phase
- First, ability cards in play are discarded.
- If your deck is empty, shuffle your discard pile and place it face down as your deck.
- Any remaining energy is lost. There is no maximum handsize.
When the monster board is empty, any --> damage is dealt to each opponent (only --> damage). If a Defender attacks, their damage is dealt to each opponent and they take 2 damage for attacking.
How Does the Game End?
- Players are eliminated when they have no life left. The last player standing wins!
OR
- After the 2nd time a player empties their monster deck and has to reshuffle, each other player takes one more turn then the game ends. The player with the highest life wins!
In 3 player games the 48 card monster deck must be emptied and reshuffled twice, and in 4 player games it must be emptied and reshuffled three times.
Mage Tower Card-By-Card FAQ
A Note On Card background colors - These don't affect gameplay, they just represent what the card does: Green = Helps survive against monsters, Black = Affects other players, Blue = Does something that doesn't help survive against monsters, White = Defender or works with defenders, Red = Monster, Yellow = Affects other players during their turn, Orange = Co-Op Monster.
- Angry Mob - The 2 damage --> is done on YOUR monster board, then Angry Mob is placed onto the OPPONENT'S monster board.
- Bloodblade - The Demonspawn is just a defender while under your control, it doesn't get "angry" or anything.
- Bodysnatcher - Cards and abilities still in play are not counted as part of your deck or discard. When Bodysnatcher attacks as --> damage, only the closest monster attacks it back, but Bodysnatcher's damage carries over to the next monster(s) if there is extra damage, just like --> damage.
- Bounty - If you use another card to play this multiple times at once, it does not create multiple copies of the card, you simply re-choose which monster it will be attached to.
- Burning Sensation - Dealing "1 damage for every 4 cards" means dealing damage equal to the cards counted divided by 4, rounded down. Cards in play or in hand are not counted.
- Chain Lightning - Normally if you need to reveal cards from your deck when its empty you'll shuffle your discard and use it as your deck. But Chain Lightning says "until your deck has no cards". So it stops when the deck is empty, and if you play Chain Lightning when your deck is empty it does nothing.
- Charm Ogre - See "Bloodblade."
- Crossbowman - If the 3 damage --> is exactly enough to kill a monster, the extra 2 damage doesn't happen, because it is only dealt to the last monster damaged by it.
- Delveheart - Only destroys monsters that entered the board on your turn, so if your opponent added monsters on their turn those aren't destroyed.