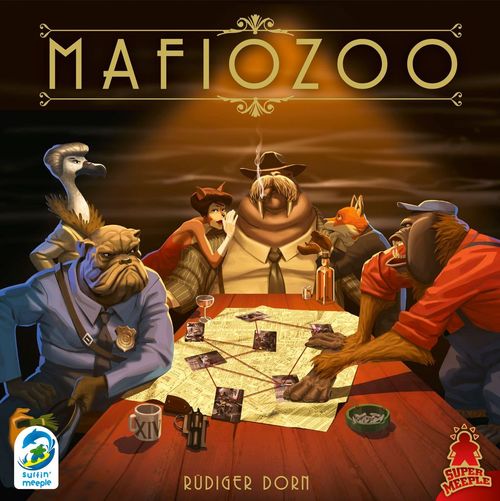
Mafiozoo
Mafiozoo Rulebook
Table of Contents
Table of Contents
Goal of the Game
In Mafiozoo, each player tries to become the new goodfella of Wally Longtooth's gang, by taking control of the Neighborhoods and Locations of Influence in the city. But everything is working against you… In order to earn your place in "The Family," you must bribe those close to the godfather to earn or buy their support, and benefit from their favors. Alas, you are not the only one with such aspirations.
Whoever best places his men, and has the most influence at the end if the game will win!
Components and Setup
Before your first game, carefully detach all the cardboard tokens from their pre-cut punchboard by hand.
The Gameboard
Place the gameboard in the middle of the table. One part of it depicts the blotter with the photos of the 12 influential members of "The Family" and the connections between them, and the other part depicts the Locations of Influence in the city and the benefits of exploiting them.
- On the blotter, the photos of "The Family" are positioned, representing the 12 primary mafiosos of the gang of Wally Longtooth, the Godfather. These are the Characters who can help you to gain Influence in this city, and can bestow their Favors upon you. They are numbered from 1 to 12, which corresponds to the order in which they are evaluated during the game.
- The Locations of Influence represent the Buildings where you can deploy your Goons to gain Influence and to racketeer in the city.
The Family Tiles
These tiles represent the Favors of each member of "The Family" and how they can be obtained. Each token has two sides that offer the same Favor, but obtained in different ways.
Place the Family tiles numbered 1 to 12 on the corresponding Characters (i.e. having the same number on the Family Photo), with a random side face up; however, make sure there are no more than 6 tiles showing the Golden side (1st).
The Favor Tokens
These tokens are used to take control of the Locations of Influence in the City. Place the weapons, booze, jewelry, and building permits near the Characters associated with them. These 4 central Characters represent the Godfather's 4 closest advisors.
Place the "Godfather's Favor" tokens in the middle of the Blotter.
Note: A "Godfather's Favor" works as a wild token, and can replace any Favor.
The Neighborhood Tokens
There are 6 different Neighborhoods, each with 10 tokens (the Financial District, the Industrial Zone, Chinatown, Little Italy, Campus, and the Park).
At the start of the game, shuffle all the Neighborhood tokens face down and place them in the Reserve (the wooden box depicted on the board).
Draw 5 of them, and place them face up on the "Agenda" space on the board.
Each time you must claim a Neighborhood token, you can either choose one of the Neighborhood tokens face up on the Agenda, or draw a random face-down token from the Reserve.
Place the Neighborhood tokens you take face down in front of you. You can look at them at any time, and the other players always know how many you have. Once you have made your choice, replenish the Neighborhood tokens on the Agenda from the Reserve, so you always have 5 Neighborhood tokens face up on the Agenda.
The Cards
The Bribery cards are used either to bribe the Characters of "The Family" in order to gain their Favors, or to replenish your Slush Fund in Gems.
At the start of the game, shuffle the Bribery cards to form a face-down deck that you place beside the Judge (11).
At the start of each round shuffle the Bribery cards of the deck with those discarded to form a new deck.
The Informant cards are played in the Favor phase, immediately before evaluating a character, and allow you to place 2 Gems on them from your Slush Fund, or 1 Gem from the Reserve.
At the start of the game, shuffle the Informant cards to form a face-down deck that you place below the Private Detective (12). There is 1 Informant card for each Character.
The Godfather cards are used to count the 4 rounds of the game, to indicate the Character who has the Godfather's attention each round, and to pay the players.
At the start of the game, shuffle the 8 Godfather cards, and place 4 random cards face down beside the board. Return the other 4 cards to the box without looking at them. These will not be used during this game.
The Money
The Zoollars are the money of the game. Each player starts with a 5Z bill.
Place the 1Z and 5Z bills on their spaces. You can make change at any time.
Each Player
Each player chooses a color and takes the Goon meeples, which can be deployed to the Locations of Influence during the game, and the Gems that can be used to bribe the members of "The Family".
Place your Goons in front of you, and your Gems on the Reserve of your color in the middle of the blotter. You are limited by the number of Gems available in the Reserve.
The Godfather Token
Place the Godfather token in its stand beside the deck of Godfather cards.
The 1st Player Token
The 1st player will pass the 1st Player token to her left neighbor at the start of the next round, during the Revenue phase. Play goes clockwise from the 1st player, mainly during the Bribery phase.
Setup
The oldest player takes the 1st Player token.
Take the Goon meeples of your color and place them in front of you. You will use these meeples to mark your presence in the different Locations of Influence in the city.
Place the 6 Booze tokens on their space.
Place the 10 Godfather's Favor tokens on their space.
Place the 6 Building Permit tokens on their space.
Place the Gems of your color in your Reserve.
Place the 6 Jewelry tokens on their space.
Shuffle the 8 Godfather cards, and take 4 without looking at them. Place them on the board with the Godfather token. Return the other 4 to the box, unseen.
Gameplay
The game plays out over 4 rounds. Each round comprises 4 successive Phases. All players must play each phase before moving on to the next:
1 - Revenue 2 - Bribery 3 - Favors 4 - Influence
At the start of the game, create your Slush Fund by taking a number of Gems from your Reserve, according to your position in the turn order. Place your Gems in front of you.
Starting Slush Fund
The 1st and 2nd players take 11 Gems. The 3rd player takes 10 Gems. The 4th player takes 9 Gems.
Note: In the game, a white Gem always indicates a Gem taken from your Reserve on the blotter, and a black Gem always indicates a Gem taken from your Slush Fund in front of you.
Example: +1 Gem, indicates that you are taking a Gem from your Reserve, and adding it to your Slush Fund.
1 - Revenue
This phase can be played simultaneously by all players.
During this phase, you receive your payment, Racket Bonuses for Locations of Influence, and cards that will enable you to bribe members of "The Family".
-
The 1st player passes the 1st Player token to the left (except during the first round).
-
Reveal the next Godfather card:
Place the Godfather figurine on the Character indicated by the card (1 to 4).
Each player takes as many Zoollars as the card indicates.
-
Shuffle the Bribery cards of the deck and discard to form a new deck.
-
Each player draws 5 Bribery cards and adds them to his hand.
-
Each player receives the Racket Bonus granted by Locations of Influence of the first two lines in which he placed a Goon, except during the first round (see the blue Locations of Influence box on page 8).
Note: Except where specified otherwise, whenever a Bonus grants you a Gem (e.g. +1 Gem) it is always a Gem from the Reserve.
Example: The players who have placed a Goon on the Clandestine Gambling Den take 2 Gems from the Reserve and place them in their Slush Funds.
Attention: There are no limits to the Tokens or money in this game. If by some chance you need more, find a temporary proxy for them. On the other hand, Gems in the Reserve can run out (except for certain particular cases; see pages 6 and 8).
2 - Bribery
During this phase, in turn order (starting with the 1st player, and going clockwise), players take turn playing one Bribery card until each player only has one remaining in his hand, which will not be played.
The goal of this phase is either to bribe the Characters to gain their Favors, or to claim Gems from the Reserve.
The Family tokens indicate what you must do to earn the Character's Favor, and what the Favor's effect is.
Family token layout: Character (top), What you must do to bribe this character (left), Favor's effect (right).
There are 3 different conditions to obtain Favors:
- To the highest bidder: Only the player who has offered the most Gems to the Character will receive his Favor.
- To whoever can pay: The player who has offered the most Gems to the Character will receive his Favor without having to pay any Zoollars, but any player who offered at least one Gem to the Character can pay the indicated amount of Zoollars to receive it, as well
- To whoever has the means: Every player who has offered the indicated number of Gems to the Character will receive his Favor.
How to Bribe
Starting with the 1st player, players will take turns discarding a Bribery card from their hand either to offer Gems to the corresponding member of "The Family", or to move Gems from the Reserve into their Slush Fund. The players will continue to play like this until each player only has one card left. On your turn, if you have more than one card left, you must play a card. Your Bribery phase ends once you have only one card left, which you will then discard without playing it.
Types of Bribery Cards
There are 2 types of card:
1) If you play a Targeted Bribery card:
- Either discard it to move up to 3 Gems from the Reserve to your Slush Fund.
- Or place 1 to 3 Gems from your Slush Fund on the photo of the corresponding Character on the blotter.
If you have placed 2 or 3, you can now transfer some of these Gems to an adjacent Character by using one of the connections (red string between two pins); however, you must always leave at least 1 on that first Character.
If you have transferred 2 Gems to the second Character, you can transfer 1 of these Gems to an adjacent Character by using one of his connections.
2) If you play a Secret Bribery card:
- Either discard it to move up to 2 Gems from the Reserve to your Slush Fund.
- Or place 1 to 2 Gems from your Slush Fund on the photo of the Character of your choice.
If you have placed 2, you can now transfer 1 of these Gems to an adjacent character by using one of his connections.
Note: While the Reserve is empty, you cannot recover any more Gems.
When you have only one Bribery card in hand, you have finished the Bribery phase. Discard this last card without revealing it, and wait for the others to finish.
At any moment during the Bribery phase, you can use the Racket Bonus of any of the 7 Locations of Influence (3rd and 4th rows) where you have a Goon. (see the pink Locations of Influence box on page 8).
Targeted Bribery Example
Boris plays the Targeted Bribery card, and decides to place 3 Gems from his Slush Fund on the photo of the corresponding Character (12, the Private Detective).
He then opts to transfer 2 of these Gems to the Lieutenant (4), who is adjacent. Then, he opts to transfer 1 of these Gems to the Forger (3) who is connected to the Lieutenant.
You cannot fork distribution of your Gems to two Characters that are adjacent to the first.
You cannot transfer all of the Gems.
You cannot transfer a Gem to a Character that is not adjacent, because there is no direct connection between them.
Secret Bribery Example
Boris plays the Secret Bribery card, and decides to place 2 Gems from his Slush Fund on the photo of the Lieutenant (4).
He then opts to transfer 1 of these Gems to the Forger (3), who is connected to the Lieutenant.
Clarification
If you have a Goon on the "Newspaper" Location of Influence, whenever you place gems on a Character, all other Characters along the diagonals from it are considered adjacent to it.
Example: After placing your Gems on the Private Detective (12), you can transfer Gems to Characters 4 or 11, as usual, but also to Characters 1 or 7 which are also on a diagonal from 12.
Let's say you transferred 2 Gems to the Distiller (1); you could then transfer 1 last Gem to Characters 2, 6, or 7, as usual, or even the Commissioner (9) who is on a diagonal from 1.
3 - Favors
This phase is played simultaneously by all players, in the priority order of the Characters.
During this phase, the players will receive Favors from the members of "The Family" that they successfully bribed.
Always evaluate the Characters in ascending order, starting with 1 and ending with 12. Completely evaluate each Character before moving on to the next.
The side of the Family token that is showing indicates the manner in which that Character's Favor can be obtained. The Character always grants the same Favor, but the manner in which you obtain it is different on each side of the Family token.
Note: Some Favors permit you to add Gems to a Character. If you place them on a Character that has already been evaluated this phase, they will stay there to be useful in the next round.
A Character who has received no Gems will not grant a Favor to anyone. A player who has not offered any Gems to a Character cannot benefit from his Favor.
For each Character, compare the players' offers to see which players receive the Favor, depending on the three types of conditions: "to the highest bidder", "to whoever can pay", and "to whoever has the means".
To the Highest Bidder
- Only the player who has made the best offer to the Character receives his Favor. The Character pockets the Gems of his offer, and to represent this they are returned to the Reserve.
- The other players retrieve their Gems and return them to their Slush Funds.
- If it is a tie for the best offer, nobody receives the Character's Favor, and all players retrieve their Gems and return them to their Slush Funds.
Example: Yellow has offered the most Gems, so he receives 1 Godfather's Favor token. He discards his Gems to the Reserve. Green receives no Favor, and retrieves his gems and returns them to his Slush Fund.
To Whoever Can Pay
- If a player has made the best offer to the Character, he receives the Favor without paying any money, but instead leaves the Gems of his offer as payment; to represent this, they are returned to the Reserve.
- The other players retrieve their Gems and return them to their Slush Funds, and if they wish, can pay the expected cost in Zoollars in order to obtain the Character's Favor.
- If it is a tie for the best offer, all players retrieve their Gems and return them to their Slush Funds, and can pay Zoollars to obtain the Favor.
Attention: If you have placed a Goon on the Courthouse (see the yellow Locations of Influence box on page 8), you pay 1 less than the amount required.
Example: Yellow has offered the most Gems, and receives 1 Bribery card. He discards his Gems to the Reserve. Green retrieves his Gems and returns them to his Slush Fund, and opts to pay 3 Zoollars so he also can get 1 Bribery card.
To Whoever Has the Means
Unlike the two other types of conditions, the Character has no intention of taking your Gems, but simply wants to see that you are a person of means:
- All players who placed at least as many Gems as required get the Character's Favor, but also retrieve their Gems and return them to their Slush Funds.
- All players who did not place sufficient Gems do not get the Character's Favor, but still retrieve their Gems and return them to their Slush Funds.
Example: Yellow and Green have offered at least 2 Gems, so they each receive 5 Zoollars. Blue does not receive the Favor. All three players retrieve their Gems and return them to their Slush Funds.
The Informant Cards
For each of the 12 Characters, there is one Informant card. During the Favors phase, if you have the Informant card for a Character when it is time to evaluate that Character, you may play the card. You can play the Informant to seize the majority, or otherwise satisfy the Character's condition. Playing the card allows you to place either 1 of your Gems from the reserve or 1 to 2 Gems from your Slush Fund on this Character. Then discard the card.
Note: You are never required to use your Informant card. You are welcome to hoard it until the end of the game, at which point it will provide you with a Neighborhood token (see End of the Game on page 8).
Favor Details
- The Distiller: Receive 1 Booze token.
- The Mayor: Receive 1 Permit token.
- The Mayor: Receive 1 Jewelry token.
- The Lieutenant: Receive 1 Weapons token.
- The Femme Fatale: Receive 1 Godfather's Favor token.
- The Truck Drivers Syndicate: Take 1 Neighborhood token and add 1 Gem from the Reserve to another Character of your choice (it's OK if that Character was already evaluated this round; the Gem will just stay until next round).
- The Banker: Receive 5 Zoollars.
- The Producer: Move 1 Gem from the Reserve to your Slush Fund, and transfer 2 Gems from the Reserve to the Femme Fatale (5).
- The Commissioner: Receive 1 Godfather's Favor token.
- The Land Developer: Take 2 Neighborhood tokens.
- The Judge: Draw 1 Bribery card.
- The Private Detective: Draw 1 Informant card and take 1 Neighborhood token.
Note: If you have the opportunity to take Gems from the Reserve (Characters 6 and 8) in order to place them on Characters, then you are allowed to take them from your Slush Fund if there are no more left in the Reserve.
Godfather Bonus
The first 4 Characters (1 to 4) represent the inner circle, close to the Godfather. Each round, the Godfather visits one of them, as indicated on the Godfather card revealed in the Revenue phase.
- If there is no tie, the player who offered the most Gems to the Character the Godfather is visiting spends his Gems and receives a Godfather's Favor token in addition to the Character's Favor. If it is a tie, the tied players spend their Gems, and get the Character's Favor, but nothing from the Godfather.
- The player who offered the second-most Gems to the Character receives the Character's Favor as if he had been the majority player; however, he retrieves his Gems and returns them to his Slush Fund. If there was a tie for first, then skip this second-place award.
- The other players retrieve their Gems. They cannot obtain the Character's Favor if the condition is "to the highest bidder", but they can always pay the Zoollars to obtain the Favor if the condition is "to whoever can pay".
4 - Influence
This phase can be played simultaneously by all players (if they wish). The Locations of Influence enable you to gain Influence and benefit from Racket Bonuses for the rest of the game. In order to take advantage of a Location of Influence, you must place one of your Goons there. Their accessibility is defined by the Roads that link them.
In Order to Place a New Goon
1) The Location must be accessible:
- The seven Locations of Influence connected to the exterior access roads, situated in the top row and the left column, are always accessible (see the yellow zone).
- In order to progress and place a Goon on one of the nine Locations of Influence in the interior zone (the red zone), you must already have a Goon in an adjacent Location (it could even have been placed in the same turn). Connections are indicated by the roads.
2) Pay 2 Favors that you must discard by returning them to their space on the board.
- If one of the required Favors is a Godfather's Favor (wild), you can spend the Favor of your choice for that one.
Remember: The Godfather's Favor is a wild token that can be used in place of any Favor. On the other hand, if the Godfather's Favor is required, you cannot replace it with something else.
- You can place several Goons in a single turn if you have enough Favor tokens.
- You can place a Goon in a Location already occupied by other players' Goons, but you cannot place several Goons of your color in the same Location. Once a Goon is placed in one of the 16 Locations of Influence, it must stay there until the end of the game. It can never be moved.
The Racket Bonus of a Location is available starting the next round.
Example: Red can place Goons in Locations A, B, C and D because they are always accessible by the exterior access roads. Locations F, G and I are accessible to her because they are connected by roads to Locations where she already has Goons. Locations E and H are currently inaccessible to her.
Attention! You can only keep 1 Favor at the end of this phase. In turn order, choose which one you will keep (if necessary), and exchange all the other Favors for the same number of Neighborhood tokens from the Agenda and/or the Reserve.
End of the Game
Once 4 rounds have been played, each player reveals his Neighborhood tokens flipping them face up, and groups them by Neighborhood.
Then, each player receives 1 Neighborhood token that he keeps face-down, in compensation for each of the following unused items:
- The Bribery card the Judge (11) provides during the last Favors phase.
- Each Informant card you still have in your hand.
- Each Favor token you still have.
- Each of your Gems that is already placed on a Character's photo.
- Each 3 Zoollars you have.
Now you can calculate your Influence:
- +1 Per Neighborhood token, face up and face down, that you have.
- +1 For each set of 6 different face-up Neighborhood tokens.
- +1 For each Neighborhood for which you have more face-up tokens than any other player. In a tie, no one gets the Influence.
- +X Influence points for each Location of Influence where you have a Goon.
The player with the most Influence is the winner, he becomes the newest goodfella.
Ties go to the player with more Gems remaining in his Slush Fund.
2-Player Rules
A 2-player game lasts 6 rounds instead of 4. Make a deck of 6 Godfather cards. Return the others to the box unseen. At the start of the game, the 1st player starts with 5 Gems in his Slush Fund, and the 2nd player starts with 6 Gems.
You will play the game against a Strawman. Choose a color of Gems to represent his offers.
During the Revenue phase, place 2 Gems from the Strawman's Reserve on the Character the Godfather is visiting. Then, reveal Bribery cards until 3 Targeted Bribery cards are showing. Add 2 of the Strawman's Gems from the Reserve to each Character targeted by the revealed cards, then shuffle all the cards to rebuild the Bribery deck.
Note: During the Favors phase, if the Strawman has the majority, he does not receive the Character's Favor. His Gems return to his Reserve.
Player Rules
With 3 players, the 1st player of the 4th round draws an Informant card as compensation for having to go first a second time.
Locations of Influence
Boxing Venue — Phase 1 - Revenue. Bonus: Take 1 Zoollar.
Racetrack — Phase 1 - Revenue. Bonus: Take 2 Zoollars.
Construction Site — Phase 1 - Revenue. Bonus: Take 1 Neighborhood token.
Dock — Phase 1 - Revenue. Bonus: Take 3 Gems, or 2 Gems and 1 Zoollar, or 1 Gem and 2 Zoollars, or 3 Zoollars.
Fence — Phase 1 - Revenue. Bonus: Take 1 Gem from the Reserve.
Clandestine Gambling Den — Phase 1 - Revenue. Bonus: Take 2 Gems from the Reserve.
Night Club — Phase 1 - Revenue. Bonus: Draw 1 Informant card.
Hotel — Phase 1 - Revenue. Bonus: Draw 1 Bribery card.
Luigi's Pizzeria — Phase 2 - Bribery. Bonus: Place 1 Gem from the Reserve on the Distiller (1) or the Mayor (2) if the Godfather is visiting that Character.
Massage Parlor — Phase 2 - Bribery. Bonus: Place 1 Gem from the Reserve on the Character the Godfather is visiting.
Police Station — Phase 2 - Bribery. Bonus: You can place up to 3 Gems instead of 2 when you play an Informant card.
Newspaper — Phase 2 - Bribery. Bonus: Whenever you transfer Gems, all Characters along the diagonal are considered adjacent.
Barber — Phase 2 - Bribery. Bonus: Place 1 Gem from the Reserve on the Distiller (3) or the Mayor (4) if the Godfather is visiting that Character.
Prison — Phase 2 - Bribery. Bonus: Place 1 Gem from the Reserve on a Character (1 to 4) the Godfather is not visiting.
Town Hall — Phase 2 - Bribery. Bonus: You can retrieve up to 4 Gems or place up to 4 Gems instead of 3 when you play a Targeted Bribery card.
Courthouse — Phase 3 - Favors. Bonus: The condition "to whoever can pay" costs 1 Zoollar less when you choose to pay in order to receive a Favor.
Note: During the Favors phase, if the Strawman has the majority, he does not receive the Character's Favor. His Gems return to his Reserve.