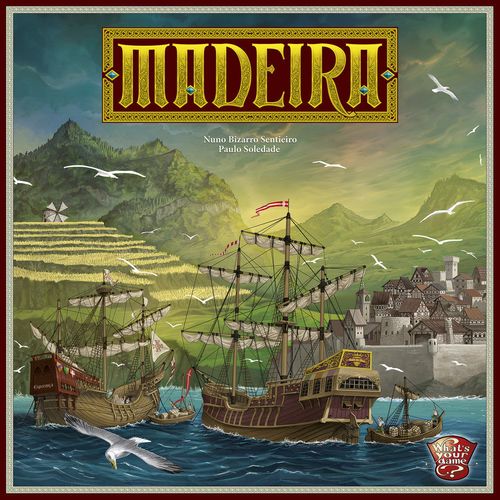
Madeira
Madeira Rulebook
Table of Contents
Table of Contents
- Overview
- Components
- Initial Preparation
- General Concepts
- Game Rounds
- Phase A. Round setup
- Phase B. Character Actions
- Phase C. Building Actions
- Phase D. Maintenance
- Phase E. The Crown's Requests
- End of the game
- Tips for the first Game
- Summary of Rule Differences for a 2- or 3-Player Game
- Rules you may forget
- Reference Sheet — Crown's Requests
- Reference Sheet — Guild Favors
- Reference Sheet — Passing Actions
- Reference Sheet — King's Rewards
Overview
Madeira has been established just as it was in the original administrative division of the island under 3 captaincies (Funchal, Machico, and Porto Santo), where the ultimate goal is to develop the Island, gaining the most prestige under and for the Portuguese Crown.
The Crown of Portugal has a series of requests regarding expeditions, urbanization, opening trade routes, increasing wealth, and controlling the guilds on the islands. Three times during the game, the players gain prestige for fulfilling certain requests by the Crown. At two other times, the Crown requests that the islands change the focus of their agriculture due to the changes in the world.
Players must carefully choose the correct timing to show their achievements. Too early and you don't gain as much prestige, too late and you risk someone else stealing the best opportunities. Will you have what it takes to excel in all of these endeavors?
Beware, wheat may become scarce, money is never enough, the population is hungry, and the shadow of piracy looms large....
Components
- 1 Game Board
- 2 Guild Boards to be assembled (one Guild Board is for a 4-player game, the other one has different sides for 3- and 2-player games. The number of players is indicated by the number of depicted heads)
- 12 Guild dice (turquoise)
- 3 Pirate dice (black)
- 3 Neutral Citizens (white)
- 48 Workers (12 each in the 4 Player colors)
- 24 Ships (6 each in the 4 Player colors)
- 12 Tracking discs (3 each in the 4 Player colors)
- 12 square Action Markers (3 each in the 4 Player colors)
- 4 Characters
- 2 Round Overview sheets
- 20 Crown's Requests (10 with 2 heads on the back, 5 with 3 heads, and 5 with 4 heads)
- 4 Starting Crown's Requests (with a small diamond on the upper-left corner of the front)
- 72 Goods (for each of Wheat, Sugar, and Wine: 20 worth 1 each, 4 worth 3 each)
- 40 Wood (worth 1 each)
- 24 Bread (15 worth 1 each, 9 worth 3 each)
- 12 Guild Favor (in the 4 Guild symbols)
- 8 King's Rewards (4 with an A on the back, 4 with a B on the back)
- 40 Pirates (with the values 1, 3, 6, and 12)
- 40 Real coins (with the values 1, 3, and 5)
- 1 Reference sheet
Before the first game, please remove all tiles from the frames.
Initial Preparation
All the rules are explained for a 4-player game. Rule differences for a 2- or 3-player game are described in the "Summary of Rule Differences" section. If the game has fewer than 4 Players, put any unused components in the game box.
1. Boards
1.1 Lay out the Game Board in the middle of the table. The Game Board is divided into 6 Areas: City Watch, Windmill, Colonies, Markets, Cities, and Islands.
1.2 Assemble the Guild Board and place it next to the Game Board. The Guild Board is divided into 2 columns: The Passing Column and the Dice Column.
2. Player's Home Supply
Each player chooses a color (yellow, red, purple, or blue) and sets the following items in front of himself, in order to create his Home supply:
- 12 Workers of the chosen color
- 6 Ships of the chosen color
- 3 square Action Markers of the chosen color
- 3 Tracking discs of the chosen color
- 1 Wheat, 1 Sugar, 1 Wine, and 1 Wood
- 4 Bread
- 5 Reals
3. Prestige Points (PP)
Each Player places 1 of his Tracking discs on "0" (zero) on the Prestige Points (from now on PP) Track.
4. Characters
Put the 4 Characters (Guild Master, Steward, Commandant, Mayor) next to the Game Board.
5. Dice
Put the 3 Pirate dice and 12 Guild dice next to the Game Board.
6. Starting Crown's Requests
6.1 Shuffle the 4 Starting Crown's Requests (the ones with a small diamond on the upper-left corner of the front). Each player gets 1 of them at random, face-up.
6.2 The player who has the Starting Crown's Request with the most crowns on the back is the First player. Then, the initial order of play is established in clockwise order around the table, starting with the 1st Player.
6.3 Each player places his Turn Order disc (1 of his Tracking discs) on the Passing Column of the Guild Board accordingly: 1st Player places a disc on the topmost slot, 2nd player on slot II, and so on.
6.4 Each player gets additional Reals according to his starting position: 1st player gets 2 additional Reals; 2nd player, 3 Reals; 3rd player, 4 Reals; and 4th player, 5 Reals.
7. Crown's Requests
Shuffle all the Crown's Requests and lay them out randomly in the Dice column on the Guild Board, face-up in rows of 5 each.
8. Cities
There are 3 Cities (Porto Santo, Funchal, Machico), each with 6 districts. Each district has 2 City spots.
8.1 Shuffle the 12 Guild Favors and place them randomly face-up on the districts, leaving the two leftmost districts of each City empty. Only 1 Guild Favor can occupy each district. If a Guild Favor is still on a district, it means that the district is not built yet. Workers and Citizens can be placed only on already-built districts (i.e. without any Guild Favor on them — see Guild Master). 2 districts in each City have been already built (the leftmost ones) so Workers and Citizens can be placed there. During the game, the players will build the other districts, for which they will be rewarded with Favors from the Guilds. Each district has spots for 2 Workers/Citizens once it's built. Only 1 Worker or Citizen can occupy each spot.
8.2 Place 1 Neutral Citizen on the now-rightmost empty spot of each City.
8.3 In reverse turn order (i.e. starting with the player whose disc is in the bottom slot of the Passing Column), each player moves 1 of his Workers from his Home into an empty City spot.
9. City Watch
Each player moves 2 of his Workers from his Home to the City Watch.
10. Windmill
Each player places 1 of his Tracking discs on "3" in the Windmill.
11. Colonies
There are 3 Colonies (Açores, Brasil, India) each one depicting 1 Colony Land at the top, 5 Colony Landing Slots in the middle and 2 King's Reward Slots at the bottom. The available Colony Landing Slots vary depending on the number of players.
Shuffle all 4 King's Reward tiles marked with A, and put 1 face-up on each of the 3 Colonies on the corresponding slot. The remaining tile won't be needed for this game and can go back into the box. Then repeat this with the King's Reward tiles marked with B.
12. General supply
Put all remaining Wheat, Sugar, Wine, Wood, Bread, Reals, and Pirates next to the Game Board as a general supply. The general supply is not limited. In the unlikely event that a supply runs out of tiles, keep track on a sheet of paper.
Wood always has a value of 1. Wheat, Sugar, Wine, Bread, Reals, and Pirates have different values. When it is said that a Player has, gets, receives, pays, or discards a certain number of Wheat, Sugar, Wine, Wood, Bread, Reals, or Pirates, it is always referred to their value and never to the number of tiles.
Example: If a player must receive 4 Pirates, he may take 4 Pirates valued 1, or 1 Pirate valued 1 plus 1 Pirate valued 3.
When a player gets, or harvests 1 or more Wheat, Sugar, Wine, gets Bread or Reals, or receives Pirates, he takes them from the general supply and places them in his Home supply. For details about buying, getting, or harvesting Wood, see the Guild Master, Getting Wood, and Discarding Wood and Buying Wood sections. When a player has to discard 1 or more Wheat, Sugar, Wine, Bread, Pirates, or Wood, or has to pay Reals, he takes them from his Home supply and places them back in the general supply.
The Markets
There are 3 Markets (Wheat, Sugar, and Wine), each one with several Market Route slots. The available Market Route Slots vary depending on the number of players.
The Islands
Regions. The Islands are divided into 3 Regions, indicated by the big numbers on the board. Region 1 is divided into 4 Fields; Region 2 and 3 are divided into 5 Fields each.
Each Field shows the Good (Wheat, Sugar, or Wine) a player can harvest when he has one of his Workers on the Field (see Harvest). Some of the Goods depicted on the Fields have a small icon of another Good in the corner. These are convertible Fields (see The Crown's Requests). For example: Later in the game, a Wheat Field with a Sugar icon will be converted from a Wheat Field to a Sugar Field.
In addition, there is a Forest Field that is not part of any of the 3 Regions and can't be harvested, but allows the players with a Worker on it to have access to Wood (see Discarding Wood and Buying Wood, and Getting Wood). Whenever a player moves a Worker onto a Field he may choose a Field in one of the 3 Regions, or the Forest Field.
Buildings. There are 5 Buildings depicted on the game board, each one connected to a Region:
- Alfândega is in Region 1
- Moinho and Capitania are in Region 2
- Fortaleza and Casa da Coroa are in Region 3
13. Wood
Some Fields have 3 numbers depicted to the side of the Good. That means that those Fields have some Wood on them. The numbers indicate how many Wood are placed on the Field (from top to bottom: in a 4-, 3- or 2-player game). Note that all the Wood needs to be cleared before any Goods can be harvested from that Field.
Put a number of Wood over the depicted Good of each Field according to the numbers, if any. In a 4-player game, put the quantity indicated by the top number.
Example: Region 1 comprises 1 Wine Field, 1 Wheat Field, 1 Convertible Wheat Field and 1 Convertible Sugar Field. Put 3 Wood on the convertible Sugar Field, and 3 Wood on the convertible Wheat Field.
14. Initial Player Setup
In reverse turn order (i.e. starting with the player whose disc is in the bottom slot of the Passing Column), each player moves 2 Workers from his Home onto 2 Fields (Regions' Fields and/or the Forest Field). He can only move his Workers to Fields where there are no other Workers. He cannot have 2 Workers in the same Region.
These restrictions (moving only to Fields unoccupied by other players, and not being allowed to have Workers of the same player in the same Region) only apply during the Initial Preparation. For the rest of the game, when a player moves a Worker to a Field, he can move it to any Field he doesn't already occupy (see Guild Master, and Reference Sheet — King's Reward).
General Concepts
This is an overview of some of the most important general concepts, useful to better understand the flow of the game. A full explanation of those concepts can be found later in the appropriate sections of the rulebook.
The Guild Board
At the beginning of each round, the Guild Dice are rolled in groups of three and placed on the Guild Board. In turn order, each player then chooses one group of them as his dice for the current round. There are several considerations involved in choosing a group of dice:
- The dice value. Players will use their dice to perform actions and having high-numbered dice is always helpful.
- The Guild. The 4 rows of the Guild Board represent the 4 Guilds in the game. Players will get some Guild Favors during the game, and can use them in order to gain advantages. The upper-left symbol on each Guild Favor indicates to which Guild it belongs. Each Guild Favor can only be used once; however, when a player takes the dice from a Guild's row, he resets all of his Favor of that Guild, allowing him to use them again.
- The Crown's Requests. Each Guild offers different Requests, made by the crown of Portugal. The player will take one Request in the same row as the chosen dice. Fulfilling these Requests is the principal way to earn Prestige Points.
- The turn order. Choosing a group of dice also sets the order of the players during phase B, in which dice will be used to perform Character actions.
Pirates
During the game, players will occasionally receive some Pirates. They represent the crime the players cause by requesting something, and then not paying for it. During the game, players will have the opportunity to discard some of their pirates. At the end of the game, players will lose Prestige Points depending on how many Pirates they have, compared to the other players.
Guild dice and Pirate dice
Each player chooses a group of Guild dice from the Guild Board and places them in front of himself. Each die allows the player to perform an Action. Besides, players will have access also to the Pirate dice. Using a Pirate die allows the player to perform an additional action. One at a time and in turn order, players will place a Guild die or a Pirate die on a Character to perform its action.
- Placing a Guild die on a Character allows the player to immediately perform the Character Action and also give him the possibility to later perform the associated Building Action.
- Placing a Pirate die, instead, only allows the player to immediately perform the Character Action but not the associated Building Action.
Prestige Points
The player with the most Prestige Points (PP) at the end of the game wins. Fulfilling the Crown's Requests is the principal way to earn Prestige Points. There are 5 different Crown's Request types:
- Market Routes: the player will earn PP for his ships in the Market Route slots.
- Urbanization: the player will earn PP for having Workers in the Cities.
- Expeditions: the player will earn PP for his ships in the Colony Landing slots.
- Wealth of the Nation: the player will earn PP for the Reals he is willing to donate to the Crown.
- Influence of the Guilds: the player will earn PP for his face-up Guild Favors.
Buildings and Characters
There are 5 Buildings depicted on the game board, each one connected to a Region:
- Alfândega is in Region 1
- Moinho and Capitania are in Region 2
- Casa da Coroa and Fortaleza are in Region 3
Then there are 4 Character tiles: the Steward, the Guild Master, the Mayor and the Commander. At the beginning of each round, the 4 Character tiles will be shuffled and randomly placed on the Buildings. So, each Character will be associated with a certain Building for the current round.
Game Rounds
The game is played over 5 rounds. After the 5th round, the game ends. The player with the most Prestige Points (PP) wins.
Each round consists of 5 phases:
- A. Round setup
- B. Character Actions
- C. Building Actions
- D. Maintenance
- E. The Crown's Requests
Using the Windmill
During phases B - Character Actions, C - Building Actions, and D - Maintenance, each player may always do any of the following, as many times as he wants, in addition to his turn and even if it is not his turn:
- Discard any 2 Goods (they do not need to be the same) to receive any 1 Good from the general supply. Goods are Wheat, Sugar, and Wine.
- Discard 2 Wheat to move his disc up one step in the Windmill.
- If the disc is already on the top slot of the Windmill, discard 2 Wheat to earn 1 Prestige Point, instead.
During phases B - Character Actions, and C - Building Actions, each player may always do any of the following, as many times as he wants, in addition to his turn and even if it is not his turn:
- Move his disc down one step in the Windmill to take 1 Bread or 3 Reals from the general supply.
- If the disc is already on the bottom slot of the Windmill, lose 1 Prestige Point to take 1 Bread or 1 Real from the general supply, instead. This option is only available if he has Prestige Points to lose.
The players cannot use the Windmill during phases A - Round Setup or E - The Crown's Requests.
NOTE: During phase D - Maintenance, each player will need to feed his Workers on the Board. A number of Workers are automatically fed equal to the number depicted on the player's level in the Windmill, if any. The player must then feed the remaining Workers on the Board discarding 1 Bread for each (see Maintenance for details).
Phase A. Round setup
1. Placing Characters
Shuffle the 4 Character tiles and place them randomly face-up on the Buildings, leaving empty (i.e. without a Character tile) the Building corresponding to the current round. The upper-right Roman Numeral on each Building indicates in which round that Building will be empty (i.e. getting no Character tile).
Example: In the 3rd round, no Character tile is placed on the Alfândega Building.
2. Rolling Pirate dice
Roll the 3 Pirate dice and put them on the City Watch, being careful not to change the values rolled.
3. Rolling Guild dice
Roll 3 Guild dice and put them on the top row of the Guild Board, being careful not to change the values rolled. Repeat this with 3 more Guild dice for each of the remaining rows.
4. Choosing a Guild
Following the turn order shown on the Guild Board, each player selects a row of the Dice Column, then he:
a. moves his Turn Order disc there. The position of Turn Order discs in the Dice Column will be the turn order for Phase B. Only 1 disc can occupy each row.
b. takes the set of Guild dice from that row as his dice for the current round. He places each die on top of 1 of his Action Markers in front of himself, being careful not to change the values rolled.
c. takes 1 of the Crown's Requests from the same row. He places the Crown's Request in front of himself face-up. Each Guild offers different Requests, made by the crown of Portugal. Fulfilling these Requests is the principal way to earn Prestige Points (see The Crown's Requests, and the Reference Sheet for details).
d. flips all his Guild Favors of that Guild (if any). There are 4 Guilds. Each row on the Guild Board represents a Guild. The upper-left symbol on each Guild Favor indicates to which Guild it belongs. If the player does not have any matching Guild Favors, he just skips this step.
Note: Players don't have any Guild Favor at the beginning of the game, so, in the 1st round, every player skips this step.
Phase B. Character Actions
Following the turn order shown on the Dice Column of the Guild Board, each player either:
- places a die (a Guild die from his Home or a Pirate die from the City Watch, see below) on a Character on the Game Board, OR
- passes
This continues in turn order until all players have passed. Players that have passed cannot act in this phase anymore. After each player has passed, Phase B ends.
Placing a die
The player places a die (Guild or Pirate) on 1 of the 5 available Characters (the 4 Character tiles or the Character depicted on the currently empty building), and may immediately either perform the action depicted, or harvest, if he can and wants to. The player may place a die on a Character even if he cannot or does not want to perform the Action or harvest.
Placing a Guild die: If the player chooses to place a Guild die, he takes a die and an Action Marker from his Home, places the die on the Character, and places the Action Marker on the associated Building slot. Placing a Guild die on a Character allows the player to immediately perform the Character Action and also give him the possibility to later perform the associated Building Action. The Action Marker indicates that the player may perform that Building Action during phase C.
Placing a Pirate die: If the player chooses to place a Pirate die, he takes a die from the City Watch and places it on the Character. He must move 1 of his Workers from the City Watch back Home. The player cannot take a Pirate die if he has no Workers in the City Watch; nor can he if there are no Pirate dice left in the City Watch. Placing a Pirate die, only allows the player to immediately perform the Character Action but not the associated Building Action, so the player does not place any Action Marker on the Building when he places a Pirate die on a Character.
Dice limit: There cannot be more than 1 Pirate die on a single Character. On a single Character, there can be a maximum of dice equal to the number of players, including a maximum of 1 Pirate die. So, in a 4-player game, either 4 Guild dice; OR 3 Guild dice and 1 Pirate die. A player can put a die on any character, provided the limit of dice has not been reached yet, no matter who has placed dice there in previous turns. So a player can have several Action Markers on the same building.
Discarding Bread: According to the placement done during Phase A - Round Setup, for the current round, each Character is associated with a Building, which is connected to a specific Region. A player can place any die (Guild or Pirate) showing a value equal to or higher than the Region number without any cost. A player can place any die (Guild or Pirate) showing a value lower than the Region number, by discarding as many Bread as the difference between Region Number and the value of the die.
Example: The player must discard 2 Bread to place a die valued 1 on the Character in Region 3.
Reminder: The player may use the Windmill to take Bread from the general supply, if he can and wants to.
Passing
On his turn, if the player cannot or does not want to place any die, he has to pass. He moves his Turn Order disc to an empty slot of the Passing column. According to the slot to which he moves his Turn Order disc, he immediately either gets the Reals, OR performs the Passing Action, if any (see Reference sheet). Only 1 disc can occupy each slot. The position of the Turn Order discs on the Passing column will be the turn order for the remainder of the current round, and for Phase A of the following round. Once a player passes, he can't choose to jump back in later this phase. If he still has any Guild dice, he places them next to the Game Board.
Example: Red passes and chooses to move his disc to slot II. He chooses to get the 3 Reals.
Available Character Actions
Steward. The player may move up to 2 of his Workers, each to any Field on which he has no Workers. Workers may be moved to Fields of the same or different Regions (they do not need to be in the same region as the Steward) and/or the Forest Field. A player cannot have more than 1 of his Workers on a single Field, so, in a 4-player game, there can be a maximum of 4 Workers on each Field: one per player. The player can move his Workers from his Home, any other Field, any City spot, or any Colony Land. He cannot move them from the City Watch.
Guild Master. The player chooses 1 of the Guild Favors from one of the Cities districts, and discards as many Wood as depicted at the top of the related column (2 to 5 Wood) in order to build that district. He then places the Guild Favor face-up in front of himself (see Reference Sheet). The player may buy the Wood if he needs more than he currently has and if he has access to it (see below). The player does not need to have Workers in the Cities in order to perform the Action.
Commander. The player may move up to 2 of his Ships, each to any empty slot, which can be either:
- a Colony Landing slot. He must then discard the indicated quantity of Wine. OR
- a Market Route slot. He must then discard the indicated quantity and type of Goods.
He can move the Ships from his Home or from any other slot (from either Colonies or Markets). If he moves a Ship from his Home he needs to immediately discard 1 Wood for it. The player may buy the Wood if he needs more than he currently has and if he has access to it (see below). Once placed on the board, Ships can never move back Home. Only 1 Ship can occupy each slot. Ships must be moved one at a time, so the player cannot just swap their positions.
After moving the Ships, he may do the following, in any order:
- For each Ship just moved into a Market Route slot, he gains the indicated number of Reals from the general supply,
- For each Ship just moved into a Colony Landing slot, he immediately performs the action of 1 of the 2 King's Rewards in that Colony (see Reference Sheet).
Note: The player has to move a Ship to a different slot in order to use it; he can't stay on a slot and just discard the Goods again.
Mayor. The player may relocate up to 2 of his own Workers and/or Neutral Citizens; each is taken from its City spot and placed on any other empty City spot. Then, regardless of whether he relocated any Workers/Citizens, from each City where he has at least one of his Workers, he gets:
- 2 Bread for each of his own Workers, and 1 Bread for each Neutral Citizen in Porto Santo;
- 2 Reals for each of his own Workers, and 1 Real for each Neutral Citizen in Funchal;
- 2 Wood for each of his own Workers, and 1 Wood for each Neutral Citizen in Machico. He only gets the Wood if he has access to it (see Getting Wood).
The player does not receive any resources from a City if he has no Workers in it, even if there are Neutral Citizens. While performing the Mayor Action, a player can only relocate Workers already in the Cities, he cannot move new Workers into them. The player can relocate them from one city to another city or within the same city. Workers and Citizens can only be placed in already-built districts (i.e. without any Guild Favor on them). Only 1 Worker or Citizen can occupy each spot. Workers and Citizens must be relocated to an empty spot one at a time, so the player cannot just swap their positions.
Discarding Wood and Buying Wood
When a player needs to discard Wood, he always has to use the Wood in his Home supply first. He can buy further Wood, but only if he needs to discard more than he currently has, and only if he has access to it, i.e. he can only take it from:
- Fields with Wood, if he has Workers on them, and/or
- the general supply, if he has a Worker on the Forest Field.
He has to pay for the total amount of Wood he bought in his turn: 1, 3, 6, 10, 15, 21 Reals for 1, 2, 3, 4, 5, 6 Wood. The player does not pay any Reals for using the Wood from his Home supply; only for the Wood he has to buy. The player takes the bought Wood and immediately discards it according to the action he is performing. He cannot buy Wood if he doesn't need to discard it.
Reminder: The player may use the Windmill to take Reals from the general supply, if he can and wants to.
Getting Wood
When a player gets Wood, performing the Mayor Action or using the Monk Favor (see Reference Sheet), he only gets it if he has access to it, i.e. he can only take it from:
- Fields with Wood, if he has Workers on them, and/or
- the general supply, if he has a Worker on the Forest Field.
He takes the Wood and places it in front of himself in his Home supply. He does not pay any Reals for getting Wood this way. If there is not enough Wood on the Fields where his Workers are, he just takes as much as he can.
Harvest
If the player placed a die (Guild or Pirate) on a Character tile, he may harvest his Fields in that Region instead of using the regular Character action (Steward, Commander, Guild Master, or Mayor). For each Worker in the Fields of that Character's Region:
- if there is Wood on the Field, the player takes 1 Wood from that Field,
- if there is no Wood on the Field, the player takes 1 Good from the general supply: Wheat, Sugar, or Wine, according to which Good is depicted on the Field (or on the Good tile placed on that Field, if the Field has been converted. See The Crown's Requests).
The Forest Field cannot be harvested because it is not part of any Region. Performing the harvest, only allows the player to harvest in that Character's Region. If the player does not have at least 1 Worker on the Fields in the Character's Region, he takes neither Goods nor Wood. The player takes neither Goods nor Woods for his Workers in the other Regions. If there is still Wood on the Field, the player cannot get the Good — the Wood needs to be completely cleared before any Goods can be harvested from that Field.
Harvesting on the empty Building's Character. Placing a die (Guild or Pirate) on the Character depicted on the empty Building (i.e. without a Character tile) only allows the player to harvest (i.e. he cannot perform any other Character Actions), but he gets to harvest one Field twice. He performs the Harvest following the usual rules, then chooses 1 Field he just harvested, and harvests it again according to the current situation (i.e. if there is still wood on the Field or not).
Phase C. Building Actions
Each Building has a number on the upper left corner. Following the numeration (from 1 to 5), the players resolve each Building one at a time. When all the Buildings have been resolved, Phase C ends. The players then get their Action Markers back, and all dice and Character tiles are placed next to the Game Board.
Resolving a building
If a Building has no Action Markers on it, simply skip it. If a Building has at least 1 Action Marker on it, roll all the dice placed on the associated Character (Guild dice and/or Pirate die). Then, following the turn order shown on the Passing Column of the Guild Board, each player that has at least 1 of his Action Markers on the Building either:
- pays the cost of the Building, and he may then immediately perform the Building Action if he can and wants to (see Paying the cost). OR
- receives Pirates. In this case he cannot perform the Building Action (see Receiving Pirates).
The player only pays the cost (and may perform the Action) or receives Pirates once regardless of the number of Action Markers he has on the Building. If a player does not have any Action Markers on the Building, just skip that player.
Paying the cost
The cost of the Building for the current round is 10 Reals minus the summed value of the just rolled Guild dice on that Character, if any. If the cost is less than 0 consider it to be 0. If the player pays, he may immediately perform the Building Action, if he can and wants to. He pays the cost and may perform the Action once regardless of the number of Action Markers he has on the Building. The player may choose to pay the cost even if he cannot or does not want to perform the Building Action.
Reminder: The player may use the Windmill to take Reals from the general supply, if he can and wants to.
Receiving Pirates
If the player cannot or does not want to pay, he cannot perform the Building Action. Also, he receives Pirates of a total value of 1 plus the value of the just rolled Pirate die on that Character, if any. If there is no Pirate Die, the player receives a Pirate of value 1. Players keep their Pirates stacked together face-down, their value hidden from other players. The player only receives Pirates once regardless of the number of Action Markers he has on the Building. If a player pays the cost, he does not receive any Pirates, even if he does not perform the Action (whether because he cannot or does not want to).
The Buildings. Each building describes the action the player may perform according to the number of Workers he has in that Region. If the player does not have at least 1 Worker in the Fields of the Building's Region, he cannot perform the Building Action. Workers in the Forest Field do not count because it is not part of any Region.
Pirates
At the end of the game (see End of the Game), players will lose Prestige Points depending on how many Pirates they have, compared to the other players. If a player has no Pirates at the end of game, he doesn't lose any Prestige Points.
Note: When a player discards 1 or more Pirates, he has to show to the other players the value of the Pirates he is discarding.
Reminder: When it is said that a player has, receives or discards a certain number of Pirates, it is always referred to their value and never to the number of tiles.
Available Building Actions
Each building describes the action the player may perform according to the number of Workers he has in that Region.
- If he has 1 or 2 Workers in that Region, he may perform the action depicted in the top slot.
- If he has 3 or more Workers in that Region, he may perform the action depicted in the bottom slot, instead.
Workers in the Forest Field do not count because it is not part of any Region. If the player does not have at least 1 Worker in the Fields of the Building's Region, he cannot perform the Building Action.
1. Moinho (Mill) — No Character tile in round 5. If a player pays the cost and has:
- 1 or 2 of his Workers in Region 2, he takes 2 Bread from the general supply.
- 3 or more of his Workers in Region 2, he takes 5 Bread from the general supply.
2. Capitania (Captaincy) — No Character tile in round 4. If a player pays the cost and has:
- 1 or 2 of his Workers in Region 2, he earns 1 PP and may move 1 of his Workers onto any empty City spot.
- 3 or more of his Workers in Region 2, he earns 3 PP and may move up to 2 Workers, each onto any empty City spot (same or different City).
Movement rules: The player can move his Workers from his Home, any Field, any other City spot, or any Colony Land. He cannot move them from the City Watch. Only 1 Worker/Citizen can occupy each spot. Workers can be moved only to already-built districts (i.e. without any Guild Favor on them).
3. Alfândega (Customs) — No Character tile in round 3. If a player pays the cost and has:
- 1 or 2 of his Workers in Region 1, he may move 1 of his Workers to any Colony Land (Açores, Brasil, India).
- 3 or more of his Workers in Region 1, he may move up to 2 of his Workers to any 1 or 2 Colony Lands (Açores, Brasil, India).
Movement rules: For each Worker just moved this way, he earns 1 PP for each of his Ships in the same Colony, if any. The player can move his Workers from his Home, any Field, any City spot, or any other Colony Land. He cannot move them from the City Watch. There is no limit to the number of Workers (same or different players) that can be present in each Colony. He can move to any Colony Land even if he has no Ships in that Colony Landing slots. The player has to move a Worker into a Colony Land in order to get the points. He does not get any point for Workers he already has on the Colony Land.
4. Casa da Coroa (Guild Palace) — No Character tile in round 2. If a player pays the cost and has:
- 1 or 2 of his Workers in Region 3, he may flip 1 of his Guild Favors face-up.
- 3 or more of his Workers in Region 3, he may flip up to 2 of his Guild Favors face-up (same or different Guilds).
5. Fortaleza (Watch Tower) — No Character tile in round 1. If a player pays the cost and has:
- 1 or 2 of his Workers in Region 3, he may move 1 of his Workers into the City Watch.
- 3 or more of his Workers in Region 3, he may move up to 2 of his Workers into the City Watch.
Movement rules: For each Worker just moved this way, he may discard up to 3 Pirates. The player can move his Workers from his Home, any Field, any City spot, or any Colony Land. There is no limit to the number of Workers (same or different players) that can be present in the City Watch. The player has to move a Worker into the City Watch in order to discard the Pirates, i.e. he does not discard any Pirate for Workers he already has in the City Watch.
Phase D. Maintenance
Perform the following 4 steps one at a time in this order:
1. Honor — honoring the most loyal guard of the City.
The player who has the majority of Workers in the City Watch may move one of his Workers from the City Watch to his Home to earn 4 PP. If he does not want to move his Worker back Home, or in case of a tie, no one earns the PP.
2. Income — bringing home the fruits of your labor.
For each of his Workers in the Colony Lands the player gets the depicted Good from the general supply.
3. Upkeep — you need to maintain your Ships.
Each player discards 1 Wood for each of his Ships on the board. The player may buy the Wood if he needs it and if he has access to it (see Discarding Wood and Buying Wood). Since players may need to buy the Wood from the Fields, it is important to perform this in the turn order shown in the Passing Column of the Guild Board. For each Wood a player cannot or does not want to discard, he receives 1 Pirate. Players keep their Pirates stacked together face-down, their value hidden from other players. The player cannot move any Ships back Home.
4. Feeding — your Workers need to eat.
Each player needs to feed his Workers on the Board. A number of Workers are automatically fed equal to the number depicted on the player's level in the Windmill, if any. The player must then feed his remaining Workers on the Board discarding 1 Bread for each. For each Bread a player cannot or does not want to discard, he receives 1 Pirate. Players keep their Pirates stacked together face-down, their value hidden from other players. The player cannot move Workers back Home to avoid feeding them.
Note: A player does not gain Bread if he could feed more Workers with the Windmill than he has on the board.
Reminder: A player may use the Windmill to go up 1 or more steps, discarding 2 Wheat for each step.
Phase E. The Crown's Requests
During Phase E of each Round, the players fulfill the requests of the Crown. As a reminder, each request is also depicted on the Building that will be empty in the corresponding round.
1st, 3rd, and 5th Round: the players gain prestige for fulfilling their Crown's Requests (see Reference Sheet for details).
- 1st round: Each player must choose 1 of the 2 Crown's Requests he has in front of him. He earns Prestige Points for it, and discards it.
- 3rd round: Each player must choose 2 of the 3 Crown's Requests he has in front of him. He earns Prestige Points for them, and discards them.
- 5th round: Each player earns Prestige Points for all 3 Crown's Requests he has in front of him, and discards them.
Note: If a player chooses more than 1 Crown's Request of the same kind in the same round, he must assign different items to them (see Reference Sheet for details). The player must discard all the chosen Crown's Requests, even if he earns 0 Prestige Points for one or more of them.
2nd, and 4th round: the Crown requests that the islands change the focus of their agriculture due to the changes in the world.
- 2nd round: Place a value-1 Sugar tile on each "convertible" Wheat Field without Wood on it. From now on, it will harvest Sugar instead of Wheat (see Harvest). The Sugar tile stays on the Field for the rest of the game. If the convertible Field still has Wood on it at this moment, it will never be converted this game, even if the Wood is later removed.
- 4th round: Place a value-1 Wine tile on each "convertible" Sugar Field without Wood on it. From now on, it will harvest Wine instead of Sugar (see Harvest). The Wine tile stays on the Field for the rest of the game. If the convertible Field still has Wood on it at this moment, it will never be converted this game, even if the Wood is later removed.
Reminder: Players cannot use the Windmill to get Reals or Bread during Phases D and E.
End of the game
After the 5th round, the game ends.
Resources
Each player converts all his Goods, Wood, and Bread 1-for-1 into 1 Real each. The player earns 1 Prestige Point for each 5 Reals he has.
Example: Red has 3 Wheat, 2 Wood, and 6 Reals in front of him. He converts the Wheat and Wood into 5 Reals, and earns 2 PP.
Pirates
Each player reveals his Pirates and declares their total value.
- The player that has the most Pirates loses 16 PP,
- The player with the second-most Pirates loses 8 PP,
- The player with the third-most Pirates loses 4 PP,
- The player with the fourth-most Pirates loses 2 PP.
In case of a tie, the current turn order is the tiebreaker: The player earlier in the turn order loses fewer points. Each player also loses 1 Prestige Point for each Pirate over 20 that he has. If a player has no Pirates, he doesn't lose any Prestige Points.
Example: Red has 25 Pirates, Yellow has 21 Pirates, Blue has 12 Pirates, and Purple has 5 Pirates. Red loses 16 PP, Yellow loses 8 PP, Blue 4 PP, and Purple 2 PP. Red also loses 5 PP, and Yellow also loses 1 PP.
The player with the most Prestige Points is the winner of the game. In case of a tie the current turn order is the tiebreaker (the tied player with the topmost disc is the winner).
Tips for the first Game
- At the end of the first round you must fulfill 1 Crown's Request. Concentrate on that in the first round.
- Out of the 5 different Crown's Requests, 2 involve having Ships on the board, but only 1 Character Action and 1 Passing Action allow you to move them to the board. If you want to or need to earn PP with Ships, plan accordingly.
- You cannot move Ships back Home, ever. So unless you have a Ship-heavy strategy, don't place them too early, because they cost you Wood every round.
- Remember that you can buy Wood whenever you need it, as long as you have enough Reals, and access to Wood through Fields or the Forest. Make sure to move a Worker to the Forest in time.
- Because you need Bread to improve your dice as needed, you may want to receive some Pirates instead of using all your Bread to feed your Workers, just to keep your options open.
- You will get Pirates during the game. If you always try to avoid them, you might lose too many actions, making it more difficult to earn Prestige Points. Instead, accept some and get rid of them later through the "Fortaleza" Building Action, the "Constable" Guild Favor, the "City Watch" King's Reward or the "Royal Support" King's Reward.
- Make use of the Windmill. Missing just a few Reals for the Building Action, or needing that 1 Bread to use your die for the Character you need? The Windmill can help you.
- You can relocate your Workers in the Cities for getting resources, but also to be better positioned for majority, for the "Urbanization" Crown's Request.
- The Neutral Citizens can be used for getting more Resources, but they can also help by blocking other players from having a majority for the "Urbanization" Crown's Request.
- Even if you cannot or do not want to perform the action or harvest, you may want to place a die on a certain Character because you need to perform the associated Building Action.
Summary of Rule Differences for a 2- or 3-Player Game
- Initial preparation - 1. Boards: Use the appropriate Guild Board: one Guild Board is for a 4-player game, the other one has different sides for 3- and 2-player games. The number of players is indicated by the number of depicted heads.
- Initial preparation - 5. Dice: Use 9 Guild dice in a 3-player game, and 6 Guild dice in a 2-player game.
- Initial preparation - 7. Crown's Requests: Play with the 15 Crown's Requests having 2 and 3 heads on the back in a 3-player game, and only with the 10 Crown's Request having 2 heads on the back in a 2-player game.
- Initial preparation - 13. Wood: Put the quantity indicated by the middle number in a 3-player game and by the bottom number in a 2-player game.
- Phase A. - Step 4. d.: In a 2- or 3-player game, each row on the Guild Board represents 2 Guilds. The player chooses 1 of the 2 Guilds depicted on the chosen row and flips all his Guild Favors of that Guild. Example: in a 2-player game, if the player chooses the bottom row, he can flip all his Guild Favors of the orange Guild OR all his Guild Favors of the violet Guild.
- Phase B. - Dice Limit: On a single Character, there can be a maximum of either 3 Guild dice, or 1 Pirate die and 2 Guild dice in 3 players; 2 Guild dice, or 1 Pirate die and 1 Guild die in 2 players.
- Phase B. - Commander Action, Available slots in Markets: In a 3- or 4-player game, both the slots with no depicted symbols and the slots marked with the 2-heads symbol are available (i.e. there are 4 available slots in the Wheat Market, 5 in the Sugar Market, and 4 in the Wine Market). In a 2-player game, only the slots with no depicted symbols are available (i.e. there are 3 available slots in the Wheat Market, 4 in the Sugar Market, and 3 in the Wine Market). Note: placing the Ship on the slot marked with 2 heads lets you choose to discard either of the indicated quantities.
- In a 2-player game, only the slots with no depicted symbols are available. In a 3-player game, the slots marked with the 2-heads symbol are also available. In a 4-player game, all the slots are available.
Rules you may forget
- During Phase B - Character Actions, you have to place your Action Marker on the Building slot each time you place a Guild die on a Character. It is easier to remember to do this by always keeping your Guild dice on top of your Action Markers when they are in front of you.
- If you do not have access to Wood (i.e. you have Workers neither in a Field with Wood on it nor in the Forest Field), you can neither buy Wood nor get it.
- When you need to discard Wood, you always have to use the Wood in your Home supply first.
- When you buy Wood, you have to take it (from the Fields or from the general supply) and immediately discard it.
- Mayor Action: You do not receive any resources for a City if you have no Workers in it, even if there are Neutral Citizens.
- Building Actions: If you have at least 1 Action Marker on the building, you must choose between paying the cost or taking the Pirates, regardless of whether you have Workers in that Region.
- If you pay, you can perform the Building Action if you have at least 1 Worker of your color in the Fields of that Building's Region.
- The Forest Field cannot be harvested because it is not part of any Region.
- Performing the harvest allows you to harvest only in the Region of the Character. You do not receive Goods or Wood for your Workers in the other Regions or the Forest.
- On a single Character, there can be a maximum of dice equal to the number of players including no more than 1 Pirate die.
- You can place any die (Guild or Pirate) showing a value equal to or higher than the Region number without any cost. You can place any die (Guild or Pirate) showing a value lower than the Region number, by discarding as many Bread as the difference between Region Number and the value of the die.
- You cannot use a Guild Favor during Phase C - Building Actions unless you have at least one of your Action Markers on the Building currently being resolved (see Reference Sheet).
Authors: Paulo Soledade and Nuno Bizarro Sentieiro. Artwork: Mariano Iannelli. Rules revision: Nathan Morse. © 2013 What's Your Game GmbH.
Reference Sheet — Crown's Requests
During Phase E, each player must choose 1 of his Crown's Requests in the 1st round, 2 in the 3rd round, and 3 in the 5th round. He earns PP for them, and discards them (see The Crown's Requests).
NOTE: If a player chooses more than 1 Crown's Request of the same kind in the same round, he must assign different items to them (see Urbanization for an example). The player must discard all the chosen Crown's Requests, even if he earns 0 Prestige Points for one or more of them.
- Market Routes: The player selects up to 3 of his Ships in the Markets (same or different Markets). He earns 3, 4, or 6 PP for each selected Ship, as depicted in the corresponding Market, according to the round. Example: For each selected Ship in the Wheat Market the player earns 3 PP in the 1st round, 6 PP in the 3rd, and 4 PP in the 5th.
- Expeditions: The player selects up to 3 of his Ships in the Colonies (same or different Colonies). He earns 3, 4, or 6 PP for each selected Ship, as depicted in the corresponding Colony, according to the round. Example: For each selected Ship in India the player earns 6 PP in the 1st round, 4 PP in the 3rd, and 3 PP in the 5th.
- Influence of The Guilds: The player selects up to 4 of his face-up Guild Favors of different Guilds (no more than 1 Guild Favor per Guild). He earns 5 PP for each selected Guild Favor.
- Wealth of the Nation: The player pays up to 15 Reals, and earns 1 Prestige Point for each 1 Real he paid. He places back the paid Reals in the General supply. Example: the player has 20 Reals in front of him. He pays 15 Reals and earns 15 Prestige Points.
- Urbanization: The player selects 1 City of his choice. If he has the most Workers in the City, he earns the higher number of PP indicated at the side of that City. Neutral Citizens count as an additional player for determining this majority. In case of a tie, the tied player with the rightmost Worker/Citizen wins the tie. If he has at least 1 Worker in the City but doesn't have the most Workers, or loses the tie, he earns the lower number of PP indicated at the side of that City. Example: if the player has the most Workers in Funchal, he earns 12 PP, otherwise, he earns 6 PP. If the player chooses 2 "Urbanization" Crown's Requests, he must assign 1 City (for example Funchal) to one Urbanization and a different City to the other one (for example Machico).
Reference Sheet — Guild Favors
A player can use 1 of his face-up Guild Favors at the beginning of each of his turns:
- in Phase B - Character Actions (i.e. before he places a die or passes) and
- in Phase C - Building Actions (i.e. before he pays the cost or receives the Pirates). He cannot use a Guild Favor if he has no Action Markers on the Building currently being resolved, because it is not his turn.
To use a Guild Favor, the player flips it face-down and immediately applies its effect (see below). No Guild Favors can be used during Phases A - Round Setup, D - Maintenance, or E - The Crown's Requests.
Reminder: A player can flip face-up:
- in Phase A - Round Setup, all of his Guild Favors of the same Guild as the one he chooses.
- 1 or 2 of his Guild Favors (same or different Guilds), performing the "Casa da Coroa" Building Action.
- 1 of his Guild Favors, performing the "Guild" King's Reward, if it is in play.
The Guild Favors:
- Monk — The player gets 2 Wood. He does not pay for it. He can get the Wood only if he has access to it (see Getting Wood).
- Miller — The player moves his disc up one step in the Windmill. He does not discard the 2 Wheat.
- Bishop — The player moves any one of his Action Markers. He takes it from any Building (whether already resolved, currently being resolved, or still to be resolved) and places it on any other Building (whether already resolved, currently being resolved or still to be resolved). Reminder: A player cannot use this Favor to move an Action Marker into the currently resolved Building if he does not already have an Action Marker on that Building.
- Patron — The player gets 3 Bread from the general supply.
- Lord — The player can only use this Favor before his turn to "pay the cost" in Phase C - Building Actions. The cost for him of the current building Action is 0.
- Diplomat — The player can only use this Favor before his turn to "pay the cost" in Phase C - Building Actions. If he pays the cost and performs the current Building Action, he performs it as if he has 2 more Workers on Fields of the corresponding Region.
- Treasurer — The player gets 5 Reals from the general supply.
- Navigator — The player moves 1 of his Ships to an empty Colony Landing or Market Routes slot, following the usual rules (see Commander).
- Engineer — The player can only use this Favor before his turn to "place a die" in Phase B - Character Actions. If he uses the Harvest Action, he can harvest 2 more Goods from his Fields. He can harvest 2 different Fields again or 1 Field twice more. If he harvests using the Character depicted on the currently empty Building, he can harvest a total of 3 extra Goods.
Reference Sheet — Passing Actions
According to the slot to which the player moves his Turn Order disc when passing, he immediately either gets the Reals OR performs the Passing Action:
- The player gets 2 Reals.
- The player gets 3 Reals — OR — earns 1 PP, and may move 1 of his Workers to any empty City spot (see Capitania for the movement rules).
- The player gets 4 Reals — OR — moves 1 of his Workers into the City Watch (see Fortaleza for the movement rules).
- The player gets 5 Reals — OR — moves 1 of his Ships following the usual rules (see Commander).
Reference Sheet — King's Rewards
When a Ship is moved into a Colony Landing slot, the player immediately performs the action of 1 of the 2 King's Rewards in that Colony:
- The player moves 1 of his Workers to any field following the usual rules (see Steward).
- The player flips 1 of his Guild Favors face-up.
- The player discards up to 3 Pirates or gets 2 Bread from the general supply.
- The player moves his disc up one step in the Windmill. He does not discard the 2 Wheat.
- The player earns 3 PP.
- The player gets 5 Reals.
- The player earns 1 PP, and may move 1 of his Workers to any empty City spot (see Capitania for the movement rules).
- The player moves 1 of his Workers into the City Watch (see Fortaleza for the movement rules).