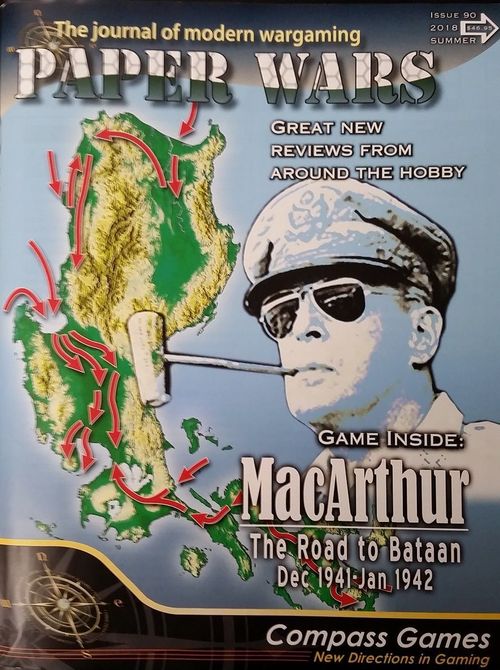
MacArthur: The Road to Bataan, Dec 1941 - Jan 1942
MacArthur: The Road to Bataan, Dec 1941 - Jan 1942 Rulebook
Table of Contents
Table of Contents
- 1.0 Introduction
- 2.0 Game Components
- 3.0 Sequence
- 4.0 Movement
- 5.0 Stacking
- 6.0 Losses
- 7.0 Ground Combat
- 8.0 Air
- 9.0 Reserves
- 10.0 Forts and Fortifications
- 11.0 Submarines
- 12.0 Paratroops
- 13.0 Supply
- 14.0 Reinforcements
- 15.0 Engineers
- 16.0 Preparation for Play
- 17.0 Victory Conditions
- 18.0 Optional Rules
1.0 Introduction
1.1 History
MacArthur: The Road to Bataan covers the battle for Luzon Island during the winter of 1941-42. Basically, this game deals with a large island that must defend itself without any hope of significant outside help against an enemy that can strike from virtually any direction. The Japanese can assault the island at many different points, causing the Allies, Filipino and American, to be very wary of being drawn too far from the island's prize, Manila Bay, the main harbor at Manila and the fortress of Corregidor that controls the entrance.
1.2 Game Situation
The Japanese are understrength for such an important and large operation, while the Allied army is neither adequately equipped nor trained for its mission. The Philippine Army has been under arms for less than six months, and a third of those for a week or less, when the attack begins. Yet heading the Allied army is the most famous American general in uniform, Douglas MacArthur.
1.3 Game Rules
It is suggested that players read the game rules carefully, then choose the scenario they will play by using the chit system for generating a scenario and the victory requirements.
1.4 Description of Play
1.4.1 General Description
The game consists of 13 turns of three historical days each. In each turn the players will alternate moving their playing pieces and resolving combat. Each side will move all, some, or none of its pieces during the movement portion of its turn and then have combat with adjacent enemy pieces.
1.4.2 Combat Description
The combat procedure is a mathematically based method of determining the overall results of a particular combat situation. This procedure consists of computing the numerical strengths of the opposing pieces as a ratio and then consulting a Combat Results Table (CRT) to find the results. The die is only used to represent a reasonable range of possible combat outcomes, reflected by the fog of war.
2.0 Game Components
The following components are be found in the magazine:
A. One map
B. One rules manual
C. One 300 piece counter sheet
2.1 The Map
2.1.1 General
A. The playing area consists of a map of Luzon Island in the Philippine Islands. Printed over the map is a hexagonal grid pattern (hexes) used to regulate movement, similar to Go or the squares in Chess. Each hex represents a scale distance of approximately 11 kilometers (6.7 miles).
B. Also on the map are different terrain symbols which will identify what type of terrain lies in each hex or hexside. Terrain affects both the movement and combat capabilities of the units.
C. Treat a hex as rough if it contains any rough terrain.
2.1.2 Bicol Peninsula
The Bicol Peninsula is the southern and virtually undefendable portion of Luzon Island. It consists of the four areas on the map which may be invaded by Japanese forces. This section is included for the required capture and use of the airfields there (4.8).
2.2 Charts and Tables
MacArthur has several charts and tables needed for play.
2.2.1 Luzon Airfield Charts
These show the various airfields on Luzon, and the number and types of aircraft that may be based there. Each player needs a copy of the chart, since the Japanese must transfer some of its aircraft to Luzon in order to use them. This chart should be kept hidden so that the other player may not see where the air units, air base support units, and anti-aircraft units are located.
2.2.2 Allied Holding Boxes
These are for the storage of units stacked with a headquarters unit, or for the few mechanized battalions which can break down to company size.
2.2.3 Japanese Holding Boxes/Formosa Airfield Chart
A. This chart has two functions:
-
It functions like the Allied Holding Boxes.
-
It functions like the Luzon Airfield Chart.
B. The difference between the Formosa and Luzon charts is that each base on Formosa has a number that represents the distance (in hexes) that air units from that base must fly to reach the hexes on the north end of the map labeled with the letter F.
2.2.4 Turn Record Chart
This chart keeps track of the number of turns which have been played, as well as identifying when reinforcements may arrive or when units must withdraw.
2.2.5 Terrain Effects Chart (TEC)
This chart covers the effects of terrain on units.
2.2.6 Combat Charts
The two combat charts cover the resolution of ground combat, air related combat, submarine combat, and special conditions.
2.2.7 Japanese/Allied Planning Pads
These are used by:
A. The Allies to keep track of their submarine locations, and the status of the Corregidor batteries, and
B. The Japanese to keep track of transport points, the damage inflicted on Cavite and Corregidor.
2.3 The Units
The printed die-cut cardboard squares are the playing pieces for the game. Called units or markers, each piece represents an actual military unit or acts a marker to identify special game conditions on the mapboard. Each unit contains the following information:
2.3.1 Unit Sizes
The organizational size of a unit is indicated by the small symbol located above its type symbol.
| Symbol | Unit Size |
|---|---|
| XXXX | Army |
| XXX | Corps |
| XX | Division |
| X | Brigade |
| III | Regiment |
| II | Battalion |
| I | Company or Battery |
2.3.2 Unit Types
The unit type symbols are graphics in the source and are not reproduced here. The following type labels are printed in the source:
- Infantry (bike units are noted with their movement factor in parentheses)
- Artillery
- Armor (Tank)
- Headquarters (HQ)
- Cavalry
- Parachute
- Self-Propelled Artillery (SPA)
- Motorized Artillery
- Marines
- Engineers
- Antiaircraft (A)
- Antitank (AT)
- Mountain Artillery
- Provisional Infantry
- Bren Carrier
- Combat Engineers
- Truck
- Air Base Support Unit (ABSU)
- Aircraft
An asterisk on armor and artillery indicates a combat die roll modifier is available (7.2.4.1).
2.3.3 Markers
- Disruption
- Fortification
2.3.4 Abbreviations
| Abbreviation | Explanation |
|---|---|
| ABSU | Air Base Support Unit |
| C | Constabulary |
| Cor | Corregidor (printed as "Correigidor" in the source) |
| F | Formosa |
| Ind | Independent |
| PA | Philippine Army |
| PR | Provisional |
| PH | Philippine Division (US Army) |
| R | Recon Unit |
| ROTC | Reserve Officers Training Corps |
| SNLF | Special Naval Landing Force |
2.3.5 Unit Identification
The identifying symbols on each unit are graphics in the source and are not reproduced as text. Abbreviations used on units are listed in 2.3.4.
3.0 Sequence
MacArthur is played in turns. Each turn is divided into two player segments which are further divided into five phases. The sequence of play follows:
3.1 Reinforcement Phase
A. Both sides introduce their reinforcements due this turn.
B. Japan removes its required withdrawals.
3.2 Japanese Segment
3.2.1 Naval Movement
A. Invasion fleets (amphibious forces) are placed on the invasion arrows adjacent to the previously selected invasion beaches.
B. Submarine attacks are conducted.
3.2.2 Air Movement and Combat
3.2.3 Land Movement
All units already on Luzon may now move.
3.2.4 Land Combat
A. The Allies may conduct reserve movement.
B. All attacks are declared before resolving any.
C. Japan may conduct reserve movement.
D. No combat may take place, nor may enemy units move, during the Movement Phase. Exception: 7.4.
E. A unit may freely pass through or stop in the same hex with other friendly units, subject to stacking limitations (5.0).
F. A friendly ground unit may not enter a hex containing enemy units, unless those units have no defense strength. Exceptions: 7.4, 12.0.
G. A unit may not enter a hex unless it has sufficient MP available to cross the hexside and enter the hex.
H. Units may not move from one coast hex to another unless they are adjacent and interconnected.
I. A unit may always move one hex a turn, except onto prohibited terrain, even if lacking sufficient MPs.
Example: The unit below with a movement factor of five MPs expends one MP to move into the clear hex and two more MPs to move into the rough hex. It may not move into the second rough hex since that would cost two MP to enter the hex and another MP to cross the completely rough hexside.
3.2.5 Air and Amphibious Unit Movement Completion
A. All air units, except Japanese units on CAP or interdiction must return to their bases.
B. Amphibious units may advance two hexes.
3.3 Allied Segment
The Allies repeat 3.2.1-3.2.5, except that the roles are reversed.
3.4 End of Turn Phase
Advance the Turn Record Marker to the next turn.
4.0 Movement
4.1 Normal Movement
A. Each unit may be moved as many hexes as possible within the limits of its movement factor (MF), terrain restrictions, and other game rules.
B. Units are moved individually, tracing the path of movement through adjacent hexes.
C. Once a unit has completed its movement, it may not change that move. A unit's move is considered complete when the player begins to move another unit.
4.1.1 Movement Allowance
A. The number of hexes through which a unit may move in a turn may allow a unit to expend less than one movement point (MP) per hex (4.2).
4.1.2 Movement in General
A. During a turn, each side may move as many or as few units as desired.
B. A unit may be moved in any direction or combination of directions.
C. A unit may expend all, some, or none of its movement allowance each turn. Unused MPs may not be transferred from unit to unit nor accumulated from turn to turn.
4.2 Road Movement
4.2.1 General Rule
A unit moving along a road connected directly to the same road on an adjacent hex may use the road movement rate. Motorized units (those with 6 or more MPs) may expend ½ MP per hex to move along the road.
4.2.2 Roads and Rivers
Roads do not negate the effect of rivers where a bridge has been blown (8.3.5, 15.1). If there is no bridge where a unit crosses a major river, that unit must spend its entire turn crossing the river. Exception: 15.5.
4.2.3 Air Interdiction Effects on Roads
Units that pass through a hex being interdicted by air units of either side may not take advantage of any roads in that hex or bridges adjacent to that hex. The interdicting air unit effectively knocks out the road in that hex and any adjacent bridges for that turn.
4.3 Strategic Movement
A. Units may use strategic movement as long as they do not start their turn adjacent to an enemy unit and do not move adjacent to an enemy unit at any time during their move.
B. The strategic movement rate may only be used in one continuous road move per turn per unit. If the road is interrupted by interdiction, blown bridges, or cross-country travel, the remainder of that unit's road movement for that turn must be at the tactical movement rate.
C. A strategic road move may be preceded by any combination of road and cross-country movement.
4.4 Amphibious Movement
4.4.1 General Rule
The map contains several named beaches which may be used for amphibious assaults. The Japanese must introduce all of ground units (Exception: Paratroops, 12.0) onto Luzon by moving a limited number of slow, vulnerable, troop transports to Luzon and assaulting these beaches.
4.4.2 Transports
A. Each scenario identifies the number of operational and strategic transport points available (16.4.4).
B. The operational transport total represents the number of stacking points the Japan can transport over a four-turn period with the transports permanently assigned to the Luzon operation. These transport points represent the capacity of the Japanese transports and their transit time between Luzon and Formosa.
C. The strategic transport total represents the special allotment of transports from the Japanese strategic pool for the main invasion of Luzon. A majority of these transports were used to initiate the Singapore campaign and later for the invasion of Java. Japanese planning could not tolerate the loss of transports from the strategic pool, so any losses inflicted on these ships must be made up from the operational pool.
D. Strategic transports are available for landings from Turn 5 through Turn 6.
4.4.3 Recording Transport Points
The Japanese side notes on its planning pad the number of transport points used each turn and when those transports are next available. (Transports used on Turn 1 are available again on Turn 5.) Losses due to submarine attacks or air bombing are subtracted from the returning number of transports.
4.4.4 Invasion Groups
A. Japan must allocate its invasion groups and place them on the arrows pointing toward the hex they will assault.
B. The stacking limit for invasion hexes is 32 stacking points.
C. The units are then subjected to possible submarine attacks (11.0).
4.4.5 Assaults
A. On Turn 1, Japan may land at any invasion beaches.
B. For subsequent turns, Japan must write on its planning pad which beach it will assault the next turn.
C. On the next turn Japan may assault that beach, an adjacent beach, or no beach at all.
D. An adjacent beach is defined as the nearest beach on either side of the designated beach.
Example: The beaches adjacent to Lingayen Gulf are Vigan and Agno.
4.4.6 Amphibious Combat
A. Amphibious assaults are similar to normal combat, but only the enemy units in the hex they will land in may be attacked.
B. Attacking units attack at half strength, except for artillery type units which have no attack strength at all.
C. Amphibious units which successfully attack may advance only one hex, while the ones which could not clear their beach hex of enemy units are destroyed.
D. If an amphibious assault is successful (defender retreats or is eliminated), the amphibious units which did not attack may advance two hexes as soon as combat is completed.
E. If an amphibious assault is unsuccessful (at least one defender remains in the hex), the attacking unit is eliminated. Any accompanying attacking units must return to Formosa.
Example: Japan attacks Lingayen Gulf with three stacks, with stack A attacking the defending Allied unit. During the resulting combat, the Japanese stack does not succeed in destroying the enemy unit or causing it to retreat, and is therefore itself destroyed. The units in stacks B and C return to Formosa.
4.5 Local Amphibious Movement
Both sides may use local amphibious movement, with differing capabilities.
4.5.1 Japanese Local Amphibious Movement
A. A total of eight stacking points of Japanese infantry, bike, or combat engineer units may use local amphibious movement each turn. These units must start the turn in a seacoast town or on an invasion beach, and may be transported a maximum of 6 coastal hexes and landed (not necessarily at an invasion beach).
B. If the invasion hex is occupied by an enemy unit, a regular amphibious assault is conducted. If the enemy unit is not destroyed or forced to retreat, the Japanese unit is destroyed.
C. This movement consumes the unit's entire move, but the units may still advance one hex after a successful combat into the coastal hex.
4.5.2 Allied Local Amphibious Movement
The Allies may move nine stacking points of any type each turn between friendly hexes within Manila Bay (with Corregidor and the adjacent hexes as its western limits).
4.6 Truck Movement
A. Truck units have a transport value, which is the number (3 or 4) following the T in the upper left corner. Each truck may transport that many stacking points of infantry per turn.
B. Infantry may not move normally during a turn they are transported by trucks.
C. Trucks may begin with an infantry unit to be moved or may move to pick it up at no MP cost and continue to move.
D. A truck unit may not carry other units that turn.
E. Truck units with troops may move adjacent to an enemy unit and fight.
F. Truck units may never leave the road. If forced to do so they are destroyed.
4.7 Bike Units
A. Bike units are Japanese infantry with a movement factor of (5).
B. They may use the motorized movement rates on roads.
C. In all other cases they are treated as infantry.
4.8 The Bicol Peninsula
A. The Bicol Peninsula is a special zone divided into four areas. To move into an area requires the entire movement factor of a non-motorized unit, while a motorized unit must expend half its MP to enter an area.
B. If a unit enters an area containing an enemy unit, all movement must cease until the time that no enemy units remain in the area.
C. Any of the four areas may also be invaded.
D. An airfield may not be used if enemy units are in the area.
E. Each area costs 6 MPs for an air unit moving through it (8.1).
5.0 Stacking
Each side may have more than one unit in the same hex. The number of stacking points in a hex is limited to 64.
5.1 Stacking Points
A. Each ground unit has its stacking point value in its upper right corner.
B. If the stacking limit is exceeded for any reason, the entire stack is immediately demoralized (7.3.3). The owning side must correct the situation during its next Movement Phase or select excess units to eliminate.
5.2 Stacks
A. To aid in the handling of large stacks, it is helpful to use the Off Board Holding Boxes (OBHB).
B. The headquarters (HQ) units can be used to represent the units stacked with them. To do this, place the respective units into the OBHB area represented by the HQ unit on the map. The HQ unit then represents the off-board stack.
C. Stacks may not be examined by the other side. Only the top unit may be observed in a stack.
D. Beginning the turn adjacent to an enemy stack, the enemy may ask for the defensive and offensive strength of the enemy stack and whether any tanks or artillery are present in the stack. (AT guns need not be mentioned.)
E. The owning side may vary the strengths by five combat factors either way when answering, but must be honest about the presence of tanks or artillery.
Example: Japan moves next to the 1st PA HQ unit. It represents an off board stack of six units, one of which is artillery. On the next turn the Japan requests the stack strength, as its unit is beginning the turn next to the PA unit. The actual strength is 7 AFs and 19 DFs. The Allied side states that there a 12 AFs, 16 DFs, and an artillery unit present.
5.3 Special Stacking
A. Airplane units stack freely. Their airbase support units include the aircraft in their stacking total.
B. The Corregidor hex may contain only 20 stacking points at the end of the Combat Phase.
C. The Bicol Peninsula may contain up to 12 Allied stacking points.
6.0 Losses
6.1 Step Losses
Many infantry units have a lower strength represented on their reverse. These units may satisfy a step loss requirement by being flipped over to their weaker side. A second loss would eliminate the unit.
6.2 Breakdown Substitute Counters
A. Each armored or SP battalion is provided with company size substitute counters for satisfying combat losses, or for dispersing the unit at the player's discretion. Each battalion therefore has three steps, one for each company.
B. Battalions may break down into companies at any time. A battalion is replaced by its companies located in the unit's OBHB.
C. Battalions may be reformed at any time that all of the original companies of the battalion are in the same hex. This can be accomplished by switching the company and battalion counters between the hex and OBHB.
6.3 Replacement Substitute Counters
The Allies may receive Provisional Infantry units during the Reinforcement and Removal Phase, one each at Bataan Airfield and Manila, on the turn after they voluntarily remove four Air Base Support Units (ABSU) per infantry unit to be received.
Historical Note: The provisional units represent the "armed mechanics" who fought during the campaign.
Player's Note: The Allies start with the ABSU of the Pensacola Convoy aircraft, whose only use will be to convert to these units if the convoy does not arrive.
7.0 Ground Combat
A. Combat occurs between opposing units in adjacent hexes (or the same hex in the case of a breakout, amphibious assault, or parachute landing) or in the same Bicol Peninsula area at the discretion of the phasing side.
B. The phasing side is always considered the attacker, while the non-phasing side is the defender, irrespective of their overall situation.
7.1 Attack Requirements
A. The only time a unit is required to attack is when an enemy unit is in the hex the unit must enter (amphibious assaults, 4.4-4.5; parachute landings, 12.0).
B. An amphibious unit may only attack the hex that its invasion arrow is pointing toward.
C. All defending units in a hex must be attacked as one combined defense strength.
D. Not all friendly units in a hex are required to attack the same defending hex. Different units in the same hex may attack defenders in different hexes.
E. Attacking units may attack the same defending units from as many different adjacent hexes as possible.
F. Defending units in multiple hexes may be attacked as one combined defense strength, provided that ALL of the attacking units are adjacent to ALL of the defending units.
7.2 Combat Resolution Procedures
A. For each attack, total all of the AF for the attacking units. Then total all of the DF for the defending units. Be sure to account for the effects of demoralization on individual units, and retain all fractions.
-
Units with their DF in parentheses will always use their AF on defense unless there is no unit in their hex that has a non-zero DF without parentheses.
-
Artillery units with an "*" may lend their attack strength to the defense of a friendly adjacent hex, if their own hex is not under attack.
B. Modify the attack and defense strengths for terrain and supply. Retain all fractions until the next step.
C. Convert these two totals into an odds ratio (attacker divided by defender). Round this ratio down to conform to the simplified odds ratio shown on the Combat Results Table (CRT).
D. Determine the die roll modifier.
-
Some tank and heavy artillery units have one or two asterisks in the upper left corner. These units have a DRM of 1 or 2, respectively, on attack or defense. Additional units of the same type will provide no more benefit to the attack or defense. That means that if three artillery units with a single asterisk were involved in an attack, the DRM would only be 1, but if an tank unit with a single asterisk were also involved the DRM would be 2.
-
Japanese AT units reduce the DRM of American tanks by 1 in the hex the AT units are defending.
-
If a tank, an artillery (mountain or SPA), and an infantry (marine or paratroop) unit are all in the same hex involved in the combat, a combined arms DRM of 1 can be applied, either for defense or attack.
E. Roll the dice, apply the DRM, and then cross-index that number with the previously determined odds ratio on the CRT to find the results of the attack.
7.3 CRT Explanations
7.3.1 Step Losses
A. The numbers 1-4 indicate the number of steps lost out of every 5 (or less) available.
Examples: A result of 1 on a stack of 16-20 steps, eliminates four steps. A result of 2 requires 4 steps from 10, and 8 steps from 16-20.
-
A step loss may be satisfied by the loss of: a company from a mechanized battalion, a step to a weaker strength (6.1), or the loss of an entire unit.
-
The defender selects which of its steps to lose.
-
The attacker must first lose its strongest infantry (marine or paratroop) step available.
7.3.2 Artillery and Armor Losses
A. Artillery and armor units are eliminated when an artillery symbol or an armor symbol appears in the combat result. When these symbols appear, at least one step loss must come from that type, if available.
-
Armor losses must come from tank units first, then recon, Bren, and finally SPA units.
-
Artillery losses must first come from mountain units, then normal artillery, AT, and finally AA units.
B. Artillery and armor steps must also eliminated lost if they are the only undemoralized units participating in a combat where losses are called for by the CRT.
7.3.3 Demoralization
A. A D result means that all participating units are demoralized.
-
Demoralized units may not attack. They defend at half strength.
-
Their movement allowance is only half their normal rate.
-
They may not be placed in reserve.
-
Demoralization lasts a full turn and is indicated by the placement of a Demoralization marker. Use the front of the marker to indicate demoralization during Japan's turn and the reverse to indicate demoralization during the Allies' turn.
-
Subsequent demoralization results in this phase will have no further effect.
-
A demoralized unit may not contribute towards a DRM nor carry out any special functions.
7.3.4 Retreats
A. An R result means that the entire stack must be retreated one hex by the owning side.
-
The retreat must be, as much as possible, away from enemy units and towards an active supply source.
-
Units may not retreat through enemy units or across prohibited hex sides. If unable to retreat the units may attempt a breakout.
B. Units unable to retreat may attempt a breakout into a single enemy occupied hex, displacing the enemy units if successful.
-
The breakout units lose five times the number of enemy stacking points that are in that hex.
-
The enemy units in that hex lose half the number of breakout stacking points which do escape, and must retreat one hex, following retreat rules above. Round up all losses to the nearest available unit.
-
A breakout by one side may not lead to a breakout by the other side.
-
Units may not breakout into a hex they would normally be prohibited from entering, though the defender may choose to leave units behind (eliminating them) to allow others to break out.
C. If a unit is demoralized and forced to retreat to a hex under attack that turn, it suffers the same result that the attacked hex suffers (if any). If forced to retreat, it suffers one step loss in addition to any other steps lost in the subsequent combat.
7.3.5 Advance after Combat
When a hex is vacated due to combat, the victorious side may occupy the vacated hex with any unit, and may occupy any vacant adjacent hexes with motorized units. Friendly CAP may advance with the victor (8.5.4.3).
7.4 Automatic Victory
A. If a stack of units moves adjacent to an enemy stack, the moving side may attempt an automatic victory by expending the MPs required to enter the defending hex, plus one additional MP.
B. The moving side must announce the number of AFs present in the stack, and if the combat ratio at least 10:1, the defending units are eliminated.
C. The non-moving side is not required to reveal the strength of its stack until 10:1 odds are achieved.
D. The moving units must enter the emptied hex and may then continue their move.
E. The phasing side may move as many stacks as desired adjacent to the enemy hex in order to create 10:1 odds. Only the last stack to arrive may continue to move, however the other units may occupy the emptied hex.
F. A unit with a non-zero attack strength may achieve an automatic victory over a zero defense strength unit merely by attempting to enter its hex.
8.0 Air
The use of air power in this campaign was significant, but it was not as decisive as it would be later in the war. One reason was that close coordination between ground and air units was poor, which is why air units may not directly support ground attacks.
8.1 Movement
A. Each air unit's movement factor is the number of hexes it may fly to its target (i.e., its one-way range). An air unit spends 1 MP for each hex it enters during its move. Terrain has no effect on air unit movement costs.
B. If an air unit flies no combat mission (8.4 and 8.6) in its Air Phase, it may relocate up to twice its range, to a friendly, supplied airfield. The air unit's ABSU is then moved to that airfield at no cost in transport points. The airfield flown to may not have been captured this turn.
C. Each airfield on the Formosa Chart has a boxed number (Example: Heito's is 33) representing the number of air MPs expended to enter the mapboard from that field. Air units flying to and from Formosa enter and exit the top of the map at hexes with a circled F.
D. Air units may attack airfields on Formosa, expending the number of MPs to fly per the number on the specific airfield, and leaving the map at the hexes with a circled F.
E. Air units on interdiction, scramble, and combat air patrol missions return to base during the enemy's Air Return Phase instead of their own Air Return Phase.
F. Air units operating from fields on the Bicol Peninsula must move through each box of the peninsula at a cost of 6 MPs and then they may enter the mapboard on the entry hexes labeled with the circled letter B.
8.2 Air Base Support Units (ABSU) and Airfields
A. Each air unit must be based with a compatible ABSU at the end of its turn.
-
A P-40E may use any P-40 ABSU, but all other air units must use their exact type of ABSU.
-
The ABSU for Neils, Bettys, and the Tina are permanently assigned to the airfield, so no ABSU counters are assigned to those aircraft.
B. Air units unable to return to a compatible ABSU may land at a friendly airbase with sufficient capacity to handle their class of aircraft. Air units doing so may not engage in any form of combat until they start a turn with a compatible ABSU.
C. Air units which cannot land at a friendly airfield are destroyed.
D. Bataan Island is a small island north of Luzon that automatically falls on turn 1 to Japan. Up to two fighter units may operate from the island's dirt strip.
E. Each airfield has a limited air unit capacity, defined by the number of air unit boxes on the airfield chart.
-
Each air unit box contains either an F (Fighters only) or a B (Both classes-fighters and bombers). This means that a bomber unit may not land at a field which does not have any B boxes available.
-
Fighters are types Zeros, Claudes, Nates, P-40s, P-35s, and P-26s. All other types are considered bombers.
F. Airfields with an ABSU may repair bombing damage at the rate of one air unit box per turn.
G. Any number of planes may use the same compatible ABSU.
8.3 Bombing Missions
8.3.1 General Rule
A. Bombing missions are conducted by bombers. They may bomb airfields, bridges, ground units, or Corregidor (8.3.6, 10.2.2).
B. Bombers must be placed directly on the target which must be within range of the bomber's field.
C. Missions conducted by Japanese Army and Navy air units must be treated as separate missions, with their sequence (within a hex) being randomly determined.
8.3.2 Bombing Groups
A. After air-to-air combat and AA fire have been resolved in a hex, bombers may attack.
B. Bombing groups must be formed in groups of six bomb factors or fewer.
C. The number of bombing groups formed must also be as small as possible.
D. After forming bombing groups, roll two dice on the appropriate column of the Bombing Attack Table for each bombing group.
8.3.3 Bombing Attacks against Ground Units
A. A D result demoralizes a unit (7.3.3).
B. An E result eliminates a step.
C. A 2D or 2E result affects two units.
D. The units affected are randomly chosen from the stack by the attacker selecting their position number from the total in the stack (e.g., 3 and 6 in a stack of 7).
E. A bombing attack may not be made if a friendly ground unit is adjacent to the target enemy unit unless there is a body of water (river, lake, or ocean) between them.
8.3.4 Bombing Attacks against Airfields
A. A D or E result eliminates an air unit on the ground.
B. A 2D or 2E result eliminates two air units.
C. The attacker may select the air units to be eliminated.
D. The attacker may bomb the field instead of any aircraft that might be on it. Each hit reduces the field's capacity by one air unit. Mark the air unit capacity boxes to indicate the loss of capacity.
E. Apply a -2 DRM to bombers making such attacks.
8.3.5 Bombing Attacks against Bridges
A. Bridges exist wherever a road crosses a major river.
B. AA or CAP located in either adjacent hex may fire on attacking bombers before bombers attack a bridge.
C. Any hit scored will destroy the bridge. Use a Bridge Blown marker to show its status.
8.3.6 Bombing Attacks against Corregidor
A. Follow the procedure in 8.3.1 and 8.3.2.
B. Use the Corregidor Bombardment Table.
-
An E result eliminates one battery.
-
A 2E, 3E, 4E, or 5E result eliminates that number of batteries.
-
A D result disrupts one battery.
-
A 2D result disrupts two batteries.
C. Apply the results per 10.2.2.
8.3.7 Dive-Bombers
Dive-bombers are indicated by circled bomb factors. They attack on the Dive Bombing Table. Their missions are otherwise identical to regular bombers.
8.4 Scramble Combat
Aircraft may scramble using the Scramble Table during the enemy's Air Movement and Combat Phase any time when:
-
An airfield is attacked,
-
A Japanese air attack takes place within six hexes of an Allied airfield, or
-
An amphibious assault takes place within 12 hexes of an airfield.
8.4.1 Airfield Attack
When an airfield is the target of an air attack, the owning side rolls on the Scramble Table. If all the aircraft may escape, the fighters (if any) may remain and fly CAP. On a 5 the fighters must fly CAP. On a 4 they may fly CAP.
8.4.2 Japanese Air Attack within 6 Hexes
A. If there is a Japanese air attack within six hexes of an Allied field, the Allies may attempt to scramble the field's fighters. The fighters then act as CAP in that hex.
B. Scrambled fighters do not need to take the ratio penalty (8.5.4.2) imposed on ordinary CAP missions.
8.4.3 Amphibious Landing within 12 Hexes
A. Air units may scramble when an amphibious landing is occurring within 12 hexes.
B. For every hit the bombers achieve on the bombing table, the amphibious stack loses a step, selected in the same manner as in 8.3.3.
C. Japan also loses as many sea transport points as lost in stacking factors.
D. If strafing fighters destroy a step (8.5.2), no transport points are lost.
8.4.4 Enemy Ground Unit Occupies Airfield
A. If friendly air units occupy an airfield when an enemy ground unit enters the hex, the air units may attempt to scramble.
B. If successful, they may fly to any friendly field within range, but may not engage in any form of combat.
C. If the scramble fails, the air units are eliminated.
8.4.5 Air Attacks on Formosa
Apply a +2 DRM to the Scramble Table for air attacks on Formosa, except for Kagi and Taichu (due to lack of an adequate early warning system).
8.5 Fighter Missions
There are four fighter missions: Escort, Strafing, Interdiction, and Combat Air Patrol (CAP).
8.5.1 Escort
A. Escorting fighters fly with bombers on bombing missions to protect them from CAP.
B. Japanese Army fighters may not escort Navy bombers, and vice versa. If Army fighters are in the same hex as Navy bombers, Allied CAP may attack the bombers without interference from the Army fighters.
8.5.2 Strafing
A. Fighters conduct strafing attacks on the Strafing Table.
B. Apply appropriate DRMs, then roll two dice for each fighter.
8.5.2.1 P-40E Strafing
P-40E units may drop 1 bomb factor and then strafe, only if they have not engaged in combat as fighters in the same turn.
8.5.2.2 Strafing by Escorts
A. Escort fighters which do not attack and are not attacked by a CAP fighter, may strafe the target hex.
B. Fighters may fly without bombers to strafe a target hex.
8.5.2.3 Strafing Tank and SPA Units
Strafing may not eliminate tank or SPA units. Those units suffer demoralization instead.
8.5.3 Interdiction
A. The Interdiction mission is used to slow enemy ground movement.
B. During the Air Movement and Combat Phase, place a fighter unit on a road hex within half the unit's range from its field.
C. The road in that hex and any adjacent bridges effectively cease to exist for all ground units while the mission is in progress.
D. Interdicting air units remain in place throughout the enemy Movement Phase, and may not be attacked by enemy air units.
E. Interdicting units return to base during the enemy's Air Return Phase.
8.5.4 Combat Air Patrol (CAP)
8.5.4.1 General Rule
A. The CAP mission is used to place a protective air cover over friendly ground units or airfields.
B. A CAP mission may avoid combat by withdrawing from the hex if friendly aircraft are not on the ground in that hex.
C. CAP missions are returned to base during the enemy's Air Return Phase, just like interdiction missions.
8.5.4.2 Inversion of Units from Originating Field
A. If a CAP mission flies half or less of its range from the airfield to the hex it protects, invert one air unit inverted at its originating field for each air unit (of the same model) flying CAP.
B. If the distance from the field to the protected hex is greater than half the fighter's range, then two air units of the same model must be inverted for each air unit flying CAP.
C. If a mixture of fighters is used for CAP, use the shortest ranged fighter for the range calculation, and use the weakest air unit over the protected hex.
8.5.4.3 CAP and Advance after Combat
A. A CAP mission remains over ground forces that advance after combat. The mission may not remain over reserve units that move more than three hexes.
B. CAP cannot advance with ground forces after combat, if doing so would place it out of range of a friendly airfield.
8.6 Air-to-Air Combat
If air units enter and attempt an attack in a hex with CAP, air-to-air combat results.
8.6.1 Dividing Attacking Force
A. In air-to-air combat, the attacker divides its force into two groups: the escorting fighters and the bombers.
B. If Japan has both Army and Navy bombers in the hex, they must be split into separate missions. Allied CAP units may attack both Japanese missions that turn.
C. Match the defender's CAP on a one for one basis with the escorting fighters.
D. Excess CAP units may combine against escort fighters already under attack, or they may attack the bombers.
E. Excess escorts may attack CAP units or strafe ground targets.
8.6.2 Declaring Attacks
A. Each air unit may roll only one attack per combat.
B. All attacks must be declared before any resolution may take place.
8.6.3 Attacking Bombers
A. When attacking bombers, fighters do not need to attack all bombers before assigning extra fighters to the attack on a specific bomber.
B. Bombers may only attack a fighter unit specifically attacking it.
8.6.4 Resolving Combat
A. Resolve combat on the Air-to-Air CRT.
B. Subtract the defense strength from the attack strength to find the differential.
C. Roll two dice, cross-referencing the row corresponding to the differential. Use a colored die for the C column and a white die for the W column.
8.6.5 Combat Results
A. A die roll less than or equal to the E column results in the elimination of the defending unit.
B. A die roll less than or equal to the A column (but not equal to the E column) causes a bomber to abort its mission, returning to its field without making its bombing attack. Place such units on their airfield upside down.
C. Air units which abort their missions may not leave their field in the next Air Movement and Combat Phase. Then flip them upright, and they return to normal.
8.6.6 Simultaneous Results
A. Air-to-air combat is simultaneous, so any units which are destroyed or aborted will still get to fire during the Air-to-Air Combat Phase.
B. However, if a unit's target is destroyed before the unit fires, the unit loses its attack for the turn.
8.7 Anti-Aircraft (AA) Fire
8.7.1 Procedure
A. When AA units are present in a hex under attack, each unit may fire once on the AA Table.
B. Apply the results against the bombers.
C. If several types of bombers are present, the firing side selects the affected bombers but losses and aborts must be evenly spread among the types present.
Example: If two planes are lost, and Neils and Bettys are present, only one of each is eliminated rather than two Neils or two Bettys.
8.7.2 Ground Unit AA against Strafing and Dive Bombing
If air units make a strafing or dive bombing attack against a hex with 20 or more stacking factors, the defender may roll once against each attacking air unit on the AA Table. This rule represents concentrated small arms fire and is additional to fire from any AA units in the hex.
8.7.3 AA Firing a Second Time against Strafing and Dive Bombing
AA units may fire again if fighters or dive bombers attack a hex after bombers have attacked. Roll once for each AA unit present, against each attacking air unit.
8.7.4 AA Sequencing
AA fire takes place after air-to-air combat, but before bombing attacks.
8.7.5 AA Units on Airfield Chart
AA units are placed off map on the airfield chart except when moving.
8.7.6 AA Fire Results
A. An A result aborts an incoming unit. A 2A result aborts two incoming units. Effects for aborted units are the same as in 8.6.5.
B. An E result eliminates an incoming unit. A 2E result eliminates two incoming units.
9.0 Reserves
9.1 Permitted HQs
The headquarters (HQ) which may place ground units in reserve are:
A. Allies: USAFFE, I Corps, and II Corps.
B. Japan: 14th Army, 16th Division, and 48th Division.
9.2 HQ Capabilities
A. A HQ unit may place all units (if desired) in a single hex in reserve.
B. Army HQs may select a hex anywhere on the mapboard.
C. Corps HQs or Japanese divisional HQs must be within two hexes of the units they place in reserve. Any number of the units in a hex may be placed in reserve.
9.3 Restrictions on Units in Reserve
Reserve units placed in reserve may not move during the Movement Phase. They may not be adjacent to an enemy unit at the start of their turn.
9.4 Movement of Reserve Units
Each side may move its reserves:
-
During the enemy Combat Phase, before any combat resolution. The reserves may reinforce a combat situation.
-
At the end of their side's Combat Phase.
9.5 Reserve Movement; Loss of Reserve Status
A. Reserves may move half of their full MF, but may not use strategic movement rates.
B. Reserve units may move independently of their original reserve stack.
C. A unit loses its reserve status as soon as it moves or as soon as it becomes adjacent to an enemy unit.
10.0 Forts and Fortifications
A. The game begins with completed fortifications on the Bataan Peninsula. Other fortifications may be built during the course of the game.
B. Fortifications give the defender a +2 DRM in combat. The effective forts at the start are Fort Wint and Fort Mills (Corregidor). Other locations with the word "fort" in them (such as Fort McKinley) are not fortifications.
10.1 Construction
A. To build fortifications, at least twelve stacking factors of infantry must not move for four complete turns (Exception: engineers, 15.3).
B. If there are fewer than twelve factors in the hex before four (or three if with an engineer) turns have passed, all of the construction effort is lost. Remove the marker.
C. If other friendly units enter the hex, the original units performing the construction may leave as long as at least twelve stacking factors are the hex at all times during construction.
D. Once constructed, a fort will remain in place until destroyed.
E. A fortification must be complete for a defender to derive a benefit from it.
10.1.1 Facing
A. Fortification markers have a facing and will only give benefits to units attacked through the three front hexsides, specified at the time of construction.
B. The numbers on the reverse of the marker represents its turn of construction (i.e., if the 1 is showing and aligned with the top of the unit, then the fortification has been under construction for one turn.).
10.1.2 Destruction
A fortification may be destroyed by one or more units totalling at least three stacking points in the fortification hex, by expending an additional 2 MPs.
10.2 Corregidor
Corregidor, the key to Manila harbor, was reduced primarily by a heavy artillery bombardment. The early placement of significant heavy artillery in range of the fort will probably lead to its reduction during the game.
10.2.1 Coast Defense Batteries
A. Corregidor has 26 Coast Defense Factors/Batteries, many of which must be destroyed before Japan has a reasonable chance of success to attack it.
B. Fourteen of the Coast Defense batteries can defend against both Amphibious Assault (4.4) and/or Local Amphibious Movement (4.5).
C. The other twelve batteries can only defend against an Amphibious Assault.
D. To be neutralized, Corregidor must be reduced to five or fewer Coast Defense Batteries/factors.
E. Coastal defense batteries have no stacking value, meaning they stack for free.
F. Coastal defense batteries have no intrinsic defense strength against paratroops, so Japan could capture the island if it were otherwise left undefended by dropping a paratroop on it.
G. This also means that the batteries do not count toward the total army attack strength calculated at the end of the game.
10.2.2 Number Assignment to Batteries
A. At the start of the game, the Allies assign (on the Allied Planning Sheet) a number between 1 and 23 to each battery on Corregidor and between 24 and 26 to the Fort Hughes batteries.
B. When a battery is destroyed by aerial bombardment, Japan selects a number between 1 and 26. The Allies then disclose which battery was destroyed. Japan may keep track of which batteries were destroyed.
C. Disrupted batteries are selected in the same manner as the destroyed batteries, but Japan is not informed of the battery's identity. These batteries may be repaired at a rate of one per turn.
10.2.3 Extra High Bombing Attacks
A. Bombers attacking the island may fly extra-high to avoid AA fire. This is the only instance where Japanese bombers may escape AA fire when bombing a hex.
B. Japan simply declares that the bombers are flying high, then receives a +1 DRM on its attack.
C. Each bomber attacks individually on the Bombardment Table.
10.2.4 Special Artillery Attacks
Each turn that an artillery unit with an asterisk is adjacent to the island, it may attack the island on the Bombardment Table. Artillery units may select specific they specific batteries they destroy.
10.2.5 Stacking Limits for Defense
A. Only nine stacking points, in addition to any artillery units, may actively defend the island.
B. Infantry type units on the island are not subject to elimination by bombardment.
10.2.6 Assault against Corregidor
A. An assault against the island may only use paratroops or amphibious assault units.
B. Japan may support the attack with an asterisk (*) artillery that is present on an adjacent land hex.
10.3 Fort Wint
A. Fort Wint is located at Olongapo.
B. Only four stacking factors may defend or be supplied by the fort.
C. Defenders have their DF tripled, in addition to any terrain modifiers that apply.
D. Other units in the hex will add their DFs in normally.
11.0 Submarines
The American naval command placed several submarines in the Philippines. Unfortunately for the Allies, they were extremely ineffective due to very poor torpedoes.
11.1 Placement
-
The Allies secretly place three submarines individually at one or more beaches before play begins, noting their location on the planning pad.
-
On any even numbered turn the submarines may be moved to different beaches.
11.2 Sub Reinforcements
In the Turn 2 Reinforcement Phase two additional submarines become available and may be immediately placed at any beach.
11.3 Effect of Bombing of Cavite
A. If Cavite on Manila Bay is bombed by four bomb factors, the Allies must remove two submarines from play on the following turn.
B. This happens only once per game and represents the effects of the loss of the exposed submarine supplies there.
11.4 Effect of Sub on Invasions
A. When an invasion force moves to a beach where a submarine is present, each submarine there may roll (two dice) once on the Submarine Attack Table before landing any troops.
B. For every Japanese step lost, the stacking point equivalent of transport points are also lost. The troops are randomly chosen using the method in 8.3.3.
Example: If Japan had to lose a step and drew an artillery unit worth 3 stacking points, Japan would lose the artillery unit and 3 transport points as well.
11.5 Better American Torpedoes (Optional)
Players may wish to experiment with American submarines equipped with torpedoes that work! Apply a +3 DRM to all submarine attacks.
12.0 Paratroops
While historically not employed, Japanese transports and paratroops were available on Formosa for possible operations. They were later used in the Dutch East Indies. In order to counter their threat, an American tank unit was deployed at Clark Field for anti-paratroop duty.
12.1 Transport of Paratroops
A. Paratroops operate like regular ground units except that they are transported by the Japanese Tina air transport unit and do not count against the Japanese sea transport total.
B. The Tina may only operate from Kagi airfield and may carry only one unit per turn.
C. Paratroops may not be transported to city hexes.
12.2 Paratroop Drops
A. To drop the paratroops, move the transport to the target hex, then conduct any air-to-air combat or AA fire.
B. If the Tina is destroyed, so is the paratroop unit.
C. Otherwise place the surviving paratroop unit in the target hex.
12.3 Attacking
A. Paratroop units are normal infantry units unless they are dropped atop an Allied unit in which case they must attack, applying a +1 DRM.
B. If, after normal combat, opposing troops remain in the same hex, then the paratroops must retreat one hex (unless they are on Corregidor, in which case they would be destroyed).
C. When regular ground units attack in conjunction with paratroops, the +1 DRM does not apply.
D. If one or more paratroops land on rough terrain atop an enemy unit, there is an additional +2 DRM for the attack.
E. Paratroops may not move during the turn in which they are dropped.
13.0 Supply
13.1 Japanese Supply Sources
A. Friendly Japanese supply sources are any captured beach hex or captured coastal city (i.e., were the last to enter in the course of play).
B. Manila and Cavite may not become Japanese supply sources until Corregidor falls.
13.2 Allied Supply Sources
A. Allied supply sources are Cabanatuan, Manila, Bataan Airfield, and Fort Stotsenburg.
B. Corregidor may supply all Allied troops located there.
C. Fort Wint may supply only those units receiving a defensive benefit from the fort (10.3).
13.3 Supply Lines
A. To be in supply, a unit must be able to trace a supply line to a supply source.
B. To trace a viable supply line, the unit must be no further than 5 MPs from a supply source in addition to any length of road (i.e., a unit can trace supply over any number of road hexes, then 5 MPs off the road).
C. A supply line is blocked by enemy units.
D. Supply may not be traced through a full rough hexside.
13.4 Determining Supply
Supply is determined at the end of the friendly Combat Phase.
13.5 Unsupplied Effects
An unsupplied unit loses 1 MP if non-motorized, and half its movement allowance (rounded down) if motorized.
An unsupplied unit's attack and defense factors are also halved (round down attack factors, round up defense factors).
14.0 Reinforcements
14.1 Time Record Track (TRC)
A. The TRC indicates the arrival and withdrawal of specific units.
B. Place arriving units on the map (or Formosa).
C. Simply remove units to be withdrawn.
14.2 Allied Reinforcements
A. Allied ground units appear at the place(s) specified on the TRC. If those places are controlled by Japan at the time of arrival, the units may not enter play later.
B. Place the B-17 arriving on Turn 2 at Clark Field. (It flew in during Turn 1 from Del Monte airfield on Mindanao.)
14.3 Japanese Reinforcements
A. Japanese reinforcements appear on Formosa and must be transported normally to Luzon.
B. They may land on Luzon the same turn they arrive on Formosa.
14.4 Japanese Withdrawals
A. Japan is required to remove the 48th Motorized Division and other land and air units from play. (These units were needed in other campaigns, especially in the Java campaign.)
B. The removed units may be taken directly from any location on Luzon or Formosa.
14.4.1 Declining Withdrawals
Japan may choose to not remove designated units from play, but if the units are not removed, the Japanese victory level automatically drops one level.
Example: If Japan wins a strategic victory, it is reduced to an operational victory (17.0).
14.4.2 48th Division
A. Losses to the 48th Division may be quite severe, so to qualify for its removal, at least 24 stacking factors must be withdrawn.
B. The specified artillery units must be left for withdrawal next turn.
C. If the 48th does not have 24 stacking factors in play, then additional stacking points must be withdrawn from either the 16th or 21st divisions to bring the total up to 24. The truck units are a part of the 48th.
14.4.3 4th Tank Regiment
A. The 4th Tank Regiment must be withdrawn on Turn 10.
B. If part or all of the 4th has been destroyed, the difference in steps must be replaced from the 7th Tank regiment, the 16th Recon, or the 4th Cavalry, in that order of priority.
C. The AT, AA, and engineer units to be removed at that time must be from Force A (or B) if possible. The shortage of these units may not be made up from the 48th Division unless no other units of that type exist. If unavailable owing to heavy losses, then ignore.
14.5 Removal of Air Units
A. On Turn 7 all Navy planes except for two Nells and three Bettys must be withdrawn.
B. On Turn 10 all Navy planes except for one Betty and one Nell must be withdrawn.
C. On Turn 11 all Japanese Army air units except for two Nates, one Ann, one Sonia, and one Ida must be withdrawn.
D. If Japan does not remove these planes the level of Japanese victory drops one level (18.3) in each instance (Army and Navy). This is in addition to any effects of 14.4.2.
15.0 Engineers
15.1 Destroying Bridges
A. Bridges (where roads cross rivers) may be destroyed by engineer units.
B. The engineer must expend an extra MP at the bridge hexside. Place a Blown Bridge marker there.
C. Bridges may not be destroyed or repaired if an enemy unit is adjacent to the bridge, and the enemy side does not want the bridge to be blown.
15.2 Repairing Bridges
A. Engineer units may repair bridges, spending their entire movement allowance to do so.
B. Units may not cross the bridge during the turn or repair.
C. The engineer may not perform any other functions during the turn it is repairing a bridge.
15.3 Bonus When Building Fortifications
A. If an engineer unit is stacked with a unit starting to build a fortification for an entire movement phase, the duration of the fort's construction may be shortened by a full turn.
B. This bonus only applies to the first turn of construction.
15.4 Japanese Attack Bonus vs Cities and Forts
When Japan is attacking a city or fort, it receives a -1 DRM if an engineer unit is stacked with an attacking infantry unit.
15.5 Assistance in Crossing Rivers
A. Engineers may reduce the movement cost of crossing major rivers, from requiring the crossing unit's full movement allowance to only half that unit's movement allowance.
B. An engineer unit may assist the same number of stacking points across the river as it has, for every quarter of its MF it uses providing the help.
Example: A 1 SP engineer unit may assist a 4 SP unit to cross the river, if it spends its entire turn.
C. An engineer unit may assist itself across the river at the cost of half its movement allowance.
16.0 Preparation for Play
16.1 Campaign Game
16.1.1 Allied Variable Forces
The Allied player randomly selects one of the five Order of Battle chits, looks at it, then reveals it to the other side.
| Chit | Forces Available |
|---|---|
| 1 | Historical |
| 2 | Historical |
| 3 | Historical |
| 4 | Historical + Pensacola Convoy (P) |
| 5 | Historical + Pensacola Convoy (P) + Polk-Coolidge Convoy (C) |
16.1.2 Historical Allied Deployment
The Allies set up first.
16.1.2.1 Allied Air Units
A. Deploy the following Allied air units:
-
Two P-35s (1 ABSU) at Del Carmen
-
Two P-40Es (1 ABSU) at Nichols
-
Two P-40Es (1 ABSU) at Iba
-
Two P-40Bs (1 ABSU) and two P-40Es at Clark
-
One P-26 (1 ABSU) at Batangas
-
One B-10 and B-18 (1 ABSU) may deploy at any bomber field.
-
Two B-17s (1 ABSU) at Clark. B-17s must always operate from Clark.
B. Place the ABSUs as desired. Recommended placement is in parentheses.
16.1.2.2 Allied Air Deployment with Convoys
A. If chit 4 or 5 is drawn, then the Allies may deploy their reinforcing B-17s at Del Monte airfield (off map). They appear on Turn 2 as reinforcements (14.0).
B. Place the additional P-40Es, A-24s, and ABSUs from the convoys at any field on Luzon.
16.1.2.3 Japanese Reconnaissance
After Allied setup, before play begins, the Japanese player may select one Allied airfield for the Allies to identify the classes of plane units present (fighters, bombers, or both).
16.1.2.4 Allied Ground Units
Deploy Allied ground units as follows:
A. 41st PA within 1 hex of Batanga Beach.
B. 51st PA within 1 hex of Infanta, Lamon, or Lucena Beaches.
C. 91st PA at Cabanatuan.
D. 31st PA within 4 hexes of Iba Airfield.
E. One Marine battalion at Ft. Wint (Olongapo).
F. Two Marine battalions and three AA batteries (including the Corregidor unit) at Corregidor.
G. 71st PA and 26th Cavalry at Camp O'Donnel.
H. 3rd Regiment of the 11th PA at Tuguegarao.
I. The remainder of the 11th PA and the 21st PA at Lingayen Beach.
J. One tank battalion and 2 AA batteries at Clark.
K. 3 artillery batteries from the PH Division and the truck units may be placed anywhere on the game board.
L. All remaining Allied forces (other than reinforcements or replacement substitute counters) are placed at Manila, San Fernando, Fort McKinley, and within two hexes of Bataan airfield, as desired.
16.1.2.5 Pensacola Convoy
A. The Pensacola Convoy contributes:
-
One P-40E
-
Three B-17s
-
Three A-24s
-
Two trucks
-
Two artillery units of the 131st
B. It also upgrades one regiment of the 11th, 21st, 41st, and 51st PA. Remove the strongest unit of each division and replace it with the Pensacola Convoy unit.
C. Two P40Es are mismarked as Pensacola. They are at start units.
16.1.2.6 Polk-Coolidge Convoy
The Polk-Coolidge Convoy contributes:
A. Three P-40Es
B. One B-17
C. Three heavy artillery batteries.
16.1.3 Free Deployment Option
The historical setup outlined in 16.2 has the vast majority of the regular PH Division (the Scouts) deployed at Manila and San Fernando. Players are encouraged to allow the Allies free deployment as an option.
16.1.4 Japanese Variable Forces
The Japanese side randomly picks one of the seven Order of Battle chits, keeping it secret from the Allied side.
16.1.4.1 Japanese Available Forces
| Chit | Forces Available |
|---|---|
| 1-3 | 16th & 48th Divisions, 65th Brigade on Turn 9, and Group A (historical). |
| 4 | 16th & 48th Divisions, 65th Brigade anytime, and Group A. |
| 5 | 16th & 4th Divisions, 62nd Regimental group, and Group A. |
| 6 | 16th, 4th, & 48th Divisions, 1st Yokosuka SNLF Paratroop battalion, and Group A. |
| 7 | 16th, 4th, & 48th Divisions, 62nd Regimental group, Groups A and B, and both SNLF paratroop battalions. |
A. Group A is made up of all non-divisional units not marked with a B.
B. The 65th brigade and 62nd regimental group both include an artillery and engineer unit.
16.1.4.2 Japanese Deployment
16.1.4.4.1 Ground Units
Japanese ground units all begin off the board and are introduced by sea transport or air assault as desired.
16.1.4.4.2 Air Units
Army air units:
| Location | Army Air Unit Types |
|---|---|
| Koshun | 2 x Nate |
| Kato | 2 x Lily, 2 x Ann |
| Chosu | 1 x Sally, 2 x Nate |
| Heito | 1 x Sonia, 1 x Ida |
Naval air units:
| Location | Naval Air Unit Types |
|---|---|
| Kagi | 1 x Tina (for paratroops) |
| Taichu | 2 x Betty |
| Tainan | 2 x Nell, 3 x Zeke |
| Takao | 3 x Betty, 3 x Zeke, 1 x Claude |
16.1.4.3 Available Forces
Japanese available forces will include the specified divisional and brigade units plus Group A.
16.1.4.3.1 Group A
Group A consists of:
A. 4th and 7th Tank regiments.
B. 23rd, 3rd, 3rd lnd, and 21st Engineers.
C. 14th Army HQ.
D. 1st FA (3 units), 8th FA (2 units), 9th lnd, 3rd Mtn, and 15th Artillery.
E. 40th/45th, 47th/48th, and 30/31 AA.
F. 3rd/8th and 9th/10th AT.
16.1.4.3.2 Group B
Group B units are marked with a B on the back of the counters and consists of:
A. 1st HA, 2nd lnd, and 14th lnd artillery.
B. 3rd and 20th AT.
C. 21st Ind artillery. (Do not confuse with the 21st MT, part of the 62nd/21st.)
16.1.4.4 Japanese Transport Availability
| Chit | Strategic Transport Points (4.4.2) | Operational Transport Points (4.4.2) |
|---|---|---|
| 1-3 | 115 | 25 |
| 4 | 120 | 30 |
| 5 | 75 | 25 |
| 6 | 110 | 35 |
| 7 | 130 | 40 |
16.2 The Main Assault Scenario
16.2.1 Allies
A. The Allies set up with Chit #1, except for the 13th regiment of the 11PA, and with all air and ABSU units.
B. The provisional units derived from the ABSUs may arrive as normal reinforcements on Turn 5 (the first turn of play).
16.2.2 Japan
A. Japan has drawn Chit #1, and may place 25 stacking factors north and east of a line drawn between the northern-most hexes of the Lingayen and Baylor Bay beaches. The units must be placed on roads in either coastal or mountain hexes.
B. Remove one Zero unit from the air units.
C. Air units and ABSU may be deployed in the four northern airfields and Bataan Island as desired.
D. Air units may transfer to John Hayes field on the first turn of play.
E. Japan rolls one die, divides by two, and rounds down to determine the number of Corregidor batteries already destroyed. Follow the procedures in 10.2.2 to determine which batteries were destroyed.
F. Cavite has been successfully bombed.
16.2.3 Pre-Start Phase
A. The Allies locates their submarines, and designate their reserves.
B. Japan selects its assault beaches.
C. All non-reserve Allied units may expend half their MF. There may be no overruns or other combat.
D. Begin with Turn 5 and use regular victory conditions.
17.0 Victory Conditions
A. Victory is always judged at the end of Turn 13.
B. The victory levels depends upon the chits pulled for forces available. Only the Japanese side knows the victory conditions as it does not reveal the set-up chit.
17.1 Victory Condition Determination
The victory conditions are determined by matching the chits drawn. The victory conditions are determined by the table below:
Rows are the Japanese chit drawn; columns are the Allied chit drawn.
| Japanese Chit \ Allied Chit | 1 | 2 | 3 | 4 | 5 |
|---|---|---|---|---|---|
| 1 | C | C | C | B | A |
| 2 | C | C | C | B | A |
| 3 | C | C | C | B | A |
| 4 | C | C | C | B | A |
| 5 | C |
| Letter | Strategic Victory Condition(s) |
|---|---|
| A | Japan must hold Manila or Corregidor on Turn 13. |
| B | Manila or Corregidor must be captured and the Allies must be reduced to 60 or fewer attack factors. |
| C | Manila and Corregidor must be captured and the Allies must be reduced to 60 or fewer attack factors. |
| D | Manila and Corregidor must be captured and the Allied army must be reduced to 20 or fewer attack factors. |
17.2 Explanation of Victory Conditions
A. To gain a strategic victory, Japan must achieve a victory equal to the letter generated in the above matrix. For example, if a letter A were generated from cross-indexing Allied chit #5 with Japanese chit #2, a strategic victory would be capturing and holding Manila (or Corregidor) on Turn 13.
B. Each successive letter represents harder objectives. If the Allies drew chit #1 and Japan drew chit #6, then:
-
Japan would win a strategic victory by satisfying the letter D conditions.
-
Japan would win an operational victory by satisfying the letter C conditions
-
Japan would win a tactical victory by satisfying the letter B conditions.
-
Anything less than a tactical victory would be an Allied victory.
C. A Japanese tactical victory should be considered a moral victory for the Allies.
D. If A is generated, then Japan could only win by a strategic victory (or a lesser victory if modified by 1.4.4.1, 14.5, or the non-reduction of Corregidor).
Failure to do so is to lose the game.
E. If a B is generated, there would only be two levels of victory for Japan.
F. If a D is generated and only an A level victory is achieved, that would be an Allied victory!
18.0 Optional Rules
18.1 Strategic Transport Availability
Japan rolls two dice in secret. This is intended to simulate the uncertainty the Allied command had concerning the arrival time of the main assault.
| Dice Roll | Arrival Turns |
|---|---|
| 2-3 | 3-4 |
| 4-5 | 4-5 |
| 6-9 | 5-6 |
| 10-12 | 6-7 |
18.2 "The Greatest American General Alive"
If the USAFFE Army HQ is captured or destroyed, Japan wins a Propaganda Victory. Japan can claim it won the game, even if it didn't.
18.3 Victory Point Table
Only Japan Receives Victory Points (VPs).
| VPs | Condition |
|---|---|
| + 1 | Hold Manila on Turn 13. |
| + 1 | Hold Bataan Airfield on Turn 13. |
| + 1 | Reduce Corregidor (no coastal defense batteries remain). |
| + 1 | Hold Corregidor on Turn 13. |
| + 1 | Reduce the Allied Army to fewer than 60 attack factors. |
| + 1 | Reduce the Allied Army to fewer than 20 attack factors. |
| + 1 | The Allies received the Pensacola Convoy. * |
| + 1 | The Allies received the Polk-Coolidge Convoy. * |
| - 1 | Not holding a Bicol Peninsula airfield before Turn 5. |
| - 1 | Insufficient aircraft were withdrawn when required (each instance). |
| - 1 |
* These points are only received if Clark Field is controlled by the Japanese and supplied from a coastal hex.
Determine victory using the table below:
| VPs | Victory Level |
|---|---|
| 3+ | Japanese Strategic Victory |
| 2 | Japanese Operational Victory |
| 1 | Japanese Tactical Victory |
| ≤ 0 | Allied Strategic Victory |