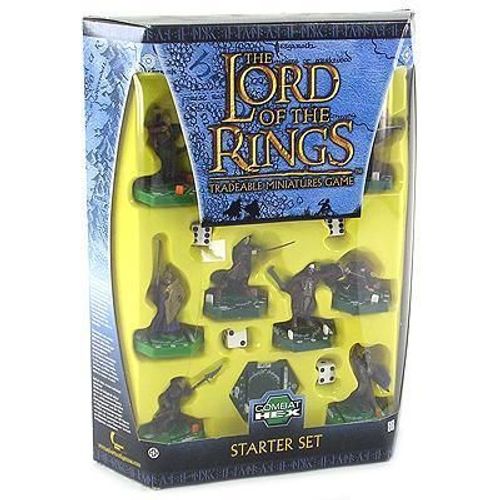
The Lord of the Rings: Combat Hex Tradeable Miniatures Game
The Lord of the Rings: Combat Hex Tradeable Miniatures Game Rulebook
Table of Contents
Table of Contents
The Figures
Pick up one of your shiny new figures; it will help you get used to the different symbols on the base.
The Lord of the Rings Combat Hex features two types of warriors: heroes and minions. Heroes have dark green bases, while minions have light green bases. All of the warrior's game information is printed right on the base.
- A. Ranged Attack: If the warrior is capable of a ranged attack, there will be an oval with 2 numbers here. These numbers represent how many dice the warrior rolls when shooting and how far the warrior can shoot.
- B. Movement Points: How fast the warrior moves across the map.
- C. Toughness: How hard it is to damage the warrior.
- D. Attacks: How many dice the warrior rolls in combat.
- E. Collector Number: This number has no effect on game play, it is just there to help you organize your collection. The two letters before the number tell you what set the model is from.
- F. Rarity Symbol: Some models are harder to find than others. Symbols indicate common, uncommon, rare, ultra-rare, and promo.
- G. Unique Number: If the model is unique, there will be a number here.
- H. Faction: The leaf represents the forces of Good, while the crow represents Sauron's forces of Evil.
- I. Points Cost: How many points this model costs towards your total.
- J. Special Abilities: The special skills the warrior has, if any.
Sliders
In addition to the static attributes listed above, you will find a slider on each side of the warrior's base.
- K. Wounds: How much damage a warrior can take before it is killed. When a warrior is out of wounds, it is removed from the map. The wounds slider has a white bar with green numbers.
- L. Action Points: How many Action Points (APs) the warrior can use during a battle. The warrior needs these to pay for certain abilities. APs do not get replenished during the game, so use them wisely. The action point slider uses white numbers.
Army Construction
Before you can play, you need to build an army out of the warriors in your collection. Army construction consists of three basic steps:
-
You and your enemy must agree on a point level for the game. For a standard 30-45 minute game, each army's total point cost should not exceed 1000 points.
-
Select heroes and determine the number of minions you will have. The maximum number of minions you may have in your army equals the total number action points listed on all of the heroes in your army. All your models must be either good or evil. You may not mix the two.
Example: Army Construction — I have Aragorn (6 action points) and Gimli (5 action points). I may have a maximum of 11 minions in my army.
-
You may not have more than one model with the same unique number.
Example: Hero Selection — If I have the advanced Aragorn (unique number 3) in my army, I cannot have the basic version of Aragorn (also unique number 3).
Setup
Each player rolls a die. The player who rolls the highest may choose to be the attacker or the defender for the first turn. In the event of a tie, re-roll.
The attacker chooses one of the narrow map edges, and sets up his army within 3 hexes of that edge. The defender must set his army up within 3 hexes of the opposite map edge.
Battle
Battles are played out in a series of turns. Each turn has the following phases:
- Strategy Phase
- Attacker's Action Phase
- Defender's Action Phase
- Combat Phase
The Strategy Phase
Starting with the second turn, each player rolls a die at the beginning of the strategy phase. This is called a strategy roll. The player who rolls the highest may choose to be the attacker or defender for the turn. In the event of a tie, re-roll.
Attacker's Action Phase
During the attacker's action phase, each of the attacker's warriors gets 1 action. Possible actions include:
- Move: See the Movement section below.
- Shoot: See the Shooting section below.
A warrior doesn't have to take an action if you don't want it to.
Movement
The number of movement points (MPs) listed on a warrior's base determines how far it can move. Warriors may move in any direction, regardless of which way they were facing, and may end their move facing any hex side. The MP cost to enter a hex depends on the color of the line the warrior had to cross to get there:
| Line | Cost |
|---|---|
| Clear (brown) | 1 |
| Rough (red) | 2 |
| Water (blue) | 3 |
| Impassable (black) | n/a |
You cannot cross a black (impassable) line. You are allowed to move through your own warriors, but you cannot move through an enemy warrior. You may never end your move in a hex that contains a warrior, or a hex that is marked with an "X".
If you move a warrior into an enemy kill zone, it must stop moving. A warrior's kill zone consists of the three hexes in front of it. Impassable terrain can limit the size of a kill zone.
If a warrior has one or more enemies in its kill zone, those warriors are considered engaged.
You may choose to disengage a warrior that starts the turn in an enemy kill zone by moving it away from the enemy warrior. If you do, the enemy warrior gets a free attack before your warrior leaves its kill zone. Assuming your warrior survives, it may then move normally. Free attacks are covered fully in the combat section.
If you decide not to move a warrior, you may still turn it to face any hex side. This does not cost any MPs and does not count as disengaging. You can even do this before you shoot.
After you've moved a warrior, that warrior may run for 1 more hex. Instead of MPs, this move costs the warrior a number of action points equal to the MP cost normally used to enter the hex.
Example: Movement — The Orc warrior (4 MPs) moves ahead 2 hexes, then comes across the crumbled section of an ancient stone wall. Since a red line runs between his hex and the next hex, it costs the Orc warrior 2 MPs to enter it. The total cost for the move is 4 MPs. The Uruk Hai warrior (5 MPs) starts at the bank of a small river. It costs the warrior 3 MPs to cross the blue line and 2 MPs to cross 2 hexes of clear terrain afterwards (1 MP per hex). The total MP cost of the Uruk Hai warrior's move is 5.
Shooting
Instead of moving, a warrior with the ranged attack ability may shoot. Check the base for an oval with 2 numbers to see if the warrior has a ranged attack.
The first number tells you how many dice you roll to hit with your shooting attack. The second number tells you how far the warrior can shoot. Your warrior may only shoot at a single target. Before you can shoot at an enemy, you must check for 2 things: range and line-of-sight (LOS). You may check both of these before deciding which enemy to shoot at.
Range
To check range, count the number of hexes between the shooting warrior and the target, including the hex the target occupies. If this number is greater than your warrior's range, you cannot shoot at that target.
Line of Sight (LOS)
If the target is in range, you must now check if the target is in your warriors LOS arc. Remember, you can change the direction your warrior faces before you shoot with it. The LOS arc extends from your warrior's kill zone straight out to the edge of the map.
If the target is in your warrior's LOS arc, you must now see if any impassable terrain blocks the actual LOS. Draw an imaginary line from either of the front corners of your shooting warrior's base to any corner of the target's hex. If that line passes through any impassable terrain, you cannot shoot at the target. Other warriors (friend or foe) also block LOS.
Example: Line-of-Sight — In the diagram, the Uruk-hai warrior cannot shoot at the High Elf warrior because the LOS passes through an impassible wall. The Uruk-hai warrior can shoot at the Rohan warrior since the LOS doesn't pass through any impassable terrain.
If the shooting warrior is on elevated terrain, it gets +1 shots and other warriors that are not on elevated terrain do not block LOS. Elevated terrain is represented on the map with a distinct marker.
The Shooting Roll
Roll a number of dice equal to your warrior's shots. Each roll of 5 or greater scores a hit. Each roll of 1 scores a glancing blow.
For each glancing blow you score, your warrior may spend 1 AP to change that roll to a 6, converting it to a hit. If your warrior doesn't spend the AP, the roll remains a 1.
The Damage Roll
For each hit you score, roll another die. These are called damage dice. For each damage die that is equal to or greater than the target's toughness, that warrior loses 1 wound. Each die roll of 1 scores a critical hit.
For each critical hit you roll, your warrior may spend 2 action points to change that roll to a 6. Otherwise, it remains a 1.
Example: Shooting — Legolas (4 shots, range 10) spies a lone Uruk-hai warrior (toughness 4, 2 wounds). After checking range and LOS, Legolas decides to shoot at it. He rolls 4 dice (1 die for each shot) and gets a 1, 2, 4 and 5. The 1 counts as a glancing blow, so he spends an action point to change it to a 6, giving him 2 hits total. He rolls 2 dice (1 die for each hit), getting a 4 and a 1. The 1 is a critical hit, so he spends 2 action points to convert the 1 into a 6. The Uruk-hai's toughness is 4, so both damage dice cause him to lose a wound. This reduces him to zero wounds and he is removed from the map. Score another kill for Legolas!
Defender's Action Phase
Once the attacker is finished, the defender takes his action phase. The rules for the defender's action phase are identical to those of the attacker's.
Combat Phase
During the combat phase, players resolve all combats on the map. The attacker decides which order the combats are resolved in.
A combat is defined as a single group of engaged warriors that are all part of the same damage chain. A damage chain is an imaginary line drawn between each warrior and every enemy in that warrior's kill zone. Warriors that are part of the damage chain must check their kill zones to see if the chain can be extended. Sometimes warriors may be adjacent to each other but not part of the same damage chain.
Elevated Terrain
Fighting on elevated terrain also provides an advantage during combat. Each warrior on elevated terrain receives +1 attack for every enemy in its kill zone that is not on elevated terrain.
Example: Damage Chains — Example A shows six warriors fighting in two separate combats. The combats are separate because the damage chain does not connect all the warriors. Example B is a larger case, but because the chain extends throughout the group, it is all one combat. Once again, example C demonstrates two separate combats.
Each combat is resolved in 2 rolls: the combat roll and the damage roll.
The Combat Roll: Each player totals up the number of attacks on their engaged warriors, then rolls that many dice. Each roll of 4 or greater scores a hit. Each roll of 1 scores a glancing blow.
For each glancing blow rolled, one of your engaged warriors in this combat may spend 1 AP to change it to a 6, making it a hit. Otherwise, it remains a 1. Each warrior may only convert one glancing blow per combat.
The Damage Roll: For each hit you score, roll a damage die. As in shooting, each 1 rolled scores a critical hit. For each critical hit you roll, one of your engaged warriors may spend 2 APs to convert it to a 6. Otherwise, it remains a 1. A single warrior can only convert 1 critical hit per combat.
The attacker then assigns all of his damage dice and the defender follows suit.
You may only assign damage dice to an enemy warrior if it lies within the kill zone of one of your warriors, and only if that die is equal to or greater than the enemy warrior's toughness. For each damage die assigned to it, the warrior loses 1 wound.
Once both players have assigned all of the damage dice they can, warriors reduced to 0 wounds are removed from the map. Any damage dice that cannot be assigned to an enemy warrior are ignored.
After the first combat is resolved, the attacker chooses the next combat. Once all combats have been resolved, check for victory (see below). If neither player has won, a new turn begins.
Example: Combat — Here, 4 Orc warriors square off against 5 Rohan warriors. Each warrior has 1 attack, 2 wounds, and a toughness of 3.
The Rohan player adds up his attacks and gets a total of 6 (1 for each of his warriors and +1 for outflanking). He picks up 6 dice and rolls them, getting a 1, 1, 3, 4, 5, and 5 for a total of 3 hits and 2 glancing blows! The Orc player adds up her attacks and has a total of 4. She rolls 4 dice, scoring a 3, 3, 4, and 6—only getting 2 hits.
The Rohan player opts to convert his two glancing blows to 6s, making them hits. Since only one warrior can convert a glancing blow to a hit each combat, he spends 1 action point from 2 different warriors. He now has a whopping total of 5 hits! The Orc player did not roll any glancing hits, so she has nothing to convert.
Now both players make their damage rolls. The Rohan player rolls 5 dice, coming up with 1, 2, 3, 3, and 5. He decides to convert the 1 (which is a critical hit) to a 6, so he chooses one of his warriors and spends 2 action points. The Orc player rolls 2 dice, getting a 6 and a 6! Once again, the Orc player's high rolls mean she has no critical hits to convert.
The Rohan player assigns the two 3s to an Orc warrior, reducing that warrior to 0 wounds, and assigns the 5 and the 6 to a second Orc warrior, killing it as well. Because all the Orc player's warriors have toughness 3, the 2 the Rohan player rolled cannot be assigned to any warriors and is ignored. The Orc player assigns both her 6s to a Rohan warrior, killing it. Now that the damage dice have been assigned, warriors reduced to 0 wounds are removed from the map.
Free Attacks
Some abilities and game situations (such as disengaging) grant free attacks. The warrior making the free attack gets to make a combat roll and damage roll, as it would in a normal combat. The warrior may only assign damage dice to the enemy they are making the free attack against.
Outflanking
Warriors who maneuver behind their enemy gain a distinct advantage in combat. If your warrior has an enemy in its kill zone, and it is not in any enemy kill zone, your warrior gets +1 attack.
Example: Outflanking — In example A, the Orc warrior outflanks the Rohan warrior since the Rohan warrior is in its kill zone and it is not in an enemy kill zone. In example B, the Orc warrior does not outflank the Rohan warrior because it is in an enemy kill zone.
Using Special Abilities
Special Abilities are represented by a symbol on the warrior's base. A number next to the symbol represents the ability's action point cost. The warrior may pay that many action points to activate that ability. Activated abilities don't "deactivate" until the end of the turn. If an ability does not have a number next to it, it is always activated. A warrior may only activate each of its abilities once per turn.
If both players wish to play special abilities in the same strategy phase, the attacker plays all of theirs first.
Determining Victory
The first player whose army is reduced 50% or less of its original warrior count loses. If both players' armies are reduced to 50% or less at the end of the same turn, each player adds up the point values of all their warriors that remain on the map. The player with the highest point total wins.
Example: Determining Victory — I have a total of 14 warriors in my army. I lose if 7 or more of my warriors are killed.
If there are 3 or more players in the game, a player is defeated when their army has lost 50% or more of its warriors. Their remaining warriors are removed from the map.
Combat Hex Play Card — Special Abilities Reference
The Combat Roll
- Battle Cry: Your henchmen in this combat get +1 attacks until the end of the turn. Activate when you are adding up the attacks for this model's combat.
- Berserker: This model gets +1 attack for each enemy model adjacent to it. Activate when you are adding up the attacks for this model's combat.
- Dirty Fighting: 2's you roll count as glancing blows as well as 1's. Activate before you roll the combat roll for this model's combat.
- Spearman: The model directly in front of this model gets +1 attacks. Activate when you are adding up the attacks for the model directly in front of this model.
The Damage Roll
- Aggressive Strategy: You may re-roll any number of your damage dice. Activate after you make your damage roll for this model's combat.
- Armor: The first damage die assigned to the model this turn does not take a wound. Activate whenever damage dice are assigned to this model.
- Assassin: Critical hits that were converted to 6's assigned to enemies in this model's kill zone take 2 wounds instead of 1. Activate when you assign damage dice to models in this model's kill zone.
- Bodyguard: Your enemy may not assign damage dice to your heroes in this combat. Activate after your enemy rolls his damage dice for this combat, but before he assigns any.
- Courage: This model is not removed from the game until the end of the next turn. Use a bead or coin next to the model as a reminder. Activate when this model is reduced to zero wounds.
Movement
- Battle Awareness: This model's kill zone extends to all 6 hexes around it. Activate in the strategy phase.
- Fast: This model gets double its normal move. Activate before you move this model.
- Fast Strike: This model may interrupt its move at any time to get a single free attack vs. an enemy model in its kill zone, then continue moving. Activate during this model's movement.
- Magical Force: You may move any enemy model that this model has LOS to, using the enemy model's move score. Activate during the strategy phase.
- Sneak: This model ignores all terrain while it moves, even impassable terrain. It may move through enemy models and is not subject to free attacks for leaving enemy kill zones. It may not end its movement in an impassable hex or a hex that is occupied by another model. Activate before you move this model.
- Tyrant: Your henchmen adjacent to this model get +1 move until the end of the turn. Activate before you move one of your henchmen.
Shooting
- Arrow Flurry: The model gets double its shots, and it may assign damage dice to any number of enemy models within LOS. Activate before you shoot with this model.
- Crack Shot: This model may shoot before or after it moves. Activate before this model takes an action.
- Deadly Shot: You roll 2 damage dice for each hit rolled. Activate before you roll this model's damage dice from shooting.
- Expert Marksman: Other models (friend or foe) do not block LOS for this model. Activate before you shoot with this model.
- Shot Caller: Choose an enemy model that this model has LOS to. Your henchmen get +1 shots if they target that enemy. Activate before you shoot with any of your henchmen.
Miscellaneous
- Dread: Models adjacent to this model have their action point costs for abilities, glancing blows and critical hits increased by 1. Activate whenever an enemy adjacent to this model spends action points.
- Healing: One friendly model adjacent to this model gets +d6 wounds, up to its maximum. This model may not heal itself. Activate in the strategy phase.
- Initiative: You get +1 to your strategy roll. Activate before the strategy roll.
- Leadership: This hero's action points are doubled for the purposes of determining how many henchmen you can have in your army.
- Steal Essence: This model gets the ability of any enemy hero, without paying that ability's cost. Activate whenever you would activate the copied ability.
- The One Ring: If Frodo is in your army, before you act with him during your action phase you can have him put on the Ring. This is in addition to his normal action. Replace your Frodo figure with the Frodo Wearing Ring figure. Set the sliders on the new base to match those on the Frodo warrior you replaced.
- Once he is wearing the Ring, each time you want to act with him—including the first turn he puts the ring on—you must make a struggle roll to see if Frodo keeps his wits about him. Take two dice of different colors, nominating one to represent good and the other evil. Roll the dice at the same time. If the number on the good die is equal to or greater than the number on the evil die, then Frodo's spirit has won out and he may act normally. If the evil die is greater than the good die, Frodo has succumbed to the dark lure of the Ring—he cannot move this turn and he loses a wound as the Black Breath overtakes him.
- While Frodo wears the Ring, all ringwraiths on the map must focus all their attacks on him. If they are not near him, they must move towards him during their action phase and can do nothing else. If they are engaged in combat, the ringwraiths must disengage and move towards Frodo. If the only hex available for the ringwraith to move to is in an enemy kill zone, the ringwraith does not have to move until there is a hex available that is not in an enemy kill zone. Ringwraiths may still participate in any combats they are engaged in.
- While the Frodo Wearing the Ring is on the map, he may only have damage dice assigned to him if he is in a ringwraith's kill zone, although he may attack normally.
- If Frodo starts the turn with the Ring on, he can try to take the ring off before you act with him during your action phase. Make another struggle roll. If the good die is higher than the evil die, he is able to take off the Ring. Replace the Frodo Wearing the Ring figure with the Frodo figure you used earlier. Remember to set the sliders to match those on the Frodo Wearing the Ring base.
- If the evil die is equal to or greater than the good die, Frodo does not remove the ring. Frodo may not move this turn and loses a wound. Note that it is more difficult for Frodo to remove the ring than it is for him to maintain control while wearing it.
Quick Reference
Turn Sequence
- Strategy Phase
- Attacker's Action Phase
- Defender's Action Phase
- Combat Phase
Movement Point Costs
| Terrain | Cost |
|---|---|
| Clear Terrain (Brown) | 1 point |
| Rough Terrain (Red) | 2 points |
| Water (Blue) | 3 points |
Shooting
- Choose a target within range and LOS.
- Roll a number of dice equal to your shooting model's shots stat.
- Each 5 or 6 rolled is a hit; each 1 rolled is a glancing blow.
- For each glancing blow you roll, your shooting model may spend 1 action point to change that roll to a 6.
- For each hit you roll, roll 1 damage die.
- Each damage die that rolls equal to or greater than the target's toughness takes 1 wound.
- Each damage die that rolls a 1 is a critical hit. Your shooting model may pay 2 action points to change that die to a 6. If you don't, it remains a 1.
Combat
- Each player totals up their attacks, then activates abilities that affect that number, starting with the attacker.
- Each player rolls a die for each attack.
- Each die of 4 or greater scores a hit; each 1 rolled is a glancing blow.
- For each glancing blow you roll, one of your models in this combat can spend 1 action point to convert it to a 6. If you don't, it remains a 1.
- For each hit you roll, roll 1 damage die.
- Each damage die of 1 scores a critical hit. One of your models in this combat can spend 2 action points to convert it to a 6. If you don't, it remains a 1.
- Assign damage dice to enemy models. You may only assign damage dice to a model if it lies within the kill zone of one of your units in this combat, and only if the number on the damage die equals or exceeds the model's toughness.
- Each damage die assigned to a model takes 1 wound.
- After both players are done assigning damage dice, remove any models that have been reduced to 0 wounds.
Combat Bonuses
| Bonus | Effect |
|---|---|
| Outflanking | +1 attacks |
| Elevated Terrain | +1 attacks, +1 shots |
Spending Action Points
| Effect | Cost |
|---|---|
| Glancing Blow | 1 AP |
| Critical Hit | 2 APs |
| Move 1 extra hex | equal to MP cost to enter hex |
Rolls Needed to Hit
- Shooting: 5+
- Combat: 4+