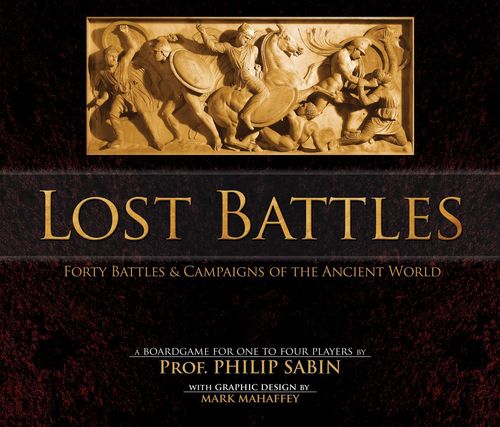
Lost Battles: Forty Battles & Campaigns of the Ancient World
Lost Battles: Forty Battles & Campaigns of the Ancient World Rulebook
Table of Contents
Table of Contents
- 1. Troops
- 2. The Battlefield
- 3. Sequence of Play
- 4. Command
- 5. Movement
- 6. Combat
- 6.1 Who May Attack
- 6.2 Combined Attacks
- 6.3 Limit on Attacking Units
- 6.4 Lead Unit and Attack Order
- 6.5 Attack Procedure and Combat Modifiers
- 6.6 Combat Results
- 6.7 "Decisive" Attacks
- 6.8 Light Infantry or Elephant Screening
- 6.9 Pursuit After Combat
- 6.10 Combat Results Table
- 6.11 Unit Size for the Attacker Limit
- 7. Morale
- 8. Commanders
- 9. Special Troop Types
- 10. Scenario Conditions
- 11. Victory
1. Troops
1.1 Troop Types and Classes
Each army in "Lost Battles" consists of roughly 20 units. Each unit has a particular type and class. There are 6 troop types: heavy infantry (HI), light infantry (LI), heavy cavalry (HC), light cavalry (LC), elephants (EL) and chariots (CH). Infantry and cavalry are each divided into 3 classes: Veteran (V), Average (A) and Poor (P). Chariots always count as "Average," while elephants are divided into two classes: Indian (I) and African (Af). Some troop types are further divided into subtypes — for example, the heavy-infantry subtypes legionaries and hoplites, described in section 9.1.
1.2 Scale
Each scenario has a multiplier (M) from 1 to 8, reflecting how large the armies involved in the battle actually were. The approximate number of real combatants represented by each unit depends on this multiplier and on the base figure for that troop type and class:
- Poor infantry: 1,000 × M foot soldiers
- Average infantry or Poor cavalry: 500 × M troops
- Veteran infantry or Average cavalry: 250 × M troops
- Veteran cavalry: 125 × M horsemen
- Chariots: 100 × M for two-horse chariots, or 50 × M for four-horse chariots (except as noted in 9.5)
- Elephants: 10 × M if unaccompanied by infantry, or 5 × M if accompanied by infantry — usually 50 light infantrymen per elephant.
1.3 Commanders
Besides its combat units, each army includes 0, 1 or 2 commanders. Commanders differ in ability, and are rated Poor (P), Average (A), Inspired (I) or Brilliant (B). Commanders also fall into 2 categories: Heroes (L), who are attached to a specific unit and cannot leave it, and Strategists (C), who move independently around the battlefield. Some commanders may also carry the Timid (T) trait.
1.4 Fighting Value
Each army has a Fighting Value (FV), made up as follows: 2 points for each Poor unit, 3 points for each Average unit or African elephant unit (except as noted in 9.3 or 9.5), and 4 points for each Veteran unit or Indian elephant unit. Each commander contributes 3 points if Poor, 6 if Average, 12 if Inspired, and 18 if Brilliant.
1.5 Fresh and Disordered Units
All units are Fresh at the start of the battle. When a Fresh unit takes a hit, it becomes "Disordered." Disordered units cannot regain their former status, and suffer penalties to morale and combat, but otherwise continue to act as Fresh units. If a Disordered unit takes another hit, it becomes "Shattered" and is immediately removed from the game.
2. The Battlefield
2.1 Zones
2.1.1 To simplify play, the battlefield is divided into 20 zones, 5 by 4, like a chessboard; each zone represents between 300 and 1,200 metres across, as shown on the scenario maps. Each zone is identified by which side's half of the field it lies in, and by its position relative to the other zones in that half. Zone names are shown in the diagram below.
2.1.2 A unit on the field is always located in one of the zones. All actions take place from zone to zone, and a unit's position within a zone is irrelevant (except as noted in 6.4). Units may freely move or attack into the enemy's half of the field (except as noted in 3.4).
2.1.3 Zones do not border each other at their corners, so diagonal attacks and movement are forbidden. All distances are measured orthogonally, so zones that are diagonally adjacent are considered 2 zones apart.
                    Right Rear   Army 1 Rear   Left Rear
        Left Wing                                          Right Wing

        Left Flank   Left Centre     Centre   Right Centre  Right Flank

        Right Flank  Right Centre    Centre   Left Centre   Left Flank

        Right Wing                                          Left Wing
                    Right Rear   Army 2 Rear   Left Rear
2.2 Terrain
2.2.1 Some battlefields will contain terrain features such as hills, forests, marshes, streams, rivers, coastlines, or impassable terrain such as deep water. Each terrain feature occupies one or more zones, as shown on the map for each particular scenario. Streams and rivers may run diagonally from zone to zone without affecting the two other adjacent zones.
2.2.2 Settlements shown along the edge of the map have no effect on play.
2.2.3 A zone may contain more than one terrain feature, and the effect of each is applied separately (though negative effects do not stack).
2.2.4 Units may not be deployed into, or enter, impassable zones.
2.2.5 Terrain affects movement as described in 5.4, the maximum number of units in a zone (see 5.5), and combat (see 6.1, 6.3, 6.5).
2.3 Camps and Key Zones
2.3.1 Each army has a key zone, located in one of the three central zones. Some armies may also have a fortified or unfortified camp on the field, located in one of the three rear zones. Camps affect the deployment of units onto the field (see 3.3 and 3.4), movement (see 5.4), and combat (see 6.1 and 6.5).
2.3.2 The enemy's occupation of a key zone or camp affects undeployed units (see 3.4), morale (see 7.1), and victory points (see 11.2).
3. Sequence of Play
3.1 Turns
Battles are played in turns, each representing roughly 3 minutes for every 100 metres of zone distance. A battle can last up to 10 turns.
3.2 Turn Sequence
3.2.1 Each turn consists of 2 player-turns. The army listed first in the scenario moves first (except as noted in 8.9 and 10.3). At the start of each player-turn, the active player rolls a die to determine the Orders available. You then activate a group made up of one or more of your units — either all standing in the same zone, or all undeployed — and use them to move and/or attack. Once that group has finished acting, you may activate another group, and so on, until you run out of Orders or have acted with every unit you wish to activate. You may activate your units in any order you like.
3.2.2 Attacks occur at the end of a group's activation. This allows you to move other units afterward to exploit the results of a previous group's attack, or to reinforce units that have attacked.
3.2.3 At the end of your player-turn, you must designate 1 lead unit in each zone that does not already have one.
Player-turn sequence:
- Roll a die to determine Orders available.
- Activate the first group of units: a. movement; then b. attacks.
- Activate the second group of units, and so on.
- Designate lead units.
3.3 Deploying Units onto the Field
3.3.1 At the start of the first turn, both armies are entirely off the field.
3.3.2 You may activate a group of one or more undeployed units and deploy it, facing forward, into one of the three rear zones, as shown by the black arrows on the diagram. This costs 1 movement (even if entering that zone would normally cost 2 movements). A group made up entirely of cavalry or chariots may instead be deployed for 1 movement into the left or right rear, facing toward the corresponding wing, as shown by the light arrow on the diagram. The group's remaining movements may be used to change facing or move further. You may then activate another group.
3.3.3 Units deployed into a camp are not required to stop there (as described in 5.4), and if the camp is unfortified, deploying the group there costs 0 movements.
The map for each scenario shows the historical deployment at the end of the first turn, allowing you to recreate the actual course of events more closely, if you wish.
3.4 Deployment Restrictions
3.4.1 Units may be deployed onto the field using double or triple movement (see 4.4 or 9.3).
3.4.2 After the first turn, units may only be deployed into the central rear zone, facing forward (except when an army is caught unaware, as described in 10.1), although they may use any remaining movements to turn and move further.
3.4.3 Units may not be deployed into zones occupied by the enemy.
3.4.4 A unit may not enter the enemy's half of the field or attack in the turn it is deployed onto the field.
3.4.5 Units may be deployed into zones occupied by friendly units, but doing so must not break the rule on the maximum number of units allowed in a zone (see 5.1 and 5.5). Your units must stop in such a zone even if they still have movements remaining.
3.4.6 You may deploy any number of activated units in a single turn, except as noted in 10.1. You may also keep units off the field for as long as you like, but all your undeployed units and commanders are considered to have withdrawn if the enemy enters your central rear zone or your camp.
4. Command
4.1 Gaining Orders
The flexibility of your army's command is represented by spending a limited number of Orders to carry out all game actions.
4.1.1 At the start of each player-turn, the active player rolls 1d6 and adds 1 for every full 10 points of the army's Fighting Value. Units and commanders that have been Shattered, routed, fled, or withdrawn, as well as units and commanders not yet deployed onto the field, are not counted when determining Fighting Value for this purpose. The resulting total is the number of Orders you may spend this turn.
4.1.2 Any unspent Orders are lost and do not carry over to the next turn. See also 10.1, 10.3, and 10.4.
4.2 Activation
4.2.1 Orders are mainly used to activate groups for movement and attacks. Not every unit can be activated each turn, but no unit may be activated more than once per turn.
4.2.2 For units to be activated as a group, they must either all be undeployed, or all start the turn in the same zone.
4.2.3 Units activated as a group must stay together and act identically — that is, make the same movements and turns — and all must attack if at least 1 of them attacks (though they need not all pursue together after an attack).
4.2.4 Activating a group of 2 Veteran units, or of 1 other unit, costs 1 Order. Activating any larger group costs 2 Orders.
4.2.5 A large group of units may also be activated for just 1 Order, but in this case it may only change facing — it may not move or enter the field. Only 1 unit from this group may attack and pursue. See 8.3.
4.3 Splitting into Groups
4.3.1 You are not required to include every unit in a given zone in an activated group. Thus, some units from a zone may form a group and move one way, while the remaining units are activated as a separate group and move another way, or attack the enemy.
4.3.2 No group may attack from a zone that contains other friendly units not part of that group. This means that if a group enters a zone containing friendly units, neither it nor those units can attack the enemy from that zone this turn, since they cannot form a single group.
4.3.3 Unactivated units may not move or attack, but one of them may become the lead unit in their zone at the end of your turn (see 6.4).
4.4 Movement and Combat Bonuses
4.4.1 At any point in your turn, you may activate a single unit for double movement instead of a standard move or attack. This activation costs 1 Order for a Veteran unit, or 2 Orders for any other unit. An activated infantry or elephant unit gains 2 movements, while an activated cavalry or chariot unit gains 4 movements. Otherwise the unit acts entirely according to the standard rules, but — importantly — it may not attack this turn.
4.4.2 Units using double movement always move individually. There is no discount to the Orders spent, even if several units make an identical double move.
4.4.3 Elephants and non-Veteran light infantry may use double movement when entering the field for just 1 Order per unit rather than 2, but in that case light infantry loses the free turn described in 5.3 and must therefore move in a straight line.
4.4.4 An alternative use of Orders is to boost an attack. Before rolling the attack dice, you may declare that you are giving the attacking unit a bonus of "+1" to the dice total. This bonus costs 1 Order if the attacking unit is light cavalry, or a lead unit of Veteran troops, or Indian elephants. In every other case it costs 2 Orders. See also 3.4, 8.3, 8.4, 8.5, and 9.3.
5. Movement
5.1 Unit Facing
5.1.1 A unit in a zone must always face one of four directions — straight ahead, right, left, or to the rear. Its front therefore always faces one of the adjacent zones, or off the field entirely. All units that end up in the same zone at the end of the movement of a single unit or group must be facing the same direction.
A group may therefore enter a zone containing friendly units facing a different direction only if it can immediately change its own facing to match the facing of the units already there (see 5.5).
5.1.2 A group that begins the turn in the same zone as other friendly units may change facing only if it immediately leaves that zone. See also 4.2.
5.2 Movement
5.2.1 An activated cavalry or chariot unit has 2 movements. An activated infantry, elephant, or cataphract (9.4) unit has 1 movement. A unit may gain additional movements per 4.4 or 9.3. A unit may spend fewer movements than it has.
5.2.2 Moving into an adjacent zone that the unit is facing, or attacking it, costs 1 movement, except as noted in 3.3 or 5.4.
5.2.3 A unit may change facing at any point during its activation (but not after combat); each 90- or 180-degree turn costs 1 movement, except as noted in 5.3. Thus heavy infantry may either move 1 zone forward or change facing, while heavy cavalry or chariots can move forward 2 zones, or move and change facing. See also 9.5.
5.3 Free Turns
There are three important exceptions to the turning rule described in 5.2:
- First, units — except hoplites (see 9.2) — are not required to spend a movement to turn 180 degrees while still in the zone they occupied at the start of the turn, if there are no enemy units in the zones on either side of their front, or in the zone (and its adjacent zones) toward which they are turning. This allows units that have not been outflanked to retreat in the face of the enemy, thereby trading space for time or falling back to more favourable ground.
- Second, units facing away from the battlefield, or originally facing a zone that contains no enemy units, are not required to spend a movement to turn to face an adjacent enemy before attacking it from the zone they occupied at the start of their activation.
- Third, light infantry may make one free turn per turn (except as in 4.4), and light cavalry may make up to 2 free changes of facing, in addition to any other free turns described in the two rules above.
Whether a unit is entitled to a free turn is assessed at the start of its activation. See also 6.1.
5.4 Terrain and Movement
5.4.1 For cavalry and chariots, moving or attacking into a zone with a hill, forest, marsh, or fortified camp, or into a zone containing enemy elephants, costs 2 movements rather than 1, except when that terrain zone is the zone the unit is entering the field into from off-board (3.3), or if the cavalry are cataphracts (9.4).
5.4.2 Streams, rivers, and coastlines do not affect movement cost. Nothing affects the cost of turning, or the movement cost for infantry, elephants, or cataphracts.
5.4.3 Units that enter a zone containing a camp may not leave it or attack from it in the same turn, except when entering the field as described in 3.3. Remember that units deployed from off the field into a zone with an unfortified camp spend no movement at all for that move.
5.5 Units per Zone
5.5.1 Units may never enter a zone occupied by enemy units.
5.5.2 Units may freely enter or be deployed into a zone occupied by friendly units, but they may not leave that zone this turn, and must change facing to match the facing of the units already there (see 5.1).
5.5.3 No more than 12 units may occupy a zone, with Poor units counting as 2 units each. This limit is reduced to 8 for zones containing rivers, coastlines, marshes, or forests, and applies even if the units there intend to leave the zone this turn. See also 6.9, 8.2, 8.8, and 9.5.
5.6 Mixed Groups
5.6.1 Units activated as a group must make identical movements and changes of facing. The number of movements and free turns available is assessed separately for each unit.
Thus, for example, a group of heavy cavalry and light infantry could turn 90 degrees (costing the cavalry 1 movement and the light infantry nothing) and then move forward 1 zone (costing the cavalry its second movement and the light infantry its only movement).
5.6.2 Mixed groups may not split apart during a single activation, except when pursuing after combat (see 6.9). Thus, no unit in a group may continue to move, attack, or change facing if doing so would require any unit in the group to spend more movements than it has (even if that unit is not itself attacking). See also 9.5.
5.7 Leaving the Battlefield
An activated group that is not on a coast, is facing off the battlefield, and has at least 1 movement remaining for every unit in the group, may leave the battlefield. Units and commanders that leave the battlefield may not return, and are considered to have withdrawn if they were Fresh. Otherwise, units are considered to have fled, and commanders to have been lost.
6. Combat
6.1 Who May Attack
6.1.1 A group may, at the end of its activation, attack the zone it is facing. This costs 1 movement to carry out (2 for non-cataphract cavalry or chariots attacking a hill, forest, marsh, fortified camp, or a zone with enemy elephants).
6.1.2 Remaining movements or free turns (as described in 5.3) may be used to move and turn before an attack, but this incurs negative combat modifiers.
6.1.3 You may not attack any of the enemy's three central zones from the five flank or rear zones if the attacking units turned to face this turn (reflecting the delay in commanders reining in their own pursuing cavalry).
6.1.4 Mixed groups may only attack if every unit in the group — not merely those that will actually attack under the attacker limit in 6.3 — has the necessary movements available (see 5.6). Attacks may also be forbidden under 3.4, 4.4, 5.4, 8.9, and 10.3.
6.1.5 Groups may not change facing or spend movements after attacking, although the victor's units may advance into the former enemy zone as described in 6.9.
6.2 Combined Attacks
6.2.1 An attack may only be made from a given zone if every unit standing in that zone is part of the attacking group. You must therefore move other units out of a zone before attacking from it, and may only bring reinforcements into that zone once the attack is complete.
6.2.2 A zone occupied by the enemy may be attacked only once per turn from each of its 4 sides.
6.2.3 A Strategist need not be part of the attacking group (though he may take part in the attack — see 8.2 and 8.4).
6.3 Limit on Attacking Units
6.3.1 Each unit in an attacking group makes a separate attack.
6.3.2 The maximum number of attacking units is 3, 4, or 5, depending on the scenario. This limit is increased by 1 if the attacking group begins its attack from a zone that borders another enemy zone and has no enemy in the zones to its left and right, or to its front and rear. The permitted number of attacking units is halved (rounding up) if both zones involved are stream, river, or coastline zones (in any combination).
6.3.3 Except as noted in 9.3 or 9.4, Veteran heavy infantry counts as 1/2 a unit when determining the number of attacking units, while all other non-Veteran troops, except heavy infantry, count as 2 units each. This reflects the difference in the actual numbers of men in each unit and the formations they use.
6.3.4 The last attacking unit may be counted as having half its normal "size," to make full use of the limit on attacking units, but in that case the attack suffers a negative modifier.
6.3.5 In a group activated for a reduced number of Orders as described in 4.2, only 1 unit may attack.
6.4 Lead Unit and Attack Order
6.4.1 Before each attack, you decide which unit will make it. You may freely choose the first attacking unit and every subsequent attacking unit, except in the situations described in 6.8 or 9.5. The first attacking unit in a zone becomes the lead unit in that zone.
6.4.2 If a unit makes a "decisive" attack (see 6.7), it loses its lead status. At the end of your turn, you must choose a lead unit for every zone that does not already have one.
6.4.3 Units lose their lead status at the start of their own player's turn, and you may then choose new lead units (but see 6.8 and 9.5).
6.4.4 Lead units receive several special combat modifiers (6.5), but they are also the target of every enemy attack directed at that zone from any direction.
6.4.5 If your lead unit takes a hit (or is removed from play due to low morale) during the enemy's turn, you must immediately choose a new lead unit for that zone. Subject to the restrictions in 6.8 and 9.5, you may freely choose which unit becomes the lead unit. You may keep the current lead unit as lead even if it is now Disordered.
6.5 Attack Procedure and Combat Modifiers
To attack with a unit, roll 2d6, add the numbers rolled, and apply all applicable modifiers. Multiple modifiers are cumulative, but each modifier may only be applied once per individual attack. See also 9.5.
- +1 to a lead unit if there is no enemy in the zones to its left and right, or to its front and rear, and it is not scythed chariots (9.5)
- +1 if the unit was given an attack bonus (4.4)
- +1 to a Hero's bodyguard unit that receives a second attack bonus (8.5)
- +1 for an Average or Veteran unit attacking a Poor unit
- +1 for a heavy infantry unit (of any type) attacking hoplites, phalangites, or archers (9.1 and 9.2) that are not facing the direction of the attack
- +1 for hoplites attacking a zone containing enemy hoplites, unless all of them entered that zone during their own player's previous turn (9.2)
- +1 to a lead unit of Fresh hoplites or phalangites attacking heavy infantry, except when there is an enemy adjacent to the phalangites' zone that they are not facing, or if the phalangites' attack is made from or into a zone containing a camp or any type of terrain (9.2)
- +1 to a non-lead unit of Average hoplites or phalangites attacking heavy infantry, if another Fresh Average unit of the same type is supporting it (i.e., not itself attacking and not supporting another unit) (9.2)
- +1 for cavalry or chariots attacking heavy infantry, if both zones are at the edge of the battlefield, or if the heavy infantry is accompanied by Fresh cavalry, chariots, or light infantry, or if the attacking unit is the lead unit and the infantry's rear is facing it
- +1 to a lead infantry unit attacking from a hill zone into a non-hill zone
- +1 to any lead unit attacking from a non-river zone into a river zone
- +1 for archers attacking light infantry or light cavalry
- −1 if the attacker moved or changed facing (even for free) before attacking (6.1)
- −1 for a non-infantry unit, or a lead heavy infantry unit outside its own camp, attacking into or out of a zone with forest, marsh, hill, or fortified camp
- −1 to the last attacking unit if its "size" is halved to fit within the limit on attacking units (6.3)
6.6 Combat Results
6.6.1 Compare the modified dice total from 6.5 to the number in the "Combat Results" table. If the total is less than the required number, the attack has no effect. If the total equals or exceeds the required number, or the attacker is making a "decisive" attack (6.7), the enemy lead unit takes a hit and immediately becomes Disordered or Shattered (1.5).
6.6.2 If the total exceeds the required number by 4 or more — or by 3 or more when attacking elephants — or if the attacker is making a "decisive" attack, the enemy lead unit takes 2 hits, and a Fresh lead Poor unit is immediately Shattered. Any other lead unit takes 1 hit, and the second hit falls on any other unit in that zone (including the lead unit itself, if it was only Disordered by the first hit) (see 6.4), chosen by the defending player. See also 6.8 and 8.6.
6.7 "Decisive" Attacks
If the modified dice total is exactly equal to, or exactly 3 more than, the number needed for a successful attack, the attacker may declare that they are making a "decisive" attack, inflicting an additional "hit" on the enemy as described in 6.6. This is only possible if the attacking unit is "Fresh," and you choose to make it Disordered as a result. A "decisive" attack must be declared before hits are assigned to the defender and before recovery attempts are made (8.6). The lead unit making a decisive attack loses its lead status, and a new lead unit must be chosen as described in 6.4. Only light infantry or light cavalry may make "decisive" attacks against light cavalry. See also 9.2 and 9.5.
6.8 Light Infantry or Elephant Screening
6.8.1 The first attacking unit of elephants or Fresh light infantry counts as 1 unit, not 2, for determining the number of possible attacking units, if it was the lead unit at the start of the player-turn.
6.8.2 An attack against light infantry that is accompanied by at least 1 heavy infantry unit inflicts only 1 "hit" if every unit in the attacked zone is Fresh. In this case, a "decisive" attack cannot be made if the total exceeds the required number by 3, and if it exceeds it by 4, only 1 hit is still inflicted rather than 2.
6.8.3 Disordered light infantry may not be chosen as the lead unit, except when there is no other choice, or if the enemy is to the rear and facing the zone containing the Disordered light infantry — in which case the player must designate the Disordered light infantry as the lead unit. However, Disordered light infantry can never be the first attacking unit, except when there is no other choice, even if enemies are behind it. It therefore need not be designated as lead unit until the current lead unit has taken a hit.
6.9 Pursuit After Combat
6.9.1 If an attack (and any subsequent removal of units due to a morale check) leaves the attacked zone empty, all or some of the units from the attacking group may move into that now-vacant zone without changing their facing, except as noted in 9.2. This is the only case in which a group may split apart after activation. The choice of which units, and how many, to move forward belongs entirely to the player, but the choice is limited to units in the group that attacked this time (whether or not they actually attacked). Groups that attacked this zone earlier in the turn may not advance into it.
6.9.2 If a group attacked using the minimum number of Orders (per 4.2), only 1 unit that actually attacked may pursue into the vacated zone.
6.9.3 Morale checks are always resolved before pursuit.
6.9.4 Pursuing units may not make any further attacks this turn, even if they have unused movements, and even if their attacks were cut short by the limit on attacking units or by routing the enemy.
6.9.5 The lead attacking unit must remain the lead unit in the zone it occupies, except when it made a "decisive" attack.
6.10 Combat Results Table
The number needed on 2d6 (modified per 6.5) for a hit, cross-referenced by attacker type (rows) against defender type (columns):
| Attacker \ Defender | Heavy Infantry | Light Infantry | Heavy Cavalry | Light Cavalry | Elephants | Chariots |
|---|---|---|---|---|---|---|
| Heavy Infantry | 9 | 9 | 8 | 9 | 9 | 8 |
| Light Infantry | 9 | 9 | 8 | 8 | 8 | 8 |
| Heavy Cavalry | 9 | 7 | 7 | 8 | 9 | 8 |
| Light Cavalry | 10 | 9 |
6.11 Unit Size for the Attacker Limit
Reference for 6.3.3 — the "size" a unit counts as when checking the limit on attacking units:
| Size | Units |
|---|---|
| 0.5 | Veteran heavy infantry, Veteran cataphracts |
| 1 | All other heavy infantry, Veteran heavy cavalry, Veteran light cavalry, other cataphracts, Veteran light infantry, a Fresh lead light infantry unit, the lead elephant unit |
| 2 | Everything else |
6.12 Cost of Activation and Attack Bonuses
Reference for 4.2 and 4.4:
| Orders | Action |
|---|---|
| 0 | Activating a Strategist for independent movement (8.2) |
| 1 | Activating 1 unit for movement/attack; activating a group of 2 Veteran units for movement/attack; activating a group to turn and/or attack with a single unit (4.2); activating a Veteran unit for double movement; activating non-Veteran light infantry or elephants entering the field with double movement (4.4); an attack bonus to attacking light cavalry; an attack bonus to a Fresh lead Veteran unit or Indian elephants |
| 2 | Activating any other group for movement/attack; activating an Average or Poor unit for double movement; activating Veteran legionaries for triple movement; an attack bonus for any other unit |
6.13 Cost of Movement and Attacks
Reference for 5.2–5.4 and 6.1:
| Movements | Action |
|---|---|
| 0 | Any unit deploying into an unfortified camp (3.3); light infantry making 1 turn; light cavalry making 2 turns; any unit (except hoplites) making an initial 180-degree turn with no enemy on its flanks (5.3); units with no enemy to their front making an initial turn in order to attack; each such free turn described elsewhere |
| 1 | Each 90- or 180-degree turn in any other circumstance; entering or attacking a zone (except as below) |
| 2 | Chariots or non-cataphract cavalry entering or attacking a zone with hills, forests, marshes, or enemy elephants, unless it is their zone of entry onto the field (5.4) |
7. Morale
7.1 Army Morale
You must make a morale check every time one of your units is Shattered and/or one of your commanders is killed. The check is made immediately after all hits from that enemy unit's attack have been assigned. You roll as many dice as units Shattered and/or commanders killed by that one enemy unit. Take the lowest number rolled, halve it, and round up. The following cumulative modifiers apply to determine your overall army morale:
- +1 if your units on the field outnumber the enemy's by at least 2 to 1
- −1 for every 4 friendly units Shattered so far (including any Shattered by this attack)
- −1 if at least 2 Poor commanders, or 1 Average-or-better commander, have been killed or have fled the field
- −1 if enemy units on the field outnumber yours by at least 2 to 1
- −1 if the number of your central zones occupied by the enemy exceeds the number of the enemy's central zones occupied by your units by 2 or more (counting a key zone without a river as 2 zones, and a key zone with a river as half a zone), or if your camp has ever been captured by the enemy (2.3)
7.2 Unit Morale
To determine the morale of each individual friendly unit at risk, apply the following additional modifiers to the army morale (remember that distances are never measured diagonally — 2.1):
- +1 for a Veteran unit, an Average legionary unit (9.3), or Indian elephants
- +1 for a heavy infantry unit, except hoplites in contact with enemy hoplites (9.2)
- +1 if the unit is three zones or more from the attacked zone
- +1 for all units except elephants, if there is an Inspired or Brilliant commander in the zone, or a Brilliant commander in an adjacent zone (exception — see 8.6)
- −1 for a Poor unit, a scythed chariot unit, or the bodyguard of a Timid commander
- −1 for a Disordered unit
- −1 if the enemy is present to the front and rear, and/or on both the left and right flanks
7.3 Morale Check Results
7.3.1 Once you have calculated the morale of each unit, apply the following results. First, all units with a morale of −1 or less are removed from the field, and are considered to have withdrawn if they are "Fresh," or fled if they are Disordered. The same then applies to all units with a morale of 0, if they are in the same zone as a unit Shattered by this enemy attack, or in the same zone as a unit just removed from the field due to this morale check.
7.3.2 Exception: if 1 light infantry unit is Shattered or flees, this does not cause friendly units with a morale of 0 to flee, except for other light infantry. If 2 or more light infantry units are Shattered or flee from the same zone, this exception does not apply.
7.3.3 The death of a commander does not cause units with a morale of 0 to be removed from the field, and unit morale is not recalculated due to units or commanders fleeing before the next morale check. See also 9.5.
7.4 Undeployed Units
Undeployed units also check morale, but use only the following modifiers: +1 for Veteran units, Average legionaries, or Indian elephants; +1 for heavy infantry; −1 for Poor units, chariots, or the bodyguard of a Timid commander. Units whose morale becomes −1 or less are considered to have withdrawn, but units with a morale of 0 remain undeployed.
8. Commanders
8.1 Heroes
Commanders known as Heroes are attached to a specific unit (their bodyguard) and cannot leave it. They are always activated together with that unit. If the unit is Shattered, withdraws, or flees, the commander is also removed from play and considered lost. A Hero may also be killed even if his unit is not Shattered — see 8.6.
8.2 Strategists
Strategists are either off the field or occupy a specific zone. They have no facing, are not counted when determining the group limit in a zone, and never block the movement of units. They may be activated and moved together with a group of units in their zone; in that case they move exactly as the group does, and may advance after combat with the group. Alternatively, they may be activated separately, at no Order cost, and repositioned into any zone on the field that contains no enemy units (without tracing a path of movement), or withdrawn from the field. A Strategist may be activated only once per turn. He never checks morale, but is removed from play and considered lost if every unit sharing his zone is Shattered, withdraws, or flees, or if, at the end of his player's turn, he is in a zone with no friendly units (or if no friendly units remain undeployed and the commander himself is not deployed). See also 8.8.
8.3 Activation Bonuses
8.3.1 Each commander has his own pool of Orders, which he may spend to activate units/groups in his own zone, provided he has not already been activated this turn. A Poor commander has 1 Order, an Average commander 2 Orders, and an Inspired or Brilliant commander 4 Orders.
8.3.2 These Orders may be spent on each successive activation in that zone, but once the pool is exhausted, the remainder must be paid with ordinary Orders.
8.3.3 If a commander is not deployed onto the field, he may use his Orders to activate undeployed units.
8.4 Attack Bonuses
8.4.1 Commanders activated together with an attacking group may use their Orders to grant bonuses to attacking units. As with activation bonuses, a Poor commander has 1 Order, an Average commander 2 Orders, and an Inspired or Brilliant commander 4 Orders. Orders for activation and for attack bonuses are tracked separately (i.e., an Average commander could first use his 2 Orders to activate units for an attack, and then use another 2 Orders to grant attack bonuses).
8.4.2 Orders spent on attack bonuses must be applied to the first attacking units — they cannot be saved for units attacking later.
8.4.3 As noted in 6.2, Strategists need not be activated together with the attacking group; they may instead be activated separately and moved elsewhere on the field, but in that case they cannot use their Orders to grant bonuses to the attacking units. See also 8.8.
8.5 A Hero's Bodyguard
If a Hero's unit is the first attacking unit, you must give it 2 attack bonuses rather than 1, provided the commander has enough of his own Orders to grant attack bonuses (as described in 8.4). Thus a Veteran unit or light cavalry gets 2 attack bonuses if led by an Average-or-better Hero, and any other unit gets 2 bonuses (which would normally cost 4 Orders) if led by an Inspired or Brilliant Hero. If the bodyguard unit is not the lead unit, you may only give it a single attack bonus, regardless of whether you have enough Orders.
8.6 Hero Recovery Attempts
8.6.1 Whenever a unit (other than Poor units, light infantry, scythed chariots, or elephants) takes a hit during the enemy's turn (not during its own "decisive" attack), a Hero present in that zone may attempt to remove the hit.
8.6.2 If the hit falls on a Hero's own bodyguard unit, he must attempt to remove it (see also 9.2). However, Timid Heroes may not attempt to remove hits from any unit other than their own bodyguard.
8.6.3 To remove a hit from a unit, roll 2d6. If the total is 10 or more for a Poor commander, 9 or more for an Average or Inspired commander, or 8 or more for a Brilliant commander, the hit is removed. However, if the total is 2 or 3 for a Poor or Average commander, or 2 for an Inspired or Brilliant commander, the commander is killed. If the total for an Inspired or Brilliant commander is exactly 3, treat this as a narrow escape from death — for the rest of the battle, during his own next turn he may not use his own Orders to activate units or to grant attack or morale bonuses, nor attempt to remove hits from friendly units (even when required to do so).
8.6.4 A lead unit that has had a hit removed remains the lead unit, and will take the second hit inflicted by that attacker (an attempt may also be made to remove this hit).
8.6.5 Any hit inflicted on the attacker as a result of making a "decisive" attack (6.7) remains in effect, even if the hit inflicted on the defender was removed.
8.7 Strategist Recovery Attempts
A Strategist's recovery attempt is made exactly like a Hero's, except that, unlike a Hero, a Strategist is never required to make one. Strategists may only recover units that are already Disordered and would otherwise become Shattered. An Inspired or Brilliant Strategist dies on a roll of 2 or 3, while a Poor or Average Strategist dies on a roll of 2, 3, or 4.
8.8 Multiple Commanders in a Zone
8.8.1 Commanders can never be activated as part of the same group, and one commander can never enter a zone occupied by another commander.
8.8.2 If both commanders are undeployed, their Orders may be pooled and even used together to activate a single group.
8.8.3 If, at the start of the player-turn, the commanders are in adjacent zones, only one of them may use his Orders for movement and combat bonuses that turn.
8.9 Brilliant Commanders
8.9.1 If you have a Brilliant commander, you will normally move second every turn. However, on any turn except the first, you may declare that you are switching this order for the current turn and every turn thereafter. This lets you act in 2 consecutive player-turns.
8.9.2 You must declare this decision before any rolls for weather or for determining Orders are made.
8.9.3 The turn order may not be switched if both armies started the battle with Brilliant commanders, or if your Brilliant commander has been killed or has withdrawn, or if the battle is fought in dry, dusty conditions (see 10.3). In addition, in the second of two consecutive player-turns, you may not attack from any zone you attacked from in the previous player-turn. Note that individual units can still attack in both the first and second player-turns if they are already in a different zone (for example, if they pursued after combat in the first).
9. Special Troop Types
9.1 Troop Subtypes
Heavy infantry has the following subtypes: archers (AR), hoplites (HO), phalangites (PH), and legionaries (LE). Heavy cavalry may be cataphracts (CA), and chariots may be scythed (SCH). All subtypes have the special combat modifiers described in 6.5, in addition to the standard modifiers of their basic type. All of them, except archers, also have other special rules, described below.
9.2 Hoplites and Phalangites
Hoplites must always make a "decisive" attack (6.7) whenever possible. Hoplites do not get the free 180-degree turn described in 5.3, and may not advance after combat if there is enemy heavy infantry in an adjacent zone. A Hero attached to a hoplite unit must attempt to remove hits from every hoplite unit in that zone, if possible. If there are enemy hoplites in an adjacent zone, hoplites do not receive the standard heavy infantry morale bonus (see 7.2).
9.3 Legionaries
Veteran legionaries may, for 2 Orders per unit, move at triple speed (the same as the double speed of 4.4, but with 3 movements instead of 2). They also count as 1 full unit rather than half a unit for determining the maximum number of attacking units (6.3). Average legionaries have the same high morale (7.2) as Veteran troops, thanks to their discipline and endurance, but their Fighting Value counts as 4, rather than 3, for every game purpose except determining the victory points the enemy earns for Disordered, withdrawn, Shattered, or fled legionary units (11.2).
9.4 Cataphracts
Cataphracts have only 1 movement per turn (or 2 if using double movement), and spend only 1 movement to attack or move into any zone. Cataphracts count as 1 unit (or 1/2 unit if Veteran) when determining the maximum number of attacking units (6.3).
9.5 Scythed Chariots
A scythed-chariot unit represents only 25 × M chariots drawn by 4 horses, and has a Fighting Value of 1, rather than 3. It is removed from play and considered to have withdrawn as soon as it changes facing or enters a zone already containing a friendly unit. The other units in its group may then continue to move or attack using their remaining movements (see 5.6). Scythed chariots are also removed from the field and considered to have fled as soon as the enemy attacks them (no attack dice need be rolled in this case). Their removal does not trigger a morale check; however, if they withdraw due to a failed morale check, this does trigger the removal of friendly units with a morale of 0 (as described in 7.3). Scythed chariots must always be the lead unit in their zone (6.4). They may receive attack bonuses (4.4), but may not make "decisive" attacks (6.7).
10. Scenario Conditions
10.1 Surprise
In some battles, one or both armies may be caught by surprise. In this case, the surprised army may deploy no more than 4 units onto the field per turn (in addition to any Heroes and Strategists). On the first turn, heavy infantry and elephant units count as 2 units each for this limit. Units deployed on later turns are not restricted to entering only the rear zones, and may be deployed into any zone available on the first turn, facing any direction that was permitted on the first turn. Otherwise, their deployment is restricted by 3.3, 3.4, and 4.4. A surprised army must subtract the Fighting Value of its undeployed units and commanders from its total Fighting Value when determining the number of Orders (4.1). Undeployed commanders of such an army may still use their own Orders to activate units.
10.2 Fatigue
In some battles, one or both sides are fatigued. Disordered attacking units of a fatigued army suffer a −1 modifier to all their attacks.
10.3 Dust
Some battles were fought in very dry and dusty conditions. In this case, the die roll for the number of Orders (4.1) is halved, rounding up. Also, at the start of every turn except the first, roll a die. On a roll of 4, 5, or 6, the player-turn order for that turn is reversed. An army that gets 2 consecutive player-turns may not attack, in the second of those turns, from any zone it attacked from in the first (as explained in 8.9).
10.4 Wet Weather
Some battles took place in wet or overcast weather. Starting from the second turn, roll a die. On a roll of 6, the weather changes from overcast to wet, or from wet back to overcast. While the weather is overcast, no special rules apply. During wet weather, players halve their die rolls for the number of Orders (rounding up); certain troop types also suffer negative combat modifiers (6.5).
11. Victory
11.1 End of the Battle
The battle ends if one side has fewer than 3 units remaining on the field and/or undeployed, with scythed chariots and Poor units each counting as half a unit. If this happens, all of that side's commanders are considered lost, all of its remaining Fresh units are considered to have withdrawn, and all its Disordered units are considered to have fled. The battle also ends after 10 turns.
11.2 Victory Points
At the end of the battle, each player totals their victory points by summing the figures below (remembering the special treatment of Average legionaries in 9.3):
- The Fighting Value of every Disordered, withdrawn, or fled enemy unit and every lost enemy commander
- + an additional 1 point for every fled unit
- + double the Fighting Value of every Shattered enemy unit and every killed enemy commander
- + 5 points if you captured the enemy camp during the game, and the enemy still has units on the field or undeployed
- + 20 points if your army was fatigued
- + 30 points if your army was caught by surprise
- + double the difference between the armies' starting Fighting Values, if your army had the lower Fighting Value
11.3 Levels of Victory
If both players' victory point totals are exactly equal, the battle is a draw. Otherwise, the player with the higher point total wins, and the level of victory is found by subtracting the loser's points from the winner's:
| Margin | Result |
|---|---|
| 1 – 24 | Pyrrhic Victory |
| 25 – 49 | Clear Victory |
| 50 – 75 | Major Victory |
| 75 – 99 | Strategic Victory |
| 100 or more | Overwhelming Victory |
Even a fled army can still win the game, if it achieves a better result than its historical counterpart did.