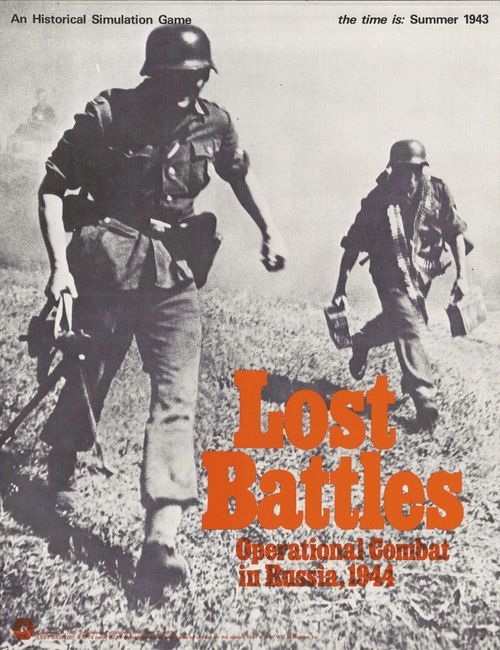
Lost Battles: Operational Combat in Russia
Lost Battles: Operational Combat in Russia Rulebook
Table of Contents
Table of Contents
- General Course of Play
- The Playing Pieces
- Types of Units
- Armored Units
- Definition of Terms
- Game Charts and Tables
- The Sequence of Play
- Outline of the Sequence of Play for One Complete Game-Turn
- Stacking (more than one unit per hex)
- Movement Phases
- Combat
- Zones of Control (ZOC)
- Terrain Effects Chart
- Engineers and Rivers
- Artillery (ranged only!)
- Supply and Command Control
- Fortifications
- Air Strike
- Victory Conditions
- Design Notes
- Division Counter Chart
- Organization Charts
- Notes on the Scenarios
General Course of Play
The 18" by 18" map sheet shows a typical area of western Russia, with terrain which affects movement and combat (see Terrain Effects Chart). An hexagonal grid has been superimposed over the map to enable the Players to determine movement, position, and firing ranges of their units. One Player is the Soviet Player, who controls the Russian Units, while the other is the German Player, who controls the German units. Each player maneuvers his units and fires their weapons ("attacks") at the units of the Enemy Player, in an effort to destroy as many enemy units as possible (see Combat Results Table), and gain certain geographic objectives, while minimizing Friendly losses, and denying the Enemy his geographic objectives. The game is won by accumulating Victory Points, with final victory (of various types) being awarded to the side with more Victory Points.
The Playing Pieces
The square, die-cut cardboard pieces (hereafter called units) represent brigade, regiment and battalion size military organizations of several different types (e.g., artillery, infantry, armor, et al). The numbers represent that unit's capabilities with respect to combat and movement.
The standard unit counter shows: Movement Allowance (upper right), Road Movement Space (RMS) (top center, the small figure between the Combat Strength and the Movement Allowance), Combat Strength (against non-armor units) (upper left), Attack Strength (against armor) (middle left), and Defense Strength (against armor) (lower left). The unit type symbol appears in the lower right of the counter.
The ranged-artillery unit counter shows: Movement Allowance (upper right), Road Movement Space (RMS) (lower center), Fire Strength (upper center, the attack strength of the unit), and Range Allowance (lower left, the number of hexes over which the unit may fire). Ranged-artillery units have an understood Defense Strength of "1" when attacked by any type of unit.
Types of Units
The following unit-type symbols are printed on the counters:
- Tank (armor unit)
- Assault Gun (armor unit)
- Reconnaissance (armor unit)
- Armored Infantry (armor unit)
- Headquarters
- Engineer
- Artillery Supply
- Anti-aircraft artillery (direct fire)
- Direct-fire Artillery
- Anti-tank Artillery (direct fire)
- Infantry
- Ranged Artillery
- An unnamed symbol showing an arrow and a box with "G" (the key prints no name for it; it is transcribed here as shown)
The four unit types tank, assault gun, reconnaissance and armored infantry are bracketed together on the counter key as "armor units."
Armored Units
The rules contain many references to armor or armored units. These are defined as: tank, assault gun, reconnaissance, and, at the owning Player's option, armored infantry.
These are the functionally different types of units:
Class I - Ground Attack. All ground attack units share certain characteristics, such as the need to be adjacent to Enemy units in order to attack them. Functionally, ground combat units are divisible into two sub-classes: armor (as defined above) and non-armor (i.e. all other Ground Attack units). See the Sequence of Play for greater detail.
Class II - Ranged-Artillery, which have a Fire (Attack) Strength, effective against all units over the number of hexes indicated by its range allowance (see Supply), and has a Defense Strength against all attacks of "one."
Definition of Terms
Combat Strength is the basic offensive and defensive power of a unit in computing odds comparisons (see Combat), and is used solely in the Ranged-Artillery Combat Segment and Final Ground Combat Segment (see Sequence of Play).
Attack Strength (against armor) is the basic offensive power of a unit used in computing odds comparisons with the Defense Strength in the Initial Armored Combat Segment.
The Movement Allowance number is the basic, maximum number of hexes which a unit may move in one Movement Phase. This capability can be influenced by terrain (see Terrain Effects Chart), closeness of enemy units (see Zones of Control), and the closeness of Friendly headquarters units (see Supply-Command Control).
The Range Allowance number is the maximum number of hexes which a ranged-artillery unit may direct its Fire (Attack) Strength against Enemy units.
Game Charts and Tables
Various visual aids are provided to simplify and illustrate certain game functions. These are the Combat Results Table (CRT), the Terrain Effects Chart (TEC), and the Scenario Charts. Each of these charts are fully explained where they are presented.
The Sequence of Play
Lost Battles is played in turns. Each Game-Turn is composed of two Player-Turns. Each Player-Turn is composed of three Phases (Note: the Combat Phase is further broken down into Segments).
Outline of the Sequence of Play for One Complete Game-Turn
1. First Player Turn.
a) First Movement Phase - Player may move all of his units in any direction, up to their full Movement Allowance, with restrictions as stated in the Movement rules;
b) Combat Phase - Player attacks those Enemy units he wishes, and is able to, in the following sequence: (All attacks must be allocated and announced before any resolution; units may not thereafter be shifted from one attack to another. Units attacking units which have been eliminated or retreated in resolution of a prior Combat Segment, attack nothing.)
I. Ranged Artillery Combat Segment - all Friendly artillery units may fire at Enemy units within their Range Allowance, with restrictions as outlined in the Combat and Artillery rules. This is only done with artillery units which have a Range Allowance.
II. Initial Armored Combat Segment (Note: For those combats in which none of the attacking units are armor, or none of the defending units are armor or anti-tank guns, proceed to Segment III.) All attacking armored units compare their Attack Strength (against armor) to the Defense Strengths (against armor) of adjacent, defending armored and anti-tank gun units, and resolve combat. Ignore all units not specified, even if stacked with either the attacking or defending units. All attacks of this type must be resolved before proceeding to any Segment III attacks.
III. Final Ground Combat Segment - all units, including surviving units of Segment II, are involved in combat. Compare the Combat Strengths (against non-armor units) of the attacking units to the Combat Strengths of all the surviving defending units (plus defensive artillery fire, if any), and resolve combat. Units must be adjacent to engage in combat (except defending artillery).
IV. Air-Strike Combat Segment - Player resolves attacks caused by air-strikes, in accordance with those rules.
All of these Combat Segments must be followed in strict order, each segment being fought, and the results of its combat being applied to the combatant units, before progressing to the next segment. Thus it is possible for a unit to be attacked four times: by Ranged Artillery, by both types of Ground Combat, and by Air Strike.
c) Second Movement Phase - First Player moves any of his units he wishes up to their full Movement Allowance, with restrictions as stated in the Movement rules. This movement is in addition to the First Movement Phase.
2. Second Player Turn (as stated on the Scenario Order of Battle Chart) Second Player executes Phases A through C, using his own units.
3. Players indicate the passage of one Game-Turn on the Turn Record Chart. Each Game-Turn represents one day of real time. The various scenarios dictate how many Game-Turns that particular game endures. At the end of the game, after the Second Player's Second Movement Phase, each Player's performance is evaluated in terms of the particular scenario's victory conditions.
The determination of which Player is considered the "First Player" and which the "Second Player" is provided in each scenario.
Stacking (more than one unit per hex)
General Rule: As many as three units (of any type or combination of types) may occupy the same hex at the same time, with the exception of units moving on the road.
Cases:
(A) Stacking limitations apply at all times, even during the Movement Phase of a Player-Turn. Therefore a unit may not move through a hex already containing three Friendly units.
(B) Stacking and moving in stacks is not permitted when the units are moving at the Road Movement rate. See the Movement rules, Case I for greater detail.
(C) All units count for stacking; there is no exception or differentiation.
Movement Phases
General Rule: During the Movement Phases of a Player's turn, the Player may move as many or as few of his units as he wishes. Each unit may be moved as many hexes as desired within the limits of its Movement Allowance, the Terrain Effects Chart, and the Zone of Control Rules.
Procedure: Move each unit individually, tracing the path of its movement through the hexagonal grid.
Cases:
(A) Movement is calculated in terms of hexagons. Basically each unit expends one Movement Point of its total Movement (point) Allowance for each hex entered. To enter some types of hexes, more (or in some instances, less) than one Movement Point is expended. See the Movement section of the Terrain Effects Chart for a full list of these different "entry costs."
(B) In any given Movement Phase of a Player-Turn, the Player may move all, some or none of his units. Movement is never required; it is voluntary.
(C) Units are moved individually, in any direction or combination of directions. A unit may be moved as many or as few hexes as the owning-Player desires as long as its Movement Allowance is not exceeded in a single Movement Phase. Unused Movement Points, however, may not be accumulated from Phase-to-Phase or transferred from unit-to-unit.
(D) No Enemy movement is permitted during a Player's Movement Phase.
(E) No combat (Enemy or Friendly) may take place during a Movement Phase.
(F) Friendly units may pass through or onto other Friendly units as long as there are never more than three Friendly units in the same hex at the same time. In other words, a unit may not enter or pass through a hex containing three other Friendly units. (See Stacking Rule.)
(G) Units may never enter or pass through a hex containing Enemy units.
(H) Units may move over different types of terrain-hexes in the same Movement Phase as long as they have enough Movement Points to expend as they enter each hex.
(I) Road Travel When units choose to use the road movement rate (see Terrain Effects Chart), their "road-march" order causes them, in effect, to occupy a certain number of hexes, into which no other unit, either Enemy or Friendly, may appear during its movement, or else the unit moving on the road loses its ability to move at the road movement rate. As soon as a unit moving down or onto a road enters a hex which is within the number of hexes, given by the Road Movement Space number (printed on the unit), of another unit (Enemy or Friendly), it may no longer move at the road movement rate, and must pay movement costs as dictated by the other terrain in the road hex.
The Road Movement Space number dictates the number of hexes which must be vacant at all times (both in front and back, along the road) while the unit is moving at the road movement rate. A "0" Road Movement Space (RMS) number indicates that the unit occupies only its own hex (however, such a unit could not move directly into an Enemy Zone of Control on the road); a "1" RMS number would indicate that one hex on the road both in front and in back must be vacant; a "2," two hexes in front and back, etc.
Obviously, units moving on the road may not be stacked and must be moved individually. It is also perfectly possible that several units may use the same section of road during a single Movement Phase, as long as the Road Movement Space number is not violated.
(J) Movement costs (i.e., the number of Movement Points it "costs" to enter a hex) are on two levels. First, the cost to enter a particular type of terrain, e.g., swamp, road, etc. Second, there is the cost to enter or leave an Enemy Zone of Control, which is an additional three and two movement points, respectively. To both enter and leave an Enemy controlled hex would therefore cost five Movement Points, even if it were a question of the same Enemy unit, in addition to the basic terrain cost. (See Zones of Control.)
(K) Undeployed Attack A player may avoid the additional cost of entering an Enemy controlled hex, and simply move into the hex, paying only the terrain cost. However, this may only be done when the unit is attacking at least one hex containing Enemy units it moves adjacent to, and, when the attack takes place, its Combat (or Attack) Strength is halved.
(L) There are certain additional restrictions and modifications to Movement, for which see Artillery, and Supply and Command Control.
(M) Non-motorized units (i.e., units with a Movement Allowance of less than seven), except for all types of artillery, may always move a minimum of one hex if in supply, even if the movement cost exceeds that unit's Movement Allowance.
Combat
General Rule: Combat occurs between adjacent opposing units and artillery fire may be directed at Enemy units within the Range Allowance of ranged-artillery at the discretion of the Player whose Combat Phase it is. This Player is considered to be the Attacker, while the other Player is the Defender (regardless of the overall strategic posture of the respective Players).
Procedure: Total up the Attack or Combat Strengths of the two different classes of attacking units (Class II, ranged-artillery, and Class I, ground attack forces) separately, and compare each of the two classes separately to the appropriate Combat or Defense Strengths of the units in the hex under attack, plus any artillery defensive fire. State the comparison of Attacker's total Strength to Defender's total Strength (again, each class being applied separately) as a probability ratio, simplified downward to the nearest whole number on the Combat Results Table (CRT). Example: 29 to 10 (or 2.9 to 1) would be simplified to 2:1 odds on the CRT. Roll the die, and read the result under the appropriate line, under computed odds. Apply each result immediately, before going on to resolve any further combat in the Combat Phase. Note especially that the Combat Segments must be followed in order.
Cases:
(A) During the Combat Phase of his Player-Turn, a Player may only make Class I (ground combat) assaults against Enemy units to which friendly units are adjacent; a Class II (ranged artillery) attack may only be made against Enemy units within the number of hexes dictated by the Range Allowance of the artillery unit.
(B) Friendly units adjacent to Enemy units are not compelled to attack, nor does the attacking Player have to utilize every adjacent unit if he does attack. Attacking is completely voluntary.
(C) Only Friendly armored units may attack more than once per Combat Phase; however, any Enemy unit may be forced to defend against more than one attack (ranged artillery and two ground combats and an Air Strike) in one Combat Phase, in which case it defends with its full Combat or Defense Strength to all attacks (assuming it survives each successive attack). Example: an assault gun unit may be attacked by ranged-artillery, and defend with its Combat Strength, and, in the same Combat Phase, defend against an armor attack force, and defend with its Defense Strength (against armor).
(D) A Friendly unit (or units) in one hex, in Class I (ground combat) attacks only, may attack units in more than one hex, if adjacent to all Enemy units to be attacked; similarly, more than one Friendly unit in different hexes may attack one Enemy held hex; this applies to both Class I (ground combat) and Class II (ranged-artillery) attacks.
(E) Enemy units in one hex, for purposes of both Class I (ground combat) and Class II (ranged-artillery) attacks, may not be broken down or in any way divided when attacked, except for the Initial Armored Combat Segment; the applicable Combat or Defense Strengths of units in the same hex must be totalled when under attack. The Defender must defend with all units in the hex under attack.
(F) Not every unit in a stack, some units of which are attacking, need attack.
(G) There are certain additional restrictions to combat, for which see Artillery, and Supply and Command Control.
Zones of Control (ZOC)
General Rule: The six hexagons immediately surrounding a given unit (or stack of units) constitute that units Zone of Control. These are semi-active Zones of Control which have an inhibiting effect on Enemy movement, but do not affect Enemy combat. Hexes upon which a unit is exerting its semi-active Zone of Control are called controlled hexes.
Cases:
(A) All units must expend three additional Movement Points, above and beyond the ordinary movement cost, to enter an Enemy controlled hex from another, uncontrolled hex. They may not enter an Enemy Zone of Control (and thus be able to attack) unless they have the three extra Movement Points to expend.
(B) It costs two additional Movement Points to leave an Enemy controlled hex, above and beyond the ordinary movement cost.
(C) If you move directly from one controlled hex of an Enemy unit to another controlled hex of the same or any other Enemy unit, it costs five additional Movement Points (three plus two, as outlined in Cases A and B). Example: If a German armored unit were to enter a Russian Zone of Control in the rough terrain, it would expend six Movement Points in moving one hex: three for entering a Zone of Control, and three for entering a rough terrain hex. If the same unit were to leave one controlled hex for another controlled hex, in the rough terrain, it would expend eight Movement Points (three plus three plus two).
(D) For movement purposes, Enemy Zones of Control extend into hexes occupied by Friendly units. For purposes of tracing supply lines, Enemy Zones of Control do not extend into hexes occupied by Friendly units. See Supply rules.
(E) Zones of Control do not extend into Swamp or Forest hexes. Thus units moving in these type of hexes adjacent to Enemy units need not pay the additional movement costs for entering or leaving Enemy Zones of Control. Zones of Control of units in Swamp or Forest hexes do extend into other types of terrain, and do affect Enemy movement.
(F) Artillery supply units, Headquarters units, and ranged-artillery units in the limbered movement position (see Artillery rules) exercise no Zone of Control. Enemy units may freely pass adjacent to them, although not through them.
(G) If a hex is controlled by more than one unit, it still costs only three additional Movement Points to enter. This is true for all movement costs; e.g., entering a hex with more than one Zone of Control never costs more additional Movement Points than entering a hex with one Zone of Control.
Terrain Effects Chart
| Type of Terrain | Movement Cost: units with a Movement Allowance of 7 or less | Movement Cost: units with a Movement Allowance of 8 or more | Addition to Attacker's Die-Roll Result when Defender is in given Terrain |
|---|---|---|---|
| Clear | 1 | 2 | 0 |
| Road | ½ª | ½ª | 0 |
| Town | 1 | 1 | 2 |
| Rough | 2 | 3 | 1 |
| Forest | 3 | 5 | 1ᵈ |
| Swamp | 3 | 4 | 1ᵈ |
The Railroad has no effect upon movement or combat.
Notes to the Terrain Effects Chart:
a. See Movement rules, Case I.
b. This cost is in addition to the cost of other terrain costs. See Movement rules, Case J.
c. Do not apply AB or DB results in cross-river attacks unless attacking across a bridged-hex side. The die roll addition is applied in combination with any other die-roll additions due to the terrain being defended.
d. All armored units have their Combat, Defense and Attack Strengths cut in half when they are in Forest or Swamp hexes.
Engineers and Rivers
General Rule: Units may only cross rivers when Engineer units form a bridge.
Cases:
(A) Engineers form a bridge by remaining adjacent to a river hex-side for one full Friendly Movement Phase without moving; the owning Player must specify which hex-side the bridge is across.
(B) On the following Friendly Movement Phase after the bridge is built, units may proceed across it with no additional movement penalty. Only Friendly units may cross the bridge. Engineer units must remain in position, although they no longer count for stacking.
(C) Engineer units may move off at any time, without movement penalty; however, no units may cross the bridge in the Movement Phase that the Engineer unit moves. The bridging effect of the Engineer unit disappears when the Engineer unit moves off the river.
Artillery (ranged only!)
Ranged-artillery units have an understood Defense Strength of "1" when attacked by any type unit.
Ranged-Artillery is functionally quite different from ground combat units. Special rules govern both its movement and combat. Ranged-artillery assumes a different status according to whether its is in a limbered mobile status or dug-in firing position.
Cases:
(A) Artillery Unit Movement Before ranged-artillery units may be moved, they must be flipped over so that the blank side of the unit(s) show up. This "limbering-up" for travel costs three Movement Points. Ranged-artillery units may not use their Fire Strength in this position, exert no Zone of Control, but are still able to use their Defense Strength, which is "one" for all ranged-artillery units. In order to regain an "unlimbered" firing position, face up, the unit must expend another three Movement Points.
(B) Units may "limber-up" as often as they wish; they may also gain firing position, as long as they have remaining the additional Movement Points, with the following exception: Russian ranged-artillery units attempting to reach a firing position, at the end of that Movement Phase, roll a die to determine whether they are successful; if a "1" or "2" is rolled, they achieve the firing position, and may have combat normally. If not, they may resume moving in the next Friendly Movement Phase, and continue the attempt.
(C) Artillery Combat Ranged-artillery units may engage in three types of attack, all of which require that the enemy unit must be within the number of hexes of the Range Allowance:
I. Supplied, Spotted Fire - Artillery unit(s) fires with full Fire Strength at an Enemy unit(s) which is in a Friendly Zone of Control (see Case F for definition of supplied).
II. Supplied, Unspotted Fire - Artillery unit(s) fires with one-third of full Fire Strength at Enemy units NOT in a Friendly Zone of Control; they are further penalized by being required to raise their die-roll result number by two (e.g., a result of "5" would be raised to "7").
III. Unsupplied Fire - Artillery unit fires with a Fire Strength of ONE; this may only be applied against Enemy units in a Friendly Zone of Control. This type of attack may be used in conjuction with Supplied, Spotted Fire.
The Fire Strength of ranged-artillery (Class II) may never be combined with Class I units. Artillery units may also engage in defensive fire.
IV. Defensive Fire - this may be either supplied, for the full Fire Strength, or unsupplied, for one point. The Friendly defending units must be within the Range Allowance. This defensive fire is added to the defending hex in the resolution of the Final Ground Combat Segment. Artillery units may not engage in Defensive Fire if any attack has been announced against those (artillery) units in the beginning of the Combat Phase.
(D) There is no limit to the number of artillery units which may fire into a single hex. All units in the target hex must be attacked in total, i.e., you may not single out units in a hex to be attacked. One artillery unit may not fire at more than one hex. Only those results (on the Combat Results Table) affecting solely the Defender are applied in attacks by ranged-artillery.
(E) Units defending against an artillery attack defend with the same Combat or Defense Strength as if they were defending against a non-armor attack. (Note, again, that all ranged-artillery units defend against all attacks with a Defense Strength of "1.")
(F) Artillery Supply Whenever artillery employs supplied Fire (see Case C), the firing unit must be adjacent to an Artillery Supply unit at the beginning of the Combat Phase. Following completion of the actual attack, the supply unit is removed. Each supply unit may supply only one artillery unit and then the supply unit is removed. It is possible for supplied and unsupplied artillery units to combine in an attack, as long as both are employing spotted fire. Artillery units have no Attack Strength, and no Zone of Control.
Supply and Command Control
General Rule: All units (including ranged-artillery units) trace supply lines to their respective Headquarters units. Units not considered in supply are penalized in movement and combat. In effect, this is both logistics and communications working.
Procedure: Units are considered to be in supply for movement purposes at the beginning of the Movement Phase; they are not affected if they move out of supply during that Phase. Units are determined to be in supply for combat at the instant of combat resolution, and not simply at the beginning of the Combat Phase.
Cases:
(A) Units must be able to trace an unblocked (see Case B) line of hexes, no more than ten Motorized Movement Points in length, from their position to the providing Headquarters unit in order to be considered supplied.
(B) Supply lines are blocked in the following ways:
I. The intervention of an Enemy unit (or units)
II. The intervention of an Enemy Zone of Control; however, a Friendly unit negates the effect of Enemy Zones of Control on supply lines (although not on the movement of units)
III. Unbridged river hexes (see Engineer rules)
(C) Units may remain out of supply indefinitely, i.e., units are never lost solely due to lack of supply.
(D) Units out of supply have their Movement Allowance, and applicable Combat, Attack and Defense Strengths, halved. All units are individually reduced, before any other effects are accounted for. Fractions are lost, but a unit's Defense Strength may never be reduced below one.
(E) For a Headquarters unit to be used as a source of supply, it must be able to trace a clear line of unblocked hexes, no matter how long or devious, to the Source of Supply specified in the scenario.
(F) Any number of units may be supplied from one Headquarters unit, for combat and movement purposes.
Fortifications
In certain scenarios, Fortifications counters are provided. Units in the Fortification should be placed under the counter to distinguish it from units merely stopping in the same hex as the counter. Both units in the Fortification and those passing through it are counted for the one hex stacking limitation. Only one Fortification counter may be placed on each hex.
Fortifications by themselves have no intrinsic value, and may not be moved from their initial placement. When units defending in Fortifications are attacked, the attacker must add two to his die-roll result (e.g., a die-roll of "5" is raised to "7"). This effect is in addition to any other die-roll-raising due to other considerations. See the Terrain Effects Chart.
Units in (as opposed to on) Fortifications may not attack. Moving in or out of a Fortification (as opposed to through or stopping on) entails a movement cost, each way, of two Movement Points; this is termed entrenching and re-assembling.
Air Strike
General Rule: Some scenarios specify that some Player receives Air Combat Points. These are used in Air Strikes, and the combat is resolved in the Air Strike Combat Segment, although the attack must be announced at the beginning of the Combat Phase. These missions attack individual units (never whole stacks), and the unit's Defense Strength (against air) is completely dependent on the terrain that the Defender is located on.
Procedure: Air Strike Combat is resolved in a similar fashion to other combats. The attacking Player allocates his Air Combat Points among his target units, and compares this to the units terrain Defense Strength, computing an odds result, and rolling the die for the Combat Results Table.
Cases:
(A) The following are the Defense Strengths for each type of terrain:
| Terrain | Defense Strength (against air) |
|---|---|
| Clear | 1 |
| Rough | 2 |
| Swamp | 4 |
| Town | 5 |
| Forest | 10 |
| Forts | Five times the other terrain in hex |
(B) Units stacked together must be attacked separately by Air Strikes, and all the units in the square would have the same Defense Strength.
(C) In this specific version of the game, the Russians have no anti-aircraft artillery, and only the Germans have Air Combat Points. Thus, the following rule is not used in this game, but is given anyway. For all defending units in a hex, add to the Defense Strength for the terrain the Combat Strength of any anti-aircraft artillery also in the same hex.
(D) Only a "DX" result affects the defending units in Air Strike combat.
Victory Conditions
Victory conditions vary greatly from scenario to scenario; consult these for more detail. In referring to units either accomplishing a task, or being destroyed, the units are measured by their "point" value. This point value is the same number as the unit's Combat Strength.
Scenario Note: Objectives and options are chosen secretly.
Design Notes
The scale of Lost Battles is two kilometers to a hexagon. Each Game-Turn represents one day's operations. Certain units in the game (in particular the "mixed" mobile Russian artillery brigade in the tank and mechanized corps) have been built up from numerous smaller units. Below is a chart showing the counters necessary to build division size units in the game. The game itself rarely contains a full strength unit, most division size units were not at full strength for any great length of time. In addition, Russian units, particularly mobile ones, often had numerous additional units added to them for major operations.
Division Counter Chart
The chart lists, for each division-size formation, the counters needed to build it and how many of each counter the formation contains (the "x" figure). Each counter is shown with the numbers printed on it, in the order printed: the top row (left, centre, right), then the lower figures (middle-left and bottom-left). The unit-type icon and any printed legend (e.g., "Mxd," "Gd," "HQ," "XX," roman numerals) are shown as printed.
German Infantry Division (before 1943 it had nine battalions of infantry)
| Top row | Lower figures | Icon / legend | Count |
|---|---|---|---|
| 2 0 3 | 2 / 2 | Infantry | x7 |
| 5 0 3 | 4 | Direct-fire artillery "105" | x3 |
| 7 0 3 | 5 | Direct-fire artillery "150" | x1 |
| 3 2 3 | 3 / 3 | Engineer | x1 |
| 6 1 9 | 6 / 10 | Anti-tank artillery | x1 |
| 3 2 3 | 3 / 3 | Headquarters ("XX") | x1 |
German Motorized Infantry Division
| Top row | Lower figures | Icon / legend | Count |
|---|---|---|---|
| 3 1 10 | 3 / 3 | Infantry | x6 |
| 5 0 10 | 4 | Direct-fire artillery "105" | x1 |
| 7 0 8 | 5 | Direct-fire artillery "150" | x1 |
| 8 0 8 | 4 | "G" with "Mxd" | x1 |
| 5 1 8 | 7 / 14 | Tank, "IV" | x1 |
| 5 1 12 | 5 / 5 | Reconnaissance | x1 |
| 3 1 10 |
German Armored Division
| Top row | Lower figures | Icon / legend | Count |
|---|---|---|---|
| 3 1 10 | 3 / 3 | Infantry | x3 |
| 4 1 9 | 4 / 4 | Armored infantry | x1 |
| 5 1 8 | 7 / 14 | Tank, "IV" | x1 |
| 5 9 | 9 / 18 | Tank, "V" | x1 |
| 5 0 10 | 4 | Direct-fire artillery "105" | x1 |
| 7 0 8 | 5 | Direct-fire artillery "150" | x1 |
| 8 0 8 |
German SS Armored Division
| Top row | Lower figures | Icon / legend | Count |
|---|---|---|---|
| 3 1 10 | 3 / 3 | Infantry | x4 |
| 4 1 9 | 4 / 4 | Armored infantry | x2 |
| 6 1 8 | 9 / 18 | Tank, "IV" | x1 |
| 6 1 9 | 11 / 22 | Tank, "V" | x1 |
| 4 1 9 | 4 / 8 | Assault gun | x1 |
| 5 0 10 | 4 | Direct-fire artillery "10" | x1 |
| 7 0 8 |
Russian Rifle Division
| Top row | Lower figures | Icon / legend | Count |
|---|---|---|---|
| 5 0 3 | 5 / 5 | Infantry | x3 |
| 1 0 3 | 1 / 2 | Direct-fire artillery "76" | x2 |
| 2 0 3 | 2 / 3 | Direct-fire artillery "112" | x1 |
| 1 3 | 1 / 1 | Anti-tank artillery "45" | x1 |
| 1 1 3 | 1 / 1 | Headquarters ("XX") | x1 |
Russian Guards Rifle Division
| Top row | Lower figures | Icon / legend | Count |
|---|---|---|---|
| 6 0 3 | 6 / 6 | Infantry, "Gd" | x3 |
| 1 0 3 | 1 / 2 | Direct-fire artillery "76" | x2 |
| 2 0 3 | 2 / 3 | Direct-fire artillery "112" | x1 |
| 1 3 | 1 / 1 | Anti-tank artillery "45" | x1 |
| 2 3 | 2 / 2 | Headquarters ("XX"), "Gd" | x1 |
Russian Tank Corps
| Top row | Lower figures | Icon / legend | Count |
|---|---|---|---|
| 7 2 9 | 7 / 14 | Tank, "X" | x3 |
| 6 2 10 | 6 / 6 | Armored infantry, "X" | x1 |
| 14 1 10 | 5 / 9 | Direct-fire artillery, "X", "Mxd" | x1 |
| 2 0 9 | 2 / 5 | Assault gun "85" | x1 |
| 4 0 8 | 4 / 6 | Assault gun "152" | x1 |
| 3 0 10 | 3 / 3 | Reconnaissance, "Mxd" | x1 |
| 3 4 10 |
Russian Mechanized Corps
| Top row | Lower figures | Icon / legend | Count |
|---|---|---|---|
| 10 4 9 | 10 / 10 | Armored infantry, "X" | x3 |
| 7 2 9 | 7 / 14 | Tank, "X" | x1 |
| 14 1 10 | 5 / 9 | Direct-fire artillery, "X", "Mxd" | x1 |
| 2 0 9 | 2 / 5 | Assault gun "85" | x1 |
| 4 0 8 | 4 / 6 | Assault gun "152" | x1 |
| 3 0 10 | 3 / 3 | Reconnaissance, "Mxd" | x1 |
| 3 4 10 |
Organization Charts
The organization charts below show the composition of several divisions and corps as printed. Each box on the chart is a unit (counter) of the formation; the parenthesised figure is the printed strength in men, and the lines list the printed sub-units and equipment. Icons not named in the counter key are shown as "(icon)". Further details on organization can be found in S&T's 23 and 25.
1944 German Infantry Division - (12352 men)
- Infantry group (stacked counters): 2008 men, 332 SMG, 131 MG, 12 81 Mtr, 8 120 Mtr, 36 ATL, 3 75 G, 6 75 H, 45 MT, 242 HD
- Artillery group (icon: dot in box): 2451 men, 164 SMG, 69 MG, 36 105 H, 12 150 H, 30 MT, 441 HD
- Rcn (708)
- (484) (anti-tank icon)
- (620) (engineer icon)
- (379) (icon)
- (1500) (vehicle icon)
1943-44 German Motorized Infantry Division - (13,800 men)
- (3043) (infantry icon)
- (567) (tank icon)
- (1649) (direct-fire artillery icon)
- Rcn (942)
- (456) (icon)
- (513) (icon)
- (873) (engineer icon)
- (764) (anti-aircraft icon)
- (1900) (vehicle icon)
1943-44 German Armored Division - (13,700 men)
- (2294) (armored infantry icon)
- (2258) (infantry icon)
- (1661) (tank icon)
- (1649) (direct-fire artillery icon)
- Rcn (942)
- (515) (icon)
- (513) (icon)
- (885) (engineer icon)
- (766) (anti-aircraft icon)
- (1900) (vehicle icon)
12/42 Soviet Rifle Division - (9,619 men)
- Infantry group (stacked counters): 2474 men, 650 SMG, 207 MG, 54 ATR, 18 50 Mtr, 27 82 Mtr, 7 120 Mtr, 12 45 G, 4 76 H, 21 MT, 148 HD
- Artillery group (icon: dot in box): 998 men, 206 SMG, 18 MG, 36 ATR, 24 76 G, 12 122 H, 48 MT, 99 HD
- Rcn (74)
- (233) (anti-tank icon)
- (164) (engineer icon)
- (130) (icon)
- (550) (vehicle icon)
1942-45 Soviet Tank Corps - (11,900 men)
- (1306) (tank icon, stacked counters)
- (3247) (infantry icon)
- (489) 120 Mtr (direct-fire artillery icon)
- (476) SU 122/152 (assault gun icon)
- Rcn (220)
- (546) 76 G
- (213) Rkt (direct-fire artillery icon)
- (440) SU 85 (assault gun icon)
- (288) Mcl (infantry icon)
- (233) 45 G
- (290) (engineer icon)
- (250) (icon)
- (800) (vehicle icon)
1942-45 Soviet Mechanized Corps - (17,400 men)
- (3743) (infantry icon, stacked counters)
- (1306) (infantry icon)
- (489) 120 Mtr (direct-fire artillery icon)
- (476) SU 122/152 (assault gun icon)
- Rcn (220)
- 76 G (546)
- (213) Rkt (direct-fire artillery icon)
- (440) SU 85 (assault gun icon)
- (288) Mcl (infantry icon)
- 45 G (233)
- (290) (engineer icon)
- (250) (icon)
- (800) (vehicle icon)
Notes on the Scenarios
In English speaking countries military operations are normally divided into "strategic" and "tactical" categories. In most other nations, Germany in particular, a third level is used. This is the "operational" level. This is the level of the game Lost Battles.
Strategy is the highest (that is, largest) level of military operations. It rarely adheres to rigid rules and is planned to cover operations over a relatively long period of time. Failure to formulate a proper strategy will usually doom all lower level activity, no matter how successful, to ultimate failure. This was what happened to the Germans and the Japanese in World War II. A more recent example is the American military/political operations in Indo-China and Russian political/military operations in Eastern Europe. The lowest level is tactics. This level is surfeit with "standard operating procedures" and carefully (if it is to be successful) thought out "solutions" for most problems to be encountered. This is necessary, as at the tactical level the participants really have no knowledge of "what's coming next." In the middle we have the operational level. Whereas strategy is concerned with armies and army groups, and tactics with companies, battalions and platoons, the operational level deals with regiments, divisions and battalions. At the operational level strategy (making up the rules as you go along) and tactics (following the rules) tend to run together. In the German army it was at this level that officers of the General Staff were first found (on regimental and divisional staffs).
Much has already been said about what Russians and Germans did right, and wrong, at the strategic and tactical levels. The game Barbarossa shows what strategic options were available to both sides, and what the results were. Panzerblitz is a game that shows the same for the tactical level.
Lost Battles simulates actions at the operational level where strategy and tactics merge into something quite different. It was at the operational level that most of the "observable" action took place. In a tactical situation you did not just observe the action but both witnessed and fell victim to it. On the strategic level you could do nothing until the smoke had cleared. But at the operational level you were right in the midst of the smoke. Divisional and regimental commanders, more than anyone else, changed the course of battles on the eastern front. Below their level no one really knew what was going on, nor could they do much about anything beyond the immediate situation. Above the operational level the time lag was too great for any decisive action to be taken.
Strategy, however, often dictated how operational situations would begin. Tactics determined how effective the operational level units would be. The scenarios for Lost Battles depict generalized situations which appeared again and again in Russia from 1943 on. These actions were, for the most part, truly "Lost Battles." The Germans still retained the edge in skill, experience, training, organization and doctrine with which they began the war. But Russians always possessed superiority in numbers, and were always gaining on the Germans in other areas also. From 1943 on the Russians won most of the battles, but at such cost that one could say both sides had lost these battles.
Scenario 1: Russian Tank Offensive. All of the decisive Russian offensives (both large and small) utilized the tank offensive. Simple in concept and execution, the Germans were usually stretched too thin to stop these attacks on or in front of the German line. In almost every instance the Russians had to be stopped by German mobile units. In many cases, in all but the massive "seasonal" (Spring, Summer) offensives, Russian attacks were for limited objectives: a critical road junction, a German supply base or a critical terrain feature close behind the German front. Russian mobile units had learned, the hard way, not to take on German mobile forces at one to one, or even two to one odds. The Russians smashed the German line, grabbed their objective and held fast.
Scenario 2: Russian Defensive Position. German limited offensives were usually more successful than similar Russian efforts. The Russians acknowledged this in their method of defending their front. Their main line was, compared to the German (or what the Germans would want to have), lightly held. Divisions holding the line lacked depth, or enough depth to really contain a German attack. The Russians had given up on trying to save divisions hit hard by a German mobile assault. Their divisions were trained to delay, while closely held Russian reserves formed the really effective defense line. A further German advantage was their ability to reinforce success. If the initial penetration failed, Russian reinforcements were usually sent in regardless, and often chewed up as a consequence.
Scenario 3: Meeting Engagement. Throughout the war this was a typical action. During a major offensive the defending side was usually (from 1942 on) able to disengage the bulk of his forces. The advancing attacker, using a road bound march order for greater speed, would often run into defending mobile forces advancing to meet them. When the Germans were the attacker they almost always got the best of the engagement. Open, mobile actions like this were the German specialty. After 1943 the Germans were usually on the defense in these actions. But even then they often got the upper hand.
Scenario 4: German Mobile Defense. Even with a "hedgehog" defense, the Russian offensive was usually halted by a more conventional (for the Germans) mobile defense. This defense often pivoted, if possible, on fortified mobile or non-mobile units. Towards the end of the war the Germans were not even capable of a successful mobile defense. At that point all that stopped the Russians was the inadequacy of their own supply system and the exhaustion of their troops and equipment.
Lost Battles does not attempt to portray all of the different tactical situations that occurred during the war. The game scenarios given do portray the majority of the "types" that occurred. If you would like to carry the experiment even further you can construct your own scenarios. Practically any possible combination of forces appeared on the eastern front during the war. Practically anything you could conjure up probably did occur. Give it a try.