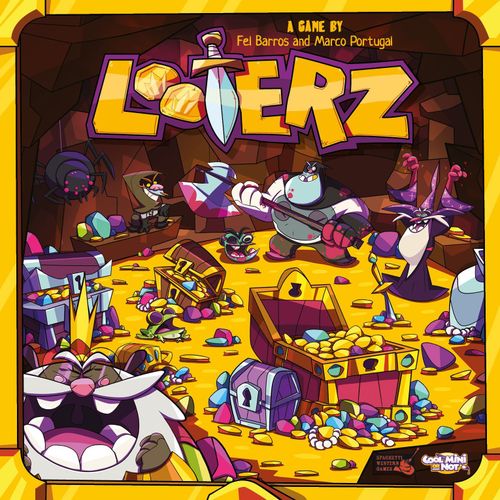
Looterz
Looterz Rulebook
Table of Contents
Table of Contents
Game Components
- Looterz Card x60
- Player Aid Card x6
- Loot Tokens x36
- Life Tokens x40
- Dice x6
- Rulebook x1
Each Looter card shows, from top to bottom: Life (hearts), Title, Power, and Ability Text.
Setting Up the Game
Choose a starting player at random.
Shuffle the Looterz cards and deal three cards to the starting player and four cards to each of the other players. It's not fair to give the starting player too many advantages, now is it?
Place the rest of the cards face down in the middle of the table to form the Draw Pile (Inn). Everybody knows that the Inn is where adventurers hang out until it's time to go looting.
Leave space next to the Draw Pile for a face-up discard pile. This is called the Graveyard. All the glorious Looters who died, got destroyed, were sacrificed, or otherwise discarded in pursuit of the noble and misunderstood duty of looting can be found here.
NOTE - In the unlikely event that the Draw Pile runs out of cards, shuffle all of the cards in the Graveyard and form a new Draw Pile. Even Looterz deserve a second chance—it just doesn't happen very often.
Game Set Up Summary
- Starting Player: 3 Cards
- Other Players: 4 Cards
- Inn (Draw Pile) and Graveyard (Discard Pile) in the middle of the table
- Dice, Loot tokens, and Life tokens available to all players
The Goal of the Game
Your goal is to collect enough Loot tokens to live the good life without having to work ever again—before that stinky old dragon gets back. How much Loot do you need? That depends on how many players there are:
- 2 PLAYERS - The first to reach 15 Loot wins the game
- 3-4 PLAYERS - The first to reach 10 Loot wins the game
- 5-6 PLAYERS - The first to reach 7 Loot wins the game.
PLEASE NOTE - These numbers are simply recommended values, based on the typical amount of time a dragon spends on a winged stroll. You can change the amount of Loot necessary to win to make the game longer or shorter, but we can make no guarantee about the safety of the Looterz...
Playing the Game
Looterz is played in turns, beginning with the starting player and going clockwise. Continue taking turns until one player collects enough Loot to win the game.
Taking Your Turn
Your turn is divided into four phases, which you must finish in order:
- FIRST RECRUITMENT PHASE
- DUNGEON PHASE
- SECOND RECRUITMENT PHASE
- SACRIFICE PHASE
After you complete all four phases, your turn is over and the player to your left takes a turn.
Phase 1 - First Recruitment Phase
During this phase you have two options. You must choose only one of them:
- Recruit one Looter; or
- Draw one card.
Recruiting
To recruit a Looter, simply play a Looter card from your hand and place it face up in front of you. Place a number of Life tokens on your new Looter equal to the Looter's starting life—the number of hearts showing at the top left of the card.
Life is how much punishment a Looter can take before it goes to the Graveyard. Duh!
Drawing a Card
Take the top card from the Draw Pile and add it to your hand.
Obviously, you'll need to do this from time to time, otherwise you'll run out of cards. But, is a Looter in your hand really worth two in the Dungeon?
Phase 2 - Dungeon Phase
This is the time where you get to explore the Dungeon! All of your Looterz in play are automatically in the Dungeon. Each turn, every one of your Looterz gets to take one action. You have three options:
- SEARCH FOR LOOT!
- ATTACK!
- USE A SPECIAL ABILITY!
Oh, but the world isn't fair, so not all Looterz know magic! Looterz with no Special Abilities must choose between the first two options.
You get to choose one of these options for each Looter you control, which can be different for each Looter.
You can use your Looterz in any order you choose. For each one, pick an action and execute it right away.
Remember - Just because these chumps aren't getting paid, they really should be doing something. After all, they are inside a legendary dungeon, performing that most noble of activities—looting! There is no better payment than that, is there? Well, actually, there is... but you can discuss that with the Looterz Union later (and you should remind them that the Dungeon was legendary AND there was ALMOST no risk of being killed by the Dragon...).
Search For LOOT!
To Search the Dungeon, roll as many dice as the Looter's current Life tokens:
For each die that rolls equal to or below the Looter's Power (that's the number in the top right corner), you get one Loot token.
The Art of Looting requires a combination of two skills: a Looter healthy enough to carry the Loot around and enough power to avoid all the pitfalls that seemingly-easy-to-pick-up-and-carry-treasure might hide behind. All that shiny gold is never left unprotected, as even a low-level Looter should know...
Search For LOOT - Example: The Dragonling is going looting. He has 3 Life, so he rolls 3 dice: he gets a 2, a 3, and a 5. Since his Power is 3, the 2 and the 3 each give 1 Loot. The 5 is just a total failure.
REMEMBER - The game ends immediately if you have the amount of Loot necessary to win the game!
Attack!
Your Looter can attack any other Looter in the Dungeon. You can even choose to attack one of your own Looterz.
Just because there's no Dragon doesn't mean it's completely safe in that dank, dark Dungeon...
When you attack, declare your target and then roll as many dice as your Looter's current Life tokens:
For each die that rolls equal to or below the Looter's Power, inflict one damage on the attacked Looter—removing one Life token from their card.
If that Looter runs out of Life tokens, he's dead and goes straight to the Graveyard.
Don't feel too bad when you kill a Looter. After all, Necromancy is a proven art in the Kingdom, and the third most popular thing in the world (after attacking and looting) is getting resurrected. Except for Looterz that know magic. In which case they already know that being killed sucks.
Attack - Example: The Death Knight is attacking that obnoxious King. He has 2 Life, so he rolls 2 dice, getting a hit and a miss. The hit is less than his Power of 2, so the King loses 1 Life token.
Use a Special Ability!
Some Looterz are lucky enough to know a Special Ability. If your Looter has text with the word "Activation" in front of it, you can use that ability as that Looter's action. You don't need to roll any dice: just follow the instructions on the card.
There aren't a lot of Looterz that know magic. Those who do tend to use it quite a lot, and are the biggest targets for other Looterz. This is partially because they are extremely powerful, but mostly it's because they are SO arrogant! And nobody inside a Dungeon likes it when magic users brag. It's really annoying.
Use a Special Ability - Example: The Assassin can use his action for the turn to destroy any Looter in play, sending it to the Graveyard—regardless of how many Life tokens it has!
Phase 3 - Second Recruitment Phase
After each of your Looterz has taken an action, it's time for your Second Recruitment Phase. This phase is exactly like the First Recruitment Phase (Imagine that!).
It's funny, but for some unknown reason, a lot of Looterz forget that they can call for more Looterz after taking Dungeon actions. Maybe the thrill of Looting has amazing amnesia powers? To help, some Looterz get an awesome tattoo that says "Don't Forget the 2nd Recruit Phase" on their right arm. If you don't fancy a tattoo that freakishly cool, you could always use a Player Aid card as a reminder.
Phase 4 - Sacrifice Phase
If you have more than three Looterz in play, you must sacrifice down to three—your choice. Discarded Looterz are placed in the Graveyard.
Too many Looterz spoil the soup. Or whatever.
Hand Limit
At the end of your Sacrifice Phase, you cannot have more than 10 cards in your hand. You must discard down to 10 if you have too many.
Keywords
A lot of Looterz have one or more Keywords in their card text. These important words tell you when and how to use their abilities:
Activation - This ability can be used as the Looter's action during your Dungeon Phase (instead of Looting or Attacking—why would anybody want to do that?)
Taunt - If an opponent chooses to attack your Looterz for any reason (attack action, magic, or Recruitment effect), he must choose one with the Taunt keyword if you have one. If you control more than one Looter with Taunt, your opponent can choose which one of those to attack.
Some Looters are just plain noisy. Some are too big to ignore. But as a general rule, these scoundrels are just attention hogs. And they're not very smart. It doesn't take a genius to see that attracting all that attention in a deadly Dungeon isn't a bright idea. But I'm sure you'll find a good use for these guys.
Taunt - Example: A Zombie, a Cleric, and a Scarecrow walk into a bar... No wait, it's a Dungeon. Since these three Looterz are together, you can only attack the Scarecrow since it has Taunt, even though you'd really like to blast that obnoxious Cleric.
Last Wish - This ability takes effect as soon as the Looter goes to the Graveyard from play. It doesn't matter if the Looter was killed, destroyed, or Sacrificed (but it doesn't count if the Looter was simply discarded from your hand).
Recruitment - This ability takes effect immediately when the Looter first enters the Dungeon. It doesn't matter how it gets there: from the Graveyard, a player's hand, or the Draw Pile. Recruitment abilities do not take effect if a Looter changes controller.
Sacrifice - This means that you must take a Looter that you control and place it in the Graveyard.
Sometimes, this is a "cost" you have to pay to use an ability, but some really awesome Looterz can actually force somebody else to Sacrifice a Looter for nothing at all!
Steal - This means that you take a Loot token from another player's collection and add it to your own (instead of taking it from the supply of unclaimed Loot tokens).
Usually, you can only steal Loot from the guy who has the most of it. After all, it's not very sporting to pick on somebody who's not winning, right?
The End of the Game
The game ends IMMEDIATELY when any player reaches the amount of Loot needed to win the game.
Awkward Situations That Can Happen in the Game
What happens if I recruit an Orc and I don't control any other Looterz?
The Orc only affects your opponents. It's actually a pretty smart move and you should feel proud of yourself when you do it!
In which order do "global effects" like the Orc and Witch Recruitment abilities take effect?
Start with the active player (the one that controls the Looter) and go clockwise around the table. For example, the Orc's controller would Sacrifice a Looter first, followed by the other players in clockwise order.
Can I recruit a Looter or activate the Mermaid's Special Ability even if this means I'll have more than three Looterz in play?
Of course! The number of Looterz you control is only checked after the Sacrifice Phase. You can even Sacrifice a Looter you stole with the Mermaid before you return it!
You must always abide by the Looter's Code! However, there are no Code Enforcers inside the Dungeon, and, therefore, you have a little time before your conscience kicks in and you get rid of the excess party members.
If two players are tied for the most Loot, who do I Steal from when I use a "Steal Loot from the player with the most Loot" ability?
You choose which of them you prefer to steal from. We strongly recommend that you go for the most competitive/worst loser at the table.
Can I attack two different Looterz with the Hydra's ability?
Yes. These attacks are resolved one at a time, and you don't have to choose the second target until after you finish the first attack. But, the Hydra cannot attack once and then Loot on the same turn!