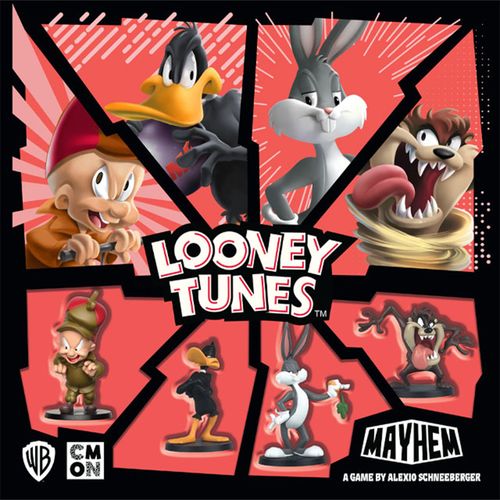
Looney Tunes Mayhem
Looney Tunes Mayhem Rulebook
Table of Contents
Table of Contents
Overview
In Looney Tunes Mayhem, 2 to 4 players sit in the director's chair as two teams of the wackiest Toons face off in this tag-team rumble. Only by using the best strategy and everything ACME has to offer can one team be the last one on screen when the smoke clears.
Players will move their Toons through iconic locations from the cartoons in the pursuit of Victory Points (VP), using their special skills to try to knock each other out and trying to avoid the other team's tricks and traps across the board.
If a player collects 5 Victory Points, or if both Toons on a Team get KO'd in the same round, the game ends and that's all, folks!
Components
- 1 Mayhem die
- 4 Toon figures (Bugs Bunny, Daffy Duck, Elmer Fudd, and Taz)
- 10 Location tiles (2 Black Bases, 2 White Bases, 6 Special Locations)
- 4 Activation dice (2 Black & 2 White)
- 4 Double-sided Toon Dashboards
- 22 Mayhem cards
- 4 Counter bases (2 Black & 2 White)
- 95 tokens:
- 10 Poison tokens
- 16 Double-sided Trap/Stun tokens (8 Black & 8 White)
- 10 ACME tokens
- 4 Shield tokens
- 4 Flee tokens
- 4 Obstacle tokens
- 16 1-Damage tokens
- 8 5-Damage tokens
- 1 Double-sided Initiative token
- 4 Activated Ability tokens (2 Black & 2 White)
- 18 Victory Point tokens (9 Black & 9 White)
Setup
The following instructions are for the setup and play of the 2-player version of the game. For the 3 and 4 players rules, see the 3 and 4 Player Variant Rules section.
-
The youngest player chooses their Team color (either Black or White) and takes the set of Activation dice, counter bases, Trap tokens and Activated Ability tokens of the chosen color. The other player will take the set of the other color.
-
Starting with the youngest player, players will alternate selecting Toons until each of them has 2 Toons each. Players will then take their corresponding Toon Dashboards and decide if they want to use either side A or B of their Toon Dashboards. Both sides are slightly different, but they do not change the difficulty level of the game. Players can choose to go with different sides if they want to. Once a side is chosen, it cannot be changed. Finally, players attach the counter bases of their Team color to their Toons.
-
Randomly place the 10 Location tiles faceup on the table following the 3-4-3 shape.
-
Place 1 Black and 1 White Victory Point token on all Locations that have VP slots (Poker Night, Desert Road, Home Sweet Home, and Hunting Grounds).
-
Shuffle the 10 ACME tokens and place them in a facedown pile on the Desert Road Location. Separate the remaining tokens by type and keep them within reach of both players.
-
Shuffle the Mayhem cards to create a facedown Mayhem deck.
-
Players draw 7 cards from the Mayhem deck. Each player's maximum Mayhem hand size is determined by the total number of Mayhem card icons indicated on their Toon Dashboards. They must choose the cards to be kept and discard down to their maximum hand size.
Discarded cards are placed facedown at the bottom of the Mayhem deck.
First game
For the first game, we recommend players skip step 7 and instead give out the following Mayhem cards for each Toon:
- Bugs Bunny: Wrong Instructions and Dice Guys.
- Daffy Duck: Luckiest Varmint and What a Surprise.
- Elmer Fudd: High De-Fence and Rocket Roller.
- Taz: Flower Power and Mega Magnet.
Basic Concepts
Whenever a component's text contradicts the rules from this rulebook, the component text takes precedence.
Some components use keywords, such as:
- Teammate: The other Toon on a player's Team, the one who is not active at the moment or is not the target of an effect.
- Immune: When a Toon is Immune to a certain effect (like Traps, for example), they take 0 Damage from it. It has no effect on the Toon whatsoever.
- Ignore: When a Toon Ignores something, they cannot interact with it in any way.
- Negative status: Poison and Stun tokens can have a lingering Effect and negatively affect a Toon.
- Characters: The playable figures in the Mayhem games, here also referred as Toons.
Toon Dashboard
In Looney Tunes Mayhem, Teams are comprised of 2 iconic Looney Tunes characters set out to battle for control of the screen. Each Toon is represented by a fully painted figure on the board and their own unique Toon Dashboard representing the different Abilities the Toon brings to the fray.
- Name of the Toon.
- Portrait: The Toon's Portrait. Also, this is the place where players keep track of tokens during play.
- Life Points: The amount of Damage a Toon can endure before they are KO'ed. As Toons take Damage, players should take Damage tokens equal to the Damage amount taken and place them on the Toon's portrait on their Dashboard. As soon as a Toon's Damage equals or exceeds their Life Points, they are KO'ed and are removed from the board until the next Recovery Phase.
- Mayhem Cards: The Mayhem card icon indicates the amount of Mayhem cards this Toon provides to their Team. The total number of Mayhem symbols on a player's Team determine the maximum Mayhem hand size a player gets during setup.
- Dashboard Side: Each Toon Dashboard has 2 sides (A and B). Each side representing different Abilities and effects the Toon can use during game. Players will choose which side of the Dashboard they wish to use during setup.
- Special Ability: The unique Ability of each Toon. Some Special Abilities indicate they can only be used once per turn or even once per game. For these powerful effects, players should place the Activated Ability token on top of the Ability to indicate they have been used.
- Ability: The Abilities the Toon may activate.
- Ability Activation die slot: During each Activation step, players place 1 of their Activation dice in this slot to show which Ability their Toon will use. Players can only activate 1 Ability per turn for each of their Toons. If the value of the dice equals or surpasses the number on the slot, the Special Effect can also be activated.
- Ability Standard Effect: The effect the player may use during the Toon's Activation after selecting their Ability. This Ability may be used regardless of whether the player is able to Activate the ability's Special Effect that round.
- Ability Special Effect: If the value of the Activation die used equals or surpasses the number on the slot, the Special Effect can be activated additionally after the standard Ability, allowing for powerful combos!
- Ability Mayhem Effect: This is the Effect described after the Mayhem icon. If the Mayhem die rolled a Mayhem symbol, the Mayhem Effect is added to the Special Effect, if activated, for the most powerful attack!
Example: Bugs Bunny used a 6 to activate his Slingshot Ability and the Mayhem die rolled a 3. For this round, he will be able to use the Slingshot's standard Ranged attack. He will also be able to PULL due to the Special Effect and PUSH due to the Mayhem Effect, either the Toon he's attacking or any other Toon in his or an adjacent Location.
Mayhem Cards
Mayhem cards provide the opportunity for players to surprise their opponents each round with powerful and unique effects. Each Mayhem card has an Activation icon showing when they can be played. Players are only allowed to play 1 Mayhem card each round. Keep the card played faceup on the table. Discard used Mayhem cards at the end of the round.
- Name of the card.
- Activation Icon: Different Mayhem cards can be used at different moments of the game round, depending on their Activation Icon.
- May be used during the Round Start.
- May be used any time during a Toon's Activation. If the card is used on a player's Team, it must target the Active Toon.
- Indicates cards that can be used in different moments of the game. This is typically for effects that react to another action, such as "When a Character Activates..." or "When a Character takes Damage...". The specific timing is listed on the card's effect.
- Effect: The effect of the Mayhem card when played.
- Duration of the effect: Mayhem cards have different durations that varies according to the icons at the bottom.
- Happens immediately.
- Lasts until the end of the current round.
- Free-For-All: Cards with this icon can be used in Free-For-All mode.
Example: Bugs Bunny announced a Ranged Attack against Taz. That allows Taz to play the Flower Power Mayhem card. The effect happens immediately, preventing Taz from taking up to 2 Damage. The card is then placed on the table, next to the Team's components, and will be discarded by the end of the round. Taz' Team can no longer use Mayhem cards during that round.
The Mayhem Die
In Looney Tunes Mayhem, Damage is determined each round by the roll of the Mayhem die. For example, if the Mayhem die rolls a 2, every Attack for that round will deal 2 Damage.
If the Mayhem die shows a Mayhem symbol, the Mayhem Effects on the Toon Dashboards are unlocked for that round and can be activated alongside the Special Effect!
Locations
Looney Tunes Mayhem features 10 different Locations: 4 Team Bases (2 Black and 2 White) and 6 Special Locations featuring places from the classic cartoons. Each of the Special Locations has a unique effect that is activated when a Toon moves to the Location. Some even provide Victory Points!
- Toon Slots: Each Location has either 1 or 2 Toon Slots available. It is considered Empty when there are no Toons occupying any Slots, no Traps placed on it, and no Obstacles on its edges. Toons moving into a Location will occupy an empty Slot there. Toons may not move into a Location if there is not an available Slot (that Location is then considered Full).
- VP token slots: When a player is directed to take a Victory Point from a Location, they take the token of their corresponding color. Each Team can only take their Victory Point from a Location once and, when taken, the Victory Point is not replenished.
- Special Location's effect: Special Locations have different effects that will trigger as soon as a Toon enters it.
The 6 Special Locations in Looney Tunes Mayhem are:
- Home Sweet Home: When both Toons of the same Team fill this Location, take the Location's Victory Point of the respective Team color. The Victory Point is gained immediately once the second Toon on a Team moves to the Location.
- Hunting Ground: Whenever a Toon enters this Location, they take the Victory Point of their Team color. They then take Damage equal to the Mayhem die value. If that Team's Victory Point is already taken, the Toon still takes Damage.
- Poker Night: Whenever a Toon enters this Location, they roll the Mayhem die. If the side shown has a Mayhem symbol, take the Location's Victory Point of their Team color. Players use the new value for the Mayhem die for the remainder of the round.
- Desert Road: Whenever a Toon enters this Location, they may take an ACME token. ACME tokens have different effects, including giving a Victory Point. The Location's Victory Point is only taken by the Team who takes the Victory Point ACME token. If all the ACME tokens have been taken, there is no effect.
- Carrot Farm: Whenever a Toon enters this Location, they Heal up to 2 Damage. This Location has only 1 Slot.
- Grand Canyon: Whenever a Toon enters this Location, they may place or move an Obstacle. Obstacles may be placed on the edge of any adjacent Location, separating 2 different Locations.
Is it Adjacent? Locations are considered adjacent if at least 1 side of each Location is touching. Obstacles that are placed between Locations prevent movement, Ranged Attacks, and Traps as those Locations are no longer considered adjacent.
Tokens
In Looney Tunes Mayhem, players have a limited set of tokens to use during the game. Some tokens are communal, like Poison or Flee tokens, and others are Team specific, like Traps.
If an effect instructs to take a token, but the corresponding pool is empty, the effect doesn't take place.
Unless otherwise stated, tokens cannot be exchanged between Toons.
The tokens used in the game are:
- Damage tokens – used to track a Toon's Damage. Place Damage tokens equivalent to the Damage suffered on the portrait area of the Toon Dashboard. Once a Toon has Damage tokens equal to or above their total Life Points, they are considered KO'ed.
- Victory Point tokens – receive a Victory Point every time a team KO's an enemy Toon or by activating some of the Special Location effects.
- Shield tokens – are used to prevent up to 2 Damage from any source (direct Attacks or token effects, like Poison or Traps), and must be used to prevent the first Damage dealt to that Toon. After that, it must be discarded and placed back on the token pool. Each Toon can only have 1 Shield token at a time.
- Flee tokens – If a Toon has a Flee token, they may discard it to move to an adjacent Location as soon as another Toon (Teammate or opponent) Moves. Each Toon can only hold 1 Flee token at a time. The Flee token can only be used in another Toon's turn.
- Obstacle – Obstacle tokens must be placed on any edge between 2 adjacent Locations. It cannot be placed between a Location and the edge of the board. The Locations separated by the Obstacle are no longer considered to be adjacent.
Important: a Location may never be completely surrounded by Obstacles. Locations must always have at least 1 open side connecting it to another Location.
- Poison tokens – some abilities allow Toons to Poison enemy Toons. At the end of the next Recovery Step, the Poisoned Toon will suffer Damage equal to the total number of Poison tokens on their Dashboard. After the Damage is dealt, discard 1 Poison token, placing it back in the pool. Poison tokens are considered to be Negative Status tokens.
- Trap tokens – are placed in the Toon's or an adjacent Location. The chosen Location must not contain an opposing Toon or any friendly Trap tokens. Traps have no effect on Toons of the same Team. If a Toon enters a Location with Traps from the opposing Team, they receive Damage equal to the amount of Traps in that Location. Once the Traps activate, remove all tokens from that Location and place them back in the pool.
- Stun tokens – when a Toon is stunned, they place the opponent's Stun token on their Toon Dashboard. During their next Activation, a stunned Toon can either use their free Move or activate 1 of their Abilities but can't do both. If a Toon gets stunned during their turn after Moving, they can no longer use their Ability. Even if they don't use an Ability, they still must place 1 of their Activation dice on the Activation die slot. Discard the Stun token at the end of the Toon's turn. Stun tokens are considered to be Negative Status tokens.
- Activation tokens – used to keep track of Special Abilities that have been used. Some can be used once per game and others can be used once per turn.
- Initiative token – used to indicate the player who has the Initiative for that round. As soon as the round ends and players determine Initiative again, the token is given to the player who won for that round.
- ACME tokens – must be used by the Toon that acquired them when they are Active, unless stated otherwise. The ACME tokens are discarded once used. If the Desert Road runs out of ACME tokens, the Location has no other effect.
There are 10 different ACME tokens:
- +2 Damage – Use to add 2 Damage to the Toon's Attack OR to increase the total Damage suffered by an opposing Toon when activating Traps.
- Mayhem symbol – The Mayhem die is treated as having a Mayhem symbol in addition to the die value for the remainder of this turn.
- Heal 2 – Heal up to 2 Damage from the Toon.
- Obstacle – Place or move an Obstacle on the border of an adjacent Location.
- Poison 2 – Give an opposing Toon in the same Location 2 Poison tokens.
- Pull or Push – Push another Toon in the same Location to an adjacent one OR Pull another Toon in an adjacent Location to the Toon's Location.
- Reroll – Allows for a reroll of one or both of the player's Activation dice, AND/OR for a reroll of the Mayhem die. All 3 dice may be rerolled with a single Reroll token.
- Teleport – Place the Toon on any open Slot on the board. This is not considered a Move.
- Trap 2 – Place 2 Trap tokens in the Toon's or an adjacent Location. Both Traps must be placed in the same Location.
- Victory Point – This token grants a Team 1 Victory Point. Take the token of the Team's color from the Desert Road.
How to Play
Round Start
a. Roll the Activation dice and determine Initiative
Each player begins the round by rolling their 2 Activation dice. These dice will be used to activate their Toons' Abilities during gameplay.
To determine the first player for the round, players must add up the total of their 2 dice. The player with the lowest total gets the Initiative. Flip the Initiative token to their team color (Black or White).
In the case of a tie, toss the Initiative token to decide.
Only during the first round of the game!
The player with the Initiative places their Toons on the map.
Toons must be placed on 2 different Bases of their player color, 1 Toon per Base. Then, the other player does the same. In the first round, Toons may NOT be placed in the same Location.
b. Roll the Mayhem die
The player with the Initiative for the current round rolls the Mayhem die. The value of the Mayhem die indicates the amount of Damage that Attacks deal during the round. In addition, if the Mayhem die rolls a Mayhem symbol, Mayhem Effects can also be activated. Note that unless an ability or Mayhem card instructs otherwise, the value of the Mayhem die stays the same until it is rerolled on the next round.
Example: Sam and Chris have finished the game setup and are ready to start some Mayhem! They each roll their Activation dice at the same time. Chris, playing Black, rolls a 2 and a 5, for a total of 7. Sam, playing White, rolls a 4 and a 6, for a total of 10. Chris, having the lower total, has the Initiative for this round. The Initiative token is set to its Black side.
Example: Chris won the initiative and rolls the Mayhem die this round. Chris rolled a 3! This means that, for this turn, all attacks deal 3 Damage. The Mayhem symbol indicates Mayhem Effects can be used during this round together with the standard Ability Effect and Special Effect.
Recovery
During the first round of the game, this step is ignored.
a. Return Toons
In case Toons were KO'ed (see below) or off the board due to a game effect, at the beginning of this phase, players place them back on 1 of their Bases, starting with the player who has Initiative. The other player does the same until all Toons are back on the board.
KO
A Toon is KO'ed when their Damage tokens equal or exceed their Life Points. A KO'ed Toon is immediately removed from the board. The player removes all Damage, Poison, Stun, Shield, and Flee tokens that the KO'ed Toon might have on their Toon Dashboard, keeping ACME tokens and Victory Points.
The KO'ed Toon stays out of the game for the rest of the round. The Toon is placed back on the board during the next Recovery phase. During the round in which the Toon is KO'ed, the remaining Toon from that Team may be activated 2 times, unless the KO'ed Teammate already activated this round.
Whenever a Toon is KO'ed, the opposing player gains 1 VP, taking a VP token of their Team's color.
b. Resolve Poison tokens
Once all Toons have been returned to the board, players resolve any Poison tokens on their Toon Dashboards. Any Toons with Poison tokens take 1 Damage for each Poison token currently on their Dashboard. Then, remove a Poison token from each Toon.
Example: At the end of his Recovery phase, Daffy has 3 Poison tokens on his Toon Dashboard. He suffers 3 Damage and discards 1 Poison token. At the end of his next Recovery phase, he will suffer another 2 Damage due to the 2 remaining Poison tokens and will discard another one.
Toon Activation
Starting with the Team that won initiative, each player will alternate activating 1 of their Toons until all Activation dice have been placed for the round.
During this phase, players should follow the steps below until all Activation dice have been placed for the round:
a. Place Activation die
The player selects 1 of their unused Activation dice and places it in an open Activation die slot for the Toon and Ability they wish to activate. This is now the Active Toon.
Each Toon can only activate once each round. Therefore, a player should never place an Activation die on a Toon that has already activated that round, unless the other Toon on their Team has been KO'ed before they could activate or is off the board due to game effects (for example, the Invisible Paint Mayhem card). If a Toon is forced to activate a 2nd time, the Activation die must be placed on a different Ability from their first activation.
Example: Sam's Team consists of Bugs Bunny and Daffy Duck. Sam chose to activate Bugs 1st and completed his activation using the Slingshot Ability. The Activation then passes to Chris, who uses their activation to KO Daffy. When the activation passes back to Sam, they must activate Bugs again as Daffy has been KO'ed. However, as Bugs' Slingshot has already been used, Sam must use Tornado in the Box for this activation.
b. Free Move (optional)
The player may choose to Move the Active Toon to an adjacent Location with an open Slot.
Whenever a Toon Moves to a Location, any opposing Traps in the Location immediately activate. If the Toon is not KO'ed by the Trap Damage, only then the Location's Special Effect must be activated.
c. Use Abilities
The Active Toon may use their Special Ability and/or their selected Ability. Abilities are resolved from top to bottom, starting with the activated Ability's standard Effects.
If the Activation die used meets or exceeds the number on the Ability Activation Slot, after using the Ability effect(s) the Toon will then use the Ability Special effects as well.
Any effects with the Mayhem icon may only be used when the Mayhem die shows the Mayhem symbol and are added to the standard Ability Effects and Special Effects.
The Ability effects in Looney Tunes Mayhem are:
-
Melee Attack: Deal Damage equal to the Mayhem die result to 1 opposing Toon in the same Location. If there are no opposing Toons in the same Location as the Active Toon, it has no effect.
Example: Chris activates Daffy's Giant Hammer to perform a Melee Attack against the opposing Bugs Bunny that's standing in the same Location. The Mayhem die value is 2 so the Attack deals 2 Damage to Bugs.
-
Ranged Attack: Deal Damage equal to the Mayhem die result to 1 opposing Toon in a Location adjacent to the Active Toon. If there are no opposing Toons in any of the adjacent Locations, it has no effect.
Example: Sam activates Bugs Bunny's Slingshot to perform a Ranged Attack. The opposing Daffy Duck and Elmer Fudd are in adjacent Locations, and Sam chooses Daffy. The Mayhem die value is 2 so the Attack deals 2 Damage to Daffy.
-
Shield: The Toon takes a Shield token and places it on their Toon Dashboard. Toons can only have 1 Shield token at a time. If the Active Toon already has a Shield token, it has no effect.
-
Flee: The Toon takes a Flee token and places it on their Toon Dashboard. Toons can only have 1 Flee token at a time. If the Active Toon already has a Flee token, it has no effect.
-
+ X Damage: Increase the Damage of an Attack or friendly Trap by the listed value.
-
Heal X: Remove Damage from this Toon equal to the listed value.
-
MOVE (optional): Move this Toon into an adjacent Location with an open Slot.
-
OBSTACLE (optional): Place or move 1 Obstacle on the border of an adjacent Location.
-
POISON: Target an opposing Toon in the Active Toon's Location. Place the indicated amount of Poison tokens on the targeted Toon's Dashboard. If there are no opposing Toons in the same Location as the Toon using this ability, it has no effect.
-
PULL (optional): Place a Toon (opposing or Teammate) from an adjacent Location to the Active Toon's Location. This action is possible only if there is a free Slot in the Active Toon's Location. Whenever a Toon enters a Location, any opposing Traps in the Location immediately activate. If the Toon is not KO'ed by the Trap Damage, only then the Location's Special Effect activates. This action is not considered a Move and does not give Toons the opportunity to use a Flee token.
-
PUSH (optional): Place a Toon (opponent or Teammate) from the Active Toon's Location to an adjacent Location. This action is possible only if there is a free Slot in an adjacent Location. Whenever a Toon enters a Location, any opposing Traps in the Location immediately activate. If the Toon is not KO'ed by the Trap Damage, only then the Location's Special Effect activates. This action is not considered a Move and does not give Toons the opportunity to use a Flee token.
Finish Your Turn
After resolving all effects of the Active Toon's Ability, the player must then finish their turn.
The player with the Active Toon has a final opportunity to play a Mayhem card before passing the activation to the opposing Team.
Teams should continue to complete their turns until all Activation dice for both Teams have been used.
End of Round
Once both Teams have used all their Activation dice for the round, players should discard any Mayhem cards used. Another round then starts.
How to Win
The 1st Team to collect 5 Victory Points or successfully KO both opposing Toons in the same round immediately wins the game, and that's all, folks! In the rare event that all Toons are KO'ed at the same time or both players manage to collect 5 Victory Points at the same time, players decide the winner over a rematch.
3 and 4 Player Variant Rules
In the 4-player variant, players are split into 2-player Teams with each player controlling a single Toon. For the 3-player variant, 2 players form a Team and face off against the remaining player. The 2-player Team uses the variant rules presented here while the single player uses the usual game rules.
During the Draw step, each player draws 4 cards and must discard down to the maximum Mayhem card icon on their Toon Dashboard.
Teams may not discuss the cards in their hand nor may they plan between them when to use their Mayhem cards during their turn. Teams are still limited to playing 1 Mayhem card per round.
Activation dice must be used as usual, and Teams are allowed to discuss how best to use them. Each Toon on a Team must activate, if possible, during the round. Teams have the choice of which Toon to activate during their turn, but that Toon's player will decide where the Toon moves and how to use their Abilities.
Free-For-All Mayhem
Apparently, someone added too much spice to Taz' special turkey dish. After seeing his dinner ruined, the Tasmanian Devil started spinning in a mad rage and isn't able to stop!
All the other Toons deny having anything to do with the explosive roast, and everyone is a suspect! This blame game will become a Mayhem game in no time!
The Free-for-All Mayhem mode is a fun alternative for 3 players to face off in an arena style rumble.
Setup
-
Each player takes a single Activation die and is considered to be their own Team. Do not use the counter bases.
-
Starting with the youngest player and going clockwise, each player picks a single Toon and takes that figure and Toon Dashboard. Taz is not a playable Toon in this mode and may not be selected by a player.
-
Take the 10 Location tiles and arrange them facedown in the triangle pattern. Do not flip over the tiles! Each Location has 2 Slots and provides no other effects.
Each player places their Toon on a different corner of the board. The Taz figure is placed in the center. No player controls Taz during the game but by pushing him around the board, players are able to damage and pester their opponents.
-
Teams do not gain Victory Point in this mode and the tiles are kept facedown, so no Victory Point tokens need to be added to the Locations.
-
Remove any cards from the Mayhem deck that do not have the Free-For-All symbol. Each player then draws 4 Mayhem cards and may keep up to their Toon's Mayhem card icon, discarding the rest.
-
All tokens in this mode are communal and should be placed around the board for all players to use.
Trap tokens are always considered to be placed by an opposing Team and will activate if ANY Toon moves to their Location, even the Toon that placed them! Effects and texts that refer to a Teammate, to a player's other die, and to ACME tokens do not apply.
How to Play
After setup, randomly choose the first player. The rounds proceed as usual with players rolling their Activation die and the Mayhem die.
The round sequence is the same as the 2-player game with each player activating their Toon, starting with the player who got the Initiative and proceeding clockwise. Each round, before they activate their Toon, the player with the Initiative may move Taz to one of his adjacent Locations.
Toons move and battle as usual, but they also have the option to move Taz around the board using a Melee or Ranged Attack on him. Taz has a special Spin effect that players can use by attacking him. Whenever Taz is attacked, the attacking player may move his figure twice, following usual rules for adjacent Locations.
At the end of the turn, deal 2 Damage to any Toons in Taz' and adjacent Locations.
When all Toons have activated, the last player of the current round removes 1 empty Location from play (unless their Toon was KO'ed, in which case the second to last player will remove the Location), without splitting the map into 2 different groups of tiles. Shrinking the board makes the spinning Tasmanian Devil that much more dangerous.
The Initiative token goes to the next player going clockwise.
When a Toon is KO'ed, they are permanently removed from the game and do not return during the next Recovery phase. The remaining players continue their battle until only 1 Toon is left on the board. The last player left is the winner!
Mayhem Competitive Mode
These competitive rules provide an opportunity for players to plan ahead and customize their Team before coming to the table to challenge each other!
How to Play
The rules of the Competitive Mode are the same as the usual game rules, with some additions to the Setup:
Game Setup
In Competitive Mode, each player is allowed to choose any 2 characters from their Mayhem collection to create their Team. Each Team may not choose 2 of the same character. Players need to provide the figures for their characters, Dashboards and any special tokens their characters may use.
Any other tokens or elements needed for play, like the Location tiles or ACME tokens, must all belong to 1 of the 2 players. Players may not mix Locations and tokens from different boxes.
Additionally, players can choose the cards in their Mayhem hand from their collection. Players' starting Mayhem hand size is still limited to the Mayhem card icon on their chosen characters. Players may not select 2 of the same Mayhem card.
Once the Setup is completed, the game plays as usual.
Round Summary
-
Round Start
- Roll Activation dice and determine Initiative
- Roll Mayhem die
-
Recovery
- Return Toons
- Poison Effects
-
Toon Activation
- Place Activation die
- (Optional) Free Move
- Use Abilities
- Pass activation to opponent
- Repeat until all Toons have activated
-
Round End
- Discard Mayhem cards used that round