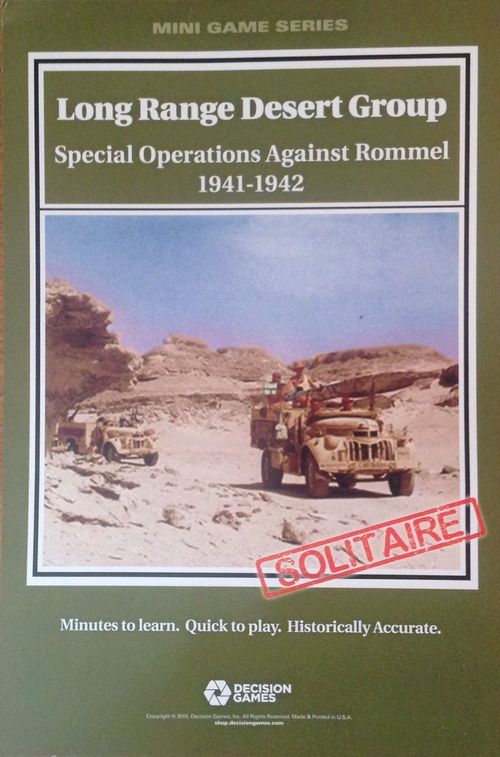
Long Range Desert Group: Special Operations Against Rommel 1941-1942
Long Range Desert Group: Special Operations Against Rommel 1941-1942 Rulebook
Table of Contents
Table of Contents
Long Range Desert Group Scenario Rules
36.0 Scenario Introduction
Each mission card has a year on it (1941 or 1942) affecting actions as noted below and in the charts.
Raid Rommel! (1941): With Afrikakorps besieging Tobruk, you must hit the enemy rear area.
Operation Crusader! (1941): You are supporting the big counteroffensive planned against Axis forces.
Delay at All Costs! (1942): Afrikakorps is racing for Alexandria, and it's up to you to give Eighth Army the time it needs to dig in at El Alamein.
Operation Agreement! (1942): This was a major operation to destroy Axis supply depots in Tobruk and Benghazi preparatory to the British El Alamein offensive. Historically, it turned into something of a fiasco as resistance was stronger than anticipated.
37.0 Counter Types
Objective Markers (36.0)
- Real Objectives: Targets of significant worth.
- Minefields: Areas with mines or Axis defenses.
Ground Units (see also 39.0)
There are no paratrooper units in LRDG.
- Royal Marine: Commandos and landing craft. (39.7)
- Armored Cars: Light armored vehicles.
- Heavy Weapons: Heavy machineguns, mortars, AAA guns, etc.
- Leader
- Sappers: Combat engineers for clearing obstacles.
- Jeep Patrol: Lend-lease jeeps with commandos.
- SIG: Special Interrogation Group. Intelligence personnel.
- Supply column: Vehicles with supplies.
- Truck Patrol: Desert adapted trucks with commandos.
- Wireless: Radio truck.
Markers
- Airstrike: On call airpower.
- Air supply: Cargo aircraft.
- KIA: Killed in Action
Afrikakorps
This marker (DAK) represents the main position of Axis forces in the Western Desert. The DAK marker is placed before the Objective markers by rolling on the Random Objective Location Table and placing the DAK marker on the location.
Exception: If a 10 (Jalo) is rolled, the DAK marker is placed on Gazala.
38.0 Objectives
There are two types of Objective markers, Real and Minefield. Each mission card will designate the number of each type to be placed for that mission. Before beginning a mission, turn all of the markers to be placed face down in a convenient off-map location and mix them up. Select one at a time, keeping it face down, for placement. They are placed and revealed per rule 23.0.
38.1 Objective Segment & Real Objectives
The player flips over the Objective marker before drawing an Event card (exception to 11.0.4). If it is a Minefield, no Event is drawn (38.2). If it is a real objective, draw an Event card. If no surviving units remain, the objective is removed. The objective must be transported to a friendly base to count for victory purposes.
If you have any surviving units after resolving the Event, gain one Op (in addition to any gain or loss from the Event) and place the Objective marker with one unit in the force. The objective must be transported to a friendly base to count for victory purposes. If no surviving units remain, the objective is removed.
38.2 Minefield Effects
No Event card is drawn when a Minefield is revealed with units in the same space (i.e. the Minefield is the event). Each time a unit enters a minefield space, even if the unit has entered it previously, it must stop. Minefields do not affect movement out of the space. Roll one die for each unit the instant it enters a Minefield (or a Minefield is revealed with units in the same space). On a 6, subtract one KIA from the index; the unit is not affected in any other way. If the operating force has a Sapper, then no die rolls are made. A unit that remains in a minefield without moving is not affected. Minefields may not be moved and remain on the map for the remainder of the mission.
38.3 Transporting Objectives
Any unit with a movement of 1 or more may pick up Real Objective marker (any number of them) and transport them. If the transporting unit is eliminated by combat or event, the Objective marker is also eliminated. Objective counters are not otherwise affected by combat. Friendly units using airfield and water moves also may transport Objectives.
39.0 Special Rules
39.1 Safe Lines
A force east of the Safe Line for the year in which the scenario is taking place ignores any card generating OPFOR units. There are two Safe Lines, one for 1941 (which also includes Tobruk) and one for 1942.
39.2 OPFOR Raid Card
If you pick this, then you must pick at random one friendly force and follow the instructions on the card. This can result in combat for a non-moving force, an exception to the normal rules. Only forces west of the applicable Safe Line can be chosen. If there are no suitable forces, then this card has no effect.
39.3 Fortifications
Benghazi and Bardia are Axis fortifications in all scenarios. Tobruk is only an Axis fortification in 1942. The Terrain Effects Chart shows special effects for them.
39.4 Stacking
The Command & Signal section of each mission card has a stacking limit when playing missions outside of a Campaign Game (stacking limit is six for all missions in a Campagin Game). Leaders do not count towards stacking.
39.5 Airfield Moves
One Commando unit (plus a transported Objective marker) can make an airfield move (15.2) each time an Intel card is played. The destination space must be a friendly base or an airfield occupied by friendly units.
39.6 Water Moves
One unit (plus a transported Objective marker or unit) can make a water move (15.3) from one port to another each time an Intel card is played. The debarkation port must be a friendly base or be occupied by friendly units. Each unit conducting a water move must roll on the Amphibious Insertion Table to determine the outcome of the move (registering the effect of Axis naval interdiction).
39.7 Royal Marines
The Royal Marine unit may make a water move from any port to any other port (friendly or not) without having to play an Intel card. Initiate the Op then roll on the Amphibious Insertion Table (AIT) to see the outcome. The unit can transport one other ground unit or real Objective marker. Both must embark from the same port and debark in the same port. Use the AIT only once for both units; the outcome applies to both counters.
39.8 Air Supply
Air supply provides additional logistical support (34.0) for movement or combat. After each supply flight, check for availability as per airstrikes (29.0). Air Supply markers can return via Aircraft Turnaround (35.0).
39.9 Airstrikes
Allied airstrikes are placed freely like other Allied units and fire as a separate unit (exception to 29.0). They can only be fired upon by Axis AAA and airstrike units. If an Allied airstrike is the next Allied unit to be targeted, Axis non-AAA/airstrike units fire instead at the next Allied ground unit. If an Allied airstrike is eliminated (or receives two Panic results), it may not be recruited again during the current mission. If it is Panicked, it goes to the Recruit box. If it is not hit, after the first round, place the airstrike in the Air Available box; it may be called in again for another battle later in the current mission.
The Axis airstrike is placed like other Axis units (in descending firepower order) and can only be targeted by Allied heavy weapons and airstrikes. If not already removed via battle resolution, it is removed at the end of the first round of battle.
39.10 Antiaircraft (AAA) Units
Axis AAA and airstrikes will prioritize their firepower to target Allied airstrikes regardless of where the Allied airstrikes are in the Allied battleline. Allied heavy weapons and airstrikes may choose their targets but only they may target the Axis airstrike. If no Allied airstrikes are available to target, Axis AAA and airstrikes fire at the next target in the Allied line.
39.11 Other Special Units
Wireless Truck: A force must have one to call in airstrikes or air supply.
SIG: (Special Interrogation Group) units provide the PSYOP bonus (26.0).
Reconnaissance: may be conducted by armored cars, truck patrols, jeep patrols, and airstrikes.
39.12 KIA
Commando losses are -1 KIA for an eliminated unit and 0 KIA for a Panicked unit (i.e. same value as for OPFOR units).
39.13 Campaign Game Resource Points
Play the missions in order. Start the campaign with the Raid Rommel mission. Roll on the Base Location Table to determine the base for each mission.
Base Location Table
| Die Roll | Location |
|---|---|
| 1 | Kufra |
| 2 | Jalo |
| 3 | Siwa |
| 4 | Farafra |
| 5 | Bahariya |
| 6 | Al Fayyum |
After the first mission, keep the remaining forces for the next mission. Add the KIA and Objective RP to the remaining RP and halve the result (rounded up). Do not add the logistics RPs on the mission card after the first mission. You may recruit more units before starting the next mission. If you lose any mission, the campaign is over.
Sample Mission and OPFOR Cards
Mission card (1941), "Crusader!" (LRDG-16): Situation: Place three Real Objectives and two Minefields. Mission: Recover two Real Objectives; KIA = 6+. Execution: 8 Operations. Logistics: 35 Recruit Points. Command & Signal (C2): 1 leader; Stacking = 4.
OPFOR card, "Raid!" (LRDG-05): Pick one of your forces west of the Safe Line at random (see scenario rules). Roll one die and place that number of OPFOR units in its space; combat is initiated. Win/Lose: 2 Op.
Commando System Rules
The following are the shared Commando Mini Game System Rules (v12). Scenario rules above supersede these where they differ. "Commnado" in 31.0 is printed that way in the source.
1.0 Introduction
Commando is a solitaire wargame system in which the player takes command of a commando force conducting daring, if sometimes unsavory, missions behind enemy lines. The Opposition Force (OPFOR) is controlled by the game system via a deck of “OPFOR” Event Cards. The game is played in scenarios, in which you must accomplish various missions, generated by Mission Cards. Each game includes this rulebook, plus a scenario sheet describing the specifics of the game itself. Any specific scenario rules supersede the rules in this Standard Rules book. The game includes a campaign scenario, allowing you to link the individual missions into a larger campaign.
2.0 Components
This mini game is complete if it includes: 40 game pieces (units), 18 campaign cards, one 11×17 inch map, this rulebook and a scenario sheet. If any parts are missing or damaged, please contact: Decision Games, Mini Game Support, PO Box 21598, Bakersfield, CA 93390-1598. Please register this game purchase on-line at: www.decisiongames.com Players must provide one or more six-sided dice.
3.0 The Map
Each game in the series shows a Theater of Operations. The map depicts the following.
Spaces: Locations in which you place units. Different types of spaces are described on the Terrain Effects Chart.
Bases: Special spaces from which you stage missions.
Routes: These are the lines connecting spaces. Players move their units via routes.
Recruit Box: This is a convenient place to put units which are not in play, or which were destroyed due to combat or other game actions. These units may sometimes be returned to play.
Air Available: Place airstrikes and helicopters that you purchased here.
Ops: Keep track of the current number of Operations. KIA: Keep track of the current number of eliminated units.
OPFOR Bin: This is a wide mouth opaque container, such as a coffee mug, a convenient place to put OPFOR units when not on the map.
4.0 Playing Pieces
The square cardboard pieces are called units. Scenario rules provide more information about their set-up. The following game definitions apply to the various playing pieces.
Friendly Units: These are the units controlled by the player.
Enemy or OPFOR Units: These are the units controlled by the game system and that will sometimes fight friendly forces and vice versa.
Firepower: The basic amount of combat power of the unit; in combat, this is the number of dice the unit throws to attempt to destroy enemy units.
Movement: The basic number of spaces the unit can move in a turn.
The reverse of the counter references any special rule for it, if any.
Objective Markers: These are special units and are explained in their own section.
Ops: Indicates the number of Ops you have remaining.
KIA (Killed in Action): Indicates the overall number of eliminated units.
5.0 Cards
There are two types of cards: Mission and OPFOR cards. These are explained under their respective rules sections.
6.0 How To Win
The game is played in missions. Each mission will require you to draw one Mission Card. This will state the objective (mission). If you have fulfilled this mission by the end of the game, you win. The mission will require you to do one or both of the following.
6.1 Recover
You must move at least this number of Real Objectives back to a friendly base.
6.2 KIA
KIA must achieve this level or higher. If you do not accomplish the Mission Objective by the end of the game, you lose.
7.0 How To Set Up The Game
-
Place all OPFOR units in the OPFOR bin.
-
Shuffle the Event Cards together and place them face down in the draw deck.
-
Shuffle the Mission Cards together and place them face down in a separate pile.
-
Draw at random one Mission Card and read it.
-
Place objective markers on the map via the Random Objective Location Table.
-
Create your starting order of battle by purchasing Commando units for the scenario with Recruit Points.
-
Place all un-purchased Commando units in the Recruit Box.
-
Place the operations marker in the space designated by the Mission Card. Place the KIA marker in the zero space.
-
The mission is now ready to be played.
8.0 Mission Cards
Each Mission card has the following information.
-
Situation: The number of Objective markers you will place for the mission.
-
Mission: What you have to do to win the scenario.
-
Execution: The number of operations (turns) in the scenario.
-
Logistics: The number of recruit points you have to build your force.
-
Command and Signal (C2): The number of leaders with which you begin the scenario.
9.0 Recruiting
Each commando unit costs a designated number of Recruit Points (RP) as listed on the Recruit Table. Place recruited ground units in any base. Place recruited air units in the Air Available box. Unused RP are lost.
10.0 How To Play The Game
The following parameters define game play.
10.1 Game length
The game lasts until the operations (Ops) marker reaches zero.
10.2 Stacking
Stacking is having more than one unit in a single space. The player may have a maximum of six ground units in a space at the end of a movement segment. Leaders, air units, OPFOR, and objective markers do not count. Any number of units may move through a particular space as long as stacking limits are observed at the end of a movement segment. An unlimited number of units may be stacked in a base.
10.3 Force
A “force” is a group of units in the same space, conducting an operation together. A force can consist of a single unit or more than one unit. All units in a force must start in the same space. They must move together. You may not pick up or drop off units from a force. A force moves no faster than the slowest unit in the force. If you have more than one unit starting in a space, you may form some of them into a force and leave the rest behind the starting space.
Example: You have three units in a space. You could form them into one combined force (of
three units), or two forces (one of two units which then moves, and a second of one unit that stays behind, or vice versa).
11.0 Operations (Ops)
Each Mission card will assign you a number of Operations (abbreviated “Ops”) you can use during a scenario. Use the Ops Track to keep track. One Operation is defined as one force of units taking the following actions.
-
Movement Segment: You move one operational force up to its maximum allotted movement allowance.
-
Event Card Segment: Pick an Event Card. The instructions on it are implemented by the player and affect the space in which the force ended its move.
-
Combat Segment: If there are any OPFOR units in the space entered (which may be generated by the event card), you must engage in combat.
-
Objective Segment: If there is a face-down objective marker in the space, pick a second Event card, and resolve it (that is, return to step 2 above). If you have any surviving units, then flip that marker face up.
Example: In one Op, you may move one force, then you must draw an Event card. Then, if enemy forces are present in the force’s space (due to the card draw), you must engage in combat. One Op, therefore, consists of all of the above actions.
12.0 Multiple Operations
A single unit or force of units can conduct any number of operations per scenario, as long as you expend one “Op” for each operation. You do not have to use your full number of operations for a mission if you win before then.
13.0 End Of Scenario
When you have conducted your last operation, the scenario comes to an end.
14.0 Variable Ops
Certain Event Cards will increase or decrease the number of Ops in a scenario. If the number of Ops is reduced to zero or less, the game immediately ends.
15.0 Ground Movement
During a force’s Movement Segment, you may move that force any number of spaces, up to its movement value.
Example: A unit with a movement of 2 may move two, one or no spaces during a Movement segment. If there is more than one unit in a force, they must move together. They use the movement of the slowest unit. You may not pick up or drop off units from a moving force—they must stick together.
15.1 Stopping
You must stop and move no farther with a unit if it enters a space for which the Terrain Effects Chart indicates “STOP.” Also, a force must stop if it enters a space with an Objective Marker.
15.2 Airfield Move
Certain Event Cards will allow you to move ground units (any types) from an airfield to any other airfield. Simply pick up the units in a force and move them. This uses all movement for that force for the operation.
15.3 Water Move
Certain Event Cards will allow you to move ground units (any types) via water routes. You move from one shore across the water and end on land. This uses all movement for that force for the operation.
15.4 Transport
Some units may be transported by other units. This will be indicated by the individual game. To transport an eligible unit, that unit must start in the same space as a friendly unit with a movement of 1 or more. It is picked up and moved with the transporting unit, using the latter’s movement allowance; it must stay with the transporting unit for the entire move. Such units may make an airfield or water move, but only if transported by another unit. If the transporting unit is eliminated, so is the transported unit. You may debark a transported unit at the end of any movement.
16.0 Event Cards
At the conclusion of a force’s movement, you must pick an Event Card. The force must have actually moved from at least one space to another for the card pick. The card is picked from the top of the deck. If the force entered a space with a face down objective marker, draw one card normally, and implement it immediately. If there are any surviving Commando units, then you must also pick a second card and implement it immediately.
Note: Once an Objective is revealed (even through Recon efforts), a second event card is not drawn.
Event cards may have the following information:
OPFOR Units: The player picks at random the indicated number of OPFOR units from the bin, and places them in the present space. These will trigger combat in the force’s ensuing combat segment.
Reinforcements: If a card calls for you to receive commando units, they are received at no RP cost.
Win/Lose: If your force wins that battle, certain cards award a number of additional Ops. If your force loses the battle, certain cards deduct a number of your Ops.
16.1 Event Card Disposition
Event Cards are placed in a separate discard pile after they have been picked and played. If all the cards have been drawn, then reshuffle all discards and start the OPFOR deck anew. Some cards will specifically require a reshuffling of the deck. Intel cards you hold in your hand are not reshuffled.
Intel Cards
If you have fulfilled the condition on an Intel card (if any), you may keep it. Simply place the card in front of you, to be played at a time of your choosing. When you decide to play it, implement one of the listed special events, and then you must place the card in the discard pile.
Note: Playing an Intel Card costs no Ops; it’s a free operation. Further, the instructions on any Event Card supersedes all other rules in the rules book.
17.0 Bases
When one of your forces completes a move in a printed base, you do not pick an Event Card.
18.0 OPFOR Units
OPFOR units are temporarily placed on the map as the result of events. They are placed in the same space as the force that triggered the card draw. OPFOR units are automatically removed from the map after the battle concludes, and placed back in the OPFOR bin. They may be temporarily eliminated by combat, but are always returned to the OPFOR bin (unless a scenario specified otherwise).
19.0 Combat (Battle)
Combat is triggered when a force of your units is in the same space as OPFOR units. This will occur as a result of Event Card draws. All combat occurs during the Combat segment. Because each force must move individually, generally, you will not be able to combine different forces in the same combat. However, if there were other units already in the space, and a moving force entered that same space, those units will also participate in combat generated by an Event Card draw.
19.1 Battle Procedure
Each combat must go through the following steps.
-
Determine which side has Tactical Superiority. Roll one die for the Commando Force, and another die for the OPFOR; if either side has a leader with its force, add 1 (+1) to that side’s die roll (but never more than one, even if multiple leaders are present with either side). The side with the higher total has Tactical Superiority. If the net die rolls are even, the Commandos have Tactical Superiority.
-
First Round of Battle. Once Tactical Superiority has been determined, line up all of the OPFOR units in the order of the strongest firepower to the weakest. If more than one unit has the same firepower, place them in any order you want. Next, line up all of the Commando units in any order you prefer.
If the Commandos have Tactical Superiority, they fire first. The player fires the first unit in line at any OPFOR unit. If the OPFOR has Tactical Superiority, they fire first with their first (strongest) unit in line at the first unit in the Commando line. To “fire” a unit, roll a quantity of dice equal to the firing unit’s firepower rating, and then cross-index each die roll with the Battle Results Table. Losses are inflicted upon the targeted unit immediately.
Note: Each side has its own Battle Results Table.
Next, the side that does not have Tactical Superiority fires with one unit, per above.
Note: A unit that was hit in combat (eliminated or panicked) before now is not eligible to fire (this is why Tactical Superiority is important). Opposing units alternate firing, one unit at a time (and inflicting any casualties immediately), until all qualified units have fired during that “round.” A unit that is eliminated or panicked may not fire. If one side has more units than the other, after alternating fire between the opposing forces, that side fires all of its remaining units.
-
Second Round of Battle. If both sides have units that were not eliminated or panicked, a second round of battle occurs. Repeat step 1 to determine the side with Tactical Superiority and conduct another round of battle.
-
Continuing Rounds of Battle. Upon completion of any second round of battle, a third (and then a fourth, fifth, etc., if necessary) round is executed, following the same procedure. Continue this procedure until all of the units of one side have been eliminated or have panicked. Whichever side has at least one un-panicked unit remaining at the end of a round of combat is considered the winner.
Note: Because of the alternating fire procedure, it is not possible for both sides to be entirely eliminated and/or panicked.
19.2 Battle Results Table
Roll one die per each firing unit firepower factor. Results are as follows.
Elimination: Remove the targeted unit from the map. If it is an OPFOR unit, put it back in the bin. If it is a Commando unit, place it in the Recruit Pool.
Panic: Flip the unit over. It may not fire for the remainder of the battle. If it receives another panic (or elimination) result it is eliminated.
Note: All units are affected the same by a die roll result, regardless of the unit’s type or strength. If a unit suffers an Elimination and a Panic result, ignore the Panic result and remove the unit from the map.
No Effect: Nothing happens.
No Overkill: If firing inflicts more than one elimination on a targeted unit, or more than two panics, those losses are not applied to other units.
20.0 Winning A Battle
If the Commando force wins the battle, any panicked OPFOR units are placed into the OPFOR bin. Panicked Commando units are flipped back to their un-panicked face-up side. Gaining
Ops: Increase the Ops available by the number listed on the Event card.
21.0 Losing A Battle
All surviving OPFOR are placed in the bin. All panicked Commando units are flipped back to their un-panicked face-up side. Losing
Ops: Decrease the Ops available by the number listed on the Event card.
22.0 Killed In Action (KIA)
The KIA Track tallies the total casualties that are inflicted during the game. At the start of a mission, place the KIA marker in the “0” space of the KIA Track. Each time an OPFOR unit is eliminated, the KIA marker goes up one space. Each time a Commando unit is eliminated, the KIA marker goes down two spaces. The KIA marker will also go down one space each time a Commando unit becomes panicked.
Note: Panicked OPFOR units do not count as KIA. If commando casualties decrease the KIA marker below zero, flip the KIA marker over to its reverse side, and down the track into the negative range. If the KIA marker is in the negative range at the end of the mission (too many Commando casualties), you have lost the game, even if you accomplished the Mission.
23.0 Objective Markers
Objective markers are placed onto the map via the Mission Card instructions. Each objective marker is placed on the map via a dice roll (two 6-sided dice, rolled together as a total), and consulting the Random Objective Location Table. Cross-index the dice roll total with the location line on the Table and place an Objective marker in the space indicated. If the result is a location where an objective marker is already present, then roll for another location.
When placing any objective markers, they are always placed face down. They are revealed only if one of the following conditions apply. a) A Commando unit is in the space at the end of an Op (that is, survived two Event cards); or b) if you play a card allowing an “Intel” action, in which case you can reveal one; or c) via the Recon rule. Once an objective marker is flipped (revealed), it remains face up for the rest of the game.
Note: Objective markers on the map stop movement of forces entering their space. When on the map, they do not engage in combat, nor are they affected by combat. See the Transport rule for captured Objectives. Objectives may not move by themselves, but specific scenarios do allow some objective markers to be transported.
24.0 Leaders
Leader markers may be assigned by a Mission card, and/or may appear after winning a battle, explained as follows. If a battle is won by a force, roll one six-sided die for that force; if the roll is a 6, the player selects one leader from the recruit pool (if available) and placed in the same space with that winning force.
Note: If all of the leaders are already on the map, no additional leader can appear. Leaders are considered units for all game purposes. If a player has a Leader with a force engaged in combat, he adds a +1 die roll modifier to the Tactical Superiority die roll. More than one Leader in a force does not provide additional bonuses. If a leader is killed, he may not be replaced in a mission.
25.0 Paratroopers
Paratrooper qualified units (per the scenario) may make airborne insertions. To do so, they must start in a base printed with an airfield symbol. You then pick up one or more paratroopers from that base, and simply place them on any single other space on the map. Next, roll one sixsided die per each paratrooper and consult the Airborne Insertion Table; apply the cross-indexed outcome indicated for that die roll result. After the insertion, the paratrooper unit may not move any further. An airborne insertion is considered one operation; pick an Event Card for that paratrooper force after it lands. Each paratrooper unit is eligible to conduct one airborne insertion attempt per game, regardless of the outcome.
Note: Airborne insertions are different from airfield to airfield moves, and they do not require an Intel card play.
26.0 PSYOP
If there is a PSYOP qualified unit with a Commando force which draws an Event card, you may discard that card without playing it, and draw a substitute card. Each force may do this one time per Event card segment, even if there is more than one PSYOP qualified unit with that force.
27.0 Sappers
Sapper units, if stacked with a force, can facilitate the resolution of certain events. Sappers allow a Commando force to continue movement through terrain and Objective markers that normally requires a moving unit to stop (per the Terrain Effects Chart).
28.0 Supply Column
Supply column markers, if stacked with a force, can facilitate the resolution of certain events, as well provide other benefits, per the optional rules.
29.0 Airstrikes
The player places purchased Airstrikes in the Air Available box. They are available to support ground combat operations. To call in an airstrike, the player picks up one or more available airstrikes from the Air Available box, and places them on the map in the same space as a Commando force engaged in combat. The airstrike adds a number of die rolls equal to its firepower rating to the ground combat of any one Commando unit.
Note: Using airstrikes does not count as an additional Op. Airstrikes are never affected by enemy fire (unless a scenario has specific anti-aircraft rules). Furthermore, airstrikes themselves may not attack OPFOR units directly; they may only ever be placed in a space where a Commando force conducts ground combat.
Availability Check
After using an airstrike for any game action, roll one six-sided die; if the die roll result is an even number, the airstrike is returned to the Air Available box, but if an odd number is rolled, the airstrike is placed in the Recruit Box.
30.0 Helicopters
The player places purchased helicopters in the Air Available box. Helicopters function like airstrikes, except that helicopters can be affected by enemy fire. Additionally, each helicopter can transport (move) one Commando unit from that Commando’s current space to any other space on the map,
even if no airfield is present in that space. Helicopter transport is an operation and the transported Commando unit may not have moved before, or move after being transported. Multiple helicopters may move multiple individual Commando units together, if they start and end in the same spaces. A helicopter can use its combat strength to support any Commando combat in the space in which the transport move ends. Availability check also applies to helicopters.
31.0 Campaign Game
Commnado can be played as a series of games. At the conclusion of a scenario, return all of your units to the Recruit Pool. You keep any leaders who survived that scenario. Other units must be recruited again normally to be brought back into play. After the first scenario, you do not receive additional leaders via scenario cards, only via winning battles. However, eliminated leaders may be replaced in future scenarios. At the start of the next scenario, reset the Ops and KIA tracks to zero.
31.1 If you won the scenario
-
Remove that Mission Card from the deck.
-
Keep any unexpended RP.
-
For each KIA you inflicted, gain one RP.
-
For each Real Objective you returned to base above the minimum you needed to win that Mission, you roll one die and gain that number of additional RP.
-
However, in the next scenario to be played, when OPFOR units are called for, pick one additional OPFOR unit per battle (to the counter limit). This is one extra unit per Mission you have accomplished.
31.2 If you did not win the scenario
-
Reshuffle that Mission card back into the deck, and you can potentially pick it again.
-
Keep any unexpended RP.
-
For each KIA you inflicted, gain one RP.
31.3 Winning the Campaign
You win the campaign only when you have won all of the scenarios. However, if you lose any two scenarios in a row, you lose the campaign.
32.0 Reserve Recruit Points (RP)
RP which you did not expend during initial deployment can be saved to:
-
Purchase additional Ops: pay 2 RP and receive one additional Op. This can be done at any point in a scenario. Or
-
in a campaign game, RPs can be accrued from one mission to the next (see 39.13).
33.0 Reconnaissance
A force conducting an Operation can attempt one Recon. This is done at the start of the Op, prior to movement, and can be either one ground recon or one air recon. For a Ground Recon, the force must have at least one Recon qualified ground unit (indicated on reverse of counter) adjacent to a space containing a face down Objective marker. Roll one die: if even, reveal the objective; if odd, nothing happens. For an Air Recon, use one Airstrike and reveal one face down Objective anywhere on the map on an even roll; if odd, nothing happens. In either case, check for availability (29.0).
34.0 Additional Logistics
A player may use a supply column to increase the movement factor of a force with which it moves by one space. Additionally, a player may use a supply column to declare “Full Firepower” at the beginning of a battle if it is part of a force engaged in combat. For that battle, all Commando units’ firepower ratings are temporarily increased one (+1). This is so even if the supply column is eliminated in that combat. An Air Supply marker may be used in the same way to increase movement or firepower. After the conclusion of the movement or combat in which the supply column or Air Supply is so employed, roll one die: on an even result, the supply column or Air Supply remains in play. On an odd result a supply column or Air Supply is placed in the Recruit Pool.
35.0 Aircraft Turnaround
Airstrikes and Air Supply returned to the Recruit Pool due to an Availability check (29.0) may be returned to play by paying one RP per unit. Move that airstrike or Air Supply to the Air Available box. This requires the expenditure of an Op (plus one RP per air unit).