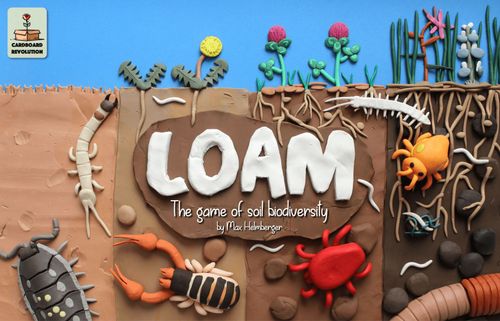
Loam
Loam Rulebook
Table of Contents
Table of Contents
Meet the Creatures!
Single-celled Microbial Decomposers break down dead plant and animal matter to release nutrients and help bind the soil together with sticky secretions. These include bacteria, fungi, and protists.
Animal Decomposers fragment dead organic matter and stimulate microbial populations through constant grazing. These include nematodes, tardigrades, and many arthropods.
Ecosystem Engineers help aerate the soil through their constant burrowing and tunneling. These include earthworms and some insects, including ants and dung beetles.
Plant Mutualists help keep plants safe and healthy by helping them get more nutrients from the soil, warding off or killing pests and pathogens, or both. These include specific bacteria, fungi, and nematodes.
Large Predators stir up the soil as they seek out prey. These include spiders and numerous insects like ants and ground beetles.
Small Predators slink through soil pores in search of equally-tiny prey. These include nematodes, many mites, and some highly ambitious protists.
To be clear, these six creature types are not specific scientific categories. However, they encompass most of the roles animals and microbes play in soil and correspond to real divisions between different soil organisms.
Some of these divisions are taxonomic, based on what kind of organism a species is (a fungus, an earthworm, an insect, etc.). Other divisions are functional, based on what an organism does rather than what it is. Soil organisms don't care what names humans give them, but each one relies on others doing what they've evolved to do.
Game Flow
One game of Loam lasts for 3 rounds, during which players use inputs to place creatures into their root zones, among other things. This advances 2 main objectives:
-
Raising your root zone's Structure, Nutrients, and Food Web stats to upgrade your inputs and gain points by achieving balance between stats.
-
Assembling diverse communities of creatures that earn additional points.
Highest score at the end of the game wins!
Components
- 120 Creatures
- 4 Root Zone Health Trackers (with turn tracker)
- 12 Inputs (4 copies of each, double-sided)
- 15 Behaviors
- 12 Stat Counters
- 4 Rules Reminder/Point Trackers (double-sided)
- 20 Point Counters
Setup and Game Start
-
Shuffle and place the creature deck somewhere accessible to all players, leaving space beside it for the soil and the discard pile. The soil should be a space large enough to hold 6-10 face-up creatures.
(Diagram labels: Creature Deck; The Soil; Discard Pile (starts empty).)
-
You take a root zone health tracker, 3 stat counters, a reminder/point tracker, and 3 inputs (one copy of each). Keep the inputs in your hand, on their "basic" side (light brown).
-
Grow the soil to 6 by putting the top 6 creatures of the creature deck face-up next to it.
(Diagram labels: Creature Deck; The Soil.)
-
Draw 1 creature from the creature deck, holding it in your hand with your inputs.
-
Shuffle and place the behavior deck somewhere accessible to all players, then put the top 3 behaviors face-up next to it.
-
Whoever most recently touched soil takes their turn first.
Inputs
Each turn, you must use all three of your inputs. Each input gives you a choice between two effects, all of which involve one or more actions.
- Place: Put a creature from your hand or the soil into your root zone (anywhere by your tracker).
- Cycle: Discard all available behaviors (page 17), then lay out that many new ones from the deck.
- Draw: Put a creature from the soil or the top of the deck into your hand.
- Grow: Put the indicated number of creatures from the top of the deck into the soil.
- Bury: Put the indicated number of creatures from your hand or the soil (in this case, the soil) into the discard pile, face-down.
When using an input (or behavior), you must resolve its effect to the full extent you are able to.
(Diagram labels: Creature Deck; The Soil; Discard Pile; Your Hand; Draw; Grow; Bury; Place; Root Zone (below tracker).)
Turn Structure
During your turn, you must use your three inputs and you may use any number of behaviors that you have earned (page 17).
At end of turn (in no particular order):
-
Draw 1 creature from the creature deck (except on your final turn).
-
If the soil has fewer than 6 creatures in it, grow it to 6.
-
Refill the available behaviors to 3.
-
Return your used inputs to your hand.
The turn then passes to the left.
One round consists of one turn for each player and a game of Loam lasts for three rounds. You may track which round/turn it is using the turn tracker on your root zone health tracker.
Creatures
Each creature has a type, which affects scoring and behaviors, and a level, which affects scoring and how you place it into communities (page 15) in your root zone. See below for how to "read" a creature card.
Card callouts:
- The soil stats increased by placing this creature into your root zone.
- Creature type (one of six) indicated in text and with a colored icon.
- Creature level (1, 2, or 3), indicated by the number next to the type icon.
- The creature's name and description.
Tiger beetle larva is a Level 2 Large Predator. It adds 1 Structure and 2 Food Web.
Placing Creatures
The table area near your root zone health tracker is your root zone, where you place creatures and assemble communities (page 13). Your tracker tracks your Root Zone's Structure, Nutrients, and Food Web. When you place creatures into your root zone, add their indicated stats as shown below.
(Example: an Animal Decomposer creature adds 3 Structure, 3 Nutrients, and 1 Food Web.)
- 3 Structure
- 3 Nutrients
- 1 Food Web
Stats are not officially capped at 20! If you exceed 20 of a stat, place a point counter on 20 and move your stat counter back to the beginning of the track (1 for 21, 2 for 22, etc.).
Upgrading Inputs
Reaching or exceeding 8 of any stat lets you immediately flip the corresponding basic input to its upgraded side (input+). If you have already used that basic input this turn, you don't get the input+ back into your hand until end of turn, and thus can't use it until next turn.
Community Assembly
Placing creatures into communities (groups of up to 7 arrayed on top of each other) is necessary in order to place higher-level creatures into your root zone and score more points. Below and on the opposite page are the rules for assembling communities.
-
All creatures are considered part of a community, even lone Level 1 creatures when they're first placed into your root zone.
-
A community of seven is complete. No more creatures can be placed into it.
-
A creature's level determines where and when it can be placed.
- Level 1 creatures may always be placed into incomplete communities or placed alone to start a new community.
- Level 2 creatures may only be placed into communities with at least two Level 1 creatures for each Level 2.
- Level 3 creatures may only be placed into communities that already contain six other creatures.
-
Individual creatures may not be swapped between communities nor moved from one community to another.
-
Whole incomplete communities (including communities of one) may be combined so long as all other rules are obeyed. Moving creatures in this way does not count as placing them and won't earn you behaviors.
-
You may have any number of communities (complete or incomplete) in your root zone. There are many valid ways to assemble a community! See below for some examples.
(Three example communities are shown as card strips on the printed page. Their creature descriptions read: "Fungi that trade soil nutrients for sugars from their partner plants." / "Microscopic worms that devour soil bacteria, spurring fresh growth." / "Large spiders that ambush prey instead of spinning a web." The creature names in the example strips are not legible at the source scan's resolution and are not transcribed.)
Behaviors
Three behaviors are available each turn. Each behavior has two creature type icons on it. If you place creatures of both those types next to each other in the same community, you may take that behavior into your hand. The two creatures do not need to be placed on the same turn, nor do they need to be placed in the specific order shown on the behavior card.
With these behaviors available, placing a Small Predator and Microbial Decomposer together would earn you Trophic Cascade.
You use behaviors during your turn like inputs, though behaviors are single-use and get placed in a common discard pile afterward. Also unlike inputs, you are never required to use behaviors and may save them between turns.
Placing an Animal Decomposer next to the Microbial Decomposer would then earn you Biofilm Grazing. The same creature may help you earn multiple behaviors!
At end of turn, replace any behaviors you earned by laying out new ones from the top of the deck. If the behavior deck runs out, shuffle the discard pile and continue with it as the deck.
Game End and Scoring
After all players' third turns, the game ends and it's time to tally up your scores! First, determine your balance bonus based on the distance between your root zone's highest and lowest stat(s). Just having high Structure, Nutrients, and Food Web stats does not contribute to your final score.
In the example here, you would earn 6 points, since your highest and lowest stats are 2 apart (14 and 16).
Next, tally up the point totals for each of your communities. Each community earns points based on the creature types and levels present within it (see next page). Even communities of one are worth 1 point.
Communities earn:
- +1 point per creature type within and +2 bonus points if all 6 types are present.
- +1 point per creature type represented by two levels and +5 points if by all three levels.
(Scoring examples: "4 types — +4 points"; "All 3 levels of one type — +5 points"; the example community shown is worth 9 points. Totals in the example: 3 + 6 + 9 + 8 = 26 points.)
Use point counters to keep track of your points earned from each community and your root zone's balance.
Whoever has the most points wins! In case of a tie, the victory goes to the player whose lowest single root zone stat is higher. If it's still a tie, all tied players win. If playing Loam with only 2 players, feel free to play a best-of-3 match.
Solo Play
Loam can also be played solo! To do so, just play three turns in a row. You'll find it works just as well as with friends. Below are some scoring benchmarks, and on the following pages are optional scenarios for making a solo game of Loam more interesting by introducing different effects at the beginning of every turn.
Scoring Benchmarks
- 14 or fewer points: Degraded soil
- 15-23 points: Marginal soil
- 24-29 points: Healthy soil
- 30+ points: Rich soil
When playing one of the solo scenarios, add that scenario's modifier to your final score.
Solo Scenarios
DROUGHT (+3) — Weeks without rain leave the soil packed hard as rock.
- Turn 1: Draw 2 creatures. You may only place creatures from your hand this turn.
- Turn 2: The first two creatures you place this turn must be from your hand unless they grant Structure.
- Turn 3: Whenever you earn a behavior this turn, you may place 1 creature from your hand without using an input.
SURFACE FIRE (+4) — A low-intensity fire sweeps across the ground.
- Turn 1: Bury 2 random creatures from the soil and discard one input until end of turn.
- Turn 2: Bury 2 random creatures from the soil, then grow the soil by 2.
- Turn 3: Whenever you earn a behavior this turn, draw 1 creature at random from the discard pile. You may place it if able.
More Solo Scenarios
ALLELOPATHY (+8) — A nearby plant unleashes chemical warfare against your roots.
- Turn 1: Discard one input until end of turn.
- Turn 2: Discard a different input until end of turn.
- Turn 3: Discard whichever input you haven't yet discarded until end of turn. When you earn your second behavior this turn, return that input to your hand.
INVASIVE SPECIES (+4) — A creature from a far-off place wreaks havoc on your ecosystem.
- Turn 1: Grow the soil by 1.
- Turn 2: Put 2 random creatures from the soil next to your root zone (not into a community). They are invasive and subtract their stats instead of adding them. (Stats can be negative, and losing stats may result in an input being downgraded.)
- Turn 3: Put 2 more random creature from the soil beside your root zone. They also subtract their stats. Whenever you earn a behavior this turn, you may bury 1 invasive creature.
FAQ
Q: If I place 2 or more creatures with a single input or behavior, do they all have to be placed from the soil or all from my hand? Likewise, if I draw 2 or more creatures at once, do they all have to be from the soil or all from the top of the deck? A: No. Each placement and each draw is independent.
Q: If I place 2 or more creatures with a single effect, do they all have to go into the same community if possible? A: No.
Q: Is there a maximum hand size, maximum soil size, or maximum number of communities? A: No.
Q: When exactly do I earn a behavior? A: Officially, you earn a behavior after the effect that let you place the decisive creature(s) fully resolves. If you use Rich Exudates and the first creature you place earns you a behavior, you technically should place the second creature before taking the behavior. This almost never matters in a standard game of Loam, though can matter in solo scenarios.
Q: Can I pay for the "bury cost" of multiple behaviors with a single creature? A: No.
Q: What happens if the creature deck or behavior deck runs out? A: In either case, shuffle the relevant discard pile and continue with that as the deck.