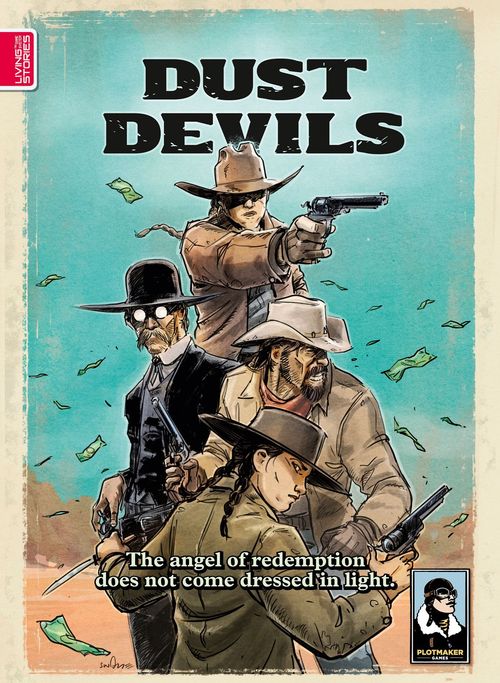
Living Stories: Dust Devils
Living Stories: Dust Devils Rulebook
Table of Contents
Table of Contents
- Components
- Ways to Play
- Action Card Anatomy
- Character Sheet Anatomy
- Setup
- Game Concepts
- Conflicts
- Aftermaths
- Playing the Game
- Card Effects
- Common Card Effects
- Character Abilities
- Final Scoring
- Showdown Cards (Optional)
- Non-Player Characters (NPCs)
- Examples: Resolving Effects
- Non-Player Characters (NPCs), Continued
Components
Component Overview
- 4 Player Aids
- 1 Status Track
- A bag of Grit Tokens
- 6 NPC Bid Tokens
- 10 Action Mode Conflict Cards
- 8 Action Mode Aftermath Cards
- 5 Achievement Cards
- 36 Action Cards (The Preacher, The Gunslinger, The Bandit, The Kid)
- 4 Status Markers
- 4 Targeting Tokens
- 4 Character Sheets
- 4 Randomizer Tokens
- 24 Money Tokens
- 24 Fame Tokens
- 24 Damnation Tokens
- 47 Cinema Mode Cards
- 12 Showdown Cards
Ways to Play
Action Mode
This mode jumps straight into the action. You use randomized Conflict and Aftermath Cards to create a different story each time you play.
Playing time: 30+ minutes
Cinema Mode
Each Living Stories title includes a special experience: a curated storyline told through a deck of cinematic cards.
Think of this as the movie version of the game. An extra treat to enjoy with friends or on your own.
Playing time: 2+ hours
Tip! New to Living Stories? We recommend starting with Action Mode.
Action Card Anatomy
- Printed Power — Your base Power in a Conflict.
- Quote — Something cool or gaudy for you to say when you play the card.
- White Rule Box — Resolve when you play the card.
- Black Rule Box — Resolve after claiming your Conflict Reward.
- Cinema Mode Icon — These cards are only used in Cinema Mode.
Character Sheet Anatomy
- Backstory — Learn more about your character.
- Starting Resources — Your starting resources and position on the Status Track.
- Character Ability — Gives your character a unique edge.
Setup
-
Build the Supply. Place all game tokens in separate piles. This is the Supply. The Supply is unlimited. If you run out of a resource, use suitable replacements.
-
Set Up the Status Track and Achievements. Place the Status Track and the 5 Achievement Cards in the center of the table.
-
Choose Characters. Each player chooses a character. Place the Character Sheet in front of you.
Build your Action Deck:
- Action Mode: Use your 7 unmarked Action Cards.
- Cinema Mode: Use all 9 of your Action Cards.
Shuffle your Action Deck and place it next to your Character Sheet.
Draw 3 cards. This is your starting hand.
Place your Status Marker on the Status Track as indicated by your Character Sheet.
Take your Targeting Token and starting Fame, Money, Damnation, and Grit, and place them in your Stash.
-
Build the Story Deck.
- Action Mode: Randomly select 5 Conflict Cards and 4 Aftermath Cards. Use these 9 cards to create a Story Deck that alternates between a Conflict Card and an Aftermath Card, with a Conflict Card on top.
- Cinema Mode: Stack all 47 Cinema Mode Cards face down in numerical order, with Card 1 on top.
Game Concepts
The following concepts are shared across all Living Stories titles. Each game also includes concepts unique to its world and story. These appear in colored boxes.
Status
Status (star icon) represents your social standing.
It determines play order during Conflicts and breaks all ties in the game.
- When you gain Status, move your marker one step up the Status Track. The player whose space you take is bumped down one step.
- When you lose Status, move your marker one step down the Status Track. The player whose space you take is bumped up one step.
Example: Stauts [sic — printed this way in the source]. Diego gains 1 Status. He moves his Status Marker from C to B. Jane is bumped from B to C.
Ties
All ties in the game are broken by higher Status.
The tied player highest on the Status Track breaks the tie in their favor, choosing whether to count as having the most or the least of the tied value.
If more than two players are tied, continue this process down the Status Track as needed.
Example 1: Ties. Jane (Status A) and Diego (Status B) are tied for the most Damnation.
They must resolve the following Aftermath effect: "The player with the most Damnation gains 2 Grit. Everyone else gains 1 Grit."
Because Jane has higher Status, she breaks the tie in her favor and chooses to count as having the most Damnation. Jane gains 2 Grit and everyone else gains 1 Grit.
Example 2: Ties. At the end of the game, Jane (Status A), Diego (Status B), and the Kid (Status D) are tied for the most Damnation.
Jane breaks the tie first. Since the player with the most Damnation is eliminated, she chooses to count as having the least Damnation.
Diego now becomes the highest-Status player among the remaining tied players. He also chooses to count as having the least Damnation.
The Kid is left as the player with the most Damnation and is eliminated.
Conflicts
Conflicts are the heart of Dust Devils. These are the dramatic moments where characters fight for Status, Money, and Fame while trying to avoid Damnation. A Conflict is resolved in 5 steps.
1. Check the Conflict Rewards
Place the Conflict Card on the table and let all players check the Rewards for ④ through ① place.
2. Play Action Cards
In reverse Status order (from D to A), players take turns playing one Action Card face-up into their Play Area.
If the card has a White Rule Box, resolve it as you play the card.
Example 1: White Rule Box. The Kid plays Bad Blood. Its White Rule Box reads: "Steal 1 Grit from another player." As she plays the card, she resolves the effect. She chooses another player and steals 1 Grit from them.
Example 2: White Rule Box. The Kid plays Harmless. As she plays the card, the effect becomes active. This round, the Printed Power of the Kid's card changes according to the amount of Damnation in her Stash.
3. Secret Grit Bidding
After all players have played a card, each player announces how much Grit they have in their Stash.
Then players secretly bid Grit to boost their Power:
- Gather all your Grit in one hand.
- Secretly move 0 or more Grit into your other hand — this is your bid.
- When everyone is ready, reveal at the same time and place the Grit you bid on your card.
4. Conflict Rewards
First, each player calculates their Total Power:
Total Power = Printed Power + Grit bid
The player with the lowest Total Power claims and resolves the reward marked ④ on the Conflict Card.
Among the remaining players, the player with the lowest Total Power claims and resolves the reward marked ③. Then do the same for ② and ① place until each player has claimed exactly one reward.
If your Action Card has a Black Rule Box, resolve it after claiming your reward, and before the next player claims their reward.
Example: Placement & Black Rule Box. After revealing their bids, the players have the following Total Power:
- The Preacher (Status B): 6
- Diego (Status C): 6
- The Kid (Status D): 6
- Jane (Status A): 5
Jane claims the ④-place reward. Then she resolves any Black Rule Box on her card.
Of the three tied players, the Kid is lowest on the Status Track, so she claims the ③-place reward and resolves any Black Rule Box on her card.
Then Diego claims the ②-place reward and resolves any Black Rule Box.
Finally, the Preacher claims the ①-place reward and resolves any Black Rule Box.
Important: Placement. Many cards and effects use the term placed (e.g. "If you placed higher than your target..."). This refers to your placement in the current Conflict (④, ③, ②, or ①) and not your position on the Status Track.
5. Clean Up
- Discard your Action Card. Its effects are no longer active.
- Return all Grit from it to the Supply.
- Return your Targeting Token to your Stash.
- Draw back up to three cards, if possible.
Important: Your Action Deck is not reshuffled when it runs out.
Aftermaths
Aftermaths represent the quiet moments that follow a Conflict.
No Action Cards are played. Instead, read the card aloud and follow its instructions, making any required choices.
Example card: Someone Took a Bullet. "One of you sags in the saddle. Breath ragged. Shirt dark with blood."
- Choose a random player: That player gains 1 Damnation, 1 Grit, and 1 Fame / Status.
- Then the player with the most Damnation gains 2 Grit. Everyone else gains 1 Grit.
Playing the Game
Play through the Story Deck one card at a time. Resolve each Conflict and Aftermath as they appear.
In Action Mode, discard each Conflict and Aftermath Card after resolving it.
In Cinema Mode, after reading a card, place it face up on the table to create a shared tableau for the chapter. At the end of the chapter, discard the tableau and continue with the next chapter.
Cinema Mode Tip: We strongly recommend taking turns drawing and reading the Story Cards aloud. Sharing the reading adds atmosphere, tension, and a stronger sense of shared experience.
Card Effects
Resolve effects one at a time, in the order they appear.
Effects that use the word "may" are optional. All other effects are mandatory.
If you can't resolve everything an effect tells you to do, resolve as much as you can.
Example. Diego claims the following Conflict Reward: "Gain a total of 2 Status / Fame. Then gain 2 Fame OR Lose 2 Damnation." He resolves the first effect and chooses to gain 1 Status and 1 Fame. Then he resolves the second effect and chooses to lose 2 Damnation. Diego only has 1 Damnation in his Stash, so he loses that.
When an effect requires you to choose between two or more options, you must choose one that changes the game state.
Example. The Kid is at Status D and resolves the following effect: "Lose 1 Status OR Gain 1 Damnation." She cannot lose Status because she is already at Status D. She must choose the other option and gain 1 Damnation.
Effects that use the wording "Lose X to do Y" describe a cost. If you cannot lose the full amount (i.e. pay the cost), the effect does not happen.
Example. The Kid resolves the following Aftermath effect: "Lose 1 Money to lose 1 Damnation." If she does not have 1 Money to lose, she cannot pay the cost, and the effect does not happen.
Common Card Effects
The following effects are used across all Living Stories titles:
- Gain X — Take X from the Supply and put it into your Stash.
- Lose X — Return X from your Stash to the Supply.
- Give X — Take X from your Stash and put it into another player's Stash. For triggering other effects, giving counts as losing.
- Steal X — Take X from another player's Stash and put it into your Stash. For triggering other effects, stealing counts as gaining.
- Target — Place your Targeting Token in another player's Play Area. They are now the Target of your effect. You cannot target yourself.
Hide and Reveal
Dust Devils uses a Hide and Reveal mechanic inspired by the bluffs and bravado of the Old West. Everyone makes their choice in secret, trying to predict what the others will do.
Secretly hide 0 or 1 of the named resource in one hand. When all players are ready, reveal at the same time. The revealed resource is then returned to your Stash.
Character Abilities
Each character has a Character Ability. See your Character Sheet for details.
Final Scoring
After resolving the last card of the Story Deck, the player with the most Damnation has lost their soul and is eliminated.
The remaining players claim Achievements and tally Victory Points (VP) to determine the winner:
- Each Money in your Stash = 2 VP
- Each Fame in your Stash = 1 VP
- Each Damnation in your Stash = -1 VP
- Each Achievement = VP shown on the card
The player with the most VP wins.
Showdown Cards (Optional)
Showdown Cards are an optional module for experienced players. They represent the daring moves, lucky breaks, and acts of bravado that often decide the final showdown of a good Western.
Setup
Each player draws one Showdown Card at random from their character's three-card Showdown deck. Look at it, but keep it hidden until the moment printed on the card.
Timing & Revelation
Showdown Cards are revealed and resolved during the game's final Conflict:
- Action Mode: during the 5th Conflict
- Cinema Mode: during the 9th Conflict
Each Showdown Card specifies when it must be revealed:
- Before Card Play — before any Action Cards are played
- After Card Play — after all Action Cards are played, but before Grit bidding
- Final Scoring — just before tallying points
Before each timing step, ask: "Does anyone have a Showdown Card to reveal now?"
When a Showdown Card is revealed, resolve it immediately.
Multiple Revelations
If more than one Showdown Card is revealed at the same timing step, resolve them in reverse Status order.
Non-Player Characters (NPCs)
When playing with fewer than four players, the remaining characters become NPCs.
NPC Setup
Set up each NPC as you would a regular player, with these exceptions:
- NPCs have an Action Deck but do not draw a starting hand.
- NPCs gain their starting resources except for Grit.
NPC Grit
NPCs can never hold Grit in their Stash. Return any Grit an NPC would gain to the Supply.
NPCs are considered to have unlimited Grit when resolving effects and bidding.
When bidding, each NPC uses an NPC Bid Token. After all human players have revealed their bids, each NPC flips one NPC Bid Token onto the Action Card they played. This is their bid.
NPC Ties
When an NPC resolves a tie, they choose to count as having the most of the compared resource.
Exception: When resolving a tie in Damnation to determine who is eliminated from the game, they choose to count as having the least Damnation.
NPC Conflicts
When it is an NPC's turn to play, reveal the top card of their Action Deck and place it face up in their Play Area.
NPC Card Effects
NPCs resolve card effects in isolation. They never consider what will happen later, however obvious it may be to a human player.
When an effect gives two or more options, NPCs choose the first option in reading order.
NPCs always say yes to "may" effects.
Examples: Resolving Effects
Example 1: Resolving Effects. The Kid is at Status A and claims the following Conflict Reward: "Gain a total of 2 Fame / Money. Then gain 1 Status / Fame."
The Kid resolves the first effect. Gaining 2 Fame is the first option in reading order, so she chooses that option.
The Kid then resolves the second effect. Gaining 1 Status is the first option in reading order. But it would not change the game state because the Kid is already at Status A.
The next option in reading order is gaining 1 Fame. The Kid chooses that option for a total of 3 Fame gained.
Example 2: Resolving Effects. Diego plays Thug. Its Black Rule Box reads: "You may steal 1 Money from each player who placed lower than you. If you do, gain 1 Damnation."
Diego placed ④ in the Conflict, so no player will lose Money. However, NPCs always say yes to "may" effects, so Diego resolves it and gains 1 Damnation.
Non-Player Characters (NPCs), Continued
NPC Randomizer Tokens
If an effect requires an NPC to choose or target a player, use the Randomizer Tokens. Shuffle them and draw one. If the token shows the NPC itself, redraw.
NPC Clean Up
In the Clean Up step, discard the NPC's Action Card. Return any Targeting Tokens and NPC Bid Tokens used by the NPCs this round to the Supply.
NPC Aftermaths
Some Aftermaths require the player at Status A to make a decision. If an NPC is at Status A, pass the decision to the next human player on the Status Track.
Important: When instructed to hide and reveal, NPCs always hide 0.
NPC Character Abilities
NPCs ignore their Character Ability.
NPCs and Achievements
NPCs can claim Achievements just like human players.
Important: For the Tough as Nails Achievement, each NPC draws one random NPC Bid Token to determine their final amount of Grit.
NPC Showdown Cards
NPCs never use Showdown Cards.
NPC Edge Cases
These rules are designed to keep the game moving and the pressure on.
If an NPC encounters a situation not covered here, quickly agree on a ruling — or choose randomly among the available options and keep the action rolling.