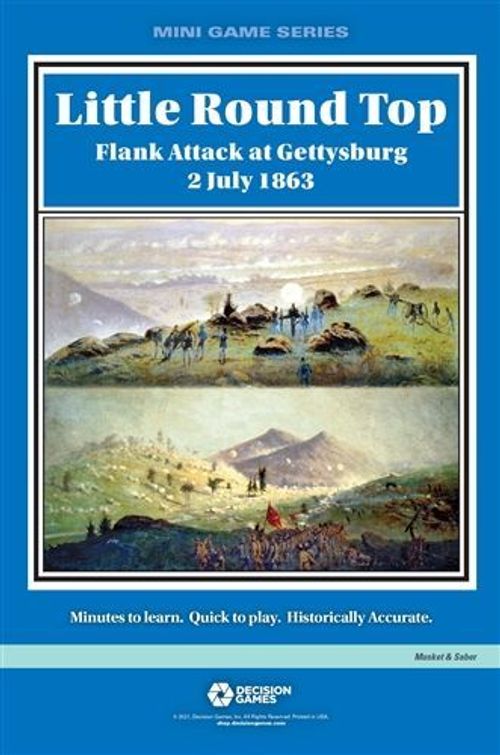
Little Round Top: Flank Attack at Gettysburg 2 July 1863
Little Round Top: Flank Attack at Gettysburg 2 July 1863 Rulebook
Table of Contents
Table of Contents
Musket & Saber Quick Play System Rules
1.0 Introduction
1.1 The Quick Play System
The Musket & Saber system is a series of games, each depicting a battle from the musket era (1600–1899); these Quick Play rules are a simplified version (for details see the M&S Expanded Design Notes file in the E-Rules at www.decisiongames.com). In each game, players command opposing forces in the situation faced by their historical counterparts and try to win the battle by capturing key terrain, or destroying enemy units, or both.
1.2 Game Scale
Each hex on the map represents 176–352 yards from side to side. Game turns represent 45–90 minutes of daylight (or several hours at night). Infantry and cavalry units represent 300 to 4,500 men, and artillery units represent up to 24 cannon.
2.0 Components
2.1 Inventory & Rules
Each game consists of a standard rules folder, a sheet of scenario rules, an 11×17-inch map covering the battlefield, and a die-cut sheet of 40 playing pieces (counters or units). Players must provide two differentiated six-sided dice. These standard rules apply to all games; the scenario rules modify or add to the rules as needed to portray a particular battle.
2.2 The Map & Terrain
The hex grid superimposed on the terrain regulates the placement and movement of units; a unit is considered to be in a single hex at any given time. Each hex has a four-digit number to aid set up and play. Every hex contains one or more kinds of terrain which affect the movement of units and combat between opposing units.
Other terrain features lie on the hex side between two hexes and affect movement and/or combat across those hexsides only; they have no effect on units in either adjacent hex. The effects of each kind of terrain are described on the Terrain Effects Chart (TEC) in the Scenario Rules for each game.
2.3 The Counters
Some counters are used for game functions; players are free to make additional markers (e.g. Disrupted) or use markers from other games as needed. Most counters represent combat units or leaders. The background colors indicate the army to which each unit belongs. Each unit (this is Husson's French infantry from Hougoumont: Key to Waterloo) has the following information (counter diagram labels):
- Formation
- Unit Type
- Unit ID
- Combat Factor
- Movement Allowance
- Morale Rating
Unit Type: in this case infantry. ID: the unit's historical designation. Formation: the unit's higher organization. Combat Factor (CF): the unit's relative ability to engage in combat. When there are two numbers, left is attack and right is defense. Morale Rating (MR): the unit's ability to withstand the shock of combat. Movement Allowance (MA): the unit's ability to move across the map, expressed as movement points (MP).
2.4 Unit Types
There are five types of units in the M&S system.
1st & 2nd: There are two types of infantry units:
- Brigade and regimental-sized
- Battalion-sized
Brigade and regimental-sized units are two-step units. On their reduced-strength side, they have a color band. Brigade and regimental-sized units are subject to disruption whether full-strength or reduced (see 11.1). When disrupted, place a Disruption marker on the unit.
Battalion-sized units are single step units. They are subject to ineffectiveness (11.2). When one of these units becomes ineffective, it is flipped to its ineffective side.
3rd–5th types: There are three other types of units:
- Leaders
- Artillery
- Cavalry
All of these units are single step units. All of these units are subject to ineffectiveness (11.2). When one of these units becomes ineffective, it is flipped to its ineffective side.
Leader units have a star icon. Their values are added to a primary unit for movement, combat, and morale purposes.
Artillery units include a Range (see 8.3 and 8.4).
Cavalry units include a Charge Factor (see 9.2).
Two step units flip to their single step side if they suffer a loss. Single step units and reduced two-step units are eliminated if they suffer a loss. Leaders are eliminated due to combat results or may be captured if alone during opposing movement.
3.0 Sequence of Play
3.1 The Course of a Game
After the players choose which side each will command, sort the counters and set them up (3.2). The players then alternate moving and attacking with their units during the game turns (3.3) to reach the victory conditions (3.4). Victory is determined after the last game turn is completed.
3.2 Setting Up
The scenario rules for each game specify which units start on the map and which enter as reinforcements later in the game. Units starting on the map (identified by ID and/or Formation) are listed with the hex number of their starting location. In some cases, the hex number has a "w/1" notation, indicating the unit may be placed within 1 hex (i.e. adjacent to) the specified hex. Units arriving as reinforcements (13.0) are listed by turn and hex of entry.
Example: "1545 at 2114" means the units arrive during the owning player's movement phase of 1545 at hex 2114.
3.3 The Game Turn
The number of turns in a game and the First Player are specified in the scenario rules. Turns are tracked by moving the turn marker along the Turn Record Track (TRT) on the map. Each turn consists of seven phases.
First Player Movement Phase: The First Player moves his units according to the rules for movement (4.0), stacking (5.0), zones of control (6.0), and entering the map (4.5).
First Player Recovery Phase: Eligible units may recover from disruption, ineffectiveness, and step loss (11.0).
First Player Combat Phase: The First Player uses his units to attack enemy units within the constraints of the combat rules (7.0, as modified by 8.0, 9.0, & 10.0).
Second Player Movement, Recovery, & Combat Phases: same as above, with the players switching roles.
Turn Marker Phase: if the last turn has been completed, determine the winner (3.4). If more turns remain, advance the turn marker and play another turn.
3.4 Winning the Game
The specific victory conditions for each player are listed in the scenario rules.
4.0 Movement
4.1 Moving Units
Units are moved one at a time tracing a path of contiguous hexes (no skipping allowed), in any direction or combination of directions. If the owning player desires, units in the same hex (Stack 5.0) may move together. The stack must start in the same hex and remain together for the entire move.
4.2 Movement Allowance (MA)
A unit's movement allowance is the number of movement points (MPs) available during each movement phase. A unit may not exceed its MA during a single movement phase; a stack is limited to the speed of the slowest unit in the stack. Unused MP may not be accumulated or transferred to another unit.
4.3 Terrain Effects on Movement
As a unit enters a hex, it must pay one or more MP depending on the terrain. Entering a clear hex across a clear hexside costs 1 MP. Other terrain may require more MP to enter; those costs are listed on the TEC. Units crossing certain hex side terrain must pay additional MP, denoted by a "+1" on the TEC. Those MP are added to the normal cost to enter a particular type of terrain. A unit may always move one hex even if lacking the necessary MP to enter a hex.
4.4 Road Movement
A unit traveling on a road always pays ½ MP per hex entered if it starts and ends on a road hex, otherwise it pays 1 MP per hex. To travel along a road, a unit must move from a hex containing the path across a hexside containing the same path into another hex containing the same path. Road and non-road movement may be combined in a single movement phase (at 1 MP per road hex).
4.5 Entry of Reinforcements
Each reinforcement unit moves onto the map during the owning player's movement phase of the turn indicated in the set up. The identified entry hex is the first hex of movement for that unit; it moves normally thereafter.
If a unit cannot enter that hex because it is occupied by an enemy unit or because the entry would cause an over-stacking (5.0) to occur, it may enter at the next hex along that map edge towards the next friendly entry hex (player's choice of direction if friendly entry hexes are in both directions); entering that hex counts as 2 MP for movement. If that hex is occupied, the unit can continue to slide down the map edge, paying one MP for each, until it enters or exceeds its entire movement allowance. In that case, it must wait to enter the following turn.
5.0 Stacking
Stacking is limited to one battalion or artillery unit, plus any three units (infantry, cavalry, artillery), plus any number of leaders. There is no limit to the number of friendly units entering, leaving, passing through a given hex at any time. However, if units are over-stacked in a hex at the end of any movement or combat phase, all infantry one- and two-step units in the hex are disrupted (11.1) or, by virtue of being one-step units (battalions, artillery, or cavalry) become ineffective (11.2).
Note: Only one or two combat units plus one leader will be able to participate in combat; the other units will not participate but will suffer any adverse results (see 7.1).
6.0 Zones of Control
6.1 Exerting Zones of Control
The six hexes adjacent to a combat unit constitute its zone of control (ZOC). There is no additional effect from having more than one ZOC projected into a hex. See 7.6 for ZOC effects on retreat.
6.2 ZOC Effects
A unit must cease moving when it moves into an enemy unit's ZOC (EZOC). A unit already in an EZOC may move out of the hex, but may move only one hex that turn and may not move directly into another EZOC. Disrupted units do not exert a ZOC and; they may not enter EZOC during movement unless accompanied by a leader. Units beginning a friendly combat phase in EZOC may make attacks (there is a penalty for not attacking; see 7.3).
6.3 Negating ZOC
Some terrain types block ZOC into or out of hexes or across a hex side; see the TEC. During a retreat after combat, some EZOC may be negated by friendly units or ZOC (see 7.7).
7.0 Combat
7.1 Who May Attack or Defend
During his combat phase, the active player (attacking) units may attack adjacent opposing (defending) units. The attacking player may conduct as many or as few attacks as he wishes, and in any order within the restrictions below.
-
One battalion or artillery unit plus one other unit (infantry, cavalry, or artillery) plus one leader from the same formation may attack from or defend in a single hex.
-
Any additional units in that hex take no part in the attack or defense but will suffer any adverse results if the participating units are so affected. Also, they are not eligible for advance after combat.
-
An attacking unit may, but is not required to, attack into any adjacent hex into which it could move during normal movement. A unit may attack only once per combat phase (exception: 9.2 Cavalry Charge).
-
Attacking unit(s) in one hex may target only one defending hex per combat phase. If the attacking unit(s) are adjacent to more than one defending hex, the attacking player may choose which hex to attack (but see 7.3).
-
A single defending hex may be attacked only once per combat phase (exception: 9.2 Cavalry Charge). If attacked from more than one adjacent hex, all participating attackers must be combined into a single combat.
7.2 Combat Procedure
For each combat:
-
Identify the involved units (7.2 & 7.3). If more than one unit is involved for a side, the owning player must identify one combat unit (which may be a battalion, artillery, or cavalry unit) as the primary unit (this affects combat results; see 7.5).
-
Calculate the total strength for the attacking unit(s) as well as the defending units(s). Note the defender's strength is the sum of the defending unit strength plus potential modifiers for terrain. In some cases, the terrain the attackers are in and the number of attacking hexes also effect the defender's total strength.
-
Calculate the differential (7.4) and locate the corresponding column on the CRT (on page 6).
-
Roll two dice, one identified as the combat die and the other as the morale die. Cross-index the combat die roll with the differential column to get the combat result (7.5). Use the morale die roll as a morale check for the primary unit of the affected side.
-
Apply the results.
-
Conduct leader checks for any leaders that added their combat strength in the combat.
7.3 Counterattack
While the attacker has complete discretion as to which friendly units attack which enemy units, there is a penalty for choosing not to attack or bombard a defending unit exerting a ZOC onto an attacking unit at the beginning of the combat phase:
At the end of a combat phase, each such defending unit not attacked during the phase may counterattack any adjacent attacking hex. Counterattacking units may not combine with other eligible defending hexes; each such defending hex counterattacks alone but may counterattack a hex that has already been counterattacked (this is an exception to 7.1).
- The counterattacking unit counterattacks any one attacking hex; it may ignore any other adjacent attackers.
- The combat factor of the counterattacking unit(s) is doubled. The counterattacking unit(s) assume all attacking roles (advance after combat, terrain effects, etc.).
- If no attacking unit remains adjacent, the triggered defending unit may move one hex (must be a legal move and may be EZOC to EZOC) to make its counterattack.
Note: it is possible for an attacking hex to be counterattacked more than once, and, by virtue of the attacking units advancing after combat and leaving non-participating units behind, those non-participating units could be subjected to a counterattack. If this occurs, the player whose units are subjected to a counterattack selects a primary defender (and leader and support unit, if present).
7.4 Calculating the Differential
Determine the combat factor of each attacking unit. Any additions or subtractions to CF are applied first. Then CF is halved if the unit is disrupted or attacking into or out of some terrain (see the TEC). If a unit is to be halved once, divide the combat factor by two, rounding up any remainder. If a unit is to be halved more than once, treat it as having a combat factor of one, regardless of its original combat factor. Total the modified combat factors of all participating attacking units. Subtract the total combat strength of all involved defending units. The result is the combat differential. Find the appropriate column on the CRT.
7.5 Morale Checks
If the morale die is greater than the morale rating the unit fails the check. The MR can be changed by a number of factors; regardless, a unit always passes the check on a roll of "1" and always fails on a roll of "6."
7.6 Losses
Any step loss called for by the CRT must come from the primary unit of the affected side. If the unit does not have a band showing, flip it to its reverse side (and see 11.2).
If the unit is a one-step unit or a reduced two-step unit, it is eliminated or captured. If it has a line of retreat (safe or unsafe, see below), it is eliminated; set it aside for possible step recovery. If it has no line of retreat, it is captured. Remove it from play and hand it to the other player; it may count for victory conditions (3.4 & 14.0).
7.7 Retreats & the SLR
Each retreating unit, separately or in a group, must retreat one, two, or three hexes (owning player's discretion within any restrictions from the combat result) from its combat hex, moving closer to one of its side's entry hexes if possible. If no retreat path takes it closer, it retreats only one hex. No MP are expended. If a unit has no option but to retreat off the map, remove it from play; it does not count as captured or eliminated but may not return to play. In addition, battalions, artillery, cavalry and leaders flip to their ineffective side. At the time of its retreat, a unit either has a safe line of retreat (SLR), an unsafe line of retreat, or no line of retreat, as defined below.
Safe Line of Retreat (SLR): a path of hexes with no prohibited terrain, enemy-occupied hexes, or enemy zones of control. For this purpose, an EZOC is negated by the presence of a friendly unit or the ZOC of a friendly unit. However, the final hex of the retreat may not have an EZOC, negated or otherwise. The retreat path may pass through and/or end in friendly-occupied hexes, even if over-stacked (see 5.0). If the destination hex is bombarded later in the same combat phase, the retreated units suffer any combat results inflicted.
Unsafe Line of Retreat: identical to the SLR but passes through a non-negated EZOC and/or ends in an EZOC. The unit or group takes a loss (owner's player's choice, not limited to primary unit), then routs (7.8) from the unsafe hex. A routing group loses only one step, not one step per unit. A group may take a loss and rout any number of times until all units are eliminated, has no line of retreat, or retreats off the map.
No Line of Retreat: a path through prohibited terrain or enemy-occupied hexes. The retreating unit is captured. Remove it from the map and hand it to the opposing player; it may count toward victory conditions (3.4 & 14.0).
7.8 Rout
A routing unit acts just like a retreating unit except it must retreat three hexes from the hex where the rout began and is disrupted at the end of the retreat. If the unit was disrupted already, there is no further effect. If a routing group is routed again during its retreat, it suffers another step loss and starts a new retreat.
7.9 Advance
When a defender retreats, the attackers may, but are not required to, advance one hex. The decision must be made immediately. Defenders, disrupted units, artillery, and attackers in some terrain (see the TEC) may not advance. If multiple attacking hexes were involved, any or all of the participating units may advance; the decision may be made separately for each. An advancing unit may move into the vacated defender's hex, or into any vacant hex adjacent to it (as long as the advancing unit could move into the hex). Advancing units ignore EZOC. If the defending unit(s) rout for any reason, advancing attackers may advance two hexes instead of one; the first as above, and the second in any direction. There is no advance if a defender is eliminated.
Note: Defenders do not advance after combat.
8.0 Artillery
8.1 Artillery Units
Artillery operates in the same way as infantry except:
-
When it has two combat factors, the first is for attack and the second is for defense.
-
It always has only one step. The reverse side represents the unit in an ineffective state. It becomes ineffective whenever forced to retreat. It may recover effectiveness (11.3).
-
If in an EZOC, it may only attack one of those enemy hexes per 7.0.
-
If not in an EZOC, it may attack one enemy hex via bombardment (see 8.4).
-
It may not advance after combat.
-
It may not move or attack into some terrain types (see the TEC).
8.2 Line of Sight (LOS)
The LOS is a line from the center of the firing hex to the center of the target hex. It is blocked if any intervening hex or hex side has blocking terrain. If the LOS is congruent to a non-blocking hex side, the LOS is blocked only if both hexes adjacent to that hex side are blocked. Units do not block LOS.
Terrain in the firing and target hexes does not block the LOS, but bombardment is not permitted into certain terrain types.
8.3 Range
The chosen target is within range if the number of hexes from the artillery to the target is less than or equal to the artillery's range factor. Do not count the artillery unit's hex, do count the target hex.
8.4 Bombardment
To bombard, an artillery unit must:
-
Not be in an EZOC.
-
Have an attack factor greater than zero.
-
Have a line of sight (LOS) to the target (8.2).
-
Be within range of the target (8.3).
-
Be on its effective side (11.2).
Bombarding Alone: Artillery bombarding a hex not being attacked by units adjacent to the hex uses its attack combat factor as the differential; do not subtract the defender's combat factor but do subtract any bombardment modifiers per the TEC. Multiple artillery units may combine their fire against a hex. If the target is cavalry, double the artillery's combat factor after the terrain modifiers. If the defender's hex has more than one unit, resolve the bombardment separately against each defending unit. Bombarding artillery units are not affected by any combat result and can not advance after combat.
Supporting Fire: Bombarding artillery may add its attack factor(s) to an attack by other units adjacent to a defender. Resolve the combat normally but the bombarding artillery do not suffer adverse (A) results. If the artillery is in an EZOC, it can only attack defending units exerting that EZOC and does suffer any adverse results.
9.0 Cavalry
9.1 Cavalry Units
A cavalry unit operates in the same way as infantry except:
-
It always has only one step. The reverse side represents the unit in an ineffective state. It becomes ineffective whenever forced to retreat, but may recover effectiveness (11.3).
-
It may charge (9.2).
-
Its charge factor (C#) is doubled when attacking a disrupted defender.
-
It must retreat 3 hexes when retreating (this includes a failed morale check—see 9.2, step 2).
-
It is affected differently by certain terrain types (see the TEC).
9.2 Cavalry Charges
A cavalry unit may charge in lieu of a regular attack. Make the choice before starting the charging unit's move. The charging unit may not start in an over-stacked hex. Each charging unit must move separately. More than one charging unit may charge a single defending hex, but each charging unit must do so from a separate hex. Only one charging unit may be in a hex at the end of charge movement. The charges are resolved separately in the combat phase (this is an exception to 7.2).
For each charge conduct these steps:
-
In the movement phase, the cavalry unit must move one or two hexes to become adjacent to its target. If two hexes, the first can not be in an EZOC. It may start in and enter only clear or clear hill terrain, not cross any hexside terrain, and the target must be in clear or clear hill terrain. It may not enter a friendly-occupied hex (other than its start hex) including a hex containing a previous charging cavalry unit. Rotate the charging cavalry unit to indicate it is charging (or other mnemonic).
-
In the combat phase, when a defending hex is selected for a charge as an attack, and the defender primary, supporting, and leader units are chosen, first make a morale check for one of the charging units. If it fails, it is disrupted and retreats (9.1.4). If other cavalry units are eligible to charge the same defending hex, they conduct morale checks until one passes. When one passes, proceed to step 3.
Note: even if all charging units fail charge morale checks, the defender may not counterattack.
-
If the primary defending unit is an infantry unit in square (9.3) or is disrupted (11.0), proceed to step 4, otherwise make a morale check. If the defending unit passes, it may form square if it is infantry. If it fails, it disrupts and remains in place (does not retreat).
-
Use the cavalry's charge factor as its attack strength. It is doubled against a disrupted primary defending unit.
-
When resolving the charge, treat all Dr, Dc, Dx and Dm results as Dm; treat any other result as Am. If the defending unit(s) are still in their hex, the attacker selects the next charging unit and returns to step 2.
-
If the defender routs, the charging unit may immediately advance zero, one, or two hexes and conduct another charge (beginning at step 2). The new target hex may have been attacked already or yet to be attacked that phase. Twice victorious charging units may advance up to two additional hexes but may not charge a third time. Once charges and advances are complete, cavalry units flip to their ineffective side in their final hex.
Design Note: Cavalry charges are unlikely to be successful against an undisrupted foe, and highly successful against a disrupted one. Note that the threat of a charge may force units into square, making them vulnerable to attacks by infantry or artillery.
9.3 Squares
Any hex with an undisrupted, effective infantry unit in it may form a square at the beginning of its movement phase or during a cavalry charge. When the square is formed, place the square marker on it. Treat all units in the hex as being in square. The square may be removed at the beginning of the unit's next movement phase.
-
Units in square may move one hex per movement phase (but not into/across prohibited terrain). Make a morale check if the square enters or crosses any terrain other than clear or clear hill. If it fails, it is disrupted (no effect if already disrupted).
-
Only the one infantry unit forming square participates in combat (plus one eligible leader); all other units in the hex with it may not participate but are affected by combat results. A unit in square does not check morale when charged by cavalry (9.2, step 2) but does check morale for combat results.
a) Add +2 to the unit's combat and morale factors when being attacked by cavalry (charging or not).
b) Attacking units other than cavalry (including bombarding artillery) add +2 to their CF.
c) If the square retreats, it retreats one hex and remains in square; if it retreats two or three hexes, it disrupts and loses its square marker.
d) If a unit in square attacks, subtract 2 from its CF.
e) Artillery in a hex with square may not fire.
10.0 Leaders
Leaders represent key generals who enhance unit abilities. They may move alone up to 12 hexes ignoring all but prohibited terrain. They may not enter an EZOC unless moving with a friendly unit or the hex contains a friendly unit. They may leave EZOC freely and are not limited to one hex movement. Leaders do not count for stacking; any or all leaders may stack freely with any friendly unit. Leaders exert no ZOC.
Effects: The factors of one leader may be applied to the units in his hex if the unit belongs to the same formation. A formation of "A" indicates all formations in that army. The leader may:
-
Add its movement factor to all units in the hex, but the leader must start the turn with and move with those units.
-
Allow disrupted units to enter an EZOC.
-
Add its combat factor to one infantry or cavalry unit (before that unit is modified), but not to bombarding artillery units. Disrupted units are not halved when attacking when stacked with the same formation leaders.
-
Add its morale factor to one attacking or defending unit for combat resolution (but that unit still fails on a die roll of 6 regardless of modifiers).
-
Add its morale factor to one unit attempting recovery (but that unit still fails on a die roll of 6 regardless of modifiers). If a unit is attempting both step and disruption recovery, a leader may support both.
Retreat: Leaders retreat with stacked units, or anytime an enemy unit moves adjacent to a lone leader. They become ineffective (11.2) after a retreat. If alone, the leader must retreat to the nearest friendly unit (7.6) within 12 hexes. If unable to do so, the leader is captured and is removed from play.
Each time a leader adds their combat factor to an attack or defense, roll two dice for each involved leader; on a roll of 2 or 12, the leader is eliminated and removed from play. Leaders that are captured or eliminated may count for victory conditions (14.0).
11.0 Disruption, Ineffectiveness, & Recovery
Infantry brigades and regiments (both one and two-step) may become disrupted. Mark a disrupted unit with a "D" marker.
Battalion, artillery and cavalry units, and leaders may become ineffective. When they do, flip them to their ineffective side.
11.1 Disruption
Disruption occurs due to failed morale checks, certain combat results, and certain movement into or across terrain.
Disrupted units suffer the following effects:
-
Are halved (rounded up) when attacking but defend with printed strength. Attack strength is not halved with a leader (see 10.0 (4)).
-
Subtract 2 from their morale rating (but always pass on a roll of 1) in any morale check or recovery attempt.
-
Exerts no ZOC and may not enter an EZOC. May enter EZOC with leader (see 10.0 (2)).
-
May not advance after combat and must retreat at least two hexes on retreat results.
-
Additional disruptions are converted to retreat.
11.2 Ineffectiveness
Ineffectiveness occurs due to failed morale checks, certain combat results, certain movement into or across terrain, or at the end of a cavalry charge.
Ineffective units suffer the following effects:
-
Can not attack but defend with printed ("0") combat strength.
-
Morale is reduced as per the counter.
-
Exerts no ZOC and may not enter an EZOC (even with a Leader).
-
May not advance after combat and must retreat at least two hexes on retreat results.
-
Additional ineffectiveness results are converted to retreat.
11.3 Disruption & Ineffectiveness Recovery
A unit may attempt to recover from disruption or ineffectiveness at the end of any friendly movement phase (after the owning player has moved all their units). It must be at least two hexes away from the nearest enemy unit. If it did not move during the movement phase, it recovers automatically. If it moved but did not start or end in an EZOC, make a morale check for it; if it passes, it recovers. If it fails, it remains disrupted or ineffective.
11.4 Step Recovery
The scenario rules state how many lost steps a player is able to recover. Step recovery is done during the owning player's movement phase.
One replacement step enables a reduced two-step unit on the map to attempt to recover its lost step. A reduced two-step unit may attempt to recover a step at the end of any friendly movement phase. It must be at least two hexes away from the nearest enemy unit. It may not have moved during the current movement phase. Make a morale check for it; if it passes, it is flipped back to its full strength. If it fails, it remains reduced.
Alternatively, one replacement step enables any eliminated (but not captured) unit to attempt to return to the map at its reduced strength for two-step units, or full-strength or effective side for one-step units at the end of the next movement phase. Make a morale check for it;
- If it passes: it is placed that die roll number forward on the Turn Track. The unit enters the map as a reinforcement (13.0) on that turn at a location specified in the scenario rules.
- If it fails, or passes but would be placed beyond the last turn of the game: it is removed from the game and counts as an eliminated unit towards victory at the end of the game (3.4).
During the Recovery Phase, units and leaders recover in the following sequence:
-
Step loss.
-
Disrupted units.
-
Ineffective units.
-
Ineffective leaders.
A unit that is both reduced and disrupted may attempt to recover both, doing so in the above sequence.
Combat Results Table (CRT)
M&S Quick Play Revised CRT
Columns are the combat differential (7.4); rows are the combat die roll (7.2, step 4).
| Die Roll | –6 or less | –5 to –4 | –3 to –2 | –1 to 0 | +1 to +2 | +3 to +4 | +5 to +6 | +7 to +9 | +10 or more |
|---|---|---|---|---|---|---|---|---|---|
| 1 | Am | Am | Ax | Ar | Ar | Ac | – | Dr | Dx |
| 2 | Am | Ax | Ar | Ac | Ac | – | Dc | Dr | Dx |
| 3 |
"A" = Attacker, "D" = Defender. "A" results indicate the attacker(s) are the losing side. "D" results indicate the defender(s) are the losing side. "–" results are no effect.
Leader check: Every leader that applies their modifier to a primary unit in combat roll two dice. On a result of 2 or 12, the leader is eliminated.
Combat Results
| Result | If primary losing unit passes morale check | If primary losing unit fails morale check |
|---|---|---|
| C | • No Effect: all units remain in position. | • Losing unit(s) disrupt or flip to ineffective side. If already disrupted or ineffective, units retreat 1–3 hexes. • Victorious attackers may advance 1 hex. |
| R | • Exchange: the primary unit on each side loses one step. • No retreat or advance. | • Losing unit(s) disrupt or flip to ineffective side. and retreat 1–3 hexes. • If primary losing unit already disrupted or ineffective, retreat must be at least 2 hexes. • Victorious attackers may advance 1 hex. |
| X | • Primary losing unit loses one step. • Losing unit(s) disrupt or flip to ineffective side. • If primary losing unit already disrupted/ineffective no further effect. | • Losing unit(s) disrupt or flip to ineffective side. and retreat 1–3 hexes. • If primary losing unit already disrupted/ineffective, retreat must be at least 2 hexes. • Victorious attackers may advance 1 hex. |
| M | • Losing unit(s) disrupt or flip to ineffective side. and retreat 1–3 hexes. • If primary losing unit already disrupted/ineffective, retreat must be at least 2 hexes. • Victorious attackers may advance 1 hex. | • Primary losing unit loses one step. • Losing unit(s) disrupt or flip to ineffective side and retreat 3 hexes. • Victorious attackers may advance 2 hexes. |
Bombardment Results
| Result | If defending unit passes morale check | If defending unit fails morale check |
|---|---|---|
| Dc | • No Effect: all units remain in position. | • Defending unit disrupts or flips to ineffective side. If already disrupted, no further effect. |
| Dr | • No Effect: all units remain in position. | • Defending unit disrupts or flips to ineffective side. If already disrupted, defending unit retreats. |
| Dx | • Defending unit disrupts or flips to ineffective side. If already disrupted, defending unit retreats 1–3 hexes. | • Defending one-step units eliminated. • Defending two-step units reduced. |
| Dm | • Defending one-step units eliminated. • Defending two-step units reduced. | • Defending one-step units eliminated. • Defending two-step units reduced and routed. |
All "A" and "–" results are no effect.
Little Round Top Scenario Rules
12.0 Introduction
12.1 Historical Background
George Meade's Union Army of the Potomac had taken up a strong position southeast of Gettysburg after being drubbed north and west of town on 1 July by Robert E. Lee's Confederate Army of Northern Virginia. The southwestern anchor to the Union position was to have been the dwindling end of Cemetery Ridge and the rugged slopes of Little Round Top. The end of the line was spotted by Confederate scouts, and Lee planned to send James Longstreet's First Corps on a long march to hit the flank and roll up the Union line.
While Longstreet marched, the Union commander on that portion of the field, Dan Sickles of the Union 3rd Corps, thought his position vulnerable to Confederate artillery on high ground a mile to the west. At noon he led his corps forward to occupy it. The move stretched his line but put the corps astride the planned Confederate axis of attack. Longstreet was forced to alter his planned route to swing farther east than originally planned—his command too was stretched over a longer front.
The Confederates struck at 4:00 p.m., just as Meade had ordered Sickles withdraw to his original position. There was nothing for it now but to fight, Sickles battling for time while Meade hurried reinforcements to him. If he lost the race, the Union flank would be turned and the army all-but trapped.
12.2 Scenario
One player controls the Confederates and attempts to drive back or destroy the Union forces. The other player controls the Union forces and attempts to prevent it.
12.3 Standard Rules
All standard rules apply. Rule 15.0 lists one new rule for this scenario. Game scale is:
- Turn: 45 minutes
- Hex: 176 yards
13.0 Set Up
13.1 Unit Colors
- Confederate Forces: gray
- Union Forces: dark blue
13.2 Game Length & First Player
The game consists of five turns. Place the Turn marker in the 1545 box of the Turn Record Track. The Confederate player is the first player.
13.3 Confederate Set Up (first)
13.3A On Map
- Formation Hd (10 counters): unstacked on any hex in the line 0117–1112 inclusive.
13.3B Reinforcements
- Formation Mc—Kershaw (2 counters): 1630/E (0117)
- Formation Mc—Semmes (2 counters): 1630/E (0117)
13.3C Optional Reinforcements
- Formation Mc—Wofford (2 counters): 1715/E (0117). Confederates −1VP if committed.
13.4 Union Set Up
13.4A On Map
- Formation 1/3:
- 2-Lft in 0808
- 2-Rt in 0609
- 3-Lft in 0410
- 3-Rt in 0211
- Formation I: US-SS anywhere N of 09xx and on or E of the above Union units.
13.4B Reinforcements
- Formation 1/5 & one artillery (6 counters): 1545/B (0102)
- Formation 1/2 (4 counters): 1630/ C (0105).
- Formation 2/5 & one artillery (3 counters): 1715/A (0501).
14.0 Victory Conditions
14.1 Victory
The Confederate player wins a victory at the end of the game by gaining at least 5 VP out of the 9 VP available. Otherwise, the Union player wins.
- 2VP for occupying Little Round Top (hex 0805)
- 1VP each for occupying Wheatfield and Devil's Den hexes (0308 and 0808—2 VP possible).
- 1VP each for occupying entry hexes (A, B, C, D, and E—5 VP possible).
15.0 Additional Rules
15.1 No step loss recovery
Neither player may recover any lost steps. Units may recover from disruption and ineffectiveness per 11.3.
16.0 Notes
16.1 Designer's Notes
One of three games covering a critical part of a larger battle, this was the cleanest of the three to design, as this portion of the field was physically separate from other points of action. The one important design decision was to cut the Peach Orchard (off the map from hex 0117) to keep the map and counter count within game format, while presenting the big brigades in counter-pairs. It was really an easy decision as the fight there drifted northeast, away from the main action portrayed here.
The victory conditions took some massaging as it was critical to determine just what constituted a Confederate "victory" for game purposes. We finally settled on the historical requirement, that they should end in position to drive north along Cemetery Ridge (north of the 01xx hex column), but that controlling certain key points on the map would also yield benefits during further fighting.
16.2 Confederate Player Notes
You have an initial advantage in numbers and troop quality but will face considerable Union reinforcements. Make hay while the sun shines.
Your best bet is to follow the historical approach, sending one of Hood's brigades toward each of Little Round Top, Devil's Den, Houck's Ridge (the woods north of the Den), and the Wheatfield. Keep your artillery close to the center of the line and use it as needed for additional punch. This attack will stretch the Union line, making any breakdown of a single unit more costly. When McLaws joins the battle, you should have set him up for a concentrated knockout punch.
Taking all five entry hexes is possible but hedge your bets by grabbing the other victory hexes, even if it means a short diversion of the main drive.
16.3 Union Player Notes
You'll know how Sickles felt by the end of the first turn—a gray tide sweeping toward a thin line. You can't be strong everywhere, so adopt a strongpoint defense around the non-entry victory hexes and wait for reinforcements. You can afford to give ground in the center because it will be easiest to launch counterattacks there.
One of your most critical decisions will be where to deploy Caldwell's division (1/2). It will be tempting, and may be necessary, to spread it along the front, but if you can use it for a single blow against one section of the Confederate line you may crumple it, causing a fatal delay in the Rebel advance.
17.0 Orders of Battle
17.1 Confederate
Hood's Division / First Corps
- Anderson's Brigade (1,875 infantrymen)
- Benning's Brigade (1,425 infantrymen)
- Law's Brigade (1,925 infantrymen)
- Robertson's Brigade (1,750 infantrymen)
- Henry's Artillery Battalion (19 cannon)
McLaws' Division / First Corps (part)
- Kershaw's Brigade (2,175 infantrymen)
- Semmes' Brigade (1,325 infantrymen)
- Wofford's Brigade (1,400 infantrymen)
17.2 Union
1st Division / 2nd Corps
- 1st Brigade (850 infantrymen)
- 2nd "Irish" Brigade (525 infantrymen)
- 3rd Brigade (975 infantrymen)
- 4th Brigade (850 infantrymen)
1st Division / 3rd Corps (part)
- 2nd Brigade (1,700 infantrymen)
- 3rd Brigade (1,400 infantrymen)
- US Sharpshooters (475 infantrymen)
1st Division / 5th Corps
- 1st Brigade (650 infantrymen)
- 2nd Brigade (1,400 infantrymen)
- 3rd Brigade (1,325 infantrymen)
2nd Division / 5th Corps
- 3rd Brigade (1,475 infantrymen)
Artillery (about 30 cannon drawn from a half-dozen batteries)
Terrain Effects Chart (TEC)
- Clear: 1 MP to enter. No effect on combat.
- Light Woods: 1 MP to enter. Defender adds +1CF to defense total; if any attacker is attacking from a clear hex, defender adds an additional +1CF for each clear hex. Blocks artillery line of sight unless artillery is on a hill. Bombardment −1CF per artillery unit bombarding into hex.
- Deep Woods or Devil's Den: Only infantry can enter; must stop upon entry. Defender adds +2CF to defense; if any attacker is attacking from a clear hex, defender adds an additional +1CF for each clear hex. Blocks artillery line of sight unless artillery is on a hill. Bombardment −2CF per artillery unit bombarding into hex.
- Hill: 1 MP to enter. No effect on combat or ZOC. Blocks LOS unless bombarding unit and defending unit(s) are both on hill hexes. Light Woods on a hill blocks all LOS.
- Road: ½ MP if starting, moving, and ending on a road. 1 MP if starting, moving, or ending in a non-road hex (see 4.4). Ignore other terrain in hexes entered and on hexsides crossed. No effect on combat (use other terrain in the hex).
- Stream (Plum Run): Infantry & cavalry +1 MP to enter, artillery must stop after entering unless travelling on a road. If any attackers are attacking out of stream hexes, defender's CF is increased +1CF for each such hex.
- Brook (in addition to any other terrain): Artillery must stop after entering.