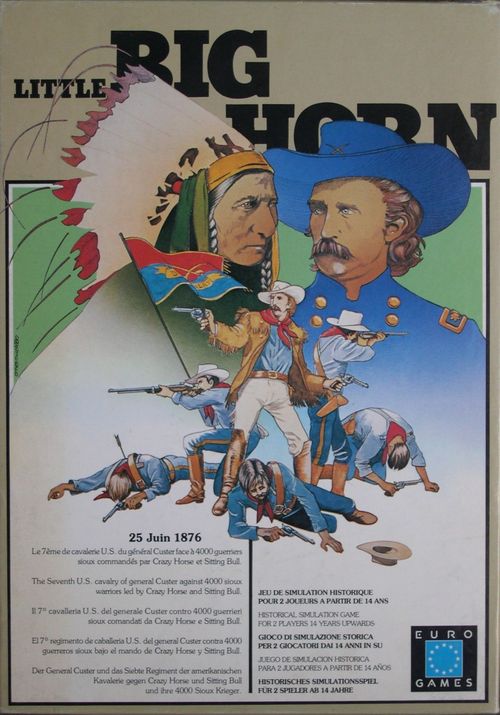
Little Big Horn
Little Big Horn Rulebook
Table of Contents
Table of Contents
Introduction
Little Big Horn is a game which simulates the battle of the same name, which was fought on June 25th, 1876 between troops of the United States Army and those of allied Indian tribes. The game is played over 10 game turns and each side is represented by one or more players.
1. Components
The game includes:
- A three-dimensional board representing the battlefield. It contains the valley of the Little Big Horn (light green), surrounded by a plateau (light brown), on which are mountains (dark brown) and a rocky area (gray). A hexagonal grid is superimposed on the map to regulate movement.
- 217 counters: 57 Indian counters, 63 U.S. counters, 24 cavalry charge markers, 60 smoke markers, 12 stop markers, and a game-turn marker.
- 2 player aids containing charts, tables, and a rules summary.
- A sheet for off-map Indian movement.
- A die to resolve combat.
- The rulebook.
2. Counters
Indian Tribes
They are represented by 44 warrior counters and 6 chief counters, divided into 8 tribes:
- Hunkpapa: 10 warriors and 2 chiefs (Gall and Sitting Bull)
- Oglala: 5 warriors and 1 chief (Crazy Horse)
- Cheyenne: 5 warriors and 1 chief (Two Moon)
- Miniconjou: 5 warriors and 1 chief (Hump)
- Sans Arc: 5 warriors and 1 chief (Spotted Eagle)
- Brulé: 5 warriors
- Blackfoot: 5 warriors
- Arapaho: 4 warriors
All Indian warriors and chiefs are mounted. Warrior counters have two sides: one represents the entire group and the other the group reduced by half (see the Firing and Melee sections). Only the most important leaders are represented, which explains why some tribes have no chief counter.
There are also 7 tribe counters: they serve to indicate the movement of tribes on the off-map movement sheet.
U.S. Army Troops
There is the 7th Cavalry (18 counters including 3 scouts) commanded by Custer, Reno, and Benteen, the 6th Infantry Regiment (8 counters including 2 Gatling guns) commanded by General Terry; and the 2nd Cavalry and 7th Infantry Regiments (5 and 7 counters respectively) commanded by Colonel Gibbon. Cavalry units have two counters: one mounted and one dismounted. Except for Gatling guns and scouts, all the U.S. counters have two sides: one represents the entire unit and the other the unit reduced by half (see the Firing and Combat sections).
Charge Markers
These are placed on U.S. cavalry units which are charging.
Smoke Markers
These are placed on units which fire in order to track which ones have fired and which have not (see the Firing section).
Stop Markers
These are placed on Indian units which are forced to stop by U.S. defensive fire.
Turn (TOUR) Marker
It is used on the track labeled 1 to 10 to indicate the game turn.
3. Preparing to Play
Set up the board by placing the mountain pieces on the corresponding locations (A on A, B on B, etc.). Then, either randomly or by mutual agreement, each player chooses a side: the Indian tribes or the United States troops. The Indian player sits on the Indian side of the camp and the opposing player on the opposite side. Each player receives their counters and a player aid card. The Indian player also receives the off-map movement sheet. If there are multiple players on a side, they are divided by tribe or regiment. The turn marker is placed on space 1.
4. Starting Positions
The Indian player places Chief Sitting Bull, 5 Hunkpapa warriors and the 4 Arapaho warriors inside the Indian camp (no more than one counter per hex). These counters cannot leave the camp before the second game turn.
The Indian player then divides the rest of the tribes among zones 4, 5, and 6 of the off-map movement sheet using the corresponding tribe counters. To keep the arrangement secret, the sheet should be hidden using the box lid.
The U.S. player starts the game by entering the entire 7th Cavalry on the east side of the map. In the 5th game turn, the 6th Infantry will also enter on the east side, while the 2nd Cavalry and 7th Infantry will enter in zone 3 on the north side.
5. Victory Conditions
The game lasts for 10 turns. At the end of turn 10 the victory conditions are checked.
Strategic Victory
The U.S. player wins a strategic victory if they have a counter in the Indian camp and have more counters than the Indian player.
The Indian player wins a strategic victory if they have [at least] 10 more counters than the U.S. player and there are no U.S. counters in the Indian camp.
Tactical Victory
The U.S. player wins a tactical victory if they have a counter within 4 hexes of the Indian camp and have more counters then the Indian player. The U.S. also wins a tactical victory if they have a counter in the Indian camp and the Indian player has at most 5 more counters than the U.S.
In all other cases, the Indian player wins a tactical victory.
Important: a reduced unit is equivalent to half a counter at the end of the game.
Automatic Victory
If at any point during the game, the U.S. player is the only occupant of the Indian camp, or eliminates all 6 Indian chiefs, they automatically win.
If the Indian player eliminates all 5 U.S. officers, they automatically win.
If any automatic victory condition occurs, the game ends immediately, without playing all 10 game turns.
N.B.: The historic result was an Indian strategic victory.
6. Turn Sequence
The U.S. player starts each game turn: they first conduct offensive fire (except on the first turn, since they have no units on the map), then move counters, and finally resolve melees. Each phase is distinct from the previous one. In other words, once a player has begun to move, they cannot fire, and they cannot move once melee has started.
Once the U.S. player has resolved all their melee attacks, it is the Indian turn. The Indian player starts by rolling a die to determine how many tribes are available for offensive fire and melee that turn (see the Indian mobilization table on the player aid card). They then conduct offensive fire and movement. The latter begins with off-map movement (see section 11), after which the counters on the board move. During the Indian movement phase, the U.S. player can conduct defensive fire. This is the only part of a game turn in which two phases are performed simultaneously. Once the Indian player has finished moving, they conduct melee. [The rules don't mention the Indian mobilization in any more detail. The Indian player rolls a die and consults the table on the player aid sheet. The number in the right-hand column is the number of tribes that can not fire or attack this turn. Tribes that have been completely eliminated count towards this number.]
When the Indian player has finished their melees, the U.S. player moves the turn marker to the next space and starts a new turn. Note that the box for the fifth turn contains an "R" to remind the U.S. player that they receive reinforcements that turn.
7. Zones of Control
Each unit has a zone of control in the 6 hexes surrounding it.
Exception: Indian chief and U.S. officer counters only control the hexes they occupy, not the adjacent hexes.
A counter cannot cross an enemy zone of control. It must stop movement when it enters a hex adjacent to an enemy unit [that has a ZOC]. During the melee phase, all counters in an enemy zone of control will fight.
A counter that starts its turn in an enemy zone of control may leave during its movement phase. It must enter at least one free (not enemy controlled) hex before entering another enemy ZOC. Otherwise, it cannot move.
Zones of control may be modified by terrain. A unit at the bottom of a plateau does not control the hexes at the top; a unit at the edge of a plateau does control the hexes at the bottom. Furthermore, forest, mountain, rock, and Indian camp hexes are not controllable [by adjacent units]. Hexes of these terrain types can only be controlled by occupying units. However, a unit on one of these hexes does control the plains or plateau hexes it is adjacent to and therefore requires enemy counters in them to attack.(*) In other words, for such a counter melee is optional but for the adjacent counters it is mandatory. Finally, the zone of control of a unit does not extend from one side of a river to the other unless there is a ford.
(*) The rocky area (gray) is a special case: it is only accessible from the plateau because the side adjacent to the plains is a cliff. Any movement or combat is impossible between the rock and plains hexes.
8. Command
U.S. officer and Indian chief counters affect the game by the command influence they have over other counters. They cannot fire or melee themselves, but they can increase the ability of troops under their command.
U.S. Officers
General Terry can command all U.S. troops. Colonel Gibbon can command the 2nd Cavalry and the 7th Infantry. Lieutenant Colonel Custer, Major Reno, and Captain Benteen can command the 7th Cavalry. Command extends for 5 hexes from the officer counter. A line of command cannot cross a river (except at a ford), impassable terrain, or an enemy zone of control, even if the hex is controlled by a friendly counter.
Figure 2: In this example, Custer cannot command any of the U.S. units:
- Because of the river (which has no ford) and the Indian zones of control, the 7th Cavalry units cannot trace a line of command.
- The infantry unit belongs to the 6th Infantry and therefore cannot be commanded by Custer.
There is no limit to the number of counters which can be commanded, provided that they are within 5 hexes of an officer and he has the right to command them.
Effects of Command
In U.S. fire phases, dismounted cavalry, infantry, and Gatling guns receive a +1 to their die rolls if in command.
In fire and melee phases, counters in command which suffer a retreat result (see the player aid) have a choice between retreating or staying in place.
Only cavalry units in command at the start of their movement phase can charge.
Indian Chiefs
They have no influence on firing. However, they have influence on attacks conducted by warriors of their tribe. The presence of a chief in melee allows the Indian player to add 1 point to the die roll. Crazy Horse, the most valiant of the Indian chiefs of the period, adds 2 points instead of 1. Having both Gall and Sitting Bull in the same fight also adds 2 points to the die roll.
To affect an attack, a chief must be in the same hex as one of the attacking warrior units. A chief cannot affect an attack conducted by a different tribe, nor a U.S. attack.
9. Firing
General Rules
Indian unit, U.S. cavalry, and scouts are only allowed one firing phase per game turn. Dismounted U.S. cavalry, U.S. infantry, and Gatling guns are entitled to two firing phases: offensive fire early in the U.S. player's turn and defensive fire during the Indian movement phase. Each counter can only fire once per phase, except for Gatling guns which may fire twice per phase. A counter which has suffered enemy fire cannot be targeted again until the next firing phase.
At the beginning of each firing phase, the firing player has the opportunity to use some or all of their pawns against the enemy. They make their shots in the order they wish, in each case designating the firing unit and its target. Each shot must meet three basic conditions:
- The firing unit cannot be in an enemy zone of control.
- The target must be at most four hexes away.
- The target cannot have a unit friendly to the firing unit in its zone of control.
Note: This rule may seem abstract but it covers real situations: 1. A unit in contact with the enemy must first defend itself before firing on others. 2. You do not take the risk of firing on enemy troops close to your friends.
Result of Firing
To determine the result of firing, roll the die and consult the corresponding firing table (U.S. or Indian) found on the player aid. Next to the number rolled is the result. Two factors may alter the die result and therefore the effects. The first is the human factor. [Some] U.S. units in command fire more effectively (+1 to the die roll), and a unit fires less effectively when it is reduced (-1 to the die roll). However, the most important factor is the terrain. Forests, plateaus, mountains, and Indian tents are all features - natural or otherwise - that alter the firing conditions and therefore its effects. Generally speaking, these hexes offer greater protection to the units in them: units that fire at them receive -1 to their die rolls. All of this is summarized on the player aid card.
Obstacles
Units cannot fire across forest, rock, mountain, or Indian camp hexes at targets located beyond them. This is also true of hexes occupied by counters: one can shoot at them, but not counters behind them. In case of dispute, draw an imaginary straight line from the center of the firing unit's hex to the center of the target's hex. If this line passes through a hex containing an obstacle, even partially, the shot is impossible.
Exception: If the obstacle is located below both the firing unit and the target, the shot is possible (see Figure 3).
However, it is possible to fire from one mountain hex to another as long as they share a side. The same applies to forest, rock, and Indian camp hexes.
The Third Dimension
This is an important aspect of the game. If you consider the valley of the Little Big Horn to be at level 0, the plateau surrounding it forms level 1 and the mountain and rock hexes are at level 2. To fire from one level to another, it is necessary for the higher counter - shooter or target - to be located on the edge of the plateau, mountain, or rocky area. Otherwise firing is impossible.
The higher unit has two advantages. If it is firing, it has a range of 5 hexes instead of 4. If it is targeted, the lower firing unit must subtract a point from its die roll when consulting the firing table.
Figure 3: The 2 Hunkpapa Indian units and the mounted U.S. cavalry unit are on a plateau. The Oglala unit is in a forest on a plateau. The reduced U.S. infantry (3-6) is in a forest. The other units are on the plain.
The 6-6 U.S. unit and the Gatling gun can fire at the reduced Hunkpapa unit (4-12) and the Oglala unit. For the first of these, 1 is subtracted from the die roll. For the second, 2 is subtracted because the target is in a forest on a plateau. The U.S. 3-6 infantry can fire at the Oglala unit with a penalty of 3 points (plateau + forest + reduced unit). It cannot fire at the Hunkpapa 4-12 because the U.S. 6-6 unit blocks its line of fire. None of these units can fire at the 8-12 Indian unit because it is not at the edge of the plateau.
The U.S. 8-12-9 unit can fire at the Hunkpapa 4-12 as it is also on a plateau so the Gatling gun below it does not block its line of fire. This fire is resolved with no penalty.
Combined Fire
Several units can fire at the same target if they do so at the same time. The player announces how many units are involved and rolls the die as many times as there are firing units. Each die roll is treated separately but the results are cumulative. In other words, a unit which is reduced twice is eliminated. A unit forced to retreat twice retreats two spaces instead of one. All units are considered to have fired even if the target is eliminated after the first die roll. A unit cannot undergo more than one combined [or any] attack per firing phase.
U.S. Defensive Fire
Reserved for dismounted cavalry, infantry, and Gatling guns, U.S. defensive fire follows the same procedure as offensive fire but can target counters the Indian player is trying to move as well as non-moving counters. When an Indian counter comes within range of one or more U.S. units, the U.S. player may announce that they are firing. The Indian player must interrupt movement. The U.S. player designates the firing units and rolls the dice. If the shot is unsuccessful, the Indian player continues moving normally. If it is successful, a Stop marker is placed on the Indian counter, which cannot move again until the next turn. If the counter is eliminated it is simply removed from the map.
Gatling Guns
These have a firing range of 5 hexes (or 6 hexes if the Gatling gun is on the edge of a plateau or mountain and the target is lower). They are also entitled to fire twice consecutively in each offensive and defensive fire phase. The two shots can be made against either the same target or two targets in adjacent hexes. When in command, Gatling guns receive +1 to their die rolls.
Smoke Markers
In some turns, it may be important to keep track of which units have fired. To avoid confusion, each time a unit fires, place a smoke marker on it. At the end of the firing phase, all the smoke markers are removed.
Firing on U.S. Officers and Indian Chiefs
A U.S. officer or Indian chief is never eliminated by fire. However, they can be targeted, whether or not they are accompanied by troops. In case of a hit, they are forced to retreat (or stop, if it was U.S. defensive fire). If accompanied by troops, they suffer the normal result shown on the fire table. [It is unclear what happens if they are with troops and get a DE result.]
10. Movement
During the movement phase, a player may move some or all of their counters, using some or all of the movement allowance of each. The movement allowance is at the bottom right of the counter: it is the number of movement points the counter can use each turn. Each hex costs a number of movement points to enter it, depending on the terrain type. The player aid has a table summarizing the different types of terrain and their movement point costs. Unused points cannot be transferred from one counter to another, nor saved from one turn to the next.
Counters can move through hexes occupied by friendly counters, but there can only be one counter per hex at the end of the movement phase, except for U.S. officers or Indian chiefs, which can be in the same box as unit counters [and other officers and chiefs, as per the +2 firing bonus for Gall and Sitting Bull together]. Once a counter enters an enemy zone of control, it must stop there and will be forced to melee in the next phase.
Any counter that wants to cross the river without using a ford must be on the river bank at the start of its movement phase.
No counter can move from the rocks directly to the plain (or vice-versa). They must go through the plateau.
Figure 4: Arrows with Xs indicate prohibited moves. The numbers indicate the total number of movement points spent. ZDC = Zone of Control of the 4-12 unit.
Cavalry Charges
Instead of making a conventional attack, a [mounted] U.S. cavalry unit has the ability to charge and thereby increase its combat strength. But to charge, the cavalry unit must meet three conditions:
- It must be in command.
- It must not be in an enemy zone of control.
- It must be at least three hexes away from the unit it is charging, by the shortest route.
Furthermore, the last two hexes of the charge must only cost one movement point each. In addition to these conditions, the charge must comply will all normal movement rules.
Mounting and Dismounting
The U.S. player can mount and dismount cavalry units. This costs the unit four movement points. Mounting takes place before he unit moves, dismounting afterwards. Neither option is possible if the unit is in an enemy zone of control. Whenever a unit mounts or dismounts, the player exchanges the counter with its equivalent on horseback or foot, as appropriate. If the unit is reduced, the replacement counter is reduced as well.
11. Indian Off-Map Movement
In each game turn, the Indian player can move some or all of the tribe counters on the off-map movement sheet. For each counter, these are the options:
- Move the tribe counter from one area to an adjacent area (e.g., from Zeon 4 to zone 5). In this case the movement remains secret.
- Enter the tribe on the map. In this case, the tribe counter is removed and replaced by the tribe's warrior units and chief(s). These counters are immediately placed in any of the hexes on the map edge corresponding to the off-map area they were in. Each counter moves normally, the entry hex counting as the first hex of movement.
Important! At the end of the fourth turn, no tribe can be in zone 3 of the off-map sheet. [It is unclear if it can be entered after that.]
12. Melee
After a player is done with movement, they can engage in melee with enemy counters adjacent to theirs. During this phase, they are called the attacker and the opponent, the defender. The attacker resolves melees one by one, in the order they prefer. There are three kinds of melee: one counter versus one counter, one counter versus several counter, and several counters versus one. The attacker can choose the combinations they think best provided these two rules are followed:
- No counter, either attacker or defender, can be involved in more than one melee.
- All pieces on either side which are adjacent to opposing pieces must be involved in a melee. Exception: When a counter adjacent to an enemy is not in an enemy zone of control, it is not obliged to attack.
The Indian player must follow one additional rule: units can only attack together if they all belong to the same tribe. Units of different tribes can add their combat strengths in defense but not in attack.
The combat strength of each unit is shown at the bottom left of the counter. U.S. cavalry units have two strength numbers: 8 points in normal melee and 12 points when they charge.
To resolve a melee, divide the combat strength of the attacker by that of the defender. If there are several attackers or defenders, add their strengths together before dividing. The ratio thus obtained corresponds to a column on the combat results table (see the player aid). The attacker then rolls the die: at the intersection of the die result and the ratio column is the outcome of the melee, which is applied immediately.
When calculating a ratio, if necessary round the number in the defender's favor. For example, an attacker with a strength of 8 versus a defender with a strength of 3 gives a ratio of 2.67-1 which is rounded to 2-1.
Combat Results
AR or DR = Retreat. All counters belonging to the attacker (AR) or defender (DR), must retreat one hex. This hex cannot be occupied by another counter(*) or in an enemy zone of control. A counter that cannot meet these conditions remains where it is and is reduced (turned over). The player owning each counter decides where it retreats.
(*) The presence of a U.S. officer or Indian chief does not prevent a unit from the same side retreating.
AE or DE = Elimination. One of the counters of the attacker (AE) or defender (DE) is eliminated and removed from the map. Any others must retreat one hex using the rules given above. The winner of the melee chooses which counter is removed, but the owning player conducts the retreats.
1/2 AE or 1/2 DE = Reduction. This is the same as elimination, but the unit chosen by the winner is only reduced. It retreats with the others.
EX = Exchange. A counter on each side is reduced. There is no retreat. Each player decides which unit to reduce.
Important:
- A U.S. unit which is in command can choose to retreat or stay where it is.
- A unit which is already reduced is eliminated if it is reduced again.
- If a combat ratio is 4-1 or more, it is resolved at 3-1 with a 1 point die roll bonus. Ratios of less than 1-3 are resolved at 1-3 with a 1 point die roll penalty.
Advance After Combat
The winner of a melee can, if desired, move a unit into the hex left empty by the retreat or elimination of an enemy unit. This must be decided before initiating the next melee. The unit must be one that was involved in the melee.
Melees Involving U.S. Officers and Indian Chiefs
During a melee, when retreating or eliminating units, a U.S. officer or Indian chief suffers the same fate as the unit it accompanies. It is not affected by the reduction of this unit, unless the reduction results in elimination. If a chief or officer is alone in a hex and is attacked, it is automatically eliminated.
Melee Examples
Figure 5
In this example the Indians are the attackers and the U.S. the defenders. The Hunkpapa unit is in a forest hex. One unit from each side is in a ford hex.
The Indian player must take two things into account:
- All the U.S. units must be attacked, except for the reduced infantry unit (3-6). This is because the adjacent Hunkpapa unit is in a forest.
- Hunkpapa and Oglala units cannot attack together.
The Indian player decides to melee as follows:
- The Oglala unit in the ford attacks the scouts on the other side of the ford. The melee will be at 2-1.
- The Hunkpapa unit will attack the adjacent 6-6 infantry. The melee will be at 1-1.
- Chief Crazy Horse, the 8-12 unit with him, and the 8-12 unit on his right attack Custer and the unit with him. Total attacking strength: 16. Total defending strength: 4. The melee will be at 4-1.
- Finally, the 8-12 unit to the left of Crazy Horse attacks the 8-12-9 unit at 1-1.
The Indian player must now decide the order in which to resolve the melees. He chooses to first resolve the one which is most favorable: the one involving Custer. The battle is 4-1, so it will be resolved at 3-1 with a bonus of 1 point to the die roll. Moreover, the presence of Crazy Horse adds a 2-point bonus, so 3 points will be added in all. As the unit accompanying Custer is already reduced, there is no need to roll the die: Custer and the cavalry unit are eliminated. Crazy Horse and a group of Sioux warriors proudly occupy the vacated hex. The Indian player then rolls the die to attack the scouts. He gets a 2: exchange! Both units must be reduced. But as the scouts cannot be reduced, they are eliminated. The Oglala pawn takes the opportunity to cross the river thanks to advance after combat. The player now resolves the Indian attack against the 8-12-9. The result is a 4: the U.S. unit must retreat. Since it cannot without entering an enemy zone of control, it stays where it is and is reduced. Finally, the Hunkpapa unit rolls a 2 and is forced to retreat. The U.S. player decides to move his 6-6 into the forest.
Figure 6
Here, the U.S. player is the attacker. The grey units represent the initial positions and the white units the final positions. [This example, unlike the previous one, starts in the movement phase.]
Only one of the Oglala units can be charged. The other is in a forest hex (requiring 2 movement points). The U.S. player decides to charge with two cavalry units and attack the second Indian unit with his third cavalry unit and his dismounted cavalry. The first melee has 24 points for the attacker against 8 for the defender: the combat ratio is 3-1. For the second melee, the attacker has 8+6=14 points against 8. The combat ratio is 1.5-1.
Notes on the New Edition
We primarily sought to improve the game by making it faster. The map was made smaller, the units' movement allowances were increased, the number of counters was decreased and the three scenarios (of which two were greatly unbalanced) were merged into one. This has all helped bring the game down to ten turns, for a play time of 2.5-3 hours in our tests. To increase the realism, several mechanisms have been added (Indian off-map movement, Indian mobilization, and U.S. defensive fire). They are inspired by the conditions of the time. The fire and melee tables have been changed to better highlight the strengths of each side, and the command rules have been enhanced and more directly integrated into the dynamics of play. Finally, this new edition fixes an unforgivable oversight of the previous one: the names of the principal Indian chiefs are written in full on the counters. Remember Crazy Horse!