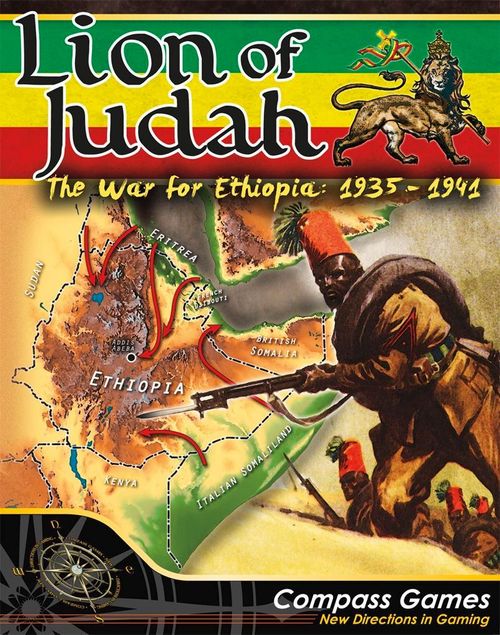
Lion of Judah: The War for Ethiopia, 1935-1941
Lion of Judah: The War for Ethiopia, 1935-1941 Rulebook
Table of Contents
Table of Contents
-
- 1. Introduction
- 2. Components
- 3. Setup
- 4. How to Win
- 5. The Turn Sequence
- 6. Events
- 7. Reinforcements & Resource Points
- 8. Stacking
- 9. Supply
- 10. Support Counters
- 11. Movement and Terrain Effects
- 12. Combat
- Extended Sequence of Play
- Playbook (Scenario Rules)
- Random Events Summary
- Errata and FAQ (through 3 June 2019)
1. Introduction
The scenarios use all of the standard rules, combined with the specific rules of each scenario. Each game turn (GT) represents one month.
When looking up references in the rules, the format (x.xx) refers to rules in this rulebook, and (PB x.xx) refers to rules in the Playbook.
The following abbreviations are used: CRT, the combat results table; D6, a roll of a six-sided die; DRM, die roll modifiers (that is, positive or negative values added to the values obtained on the die by the player; all DRMs are cumulative unless otherwise specified); and TEC, the terrain effects chart.
2. Components
2.1 General
The components of LoJ include:
- This rulebook
- One playbook
- One 22" x 34" map
- 352 counters
- Five player aid cards
- One scenario setup card
- One random events card
- Two six-sided dice
2.1.1 Contacting Compass Games
If any of the components are missing or damaged, you may contact Compass Games by email at [email protected] or check the game's line on the website at www.compassgames.com.
2.1.2 Live questions and answers
Help or general questions about the game can be posted in the game folder Lion of Judah: The War for Ethiopia, 1935-1941 at www.consimworld.com (WW2 – North Africa / Med Front subfolder) or on the page of the same name at www.boardgamegeek.com.
2.2 Game map, cards and tracks
The map represents the Horn of Africa region in the mid-1930s. A hexagonal grid has been superimposed over the map to regulate the placement and movement of units. Each hex represents approximately 46 miles (75 kilometers) from side to opposite side. A unit may only be in one hex at any one time. Each hex contains natural and/or man-made terrain features, which may affect the tracing of supply (9), the movement of units (11.), and combat between units (12.).
Half-hexes do not contain a hex number and, therefore, are not in play and no unit may enter them.
The charts and tables printed on the map are used to remind and resolve various game functions. Additional charts and tables are found on the player aid cards (one per player). Their use is explained in the appropriate rules sections below.
2.3 Counters
The game includes 352 counters, many of which represent combat formations; others are supplied as informational markers and memory aids. All headquarters (HQs, 10.2) and any counter with a movement factor are units; the others are markers. Each unit shows various pieces of information, as shown in the unit key. This includes the unit's nationality, historical identification, size, movement and combat factors (often as separate attack and defense factors), turn of entry and/or hex of entry, and whether the unit is a replacement unit (represented by a dot in the upper left corner). Many units have more than one side, representing the various strength steps of the unit (2.3.9).
The counter mix is fixed except for status markers (out of supply, activated, etc.), resource point (RP) markers and paved road markers. If for some reason a player needs one of those markers and none is available, they may freely use other means to represent the necessary markers until one becomes available again (a coin, a handmade marker, etc.).
Headquarters (HQs) also have two sides, but do not represent separate steps. Instead, the front side represents the HQ unit in combat support mode and the reverse represents the HQ unit in movement mode (10.2).
Irregular units have a shield-and-spear graphic, while regular units use NATO symbols.
2.3.1 Unit scale
Divisions are in many cases divisions, brigades, regiments, levies of warriors and irregular tribal bands. HQs represent corps-level artillery, engineers, armored assets and transport, as well as their administrative and command centers. Truck units represent enough motorization to carry approximately one brigade of men and materiel; air markers represent 50 to 75 aircraft of various types, depending on the scenario.
2.3.2 Example of a combat unit
This unit is the Italian Sabauda (Sb) division. It is a 4-step infantry unit with an attack factor of five, a defense factor of 7 and a movement factor of four. The E is the Setup Code, and indicates that it starts in Eritrea in the 1935-36 scenario.
2.3.3 Example of an HQ unit
This is the British Northern Front HQ. It starts the 1940-41 scenario in Anglo-Egyptian Sudan (the setup code SD) and is shown on its combat support (CS) side (10.2).
2.3.4 Nationalities
The nationality of each combat unit is indicated by its color scheme. The armies of the different tribal factions that make up the Ethiopian Empire are distinguished by a colored bar (see unit key). The Italians in 1935 are in turn subdivided by the fill color of the unit type symbol (2.3.6).
European units include all Italian regulars (but not colonial regulars), German units, British Commonwealth units, and Free French units. This is important for forced march (11.5) and for movement in tugs (PB 13.6.7.3).
Italian colonials include both Italian colonial irregulars and Italian colonial regulars.
Irregular units include Italian colonial irregulars, Ethiopian tribal levies (PB 13.6.9), and Ethiopian guerrilla units (PB 14.6.4.1).
2.3.5 Historical identification
Each unit is identified by a number and/or an abbreviation of its name. The historical abbreviations are shown on the back of the unit key. Ethiopian tribal levies include tribal information on the non-?-6 side of the counter; this has no effect on the game, except if the optional rule Tribal Friction (12.7) is used.
2.3.6 Unit sizes and types
The unit size is shown in the unit key. For game purposes, units are classified into division-size units and non-division-size units.
The symbols in the box in the center of the counter indicate the unit type. The unit types are shown in the unit key.
Italian regular units in 1935-1936 have the following color codes inside the unit type box:
- Italian regulars
- Italian Black Shirt militia regulars
- Italian Eritrean colonial regulars
2.3.7 Combat factors
Ethiopian units and Italian colonial irregulars have combat factors that begin the game hidden from both players (on their '?' side), until the unit enters combat (12.3). If the unit has only one combat factor, it is used both when attacking and when defending.
Many other units have two combat factors, the attack factor used when attacking and the defense factor when defending (see unit key). Units with an attack factor of zero and a defense factor may attack, but may not be taken for the first step loss in a combat (12.11).
Some units have no combat factors (trucks and HQ units, for example) – where the attack factor should be, they have a *, CS, or M. These units may never attack and are automatically eliminated if an enemy combat unit enters their hex (11.6) or if they are attacked (12.13).
2.3.8 Movement factor
This is a measure of a unit's ability to move from hex to hex across the map. Units pay different movement costs for entering different types of terrain (see the terrain effects chart, TEC).
Units are either foot units (moving mainly on foot or on horseback), or motorized units (moving primarily by vehicle), with each class of unit paying a different cost per hex.
Motorized units are armor, light armor, HQs, motorized infantry and trucks (including units or RPs motorized by trucks ~ 7.3.2; 10.3). All other units are foot units.
2.3.9 Steps
HQs have no steps, but all other units have from one to four steps, as indicated on the left side of the counter, next to the unit type graphic.
Example: This Black Shirts 21A counter has four steps.
A step is the unit's ability to absorb losses before being eliminated. Note that all Ethiopian levies and Italian irregular colonial units are one-step units.
If a two-step unit takes a step loss (12.11), it is reduced by flipping the counter to its reverse (the side with the lower combat factor). If a one-step unit (or an already reduced two-step unit) takes a step loss, it is eliminated and removed from the map. If a reduced two-step unit is replaced (7.3.3), add the step by flipping it back to its full-strength side.
Some units in LoJ have three or four steps, and are represented by two counters: a starting unit and a replacement unit. When a four-step unit takes a second step loss (for example, going from its three-step side to its two-step side), instead of being eliminated it is replaced by its replacement unit (having the same identification, but with reduced factors). A dot in the upper left corner of the unit indicates that it is a replacement unit. Adding steps through replacement functions works in a manner similar to that described above. At no time may the replacement unit and the starting unit both be in play at the same time.
Example: The Italian regular infantry unit SL is at full strength and takes three step losses. The Italian player removes this SL unit from the map and places its replacement unit in the same hex on its reverse (lower left), going from its four-step side minus three steps = its one-step side. If a step is replaced, the replacement unit should be flipped to its two-step side; if a second step is replaced, the starting unit on its three-step side would replace the replacement unit.
Design note: Due to its unreliability, the Italian Black Shirt militia division Tevere (Tv) has only three steps. It did not fight a single engagement during the entire 1935-36 campaign.
2.4 Breaking down units
In supply (9.), units that have three or more steps may break down during the Mutual Administration Phase (MAP), or as directed by the scenario. To break down, remove one step from the unit and place an appropriate breakdown unit in the same hex. A four-step unit may break down two steps at this time, if desired.
Units only break down into breakdown units of the same nationality; if none is available, the unit may not break down. In addition, Italian regulars must use Italian regular breakdown units, Eritrean colonials must use Eritrean colonial breakdown units, and Black Shirt units must use Black Shirt breakdown units.
A breakdown unit may never receive RPs and if eliminated returns to the breakdown box and so is available at the MAP of a later turn.
Example: At the start of the 1935-1936 scenario, the Italian player wants to create a breakdown unit from the Peloritana division. The Peloritana division has its full complement of steps (four), so the division is flipped to its three-step side, and an Italian regular breakdown counter is placed in the same hex.
Design note: A breakdown unit has a considerably greater strength than the amount lost by the parent unit, because of corps- and army-level support that is represented in an abstract manner in the game.
2.5 Consolidating units
In supply, breakdown units may be used to consolidate a three- or four-step unit during the MAP. To do so, both units (the three- or four-step unit and the breakdown unit) must be in the same hex. The breakdown unit is removed from the map and one step is added to the three- or four-step unit (up to the maximum steps available).
A breakdown unit may only consolidate into a unit that could have formed the breakdown unit when at full strength (2.3.9).
Example: An Italian Eritrean breakdown unit may not consolidate with a Black Shirts division, as the Black Shirts division could not have formed the Eritrean breakdown unit.
2.6 Markers
The use of these markers is explained at the appropriate points in the rules.
- Turn track marker (5.)
- Events (6.)
- Resource points (RPs) (7.3)
- Air (10.1)
- Italian bombing attacks (1935-36 scenario) (PB 13.6.5.1)
- Italian eliminated steps (1935-1936 scenario) (PB 13.4.4)
- Italian fuel available (1940-1941 scenario) (PB 14.6.1.1)
- Italian prestige level (1940-1941 scenario) (PB 14.6.3)
2.7 Die and rounding
A six-sided die is used to resolve combat, activation and other player activities. When a chart or result calls for dividing a value in Lion of Judah, always round 0.5 up unless otherwise indicated.
3. Setup
3.1 Choosing sides and setup
After choosing the scenario from the playbook, each player must decide which side they will command. They then take all the units of their side and separate them into two piles: one for starting units and the other for reinforcement units. Specific setup instructions are given in the scenario rules. There are three scenarios included in the game: the Italian conquest of Ethiopia in 1935-36, the Allied liberation of Ethiopia, 1940-41, and the campaign game, played by playing both scenarios in sequence, with the same player commanding the Italians throughout (PB 14.3.4).
3.2 Control
A side controls all hexes where it currently has a unit, or where it was the last to have a unit occupying the hex. These hexes are considered friendly-controlled. All other hexes are considered enemy-controlled. The scenario setup will specify the initial control of each side. Control changes immediately after a unit with a combat factor enters a hex.
IMPORTANT: Although guerrilla units (PB 14.6.4.1) control hexes, they do not block the tracing of supply of enemy units through or adjacent to their hex (they do prevent tracing supply into the hex they are in, if they are the only units in the hex).
Design note: A unit only controls the hex it is in; there are no zones of control in this game, except in terms of supply blocking.
4. How to Win
4.1 General
In general, LoJ scenarios are won by the attacking player accumulating enough victory points (VPs) or the defender preventing this. In both scenarios, key towns and amba hexes with their names or symbols printed in white are worth VPs.
VPs are also gained or lost by destroying enemy units or by losing friendly units in some situations. See the scenario instructions for more details.
5. The Turn Sequence
5.1 General
Each LoJ scenario lasts a certain number of game turns, with each game turn divided into two player turns. The scenario instructions list which player has the turn as first player in each scenario, as well as any modifications to the game sequence for each scenario.
Example: In the 1935-36 scenario, the Italian player has their player turn first, followed by the Ethiopian player, the two making a complete game turn.
Each game turn is likewise divided into a series of sequenced phases. Each action carried out by a player must be performed in the appropriate phase.
5.2 Sequence of play
The general sequence of play for each scenario is as follows. Actions are performed in the order listed, unless otherwise specified.
a) Mutual Administration Phase (MAP) (note 1)
- i) Add new events if it is a strategic turn (6.)
- ii) Both players bring in reinforcements and replacement points (7.2; 7.3)
- iii) Both players replace/rebuild units (7.3.3; 7.3.4)
- iv) Both players consolidate/break down units (2.4; 2.5)
- v) Both players add or remove motorization markers from units (10.3.2; 10.3.3)
- vi) Both players add or remove trucks to or from the RP storage box (7.3.2)
- vii) Both players build roads (10.2.2)
- viii) One or both players conduct rail or naval movement, if allowed (11.7; 11.8 and the scenario instructions)
- ix) Both players carry out scenario-specific MAP procedures (see scenario instructions)
b) Event Phase
- i) Draw an event and apply the results (6.2)
c) First Player Phase
- i) Movement segment: The first player conducts movement (11.)
- ii) Combat segment: The first player conducts combats with their units (12.)
d) Second Player Phase
- i) Activation segment [1935-36 scenario only]: The Ethiopian player conducts leader activation (PB 13.6.2) for a single leader, repeating steps (ii) and (iii) for that leader before the activation of another leader. Repeat until all desired leaders have attempted to activate.
- ii) Movement segment: The second player conducts movement.
- iii) Combat segment: The second player conducts combats with their units.
e) End of Turn Phase
- i) Both players check supply (9.2)
- ii) All HQs on their M side are flipped to their CS side (10.2.1)
- iii) All Ethiopian leaders are flipped to their front (available) side (PB 13.6.2)
- iv) Remove any air markers still on hexes and roll the die for the delayed return of these markers. Then, all markers in the "Committed" box return to the "Ready" box of that front.
- v) Ethiopian attrition check [1935-36 scenario only] (PB 13.6.3)
Note 1: Many actions in the MAP may be performed simultaneously; however, if the order is important, the first player must perform the action before the second player.
6. Events
6.1 Procedure
Each scenario has its own events, which enter the game on a designated strategic turn, as listed in the scenario instructions. There are two strategic turns in the 1935-1936 scenario (A and B), and two strategic turns in the 1940-1941 scenario (C and D).
When an event is added to the game, it is placed in an opaque container called the Event Pool. All events remain in the event pool until selected and entered into the game.
6.2 Drawing events
During each event phase a player randomly draws a single event from the event pool.
All events are mandatory, and must be resolved immediately when drawn. See the random events player aid and/or the scenario instructions for the specific events. Only No Event markers are returned to the event pool. All others are removed from the game after being played (either immediately or after being held). An event declared to be discarded is removed from the game without resolving any further text.
7. Reinforcements & Resource Points
7.1 General
During the MAP, both sides receive reinforcement units and resource points (RPs) according to the scenario instructions, carry out withdrawals, breakdowns and consolidations on division- or brigade-size units, and conduct other scenario-specific actions.
7.2 Entry of reinforcements
Reinforcement counters are all counters that do not start on the map or that are not available for use on the first turn of a scenario. They enter the game on the turn specified in the scenario instructions, as printed in the upper left corner of the counter.
Example: The Italian unit PS enters the game on turn 5.
Each scenario will specify where reinforcements enter and whether there are any special rules regarding reinforcements. Some events may change the entry turn of certain reinforcements.
Reinforcements may not enter a reinforcement hex occupied by the enemy, but may enter a reinforcement hex that is only enemy-controlled.
Design note: The garrison of a hex blocks all entry, regardless of the strength of the garrison, as an abstraction. For this reason, no attack from off-map is allowed against such garrison units; instead, players are encouraged not to lose those hexes in the first place.
7.3 Resource points (RPs)
RPs are rates of replacements, fuel, ammunition and equipment. They may also represent weapons and ammunition captured from the enemy.
7.3.1 General
RPs are represented by markers, and are used to replace units weakened by combat losses but still in play on the map (7.3.3), to rebuild eliminated units from the dead pile (7.3.4), or to improve the ratio in an attack or defense (10.2.3). RPs are received and used in step increments; each step RP recreates or rebuilds one step of strength for the unit or grants a single column shift in combat.
RPs are associated with a specific nationality. Italian units must use Italian RPs, Allied units must use Allied RPs, etc. RPs may never be captured – instead, if they are ever alone in a hex with an enemy unit (11.6; 12.13), the RP is eliminated. The scenario instructions will have additional rules for obtaining and using RPs.
RP markers have two sides: one showing 2 RPs (or 5 RPs) and the other showing 1 RP (or 3 RPs). When an RP is spent, flip a 2 RP marker to its 1 RP side or remove a 1 RP marker from the map. If you spend from a 5 RP or 3 RP marker, you will need to make change using other RP markers. You may always combine two 1 RP markers stacked together into a single marker, etc. The number of RP markers in the game is not limited by the counter sheet. If additional markers are needed, players may use other markers to represent RPs.
7.3.2 Use of RPs and storage boxes
RPs are stored off-map in the RP storage boxes. The 1935-36 scenario has two RP storage boxes in play (the Northern Front and the Southern Front), while the 1940-41 scenario has five (three Allied boxes and two Italian).
RPs are placed in one of these boxes depending on where they arrive as reinforcements (see scenario rules). Once placed in a storage box, they remain there until used.
RP markers are only placed on the map when they are moved from one RP storage box to another via truck (10.3.1). A truck may only carry a single RP at a time (exception: Increased truck capacity ~ 10.3.4) and may use road movement while carrying an RP. RPs may only be used if they are in an RP storage box (exception: the Ethiopians in the 1935-36 scenario have their own rules for the use and movement of RPs ~ PB 13.6.4).
When an HQ needs to use an RP, the owning player must trace an RP route from an ultimate supply source hex (PB 13.6.6.1; PB 14.6.1) in the (exclusive) region associated with the HQ (inclusive), attempting to use the RP.
The base RP route is four hexes, but any hex entered along the route of contiguous road or rail hexes counts as zero hexes and any hex along a route of dirt track hexes counts as ½ hex. The RP route may not enter hexes containing enemy units. RPs spent for actions that do not require an HQ may be spent from the designated RP storage box without needing to trace an RP route (bribes).
Example: An Italian HQ in hex 1008 wants to spend an RP. The USS on the Northern Front is Massawa (hex 1405). Tracing from Massawa, it uses zero of the 4 hexes to reach Asmara along the connected rail line, then it costs four more hexes to reach the HQ. The HQ spends an RP from the Northern Front RP storage box.
A truck may be placed in an RP storage box at scenario setup or during the MAP, if it is stacked in the associated USS hex. Alternatively, a truck in an RP storage box may be returned to the USS hex during the MAP. Each truck in an RP storage box (up to a maximum of three trucks per box) increases the available RP route for that RP storage box by one hex.
Example: If there were two trucks in the Northern Front RP storage box, HQs up to a distance of 6 hexes would be able to use the RPs from that RP storage box.
If an enemy-controlled unit enters the USS hex associated with an RP storage box, all RPs and truck units in the associated RP storage box are immediately eliminated.
7.3.3 Replacing units
In supply (9.), a reduced multi-step unit still on the map may replace one or more steps by spending one RP per step to be gained during the MAP, unless the unit has a black circle in the upper right corner. The unit being replaced must be stacked with or adjacent to an HQ, which must be able to spend an RP by tracing an RP route. If adjacent, they may not be separated by an impassable hexside.
Example: A single 2 RP marker is used to replace a single step. It is flipped to its 1 RP side and the reduced-strength unit adds a single step.
7.3.4 Rebuilding units
Eliminated units may be rebuilt from the dead pile only according to the scenario instructions, though units with a black circle in the upper right corner may not be rebuilt (although if they are breakdown units, they may return to play via the breakdown process ~ 2.4). Rebuilt units enter the game as if they were reinforcements. Each RP spent allows a unit to rebuild one step (exception: HQs and trucks, see below). The rebuilt unit must arrive at a reinforcement location that can trace supply to the same supply source location where the RPs were spent (if more than one is spent, all RPs must be spent from the same location). A unit may be brought back onto the map this way even if it is not at full strength.
An eliminated HQ may be rebuilt at a cost of two RPs, and an eliminated truck may be rebuilt at a cost of one RP.
Example: The Italian player wants to return an eliminated infantry division to the game. During that turn's MAP, the Italian player receives 2 RPs in the Southern Front RP storage box. They spend one of them to rebuild the eliminated infantry division (it enters play with one step of strength). The unit must arrive as a reinforcement at Mogadishu (the supply source hex associated with the Southern Front RP storage box).
8. Stacking
8.1 General
The maximum number of units that may stack in a hex is the stacking limit. Stacking limits for all hexes apply at the end of the following phases: the MAP, the combat phase and each movement phase. There is no limit to the number of units that may enter or pass through a given hex during a phase or game turn, provided that stacking is met at the end of the phases indicated above (exception: the Ethiopian factions may not pass through each other ~ PB 13.6.1).
8.2 Limits
Ethiopians (1935-1936 scenario): As determined by the scenario instructions (PB 13.6.1); eight Ethiopian units per hex (leaders included).
All other units (including Italian colonial irregulars): Three divisions (or equivalents) per hex, plus one (in total) if the hex is clear and/or contains a town, capital or amba.
HQs do not count against stacking limits, but no more than one HQ may stack per hex. An unlimited number of trucks may stack in a hex. Each non-division unit counts as ½ of a division for stacking purposes (this includes Italian colonial irregulars and the guerrilla units in the 1940-41 scenario).
IMPORTANT: The number of units that may attack from each adjacent hex into a defending hex is restricted to the stacking limit of the defending hex (12.8.2).
Example: The most Italian units that could attack an amba hex is 24; four from each of the six adjacent hexes.
RPs and any other markers may stack freely. An unlimited number of markers may be in a hex, subject to the individual rules for each type of marker.
Example: Ethiopian units are defending in a mountain hex in the town of Gondar (stacking limit of 4 for non-Ethiopians, but 8 for Ethiopians); the Italians may attack with all adjacent units. However, if the hex did not have a town, the stacking limit for the Italians would be only 3. The Italians could only attack with three divisions of units or equivalents from the adjacent clear hex.
8.3 Exceeding the stacking limit
Units may voluntarily exceed the stacking limits at times when stacking limits are checked. If units are found (or forced) stacked in excess of the stacking limits at those times, the excess units are eliminated (the units being selected by the owning player).
9. Supply
9.1 General
Units require supply to operate at full combat strength and for forced march (11.5). Units are either in supply or out of supply (OOS).
A unit may not end its movement in a hex if it would be OOS at the end of its movement; it may move through hexes in which it would be OOS, provided it ends its movement in supply, but this determination is made assuming no forced march. This restriction applies even if the unit starts OOS (thus, an OOS unit may only move if it can reach a hex where it would be in supply at the end of its movement).
9.2 When supply is checked
Supply is checked in the MAP when reinforcements are placed, at the start of each player's movement segment, at the moment a unit attempts to force march (11.5) into a new hex, at the time of combat and at the end of the turn phase. Supply is also checked when a unit ends its movement (exception: advance after combat ~ 12.12).
9.3 Effects of being OOS
A unit that is OOS at the start of the movement phase has only ½ of its movement factors and may not force march (11.5).
In addition, a unit that is OOS at the time of combat has its combat factors halved for that combat.
9.4 Tracing supply
A unit is in supply if it can trace a supply path back to an ultimate supply source (USS) for that side. See the scenario instructions for which hexes are a USS for each side in a given scenario.
A supply path is one of the following:
- Up to 3 hexes from the unit's current hex (exclusive) to a friendly-controlled USS.
- Up to 3 hexes from the unit's current hex (exclusive) to a road (10.2.2), railroad or dirt track, which may then trace an unlimited number of consecutive hexes along roads, rail lines or dirt tracks back to a USS controlled by the friendly player.
- For a non-HQ unit, up to two hexes from its current hex (exclusive) to a friendly HQ, which may then trace a supply path as indicated above in (1) or (2).
No more than one HQ may be included in any supply trace for a unit.
9.5 Unit limits and restrictions
There is no limit to the number of units that may trace supply to a single USS.
Italian colonial irregular units, all Ethiopian units and all guerrillas (PB 14.6.4.1) are always in supply in Ethiopia (exception: Danakil desert hexes). Italian colonial irregular units outside Ethiopia must trace a supply path like any other unit (9.4). Ethiopian units outside Ethiopia are handled according to the scenario rules (PB 13.6.6.2).
9.5.1 Restrictions
A supply path must satisfy the following requirements:
- A supply path may never be traced through a desert hex, even if traced along contiguous dirt track hexes.
- The road, rail line or dirt track portion of a supply path may not pass through a capital or town hex controlled (3.2) by the enemy.
- A supply path may not enter all-sea hexes or hexes containing one or more enemy units, nor may it cross all-sea or impassable hexsides.
- A supply path may only enter a hex adjacent to an enemy unit if that hex is occupied by a friendly unit.
- A captured USS never functions as a USS for the side that captures it.
- The supply rules above are slightly modified for Italian units in the 1940-41 scenario (PB 14.6.4.1):
- Supply paths for those units may be traced through hexes occupied only by Ethiopian guerrilla units, but may not end their supply in such a hex.
- Supply paths for those units may enter hexes adjacent only to Ethiopian guerrilla units, even if no Italian-controlled unit is in that hex.
- Attacks (only) of these units may be affected by a column shift or DRM depending on how their supply path is traced with respect to Ethiopian guerrilla units.
10. Support Counters
10.1 Air markers
Air markers may fly various types of missions: air support (10.1.3), interdiction (10.1.5), bombing or gas attacks (PB 13.6.5.1), or air supply (PB 13.6.5.2) – the last three only in the 1935-1936 scenario.
10.1.1 Range
Air markers may fly missions within 4 hexes of an air base (exception: Allied air markers in the 1940-41 scenario have a range of 5 hexes ~ PB 14.6.9). The range is printed on the front of each air marker. An air base is any friendly-controlled and supplied town or capital hex (do not count the town or capital hex as part of the four hexes). Town or capital hexes become available the instant they are controlled by the player.
All air missions are subject to the range requirements indicated above.
Example: An Italian-controlled Gaba (hex 1516) allows the Italian player to fly an air mission to Gogo (hex 1214).
OPTIONAL RULE: HQ Infrastructure An HQ in supply may also serve as an air base in a manner similar to a town or capital hex.
10.1.2 Characteristics
Air markers may not be used to satisfy step losses in ground combat. Air markers may not by themselves be used to gain or reestablish control of any hex on the map. Each air marker may fly one mission per game turn, and all air markers in play become available for new missions at the end of each game turn. Air markers may never be permanently eliminated due to combat.
10.1.3 Air support
One or more air markers may be committed to combat by being placed in the hex where an attack has been declared, the attacker first (12.4). For each air marker committed, the controlling player rolls the die on the air support chart (see player aid). Both players conduct all die rolls and then implement the results for both sides (the die rolls are simultaneous).
Results:
- NE: No effect – place the air marker in the "Committed Air Marker" box.
- Air shift: Column shift per air marker. The player gains a favorable one-column shift in the combat – to the right if the attacker; to the left if the defender (12.4).
IMPORTANT: A maximum of two column shifts per player may be gained due to air markers.
- Air superiority: The player who rolls the die gains an air shift result and the opposing player must negate one of their air shift results, if any.
Example: During the 1940-41 scenario both players assign air markers to provide support for a given combat. The British player commits 2 air markers and the Italian commits 1. The British die roll is an air shift result and an air superiority result, while the Italian die roll obtains a single air superiority result. The British player obtains two air shift results and the Italian player one; however, both sides must negate one result due to the opponent's air superiority die rolls. The final result is that the British player obtains one column shift in their favor during the subsequent resolution of the combat.
10.1.4 Delayed air return
Immediately after resolving an air mission, the owning player must roll 1d6. On a five or less, place the air marker in the appropriate "Committed" box – it will move to the "Ready" box at the end of the turn phase. On a result of six, the air marker is delayed and placed on the turn track two turns after the current turn; it will arrive as a reinforcement on that game turn and functions as a new reinforcement air unit for all purposes (exception: on the last turn of a scenario, the controlling player instead loses 1 VP). Air markers that conduct bombing or gas attack missions add a +1 DRM to this die roll.
Example: The Italian player conducts a gas attack on turn 3 and a five is rolled for the air marker, becoming six due to the +1 DRM; it is placed in the turn 5 box and will return as a reinforcement on that turn.
10.1.5 Interdiction
At the start of an enemy movement segment, an air marker may be placed on top of an enemy unit or stack within range. The movement factors of the unit(s) are reduced by two for that movement segment (even if they split up). Multiple hexes may be subject to interdiction, but each hex requires its own air marker and no more than one air marker may be placed per hex.
10.1.6 Gas attacks and bombings
The Italian player may conduct both bombings and gas attacks against Ethiopian units in the 1935-36 scenario, but may risk a VP penalty if they are carried out before event A4: League of Nations is drawn (PB 13.6.5.1).
10.1.7 Air supply
The Italian player may supply a limited number of units by air during the 1935-36 scenario (PB 13.6.5.2).
10.2 HQ units
HQ units represent administrative centers, as well as a variety of military support (logistic units, supplies, corps-level artillery, transport, etc.). HQ units are used to provide support (defensive or offensive) to units, replace units (7.3.3) and build roads.
HQ units have two sides: combat support (CS) or movement (M). When on the CS side, the HQ may provide support but may not move; when on its M side, the HQ may move but may not provide combat support. HQ units always begin a turn on their CS side.
HQ units may never attack by themselves; they have no intrinsic combat factor, stacking values or steps. If they are alone in a hex, see defenseless units (11.6).
10.2.1 HQ movement
If the HQ moves, it must be flipped to its M side. When designating an HQ to move, a player may also designate at least one truck to move the HQ, provided the truck begins the movement segment stacked with or adjacent to the HQ (10.3.3).
If a truck is used to move the HQ, place the truck unit under the HQ.
An HQ on its M side has an MF printed on the counter in brackets, but normally they may only move one hex.
An HQ may instead use its full MF (in motorized MPs) if it moves exclusively along a continuous route of dirt track, rail line and/or road hexes, or if it is being moved by one or more truck units.
An HQ unit using its MF is considered a motorized unit for all purposes, including the use of road movement (10.2.2.2). For each extra truck unit assigned to move that HQ, the HQ may spend one extra MP (10.3.3).
During the end of turn phase, all HQs on their M side are flipped to their CS side.
Example: The 2CA HQ moves one hex, since at that moment it is not in a dirt track, rail line or road hex (it may do so without using the truck). The 1CA is able to follow the dirt track route, but cannot at that moment reach Macallé since this would cost it seven motorized movement points (Italian HQs during the 1935-36 scenario have only four MPs). In addition, since only one HQ may stack in a hex, the 1CA HQ also cannot advance just a single hex along the dirt track (since the CAE HQ already occupies that hex). If the 1CA HQ uses the truck, it could move to hex 1407, since this would only cost it four MPs.
10.2.2 Roads
Any non-desert hex may be converted to a road hex if an HQ is in or adjacent to the hex. The hex must be controlled by the friendly player and the HQ must be able to trace an RP route for the appropriate number of RPs. A road may be built adjacent to an enemy unit only if the hex to be converted also contains at least one friendly unit throughout the entire road construction procedure. If a hex containing a road marker on its reverse "under construction" side is empty of friendly units and adjacent to enemy units, the road marker is removed; all RPs spent are lost.
10.2.2.1 Road construction procedure
One RP is required to build a road in a hex with an existing dirt track; any other valid hex requires two RPs. During the MAP, step vii, if the conditions above are met, place a road marker on its reverse, under construction side, in the hex to be converted, and remove the RPs spent.
Otherwise, flip the marker to its front road side in the next MAP, step vii. The hex is now considered a road for all purposes for the rest of the game.
10.2.2.2 Effects of roads
Non-motorized units moving from one contiguous road hex to another pay only 1 MP per hex, regardless of the terrain. Motorized units (including HQs and trucks carrying RPs or HQs) pay only ½ MP per hex.
10.2.3 Combat support
HQs may supply offensive or defensive support in combat to friendly units in the HQ's hex, or in an adjacent hex (even if separated by an impassable hexside). The HQ must be in supply, on its CS side, and must be able to trace an RP route from a USS with available RPs (7.3.2). Each HQ may supply a single shift to a combat, but may support more than one combat per combat segment – although each combat would require a separate expenditure of RP.
IMPORTANT: A maximum of two HQs per player may support a single combat.
10.3 Truck units
Truck units (hereafter trucks) are used to motorize other units and to transport RPs and HQs. Trucks may only transport one type of unit per turn; the number of trucks with which a side starts is indicated in the scenario setup. Only units of the same nationality as the trucks may be motorized by the truck. Unlike other units, truck units may move into and out of RP storage boxes during the MAP (7.3.2).
10.3.1 RP movement
Trucks may be used to move RP markers. A truck may carry a single RP (exception: 10.3.4) and an RP marker carried by a truck unit has a movement capacity of up to 6 movement points (MPs).
RPs may only be loaded and unloaded in USS hexes for that side. To load an RP, move a truck into a USS hex associated with the RP, and place the RP on top of the truck. Loading costs no MPs and the truck (now carrying the RP) may continue moving with any MPs remaining to the truck. If the truck begins a movement segment in the USS hex, the truck-RP combination may move the full 6 MPs.
Example: A truck moves three MPs and enters a USS hex associated with an RP, which it loads. The RP is placed under the truck and the truck-RP combination may continue moving up to 3 motorized MPs, which is what remains to the truck.
To unload an RP, the truck-RP combination must be in a USS hex; simply place the RP in the associated RP storage box. If the truck has remaining MPs, it may continue moving.
10.3.2 Transporting combat units
Two trucks may be used to motorize an in-supply infantry or mountain infantry division of that nationality, during the MAP (one truck may motorize a non-division unit). The number of steps in the unit does not matter. To be motorized, the unit must be adjacent to or stacked with the truck unit.
Place the truck unit(s) under the combat unit. This costs no MPs and in the subsequent movement segment the combat unit uses the motorized movement cost when it moves, and also gains two MPs.
The truck unit(s) must remain stacked with the combat unit until the next MAP, at which point the owning player may either leave the unit motorized or unload the unit. When a unit unloads, the truck is placed in the same hex the unit moved to.
10.3.3 HQ movement
Truck units are used to move HQ units up to the number of MPs assigned to that type of HQ according to the scenario instructions. This movement need not be along dirt tracks, roads or rail lines, although it may benefit from roads, if used (10.2.2.2). For each additional truck assigned to move the HQ, increase the number of MPs the HQ may spend. HQs carried by a truck may not force march (11.5). Increased truck capacity (10.3.4) may not be used when moving an HQ unit.
10.3.4 Increased truck capacity
A truck that begins its movement segment in a USS hex with multiple RPs may carry more than one RP, but for each RP above 1, it must subtract 1 MP from its total MPs. A truck carrying multiple RPs may drop off and pick up RPs, but may never exceed the number of RPs with which it began its movement. If forced march is used, this subtraction occurs before determining any MP bonuses.
11. Movement and Terrain Effects
11.1 General
Units move from hex to adjacent hex, spending movement points (MPs), depending on the terrain in the hex entered, together with any terrain modifiers per hexside crossed (see TEC).
Rail movement (11.7; PB 13.5.1; PB 14.5.1), naval movement (11.8), placement of reinforcements (7.2), and advance after combat (12.12) do not use MPs and are not considered movement.
Foot units pay the foot movement cost on the TEC; motorized units pay the motorized cost per hex. Motorized units are armor, light armor, HQs, motorized infantry and trucks (including units or RPs motorized by trucks ~ 10.3). All other units are foot units.
Example: A foot unit entering a mountain hex while crossing a river would pay two + one = three MPs to enter the hex.
11.2 General prohibitions and limits
MPs may not be accumulated from turn to turn, nor may they be lent from one unit to another. A player may move all, some or none of their units in their movement segment. Moving units need not spend all their MPs before stopping.
The movement of each individual unit or stack must be completed before another begins. Once a stack or unit has moved, a player may change it only if their opponent allows it.
All units with a movement factor greater than zero are guaranteed the ability to move at least one hex during their movement segment, spending all their available MPs at the start of their movement. This does not allow units to enter hexes or cross hexsides that would otherwise be impassable to them, nor may units use forced march (11.5) when conducting a minimum move.
Units may never enter hexes containing enemy units (exception: defenseless units ~ 11.6), nor may they move into prohibited hexes (for example, desert, grayish hexes or neutral countries), or cross all-sea hexsides.
Units may only move during the movement segment of the player who controls them, and may never exceed their printed movement factors (MFs ~ 2.3.8), unless they conduct a minimum move or a forced march (11.5).
Design note: Remember, air is represented by markers, not by units, so the presence of an air marker in a hex has no impact on the movement of units within the hex.
11.3 Movement of stacks
To move as a stack, units must begin their movement already stacked. Units are not obliged to move together simply because they begin movement in the same hex; in such situations, those units may be moved together, individually or in smaller sub-stacks.
A stack may drop off units while moving, allowing the rest of the stack to continue moving. Any unit that leaves the stack in this way may not move further in the current movement segment. Other than units leaving the stack, once a unit or stack begins to move, all its movement must be completed before another unit/stack begins.
If units with different movement factors are traveling together in a stack, the stack must use the movement factor of the slowest unit. Slower units may be dropped off along the way, as indicated above, allowing the stack to use the MFs of the next slowest unit(s).
Example: A stack contains two units that have movement factors of 6 and one of 4. The stack moves two hexes, costing 4 MPs (using up the 4 available MPs of the slowest unit), and leaves behind the 4 MF unit. The two units with 6 MF may continue moving, as they have two MPs remaining available (six minus four spent = still two available).
11.4 Terrain effects on movement
The terrain effects chart (TEC) on the player aid card lists the costs of entering each hex and crossing each hexside. Use only the MP cost of the predominant terrain in the hex (11.4.3) and any additional MP cost for crossing terrain at the hexside. Terrain listed as prohibited may not be entered by any unit, nor may hexes listed as out of play (for example, neutral countries). Roads and rail lines may reduce the costs of entering the hex, but do not negate any hexside terrain cost (11.4.2).
Example: For an infantry unit to cross a river into a mountain hex would cost a total of 3 MPs (that is, two MPs for a foot unit to enter a mountain hex plus one MP for crossing the river).
11.4.1 Ambas
Ambas (Amharic for "mountain top"; for example hex 1308, Amba Alagi), were defensive positions used during both campaigns. Ambas are treated as mountain hexes for all purposes, except as indicated on the TEC; units may not force march (11.5) into an amba hex, even along a dirt track, rail line or road.
11.4.2 Dirt track, rail and road hexes
Units moving along a route of contiguous rail/road hexes and/or road hexsides pay only 1 MP per hex entered (exception: motorized units pay only ½ MP per road hex) regardless of other terrain in the hex; hexside terrain modifiers still apply. Dirt tracks provide no movement benefits, but function as a road for all other purposes, including supply (9.4; 9.5.1), HQ movement (10.2.1), and forced march (11.5.3). Dirt tracks and railroads may not be built; dirt tracks allow roads to be built in their hex at a cost of only 1 RP, instead of two (10.2.2.1). In addition, roads and railroads cost no hexes of an RP route, while tracing along contiguous dirt track hexes costs only ½ of a hex on an RP route.
11.4.3 Multiple terrain types in a hex and half-hexes
If a hex contains any portion of non-prohibited terrain, the hex is playable (such as hex 1505). If a hex contains more than one terrain type, use the predominant (land) terrain in the hex (for example, hexes 0904 and 1613 are clear). Half-hexes that do not contain a hex number are not in play, so no unit may enter them.
Errata (11.4.3 and 12.8): A Town/City or Amba always controls in terms of terrain effects. Only consider the predominant terrain exclusive of Town/City or Amba features. For movement purposes, look at the other terrain in the hex to determine the movement cost. For combat, the 1L for Town/City would apply.
11.5 Forced march
11.5.1 General
Certain units may attempt to move up to double their available movement factor (MF), in a single movement segment, by conducting a forced march into each hex entered beyond their printed MFs.
11.5.2 Prohibitions
Non-European units (2.3.4) and HQs may not force march (exception: Italian Eritrean colonial regulars may force march). No unit that begins its movement out of supply or that moves by minimum move may force march; nor may a unit force march into a desert or amba hex. All other units may attempt to force march.
11.5.3 Forced march procedure
The owning player declares that a unit or stack is conducting a forced march when it first attempts to spend more MPs than the MFs it has available.
The controlling player designates a hex to enter and the unit or stack rolls a die and consults the forced march table (see PAC). Each die roll is completely resolved before deciding to attempt to continue the forced march. Roll the die only once per hex for each moving stack, applying all applicable modifiers. Not all units in a stack need to force march, but the result obtained on the forced march table applies to all units in a stack – even those that were not force marching. If the unit has insufficient MPs to enter the hex after the die roll, the unit must stop in its current hex and may not enter the designated hex.
Force marching to or from hexes not in a friendly country or adjacent to an enemy unit may result in an ambush (Ambush), the moving stack – not each unit in the moving stack – losing one step, chosen by the controlling player.
Example: The IT division and the armored unit wish to move to Jijiga to provide a concentric attack bonus against the units in Dagahbur. The armor would reach the hex by itself, but could not move there at that time, since it would be OOS at the end of its movement (since the clear hex SE of Jijiga would be empty); so the Italian player moves the armor to the hex north of the HQ. The 5-7-4 infantry then moves to the same hex and declares a forced march into Jijiga – a rough hex. The Italian player rolls a single die, obtaining a net result of 1. The Italian division must pay a total of three MPs to enter the hex (two for the normal cost plus one for the '1/A' result), and suffers a step loss because the forced march occurred adjacent to at least one enemy.
Design note: Movement in most regions of Ethiopia and the surrounding countries had to depend on the use of local guides and prior air and ground reconnaissance, due to the difficulty of the terrain and the absence of reliable maps. During the 1935-36 war, for example, Italian units took up to 15 days to move from one sector to another of the front, even when moving behind their own lines. This is generally simulated by the low MF values of most European units, which represent the safe distances that can be moved with the help of local guides and prior air/ground reconnaissance. European units may attempt to force march, but risk getting lost, suffering delays in the form of mechanical breakdowns, losing pack animals, or even being ambushed.
11.6 Defenseless units
Enemy units may enter a hex containing only defenseless units, such as RPs, HQs, trucks and/or actual deception units (PB 14.6.5). If the hex contains only RPs or trucks, there is no additional cost; otherwise the moving unit must pay one additional MP. All RPs, HQs, trucks and/or deception units in the hex are eliminated. Such a hex may also be entered as part of an advance after combat (12.12).
11.7 Rail movement
Each scenario will specify which rail lines are permitted for use for rail movement and by which side. Rail movement is only allowed on the indicated rail lines – not on all rail lines. To conduct rail movement, a unit must begin the MAP in supply and on the designated rail line. Movement is conducted in the MAP and costs no MPs; the unit(s) thus moved have their full MFs during the subsequent movement segment. Rail movement may occur every turn of the scenario and the unit(s) moving by rail must move from a rail hex on the indicated rail line, to any other rail hex on that line, passing only through connected friendly rail hexes.
Each rail line may move up to two RPs and one division or equivalent (two non-division units) during the MAP. HQs and trucks count as ½ of a division for rail movement.
11.8 Naval movement
Each scenario will specify which side is allowed to use naval movement and whether there are restrictions on naval movement. Naval movement may be conducted every turn unless otherwise indicated. To conduct naval movement, a unit must begin the MAP in a coastal hex containing a town or capital (a coastal hex is any hex that contains land and a portion of the Red Sea, Gulf of Aden or Indian Ocean). The owning player removes the unit from the map and places it on the turn track to enter as a reinforcement on the following turn.
Naval movement may be used to move up to two RPs and one division or equivalent (two non-division units) during the MAP. HQs and trucks count as half of a division for naval movement.
Example: On turn 4, the Italian player wants to send two divisions to Mogadishu from Massawa. They remove one division from the map and place it to arrive as a reinforcement on turn 5 – the other division must wait until the next turn, since only one division may be moved per turn.
12. Combat
12.1 General
Combat takes place between opposing units in adjacent hexes during the combat segment of a game turn. Combat is never mandatory. During the first player's combat segment, the first player is always the attacker and the second player is always the defender. During the second player's combat segment, the roles are reversed. All attacks by the Italian player in both scenarios and by the Allied player in the 40-41 scenario are resolved on the regular combat results table (CRT). Attacks by the Ethiopian player in the 35-36 scenario are resolved on the Ethiopian CRT (PB 13.6.2.3).
12.2 Limits and prohibitions
An occupied enemy hex may be attacked in one combat segment by as many units (12.8.2) as can be brought to one or more hexes surrounding it. An attack may only target one hex; all units in the defending hex must be attacked together. No unit may attack more than once per combat segment (exception: Recon results ~12.11.1), and no defending unit may be attacked more than once per combat segment. Units may not divide their attack strength among more than one attack. Units stacked together need not participate in the same attack. Some could attack into one hex, while others may attack other hexes, or simply not attack.
There is no limit to the number of attacks each player may make during their combat segments. Attacks need not be declared in advance and may be resolved in any order, provided each attack is completed before beginning the next.
12.3 Fog of war / hidden combat factors
Only the combat unit on top of an enemy stack is visible to a player, until the ratios are ready to be computed (note: trucks, HQs, leaders and markers must always be placed on top of a stack; the other player may not look beneath them to see the first unit with a combat factor other than *in the stack). A player may not look beneath this top unit of an enemy stack except as noted above. Once an attack is declared, the attack may not be cancelled.
Until they are flipped to their reverse, the combat factors of all Ethiopian combat units and all Italian colonial irregulars are hidden from both players. See the scenario instructions for more details.
12.4 Combat procedure
Each combat is resolved as follows:
-
The attacker designates a target hex to be attacked and indicates the exact units that are attacking the target hex; after all attacking units are designated, reveal all defending units.
-
Determine the initial ratio column (12.5); all OOS units (9.3; 12.6) are halved before determining the initial ratio column.
-
The attacker commits any air markers to the combat (10.1.3), then the defender.
-
The attacker and defender resolve their committed air markers, which may result in up to a two-column shift in favor of each side.
-
The attacker commits any eligible HQ (using RPs) for combat support (10.2.3), and then the defender. Each HQ committed grants a column shift in favor of each side (exception: Negus ~ see PB 13.6.4.3), up to a maximum of two column shifts in favor of each side.
-
All column shifts are applied (12.7; 12.8) and the final ratio level is determined. The ratio may be shifted up or down on the CRT as if additional columns existed; for example, an attack at 6:1 with two column shifts to the right would shift the column to 8:1. Attacks ending at a ratio above 7:1 are resolved on the 7:1 column; attacks ending at ratios lower than 1:3 are resolved on the 1:3 column.
Errata (12.4): For attacks that end up as 0 vs {something above 0}, do not resolve on the 1:3 column; instead eliminate all attacking units with no effect on the defenders. Note that this can only happen if some of the attacking units began as ? strength units. For attacks ending as 0 vs 0, resolve on the 1:1 column.
Example 1: The Italian player is attacking a one-strength Ethiopian unit in a mountain hex with 6 attack factors. The initial ratio is 6:1. The Italian player commits an air marker and gains a result column shift, and also commits an HQ that is adjacent to the attacking Italian unit, to obtain a second column shift. This gives the Italian player two column shifts to the right, while the mountain gives the Ethiopian player a column shift to the left. After applying all shifts, the final ratio will be 7:1.
Example 2: An attack occurs in a rough hex (-1L) and begins at a ratio of 10:1. The attack is still resolved on the 7:1+ column (as 9:1 is still > 7:1).
Design note: Unlike many other wargames, there are no retreats in Lion of Judah.
12.5 Calculating the initial ratio column
The attacker totals the attack factors of all attacking units; the defender totals the defense factors of all defending units; divide the total attack strength by the total defense strength, rounding the resulting ratio down to conform to one of the ratios that appear in the CRT columns. Example: 15 to 4 would result in 3-1; 3 to 4 would result in 1-2.
Note that halving (including any rounding due to the ½, see 12.6) occurs before calculating combat ratios.
12.6 Halving combat factors
When halving, always add the combat factors of all the units that need to be halved and then make a single reduction. Units are halved if they are OOS (9.3) or subject to a gas attack (PB 13.6.5.1).
IMPORTANT: A unit may never be halved more than once.
Example: An OOS unit subject to a gas attack has its attack factor only at ½, not at ¼.
12.7 Combat modifiers
The ratios obtained above may be modified/shifted by the terrain in the defender's hex and/or when attacking across a river (12.8.1). HQs and aircraft may also supply column shifts to the ratios determined above.
All combat shifts and DRMs are cumulative (exception: terrain shifts ~ 12.8). That is, in each battle, all applicable modifiers are determined and their effects calculated before rolling the die to obtain the combat result.
Any die roll result modified to a number greater than seven is considered seven, and any result modified to less than one is considered one.
OPTIONAL RULE: Tribal Friction Any hex containing Ethiopian units with different historical IDs (2.3.5) suffers a -1 DRM against them when they attack, and a +1 DRM when they are attacked. This also applies to Ethiopian guerrilla units (PB 14.6.4.1).
12.8 Terrain effects
The initially calculated ratio may be shifted due to terrain effects (see the terrain effects chart). In the case of multiple terrain types in a hex, use the predominant terrain in the hex (11.4.3). Hexside terrain modifiers (for example, attacking across a river) are in addition to any terrain modifier in the target hex.
(See also the Errata under 11.4.3: a Town/City or Amba always controls in terms of terrain effects.)
12.8.1 Rivers
The penalty for attacking across a river only applies if a majority (>50%) of all attack factors involved in the combat are attacking across one or more rivers.
Example: The Italians attack hex 1214 (Gogo) from 1313 and 1314, the latter across a river. If fourteen combat factors attack from hex 1313 and fourteen attack from hex 1314, the -1L river shift would not apply. However, if only thirteen factors (or fewer) attack from hex 1313, then the defender would gain the -1L column shift in their favor.
12.8.2 Stacking
The number of units that may attack from each adjacent hex into the defending hex is restricted to the stacking limit of the defending hex (8.2).
12.9 Concentric attacks
The attacker adds a +1 DRM to their die roll result when making a concentric attack. A concentric attack is an attack made by units from two hexes directly opposite the defender's position, by units from three hexes with one hex between each, or by units from more than three hexes. The concentric DRM does not apply against defenders in amba hexes.
12.10 Scenario-specific modifiers
Each scenario may add or remove column shifts or DRMs that apply to combat. Scenario-specific rules always override a base rule, unless otherwise indicated.
12.11 Combat results
The number to the left of the slash is the attacker's combat result; the number to the right is the defender's. The numbers signify the number of steps that side must eliminate from its forces involved in that combat. Attacker losses are always removed before defender losses. HQs may never be used to satisfy a step loss.
Example: At a 1:1 ratio with a modified die roll of 5, the combat result is 2/1; two steps lost for the attacker and one for the defender.
Both players may distribute their losses among their non-HQ units as they see fit, with the following two restrictions:
- No unit may take a second step loss until all units involved in the combat have absorbed at least one step loss.
- The first step loss taken by the attacker may not be a unit with zero attack strength, unless that is all they have involved in the combat.
Example: An attack involves a four-step unit and two one-step units, and the result is two step losses for that side. The 4-step unit must take the first step loss before either of the one-step units is eliminated. The second loss could also be applied to the (now) three-step unit or could be used to eliminate one of the two one-step units – at the choice of the controlling player.
12.11.1 Recon attack result (R)
If the combat result includes an R result on the CRT, then in addition to any RP gained by the Ethiopian player (PB 13.6.4.1), the attacker has achieved a Recon attack result. Any of the units that advance after combat (12.12) into the defender's hex have the option to attack again immediately. This option must be exercised immediately before another combat is declared. These units may attack in conjunction with other units that have not yet attacked during the current combat phase. An individual unit may attack at most twice in a given combat phase, even if they achieve multiple R results on the CRT (although other units involved in the second attack may still qualify for a Recon attack result).
IMPORTANT: Remember that no defending unit may be attacked twice in the same combat phase.
Example: The Italian player attacks the lone Ethiopian unit Ras Kassa in hex 1307 and achieves an 'R' result on the CRT. The Eritrean divisions 1E and 2E advance into the hex and may immediately attack again. The Italian GS division in 1207, which did not advance into the defending hex (see drawing 2), may not attack. In order to take advantage of this bonus attack capability, the Italian player declares that the next attack must use the 1E and 2E divisions, so the Italian player declares an attack on Amba Alagi with the 1E and 2E divisions and the Italian units in the other hexes adjacent to the amba. If this attack also clears the hex of defenders and achieves an 'R' result, the 1E and 2E divisions may not attack again, even if they advance into the amba, but other advancing units could.
12.12 Advance after combat
If the defender's hex is empty of units after combat, all non-defenseless (11.6), the attacker must advance with at least one attacking unit into the now empty hex. A unit must advance even if it would end up out of supply in the defender's hex. More units may advance up to the stacking limit in the hex. HQs may never advance.
12.13 Attacks against defenseless units
If a hex containing one or more trucks, RPs, deception units (PB 14.6.5), and/or HQs is attacked in combat, all trucks, RPs, deception units and/or HQs in the hex are automatically eliminated with no losses to the attacker. The attacker must advance into the hex and if the hex does not contain at least one deception unit, the attacker also gains a Recon attack result (12.11.1).
Extended Sequence of Play
[All numbered steps (in Arabic or Roman numerals) are conducted in the order listed, unless specifically indicated otherwise. Note: the original is a two-column chart; it is given here in reading order. Green shading in the original applies only to the 1935-36 scenario; yellow shading applies only to the 1940-41 scenario, but the shading is not reproducible in text, so the scenario markings are given in the text where they appear in the chart.]
A. Mutual Administration Phase (MAP)
[Player order and sequence as indicated. First player '35-36 = Italian; Second = Ethiopian. First player '40-41 = Allied; Second = Italian.]
- i) Add new events if it is a strategic turn (6.1).
- ii) Bring in reinforcements and RPs (7.2; 7.3).
- iii) Both players replace/rebuild units (7.3.3; 7.3.4).
- iv) Consolidate or break down units (2.4; 2.5).
- v) Motorize or unload units (10.3.2; 10.3.3).
- vi) Add/remove trucks from the RP boxes (7.3.2).
- vii) Build roads (10.2.2).
- viii) Italian and Allied naval movement and rail (11.7; 11.8; PB 13.5.1; PB 14.5.1)
- ix) Allied guerrilla recruitment (PB 14.6.4)
- Up to 3 units may be recruited.
- Modified by Mission 101, IPL, Gideon (PB 14.6.4.2) and Negus (14.6.4.4).
- Not in Somalia, Eritrea or Ogaden.
- x) Italian colonial desertion (PB 14.6.3.1)
- Roll a D6 and apply the modifiers.
B. Event Phase
- i) Draw an event and apply the results.
B. First Player Phase
i) Movement segment (11.)
- The Second player places any interdiction (10.1.5).
- The Italian designates air supply (PB 13.6.5.2).
- The units are now supplied for the turn.
- Only Northern Front units.
- The effects are removed at the end of the turn phase.
- Reduce Italian fuel by one if one or more air markers are placed for any purpose (PB 14.6.1.1).
- The Italian designates air supply (PB 13.6.5.2).
- Check the supply status for all units. OOS units have their MPs halved and may not force march.
- Designate M HQs (10.2.1) – they may use trucks.
- Move all, some or none of the controlled units.
- May not end OOS (9.3) or overstacked (8.1).
- May not enter a hex occupied by the enemy.
- Trucks may increase capacity (10.3.4).
- Europeans/Eritreans may force march (11.5).
- Declare when printed MFs are first exceeded.
- Roll a die for each hex entered.
- HQs may not force march.
- Danakil desert hexes prohibited.
- OPTIONAL: Italian colonial irregulars may never be first into an Ethiopian capital/town (PB 13.6.7.4).
- Italian HQs have 4 MFs in 'M' mode.
- Allied HQs have 7 MFs in 'M' mode.
- Italian fuel reduced if 1925 (Kismayo), 1405 (Massawa) or 1213 (Addis Ababa) are Allied.
- Rainy season (turns 2 – 4): ½ MPs, not in Eritrea, Ogaden or Somalia.
ii) Combat segment (12.)
- Declare any bombing (10.1.6).
- Declare a single combat against a single hex.
- Reveal all units.
- OOS units at ½ strength (9.3).
- The attacker commits any desired air marker (10.1.3).
- Must be within range (4 or 5 hexes) of a controlled town or capital hex.
- The defender commits air marker.
- Must be within range (4 or 5 hexes) of a controlled town or capital hex.
- Decrease Italian fuel by one if one or more air markers are placed for any purpose.
- Resolve all air (max two shifts per side).
- The attacker designates any HQ support (10.2.3).
- Must be adjacent to the attacking units (need not be adjacent to the defending units).
- One RP spent per combat for HQ support.
- A maximum of two HQs may support each combat.
- The defender designates any HQ support.
- Must be in or adjacent to the defending units (need not be adjacent to attacking units).
- One RP spent per combat for HQ support.
- A maximum of two HQs may support each combat.
- Calculate the final ratio and apply all shifts.
- Air shifts (as determined above).
C. Second Player Phase
i) Movement segment
- The Ethiopian player may make a Great Offensive (PB 13.6.2.4).
- Resolve as above, but with "Second player".
- The Italian designates gas attacks (PB 13.6.5.1).
- Like interdiction, but also attack factors halved.
- Effects removed at the end of the turn phase.
- The Italian designates gas attacks (PB 13.6.5.1).
- Activation segment: The Ethiopian player conducts leader activation (PB 13.6.2) for a single leader, resolving all movement and combat of that leader and its units before activating another leader. Repeat until all desired leaders have attempted to activate. A leader may carry an RP but at a cost of 2 MPs (treat as a 1-4 unit).
- Negus leader not before turn 4 (PB 13.6.2.2).
- Unless IT units are within 2 of Addis Ababa.
- Italian HQs have 4 MFs in 'M' mode.
- Negus leader not before turn 4 (PB 13.6.2.2).
ii) Combat segment
- Resolve as above, but with second player.
- Ethiopian attacks against 1+ Italians (not colonial irregulars) gain an RP on an 'R' result.
- Decrease Italian fuel by one if one or more air markers are placed (PB 14.6.1.1) or if one or more armor units, HQs or trucks moved.
- Italian attacks against guerrillas (PB 14.6.4.5) must roll the die to engage the guerrilla before combat.
D. End of Turn Phase
- i) Both players check supply (9.2).
- ii) Flip all HQs to their CS side (10.2.1).
- iii) Ethiopian attrition check (PB 13.6.3).
- iv) Remove gassed markers (PB 13.6.5.1).
- v) Remove any air supply markers (PB 13.6.5.2).
- vi) All air return to their available box (roll the die for delayed return if they conducted gas attack, interdiction, air supply).
- vii) Flip all Ethiopian leaders to their front side (PB 13.6.2).
Scenario-specific modifications
- Green shading applies only to the 1935-36 scenario.
- Yellow shading applies only to the 1940-41 scenario.
Playbook (Scenario Rules)
Translated from the official Spanish "Libro de juego" (Playbook). Rule numbers continue from the standard rules (13 = 1935-36 scenario, 14 = 1940-41 scenario, 15 = setup and reinforcement details).
13. Rules for the 1935-36 Scenario
The Italian side is the first player for this scenario.
13.1 Game length
Seven monthly turns, from October 1935 (turn 1) to April 1936 (turn 7). The scenario begins at the start of the event phase.
13.1.1 Areas in play
The only areas in play are Eritrea, Ethiopia and Italian Somaliland. No unit may enter a hex in any other area.
13.1.2 Initial control
The Ethiopian player controls all hexes in Ethiopia. The Italian player controls all hexes in Eritrea and in Italian Somaliland. Ethiopia is the home country for the Ethiopian player, and Eritrea and Italian Somaliland are the colonial metropolises for the Italian player.
13.2 Fronts
13.2.1 Italian fronts
The Italian forces are divided into two fronts – the Southern Front, which includes all units and air bases in Italian Somaliland, and the Northern Front, which includes all units and air bases in Eritrea. The setup indicator on a unit does not limit from which front a unit may conduct supply, or where it may be rebuilt if eliminated.
Units and air bases in Ethiopia that can trace a supply path (9.4; PB 13.6.6) to only one of those areas are considered associated with that front; units or air bases that can trace a supply path to both USSs may be considered as part of either front, at the choice of the Italian player. When this situation exists, the fronts are considered connected.
The Italian player should use the appropriate "ready", "committed" air box and RP storage box for each front.
This is important for air supply (PB 13.6.5.2), air marker placement (PB 13.6.5.2), Event A1 Mussolini's Pressure, and for calculating the ranges of air missions (10.1.1). Air units assigned to a specific front may only trace from air bases within that front.
13.2.2 Ethiopian fronts
While the Ethiopian player does not have fronts in the same way as the Italian player, there are two groups of forces that affect the choices made by the Ethiopian player, such as the Great Offensive (PB 13.6.2.4). The two groups are classified as follows:
- Southern Front: Negus, Sidamo (Ras Desta), Bale (Dejaz B. Merid) and Hararghe/Ogaden (Dejaz Nassibu)
- Northern Front: Negus, Wollo (Prince Tafari), Shoa (Ras Mulugheta), Tigray (Ras Seyum), Beghemder (Ras Kassa), Gojjam (Ras Imru and Dejaz G. Belu)
The two tribal faction areas other than Tigray (surrounded by an orange border near Eritrea) and Ogaden (surrounded by an orange border near Somalia) have no special functions in this scenario.
13.3 Setup
13.3.1 Marker placement
Place the game turn marker in box 1 of the game record track (GRT). Place the Italian bombing attacks and Italian eliminated steps markers in box 0 of the GRT. Place all the event markers of strategic turn A (13.7) in the event cup.
13.3.2 Ethiopian setup
The Ethiopian player sets up first, according to the scenario card.
All units must be deployed in Ethiopia. When they are to be deployed, place all non-leader units of that tribal faction in an opaque container and randomly draw the indicated number of units. These randomly drawn units are placed showing the front of the counter (their "?-6" side) – neither player may inspect the actual strength of the unit until they are involved in combat (12.7).
- Place Ras Mulugheta and eleven Shoa units (red stripe) at or within two hexes of hex 1213 (Addis Ababa). Set the rest of the units aside in the Shoa pool of available units.
- Place Ras Kassa and seven Beghemder units (green stripe) at or within two hexes of hex 1310 (Dessié). Set the rest of the units aside in the Beghemder pool of available units.
- Place Ras Seyum and three Tigray units (black stripe) at or within two hexes of hex 1107. Set the remaining unit aside in the Tigray pool of available units.
- Place Ras Imru and four Gojjam units under his command (light blue stripe) at or within two hexes of hex 1109 (Debra Tabor). Set the rest of the units aside in the light blue stripe Gojjam pool of available units.
- Place Dejaz. G. Belu and two Gojjam units under his command (olive color stripe) at or within two hexes of hex 1009 (Gondar). Set the rest of the units aside in the olive stripe Gojjam pool of available units. Units belonging to Ras Imru (light blue stripe) may not stack together with units belonging to Dejaz G. Belu (olive stripe), even though both are Gojjam.
- Place Ras Desta and three Sidamo units (blue stripe) at or within two hexes of hex 1118 (Yabello). Set the remaining unit in the Sidamo pool of available units.
- Place Dejaz Nassibu and six Hararghe/Ogaden units (brown stripe) at or within two hexes of hex 1914 (Dagabur). Set the remaining units aside in the Hararghe/Ogaden pool of available units.
- Place Dejaz B. Merid and four Bale units (yellow stripe) at or within two hexes of hex 1817 (Imi). Set the remaining units aside in the Bale pool of available units.
- Place Crown Prince Asfaw Wossen Tafari and two Wollo units (orange stripe) at or within two hexes of hex 1310 (Dessié). Set the remaining unit aside in the Wollo pool of available units.
- Place the Negus leader and all the regular Imperial Guard (KZ) units at or within two hexes of hex 1213 (Addis Ababa).
Exception: One battalion-size Imperial Guard unit may be placed at or adjacent to any other Ethiopian leader. This battalion may be activated with the indicated leader (only) or by the Negus leader (at the Ethiopian player's choice each turn).
Note that there are no other Negus units immediately available for activation (PB 13.6.2.2).
13.3.3 Italian setup
The Italian player sets up second, according to the scenario card.
The Italian colonial irregular units are randomly drawn and deployed showing their front side (their ?-6 side) – neither player may inspect the actual strength of the unit until it is involved in combat.
Southern Front (Setup code S)
- 4 x RP markers in the Southern Front RP storage box.
- 7 St air marker in the Southern Front air marker box (may only support Southern Front units).
- 1 x Italian colonial irregular unit in hex 2416 (Walwal).
- Place the following units anywhere in Italian Somaliland:
- HQ unit CSI.
- Italian regular unit PL.
- 4E and 1AS, 2AS and 3AS Eritrean colonial units.
- Armor unit CV.
- 2 x Italian colonial irregular units.
- 1 x truck unit (may be placed on the map or placed in the Southern Front RP storage box).
IMPORTANT: The PL division may break down (2.4) before setup.
Northern Front (Setup code E)
- 21A Black Shirts division in hex 1405 (Massawa).
- 6 x RP markers in the Northern Front RP storage box.
- 2 x III Br air markers in the Northern Front air marker box (may only support Northern Front units).
- Place the following units anywhere in Eritrea:
- 1CA, 2CA, CAE HQ units.
- Italian regular units SB, GS, GV, SL.
- Italian Black Shirt militia units 23M and 38OT.
- Eritrean colonial units 1E and 2E.
- Eritrean cavalry units 1G, 5G, 6G and 10G.
- Light tank units 4, 5, and 10.
- 4 x Italian colonial irregular units.
- 2 x truck units (one or both may be placed on the map or placed in the Northern Front RP storage box).
13.4 Victory conditions
13.4.1 Victory points (VPs)
At the end of turn 7 (April 1936) the Italian player calculates the number of VPs achieved during the game. To count a VP hex, it must be occupied by at least one supplied Italian-controlled unit. Each VP hex is either a capital/town with white font, or an amba with white underlined font.
- +8 VPs for occupying hex 1213 (Addis Ababa)
- +6 VPs each for occupying each Ethiopian amba hex: hex 1208 (Amba Aradam), hex 1308 (Amba Alagi), and/or hex 1311 (Ad Termaber) [note: the Eritrean amba, hex 1104 (Dongolaas Gorge), does not award VPs in this scenario]
- +1 VP each for the occupation of each of hex 1307 (Mekellé), hex 1009 (Gondar), hex 1310 (Dessié), hex 1012 (Debra Markus), hex 1711 (Dire Dawa), hex 1712 (Harrar), hex 1516 (Gaba) and/or hex 1118 (Yabello) (all white-font towns other than Addis Ababa).
- +1 VP for each Ethiopian leader (other than Negus) eliminated.
- +2 VPs if the Negus has been eliminated.
- -1 VP for every two steps of Italian units eliminated during the scenario (13.4.4)
- -1 VP for League of Nations sanctions (see Event A4)
- -1 VP for any air marker removed on the last turn (10.1.2 and PB 13.6.5.1).
13.4.2 Victory levels
There are 45 potential VPs, not counting any of the negative VPs.
- Italian strategic victory: 26 or more VPs.
- Italian tactical victory: 21 - 25 VPs.
- Ethiopian tactical victory: 16 - 20 VPs.
- Ethiopian strategic victory: 15 or fewer VPs.
Design note/optional rule: A scenario like this is difficult to balance, since the Italians brought enough firepower that the Ethiopians essentially had no chance to "win" in a conventional way. We believe the VPs noted above make the game tense and interesting for both sides, but we also think the scenario – especially when played as part of the campaign – can be played in a bidding manner. Both scenarios require 21 VPs to win and both scenarios have different attacking sides, so one option is for the players to bid for playing one side. The bidding should begin at -3 VPs and whoever offers the highest bid plays the Ethiopian/Allied side. If only this scenario is played, the bid value is subtracted from the Italian total VP score (added if negative), to determine whether they win. If both scenarios are played, players should add the bid to the Allied VP score. If the Ethiopians achieve a strategic victory, the Italian player has to be very lucky to win the campaign, barring a higher bid in their favor.
Example: Lee and Molly decide to play the campaign. Lee bids -2 while Molly bids 0. Then Lee bids +2 and Molly allows Lee to have the Ethiopian/Allied side at +2 VPs. In the 1935-36 scenario, Molly achieves a tactical victory with 24 VPs while, in the 1940-41 scenario, Lee achieves a tactical victory with 21 VPs. Comparing the two VP scores, while adding 2 to Lee's score, Molly wins the campaign 24 VPs to 23 VPs.
13.4.3 Sudden death victory
The instant the Ethiopian player gains control of hex 1305 (Asmara), hex 1405 (Massawa) or hex 2322 (Mogadishu), the game stops immediately and the Ethiopian player wins a strategic victory.
13.4.4 Italian step losses
The Italian player must record all non-colonial-irregular steps lost during the game for any reason. This includes HQs, which count as one step, but not truck units. Eritrean colonial regular units count for this purpose. The recorded number of lost steps is not affected by any steps replaced or units rebuilt.
Example: Upon entering turn 4, the Italian has 5 lost steps. They replace 2 steps during the MAP of turn 4 – this does not change the number of steps lost by the Italians.
13.4.5 Combined scenario effects
If the campaign game is being played, neither player is the winner yet; record the total VP obtained by the Italian player and then play the 1940-41 scenario with the same player commanding the Italian side. Victory in the campaign is determined after the 1940-41 scenario ends. If the Ethiopian player achieves a sudden death victory, treat it as if the Italian player had 15 VPs.
The victory level achieved in this scenario will have an impact on the effects of the Ethiopian guerrilla (PB 14.6.4.1), Negus (PB 14.6.4.4), and the overall winner in the second half of the combined scenario.
13.5 Modifications to the sequence of play
13.5.1 MAP: rail and naval movement
The Italian player may use rail movement only along the railroad line that connects hex 1405 (Massawa) with hex 1104 (Dongolaas Gorge). Naval movement may be used from any appropriate coastal hex (11.16).
The Ethiopian player may not use rail or naval movement.
13.5.2 MAP: Reinforcement and replacement rules
13.5.2.1 Italian reinforcements and replacements
On each of game turns 2 and 3, the Italian player adds 3 RPs to the Northern Front RP storage box, and 2 RPs to the Southern Front RP storage box.
On each of turns 4 – 7, the Italian player adds 5 RPs to the Northern Front RP storage box and 4 RPs to the Southern Front RP storage box.
Italian reinforcements and rebuilt units are placed at Massawa or Mogadishu (at the Italian player's choice). Reinforcements must satisfy the stacking requirements (7.2) when placed. If the chosen hex is fully stacked, the unit(s) may enter an adjacent hex (the other entry hex need not be fully stacked to use this ability).
13.5.2.2 Ethiopian reinforcements and replacements
Each turn, the Ethiopian player receives one free reinforcement of the Shoa tribal faction and a variable number of additional reinforcements, as shown in the reinforcement table and in the tribal faction setup. On many turns, the Ethiopians of the Northern Front (13.2.2) will receive one additional reinforcement, while the Ethiopians of the Southern Front receive two. The Ethiopian player must allocate those additional reinforcements so that no tribal faction receives more than one per turn, if possible. Note that the Shoa faction may be given one additional reinforcement each turn (in addition to its free reinforcement). Otherwise a tribe may only receive multiple reinforcements in a single turn to avoid the loss of reinforcements for that front.
If Ethiopian units of the Northern Front attacked and inflicted at least one step loss on the defenders during the previous turn, increase the additional reinforcements of that front to two; if the Great Offensive (PB 13.6.2.4) was conducted on that front the previous turn, increase the additional reinforcements of that front to three. If either of the above has occurred on the Southern Front (a loss inflicted on the defenders or the Great Offensive), increase the additional reinforcements of the Southern Front to three.
IMPORTANT: A faction may not receive reinforcements if its capital is controlled by the enemy. In addition, a faction whose leader has been eliminated stops receiving reinforcements for the rest of the game.
Place all units in the available unit pool of a given tribal faction in an opaque container and randomly draw the required number. These units are deployed showing their front (that is, their ?-6 side) in the capital of their tribal faction (marked with white font on the map) or in the hex with their leader if in Ethiopia (whichever the Ethiopian player chooses), provided the chosen hex is not already fully stacked. As with setup, neither player may inspect the actual strength of the unit until it is involved in combat. If all possible entry hexes are fully stacked, the reinforcement may enter a hex adjacent to either the leader or the capital. Ethiopian reinforcements may be placed with the leader even if that leader is completely surrounded, provided the other requirements are met.
Design note: Ethiopian reinforcements represent troops returning to the battle after being dispersed, as well as the accumulation of provisions, which would easily have found their way past any attempt by the Italians to form a cordon around a hex.
The Ethiopian player does not receive RPs as reinforcements (exception Event A3 Foreign Arms).
OPTIONAL RULE: Limited reinforcements To deploy a reinforcement in a leader hex, a path of contiguous hexes of any length must be traced to the tribal faction's capital, without entering hexes occupied by the enemy (empty hexes adjacent to enemy units are not restricted). If such a path cannot be traced, the reinforcement must enter the capital hex.
Capitals of the Ethiopian tribal factions:
- Shoa: hex 1213 (Addis Ababa)
- Gojjam (both): hex 1012 (Debra Marcos)
- Wollo: hex 1310 (Dessié)
- Tigray: hex 1307 (Macallé)
- Beghemder: hex 1009 (Gondar)
- Hararghe-Ogaden: hex 1712 (Harar)
- Sidamo: hex 1118 (Yabello)
- Bale: hex 1516 (Gaba)
13.5.3 Player order
The Italian player is the first player and the Ethiopian player the second player.
13.5.4 Second player movement and combat segments
Unlike the Italian player, the Ethiopian player will conduct movement and combat for a single leader, then movement and combat for another leader, etc. Their movement and combat segments are essentially combined and conducted until all leaders have been activated.
Before moving any of the units, the Ethiopian player must designate a leader to activate. When available, the Negus automatically achieves full activation (PB 13.6.2.2), but all other leaders must roll the die for leader activation (PB 13.6.2).
Once per game, the Ethiopian player may designate a Great Offensive (PB 13.6.2.4), which is carried out as the first action of their movement segment (before any Italian gas attack). The Shoa tribe has movement restrictions on turn 1 (PB 13.6.7.1).
All Ethiopian combats are resolved on the Ethiopian CRT, not on the regular CRT. The only modifiers that apply are those listed under the Ethiopian CRT. Each tribe resolves all its combats before any other tribe is activated.
13.5.5 End of turn phase
After the supply check, the Ethiopian player must check for attrition (PB 13.6.3) for hexes containing six or more Ethiopian units (leaders included). Remove all gassed markers (PB 13.6.5.1) from the map, returning the air markers to the Italian player by rolling the die for air return (10.1.4). Flip all Ethiopian leaders to their front, non-activated side.
13.6 Scenario-specific rules
13.6.1 Ethiopian tribal faction cooperation
Up to eight Ethiopian units may stack per hex (leaders do not count against stacking limits). No unit (including leaders) of an Ethiopian tribal faction may stack with units of another tribal faction or move through a hex containing another tribal faction. No unit of a tribal faction may be activated by a leader of another tribal faction.
The only exception to the above are the Negus units (including the Negus Leader unit). A Negus Imperial Guard battalion (KZ) may be placed assigned to a host leader: it is treated as a unit of that faction for all purposes. It is also treated as a Negus unit. In addition, all Negus units may stack with units of any tribal faction and the Negus leader may activate units of other tribal factions (PB 13.6.2.2).
13.6.2 Ethiopian leaders
Each Ethiopian leader commands their own army, and the activation of those units will vary from turn to turn. During the Ethiopian player's movement segment, the following sequence is used by the Ethiopian player.
- Designate a single leader by their front (or tribal faction if there is no leader).
- Roll a die on the Ethiopian army activation table for the designated leader (exception: the Negus leader does not roll the die and is always considered to achieve a full activation result).
- Depending on the activation level, move and/or attack with the indicated number of units only of that leader's faction (exceptions: the Negus leader and the KZ battalion ~13.6.1). The leader unit will always be able to move its full MFs.
- Flip the leader to its reverse "activated" side.
- Repeat steps 1 – 4 until no more leaders are desired to be activated or can be activated.
All units of factions whose leader(s) have died may move up to 1 hex, but may not attack.
Only units of that leader's faction that are stacked with or adjacent to the activated leader may potentially move more than one hex and/or attack. Ethiopian units that are not adjacent to their leader defend normally, but may only move one hex and may not attack. This is checked at the start of the movement segment (only). Mark those units with a No Leader marker if necessary.
Example: The Ethiopian player first tries to activate the army of Ras Mulugheta and obtains a half activation result. Ras Mulugheta has nine units in addition to the leader unit. They activate five of the nine (½ rounded up), and move and attack with them. The other four units may only move one hex and may not attack. After all movement and combat, the Ras Mulugheta leader counter is then flipped to its reverse activated side, and they try to activate another Ethiopian leader.
When there are no more Ethiopian leaders to activate, or when the Ethiopian player decides they do not want to activate any more Ethiopian forces, proceed directly to the end of turn phase. Flip the Ethiopian leader units back to their front in the end of turn phase.
If an Ethiopian leader dies, it may never return to play and the faction no longer receives reinforcements (PB 13.5.2). (Errata: this first sentence of the last paragraph should read: "If an Ethiopian leader dies, it may never return to play and the faction no longer receives reinforcements (PB 13.5.2)".) The units of that faction may only attack or move more than one hex if activated by the Negus. When their faction is designated for movement (step 1, above), consider that the activation will always be No Activation for the rest of the game.
13.6.2.1 Bribes
The Italian player may attempt to use an RP to modify the activation of a given Ethiopian leader. It must be announced before the Ethiopian player rolls the die, and the RP must come from the RP storage box of the front associated with that leader (13.2.2).
The Ethiopian player must give the Italian player an opportunity for the bribe, after announcing which leader is rolling the die for activation.
IMPORTANT: This procedure is modified by the Great Offensive (PB 13.6.2.4) and Event B7 "Wireless Interception".
13.6.2.2 The Negus' army
A Negus Imperial Guard battalion, if placed with a host leader, may always be activated when that host leader is activated (thus, treat the battalion as one of that tribal faction for all purposes) or when the Negus is activated. It may only be activated once per turn, although the choice of which leader activates it may vary from turn to turn.
The remaining Negus units (the leader and the Imperial Guard units not assigned to another leader) may not be activated until turn 5 or later (exception: see below). Starting with turn 4, the Ethiopian player rolls a die at the start of the MAP and consults the Negus availability table (see PAC). On a Success result, those remaining Negus units are now available to be activated during the remaining Ethiopian movement segments.
IMPORTANT: Before obtaining a Success result, if at least one Italian-controlled unit moves within two hexes of hex 1213 (Addis Ababa), those Negus units are automatically considered to have achieved a successful die roll that turn (that is, they can be activated in the next Ethiopian movement segment and in all subsequent Ethiopian movement segments).
When activated during a movement segment, in addition to any Negus unit stacked with or adjacent to the Negus leader, the Negus leader may also activate up to six non-leader units belonging to other tribal faction(s). These units must still be stacked with or adjacent to the Negus leader and this allows those units to activate twice in this segment. The movement and combat restrictions still apply to those additional units (thus, Negus units could coordinate with multiple tribes, provided that no more than one tribal faction is involved in each individual combat or located in each hex).
Unlike tribal faction units, Negus units may move through and stack with units belonging to other Ethiopian factions. If the Negus leader unit dies, it is permanently removed from the game and all Imperial Guard units may only move one hex per turn and may not attack for the rest of the game. Unlike other tribal leaders, the Negus leader is allowed to stack with another leader unit.
13.6.2.3 Ethiopian tribal units in combat
When the Ethiopian player attacks, all combats are resolved on the Ethiopian combat results table (CRT). Only the modifiers listed on the Ethiopian CRT apply. Note that any attack where at least half of the Ethiopian units attack into or from an amba or mountain hex grants the Ethiopian player an additional +1 DRM.
13.6.2.4 Ethiopian Great Offensive
Once per game and only between turns 2 - 5 (inclusive), the Ethiopian player may announce a Great Offensive as the first action of their movement segment (before the Italian player declares any gas attack ~ PB 13.6.5.1).
First, the Ethiopian player designates a front (13.2.2) for the Great Offensive.
Then, for all leaders on the selected front, the following applies:
- All Ethiopian tribes of that front activate simultaneously without the die roll for activation being required (treat it as a 5: Full activation). The restrictions on stacking and combat between tribes remain in effect (but note that Negus units could coordinate with multiple tribes, provided that no more than one tribal faction is involved in each individual combat).
- All Ethiopian combats gain 2 column shifts to the right (2R).
- All Ethiopian combats increase Ethiopian losses by one.
- Attacks that include one or more Ethiopian units marked with a "gassed" marker gain only one column shift to the right (1R); attacks that include only Ethiopian units marked with "gassed" markers gain no column shift, but also do not suffer the increased losses noted above.
- The Ethiopian player must make a minimum of three attacks during the game turn – if they fail to make all three attacks, the Italian player gains +2 VPs for each attack not made. For each hex subject to an Italian gas attack, reduce the number of mandatory attacks by one.
13.6.3 Ethiopian attrition
Roll a die for each stack of Ethiopian units that has six or more units (leaders included). On a die roll of 1-2, eliminate one unit (at the Ethiopian player's choice, but ?-6 units may not be inspected before removal), and place it in the appropriate available unit pool of the Ethiopian faction. Subtract one from the die roll if the stack is in an amba or mountain hex.
Design note: This simulates several factors: disease, desertions and units returning to their respective villages for the harvest season.
13.6.4 Ethiopian RPs
13.6.4.1 Gaining RPs
The Ethiopian player only obtains RPs by means of Event A3 Foreign Arms and by an R result on the CRT when attacking. The latter simulates weapons, ammunition and other supplies captured by the attacking unit(s).
When the Ethiopian player conducts a combat against at least one Italian or Eritrean unit (not only colonial irregulars) and achieves an R result, place an RP (taken from RPs not in play) in the same hex with at least one Ethiopian unit that was involved in the combat.
Example: A stack of Ethiopian units attacks an isolated Italian light tank unit. The Ethiopian attacks at a ratio of 4:1 after applying terrain modifiers. The Ethiopian player obtains a 6 on the die, which gives a result of 0/2+R. The Italian unit is eliminated and the Ethiopian player receives an RP. This RP marker is stacked with one of the attacking units.
13.6.4.2 RP movement
Ethiopian RPs may only be moved by a leader, and the RP must begin the movement phase stacked with the leader (place any RP on top of the stack). A leader may carry any number of RPs, but carrying at least one reduces its movement by 2 MPs (treat it as a 1-4 unit). A leader may never voluntarily drop an RP.
13.6.4.3 Use of Ethiopian RPs
Ethiopian RPs may be spent to generate a favorable shift in the combat ratio, on attack (1R) or on defense (1L). The units using an RP must be adjacent to an Ethiopian leader with an RP in their hex – this leader need not be the leader of their faction. No more than one RP may be used per combat with the exception of units adjacent to the Negus leader, who allows units to spend up to 2 RPs per combat (and, therefore, up to two shifts per combat).
The Ethiopian player may not use RPs to replace units (7.3.3).
13.6.5 Additional air rules
13.6.5.1 Bombing and gas attacks
For each bombing or gas attack mission conducted by the Italians, the Italian bombing attacks marker is increased by one. If Event A4: League of Nations is drawn on that turn, the Italian player may not conduct any of those missions and may lose a VP depending on the number of gas attacks and bombing missions previously conducted by the Italian player (cumulative across all turns of the game).
Bombing
At the start of a player's combat segment, an air marker may be placed on top of an enemy stack or unit within range. Multiple hexes may be subject to bombing, but each hex requires its own air marker and no more than one air marker may be placed per hex. The die roll for delayed air marker (10.1.4) is modified by +1 DRM.
For each hex subject to bombing, the controlling player rolls a six-sided die (1d6) and consults the air attack table (see PAC).
Gas attacks
In addition to regular bombing missions, Italian air markers may conduct a special form of bombing (called a "gas attack mission") at the start of the Ethiopian player's movement segment – before any Ethiopian leader has been activated but after the designation of a Great Offensive (PB 13.6.2.4).
The Italian player places an air marker on an enemy unit or stack within range, and declares a gas attack. Roll a die and consult the air attack table, using the gas attack result column. The result is the number of units affected by the attack (determined randomly).
Place a "Gassed" marker on the units affected by the attack. The effect on units subject to a gas attack is the same as interdiction (10.1.5), but units subject to gas also have their attack factors halved. They still defend at full strength. Remove the gassed marker from the unit(s) in the end of turn phase.
OPTIONAL RULE: Increased gas effectiveness Gas attacks halve both attacking and defending units. The Italian player may declare only one gas attack during each player phase; declaring as above or during their combat segment.
13.6.5.2 Air supply missions
Up to two steps of Italian Northern Front units may be supplied by an Italian air marker. Units that are only able to trace supply to the Southern Front may not be supplied by air.
To provide air supply, the Italian player places an air marker on the unit(s) within range of an air base on the Northern Front. This must be done at the start of the Italian movement phase, before any of the units have moved. If more than one unit is to be air supplied with the air marker, they must begin the movement segment stacked together and must remain stacked together throughout the movement segment. These units are considered in supply during the subsequent combat segment and the air supply marker is removed in the end of turn phase. No more than one air marker may be used for air supply per turn. This does not provide supply to other units or air bases in the same hex.
13.6.5.3 Italian fronts and air missions
The Italian player initially has three air markers available. The E markers may only be used at air bases and provide support to units associated with the Northern Front (PB 13.2.1). The S marker may only use air bases and provide support to units associated with the Southern Front.
Reinforcement air markers (turn 3 or due to the return of previously delayed ones) must be assigned to a specific front on the turn they are received (if multiple air markers arrive on the same turn, they may be assigned to the same or different fronts, but once assigned they may only support that front).
Once the fronts are connected, the Italian player may freely reassign air markers during the MAP of each turn (but once placed, the air markers only support that front in the present turn).
13.6.6 Supply
13.6.6.1 Italian supply
The ultimate supply source hexes for Italian units are hex 1405 (Massawa) for the Northern Front, and hex 2322 (Mogadishu) for the Southern Front.
13.6.6.2 Ethiopian supply
Ethiopian units are always supplied when they are in Ethiopia.
Ethiopian units outside Ethiopia are only supplied if they are in or adjacent to a dirt track, road or rail hex that can trace back (along a route of connected dirt track, road and/or rail hexes), to a town or capital in Ethiopian territory. This path may be of any length, but must meet the same requirements as for tracing the supply line (9.4).
13.6.7 Movement modifiers
13.6.7.1 Burning villages
All Shoa units, including the leader, have only 4 MPs on game turn 1.
Design note: This simulates the time lost burning and looting the towns of the rebel Raya Galla and Azebo Galla tribes.
13.6.7.2 OPTIONAL RULE: The Danakil desert
The Italian player may move a single air-supplied (PB 13.6.5.2) Italian colonial irregular unit through the desert per turn, at a cost of 1 MP per desert hex. The unit may only move through desert hexes along the dirt track route, and may not end its movement in a desert hex.
Design note: The Italian army managed to move a small number of troops through the Danakil desert, one of the most inhospitable places on the planet. Conditions were so bad that food could not be sent because it would spoil by the time it reached the troops. To counter this, the Italians supplied the units by air, including parachuting in live goats.
13.6.7.3 Tug movement
In the Ogaden region of Ethiopia and in Italian Somaliland, European and Italian Eritrean colonial regular units that move following the bed of the Jubba river (from hex 1925 to hex 1420) or Wabi Shebeli (from hex 2321 to hex 1916) may double their MF without having to roll the die on the Forced March table. To follow a river bed, all hexes entered by the unit must be contiguous Tug hexes (as indicated on the map).
Design note: The above rule simulates the lack of reliable maps of the area, which made river beds the most common invasion routes. "Tug" means "dry bed" in the Somali language.
13.6.7.4 OPTIONAL RULE: First to enter
The first Italian unit to enter an Ethiopian capital or town may never be an Eritrean colonial unit or an Italian colonial irregular unit. It must be a regular or Black Shirt unit.
Design note: For example, the Eritreans were prevented, for propaganda reasons, from being the first to enter Gondar and Addis Ababa.
13.6.8 Badoglio, Frusci and Starace columns
On game turn 4, the Italian player receives the Starace, Frusci and Badoglio column counters as reinforcements. These units are treated as breakdown units (2.4) when first placed on the map, but require truck units to be formed. That is, the Italian player does not bring in those units as regular reinforcements, but removes a step from a unit already on the map and places the associated column in its hex, as in the placement of a breakdown unit. Once placed, they are treated as regular Italian units for all purposes.
To form one of those units, the Italian player must permanently remove a truck unit; to form two or three of the units, the Italian player must permanently remove two truck units. The step removed to form the unit must be of the corresponding type (thus, to form the Starace column, a step from any three- or four-step Black Shirts division must be used). To form the Badoglio or Frusci column, use a step from any three- or four-step Italian regular division.
13.6.9 Irregular units
All irregular units are initially deployed showing their front, on their '?-6' side. No player may look at the reverse of the counter until it is revealed in the combat ratio calculation step. When eliminated, place them back in the appropriate pool of available Ethiopian units.
13.7 Events
Strategic turn A comprises turns 1 to 4. At the start of the game, put all the event markers of strategic turn A into the event pool.
At the start of turn 5, add the event markers of strategic turn B to the event pool.
14. Rules for the 1940-41 Scenario
The Allied player is the first player in this scenario.
14.1 Game length
Eleven one-month turns, from June 1940 (turn 1) to April 1941 (turn 11). The scenario begins at the start of the event phase.
14.1.1 Areas in play
Initially, the entire map is in play, except French Somaliland. French Somaliland begins the game as neutral, but may become Allied-controlled when Event C1: French Somaliland is drawn (PB 14.6.6). No unit may enter French Somaliland while it is neutral.
14.1.2 Initial control
At the start of the game, the Italian player controls all hexes in Eritrea, Ethiopia and Italian Somaliland, unless otherwise stated. The Allied player controls all (Anglo-Egyptian) hexes in Sudan, Kenya and British Somaliland. Eritrea and Italian Somaliland are the colonial metropolises for the Italian player, and Sudan, Kenya and British Somaliland for the Allied player.
Ethiopia is not considered a colonial metropolis for either player (this is important for ambushes when using forced marches).
14.2 Fronts
There are no front limits in this scenario for air units – all air markers may be used to support any unit within range of a friendly base.
For RPs, there are five fronts – three for the Allied and two for the Italian. The three Allied fronts are associated with the three starting Allied countries, each with its own RP storage box. The Italians have two fronts for the use of RPs, one associated with Eritrea and Ethiopia, and the other with Italian Somaliland. RPs must be used in a USS hex with the associated front, when tracing an RP supply route.
Example: An Italian HQ is in British Somaliland. If it can trace an RP route back to Mogadishu, it could spend an RP from the Italian Somaliland RP storage box; if it can trace an RP route back to Addis Ababa or Massawa, it could spend an RP from the Ethiopia/Eritrea RP storage box; if it cannot trace such a route to either, it cannot spend any RPs.
14.3 Setup
14.3.1 Marker placement
Place the game turn marker in box 1 of the General Records Track (GRT). Place the Italian fuel available marker in box 6 of the GRT. Place the Italian prestige level marker in box 5 of the GRT. Place all the event markers of strategic turn C in the event cup.
14.3.2 Italian setup
The Italian player sets up first, according to the scenario card.
IMPORTANT: At least one Italian brigade or division (not colonial irregulars or armored regiments) must begin at or adjacent to each town, capital and amba hex in Ethiopia.
Anywhere within Eritrea Place the SN HQ unit, one Italian colonial irregular unit, and all Italian units with an E in the upper left corner, anywhere within Eritrea.
Anywhere within 2 hexes of hex 1213 (Addis Ababa) Place one Italian colonial irregular unit, and all Italian units with 1213 in the upper left corner in Ethiopian territory, anywhere within two hexes of hex 1213 (Addis Ababa).
Anywhere within 3 hexes of hex 1208 (Amba Aradam) Place all Italian units with 1208 in the upper left corner in Ethiopian territory, anywhere within three hexes of hex 1208 (Amba Aradam).
Anywhere within 3 hexes of hex 1814 Place one Italian colonial irregular unit and all Italian units with 1814 in the upper left corner in Ethiopian territory, anywhere within three hexes of hex 1814.
Anywhere within 2 hexes of hex 0714 Place the two regular colonial brigades marked with 0714 in the upper left corner in Ethiopian territory, within two hexes of hex 0714.
Anywhere within 4 hexes of hex 1318 (Neghelli) Place one Italian colonial irregular unit and all Italian units with 1318 in the upper left corner, in Ethiopian territory anywhere within 4 hexes of hex 1318 (Neghelli).
Anywhere within Italian Somaliland Place one Italian irregular unit and all units with an S in the upper left corner anywhere in Italian Somaliland.
Anywhere within 2 hexes of hex 1925 (Kismayo) Place one Italian colonial irregular unit and the two Italian units with 1925 in the upper left corner, in Italian Somaliland, within two hexes of hex 1925 (Kismayo).
Anywhere within Eritrea, Italian Somaliland or Ethiopia Fourteen RPs to be distributed between the two Italian RP storage boxes. No more RPs are received during the scenario except when Event C3 Blockade Runner is drawn.
All remaining Italian 1940-41 units (including the SE HQ unit) may be freely deployed anywhere within Eritrea, Italian Somaliland or Ethiopia. All truck units may be placed on the map or placed in the RP storage box corresponding to the USS in their region of placement (for example, Italian Somaliland or Eritrea/Ethiopia).
Design note: It is highly recommended to place units in all amba hexes and in many town and capital hexes, to prevent the Ethiopian guerrillas (PB 14.6.4) from occupying them. The Italian player should be aware that the Free French may activate from Djibouti.
14.3.3 Allied setup
The Allied player sets up second, according to the scenario card.
British Somaliland Place the Somali Camel Corps (SCC), the A and B breakdown units, and the truck designated So anywhere in British Somaliland. One RP is placed in the British Somaliland RP storage box.
Sudan Place the C and D breakdown units, the SDF1 and SDF2 units and the truck unit designated SD anywhere in Sudan. Three RPs are placed in the Sudan RP storage box.
Kenya Place the two KAR brigades, the EAF HQ unit and the two truck units labeled with a K anywhere in Kenya. Two RPs are placed in the Kenya RP storage box.
Design note: At the start of the scenario, the Italian player has a significant advantage in both numbers and overall combat strength – the Allied player is advised to keep this in mind when setting up (see also the sudden death victory conditions, below). Historically, the Italians conquered British Somaliland and went on the offensive in both Kenya and Sudan!
Starting resource points and trucks The Allied player also places three RPs in one or more of the RP storage boxes. No more than one RP may begin in the British Somaliland RP storage box. The starting truck units may each begin on the map or in the RP storage box corresponding to the country in which they are placed.
Reinforcement trucks Allied reinforcement trucks are freely deployed anywhere when they arrive.
Mission 101 marker The Mission 101 marker is available at the start of the scenario (PB 14.6.4.2).
Allied breakdown units Note that these units may never return to play once eliminated, since the Allied player has no 3- or 4-step units in this scenario.
OPTIONAL RULE: BF and GF Regiments If using this optional rule, the Allied player has the option to place those two regiments in Sudan at a cost of 1 eliminated step from a KAR Brigade for each unit so placed.
Ethiopian guerrillas The Allied player controls Ethiopian guerrillas in addition to the CW forces. The non-leader Ethiopian Shoa (red stripe), Gojjam (light blue stripe only) and Beghemder (green stripe) faction units represent these guerrillas. These randomly drawn units are placed on their front side (showing their ?-6 side) – neither player may inspect the actual strength of the unit until they are involved in combat (12.7).
- Put all non-leader Shoa (red stripe) units in an opaque container. Randomly take any three Shoa units and place them in any hex in Ethiopia within two hexes of hex 1213 (Addis Ababa) not occupied by an Italian unit. The remaining Shoa units form the Shoa guerrilla pool – they will be available as guerrilla reinforcements on later turns.
- Put all non-leader Gojjam units with the light blue stripe in an opaque container. Choose two at random and place them in any hex in Ethiopia within two hexes of hex 1012 (Debra Marcos) not occupied by an Italian unit. The remaining Gojjam units with light blue stripe form the Gojjam guerrilla pool – they will be available as guerrilla reinforcements on later turns.
- Put all non-leader Beghemder (green stripe) units in an opaque container. Choose three at random and place them in any hex in Ethiopia within two hexes of hex 1009 (Gondar) not occupied by an Italian unit (exception: not in Tigray – see 14.6.4.1). The remaining Beghemder units form the Beghemder guerrilla pool – they will be available as guerrilla reinforcements on later turns.
Dummy counters The Allied player randomly draws eight dummy markers – this forms the dummy pool. Six are randomly drawn from this pool and may be deployed anywhere in Sudan, Kenya or British Somaliland (maximum of one in British Somaliland) (PB 14.6.5).
French Somaliland Place all Free French units in hex 1910 (Djibouti). They are not at that moment controlled by the Allied player, but may become active either by Event C1 French Somaliland, or – in the case of the BdO Brigade, on turn 9 if not already active.
Design note: They are placed at Djibouti to help remind the Italian player that the French could become a threat to their flank; experienced players may leave them off the map until needed.
14.3.4 Campaign game modifications for 1935-36 scenario results
If the players are playing the campaign game connecting both scenarios, the player who played the Italian side in the 1935-36 scenario must again be Italian in this scenario. The results obtained in the 1935-36 scenario will affect the number of guerrillas at the start, as well as the subsequent guerrilla recruitment.
- If the Italian player achieves a strategic victory, reduce the three starting guerrilla factions by one. In addition, the Allied player must apply a -1 DRM to their guerrilla recruitment die roll each turn, until Negus is in Ethiopia (PB 14.6.4.4).
- If the Italian player achieves a tactical victory, no changes are made.
- If the Ethiopian player achieves a tactical victory, the Allied player may draw one additional guerrilla unit during setup for two of the three factions.
- If the Ethiopian player achieves a strategic victory, all three guerrilla factions draw one additional guerrilla unit during setup. In addition, the Italian player may not spend RPs to replace (7.3.3) regular colonial units if the Italian prestige level is currently low (PB 14.6.3.2).
OPTIONAL RULE: Additional impacts from the previous scenario The player may decide to use any or all of the following additional changes from the scenario, based on the result of the 1935-36 scenario.
- Any road built by the Italian player remains in this scenario. For each road built along the dirt track leading between Asmara and Addis Ababa, the Italian player may either place an additional road marker anywhere within Ethiopia, Eritrea or Italian Somaliland, or increase the Italian starting RPs by one.
- If the Italian player achieves a strategic victory, regular colonial units may be rebuilt during the course of the scenario.
- If the Ethiopian player achieves a strategic victory, the Allied player rolls a die after the Italian player has set up; the Italian player must remove that number of steps from colonial units (regular and irregular). If the Ethiopian player only achieves a tactical victory, halve the die roll to determine the step loss that must be applied.
14.4 Victory conditions
14.4.1 Victory points (VPs)
At the end of turn 11 (April 1941) the Allied player calculates the number of VPs accumulated during the game; to count, a VP hex must be occupied by at least one supplied Allied-controlled unit (exception: Addis Ababa must be occupied by a non-guerrilla unit to count the VPs). Some VPs are accumulated during the game – these are recorded with the associated VP marker (rotate the marker to reflect negative VPs).
-
+4 VPs for occupying hex 1213 (Addis Ababa).
-
+2 VPs each for the occupation of each of hex 1307 (Macallé), hex 1009 (Gondar), hex 1310 (Dessié), hex 1012 (Debra Marcos), hex 1711 (Dire Dawa), hex 1712 (Harar), hex 1516 (Gaba) and/or hex 1118 (Yabello) (all towns with white font, other than Addis Ababa).
-
+1 VP for each amba hex occupied: hex 1104 (Dongolaas Gorge), hex 1208 (Amba Aradam), hex 1308 (Amba Alagi), and hex 1311 (Ad Termaber).
-
+1 VP for the occupation of hex 1305 (Asmara) and +2 VP for hex 1405 (Massawa).
-
+1 VP for the occupation of hex 1925 (Kismayo) and +2 VP for hex 2322 (Mogadishu).
-
-5 VPs if the Negus is killed or captured (PB 14.11.4 [sic; printed as such in the source]).
-
-2 VPs if hex 2311 (Berbera) is occupied by an Italian-controlled unit.
-
-2 VPs for each turn that begins at high IPL (PB 14.6.3); judged at the start of the MAP (before any other actions).
-
+1 VP for each turn that begins at low IPL; judged during the MAP.
14.4.2 Victory levels
There are 30 possible VPs in total, not counting negative VPs.
- Allied strategic victory: 26 or more VPs.
- Allied tactical victory: 23 - 25 VPs.
- Italian tactical victory: 18 - 22 VPs.
- Italian strategic victory: 17 or fewer VPs.
14.4.3 Sudden death victory
The Italian player wins an automatic sudden death victory if they reduce the Allied player's control of USS hexes to only one of the initial Allied home countries (Kenya, Sudan and British Somaliland).
Example: The Allied player takes Berbera in British Somaliland and both supply hexes in Kenya, reducing the Allied player's USS hexes to only those in Sudan. The Italian player wins an automatic sudden death victory.
(Translator's note: the example is reproduced as printed in the source, in which the Allied player "takes Berbera ... and both supply hexes in Kenya" [sic].)
14.4.4 Campaign game victory
If this scenario is played as part of the campaign game, the winner of the campaign game is determined as follows: First, if the Allied player achieves a strategic victory in this scenario -or- achieved a tactical victory and controlled all three Italian USS hexes, the Allied player wins the campaign game. Otherwise, victory in the campaign game is determined by comparing the number of VPs achieved by the Italian player in the '35-36 scenario, against the number of VPs achieved by the Allied player in this scenario. Whoever has the higher value wins the campaign game. If both players tie, then the Allied player wins if the Negus was eliminated in either scenario; otherwise the game ends in a draw.
14.5 Modifications to the sequence of play
In addition to rail and naval movement (PB 14.5.1), at the end of the MAP, the Allied player rolls the die for Italian colonial desertion (PB 14.6.3.1) and the Allied player recruits Ethiopian guerrillas (PB 14.6.4.1).
14.5.1 MAP: Rail and naval movement
The Italian player may use rail movement only along the rail line that connects hex 1405 (Massawa) with hex 1104 (Dongolaas Gorge). The Italian player may not conduct naval movement in this scenario.
OPTIONAL RULE: Repair of the Djibouti to Addis Ababa railroad line The Italian player may declare at the start of the game that they are repairing the railroad line that runs from Djibouti to Addis Ababa. After declaring it repaired, the Italian player rolls a die and adds three (D6 + 3) and removes that amount of their starting RPs from the game (those RPs may come from any location). For the rest of the game, during the MAP, the Italian player (only) may use rail movement with up to 1 division or equivalent (two non-division units) along the rail line connecting hex 1213 (Addis Ababa) to hex 1910 (Djibouti) – noting that hex 1910 may only be entered if French Somaliland is a playable country (PB 14.6.6).
The Allied player may use rail movement only along the rail line in Sudan, connecting hex 0508 to hex 1001. Naval movement may begin in an appropriate coastal hex (11.16).
14.5.2 Reinforcement and replacement rules
14.5.2.1 Allied reinforcements and replacements
The Allied player receives three RPs per turn during game turns 2 to 6 (June-December 1940) and four RPs per turn during game turns 7 to 11 (January-April 1941). They are placed in one or more of the three Allied RP storage boxes (Sudan, Kenya or British Somaliland). No more than one RP per turn may be placed in the RP storage box in British Somaliland (this may be reduced by Event C2 War Office Orders No Resistance).
Allied reinforcements and rebuilt units may be placed in hexes 0505 (Khartoum), 0508 or 1001 in Sudan, hexes 1122 (Marsabit) or 1327 in Kenya, or hex 2311 (Berbera) in British Somaliland (at the Allied player's choice). Reinforcements must satisfy the stacking requirements (8.2) when placed. If the chosen hex is fully stacked, the unit(s) may be placed in an adjacent hex (the other entry hexes need not be fully stacked to use this ability). No more than one reinforcement unit or rebuilt unit (total), including deception units, may be placed per turn in British Somaliland (this may be reduced by Event C2 War Office Orders No Resistance).
OPTIONAL RULE: Regional units The SCC may only be rebuilt in hex 2311 (Berbera) and SDF1 and SDF2 may only be rebuilt in hexes 0505 (Khartoum), 0508 or 1001. Rebuilding the SCC does not count against the maximum of one reinforcement or rebuilt unit within British Somaliland. If French Somaliland joins the Allied side (PB 14.6.6), rebuilt Free French units must appear in Djibouti.
14.5.2.2 Italian reinforcements and replacements
The Italian player has fourteen RPs available at the start of the game. They may be distributed to either of the two Italian RP storage boxes.
The Italian player does not receive additional RPs during the game with the exception of Event C3 Blockade Runner.
14.5.2.3 Rebuilding units
Eliminated Italian units may not be rebuilt (7.3.4) once eliminated. They may, however, be replaced (7.3.3) if RPs are available.
IMPORTANT: Black Shirt units and the 40th and 65th infantry divisions may not be rebuilt or replaced (they are marked with a black circle with no replacement).
Non-guerrilla Allied units may be replaced and rebuilt normally (exception: Negus ~ PB 14.6.4.4).
14.5.2.4 Capture of enemy ports
If hex 1405 (Massawa), hex 2322 (Mogadishu), or hex 1925 (Kismayo) are under control of Allied forces, the Allied player may place reinforcement units there. In addition, the Allied player may use the RP storage boxes associated with Mogadishu and/or Massawa if they control these hexes (respectively). (This passage is printed in English in the Spanish source.)
Example: If the Allies take Massawa, Allied HQs could trace an RP path to Massawa to use any Allied RPs in the Massawa RP storage box (which could be placed there via Naval Movement or Reinforcements).
14.5.2.5 Breakdown counters
Only the two Italian regular divisions (40th and 65th Divisions) may be broken down into 3-4-4 regiment-size units (2.4). No other Italian unit may break down in this scenario. The Allied player has no three- or four-step units in this scenario.
14.5.3 Player order
The Allied player is the first player and the Italian player is the second player.
14.5.4 Second player movement and combat segments
If one or more Italian armor units, HQs or trucks move (or if armor units attack), the Italian player must reduce their available fuel reserve (PB 14.6.1.1). Fuel is also reduced if one or more air units are used during the first or second player's movement or combat segment, but no more than one fuel is lost per player phase (thus, a maximum of two fuel spent per turn).
Design note: Even though the German volunteer unit DMK is a motorized unit, it does not cost the Italian player fuel if it moves.
Italian attacks against guerrilla units must be checked before rolling the die for the attack (PB 14.6.4.5).
14.6 Special scenario rules
14.6.1 Supply
14.6.1.1 Italian supply
Ultimate supply source (USS) hexes The USS hexes for Italian units are: 1405 (Massawa), 2322 (Mogadishu), and 1213 (Addis Ababa).
Italian fuel limits The Italian player has a limited supply of fuel for aircraft and tanks. The Italian fuel level begins at six at the start of the scenario.
Reduce the available Italian fuel by one for each of the following conditions:
- During a game turn, if the Italian player moves one or more of their armor units, HQs or trucks, attacks with one or more armor units, and/or places one or more air markers during a player phase. Only one fuel is spent per player phase in this manner, regardless of the number of units moved and/or air markers placed.
- When hex 1925 (Kismayo) is conquered by Allied forces.
- When hex 1405 (Massawa) is conquered by Allied forces.
- Reduce the available Italian fuel by two when hex 1213 (Addis Ababa) is conquered by Allied forces.
Example: The Allied player conducts several attacks during their portion of the turn, forcing the Italian player to fly an air unit; this reduces Italian fuel by one. During the second player phase, the Italian player moves several tanks and trucks, reducing Italian fuel a second time. However, during the Italian combat segment, the Italian player may fly the second air unit without reducing the fuel reserve, since it had already been reduced during the current phase (due to the movement of the tanks and trucks).
Errata (PB 14.6.1.1): When the Italian fuel supply reaches 0, the Italian player cannot move HQ, truck, or armor units, cannot attack with armor units, and cannot use air units for any purpose.
OPTIONAL RULE: Captured fuel depots The first time an Italian unit enters an Allied USS hex, increase the Italian fuel level by one.
14.6.1.2 Allied supply
Ultimate supply source (USS) hexes The USS hexes for Allied units are hexes 0505 (Khartoum), 0508, and 1001 in Sudan; 1122 (Marsabit) and 1327 in Kenya; and 2311 (Berbera) in British Somaliland. Hex 1910 (Djibouti) is also a USS hex for the Allied player if French Somaliland joins the Allied side (14.6.6).
14.6.1.3 Ethiopian supply
Ethiopian guerrilla units are always in supply in Ethiopia and may not leave Ethiopia.
14.6.2 Movement
14.6.2.1 Asmara to Addis Ababa road
Consider the dirt track through Amba Alagi, from Asmara to Addis Ababa (hexes 1305 to 1213, inclusive), as road hexes for all purposes.
14.6.2.2 Weather effects
During the game turns of July, August and September (turns 2-4), it is the rainy season in the Ethiopian highlands; torrential rains that turn dirt tracks into oceans of mud and dry stream beds into raging torrents.
The effects are that all hexes not in Eritrea, the Ogaden region or British, French or Italian Somaliland have their terrain costs doubled. This applies even if they move along a road/railroad and doubles all hex and hexside costs.
14.6.3 Italian prestige level (IPL)
The Italian record level tracks the prestige among the Amhara, the Shoans, and the other peoples who inhabit Italian East Africa. Most of the Italian colonial army was formed by natives who sometimes fought loyally and sometimes did not. The IPL also records the morale level of the Italian army, whose main concern was the safety of thousands of Italian settlers. When the safety of civilians was at risk, Italian commanders generally chose to surrender a town without a fight to allow British forces to possess them as soon as possible to prevent the Ethiopians from taking revenge and committing atrocities against the Italian settlers. The prestige level begins at five (medium), and was never negative.
14.6.3.1 Colonial unit desertion
During each MAP, the Italian player rolls a die to check for desertions among the Italian colonial units (regular and irregular colonials). Roll 1d6 and check the Italian colonial desertion table. The current IPL and how well Ethiopia is garrisoned may modify the die roll and the Allied player may attempt to bribe the colonials (see below).
Bribes The Allied player may attempt to use an RP to modify the desertion die roll by +1 DRM. This must be announced before the Italian player rolls the die; the RP may come from any RP storage box.
Results The Italian player removes from the game (simply take it and remove it, regardless of its location on the map or its supply status) one colonial unit for each unit indicated as a deserter (?-6 units may not be inspected before removal).
IMPORTANT: If the IPL is zero and the modified desertion die roll is eight or greater, the Allied player removes the second unit (or the third).
14.6.3.2 Italian prestige levels
The Italian prestige level (IPL) is modified by certain events, as shown on the player aid card. Adjustments to the IPL occur immediately when control of a hex changes or when Negus ends a movement within the original Ethiopian borders of 1935-36.
Effects of the Italian prestige level
- Low IPL (4 or less)
- +1 DRM to the Italian colonial desertion die roll (see PAC).
- +1 DRM to the guerrilla recruitment die roll (see PAC).
- Medium IPL (5 to 8)
- No effects.
- High IPL (9 or more)
- -1 DRM to the Italian colonial desertion die roll.
- -1 DRM to the guerrilla recruitment die roll.
14.6.4 Gideon Force, Mission 101 and the Ethiopian guerrillas
14.6.4.1 Ethiopian guerrillas
During the MAP of each turn, the Allied player may attempt to recruit Ethiopian arbegnoch (patriot) guerrilla forces. These forces operated independently and were extremely reluctant to leave their home regions. It was also easier to recruit them when the prospect of loot and victory were more certain. The Ethiopian guerrillas are represented by the red stripe Shoa units, the light blue stripe Gojjam units and the green stripe Beghemder tribal faction units; they move and operate as normal units except as noted below.
- They are always in supply and must always end their movement within Ethiopia.
- Guerrilla units of different tribal factions (Shoa, Gojjam and Beghemder) do not cooperate with any other units except the units of their own tribal faction (although see below).
- Guerrilla units may be included in an attack with Commonwealth units (only), but contribute zero combat factors (and are treated as zero combat factor units for all purposes); they are still flipped to their non-? side if used. They may be used to gain a concentric attack bonus (12.9) and may be taken for losses like any other 0 combat factor unit (12.11).
- Guerrilla units alone in a hex may not receive air or HQ support and may not move through a hex containing other guerrilla tribal faction units.
- Unlike other units, guerrilla units may occupy the same hex as Italian-controlled units. For each guerrilla unit in the hex, one Italian-controlled unit (at the Italian player's choice) suffers the effects of interdiction (10.1.5). This is not cumulative with interdiction via air marker and may not be chosen for the interdiction of that unit. Italian units may move into or through hexes occupied by guerrilla units and may attack guerrilla units in their same or an adjacent hex; however, they may not use forced march to enter or leave a hex with a guerrilla unit. Guerrilla units attacking an Italian-controlled unit in their hex are ignored for determining the concentric attack bonus (12.9). Hexes in which both players have units may be freely inspected by both sides (?-6 units may still not be revealed). Stacking limits apply separately for both sides.
OPTIONAL RULE: The long march home To prevent the Allied player from abusing the guerrilla rules, players may choose to allow forced march through a hex occupied only by guerrilla units, but requiring an additional -2 DRM modifier to the die roll for the forced march when entering or leaving the hex occupied by the guerrilla unit(s).
- Guerrilla units alone in a hex control the hex (for VP and IPL purposes); otherwise the other unit(s) in the hex control the hex. In this latter situation, the guerrilla units qualify for the shifts on the TEC for non-town, city or amba if attacked.
Example: A guerrilla unit moves on top of an Italian unit in Amba Aradam. During the Italian player's phase, a unit in this hex would have ½ MPs. If the Italian player chooses to attack the guerrilla unit, the guerrilla unit would still obtain a column shift for the mountain terrain in the hex, but not the two column shifts for the amba.
- Non-guerrilla Allied units may stack with guerrilla units (treat guerrilla units as ½ of a division for stacking purposes), but if attacked, the guerrilla units do not contribute to the defense strength of the hex, may not be taken to absorb losses and if the non-guerrilla units are eliminated, the guerrilla units are also eliminated (they melt away in the field upon seeing the defeat of the regular army units).
- Ethiopian guerrilla units remain on their ?-6 side until combat resolution (12.7; PB 14.6.4.5) and if eliminated, return to their respective available guerrilla pool.
- Ethiopian guerrilla units defending alone in a hex require the Italian player to conduct a counter-guerrilla die roll (PB 14.6.4.5) to see if that attack actually proceeds.
- Immediately after the Italian player designates a combat target hex, but before conducting the counter-guerrilla die roll or revealing units, all attacking units must check to see if there are guerrilla units in or adjacent to their supply line (9.4). Guerrilla units in the designated combat hex are ignored for these purposes. If any Italian unit in the attack must trace a supply line that passes through a hex occupied by a guerrilla, the attack suffers a shift of the combat ratio to the left; if the supply line passes adjacent (even if that hex contains an Italian unit), the attack suffers a -1 DRM. These are not cumulative. Note that supply may not be traced to a USS occupied only by guerrilla units (since they control that hex).
Recruitment of Ethiopian guerrillas During the MAP, the Allied player may attempt to recruit new guerrilla units by rolling the die once on the guerrilla recruitment table and applying all modifiers. The die roll may be modified by the result of the previous scenario (PB 14.3.4), the current Italian prestige level, by the use of the Mission 101 counter (PB 14.6.4.2), and by the Gideon Force and/or the Negus (PB 14.6.4.3; PB 14.6.4.4), if they are in Ethiopia.
This will result in zero to three new guerrilla units arriving as reinforcements. The Allied player may place a maximum of one from each guerrilla faction, subject to the following restrictions:
- Shoa guerrillas: Must be placed in a hex within two hexes of hex 1213 (Addis Ababa).
- Gojjam guerrillas: Must be placed in a hex within two hexes of hex 1012 (Debra Marcos).
- Beghemder guerrillas: Must be placed within two hexes of hex 1009 (Gondar) (but not in Tigray).
- They must be placed in a hex free of Italian-controlled units and obey all stacking rules when placed.
For each reinforcement guerrilla unit, the Allied player randomly draws one from the guerrilla pool of that tribe. If at that time all are on the map, that tribe receives none. These randomly drawn units are deployed face up (showing their ?-6 side).
Pro-Italian regions Ethiopian rebel units may not be recruited in the following territories: Somalia (British, French and Italian), Eritrea, and the regions of Tigray or Ogaden. Tigray and Ogaden are marked on the map by orange dashed lines. The Italians have a +1 DRM to the Italian counter-guerrilla die roll (PB 14.6.4.5) when attacking guerrilla units in Tigray or Ogaden.
14.6.4.2 Mission 101
Mission 101 is available at the start of the scenario. Before rolling the die for guerrilla recruitment, the Allied player may spend an RP from any RP storage box to modify the guerrilla recruitment die roll for this turn by +2 DRM.
OPTIONAL RULE: Improved guerrilla coordination The Allied player may spend an RP from any RP storage box to allow guerrilla units in a hex to contribute their combat factors to a combat with Commonwealth units (not Free French or other guerrilla factions). This decision must be made after designating the attacking units, but before revealing the units (12.4). More than one RP may be spent per combat in this way, but each RP only allows one hex of guerrillas to participate in the attack.
Design note: During the Ethiopian campaign, the British began to send food, weapons and resources to Ethiopia to help the local guerrillas who still resisted the Italian occupation. In August 1940, the British established Mission 101 under the command of Colonel Daniel Sandford, former advisor to the Negus. The role of Mission 101 was to contact the Ethiopian guerrillas and provide any of those leaders who agreed to fight the Italians with money and weapons. Mission 101 would go on to organize "operational centers", for example, cadres of officers and NCOs to supply weapons, training and coordination to the Ethiopian guerrillas.
(Errata/FAQ: The Mission 101 ability can be used multiple times, including multiple times in a turn if playing with the optional rule. The only restriction is having the RPs to expend.)
14.6.4.3 Orde Wingate's Gideon Force
At the start of game turn 6, the Allied player receives Orde Wingate's Gideon Force as a reinforcement. If eliminated, this unit may be rebuilt as a normal Allied unit.
The Gideon Force operates as a regular Allied unit with the following special ability. During the MAP, if in Ethiopia and not in the Ogaden or Tigray regions, the guerrilla recruitment die roll receives a +2 DRM (PB 14.6.4.1); this is cumulative with the +2 DRM for spending an RP (14.6.4.1).
Design note: The Gideon Force was a small native African force led by Major Orde Wingate, who would later gain fame as commander of the Chindits in the Burma campaign. Wingate arrived in Sudan in November 1940 to form a guerrilla force that would resist the Italians. This unit operated in the enemy's rear, harassing Italian forces and reaching a guerrilla strength. Wingate had proposed that the creation of such a force would result in "a thousand resolute and well-armed men [who] can paralyze 10,000".
14.6.4.4 The Negus
The Negus leader counter enters the game on turn 6 and is controlled by the Allied player. It is treated as a Commonwealth unit for all purposes, except as noted below (for example, the Italian player does not gain a +1 DRM for air support against the Negus unit).
While outside Ethiopia, the Negus leader unit may move as a regular Allied-controlled unit. However, to enter a hex of Ethiopia, it must be stacked with the Gideon Force unit and must remain stacked with the Gideon Force whenever it remains in Ethiopia. The first time it enters Ethiopian territory, reduce the IPL by two (PB 14.6.3.2).
If the Negus is stacked with the Gideon Force in Ethiopia, the modified recruitment die roll for the Gideon Force receives a +4 DRM, not a +2 DRM. If the Italians achieved a strategic victory in the 1935-36 scenario, the -1 DRM associated with that result does not apply on a turn that the Negus is within the original borders of Ethiopia.
If the Negus unit is eliminated in combat, it is permanently removed from the game. If the Gideon Force is eliminated while stacked with the Negus, roll a die. On a roll of 1-3, the Negus unit is also eliminated. On a 4-6, the Negus escapes and may return as a reinforcement on the next game turn.
14.6.4.5 Italian counter-guerrilla operations
When the Italian player declares a combat against a hex occupied only by Ethiopian guerrilla units, a die is rolled after designating all attacking units, but before revealing the ?-6 units. On a modified result of four or less, the guerrilla unit(s) escape – the guerrilla unit(s) remain in the hex and the Italian units may not attack again during their combat segment.
| Die roll | Result |
|---|---|
| 1-4 | Nothing happens |
| 5+ | Attack normally |
Several modifiers apply to this die roll (see PAC).
14.6.5 Dummy counters
At the start of the scenario, the Allied player draws 8 dummy counters from the dummy counter pool for the scenario; the remaining four dummy markers are set aside and not used. Of the eight, the Allied player initially places six randomly drawn dummy counters during setup, and receives two additional dummy counters as reinforcements during each of turns 2 to 6, if available. A maximum of 8 dummy counters may be in play at a time. Reinforcement counters come from the pool of available dummy counters and may be placed in any hex containing an Allied-controlled unit or according to the regular reinforcement rules (placement in British Somaliland is limited ~ PB 14.5.2.1).
Dummy counters have a front side showing Dummy and a reverse that either also says Dummy or has a 0-x-4 unit, where the defense varies from 1 to 3. The Allied player may freely inspect those units, but places them so that the Dummy side is face up. The Italian player may not inspect a dummy counter with its front Dummy side face up, until they attempt to move into its hex (at +1 MP, but see below), or the dummy counter is involved in a combat. In either of those situations, the dummy counter is flipped to its reverse at that moment (for an attack, the Italian player must declare all attacking units before the dummy marker is revealed). If the word Dummy is on its reverse, simply remove the marker from the map and treat it as a defenseless unit (11.14 [sic; 11.6]; 12.17 [sic; 12.13]). In all other situations, the revealed dummy counter is now treated as a regular Allied unit for all purposes and will not return to its front side until it is eliminated and drawn again as a reinforcement.
An eliminated dummy counter (or one that was revealed as a Dummy), is immediately placed back in the pool of available dummy counters. If the dummy unit is in the hex with a regular combat unit when the Italian player attempts to enter its hex, the Allied player only reveals the regular combat unit and not the dummy unit. Units that attempted to move into a hex in this way, or into a hex that now contains a 0-x-4 unit, return to their previous hex and must end all movement.
While on their front side, they count for stacking, have 4 foot MPs, may not force march and are considered to control hexes for all purposes (including VPs) until they are revealed to be a true "dummy" (by their reverse). The Allied player may always voluntarily remove a dummy marker during the end of turn phase, which is done so that a new reinforcement dummy marker may be placed elsewhere on the next turn.
Design note: The dummy counters represent the tendency of Italian intelligence to overestimate the number of enemy troops they faced.
14.6.6 Free French and French Somaliland (Djibouti)
All Free French units begin in hex 1910 (Djibouti), although they are not Allied-controlled units at the start of the scenario (French Somaliland is neutral at the start).
However, when Event C1 French Somaliland is drawn, there is a possibility that French Somaliland will join the Allied side (see event text). If it does, the following occurs:
- The BdO Brigade (Brigade d'Orient) and the two TS regiments become Allied player-controlled units in Djibouti for all purposes, including RP expenditure. Alternatively, the BdO brigade may be placed immediately as a reinforcement (7.2) in hex 1001.
- One RP is added to the Berbera RP storage box and Djibouti is treated as a USS hex associated with the British Somaliland RP storage box.
- French Somaliland is now an active area for units of both sides.
- Allied reinforcements may enter Djibouti.
OPTIONAL RULE: French call to war No Free French unit may leave Djibouti until turn 3 or later. If France joins the Allied side before turn 3, the two TS regiments must remain in Djibouti and the BoO brigade must also remain if the Allied player does not choose to send it to hex 1001.
If French Somaliland remains neutral, the BoO brigade will instead enter as an Allied-controlled unit on turn 9 in hex 1001 and the two TS regiments will never be received by the Allied player.
The Italian player may never voluntarily declare war on or enter French Somaliland while it is neutral.
(Errata/FAQ: On some Reinforcement cards, the guerrilla tribes are unclear for the '40-41 scenario setup. The playbook is correct, so make sure you are using the right color tribal units (Shoa, Gojjam, and Beghemder).)
14.6.7 Allied withdrawals
In the MAP of turn 5 the Allied player must withdraw the KAR1 and KAR2 brigades, provided they are in play (for example, not eliminated) and at that moment in supply. For each unit withdrawn, the Allied player replaces the withdrawn unit with the 21EA/11A or 22EA/12A brigade at full strength (in the same hex as the withdrawn KAR unit and regardless of whether or not the withdrawn brigade was at full strength). For each KAR unit unable to be withdrawn on turn 5, one of the 21EA/11A and 22EA/12A brigades will never enter the game. Either (or both) of those brigades may be rebuilt immediately before withdrawal (and thus bring in the EA brigades).
14.6.8 Somalia HQ
If the Allied player controls hex 2311 (Berbera) on turn 5, they may permanently remove two of their truck reinforcements to instead bring the SOM HQ as a reinforcement at Berbera (if allowed by the rules ~ Event C2: War Office No Resistance Orders).
14.6.9 Superior Allied logistics
Allied air markers have a range of 5 hexes from an air base, not 4 (10.1.1).
14.7 Events
Strategic turn C comprises turns 1 to 3 (June 1940 to August 1940).
At the start of game turn 4, add the strategic turn D event markers to the event pool.
15. Player Notes
15.1 1935-36 Scenario
15.1.1 Italians
The Italians of 1935-36 are the easier side to play, since they have stronger attack and defense factors, almost unlimited RPs and plenty of HQs to use. How the Italians should proceed will depend on luck, opportunity and on how the Ethiopian player decides to defend. The Italian player also faces the dilemma of wanting to attack quickly since the scenario has only seven turns; however, making too many attacks at low ratios will result in greater losses, which will reduce the Italian VP level and perhaps deny them victory.
First, we will look at the setup options for the Italians. The easiest is in the south, where the Italians have enough units to form a solid line, but little more. This is the conservative approach and roughly follows the historical path of this part of the conflict. The Italian player can also take a more aggressive approach, forming their units into one or two attack groups. This has the advantage of inflicting losses on the southern Ethiopians, but also carries the risk that the Ethiopians may surround and cut off the Italian forces from supply.
The Northern Front offers more possibilities, but also has much more difficult terrain to face: the two key amba hexes: Amba Alagi and Amba Aradam. Taking these two can almost guarantee Italian victory in itself, since it will generate twelve VPs. However, the Ethiopian player can channel a good number of troops into these hexes, making the battle for both a clash of attrition. Another strategy in the north is to use your headquarters to chain supply beyond both, either along the Danakil desert or toward Gondar. The problem is that RP supply routes and general supply lines quickly become tenuous without the path going through both ambas. The best strategy is often a mix of brute force and deception, using your numerical superiority to spread across the front, forcing the Ethiopian player to defend everywhere... all while hitting the amba hexes, one at a time until you get to them. Bombing or gas attacks (especially with the optional rule that halves defensive strength) can be used here, although the -2 DRM will limit their effectiveness.
Once Amba Alagi and Amba Aradam fall, you will often find that the Ethiopian forces have been reduced to a shadow of their initial selves, and an aggressive Italian player may be able to stretch for a Strategic Victory (the air supply rule can be useful!). Much also depends on how the south is, since the defense of Dire Dawa and Harar will often fall to the southern tribes. If you have caused significant attrition among the southern tribes, these VP hexes will also be in play in the end game.
Do not be surprised if Addis Ababa does not fall in most games; it was an effort for the Italians to take the historical capital. Taking Addis Ababa is not required to achieve an Italian tactical victory or even a strategic victory, but if the Italians manage to seize Addis Ababa, an Italian strategic victory is almost a certainty. The Ethiopian player knows this, so they will be forced to defend the capital from long-range, air-supplied forces, especially toward the end of the scenario. Keep the Ethiopian player guessing as you defeat their units; you have the steps and replacements, while Ethiopia's replacement rate is very, very limited. A last comment is to remember the road building rules, especially in the north. Later in the game, this can greatly help your units get to the front lines and extend your RP Route.
15.1.2 Ethiopians
The situation is extremely complicated for the Ethiopian. The Italians have more steps than you, stronger offensive and defensive strength, more RPs, more HQs and the only air units in the game. In return, the only advantage you have is slightly higher mobility and favorable defensive terrain, but it does not help the Italians in most situations. But do not despair, the victory conditions are such that the Italians have key hexes they must take, so you can make sure you bleed them, while preparing for a great offensive.
The three to four key hexes are, of course, the three amba hexes in Ethiopia and Addis Ababa. While two of these are close to the front line, they are not easy for the Italians to take if deployed correctly. There are five tribal levies that set up in this region. The G. Belu and Prince Tafari tribes only have three units, including their leader, so they will not often be used to hold a hex as important as an amba; these tribes should be used to hold a flank and, possibly, guard against the Revolt Event, which could cause the Italian colonial irregulars to rise up to take Gondar or Debra Tabor. Ras Seyum begins with four units (including the leader), but note that his home area is Macallé, right on the front line.
This presents the first dilemma for the Ethiopian player: do they try to hold Macallé (only possible with Ras Seyum's troops), or admit that Ras Seyum will never get reinforcements for the rest of the game (since, no capital = no reinforcements)? There is no right or wrong answer, since Ras Seyum can be used to control the flank of Amba Aradam, or to delay the Italians' ability to get good attacks against either of the amba by holding out at Macallé.
Which leaves the two tribes of Ras Imru and Ras Kassa to hold the amba hexes, as well as most of the rest of the front. Ras Imru only has five units in total, so can only hold one hex and perhaps a second against possible Italian colonial irregular assaults (which are always supplied in Ethiopia). However, note that Ras Imru is one of your best tribes, with a high average strength and a +1 DRM for activation. Ras Kassa is a larger tribe, with eight units in total, as well as about two and three tribal strength... but they can only set up at Amba Alagi initially, since Amba Aradam falls outside their two-hex setup range.
In general, I recommend using Ras Imru to hold Amba Aradam, at least initially, and Ras Kassa to hold Amba Alagi and perhaps Kvoram. The Prince can hold one of the rough hexes along the desert to seal Ras Kassa's flank until the Shoa units arrive. However, once the Shoa units arrive, the Ethiopian player will have to decide whether they will accumulate these units for attacks (which can generate Italian losses, as well as additional reinforcements), or use them as mostly defensive troops. There is no right or wrong answer, as it will also depend on how aggressive the Italian player is and what attack opportunities arise. While your units are generally weaker than Italian units, the only terrain that benefits the Italians is amba and rivers. Also, do not underestimate the +1 DRM for attacking from mountain or amba hexes, as this can often save you a one-step loss and/or inflict a loss on the Italian defenders.
In the south, your setup options are quite limited, since you only have two tribes that start close enough together to form any kind of line. Dejaz Nassibu should try to set up on terrain that at least grants a favorable column shift, if possible, but also prevent the Italians from outflanking his units and generating concentric attack DRMs. The big question will be whether to defend Sassabaneh, since this denies the Italians an airfield on the front line, but will also force you to hold at least two clear terrain hexes. Dejaz B. Merid can defend Imi and the rough terrain in front of Gaba, but until Ras Desta arrives from Neghelli (where he should set up, along with his three tribal levies), the front line will be terribly weakened. However, the Italian front line is equally thin and the CRT tends to favor the defender at low ratios. Since the loss of Mogadishu is an auto-victory for the Ethiopians, the Italian player is likely to play it safe in the south... but if they expose themselves or are too aggressive, the Italians will make them pay for it.
Perhaps the most important decision the Ethiopian player will have to make is whether to carry out a great offensive; and, if so, on which front to attack. Historically, the northern tribes launched the Great Offensive in December and ended up bleeding themselves dry, so that when the Italians counterattacked there was not much left to stop them. Obviously, this is something you should avoid, but keep in mind the VP penalty for declaring a great offensive and not attacking. At two VPs per attack not made, if you launch a Great Offensive and make no attacks (so you only declare it to get the additional reinforcements), you are giving the Italians the same number of VPs as if they had taken an amba hex. Of course, if those additional reinforcements allow you to hold an amba hex that you otherwise would have lost, then it is worth declaring a great offensive for the reinforcements.
However, by far the most common use of a great offensive is to counterattack. There are many benefits during a great offensive, so the goal is to find two or three hexes where you can potentially get 3:1 or better on the CRT. Throw in the +1 DRM for attacking from mountains or amba hexes and you can generate a few step losses on the Italian player. However, with each attack generating a minimum of one loss for the Ethiopians, even in the best case, the Ethiopians will end up with the same number of units before the Great Offensive as after (that is, three attacks, each generating only one extra mandatory loss, but then three reinforcements the next turn). In most cases, the Great Offensive will see the Ethiopians weaker than before the Great Offensive, but having caused some losses on the Italians.
Eventually, you will have to choose whether to remain in the amba hexes or flee. For me, this depends on the number of units you have in the hex and the likely combat strength the Italian player can get against the hex. With three units, you still have a one-in-three chance of holding the hex, even at 7:1 (since the concentric cannot be won against an amba). With only two units, this is reduced to one in six at 6:1 and an automatic loss at 7:1. There have been games that have been won or lost based on whether the Ethiopians could get a third unit into a key amba and the subsequent Italian attack roll. Of course, the Italians could split forces more and make several lower-odds attacks... but that will increase their step losses.
In the south, it depends a lot on how many reinforcements the Italian player sends to that region. If they make a concerted effort to push south, you will eventually be forced back and risk losing Dire Dawa, Harar and some of the other VP towns. Eventually, you will have to make a decision about staying and delaying the Italians, but potentially saving one or more of your VP towns, rather than falling back and ceding the VPs to the Italians, but hopefully limiting the amount of damage they can do. While Addis Ababa will rarely fall from the south, simply due to the supply and distance the Italians must travel, do not leave Addis Ababa empty at the end of the game if the southern front is crumbling... or it may cost you the game.
15.2 1940-41 Scenario
15.2.1 Italians
The situation in the 1940-41 scenario presents the Italian player with a number of problems, with only a few solutions. You start with a numerically superior force that has much greater strength than the Allied forces, but you are also forced to spread it all over the map. Your initial decision will be whether to concentrate most of your free-deployment forces against one Allied objective, or try to get an automatic victory by spreading yourself against multiple objectives.
There are four objectives you can focus on: Sudan, Kenya, British Somaliland and the guerrilla units. The latter does not help if you go for the automatic victory, but can help if you focus on a single Allied country and play a defensive battle against the others. Of the three Allied countries, British Somaliland is the most likely objective, so we will look at this country first.
British Somaliland has limits on the reinforcements and initial forces that can enter the country. There is also the very important Event C2 War Office No Resistance Orders, which recreates the historical decision to abandon British Somaliland in the face of Italian aggression. If this Event is drawn and the roll is made, British Somaliland will fall if the Italian player is making any attempt. Even without Event C2, British Somaliland can be attacked and taken, but it will require the placement of the free HQ, most of the free placement units, and several turns of fuel use (since all available air units will be needed to support attacks on Berbera). Fortunately, the rainy season does not apply to British Somaliland, so movement is not restricted during turns 2 to 4. Even if Berbera is not taken, if the Italian player attacks, they will often eliminate several good Allied units in Berbera, which will be missed much later in the game... the trick is not to lose too many of your good units!
Kenya can be attacked and the border IPL town of Moyale can be easily taken. If done together with border raids into Sudan, the Italian player can often keep their IPL high, at least until the Allied player accumulates enough forces to retake them. If the Allied player places aggressively, with units on the borders with Ethiopia or Italian Somaliland, the Italian can surround their forces and leave them out of supply; although, remember, only regular Italian units can force march in this scenario (and the supply rules will limit how far you can move from your own supply lines, although the free-placement HQ can be useful to allow an unexpected flank move). It is unlikely that the Allied player can defend both supply hexes, so attacking in Kenya should guarantee at least one supply source taken... but Marsabit will be difficult because it is always available, the Allied headquarters there, and the fact that the Allied player can deploy reinforcements in the hex. Like taking Berbera, you will need to make sure you can maximize your turns, which means all air units and the HQ, as well as hoping to get the +1 DRM for concentric attack. Note that, unlike any of the other scenarios, your supply lines will be quite safe to pursue Kenya, since you can always trace supply to Mogadishu, avoiding any DRM or column shifts for the guerrillas.
Attacking Sudan presents many of the same problems as attacking Kenya. You can probably take the outer supply sources (and gain IPL for them and for the two border towns), but taking Khartoum will require being lucky and committing forces en masse (or perhaps you can get lucky and punish an Allied player who is too aggressive early in the game!). Like Kenya, if you manage to take Sudan, you have helped protect one of your countries (Eritrea in the case of Sudan, British Somaliland in the case of Kenya) and are halfway to an automatic victory. In addition, taking one of these Allied countries may be all it takes to win the game, as long as Ethiopia is not overrun by guerrillas while you are away "fighting a real war".
The final option is to give up the auto-victory and decide to eliminate the guerrilla threat, once and for all... except you will find it keeps coming back, again and again. This will be especially true since no aggression means you will be locked into a mediocre IPL, so you will not have favorable DRMs against desertion or guerrilla recruitment. However, if you are able to eliminate most of the guerrillas each turn, the Allies will find it difficult to make good progress against you, as they will have far fewer concentric attack DRMs and will be spread very thin over the terrain.
Some general comments can also be made, although most will be evident from the rules. Do not forget that you can replace your colonial regulars; this gives you something to use your RPs on, even if you are not campaigning aggressively. It is often best to fly your aircraft offensively, since (if you know they will be used), you can also move all motorized units on that player turn and maximize the benefit of that fuel expenditure. Flying them defensively still burns a full fuel, but all you get is the ability to fly up to two air markers. When you start running low on fuel, plan ahead where you want these fuel-using units to end up, since once the fuel runs out, they will be stuck in their current hex. Nothing hurts more than having an HQ with lots of RPs available sit in the middle of nowhere because they ran out of fuel on the way back to Mogadishu...
15.2.2 Allies
You thought this was going to be a walk in the park, right? Unfortunately, a big surprise awaits you... the Italians, whom you are supposed to attack, outnumber you, outmuscle you and outgun you. They will be the ones attacking, at least initially. And you must be aware of this, since if you try to attack aggressively from turn 1, it will most likely be a rather quick game, since the Italians get an automatic victory if they conquer a couple of Allied countries. The key for the Allies during the first few turns is patience. You are building each turn: getting reinforcements, RPs, guerrillas, while the Italians are losing steps due to desertion, spending precious fuel and having many fronts to defend against. If they offer any ripe fruit, take advantage of your superior strength per step to attack; perhaps you can entice them to use one of their fuel defensively? But just make sure it is not a trap and you find yourself surrounded due to a well-planned forced march!
Once the rainy season has ended (or perhaps a little before), you will discover that the threat of automatic victory should have passed. Depending on whether the Italian player attacked Kenya or Sudan, the situation on the map will vary greatly... Your units may be under siege at a single supply source, or your entire country may be empty of Italian units. In either case, it is imperative that you attack and begin to inflict step losses on the enemy; you can replace them, he cannot. If you can take step losses on the two KAR brigades before turn 5, do so, since the new units will replace these two brigades, regardless of their current strength on the map. Eventually, you will have to decide which axis your units will need, which may depend on whether you have to liberate Berbera.
The Kenyan forces can press toward Addis Ababa, but they also need to take Italian Somaliland... and may need to liberate British Somaliland. They would need about three trucks in the Mogadishu RP storage box in order to spend HQ RPs liberating Berbera, so most likely any liberation of Berbera will be an operation with a very extended logistics base, just like many of the historical Allied operations! There are only three potential supply lines for the troops liberating Berbera – Djibouti (only possible if the Free French joined your side), Addis Ababa or Mogadishu. If Berbera is lost, you will need to make sure to liberate one of these if you want to liberate it.
The Sudanese forces will do much of the heavy lifting, but will also need the help of the guerrillas that predominate in northern Ethiopia. Unfortunately, for this very reason, they will probably face more Italian defenders. The goal of these forces is to take Eritrea and Addis Ababa, if possible, but they will need to go beyond these objectives if they want to obtain enough VPs for victory (especially if Berbera is Italian).
Perhaps the most versatile group of units on the Allied side are the guerrilla units. They are always in supply in Ethiopia, but are also limited to operating in Ethiopia. They control hexes for VP purposes and, if they can get to Addis Ababa, can prevent it from being used for supply. They can also help reduce the Allied players' fear of Italian attacks, by sitting on or near all supply lines, ensuring that any Italian attack will be penalized in some way. However, perhaps their most important use is to draw Italian units away from the front lines, forcing them to protect the interior of Ethiopia with forces that could be used to attack your main Allied units. The Allied player who coldly discards their guerrilla units may find themselves wishing they had more guerrillas to do more of everything.
As with the Italians, there are some general ideas that the Allied player should keep in mind. Most important is to remember that you will only get VPs if the VP hex is occupied by a unit at the end of the game (and for Addis Ababa, only by a non-guerrilla unit). This means that as you advance and take territory, you will be forced to abandon units to garrison these VP hexes, or you will not receive VP credit for them. Dummy units and weak guerrilla units are excellent garrisons... but only if you have not killed them all. Your HQs are great in principle, but if the Italian player fights a mobile battle, they will always find themselves one hex too far. In those situations, do not forget that you can replace reduced two-step units that are adjacent to the HQ during the MAP, and then move it again during the movement phase, so plan ahead where you will be losing your steps! Your air units, once they all arrive, are friends... and do not forget that intercepting a stack of Italians trying to pass from one front to another can sometimes be all it takes to turn a stalemate into a breakthrough. And as said before, be patient at first.
15.3 Campaign scenario (connected)
All the above notes apply, but if you know you are playing the campaign, the Italian player in 1935-36 should think carefully about whether they can achieve a Strategic Victory, since it has some quite important benefits for them in the second half of the campaign. Likewise, while the Ethiopian player probably can never achieve a Strategic Victory without considerable luck or a difference in experience levels between the players, the additional effort to achieve this level may be worth it, as long as it does not cost you an Italian victory if you fail.
There are also many optional rules to further link the two scenarios; some may definitely influence what is done during the 1935-36 scenario, so players should review this before beginning the first scenario.
16. Design Notes
By Javier Romero and Kevin Bernatz
Hearts and minds: Conventional and guerrilla warfare Historically, both campaigns saw the sides engage in conventional and unconventional warfare; in game terms, neither scenario is easy to win if irregular warfare is ignored. In the '35-36 scenario, this is modeled by the Italian player having the Revolt and Rebellion events. They are also able to bribe tribal leaders to inhibit their activation. Ignoring this may allow the Ethiopian forces to concentrate and perhaps achieve a glorious Adwa-style victory over the Italian invaders (partly simulated by the Great Offensive rules).
In the '40-41 scenario, it is the Allied player who must coordinate their professional army forces with those of the guerrillas. The Italians had a large army on paper, but suffered two major disadvantages. First, they had no way to replenish military supplies unless Egypt fell. Second, the Italian Viceroy was deeply concerned about the safety of the thousands of Italian settlers living in Ethiopia, which meant that many units were kept on garrison duty in Addis Ababa and other cities. Guerrilla warfare is modeled directly, through the recruitment of new guerrillas each turn, but also indirectly through the prestige track, which records Italian prestige among the local Ethiopians. If they perceived that the Italians were winning, the chances of rebellion were lower. Otherwise, the chances of rebellions and uprisings are higher.
Map nomenclature At this point, I must mention that although the capital of Ethiopia is referred to as Addis Ababa above, the map has the Italian spelling Addis Abeba. There are two reasons we use Italian names on the map. First, most period maps of Ethiopia were made by the Italians; which makes sense given their interest in conquering this country! This allows us to be more consistent in naming the small towns and cities found on the game map. Second, since the Italians featured prominently in both campaigns, it is our way of acknowledging that these were their battles, even if they were under Fascist rule at the time.
Command, control and logistics Both campaigns share a common trait of colonial warfare: the importance and difficulty of logistics. The Ethiopian wars were fought on a tight budget, through hostile terrain and with few roads or railroads. Even the Ethiopians, who could live better off the land, had their limits.
In earlier versions of the game, RPs had to be moved on the map from ports and supply centers to the front. This simulated the difficulty of getting artillery and other corps and army-level assets to the front, but resulted in games that were more about combining RPs than fighting. We also found that, with the large number of resources the Italians had, a smart player could easily set up an RP chain, so there were new RPs available every turn. Because of that, we adopted the current RP route approach, which does a good job of forcing the player to focus on the dirt tracks, roads and railroads that cross Ethiopia. While they can often get supplies 'off the beaten track', getting RPs to HQs there was a different story. The fact that this change also made the game faster was an added benefit.
Historically, supplies often had to go by air due to the poor road network, which is why we allow only limited RP and supply tracing off roads and tracks, as well as the ability of the 35-36 Italians to use air supply to a limited extent.
Unlike the European forces, the Ethiopian army of 1935 was a collection of medieval-style warriors, with little or no central command. This is simulated through the activation rules, where Ethiopian forces activate sequentially rather than having the same flexibility as European and colonial forces. The variable activation die roll will also result in some tribal forces doing very little while the battle unfolds around them. Historically, Italian commanders bribed many of the tribal forces they faced, resulting in their being significantly less effective than they might have been.
Random events Events inside and outside Ethiopia influenced both campaigns. Diplomacy and international public opinion played a key role, which is reflected in events such as the League of Nations or French Somaliland. Beyond political and military events, orders that came from Rome or London also influenced the campaigns in East Africa; often forcing commanders to make decisions they did not want to! This is simulated by the War Office No Resistance and Mussolini's Pressure events. This system of event markers was used in GMT's 2010 Spanish Civil War game and we adapted it here. Since events are revealed when drawn, the game still lends itself to solitaire play, while maintaining greater replayability due to the unpredictability of when each event will be drawn.
Air operations Air operations in the game are fairly abstract. We had several reasons for keeping this abstraction, including the desire to simplify the rules. In '35-36, the Italians had about 600 aircraft with almost unlimited supplies of ammunition and fuel, while the Ethiopians lacked a real air force and had very little AA artillery. This, combined with the moral effect against tribal warriors, worked as a 'force multiplier'; that is, the Italians in '35-36 could fly anywhere they wanted, without needing to organize fighter escorts or limit time over targets. These factors allow them to carry out special air missions during this scenario, while the shorter range of many of their aircraft was summarized in the main rules.
By contrast, while the Italians still had about 250 aircraft in 1940, their supply of fuel and ammunition was very limited, especially after the first British attacks on the fuel reserves of the Regia Aeronautica. This is where the fuel rule was born, and is also why special missions like bombing are not available to the Italians in this scenario. Allied aircraft were older and obsolete, but had much more logistical support. This is reflected in their greater range and ability to fly from any air base, but also in not being able to bomb or conduct air supply.
The air return roll was originally an optional rule that applied to all mission types; however, we found that by making bombings with a +1 DRM, it helped limit the number of these attacks. The VP penalty for a lost aircraft on the last turn is certainly an abstraction, but it serves to moderate 'hopefully we get lucky' bombings by the Italian player and ensures that even the last turn has some negative effect if you fail your return roll. After all, in real life armies do not just stop and say "Game over, that was the last turn!".
Unique combat units In the '35-36 scenario, the Ethiopian army was composed mainly of warrior bands loyal to their tribal leader. However, there was a single Western-style unit: the Imperial Guard (Kebur Zabagna), formed and trained by Swedish and Belgian advisors, and organized according to Western patterns. However, apart from a single battalion that was historically formed in Sidamo and sent to fight Italian forces coming from Somalia, the Negus saw these as a more political asset than anything else. That is why they are restricted in their movement until Addis Ababa is directly threatened or the Negus realizes he needs to react to the Italian threat. Since they were more Western in training, they are the only Ethiopian units that can stack and attack with other tribal units.
On the Italian side, many colonial units were deployed in both campaigns. These were recruited in Eritrea, Somalia (the Arab-Somali battalions, or "dubats") and Libya. The Eritreans were among the best units of the entire Italian army, comparable to the best alpini and bersaglieri units. In addition, the Fascist party militia (the Black Shirts) contributed about seven divisions of men and materiel to the war effort; although some, like the Tevere division, were of dubious quality.
The only German company on the counter sheet was a curious detachment. Recruited from Germans who had fled Kenya and other British colonies, or who had lived in Italian East Africa, they were formed into the DMK, or German Motorized Company ("Compagnia Autocarrata Tedesca" in Italian). They fought the entire campaign to the end, literally: the last eight survivors died in the defense of Amba Alagi, which surrendered in May 1941.
There are also exotic units on the Allied side: Orde Wingate's Gideon Force, which operated behind Italian lines by providing support and ammunition to the rebel arbegnoch, or "patriots"; or Mission 101, an SOE operation that trained and funded Ethiopian rebels. And, of course, the Somali Camel Corps, which helped in the defense of British Somaliland until it was dissolved after the conquest of Berbera.
Two fundamental differences between tribal and Western forces are combat and defense factors, generally stronger for Western units, but base movement is superior for tribal units. However, it is important to remember that Western forces may attempt to move farther (using the forced march table), but this carries risks: units can get lost, run out of supply, lose their pack mules or even suffer ambushes.
17. Example of Play
(The original includes map illustrations, which are not reproduced here; only the text is transcribed.)
Chris and Jeff decide to play the 1935-36 scenario, with Jeff playing the Ethiopians and Chris the Italians. Jeff sets up first, taking the Ethiopians from the scenario card and placing the leaders in their starting hexes.
As can be seen, many of the tribes start in the north, with only three tribes in the south – and one still far enough from the front at Yabello.
Each of the tribes can place in two of the indicated hexes, and one of the KZ 1-2-6 battalions may start stacked with the leader of another tribe (only Negus Ethiopian units may stack with units of different tribes).
The key hexes Jeff must worry about are the two amba hexes on the front lines – Amba Aradam and Amba Alagi. Not only because each is worth 6 VPs, but also because they are on the only dirt track that goes to Addis Ababa from the Italian Northern front. Since Italian supply and RPs come from Massawa, they will need to travel along this route to reach the front lines, so it is important to hold those hexes as much as possible.
To finish, Jeff decides to start with his two strongest tribes on the front lines (the tribes of Ras Imru and Ras Kassa) guarding those hexes, intending that this stronger tribe (the Shoa tribe with the red stripe, led by Ras Mulugheta) will eventually come up and replace them. However, Jeff knows this may be a couple of turns away, depending on the die rolls for Ras Mulugheta's activation – as well as the fact that the Shoa tribe can only spend 4 MPs for movement during turn 1. His setup is as follows:
Jeff decides to be aggressive on his flanks, using his G. Belu units to hold the leftmost rough terrain hex (-1L shift on defense) and his Prince Tafari units on the right flank. Ras Kassa defends Amba Alagi and the town of Kvoram, while Ras Imru (and a 1-2-6 KZ battalion) defends Ras Aradam [sic]. Ras Seyum is placed at Macallé, since it is his tribe's capital and, hopefully, will force the Italians to spend 2 turns before they can attack either of the amba hexes. However, this leaves the town of Axum undefended, which means the left flank may be disrupted if the Italians are able to mount an aggressive attack toward G. Belu.
The Shoa tribe is placed as close as possible to the northern border, hoping that at least they can relieve Prince Tafari and perhaps help prop up Ras Imru and/or Ras Kassa.
The risk is that Event A2 Rebellion is drawn, which would potentially allow the Italians to conquer Gondar, thus preventing Ras Kassa from getting reinforcements until the capital was again controlled by the Ethiopian player. In the south, the Ethiopian player places to deny the Italian player advance air bases and hopes the Italian player does not want to risk being surrounded by the more numerous Ethiopian forces – at least until Ras Desta can reach the front lines.
Chris takes his Italian forces from the scenario card and quickly realizes that it is on the Eritrean front that he has to make his greatest progress. The Southern Front is significantly weaker and, while Chris could send all reinforcements to that front (as well as the naval transport of one division per turn), he decides that he will instead focus on capturing the two amba hexes. Since the game begins with the Italian player's turn, he places his forces on the front line to wait and see what the first Event will be, which hopefully will not be Event A1 Mussolini's Pressure!
He also decides to break down the Italian PL division, which at that moment starts at Belet Uen with the HQ/CSI. Chris replaces the 5-7-4 PL division with its 3-4-4 two-step unit, as well as two 3-4-4 breakdown units (they must be the two regular infantry breakdown units, since the PL division is an Italian regular unit).
Turn 1 of each scenario begins with the Event phase, where an event marker is drawn at random. Jeff reaches into the cup and draws the A2 Rebellion marker, letting out a groan... exactly the event he did not want to happen.
Chris rolls a die and will get half of that number in Italian colonial irregulars, which will be placed within two of hex 0910. While those cannot start directly in Gondar, they will be able to move into that hex during the Italian movement segment. Chris also chooses to spend an RP to bribe the rebelling faction, adding one to his die roll. This RP must come from the Northern Front, so Chris reduces his RPs in the Northern Front RP storage box by one and rolls a die, obtaining a modified 3 – generating two colonial irregulars. Chris then places both of them in hex 0909, where they will be able to either take Gondar or support an attack on the Egyptian [sic] front line; he makes sure not to place them within two of Addis Ababa, or they would allow the Negus to activate this turn.
This is then the beginning of the Italian movement segment. Chris decides to be cautious and focuses on eliminating Ras Seyum's forces from Macallé, since it is on a vital route leading to the amba hexes and Addis Ababa, beyond. In the south, he decides to maintain a continuous line to avoid any possible threat to his supply lines... at least for now. Again reinforcements are available for the south, where he considers he can attack.
In the north, Chris declares two attacks – the first against the hex held by G. Belu, the second against Macallé and Ras Seyum's tribe. He chooses to resolve the G. Belu attack first, declaring all adjacent units attacking, and revealing the hidden strength of any unit(s) on both sides.
Chris has 16 strength attacking 3 strength of the G. Belu units, giving an initial ratio of 5:1. The CAE HQ is adjacent to the attacking units, so it supports them by tracing an RP route from Massawa, giving a column shift in favor of the Italian (1R). The rough terrain generates a column to the left in Jeff's favor, so the final ratio will be 5:1, and Chris decides not to commit aircraft to this combat. Unfortunately for Jeff, Chris rolls a 5, obtaining a result of 0/3, eliminating all G. Belu units. If he had rolled a six (which would give a result of 0/3+R), he could have advanced with three of the four units that attacked the Ras Imru units north of the Wolchefit pass.
Chris advances the two units from hex 1006 and the 3-2-6 from Axum. Against Macallé, Chris has 48 strength against five, giving an initial ratio of 9:1. Even after applying the 1L modifier for the mountain, the final ratio is still over 7:1, so it will be resolved on the 7:1 column. Chris also gains a +1 DRM for a concentric attack, since he has units attacking from both sides of Macallé. This time Chris's die roll fails, and he rolls a one, becoming two due to the modification: result 0/2. Jeff breathes a sigh of relief and kills two of Ras Seyum's weakest units.
Jeff looks at his crumbling lines and hopes for the best, deciding he needs to extract Ras Seyum from Macallé, since each dead leader is a VP for the Italians. However, he cannot move the Ras or his troops through a hex occupied by another tribe, so he decides to activate Ras Imru first, to open a gap for Ras Seyum to flee through, and then plans to use Ras Kassa to close the gap behind Ras Seyum.
Chris chooses to bribe Ras Imru (removing an RP from the Northern Front RP storage box), hoping to prevent him from moving more than one hex – even though Ras Imru always adds +1 to his activation roll. Jeff rolls a 6 on the die, which would have been a surprise tactical activation without the bribe. He decides to take a chance and attack the two Italian colonial irregulars in Gondar, even though the other colonial irregulars revealed during the attack on Macallé were all 1-6 units (meaning they could be stronger units... but they could also have been 0-1-6 units).
Jeff is unlucky, as they are two more 1-6 irregular units. Ras Imru has some of the Ethiopians' strongest units and the attack comes out at 10 against 2, or a 5:1. No terrain applies to the defenders, since they are not in an amba hex and the Ras is not attacking across a river – thus, the only modifier is a +1 DRM in Jeff's favor for having the Ethiopian attackers attacking into or out of mountain or amba hexes. Jeff rolls the die and obtains a modified result of 5 on the 4:1 table, generating a result of 0/2+R. This retakes Gondar, but does not generate an RP, since the only defenders were colonial irregulars.
The figure above shows the state of the front after Ras Imru has been activated. Now Jeff activates Ras Seyum, making Chris have to make a difficult decision. He still has 3 RPs on the Northern Front, and gains three per turn (in addition to being able to use naval movement to move two from the Southern Front), but he knows he will want to bribe the Shoa tribe and probably Ras Kassa. Chris decides he cannot afford to spend the RP on Ras Seyum, so Jeff rolls the die for activation without modifiers, and obtains a 5 – full activation. The Ras flees to Debra Tabor, knowing that his capital will be lost next turn.
Jeff then activates Ras Kassa, whom Chris bribes, and rolls the die obtaining a modified 5 (causing Chris to mutter under his breath about Jeff's death and whether it is rigged). However, the actual die roll was moot for Jeff, since he simply moves both stacks one hex – sliding them into the hexes adjacent to the amba. Jeff then activates the Prince, which Chris allows to activate, since he suspects he will only move one hex anyway. This time Jeff rolls a one on the die and Chris is right, as the Prince's units can only move one hex, no matter what Jeff had originally planned for them (the leader unit can always move its full MPs, but Jeff keeps them stacked together, sliding into Kvoram – recently abandoned by Ras Kassa's troops).
Now Jeff designates the Shoa tribe and Chris spends his second-to-last RP of the Northern Front. However, Jeff continues with his dice and gets a full activation – although the Shoa tribe has only 4 MPs this turn, due to the looting and burning of villages by members of the tribe. The figure is after all the movement.
In the south, Jeff is much happier to stay where he is, since Chris did nothing aggressive that might have tempted Jeff to attack the thin line of Italian units. The only activation that matters is Ras Desta, who rolled a 4 – still obtaining a full activation. This allows the Ras to move to hexes 1618 and 1619, sealing the front line.
This ends the first turn of the scenario – Chris has made good progress, already generating 2 VPs – one for killing the G. Belu leader and one for Mekellé, now empty and soon to be occupied by Italian forces. Jeff will get a Shoa reinforcement and another reinforcement in the North, and will have to make a difficult decision: Will he give it to Ras Seyum, since it will be the last chance to give them a reinforcement before Macallé falls? Or does he give it to Ras Kassa, who is on the front lines at the amba and will need all the units he can get? Or perhaps the Prince needs another unit, since he is holding a front line hex with only three units in total against the elite Eritrean 7-9-4? Depending on where the reinforcement ends up, the front line may hold with only a few losses – or it may collapse completely in the next few turns. He could also put it in Macallé, to try to delay the Italians – but an 'R' result on the CRT would still allow them an attack by the advancing units.
In the south, Chris is the one who has to make the harder decisions – does he send additional reinforcements here, hoping that the forces on the Northern Front are enough? Or does he continue sending extra units North, since that is where he is making progress? Chris also knows Jeff will get two reinforcements per turn in the south, so if Chris wants to attack in the south, the sooner the better.
18. Bibliography
- Badoglio, Pietro, La Guerra d'Etiopia, Milan, 1936 (4th Ed).
- del Bocca, Angelo, The Ethiopian War, 1935-1941, Chicago Press, 1969.
- Gentilli, Roberto, Guerra aerea sull'Etiopia 1935-1939, Firenze, 1992.
- Glover, Michael, An Improvised War: The Abyssinian Campaign of 1940-1941, London, 1987.
- Graziani, Rodolfo, Una vita per l'Italia. Ho Difeso la patria, Milan, 1994.
- Hilton, Andrew, The Ethiopian Patriots: Forgotten Voices of the Italo-Abyssinian War, 1935-41, Staplehurst, 2007.
- Mockler, Anthony, Haile Selassie's War, London, 1984.
- McNab, Duncan, Mission 101. The Untold Story of the SOE and the Second World War in Ethiopia, The History Press, 2012.
- Page, Malcolm, King's African Rifles - A History, Barnsley, 1998.
- Rovighi, Alberto, Le operazione in Africa orientale. Giugno 1940-Novembre 1941 Vol. I., Narrazioni. Rome, 1988.
- Shireff, David, Bare Feet and Bandoliers. Wingate, Sanford, the Patriots and the Liberation of Ethiopia, London, 2009.
- Stewart, Andrew, The First Victory – The Second World War and the East Africa Campaign, Yale Univ. Press, 2016.
19. Index
- Air markers: 10.1
- Air base (town/capital): 10.1.1
- Air supply missions: PB 13.6.5.2
- Bombing/gas attacks: PB 13.6.5.1
- Delayed air return: 10.1.4
- Interdiction (½ MPs): 10.1.5
- Max 2 shifts from: 10.1.3
- Breakdown (in the MAP): 2.4
- Consolidation: 2.5
- Combat
- Concentric attacks: 12.9
- Defenseless units, attacks on: 12.13
- Fog of war: 12.3
- Halving factors: 12.6
- Mandatory advance after: 12.12
- Procedure sequence: 12.4
- Results (including 'R'): 12.11
- Control: 3.2
- Guerrillas and ('40-41 only): PB 14.6.4.1
- Dummy counters ('40-41 only): PB 14.6.5
- Events: 6.
- Ethiopians
- Attacks by (special CRT): PB 13.6.2.3
- Attrition of (6 or more): PB 13.6.3
- Cooperation: PB 13.6.1
Optional Rule Manifest
All optional rules are listed below, including where they can be found in the playbook. They are also assigned a value from -5 (strongly anti-Italian player) to 5 (strongly pro-Italian player), with a value of 0 favoring neither player. It is recommended to add up the values of all the optional rules being used and divide by two. If positive, these VPs count against the Italian player, and if negative, they count for the Italian player. These are added to the +3 VPs given to the Allied player during the campaign game.
Example: If you are playing only the 40-41 scenario with optional rules totaling a value of -3, the Allied player would have to subtract 2 VPs before determining their final victory level (-3/2 = -1.5 = -2 → 2 VPs counting for the Italian player). If this were the 35-36 scenario, the Italian player would add two VPs to their VP total before determining their victory level.
| Optional rule | Value |
|---|---|
| 10.1.1: HQ Infrastructure (HQs in supply are air bases) | 1 |
| 12.7: Tribal friction (Ethiopian units may be penalized) | 4 |
| PB 13.5.2.2: Limited reinforcements (Surrounded = no reinforcements) | 2 |
| PB 13.6.5.1: Increased gas effectiveness (as named) | 5 |
| PB 13.6.7.2: The Danakil desert (limited crossing for the Italians) | 1 |
| PB 13.6.7.4: First to enter ("real" Italians must enter towns) | -2 |
| PB 14.3.3: BF and GF Regiments (extra Allied units) | -1 |
| PB 14.3.4: Additional impacts – roads (keep built roads) | 1 |
| PB 14.3.4: Additional impacts – Rebuilds (rebuild colonial regulars) | 3 |
| PB 14.3.4: Additional impacts – Withdraw colonials (fewer in the starting forces) | -4 |
Random Events Summary
Translated from the official Spanish "Sumario de eventos aleatorios". All event markers are discarded once resolved (whether when drawn or when played), except No Event markers.
1935-36 Scenario: Strategic Turn A (October 1935 - January 1936)
A1. Mussolini's Pressure (x1). Mussolini pushes for a rapid advance before the favorable international situation changes. Effects: Discard if the fronts are connected (PB 13.2.1). Otherwise the Italian player must conduct a minimum of four attacks against Ethiopian hexes on the Northern Front, on this game turn. Each hex must be attacked by at least one division or equivalent (8.2). For each attack not made, the Italian player loses 2 VPs (use the event marker to record those lost VPs).
A2. Rebellion (x1). Gojjam rises in open rebellion against the Emperor. Effects: roll a die and halve the result; before rolling the die, the Italian player may use an RP from the Northern Front RP storage box for a +1 DRM (representing money used to bribe local chieftains). Place that number of Italian colonial irregular units within 2 hexes of hex 0910 but not in a town or capital hex, nor in a hex containing an enemy unit.
A3. Foreign Arms (x1). Foreign military aid reaches the Horn of Africa. Effects: The Ethiopian player receives two RPs. They must be placed in map hexes with one or more Ethiopian leaders.
A4. League of Nations (x1). The international community is outraged by the Italian use of chemical weapons. Effects:
- The Italian player may not conduct gas attacks or air bombing missions this game turn (PB 13.6.5.1).
- The Italian player rolls a die: if it is lower than the current Italian bombing attacks marker, subtract 1 VP at the end of the scenario (flip the Italian bombing attacks marker as a reminder).
- The Italian player no longer records the number of gas attacks and bombings.
A5. No Event (x1). Nothing happens. Return to the pool.
1935-36 Scenario: Random Events, Strategic Turn B (February - April 1936)
B6. Coordination (x1). The Ethiopians use aircraft to better coordinate their forces. Effects: When this event is drawn, it is given to the Ethiopian player. During this or a later turn, when a leader is activated, the Ethiopian player may place this marker on a leader before rolling the die – there is no need to roll the activation die for that leader; treat it as a full activation.
B7. Wireless Interception (x1). The Italians intercept wireless messages sent by an Ethiopian Ras. Effects: when this event is drawn, give it to the Italian player. During this or a later turn, the Italian player may place this marker in a hex containing one or more Ethiopian units that are not within one hex (inclusive) of the Negus. It may be used at any time during a turn (exception: if played during the Ethiopian Movement Segment, it must be played immediately after a tribal activation roll, before any of the units of that tribe move). It works in one of two ways when used:
- Each air unit attacking that hex rolls twice for the results, taking both results (the maximum of two shifts still applies); or
- The stack under the wireless interception marker may not move during this tribal activation. Any units in this hex are ignored when determining the number of units that may move on a half-activation result.
Example: The Italian player holds the wireless interception event, and tries to play it on a Shoa stack. The Ethiopian player rolls the die to activate Shoa and obtains a half-activation result. The Italian player then places the counter on a stack and indicates that it may not move from its current hex this turn. The Ethiopian player calculates half of the Shoa units that are not in that stack and may move those units and the leader. When those units have moved, the Italian player removes the wireless interception marker and the Ethiopian player proceeds with their next activation.
B8. Revolt (x1). The members of the Galla tribe rise in open revolt against the Emperor. Effect: Discard this event if both Amba Alagi and Amba Aradam are still under Ethiopian control. Otherwise roll a die and halve the result; before rolling the die the Italian player may use an RP from the Southern Front RP storage box for a +1 DRM (this represents money used to bribe local chieftains). Place that number of Italian colonial irregulars within two hexes of hex 1418, but not in a town or capital hex, nor in a hex containing an enemy unit.
1940-41 Scenario: Random Events, Strategic Turn C (June 1940 - August 1940)
C1. French Somaliland (x1). The local French leaders decide whether to intervene. Effects: roll a die applying a -1 DRM if the IPL is currently high. On a 1–3, discard the event marker; French Somaliland remains loyal to Vichy. On a 4–6, French Somaliland joins the Free French and is now an active area in the game (see PB 14.1.1; 14.6.7 [as printed; the French Somaliland rule is PB 14.6.6]).
C2. War Office No Resistance Orders. The Allied High Command opposes Churchill's plan to fight in defense of British Somaliland. Effects: Discard if there are no Italian-controlled units in British Somaliland; otherwise the Allied player rolls a die, applying a +1 DRM if the IPL is currently low. On a roll of 1–4, no reinforcements or rebuilt units may enter hex 2311 (Berbera) until there are no Italian-controlled units in any hex of British Somaliland; on a 5–6, discard the event marker.
Design note: If players want to be more historically rigorous, but at a slightly higher cost – discard event C2 if drawn while French Somaliland is active and Djibouti is controlled by the Allied player. Historically, the defense plans called for the French to attack from Djibouti and surround any invader of British Somaliland, but the formation of Vichy France upset those plans.
OPTIONAL RULE: Less randomness for British Somaliland At the start of the scenario (before drawing an event for turn 1), remove event C2 from the event cup and give it to the Italian player. On any later turn in which the Italian player first enters British Somaliland with at least 4 brigades or division-size units, the event for the following turn is automatically event C2. No random event is drawn on that turn; apply event C2 normally.
C3. Blockade Runner. An Italian blockade runner reaches an A.O.I. port. Effects: place two RPs in either of the Eritrea/Ethiopia RP storage boxes, or in the Italian Somaliland RP storage box. Both RPs must be placed in the same box.
C4. Italian Red Sea Fleet. Light units of the Italian Red Sea flotilla intercept a small Allied coastal convoy. Effects: Give this event marker to the Italian player to be played during the MAP of any later turn. The Allied player only receives half of their RP reinforcements for that turn.
C5. No Event (x1). Nothing happens. Return to the pool.
1940-41 Scenario: Random Events, Strategic Turn D (September 1940 - April 1941)
D6. Italian Defeat in Libya (x1). The victory in Libya frees up the Commonwealth. Effects: Discard if rolled before event D7 Italo-German Counterattack. Otherwise, the Allied player may designate any three Commonwealth brigades scheduled to arrive as future reinforcements, which become available one turn earlier than scheduled, including entering this turn if scheduled for the next. The Allied player selects the three brigades; they need not be scheduled for the same entry turn.
D7. Italo-German Counterattack in Libya (x1). The British rush forces to Libya to deal with Rommel. Effects: any two Commonwealth brigades scheduled to enter as reinforcements on a future turn (if any), instead enter the game one game turn later. The Italian player selects the two brigades; they need not be scheduled for the same entry turn.
D8. Imperial Proclamation (x1). The Negus calls on all patriots to join his banner and fight the Italians. Effects: give this event marker to the Allied player to be played during the MAP of any later turn. Apply a +2 DRM to the Ethiopian guerrilla recruitment attempt on the game turn in which the chit or marker is played.
D9 and D10. Città Aperta (Open City) (x2). The Italians declare an open city to avoid civilian losses. Effects: discard if the IPL is high (nine or more). Otherwise give this event marker to the Allied player. The Allied player must immediately discard this chit or use it to attempt to conquer any town or capital hex in Eritrea, Ethiopia, or Italian Somaliland that is adjacent to at least one Commonwealth unit. If the chit is used, the Allied player places the "Open City" marker on the desired hex and rolls a die. If the roll is greater than the number of VPs associated with that hex, the town/capital is declared an "open city" and the Italian player moves any Italian unit(s) in the hex to one or more adjacent hexes (toward a friendly supply source, if possible). Italian units may not enter a hex containing an open city marker for the rest of the scenario, except via advance after combat (12.12), at which point the open city marker is removed from the game. This marker may not be played on a hex completely surrounded by Allied units. Units using Italian fuel (PB 14.6.1.1) may be moved one hex without costing the Italian any fuel and may move even if the Italian player has no fuel. HQs moved in this way remain on their CS side. Any hex with an open city marker in it is only worth half the usual number of VPs (rounding down) at the end of the scenario.
Example: If played on Addis Ababa (4 VPs), the Allied player must roll a 5-6 on the die. If successful and it is later occupied by the Allied player, it would only give them 2 VPs for the hex.
Design note: This represents the concern of the Italian command for the protection of the thousands of Italian settlers living in the towns of Italian East Africa.
Errata and FAQ (through 3 June 2019)
English original, as issued by the publisher. The errata items below have also been noted inline where they apply.
- 11.4.3 and 12.8: Town/City or Amba always controls in terms of terrain effects. Only consider the predominant terrain exclusive of Town/City or Amba features. For movement purposes, look at the other terrain in the hex to determine the movement cost. For combat, the 1L for Town/City would apply.
- 12.4: For attacks that end up as 0 vs {something above 0}, do not resolve on the 1:3 column, instead eliminate all attacking units with no effect on the defenders. Note that this can only happen if some of the attacking units began as ? strength units. For attacks ending as 0 vs 0, resolve on the 1:1 column.
- PB 13.6.2: First sentence of last paragraph should read: "If an Ethiopian leader dies, it may never return to play and the faction no longer receives reinforcements (PB 13.5.2)".
- PB 14.6.1.1: When the Italian fuel supply reaches 0, the Italian player cannot move HQ, truck, or armor units, cannot attack with armor units, and cannot use air units for any purpose.
FAQ
- On some Reinforcement cards, the guerilla tribes are unclear for the '40-41 scenario set-up. The playbook is correct, so make sure you are using the right color tribal units (Shoa, Gojjam, and Benghemder).
- (PB 14.6.4.2): The Mission 101 ability can be used multiple times, including multiple times in a turn if playing with the optional rule. The only restriction is having the RPs to expend.